Communications: Letters
- The Letters function is a built-in mail merge function that allows you to generate a list of letter recipients using the advanced search interface/function and then merge these contacts’ information into a letter that you have created. You can then email the letters or print them out (in MS Word or PDF format) and mail them to your recipients (you can also generate envelopes or labels for your recipients). This functionality achieves the same thing as writing a mailing list report, exporting the report to excel, creating a letter in MS Word, and then creating a mail merge of the letter and excel file but with much less difficulty and fewer steps.
- To get started, first make sure you have a template in the Letter category (Main Menu: Create New Communication: My Templates: Letters) (follow this tutorial on working with templates to create or edit a template in the Letters category).
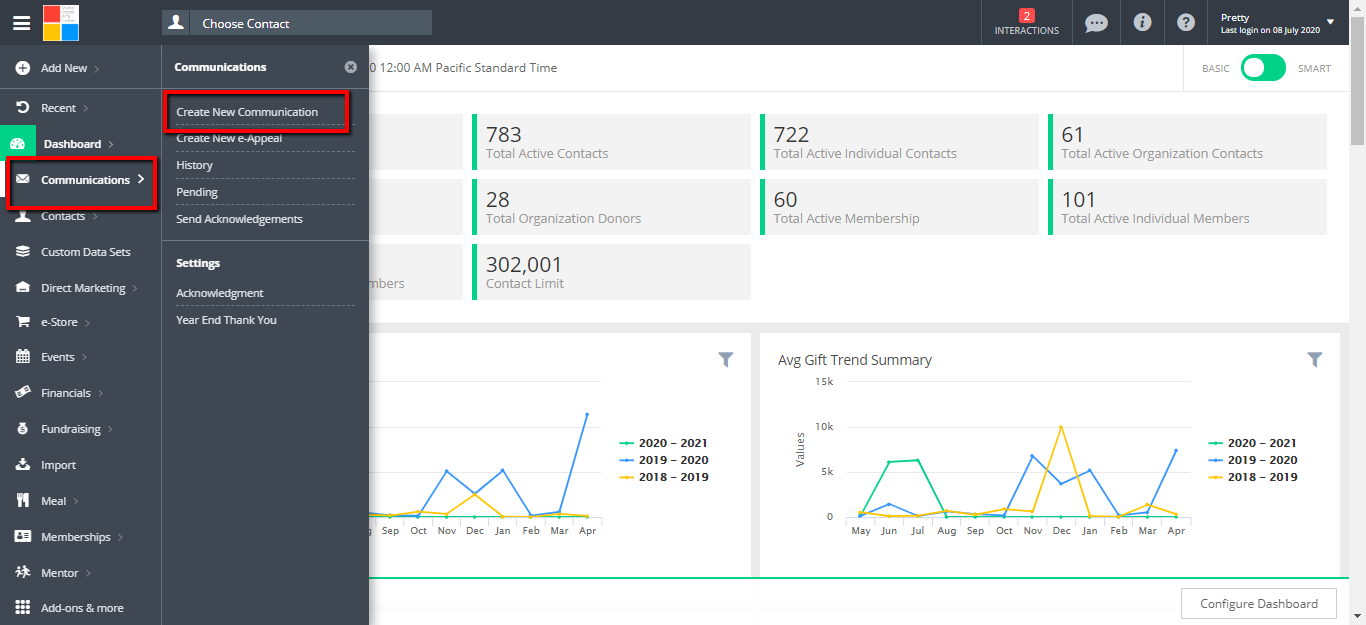
- From the left hand Menu, click on Communications to open the sub-menu. SelectCreate New Communication.
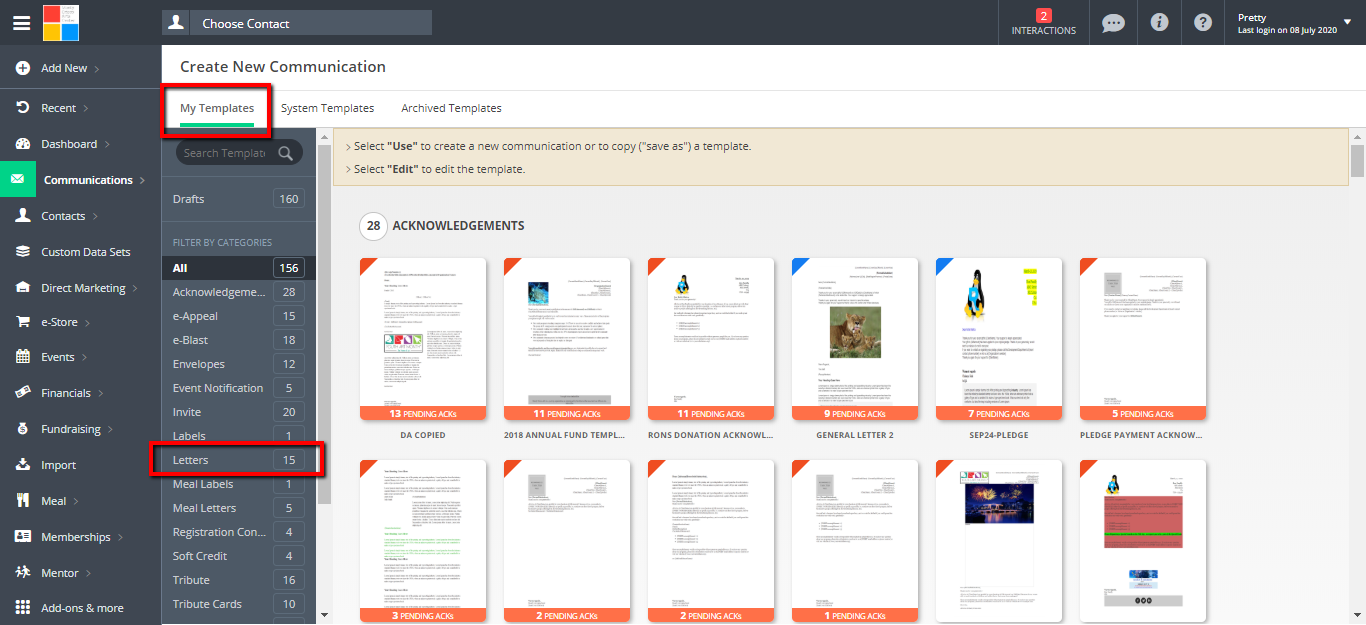
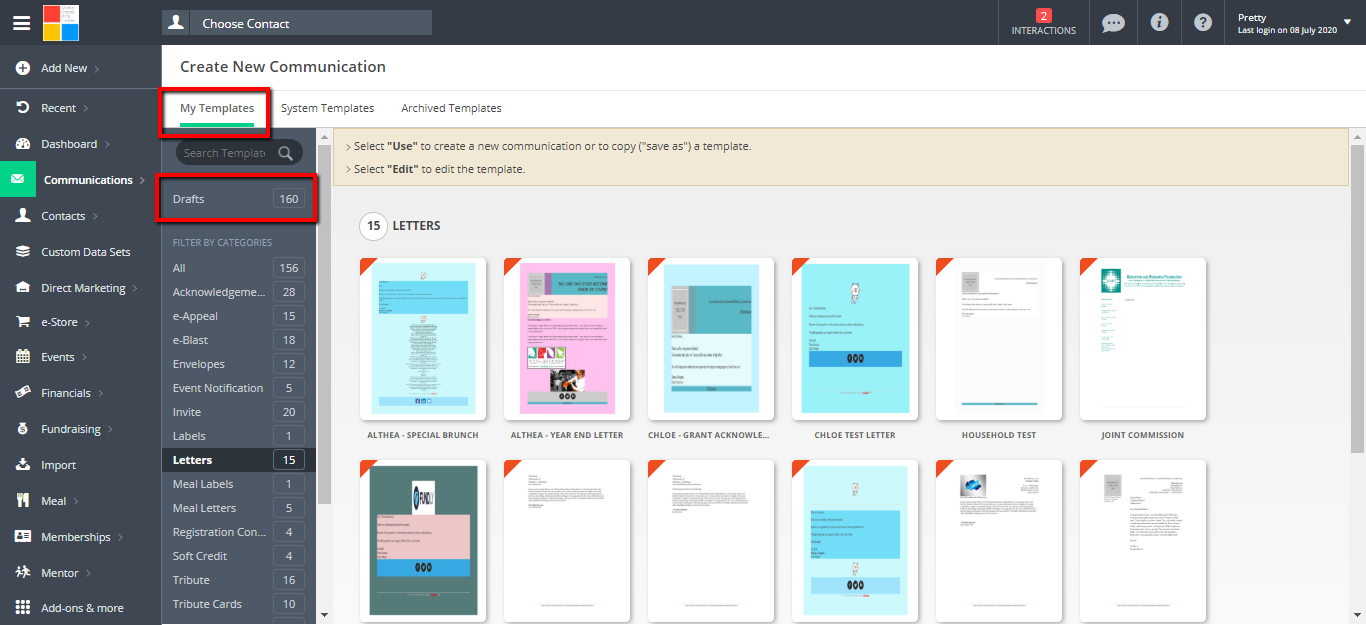
- UnderMy Templates tab, scroll down to the Letters category.
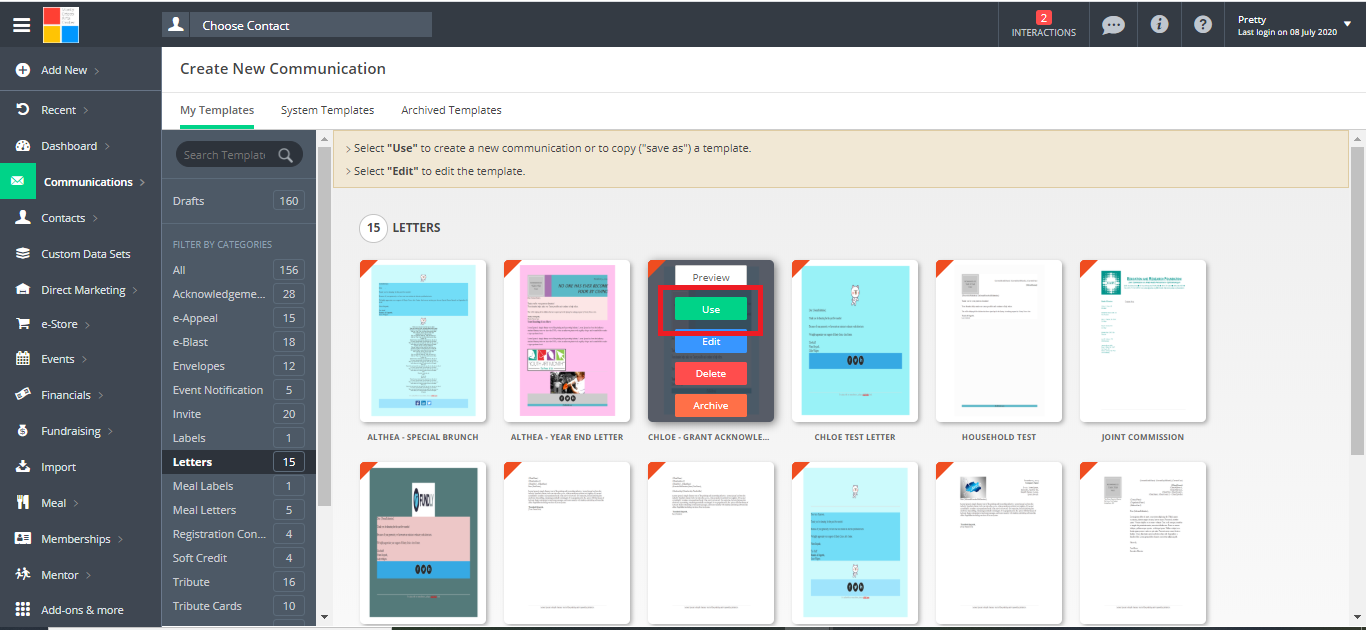
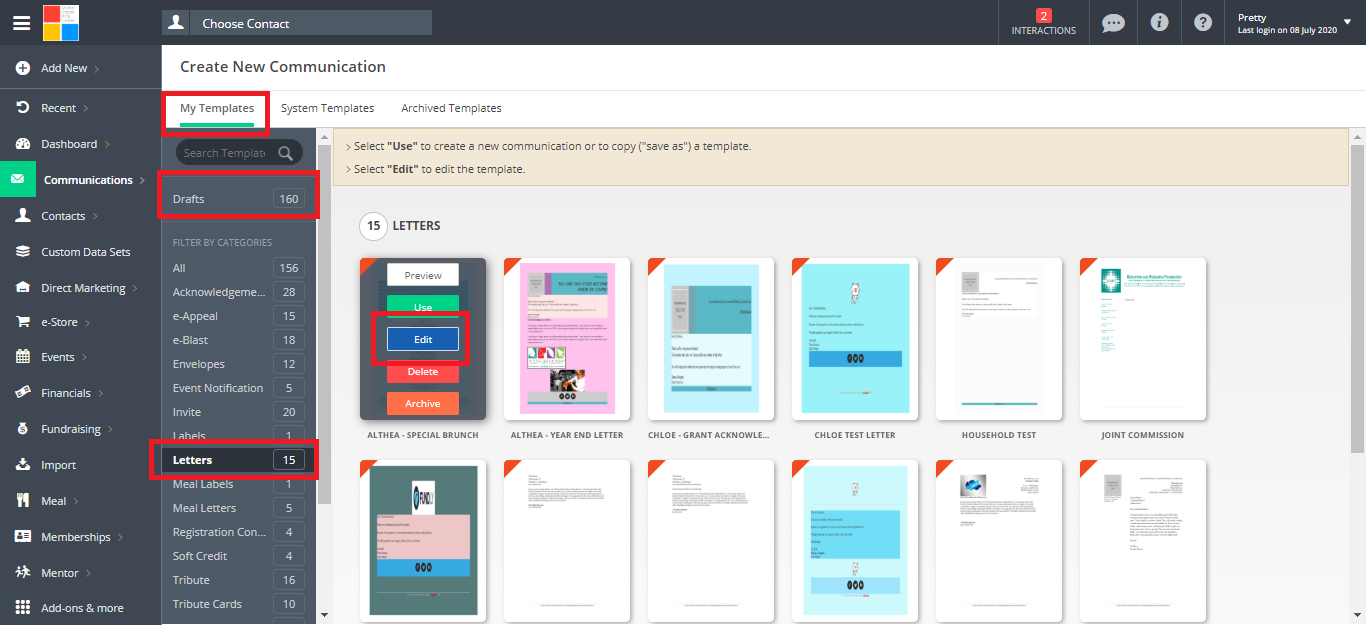
- Hover over the template and select Use.
- Make any edits you want to your Letter template (selecting Use in step #5 makes a copy of your letter template, so any changes you make here will be just to this version/instance of the letter and will not change the underlying/base template).
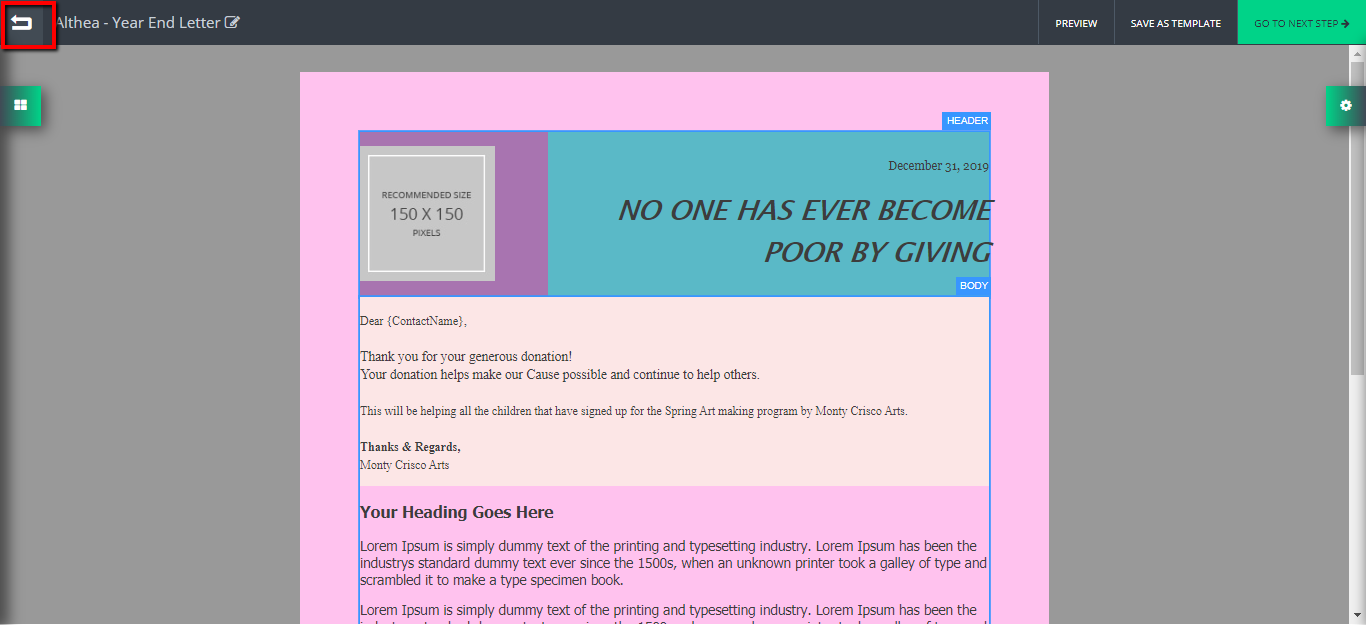
- If you need to leave while editing your letter, click the Edit button(pencil icon) next to the file name and give the file a name.

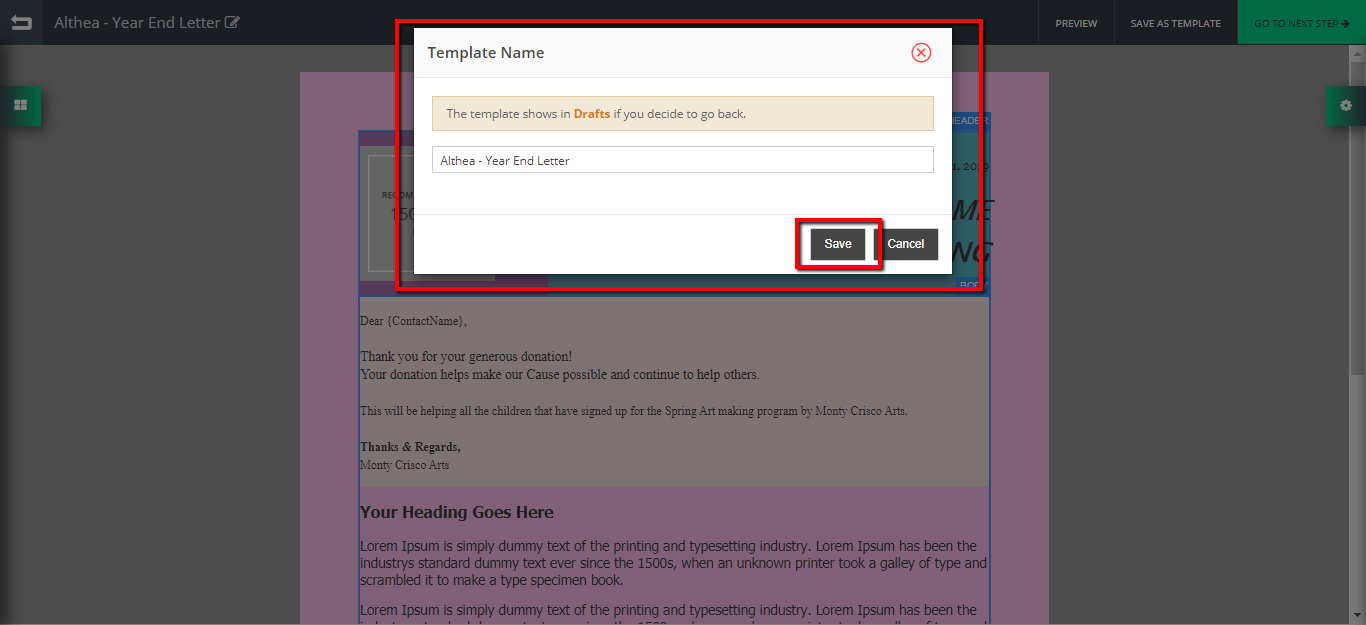
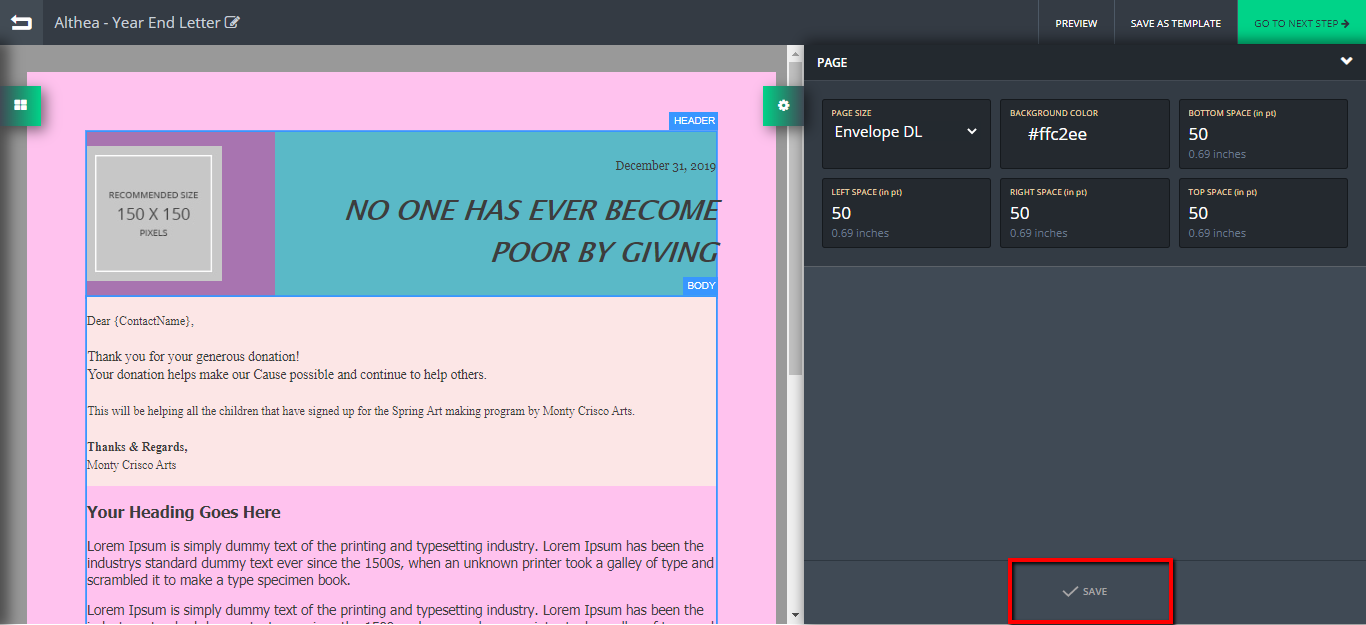
- Then click the Back button in the upper right hand corner. The template aito saves but you will want to make sure you've saved any changes you've made up to this point by clicking Save in the lower right hand corner. You will be asked if you want to save this work in progress in your drafts folder. Click Yes.

- When you want to return to your work in progress, you will find it on Create New Communication: My Templates: Drafts tab.
- To pick up where you left off, simply hover over the template and select Edit.
- Once you have finished setting up your letter, click the Save button in the lower right hand corner (the system does have an autosave function that will save your work periodically but be sure to Save before moving to the next screen).
- Next, click the green Go to Next Step button in the upper right hand corner.
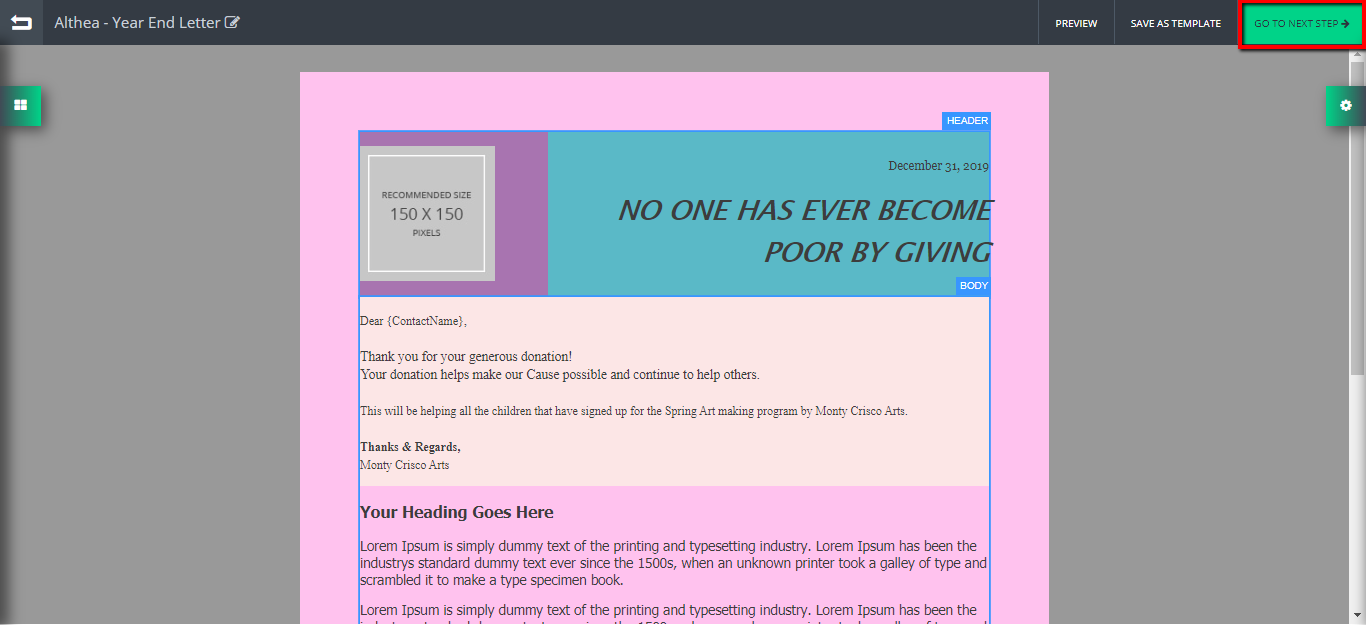
- This will take you to the Select Letter Recipients screen.
- At this point, if you need to leave your work in progress and return, you can pick up where you left off by going to Create New Communication: History (that is, your draft Letter will no longer be found in the drafts folder of My Templates and, instead, will be found on the Pending tab as a pending batch from this point forward).
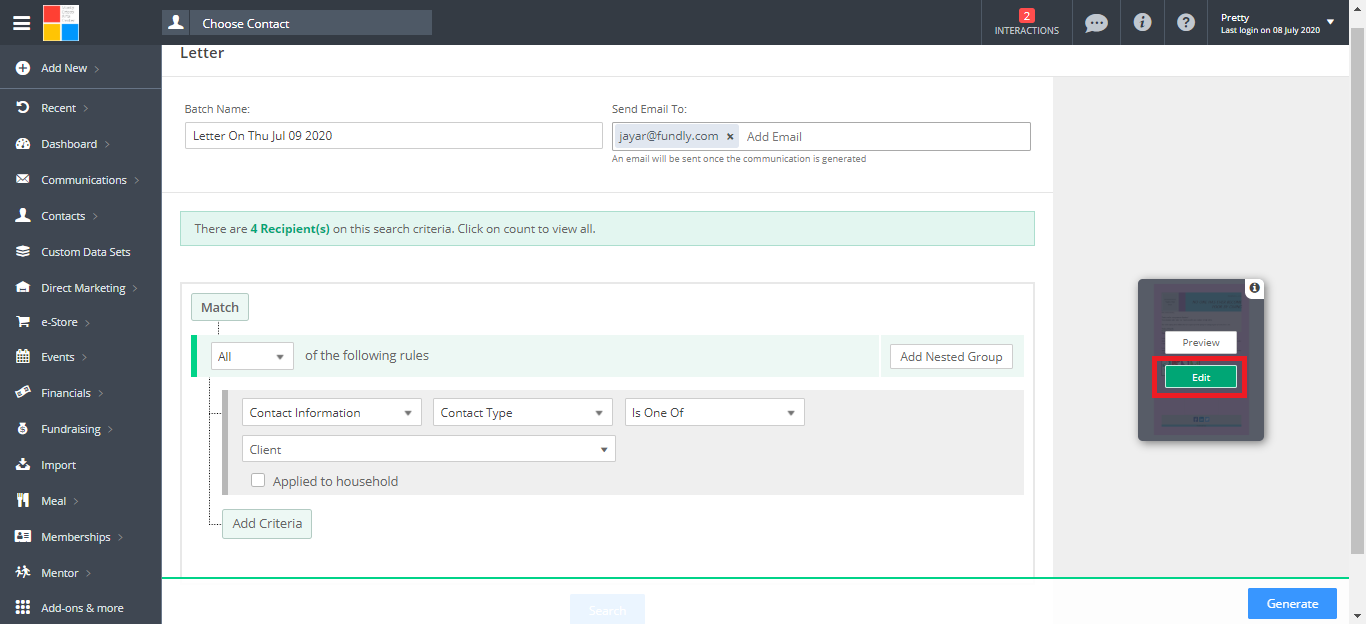
- If you need to go back and edit your letter template/body, you can hover over the preview on the right and select Edit.
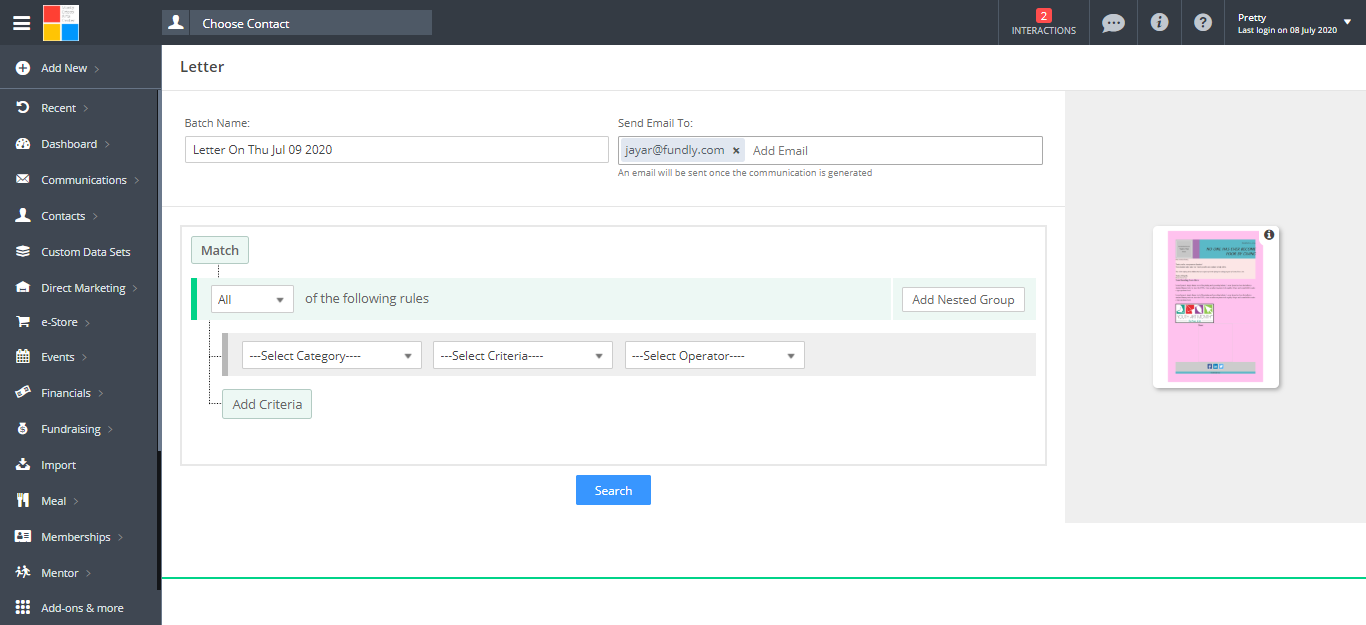
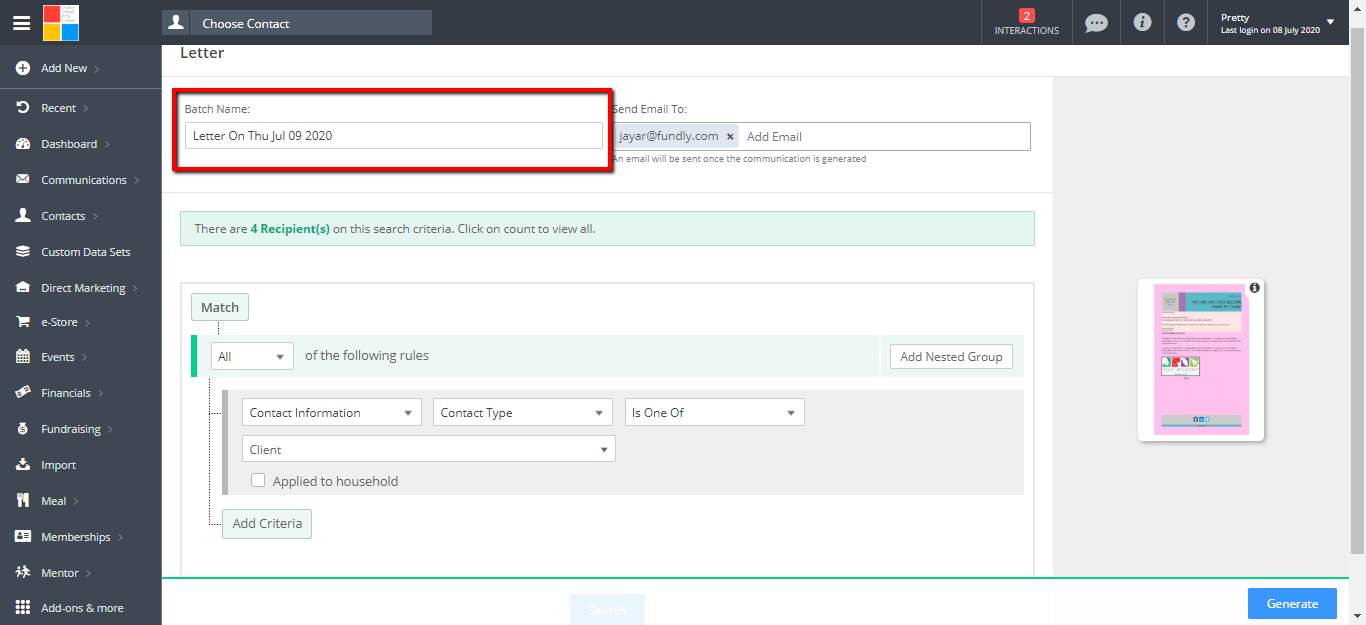
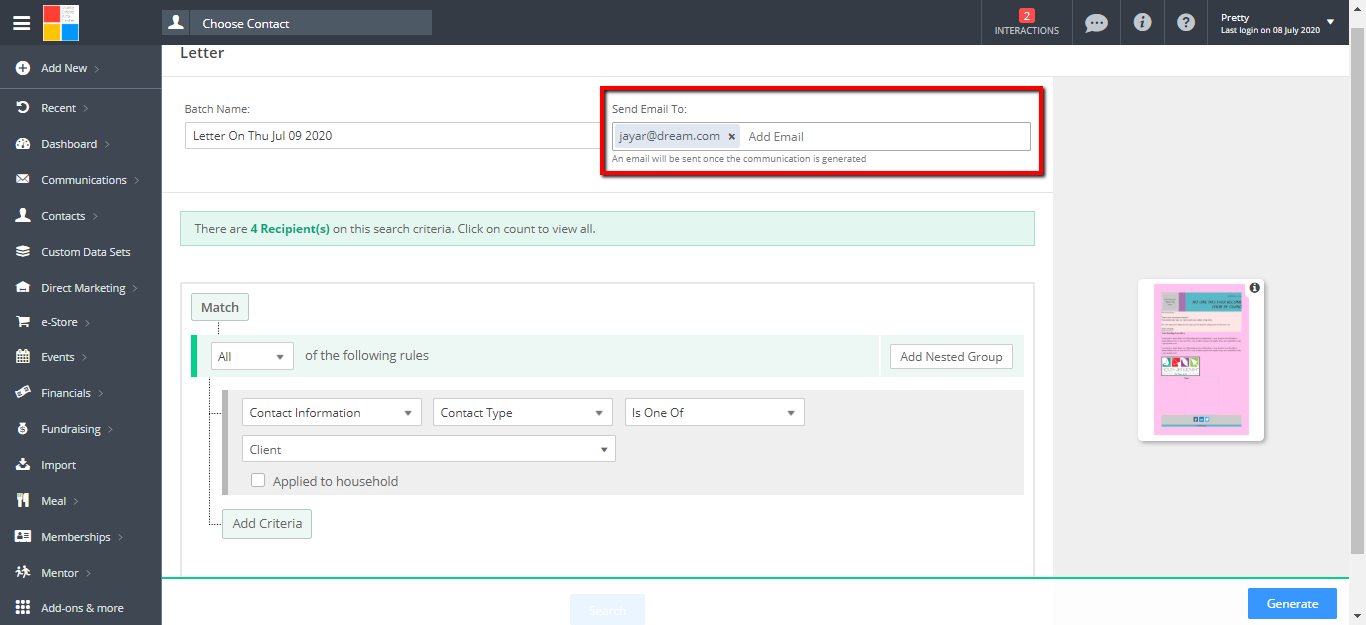
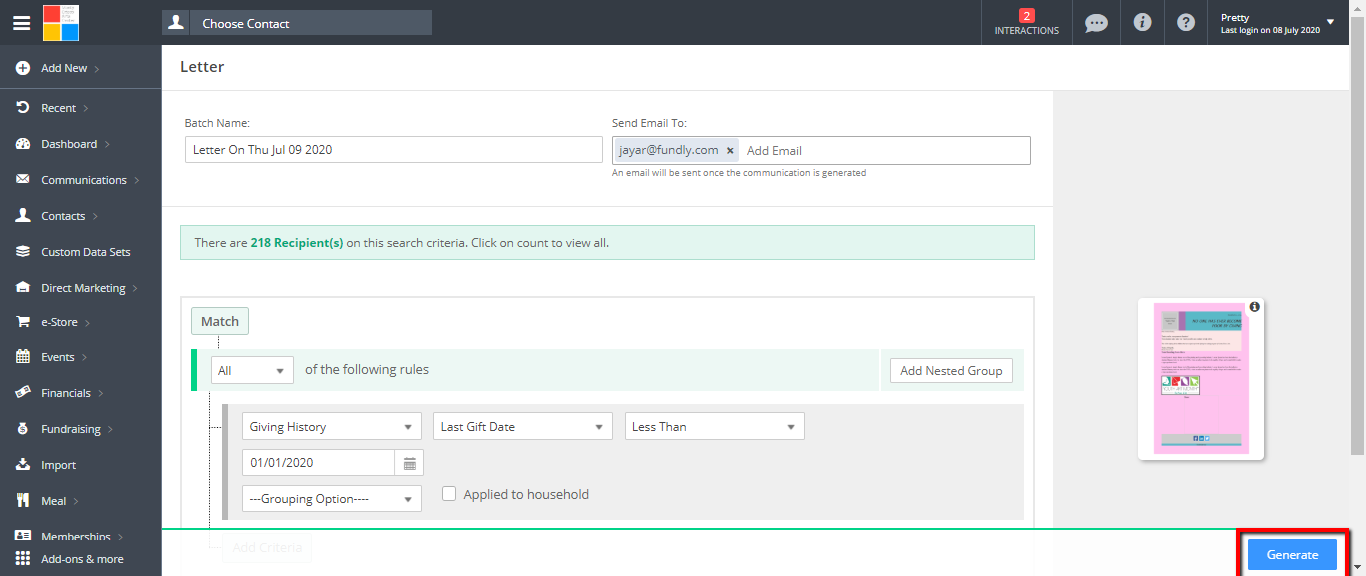
- The system will assign a default batch name, which you can change to something more descriptive if you like.
- Indicate the email address of the staff person who should be notified once the letters are generated/ready to be sent/downloaded (the system will have to work in the background to merge the letters and prepare the file for sending/download).
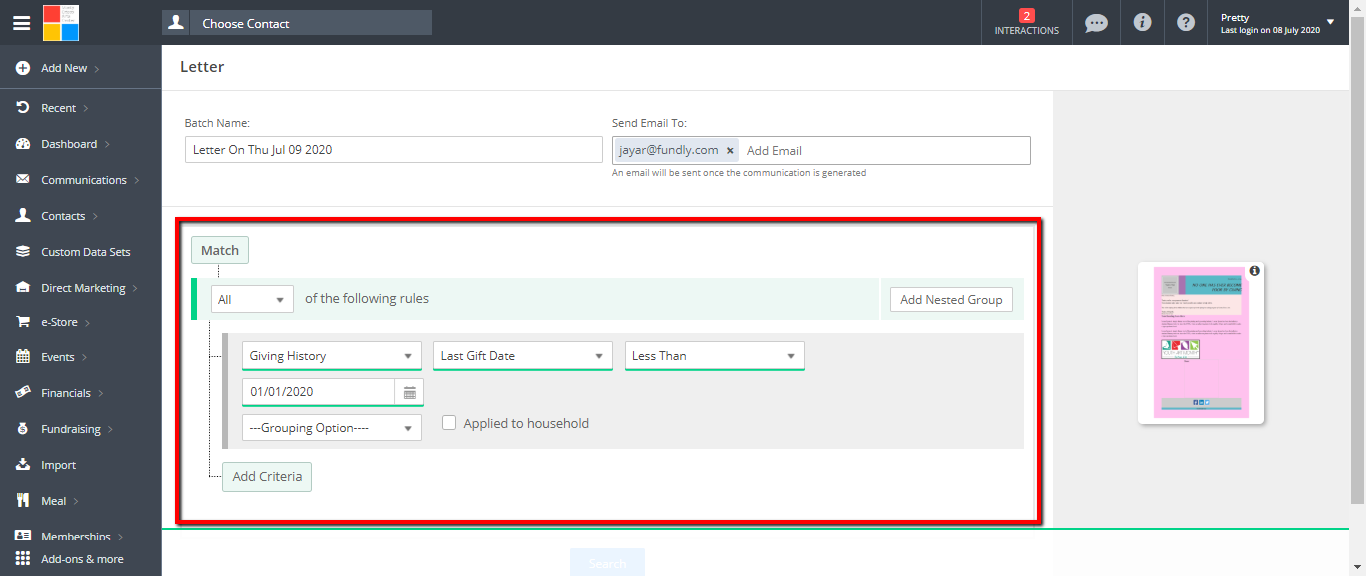
- Use the filters to create a query/search for the contacts that should receive your letters. For instance, if I wanted to send my example letter to past donors who have not yet donated this year, I could put in the criteria “last donation date is less than 1/1/2020” (if I want to exclude contacts from my list if any member of the household has donated since 1/1/2020, then I could also click the “Applied to household button) or I could use “Recency in Months Is Not 12” to indicate that I want to see everyone who hasn’t donated in the last 12 months. You can use the filters for almost any criteria you might want – lapsed or expired members, people who have attended a certain event (or didn’t attend a certain event), etc.
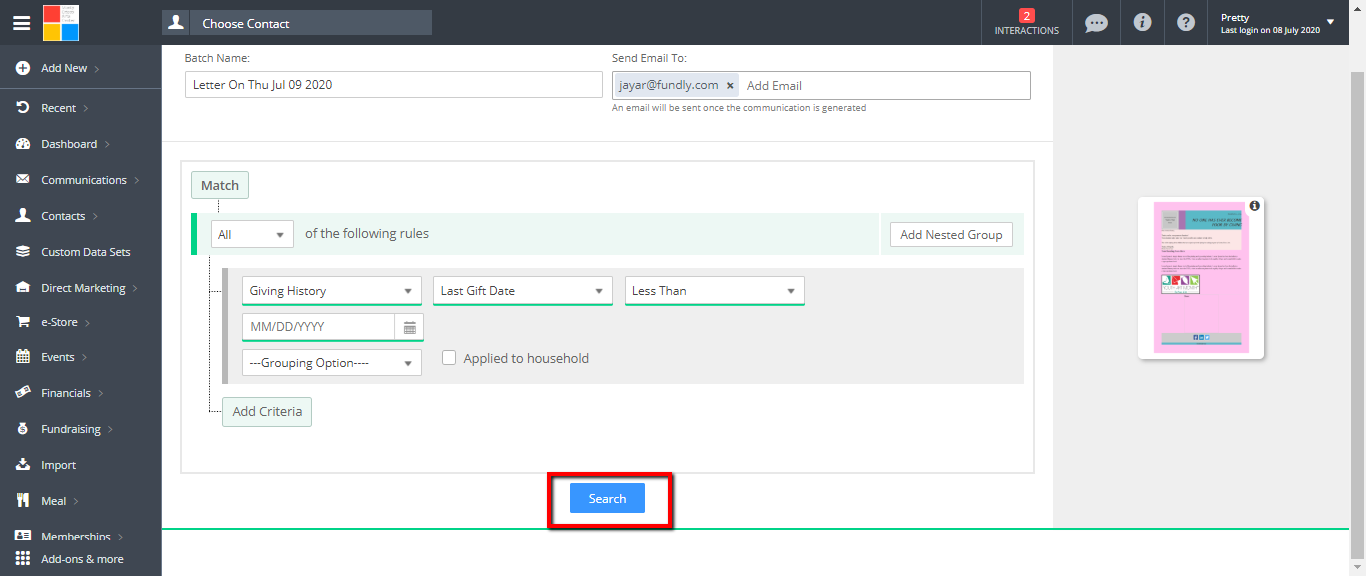
- Once you enter your criteria, select Search to bring up a list of results.
- You can click on the search results to view the list of names.

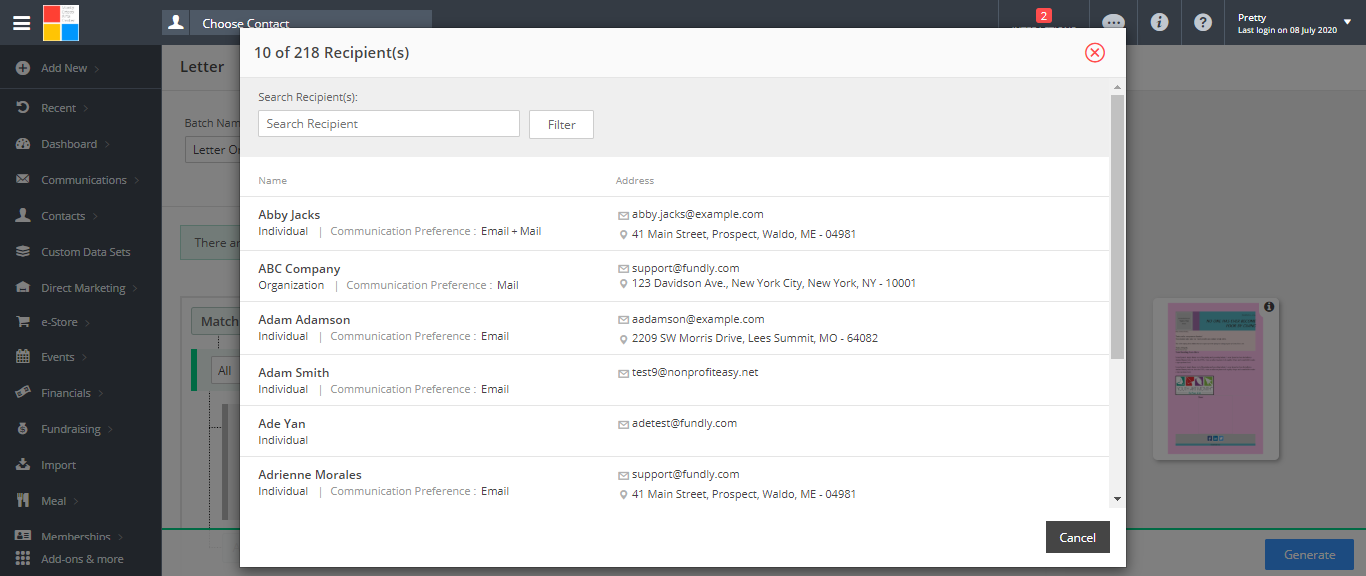
- You cannot interact with the list of names; that is, you cannot select someone from the list to exclude. To exclude contacts from the recipients list, you would need to add a filter to your criteria such as “Contact Name Is Not Joe Smith” (for one name) or “ContactName Not In Joe Smith, Betty Grable, Clark Kent, Sammy Hagar” (to enter several names). Please note, if sending the letters via email, you will be able to delete individual contacts/letters out of the batch before sending and if you are sending by postal mail you will be able to skip printing those letters, so it is not necessary to exclude contacts from the batch at this point; we simply note that it can be done if you prefer to do it at this point).
- Once you have your letter and list of recipients the way you want it, click the Generate button in the lower right hand corner.
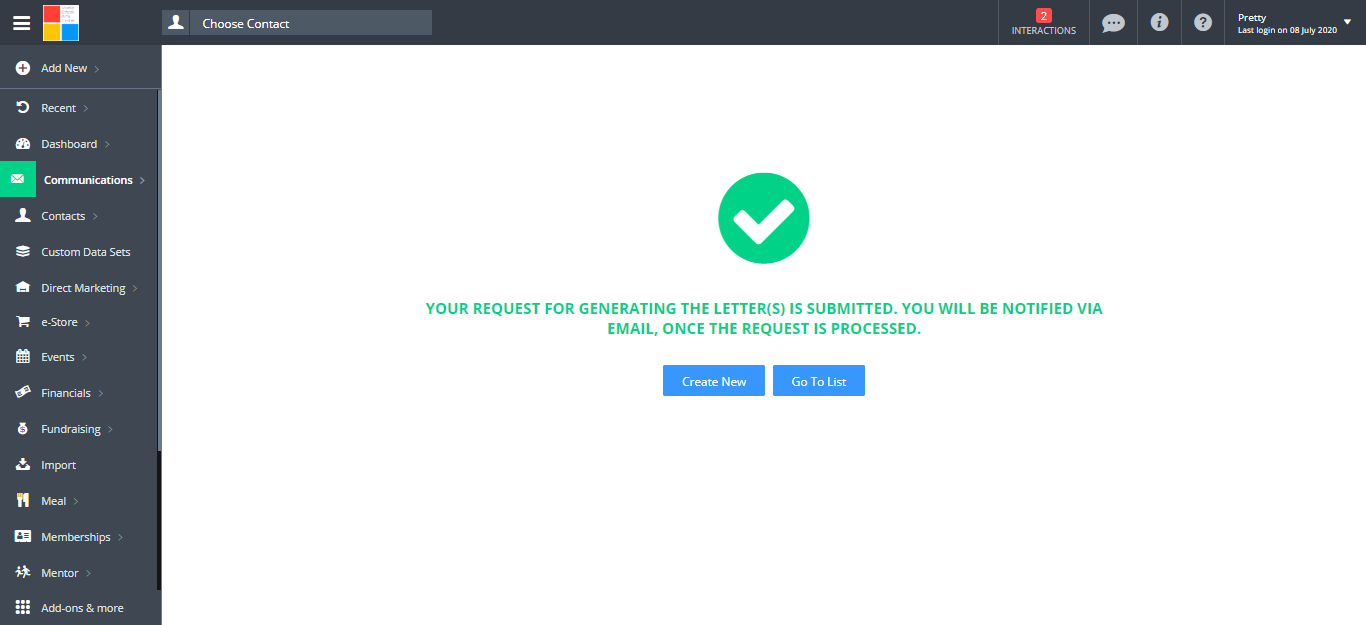
- The system will work now to create the merged letters. Depending on how many names are in your batch, this may take a while. You will receive an email when the letters are ready to be sent.
- You will find the draft batch on the Create New Communications: Pending tab with a status of "scheduled for generating." The status will update to Generated when the letters are ready to be sent.
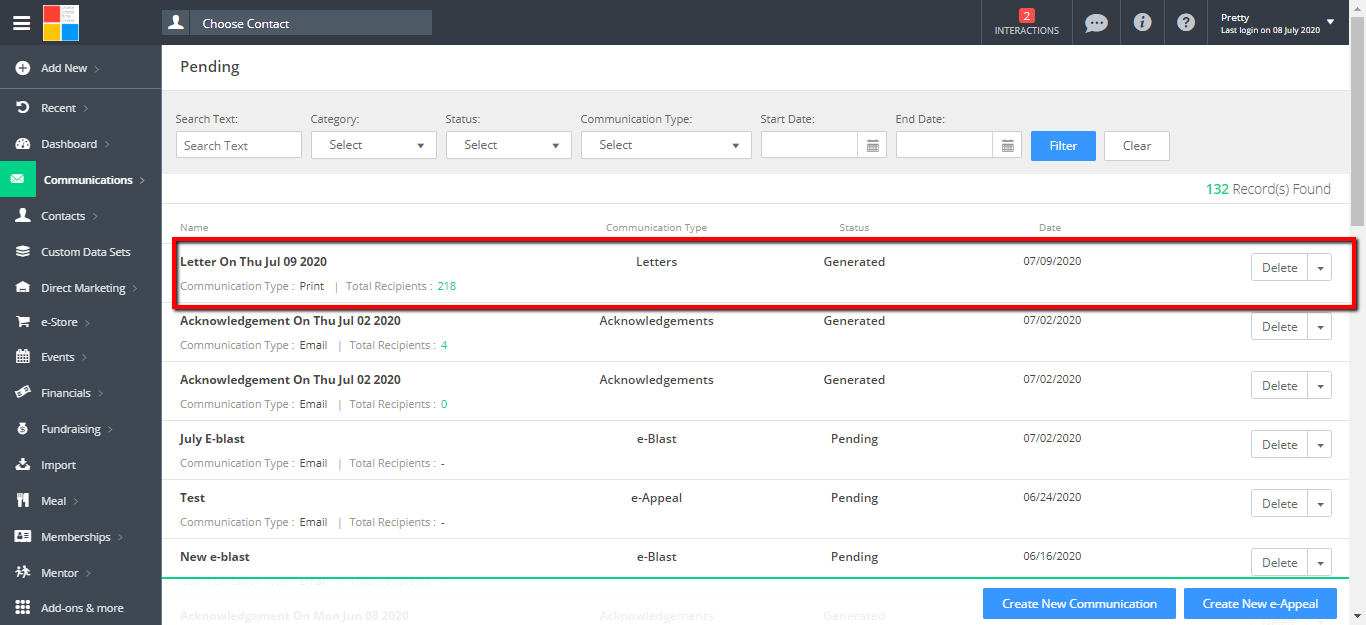
- Once the letters are ready to send, to send the letters via email, click the drop down menu to the right of the letters and select Process. To send the letters via postal mail, select Download from the menu.

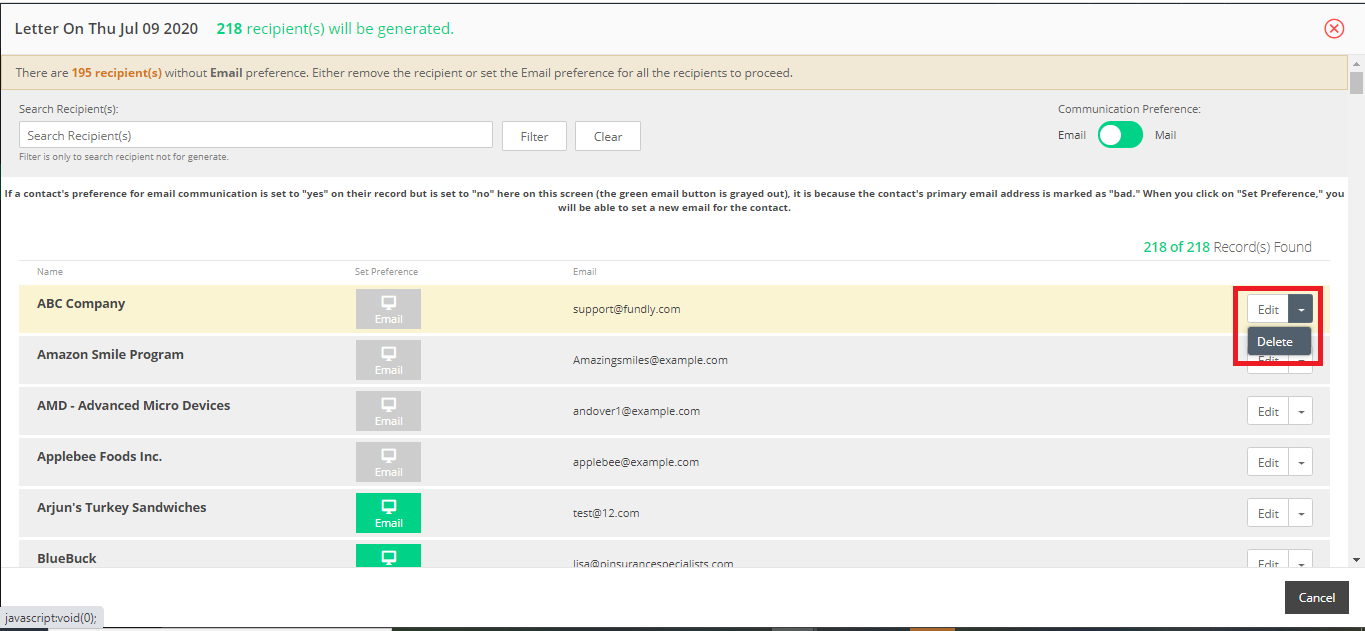
- Clicking Process to send the letters via email will open up the Send Letters by Email interface.

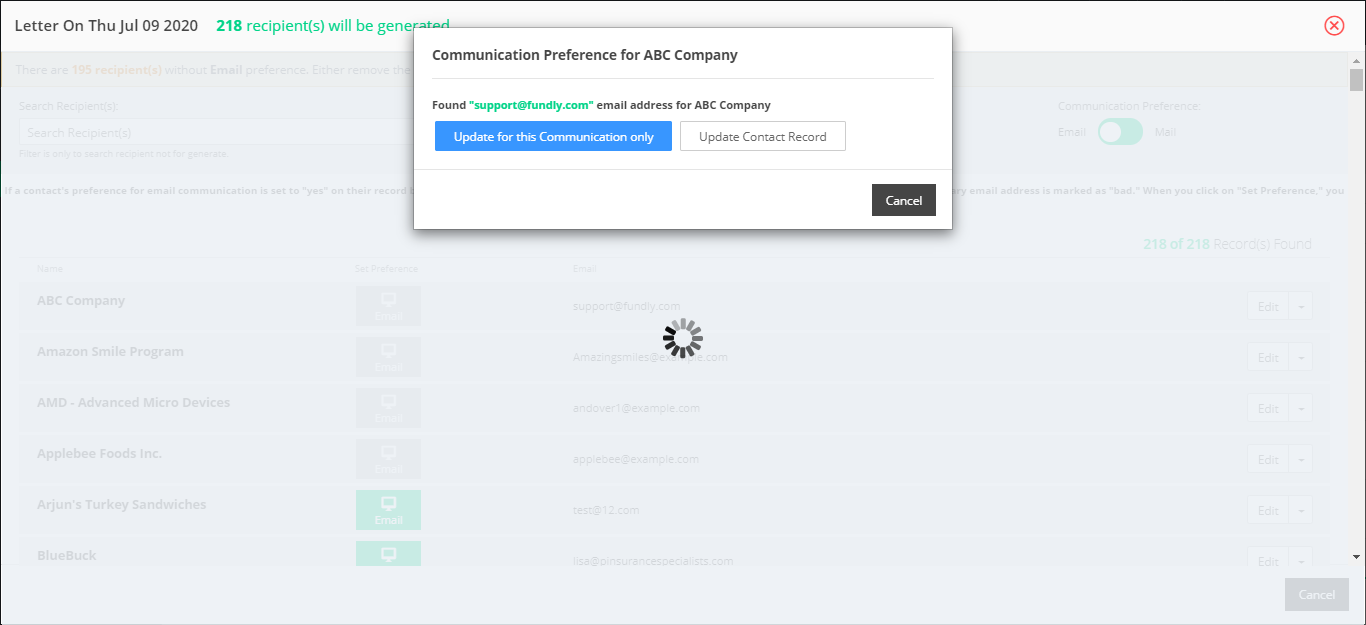
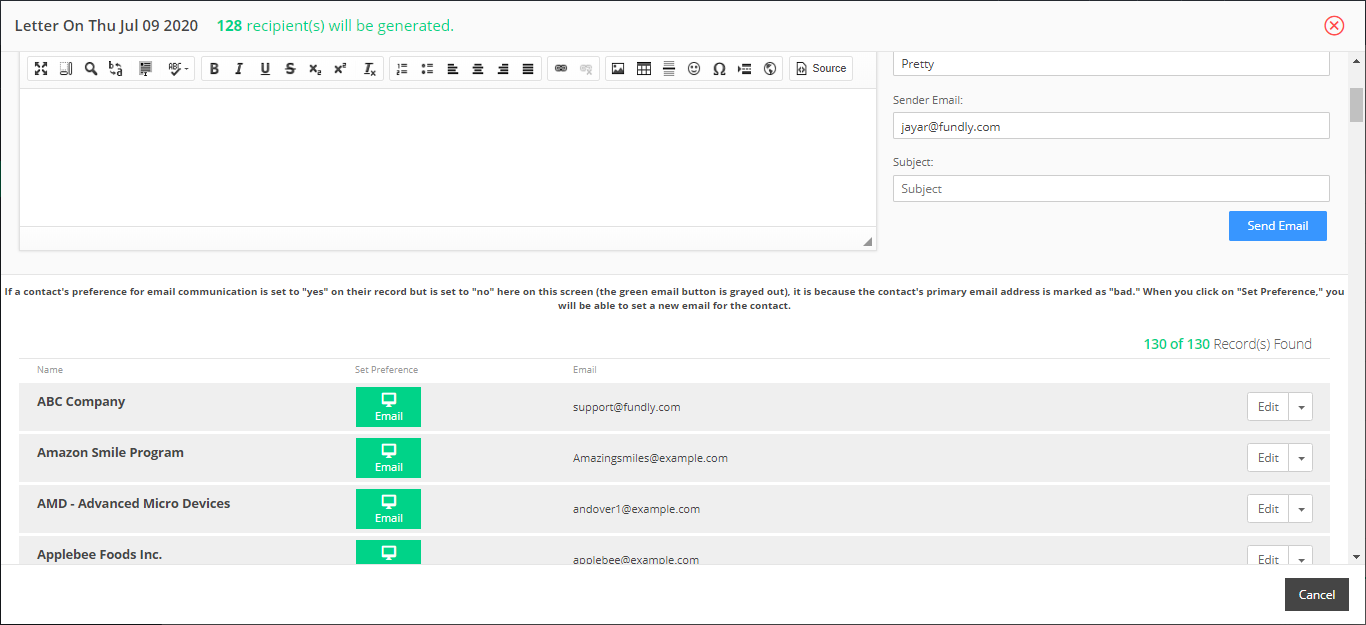
- Those without an email address on file or whose communication preference for email is set to No or Not Set will have their green email button grayed out. You will not be able to send the letters until every person in the batch has their email communication preference set to Yes and they have an email address to send to.

- Click on a grayed out email button to add an email address to the record or change the contact’s email communication preference.
- When changing communication preference, the system will ask if you want to update the preference just for this one letter (temporarily set it to yes so you can send the letter) or change it to yes permanently.
- For any contacts you with to remove from the batch, click the drop down to the right and select Delete (this just removes the contact from the batch; it does not delete the contact record).
- If you wish to edit any of the individual letters (for instance, to add a private/customized message or note), select Edit from the drop down on the right.
- This will open up the Edit Letter window; Make your changes to the letter and click Save.

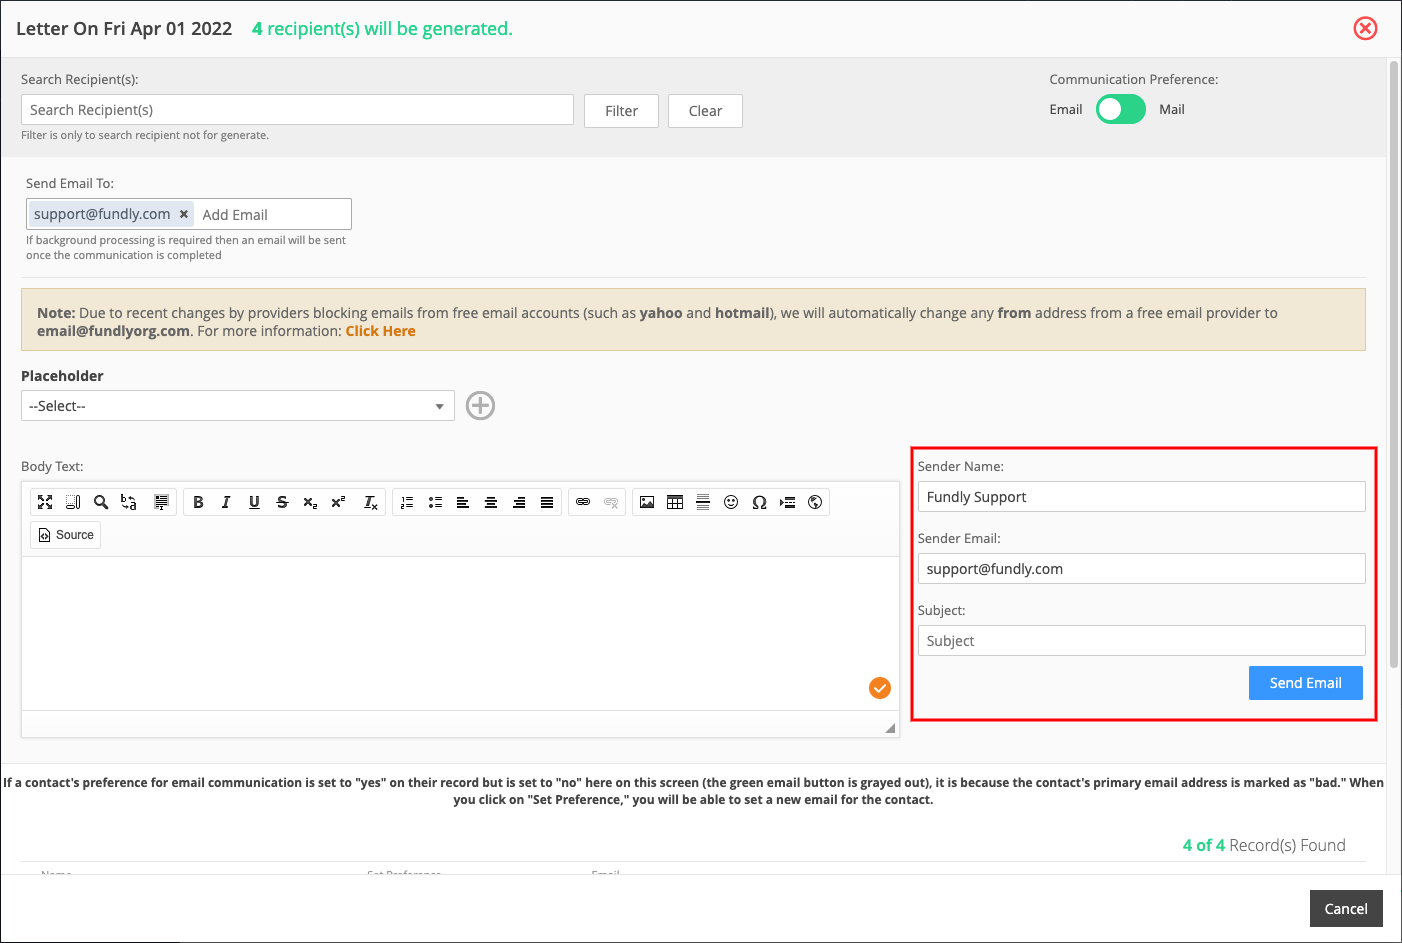
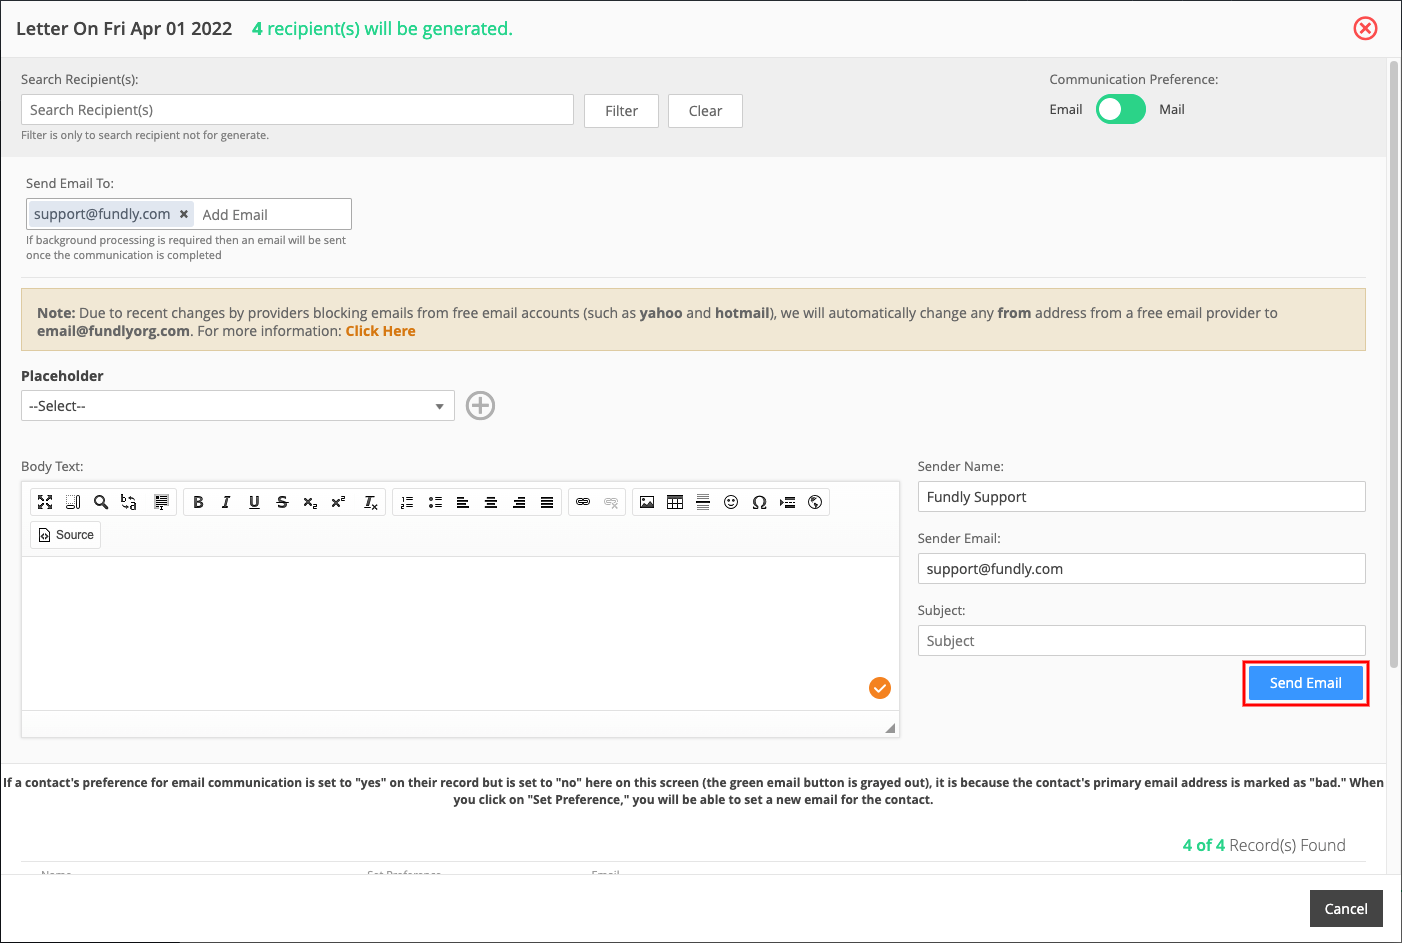
- Once everyone in the batch has an email address and Yes for email communication preference (either temporarily or permanently), the Send Email fields and button will become available.
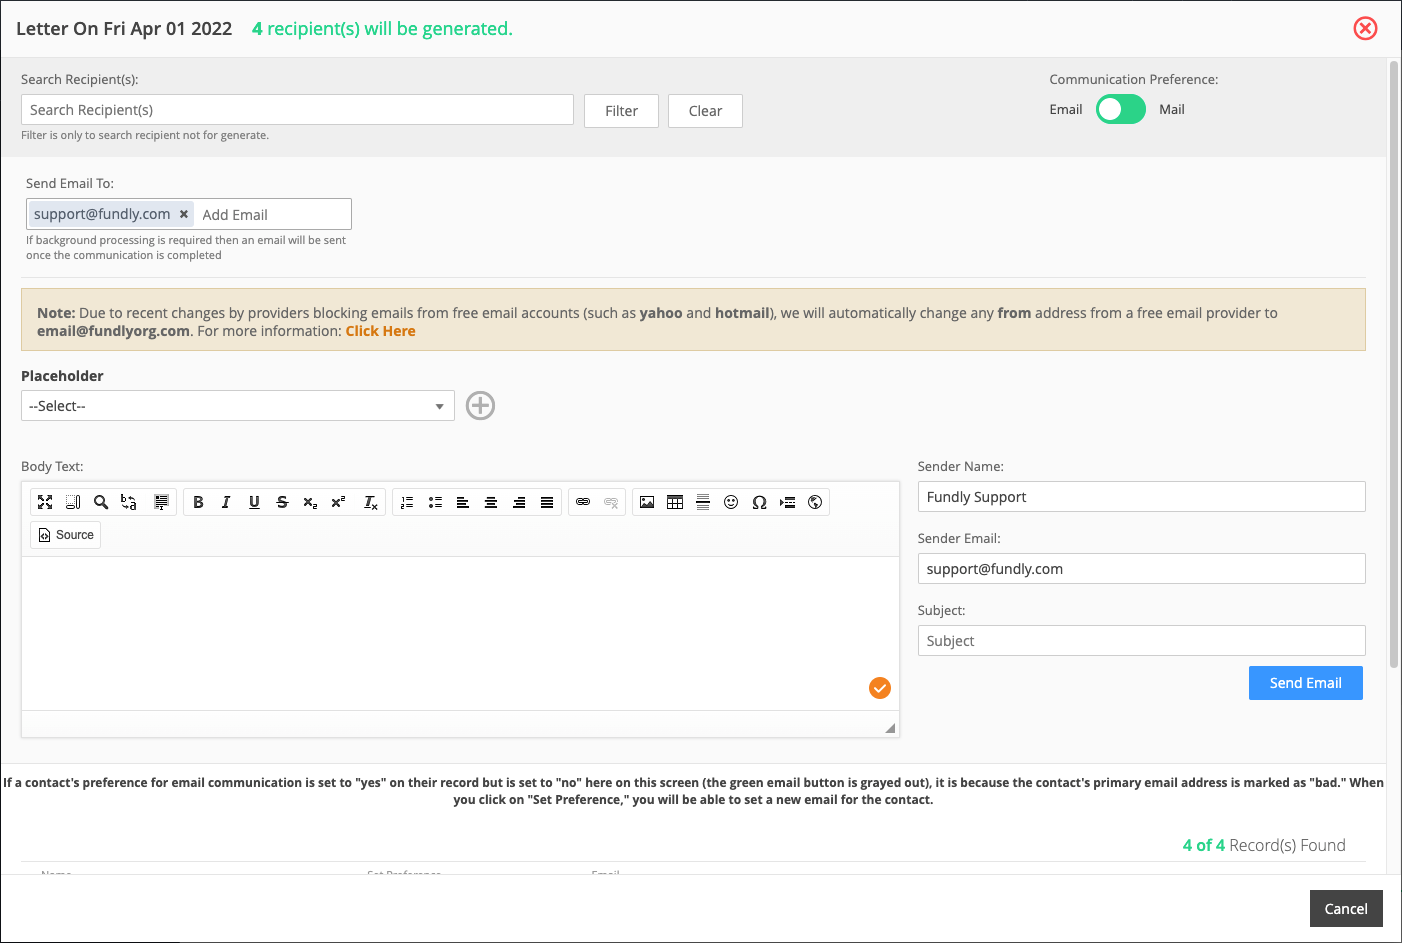
- Fill in the sender name, sender email address, and subject line for your email.
- In the “Send Email To” field, fill in the email address of the staff member who should be notified when the email has completed sending (if the batch has less than 100 emails it will be sent immediately and no notification will be sent to the staff person; if the batch has more than 100 emails, then the system will need to use the bulk email gateway and process emails more slowly – in this case, a notification email when sending is complete will be sent).

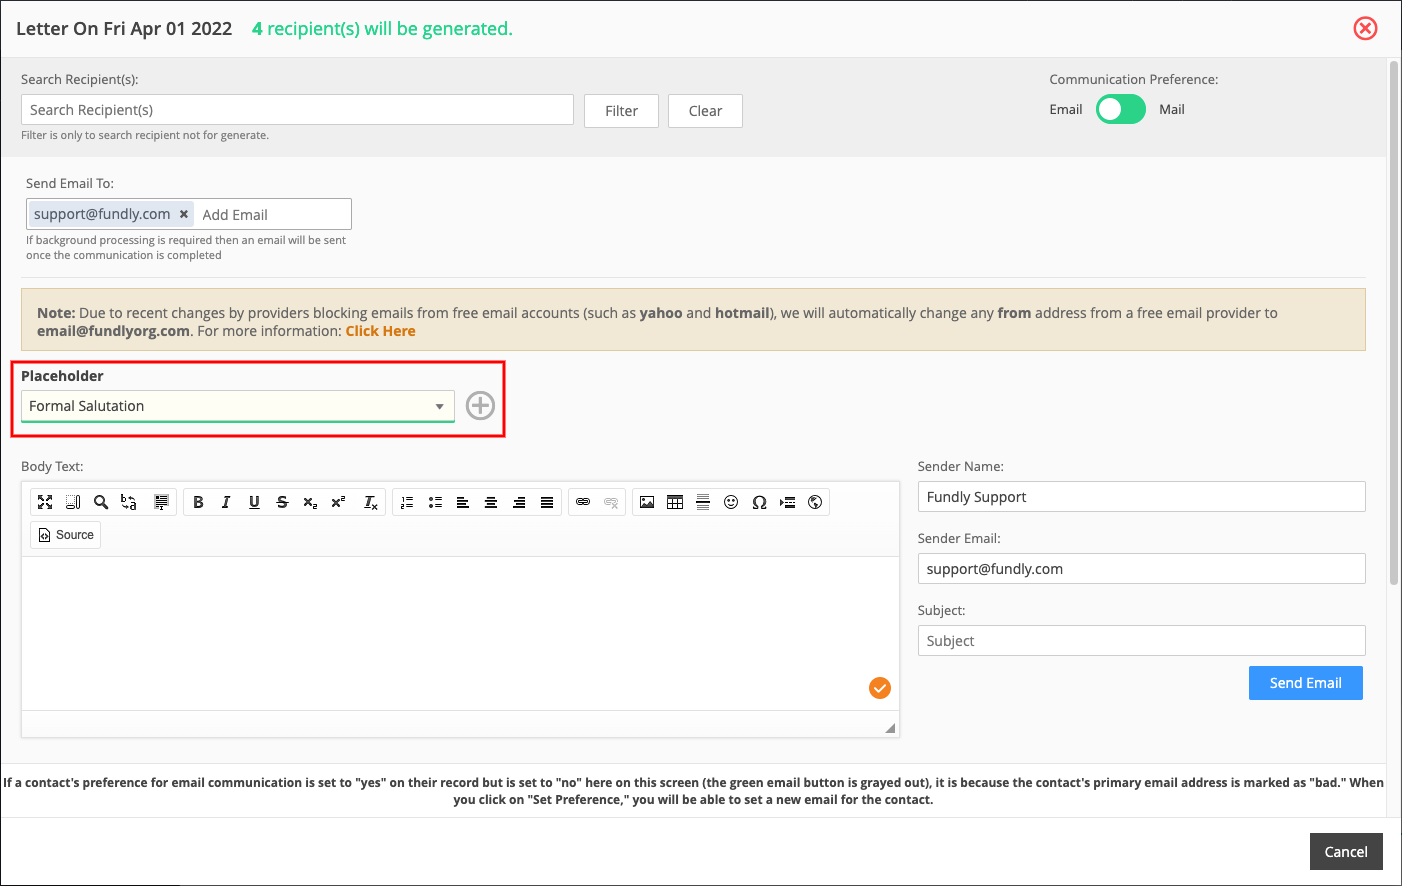
- Letters sent via email will be sent as a PDF attachment to an email. Fill in the email Body text with a message to the recipients.

- If using placeholders, make sure to select the placeholder from the dropdown and click the plus sign.
- Click Send Email to send the letters to your contacts.
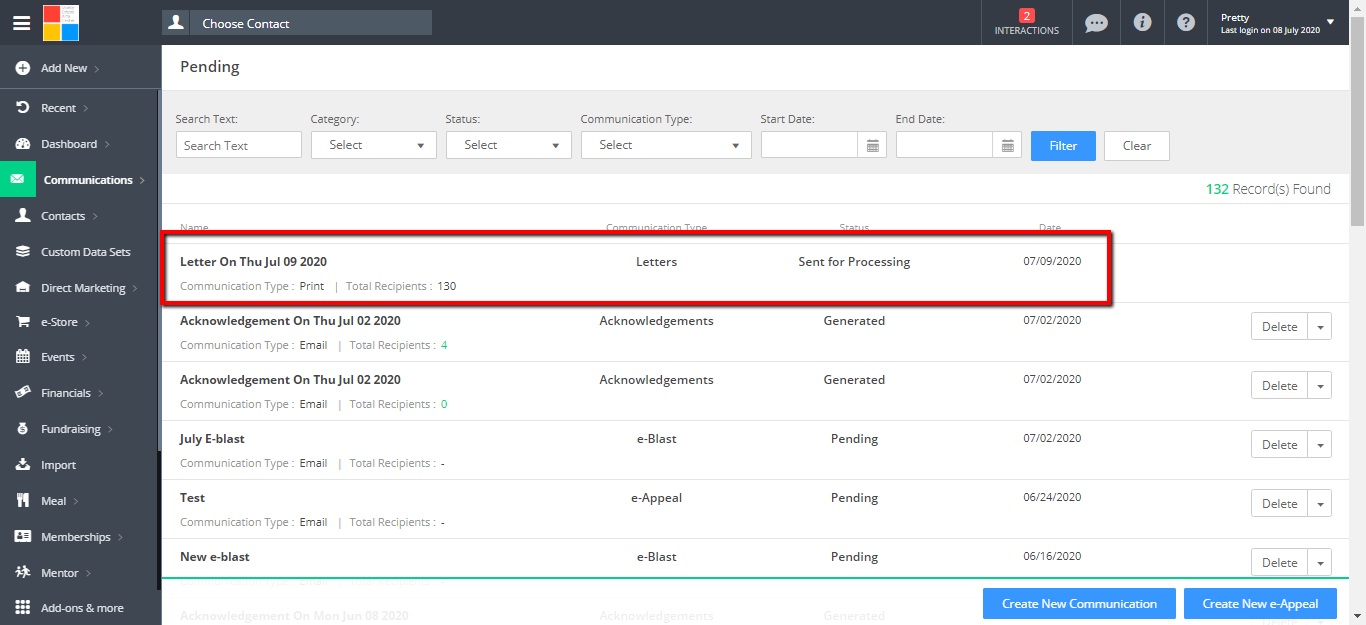
- The batch will appear on your Pending tab with the status Sent for Processing.
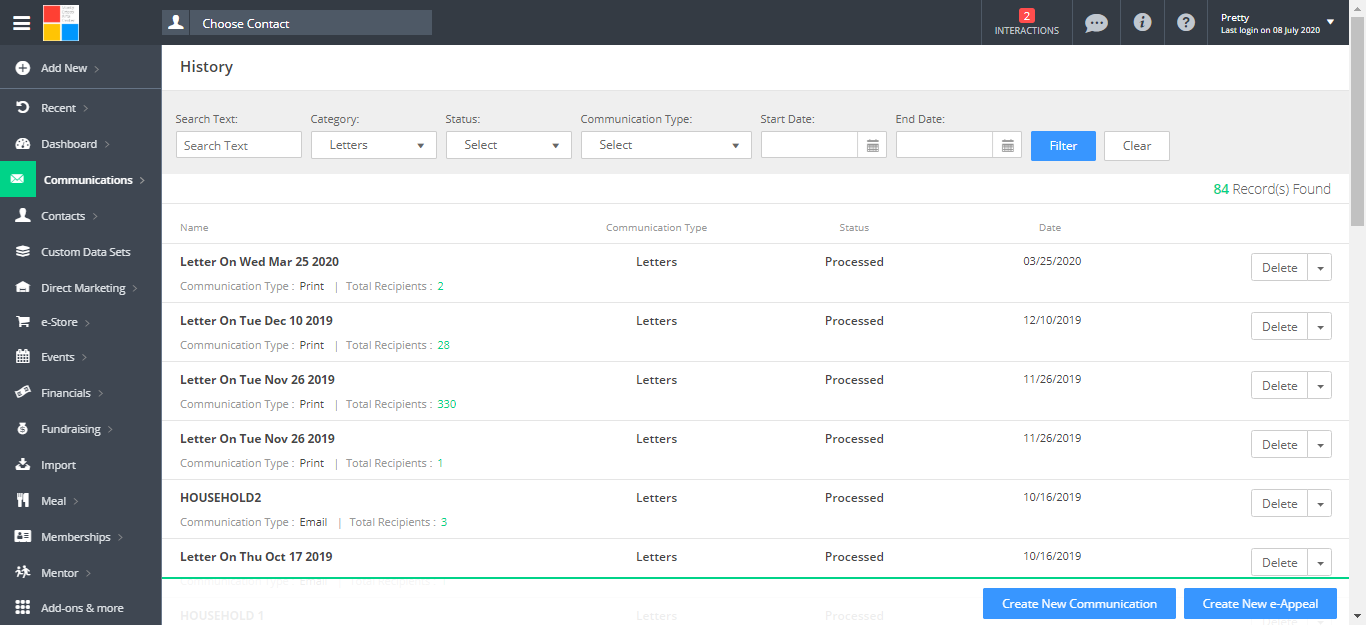
- Once the letters have finished sending, you will find the batch on the History tab.
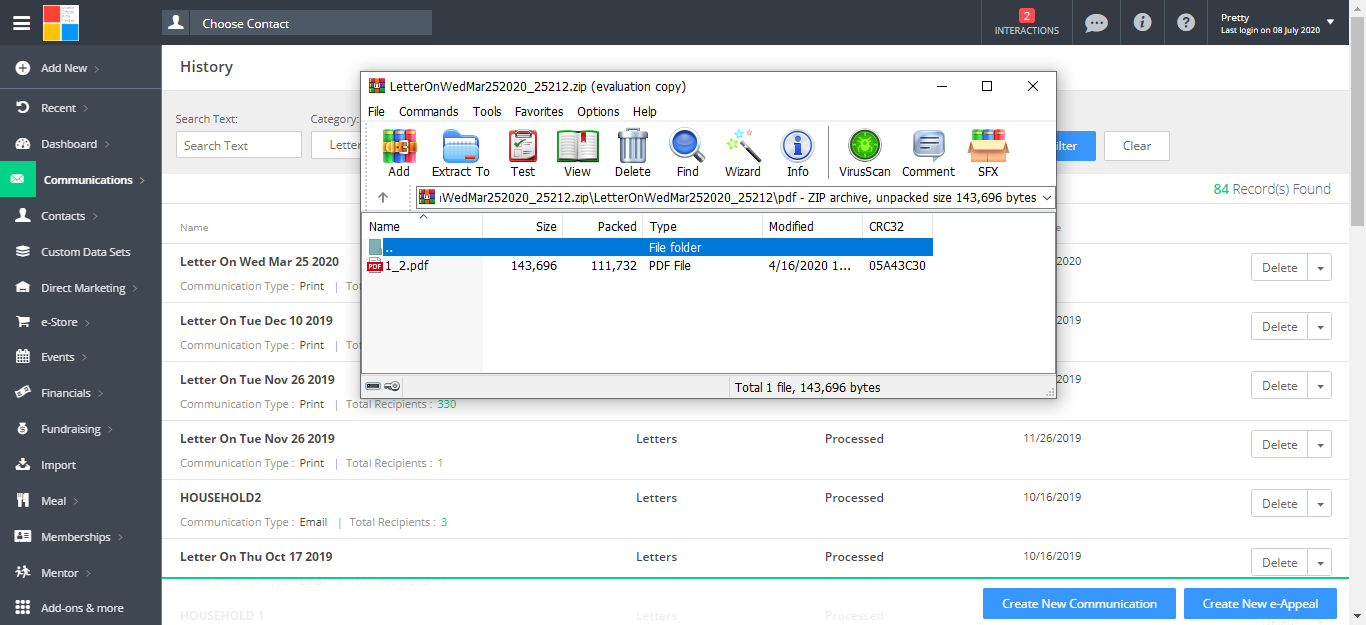
- For letters to be sent via postal mail, downloading the file will download a Zip file that contains a PDF and MS Word version of the letters and also a PDF of mailing labels to use with the letters.
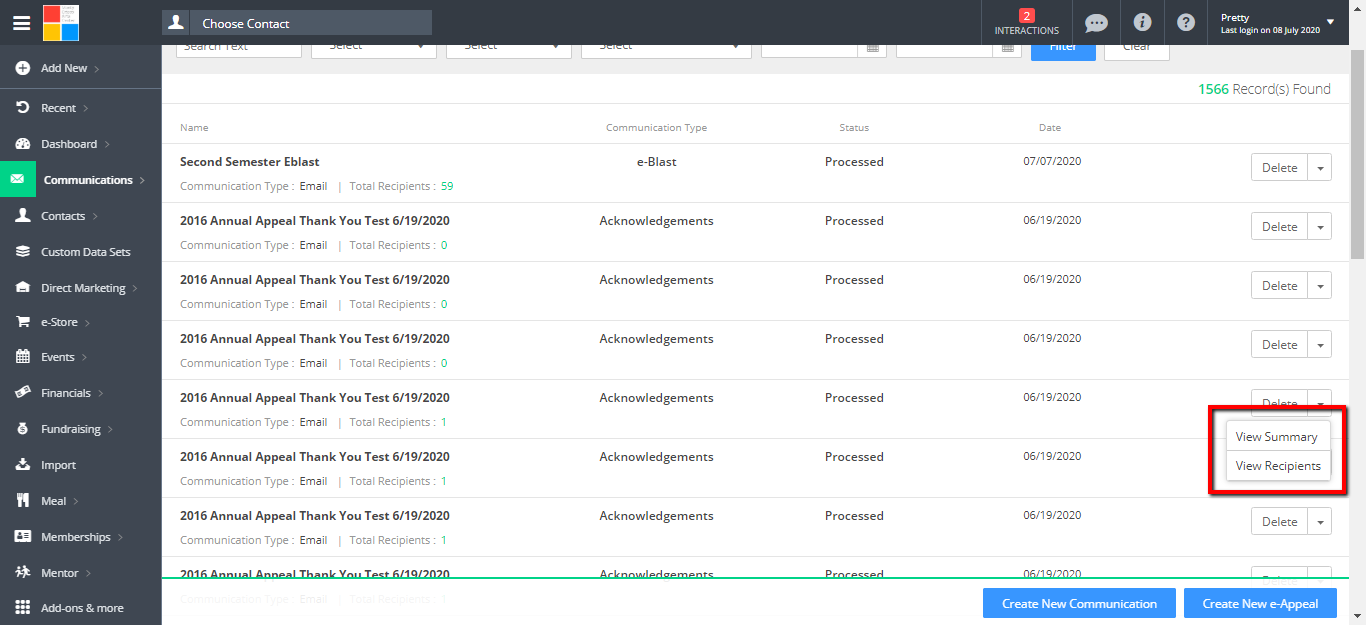
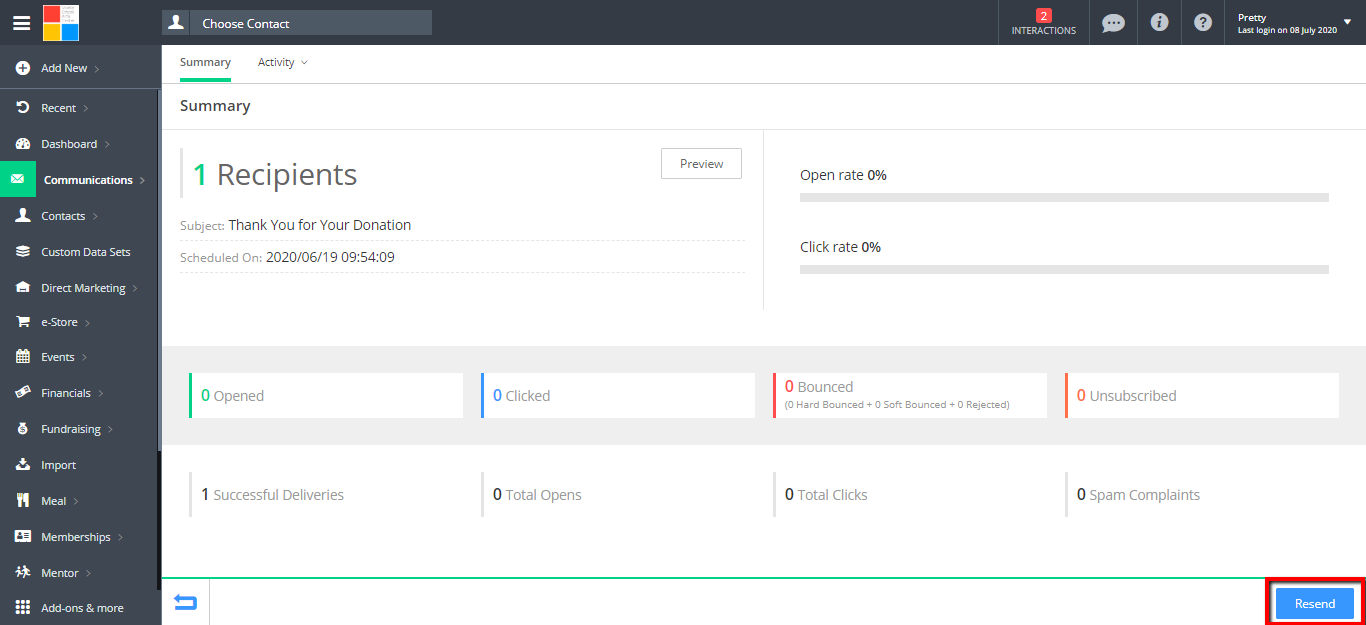
- If you ever need to resend the letters via email or postal mail, go to the History tab, click the drop down to the right and select the option that you want.
Comments
0 comments
Article is closed for comments.