
Events: Create Event Part I: Event Details
- This tutorial will cover the first step in creating an event.
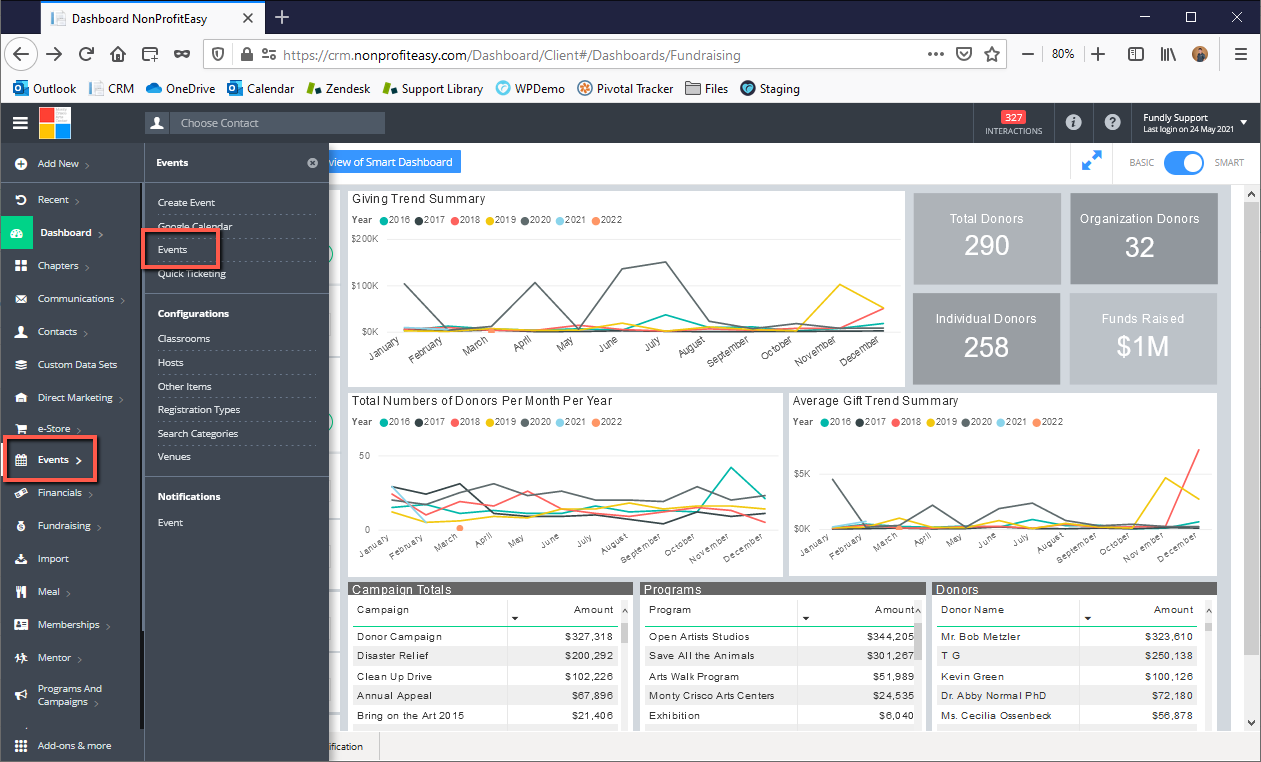
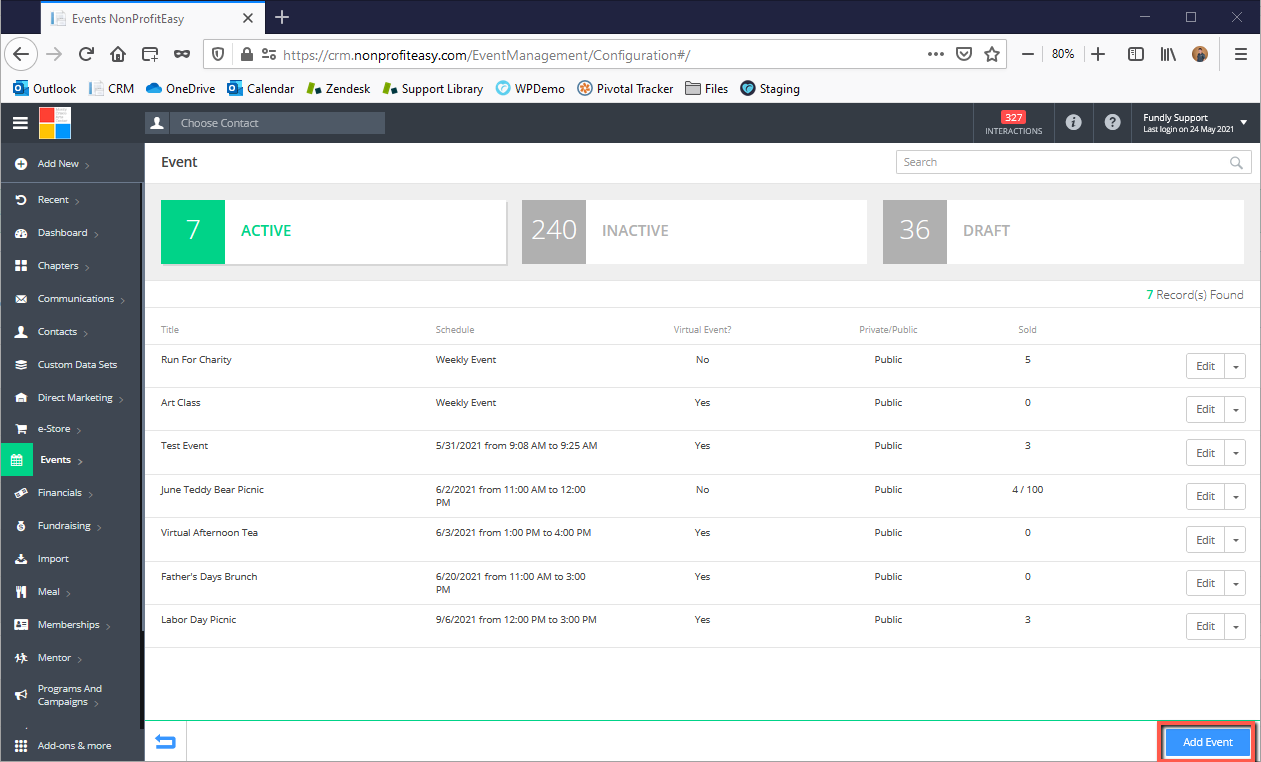
- To create a new event within the system, click on Events on the Main Menu to open the Events sub-menu and then click Create Event (to create an event from scratch) OR from the Events sub-menu select Events to be taken to the Events Index Page and then on the Events Index page click Add Event (to create an event from scratch) OR from the Events Index Screen copy an existing event by selecting Copy from the drop down to the right (to create a new event with the same settings as a previous event; you will then be able to edit all of the settings in the copy to customize it for your new/upcoming event).
- NOTE: For some subscription levels, Fundly charges $1 for every transaction paid via credit card and this charge is not refunded when the registration is canceled, refunded, or credited. This charge is applied monthly. Refer to this FAQ.

OR
OR

- This will bring up the Event creation/edit screen, open to the Event Details (first) tab. Creating events is a multi-step process. Which tabs you have at the top of the screen will depending several factors: if this is a "Hosted Event" (registration not being handled by your organization and therefore no Registration Type tab), a Zoom-integrated event (you will have an additional tab for configuring the Registration Form), and/or if you have the Classrooms module turned on (the classrooms module allows you to integrate an organizational conference/meeting room Google calendar to schedule/reserve meetings rooms for your events).
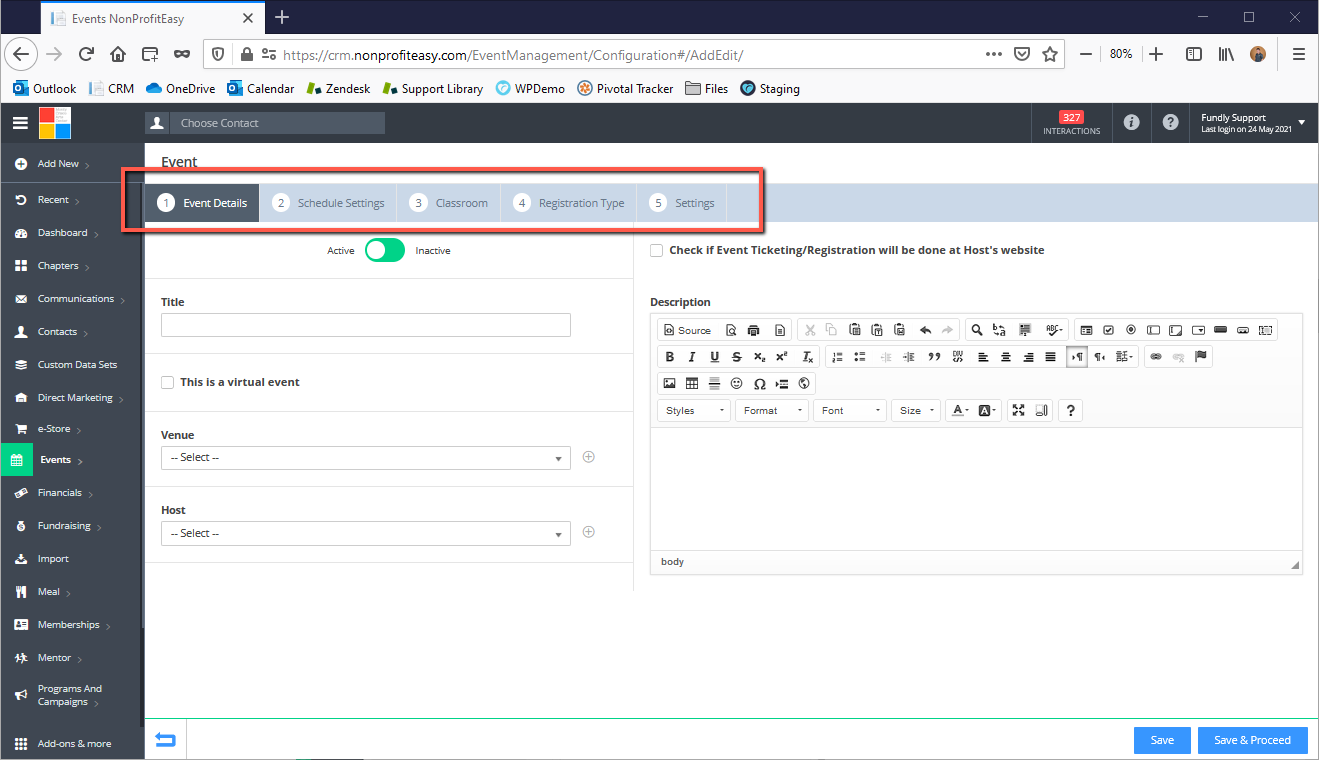
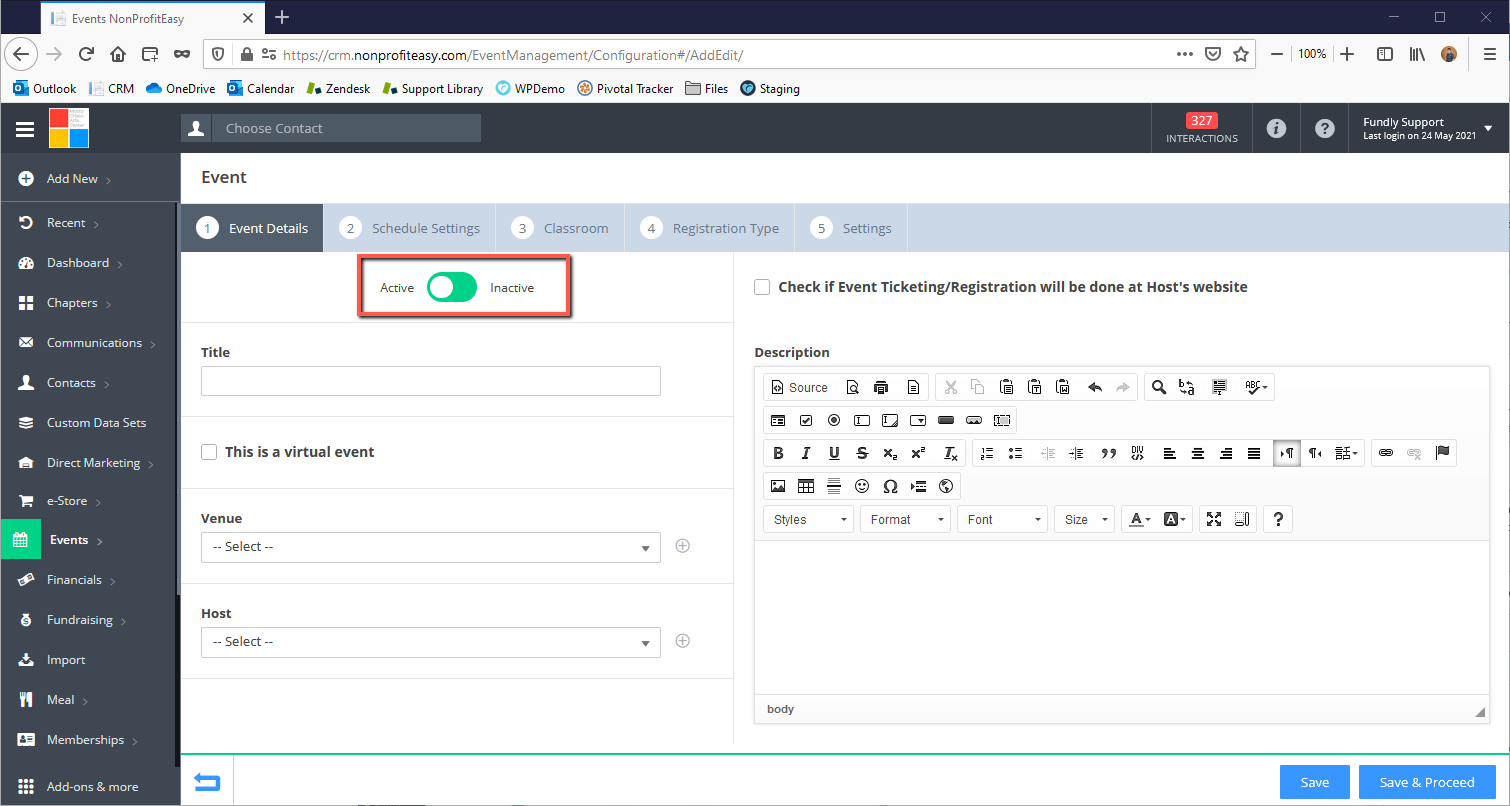
- To begin configuring an event, on the Event Details tab, start by making sure the Active/Inactive slider is set to Active.
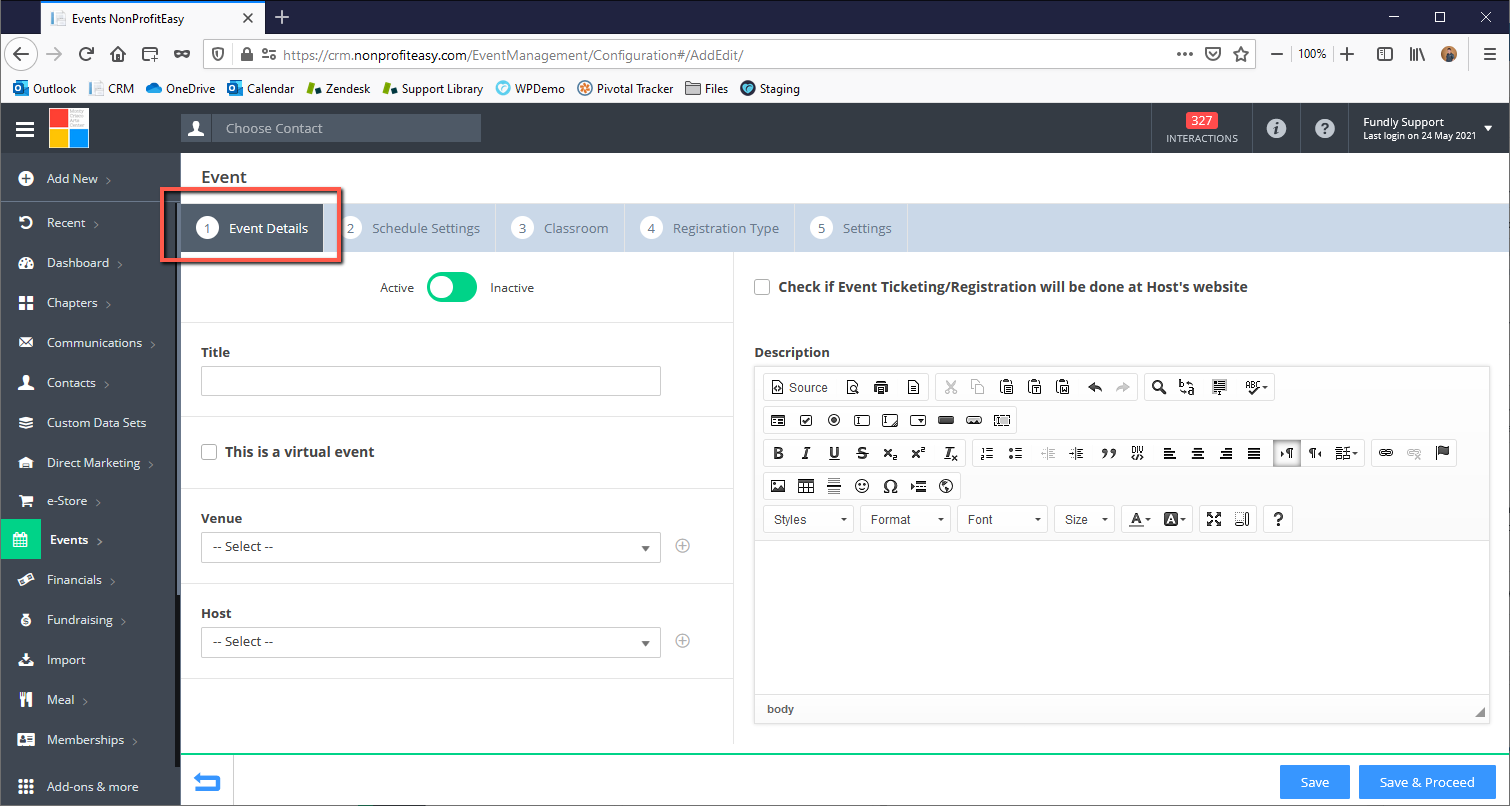
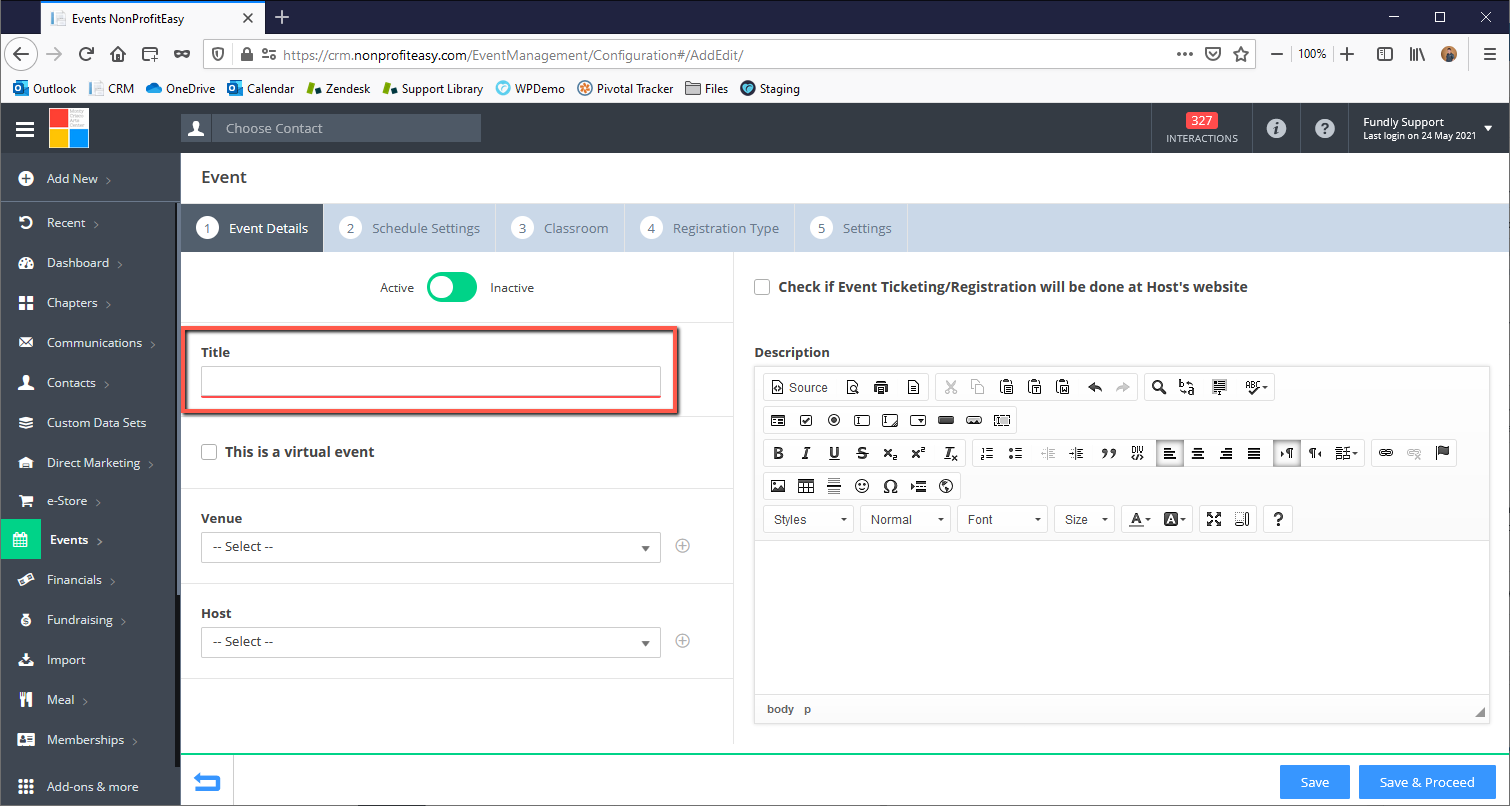
- Next, give your event a Title that clearly describes the event for both staff and potential users on your public site (this field is required). The event title WILL be visible to the public on your website when using our event integrations (this is what will be listed in your online calendar and at the top of the event details and registration pages when using our event integrations).
- If this event will be virtual/will not be held at a physical location, check the "This is a virtual event" checkbox. Checking this box will hide/remove the Venue field (see step #X below). Please Note: If you want to use the Zoom integration for our events module you MUST check this box (AND you must also complete the steps on the Settings tab to link this event to a Zoom room)


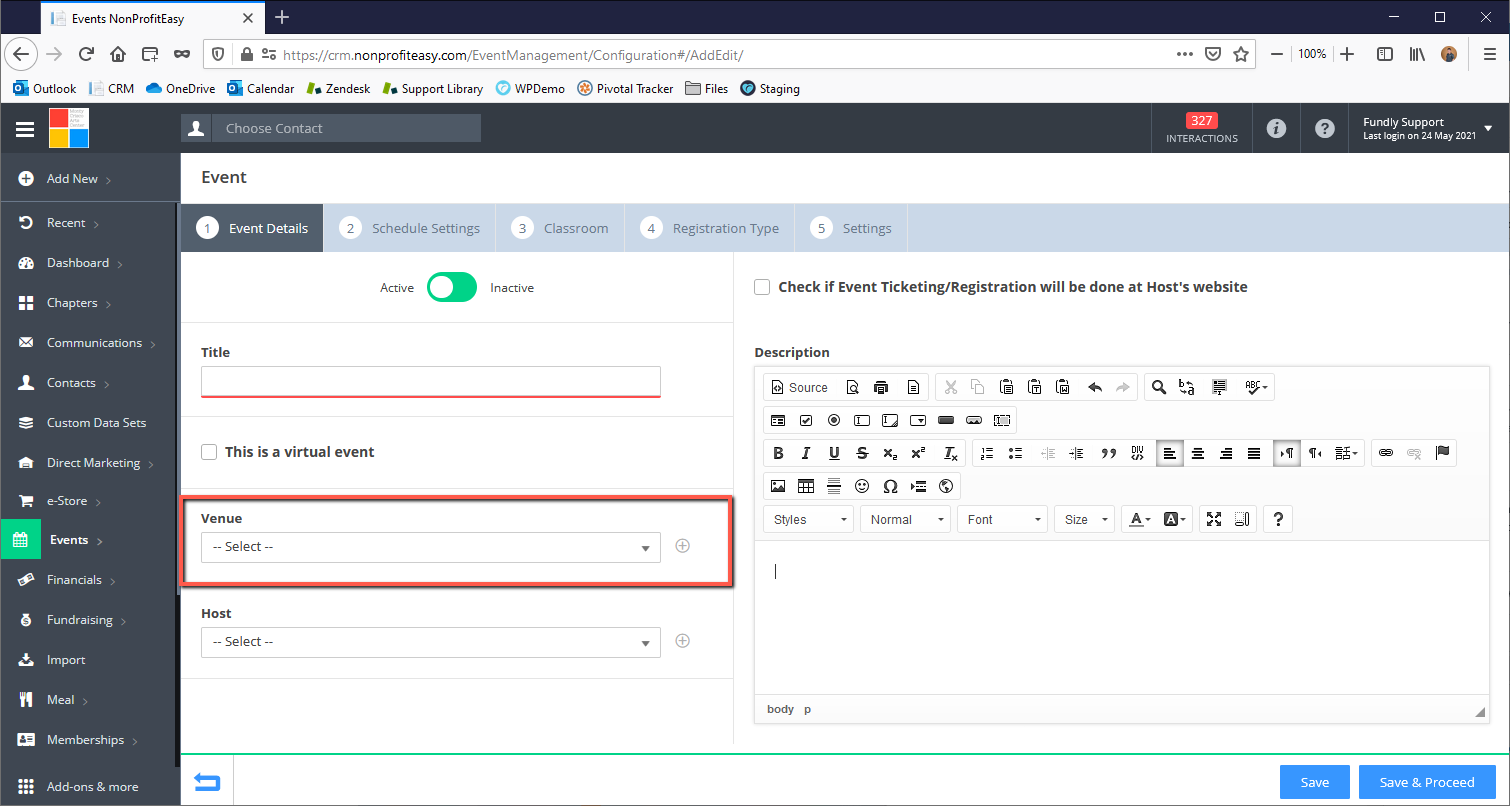
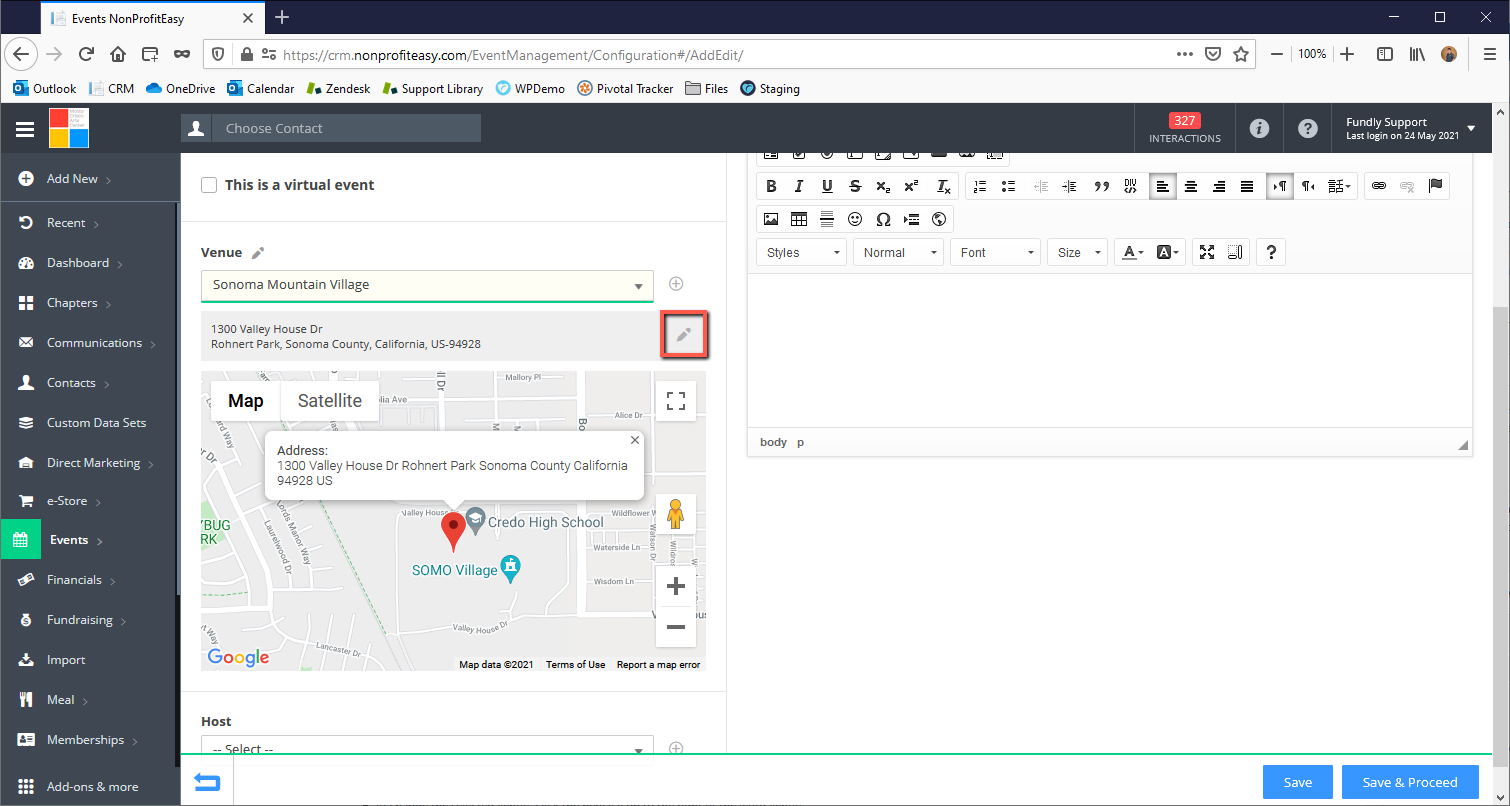
- If you wish to specify the location where the event will occur, use the Venue field (this field is optional). Select from the drop down list of Default Venues or click the + button to the right of the drop down to add a new Venue (see our tutorial on configuring default venues for more information on adding venues).
- Selecting a Venue will populate the Venue's address and a google map of the location.
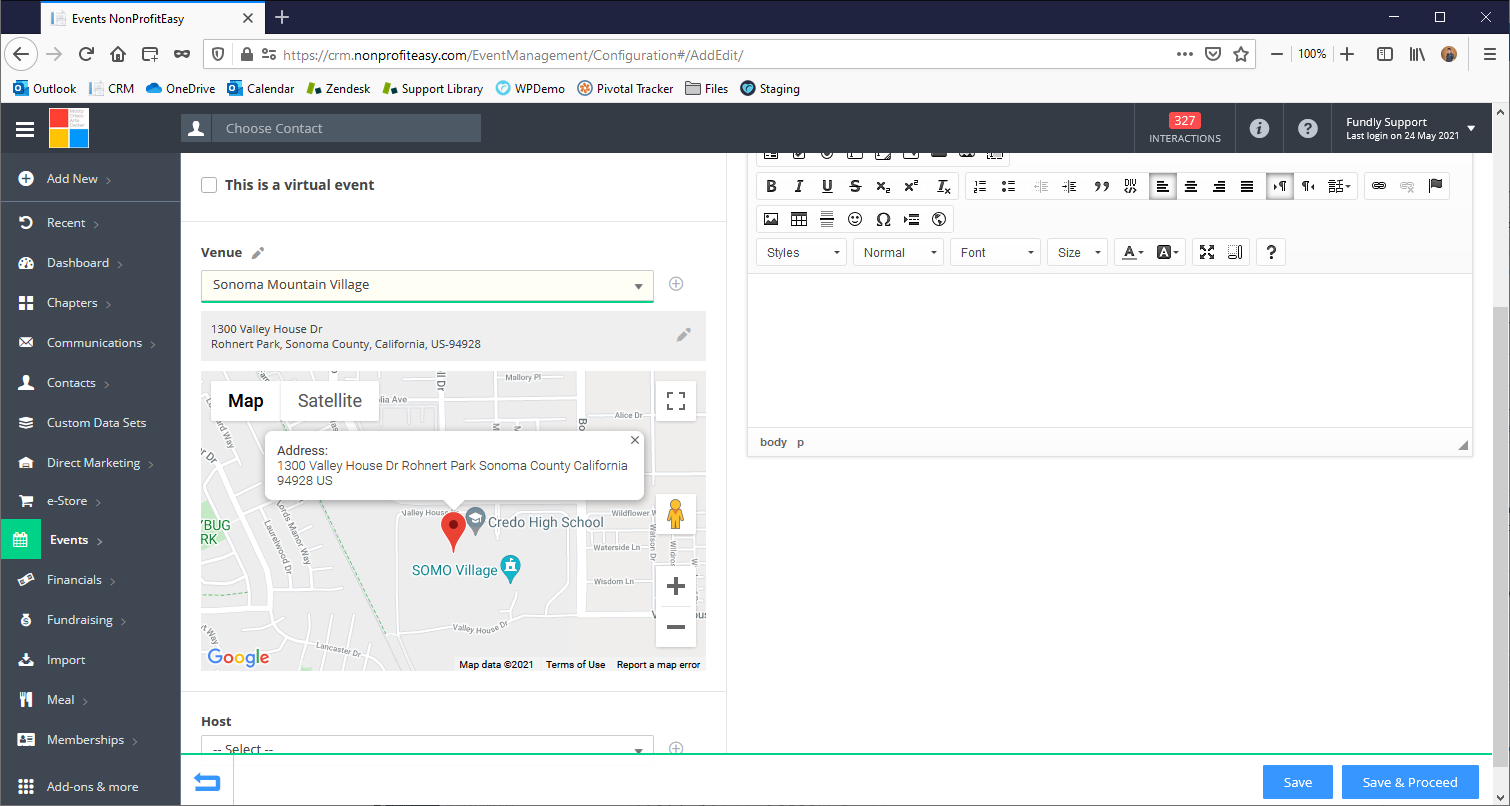
- To edit the selected Venue, click the pencil icon to the left of the Venue's address.
- To change the selected Venue, click the pencil icon to the right of the word Venue.
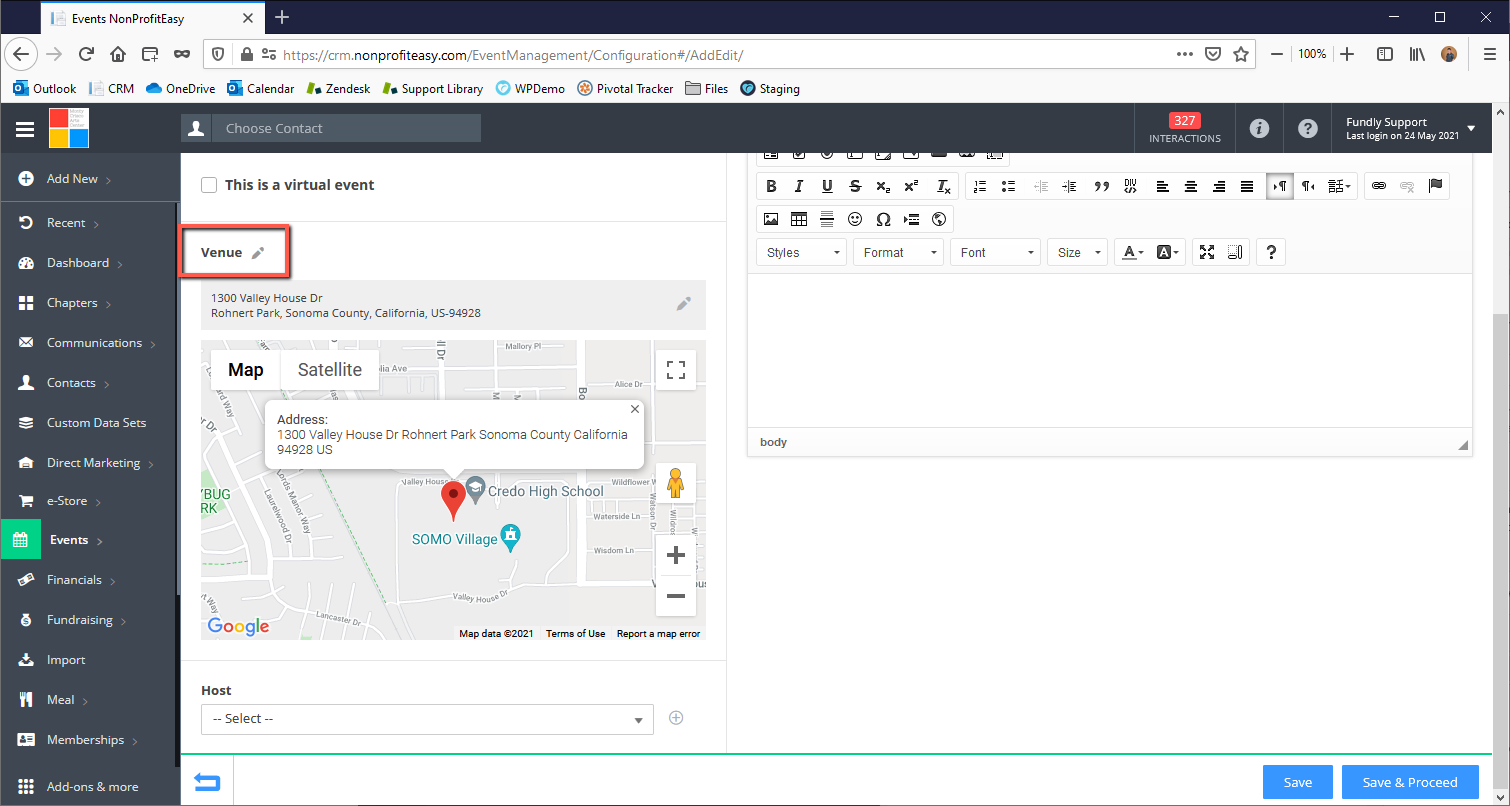
- Selecting a Venue will populate the Venue's address and a google map of the location.
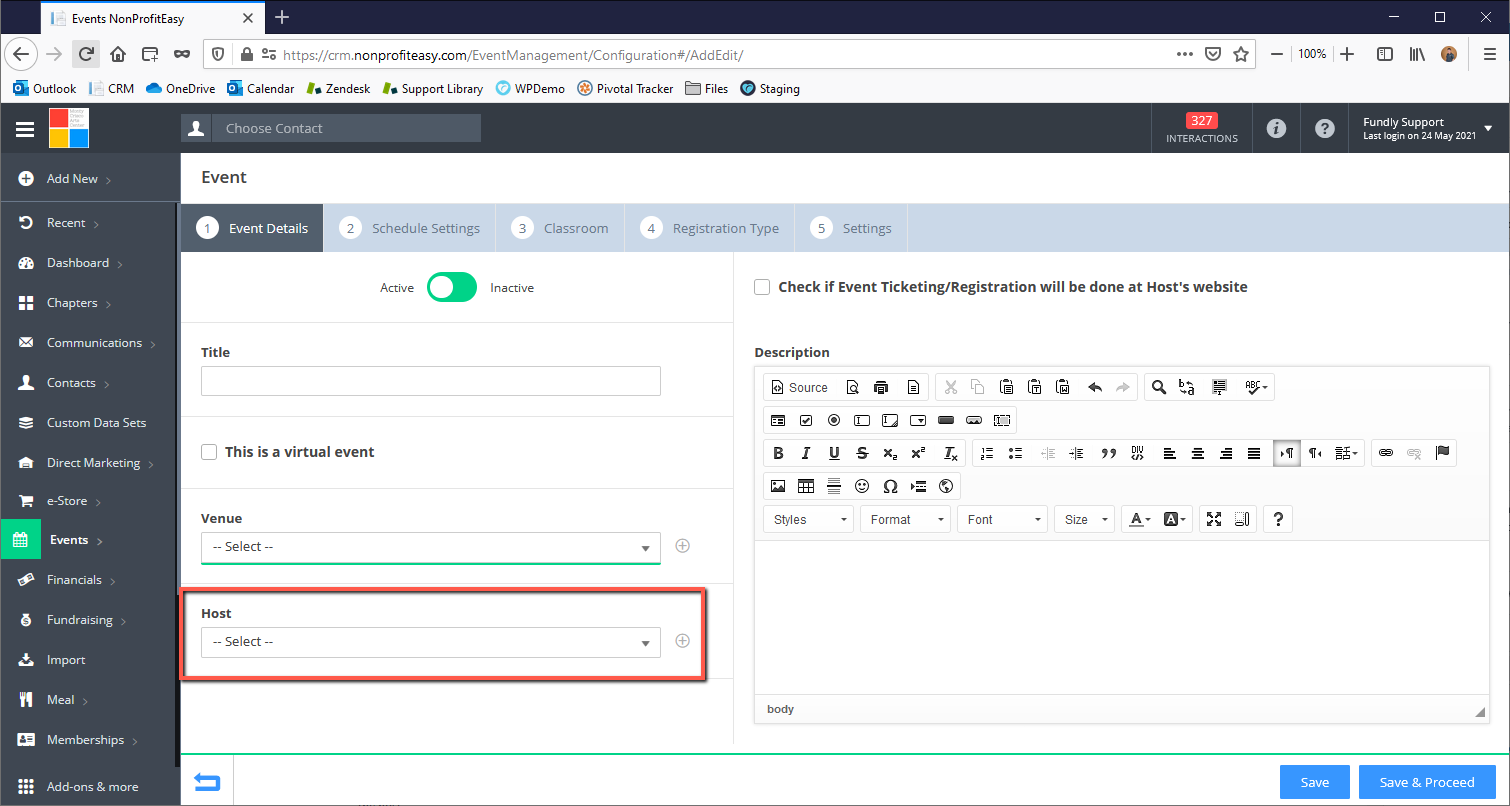
- If another organization is the host for the event, you can select that Host from the drop down list of Default Hosts or click the + button to the right of the drop down to add a new host (see our tutorial on configuring default hosts for more information on adding hosts). By default, your organization is assumed to be the host; therefore the field should be left blank unless some other organization is the host.
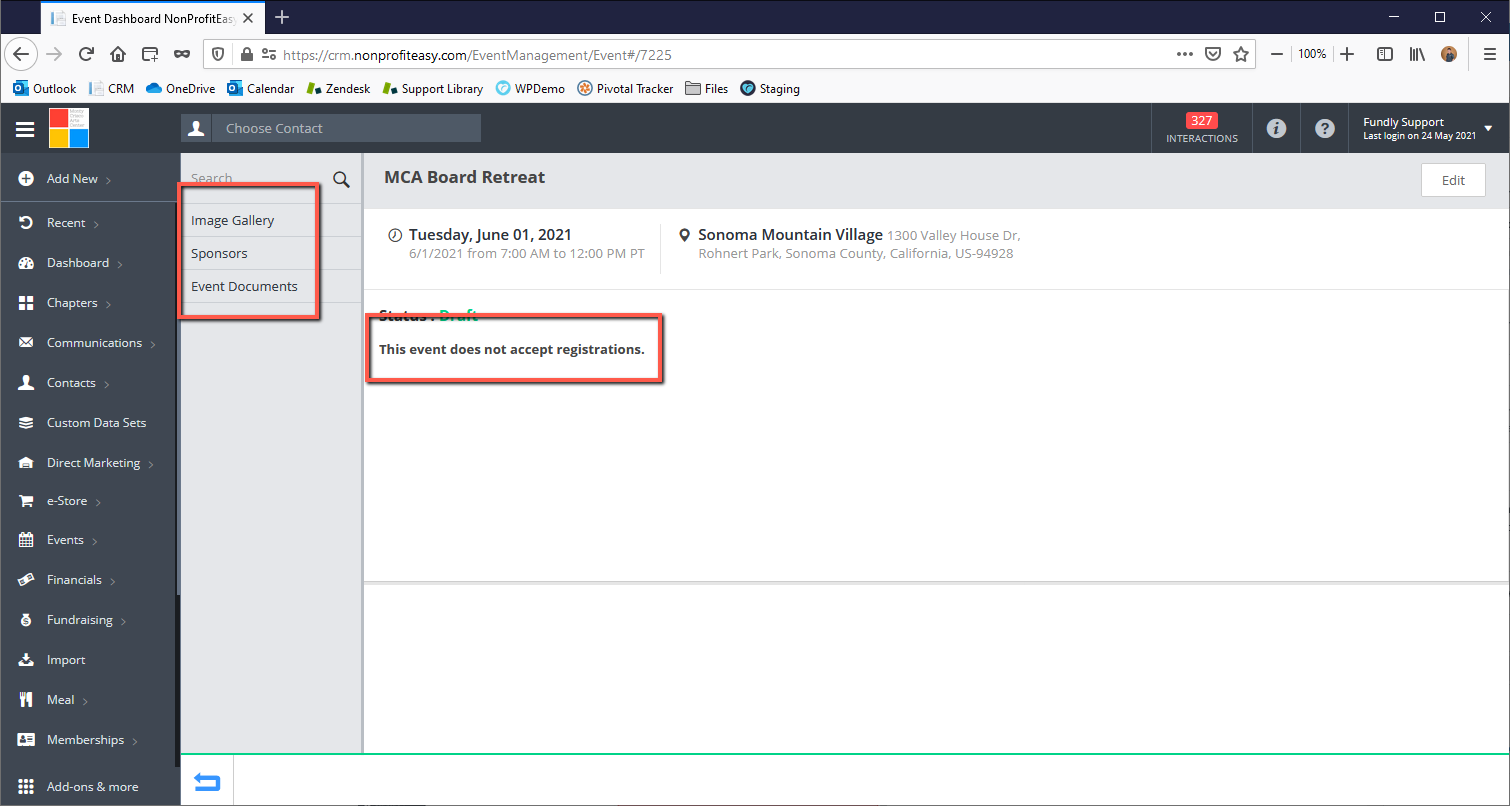
- If you do not want to sell tickets to the event online (only want to display the event name, location, date, and description) and/or ticket sales will be handled by a different organization, click the "Check if Event Ticketing/Registration will be done at Host's website" box.

- Checking this box will remove the Registration Type tab as well as remove all registration related tabs when viewing/managing the event (waitlist, event registration confirmation, event notifications, event invites, manage attendees, track expenses, and the dashboard; the only items that will be left is Image Gallery, Sponsors, and Event Documents).

- If you change your mind later and decide you want to sell tickets to the event, you will need to uncheck the hosted event checkbox AND THEN REMEMBER TO COMPLETE THE REGISTRATION TYPES TAB.
- Checking this box will remove the Registration Type tab as well as remove all registration related tabs when viewing/managing the event (waitlist, event registration confirmation, event notifications, event invites, manage attendees, track expenses, and the dashboard; the only items that will be left is Image Gallery, Sponsors, and Event Documents).
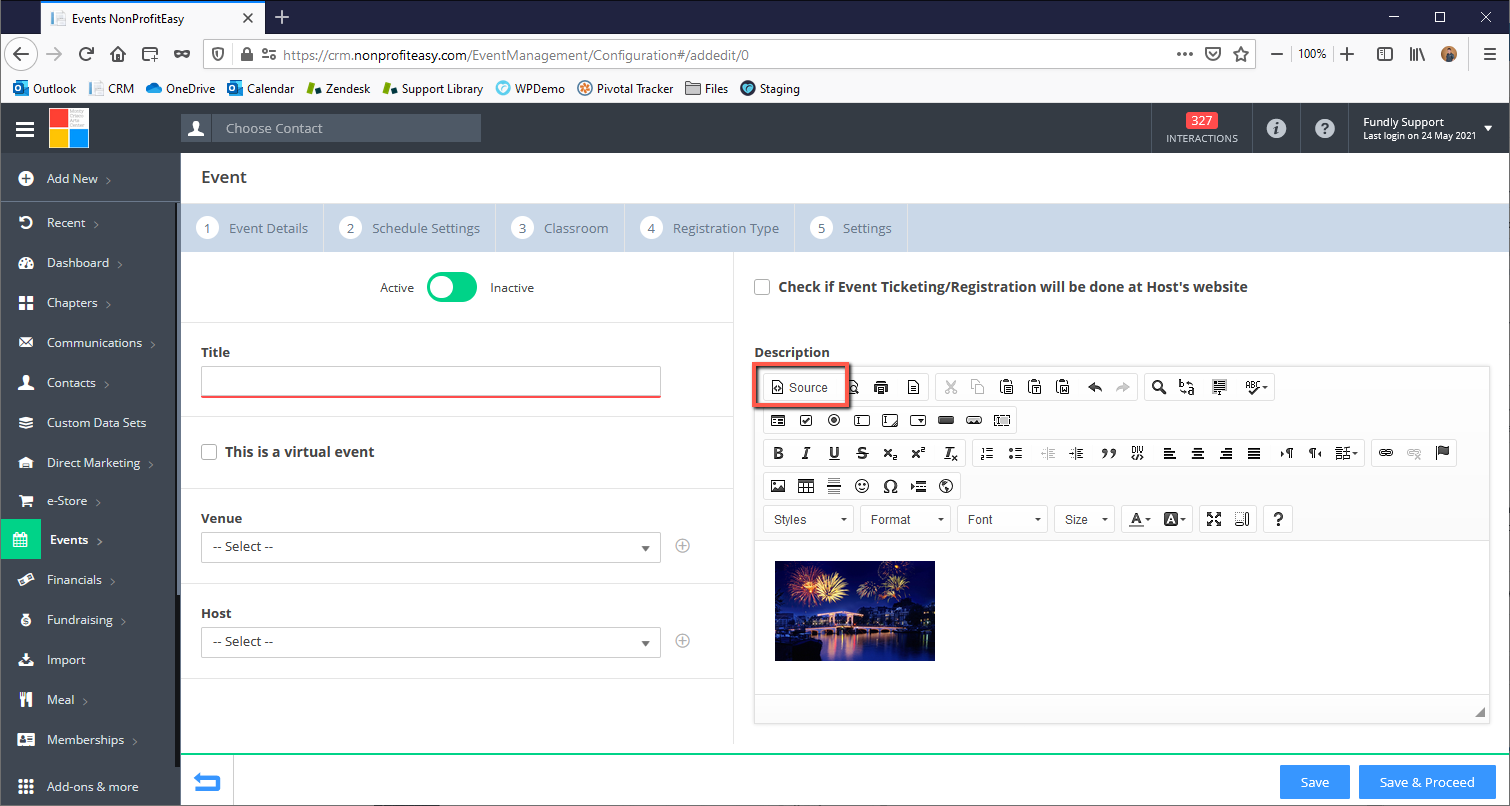
- In the Description section, use the provided editor to create the content of the event page which users will see when they look at the event online. You can include event details, images, hyperlinks, and instructions to potential attendees in this field.
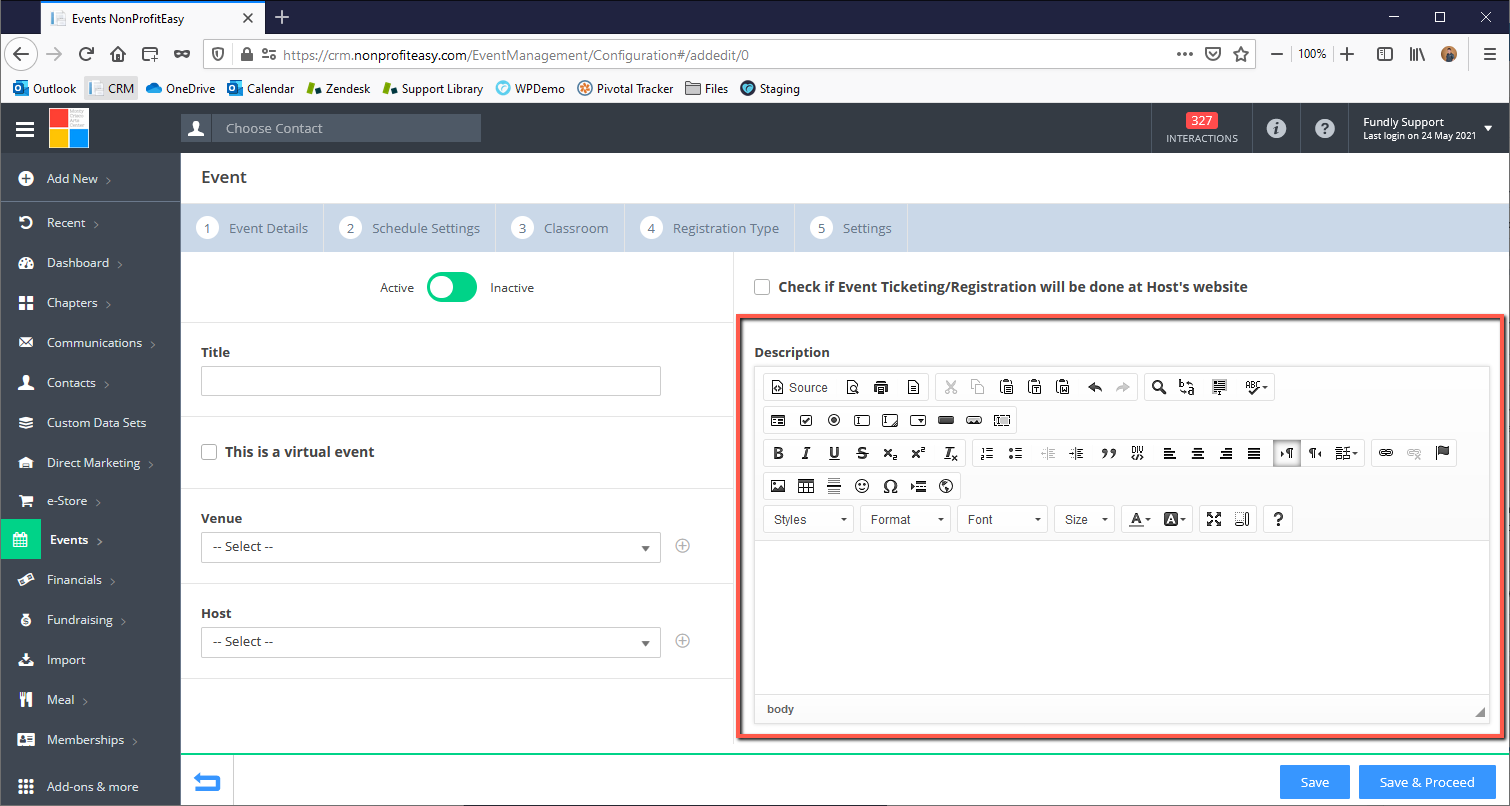
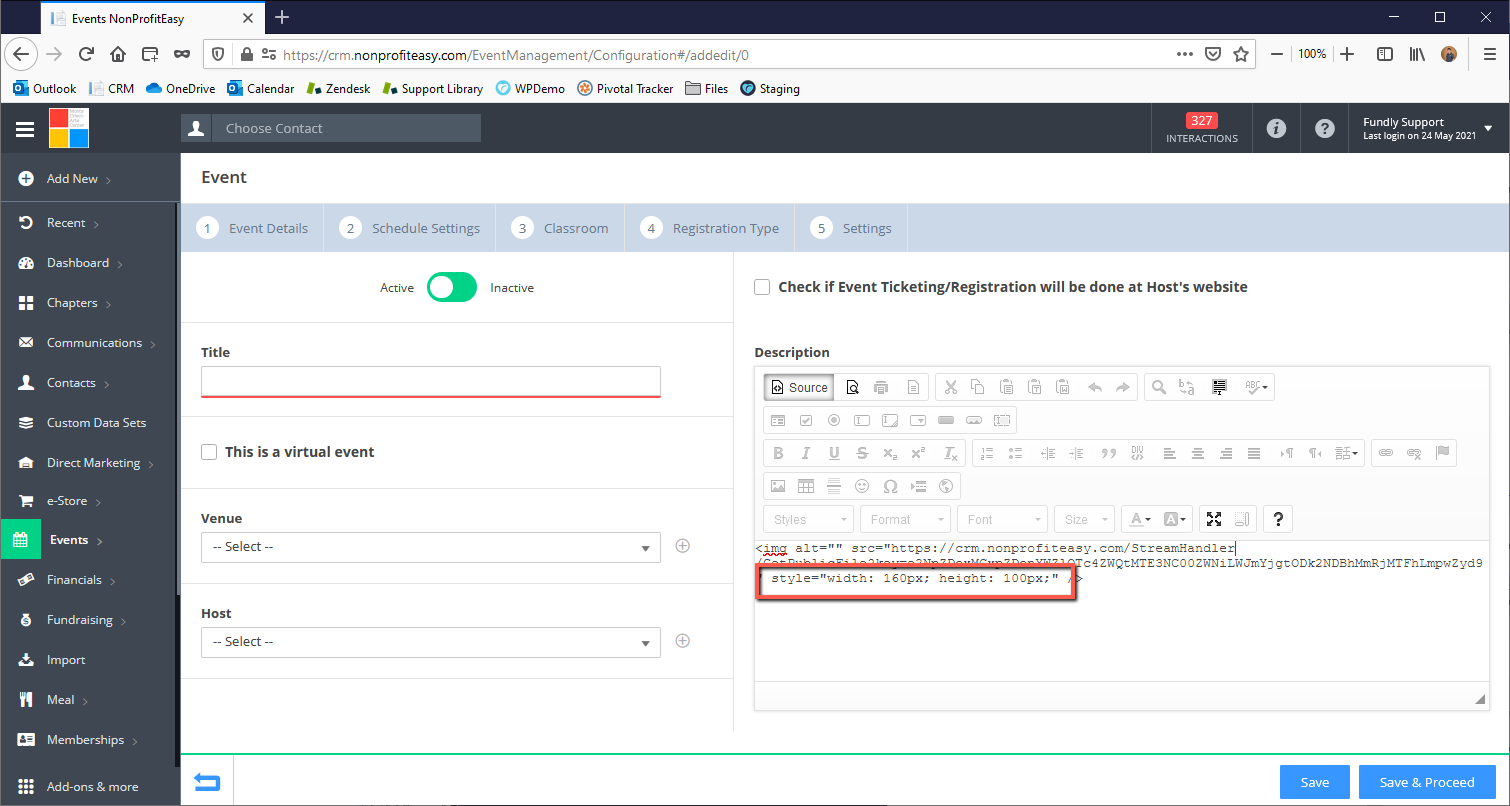
- TIP: if you want to left or right align an image and have text next to it, the text will butt up against the image with no spacing. If you want to add spacing, click on the Source button to enter the HTML editor screen and add the following html code for margins/padding inside the image tags: style="margin:10px 10px 10px 10px" [this is padding for left, top, right, and bottom - you can adjust the margin sizes by changing the numbers] (if you already have a style tag on the image for alignment and/or size, just add the margin: 10px 10px 10px 10px portion of the attribute.
- The Spell checker will help you proofread and will detect the incorrect words or spelling mistakes. Users just need to hover on the marked words for instant correction suggestions or click the dialog icon in the bottom right corner to have the whole text proofread at once. Read this article on How Spell Checker Works to know more details about spell checker.
- TIP: if you want to left or right align an image and have text next to it, the text will butt up against the image with no spacing. If you want to add spacing, click on the Source button to enter the HTML editor screen and add the following html code for margins/padding inside the image tags: style="margin:10px 10px 10px 10px" [this is padding for left, top, right, and bottom - you can adjust the margin sizes by changing the numbers] (if you already have a style tag on the image for alignment and/or size, just add the margin: 10px 10px 10px 10px portion of the attribute.
- To save the event and proceed to the next step, click on Save & Proceed in the lower right. To save the event and then exit (to return later), click Save.

- In the next tutorial (Create Event Part II), we will discuss how to configure an event’s Schedule Settings (date and time of the event).
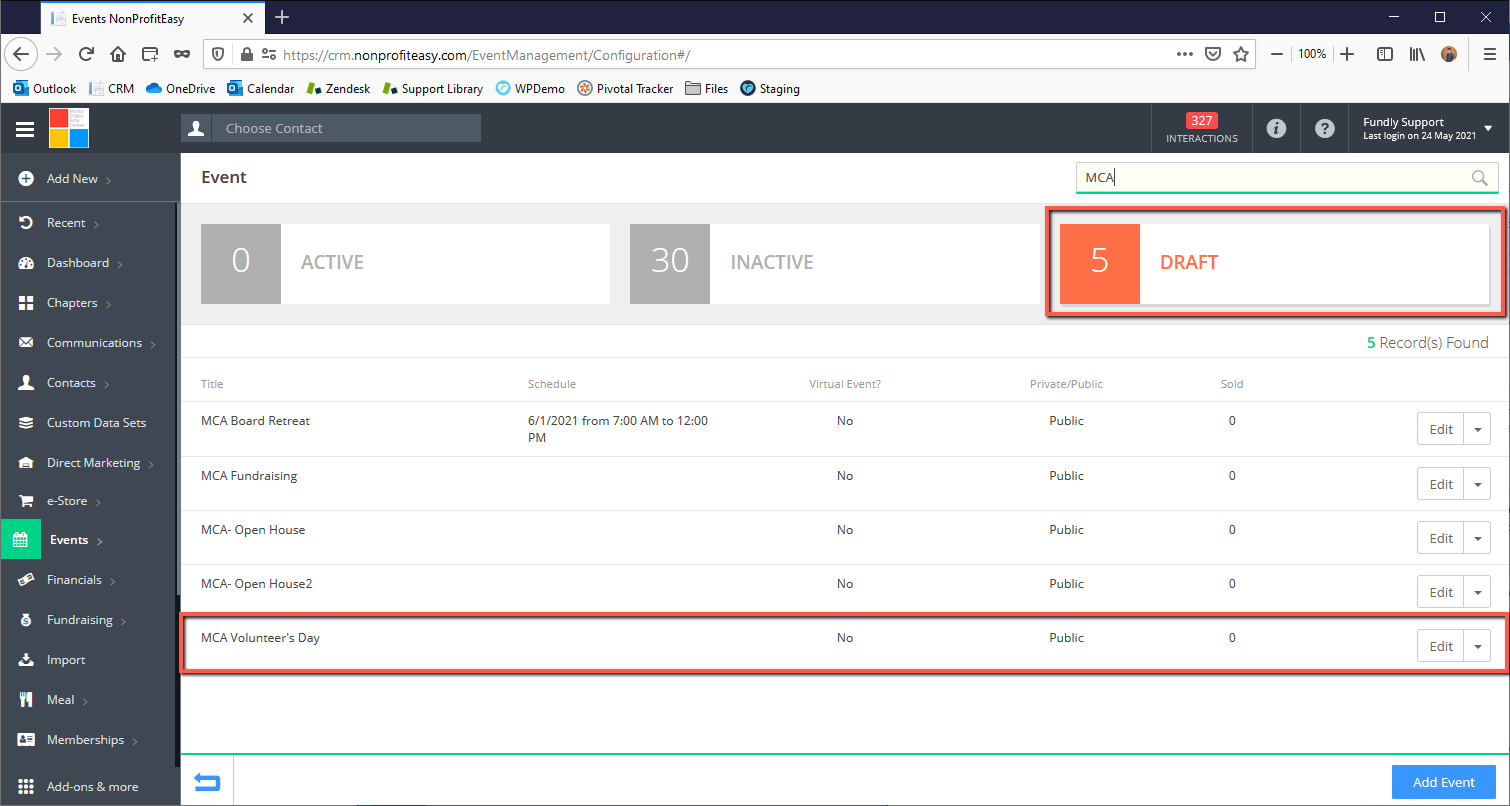
- If you save and exit, you can return to event set up by going to the Drafts tab of the event index page and selecting Edit from the drop down to the right of the event name.
- You can edit/amend any event's settings at any time (even after publishing the event) regardless of whether they are on the Active, Inactive, or Drafts tab.
Comments
0 comments
Article is closed for comments.