
Configure Membership Levels Part I - Basic Settings
- This tutorial will cover how to create membership levels. Membership Levels are the different categories of membership that you offer. Each Membership Level can have multiple pricing tiers, so it's not necessary to create a different level for each pricing option. Instead, Membership Levels usually have different benefits or eligibility requirements.
- For example, you could have one Membership Level that has a "student," "adult," and "senior citizen" pricing levels if all of those members get the same benefits (and just pay different prices to access those benefits). However, if the student membership does not provide the same benefits as the adult membership, then you would want to create different membership levels for those.
- Additionally, a membership can be EITHER a single member (for one member) or a group membership (for multiple members, such as a family membership or an organizational membership where the benefits extend to the employees) and can be EITHER for individuals or an organization. As a result, you would need to create two different membership levels for an "adult membership" versus an "adult family" membership, and two different membership levels for "Supporter" (individual) and "Supporter" (organization).
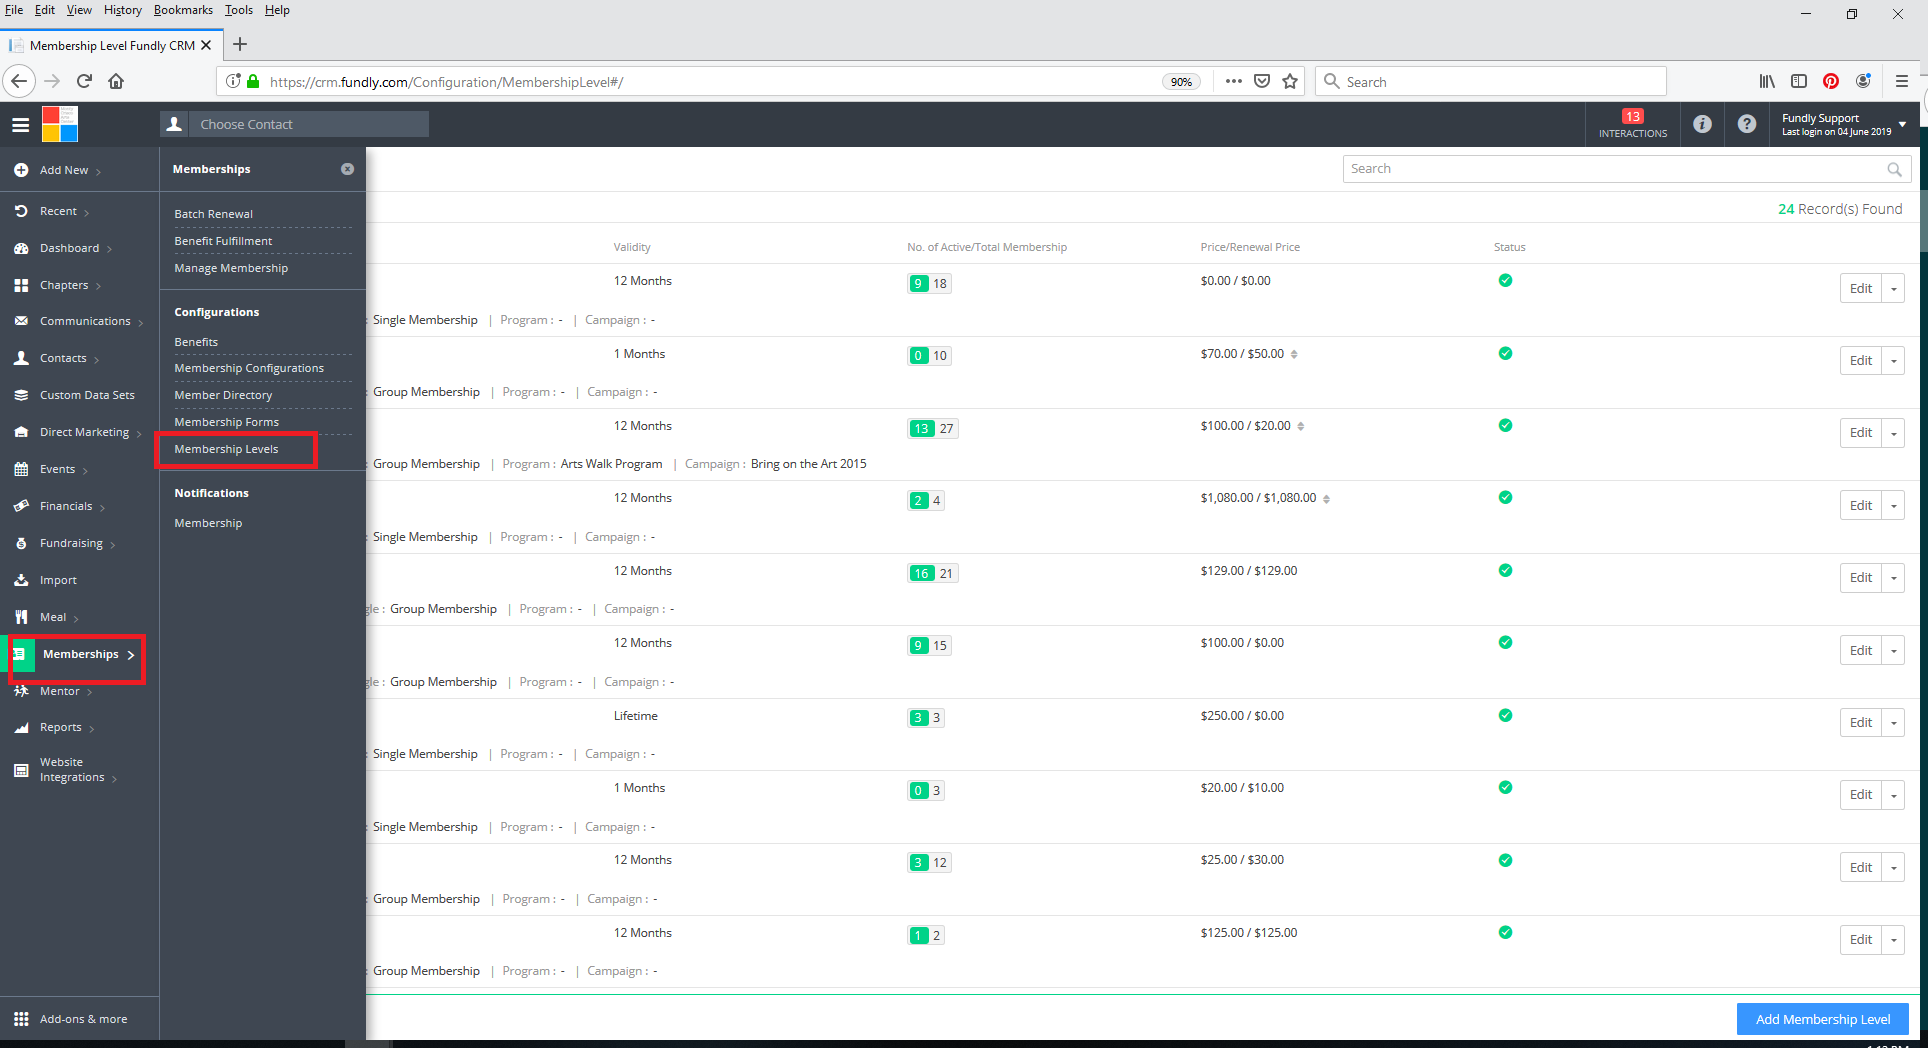
- Start by clicking on the Main Menu and select Membership. On the Membership sub-menu, select Membership Levels in the Configurations section.
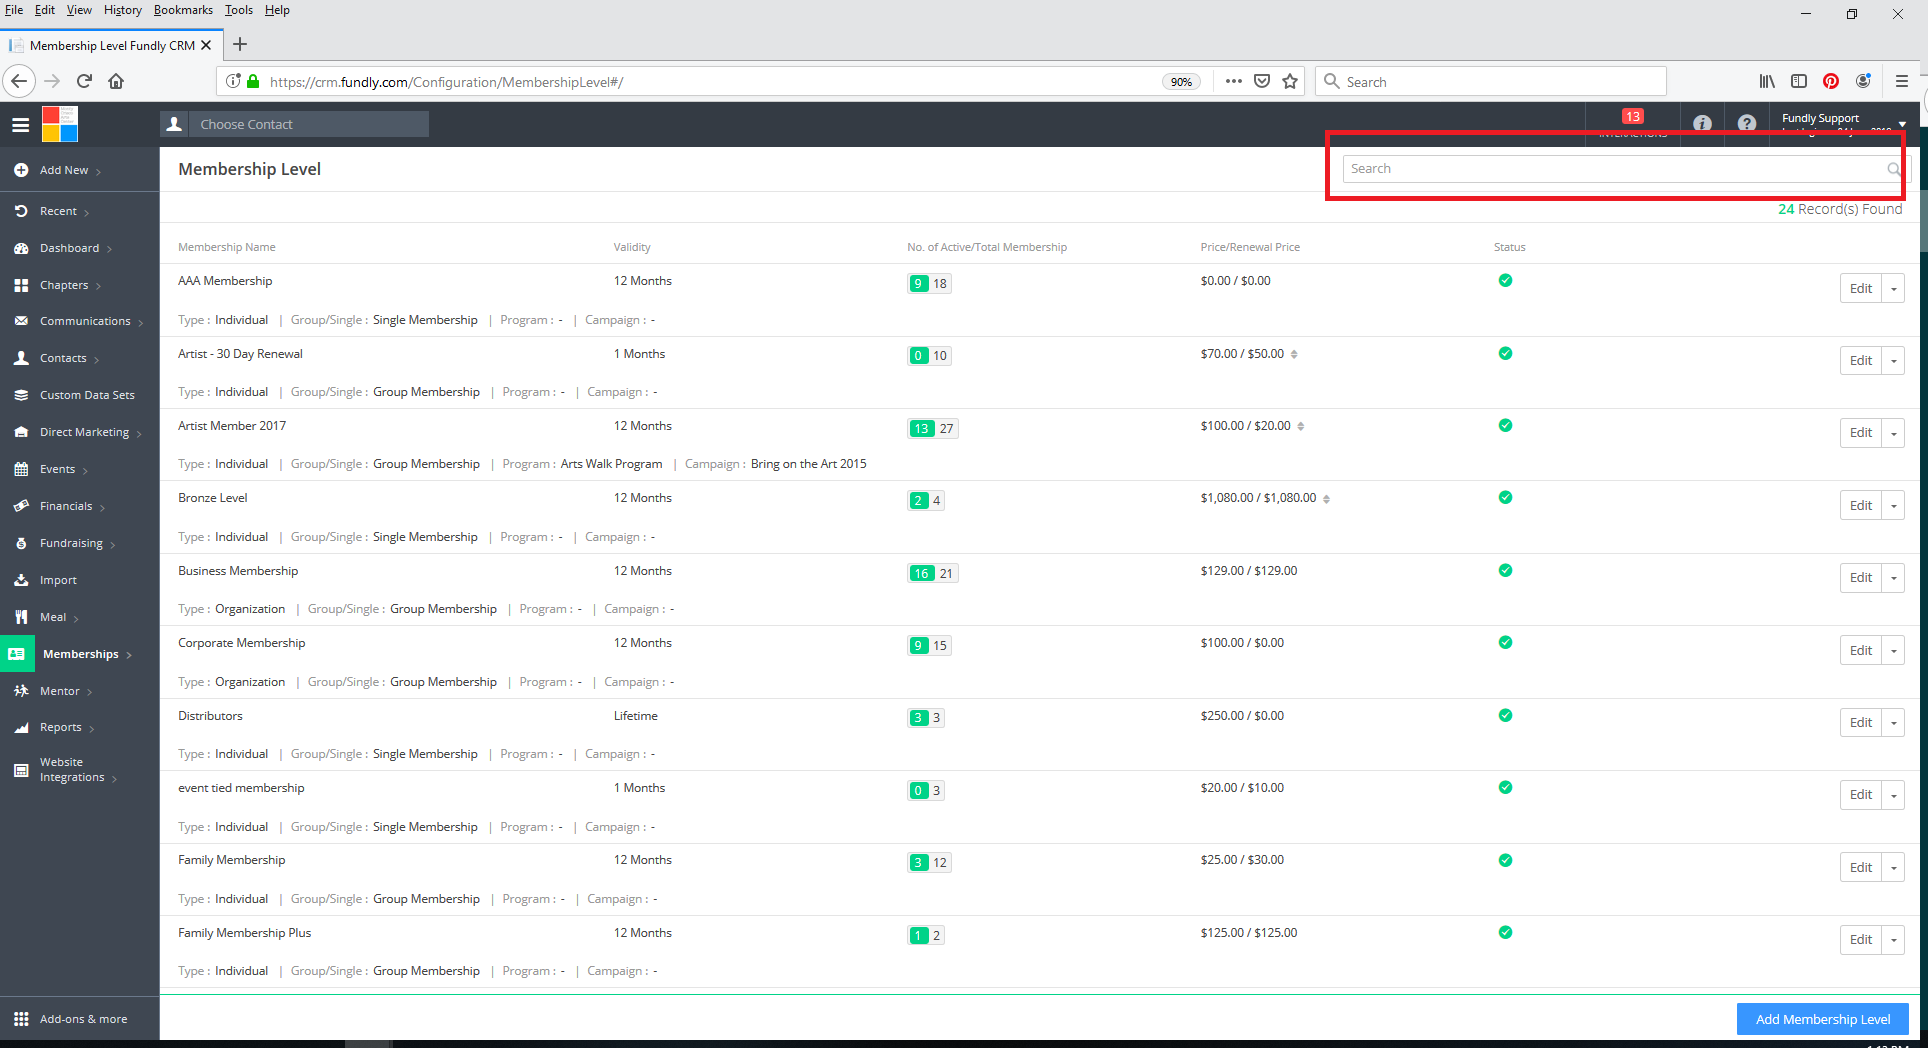
- This will take you to the Membership Levels Index Page. Here you will see a list of all your current configured membership levels.

- You can search your membership levels using the search box in the upper right.
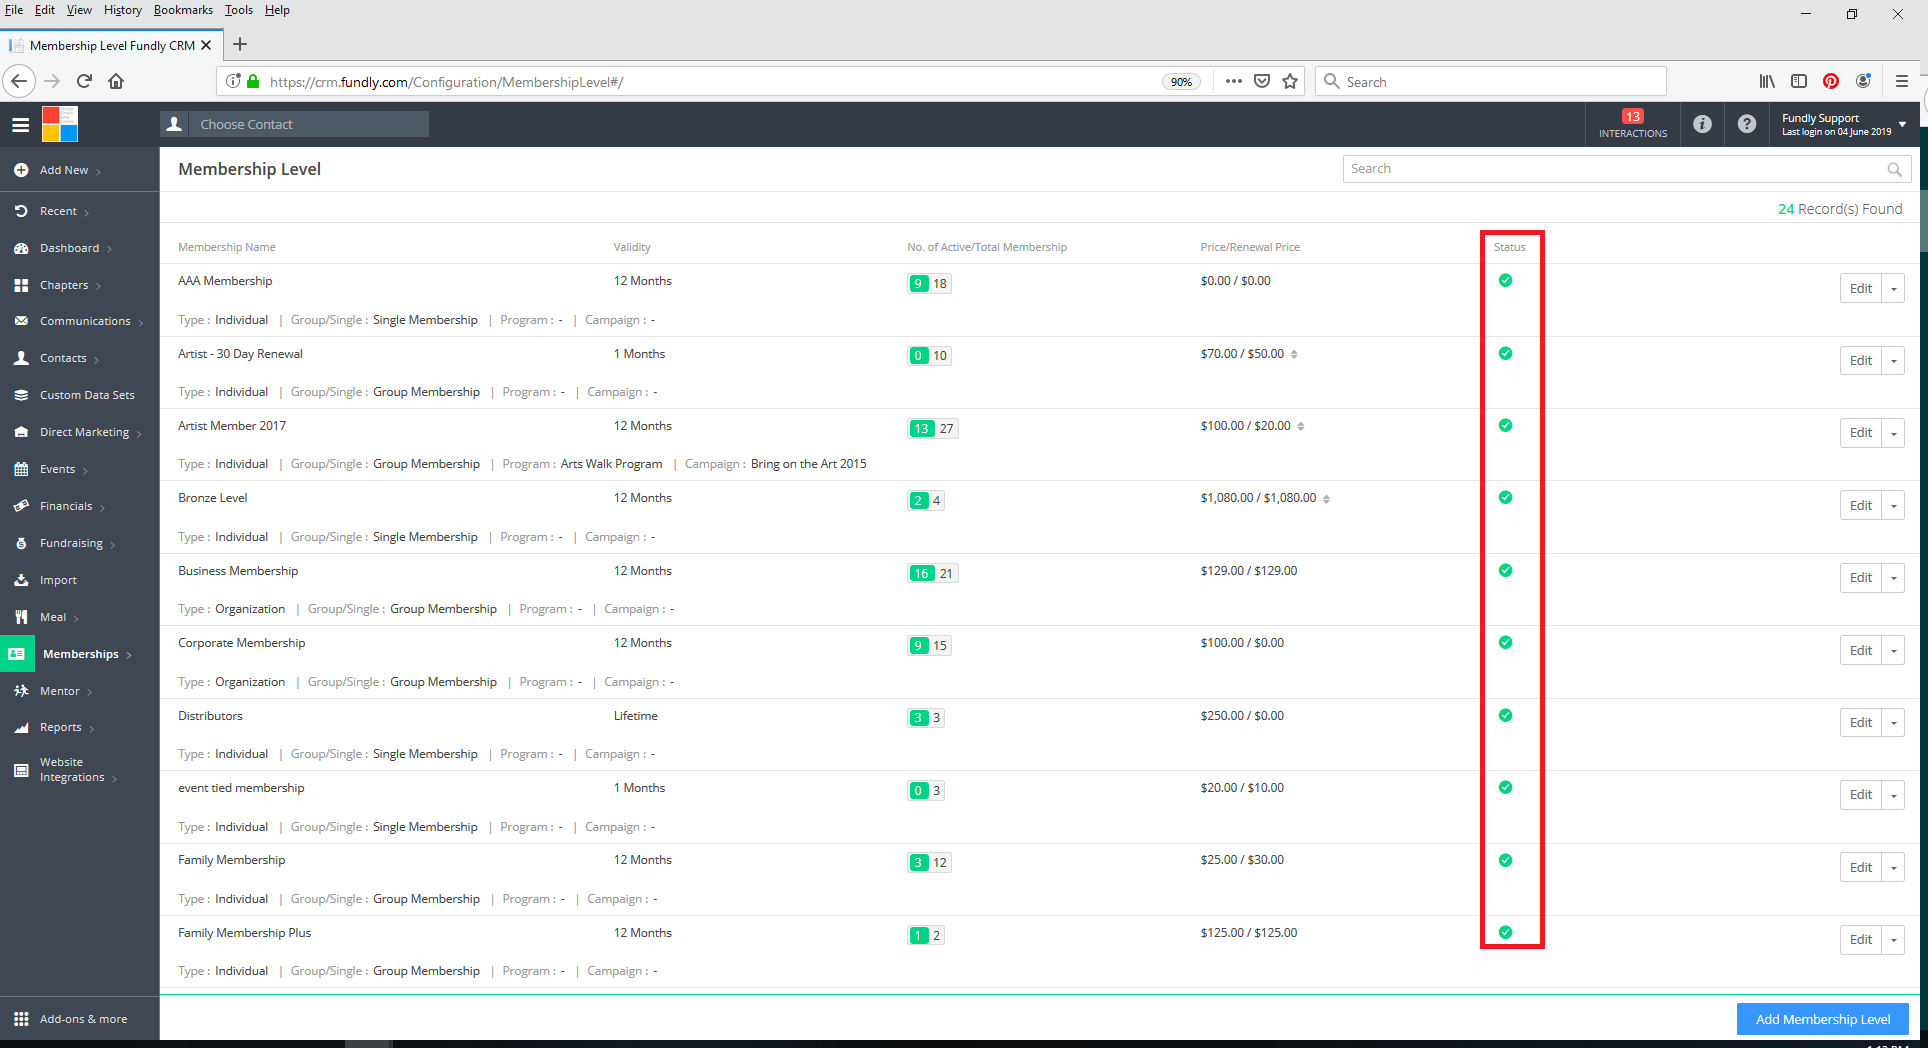
- You can inactivate any membership level by clicking the green Status check mark (which will then turn gray to indicate the membership level is inactive) (similarly, you can reactivate any membership level by toggling a gray Status back to green).
- You can edit any existing membership level by clicking the drop down to the right of the level and selecting Edit.
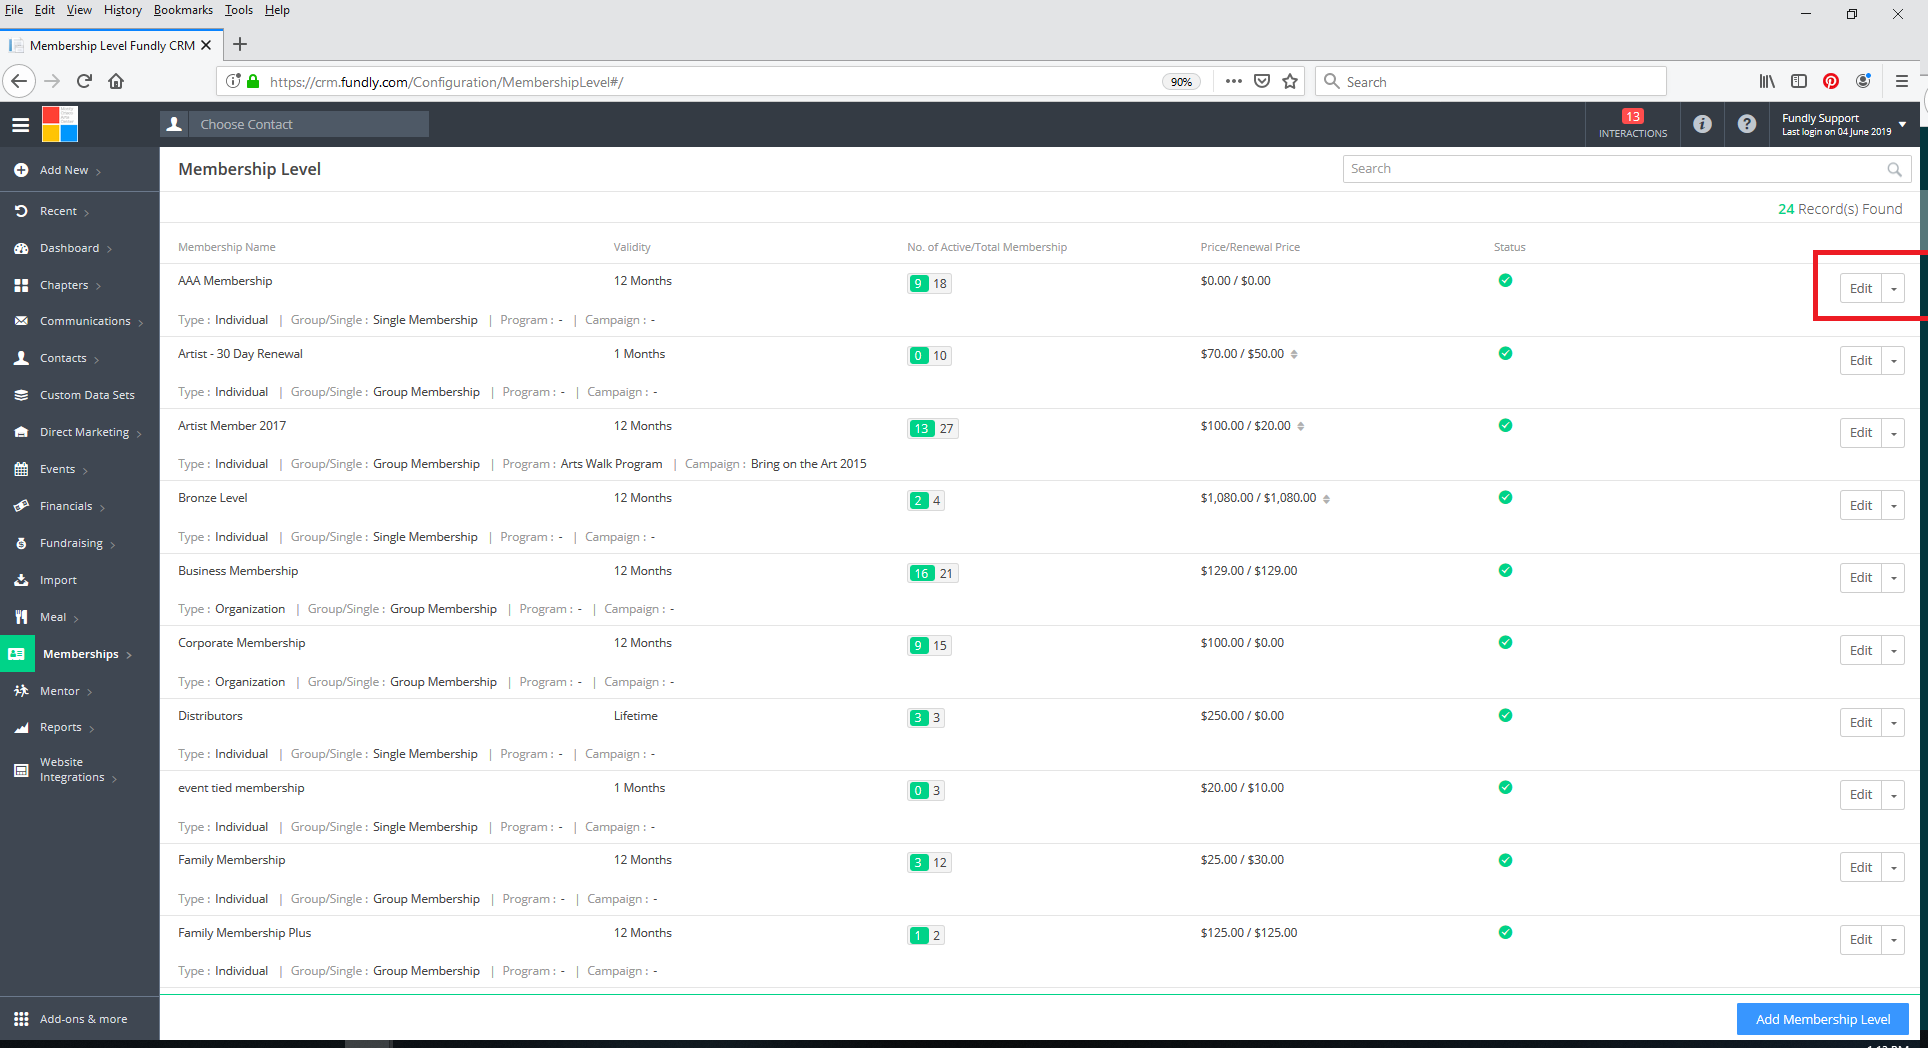
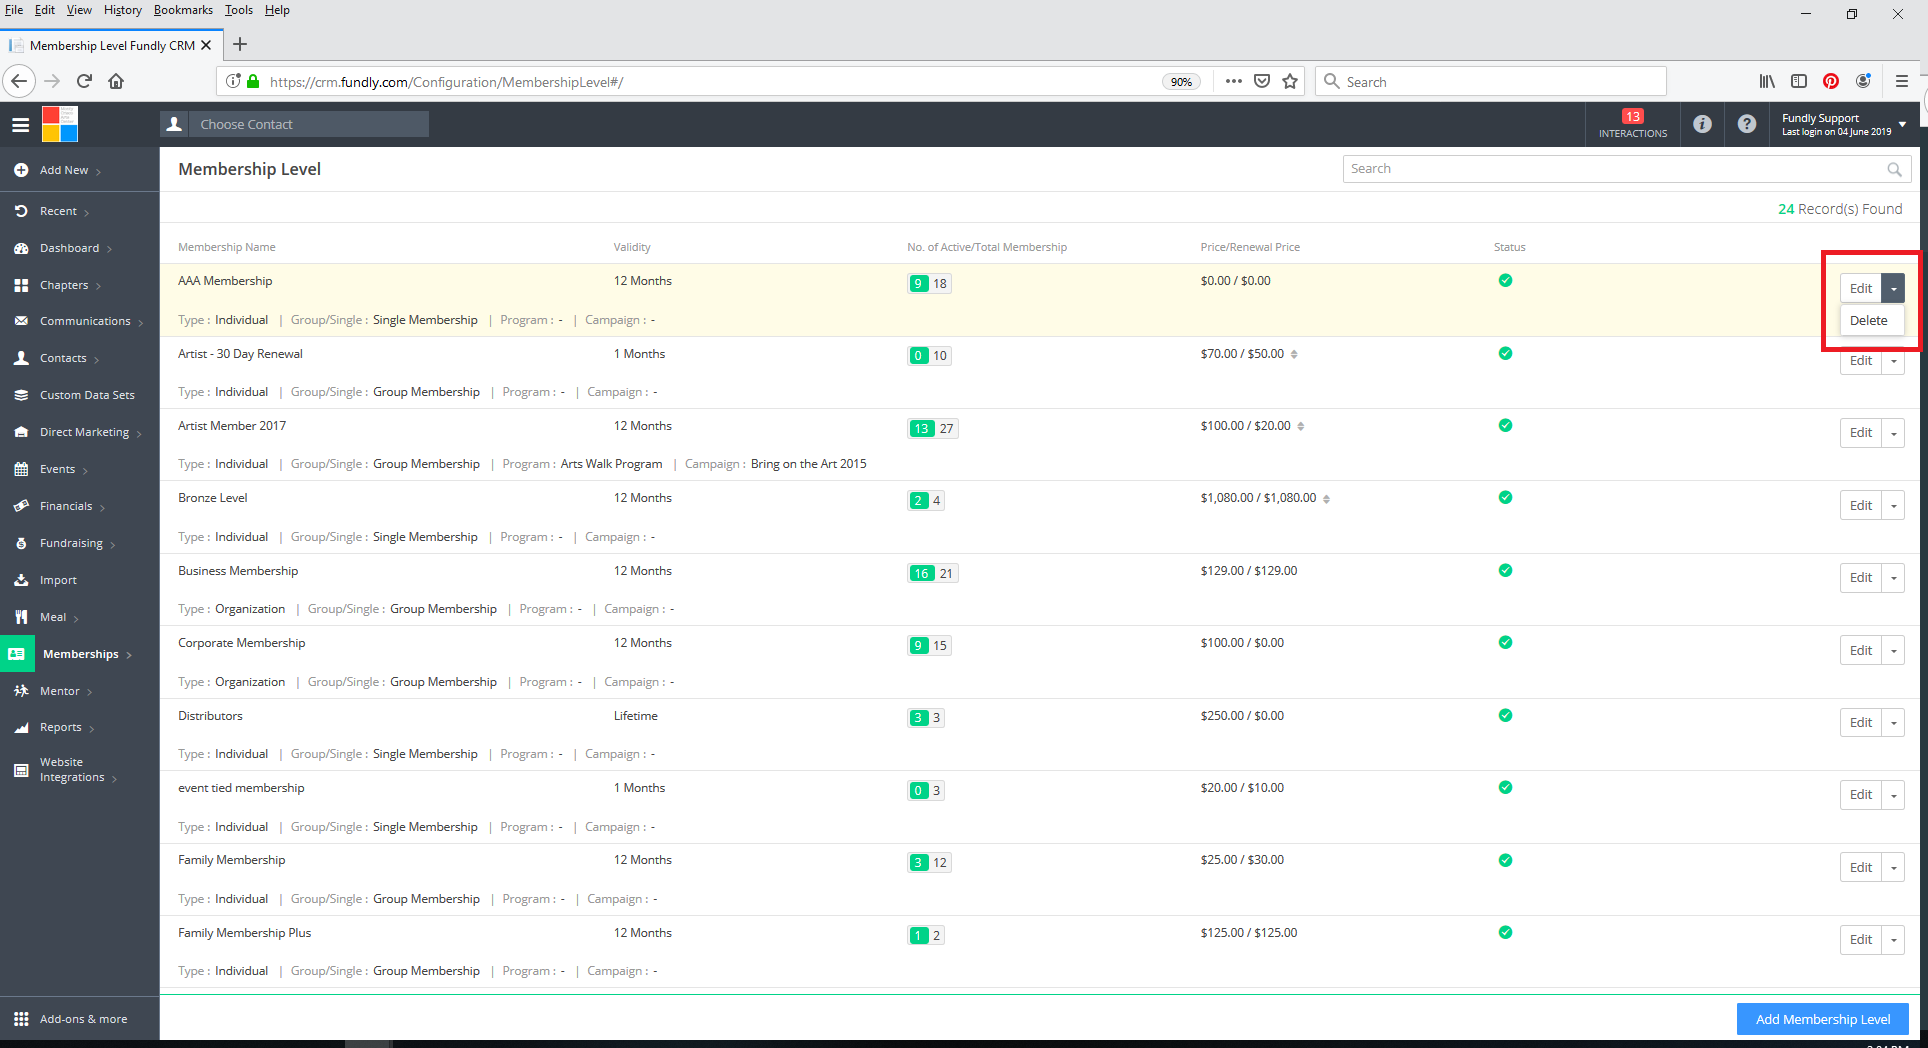
- You can delete any existing membership THAT HAS NO MEMBERSHIPS TIED TO IT by clicking the drop down to the right of the level and selected Delete.
- Before deleting any membership, you must remove all memberships (not just active memberships but inactive memberships as well. The "No. of Active/Total Membership" column will show you if there are any memberships still tied to the membership level. If both boxes show "0" then you should be able to delete the membership).

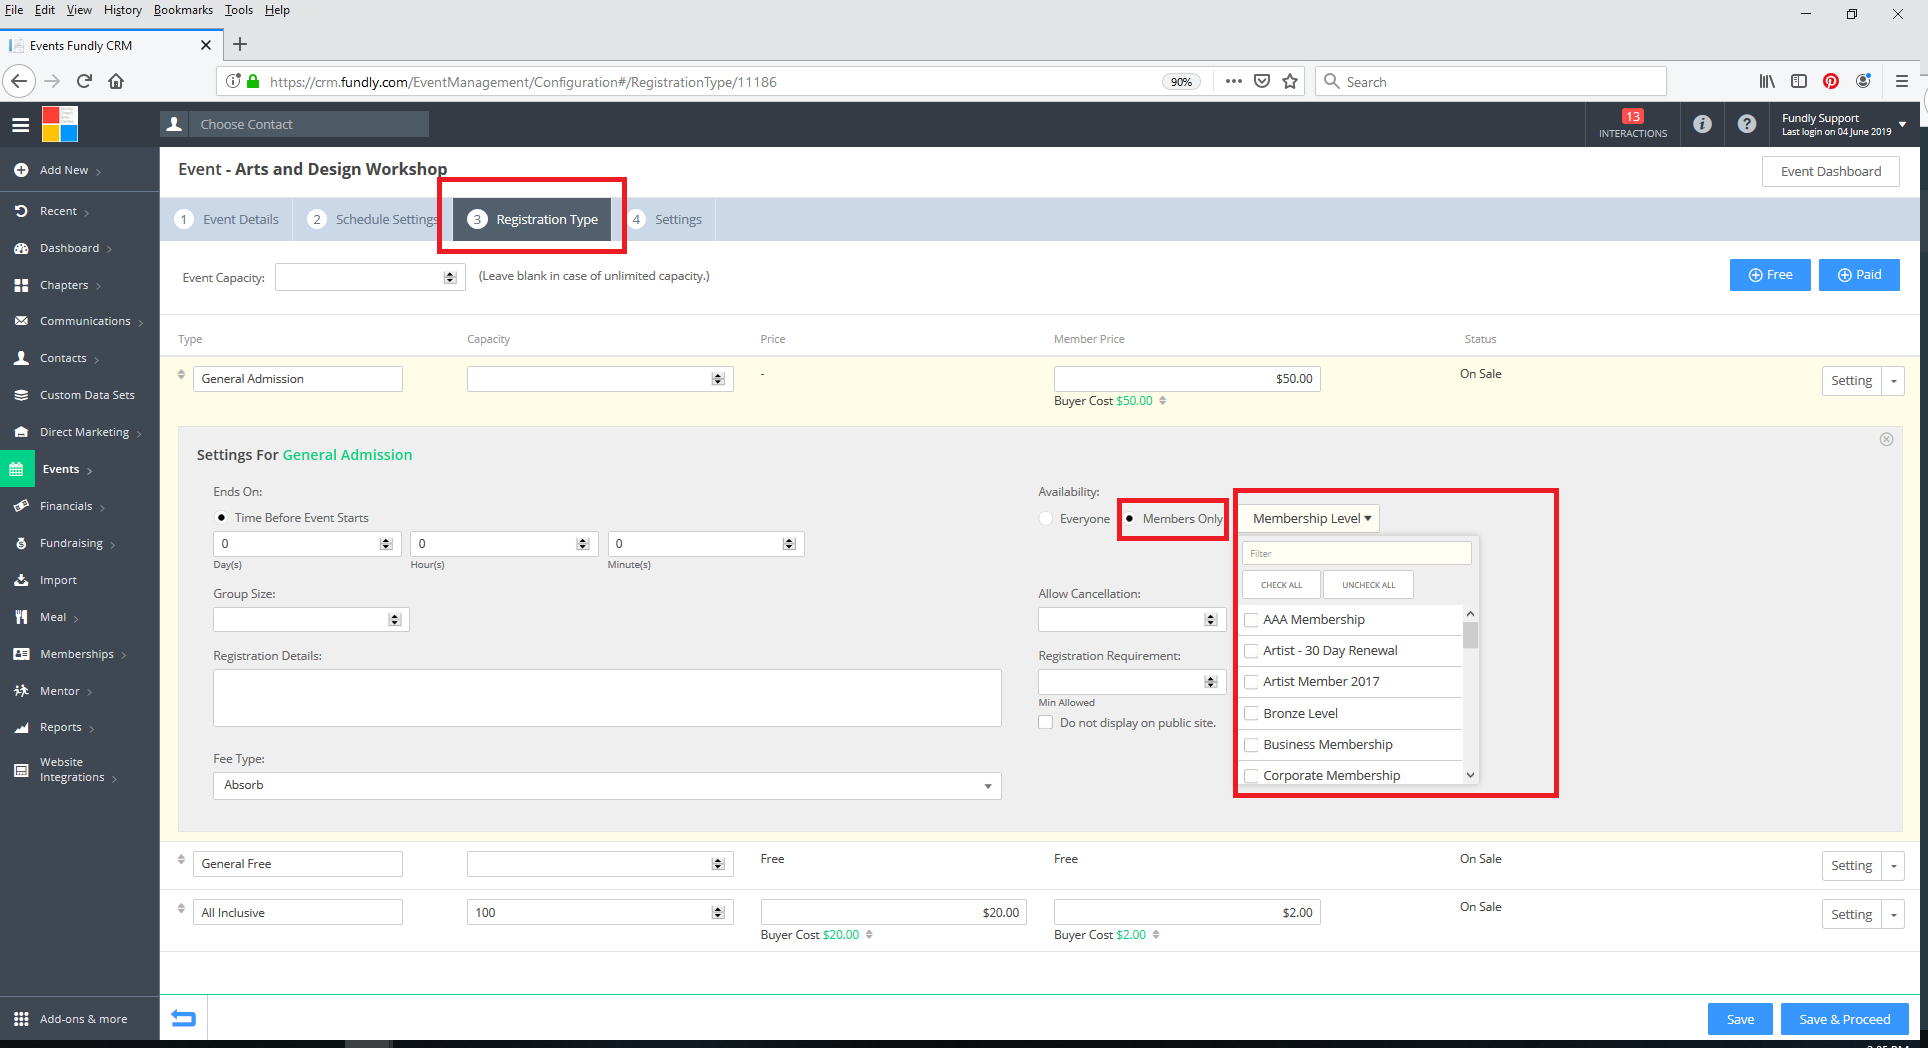
- The membership must also not be tied to any event registration confirmations. When setting up event registrations, you can indicate if a registration type has a member discount and limit that discount to certain membership levels. This association must also be removed before you can remove a membership level.
- In general, we do not recommend deleting membership levels as you will lose all historical data. If a level is no longer needed, then simply inactivate it so you do not lose historical data.
- Also, keep in mind you can phase out pricing tiers within any given membership level/category through not allowing renewals and/or setting the renewal pricing. See the Configure Membership Part II - Price Settings tutorial for more information.
- Before deleting any membership, you must remove all memberships (not just active memberships but inactive memberships as well. The "No. of Active/Total Membership" column will show you if there are any memberships still tied to the membership level. If both boxes show "0" then you should be able to delete the membership).
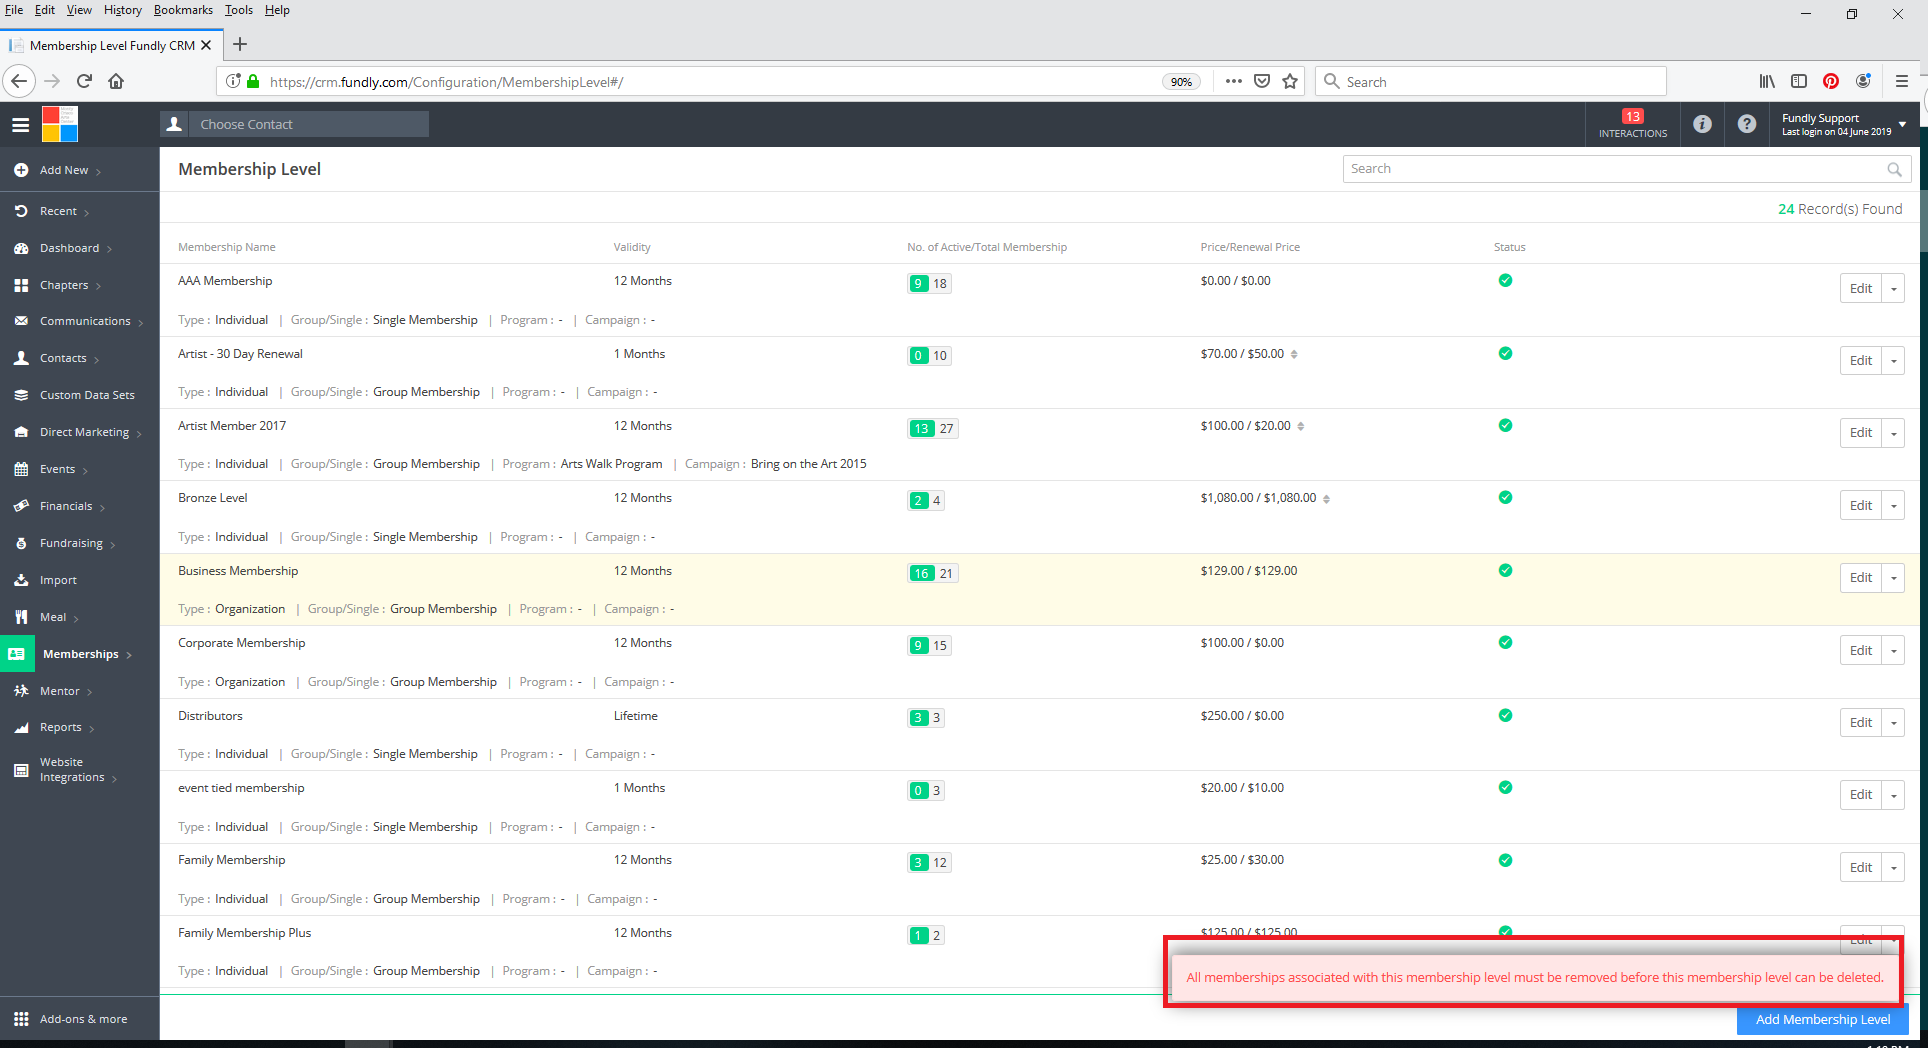
- If you try to delete a membership level that still has memberships tied to it, you will receive a validation error.
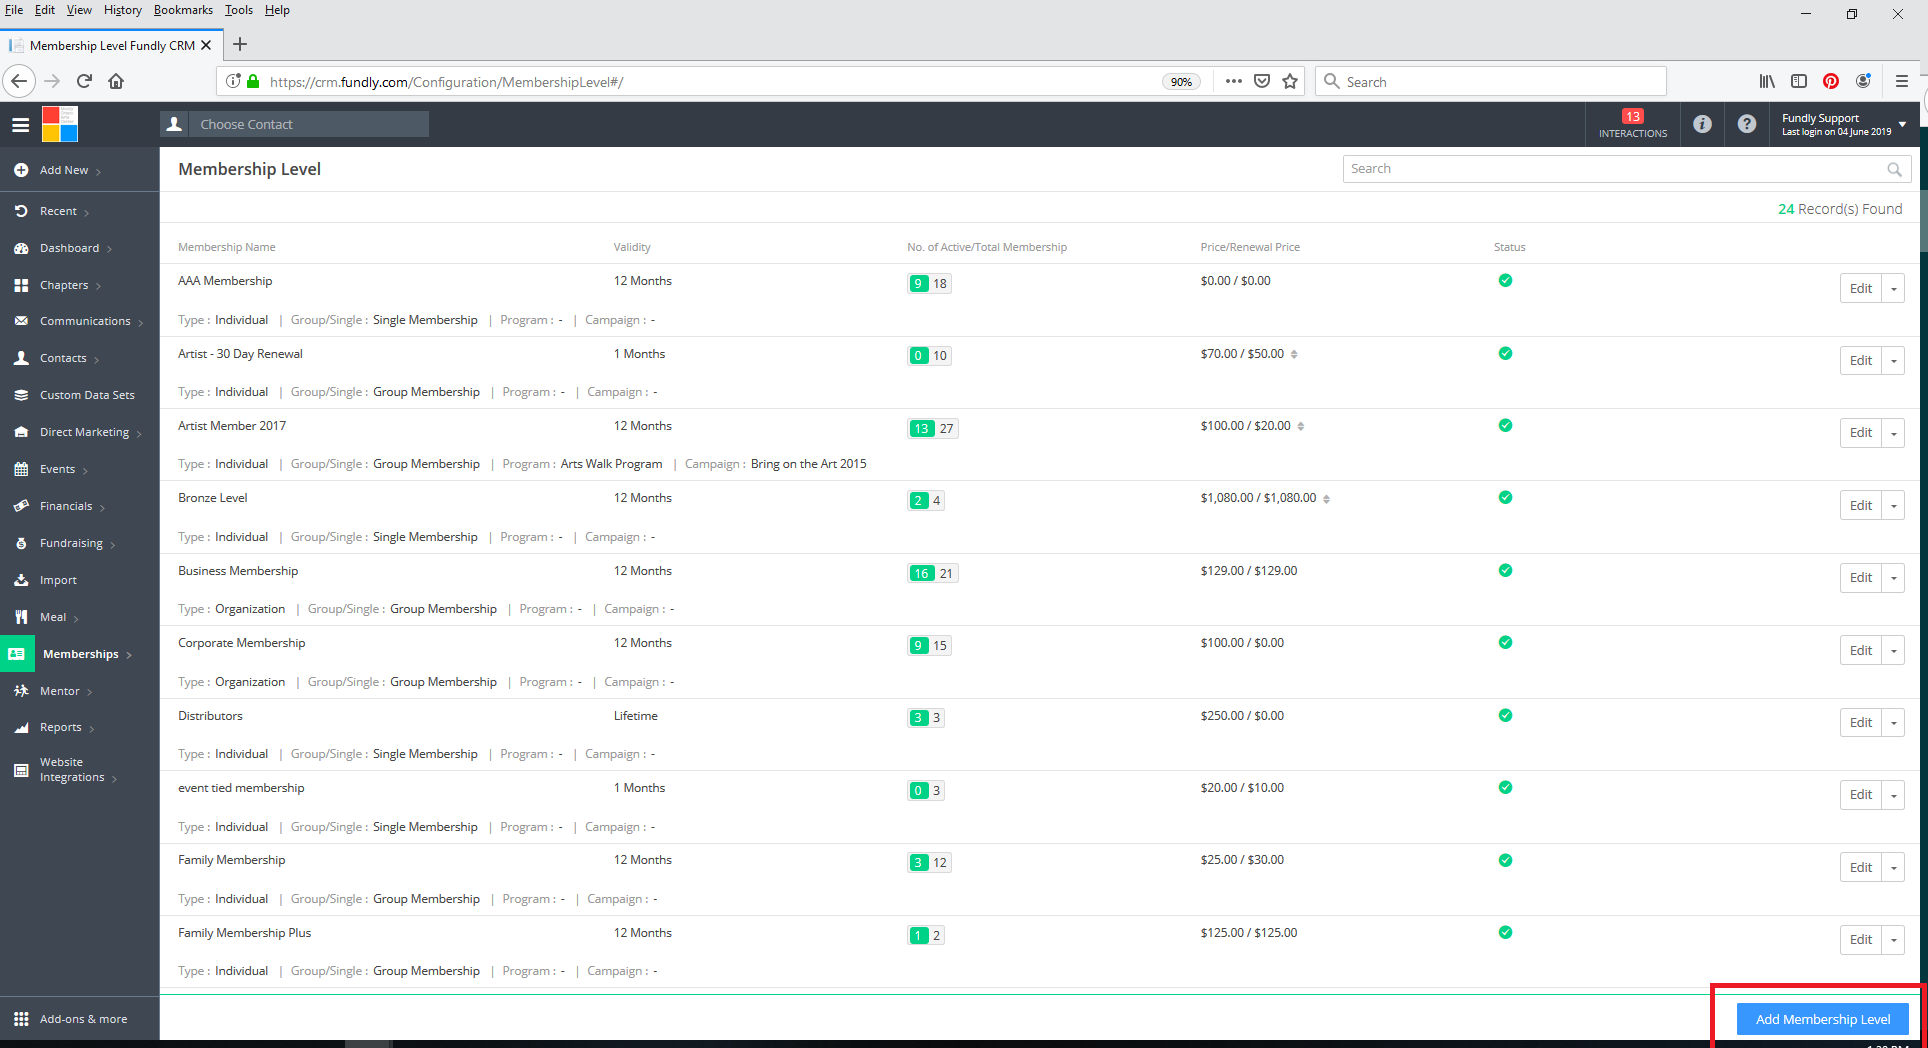
- To create a new membership level click on Add Membership Level in the lower right of the screen.
- Creating a membership level is a five step process.
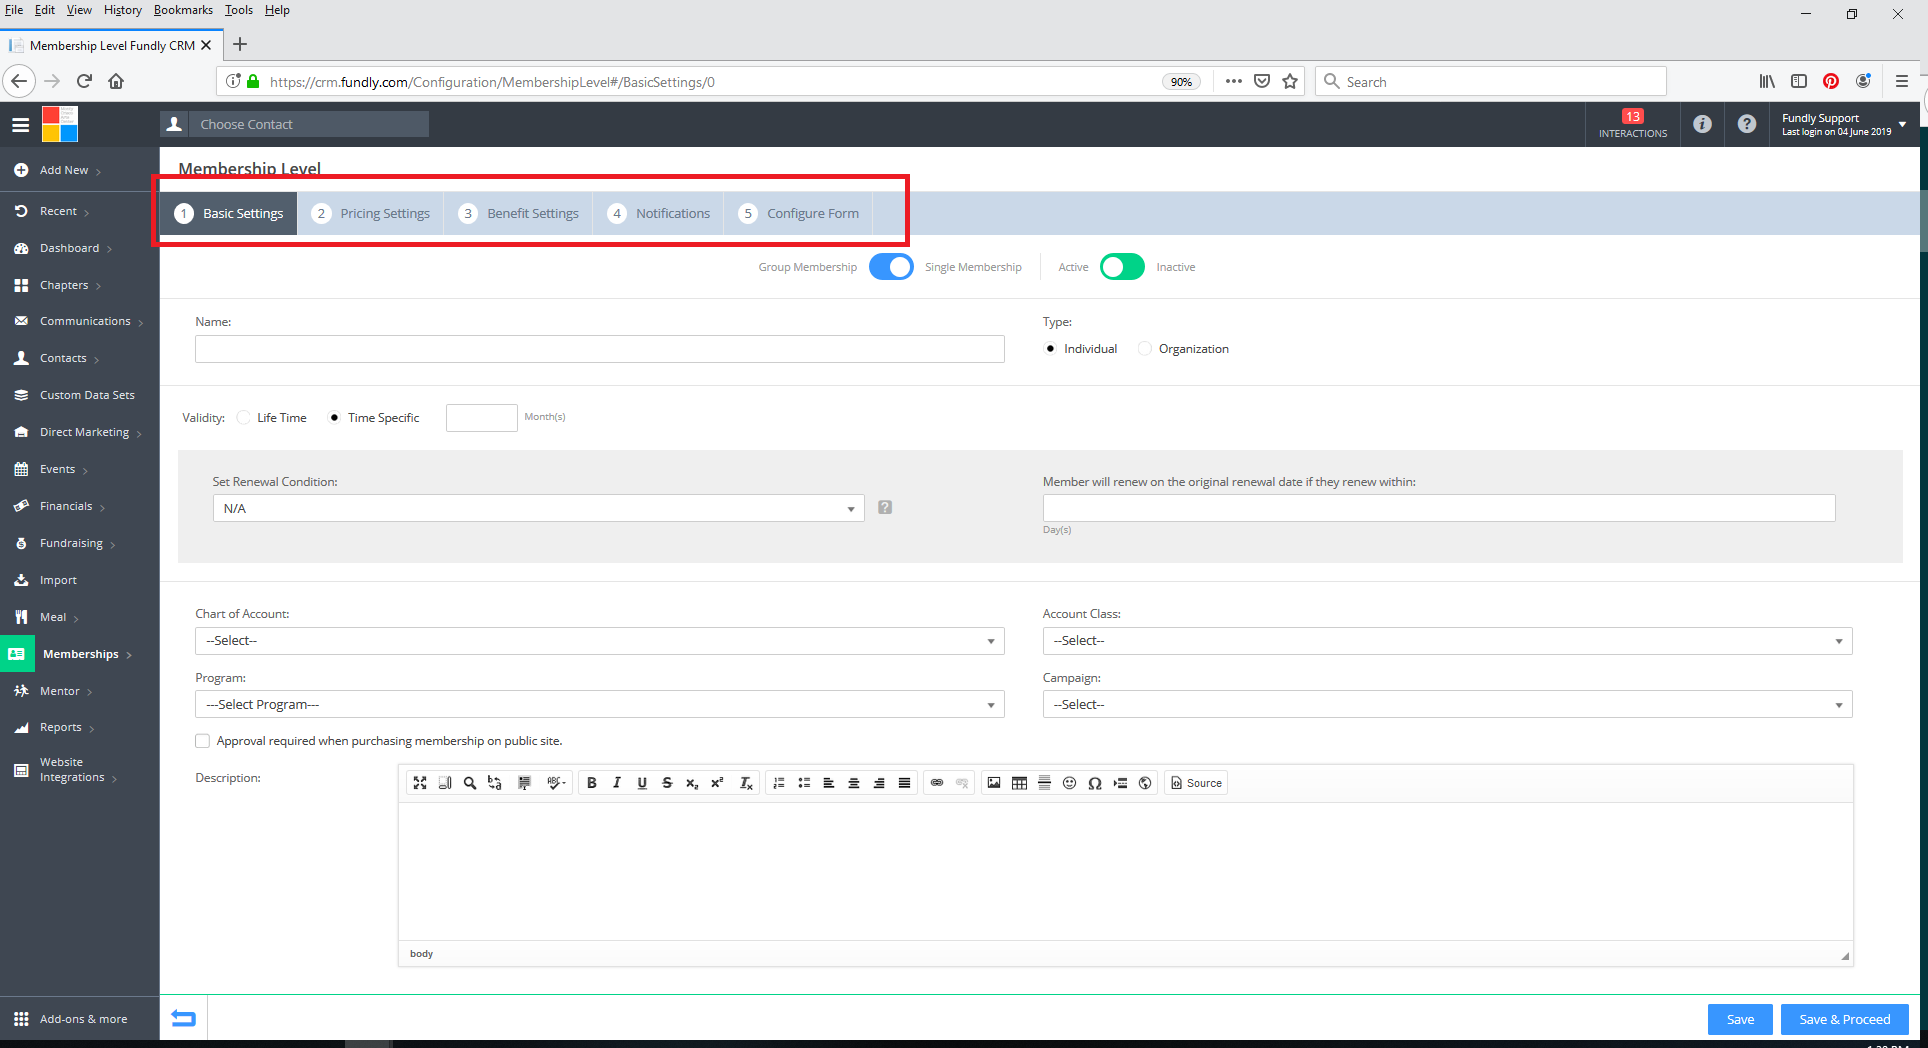
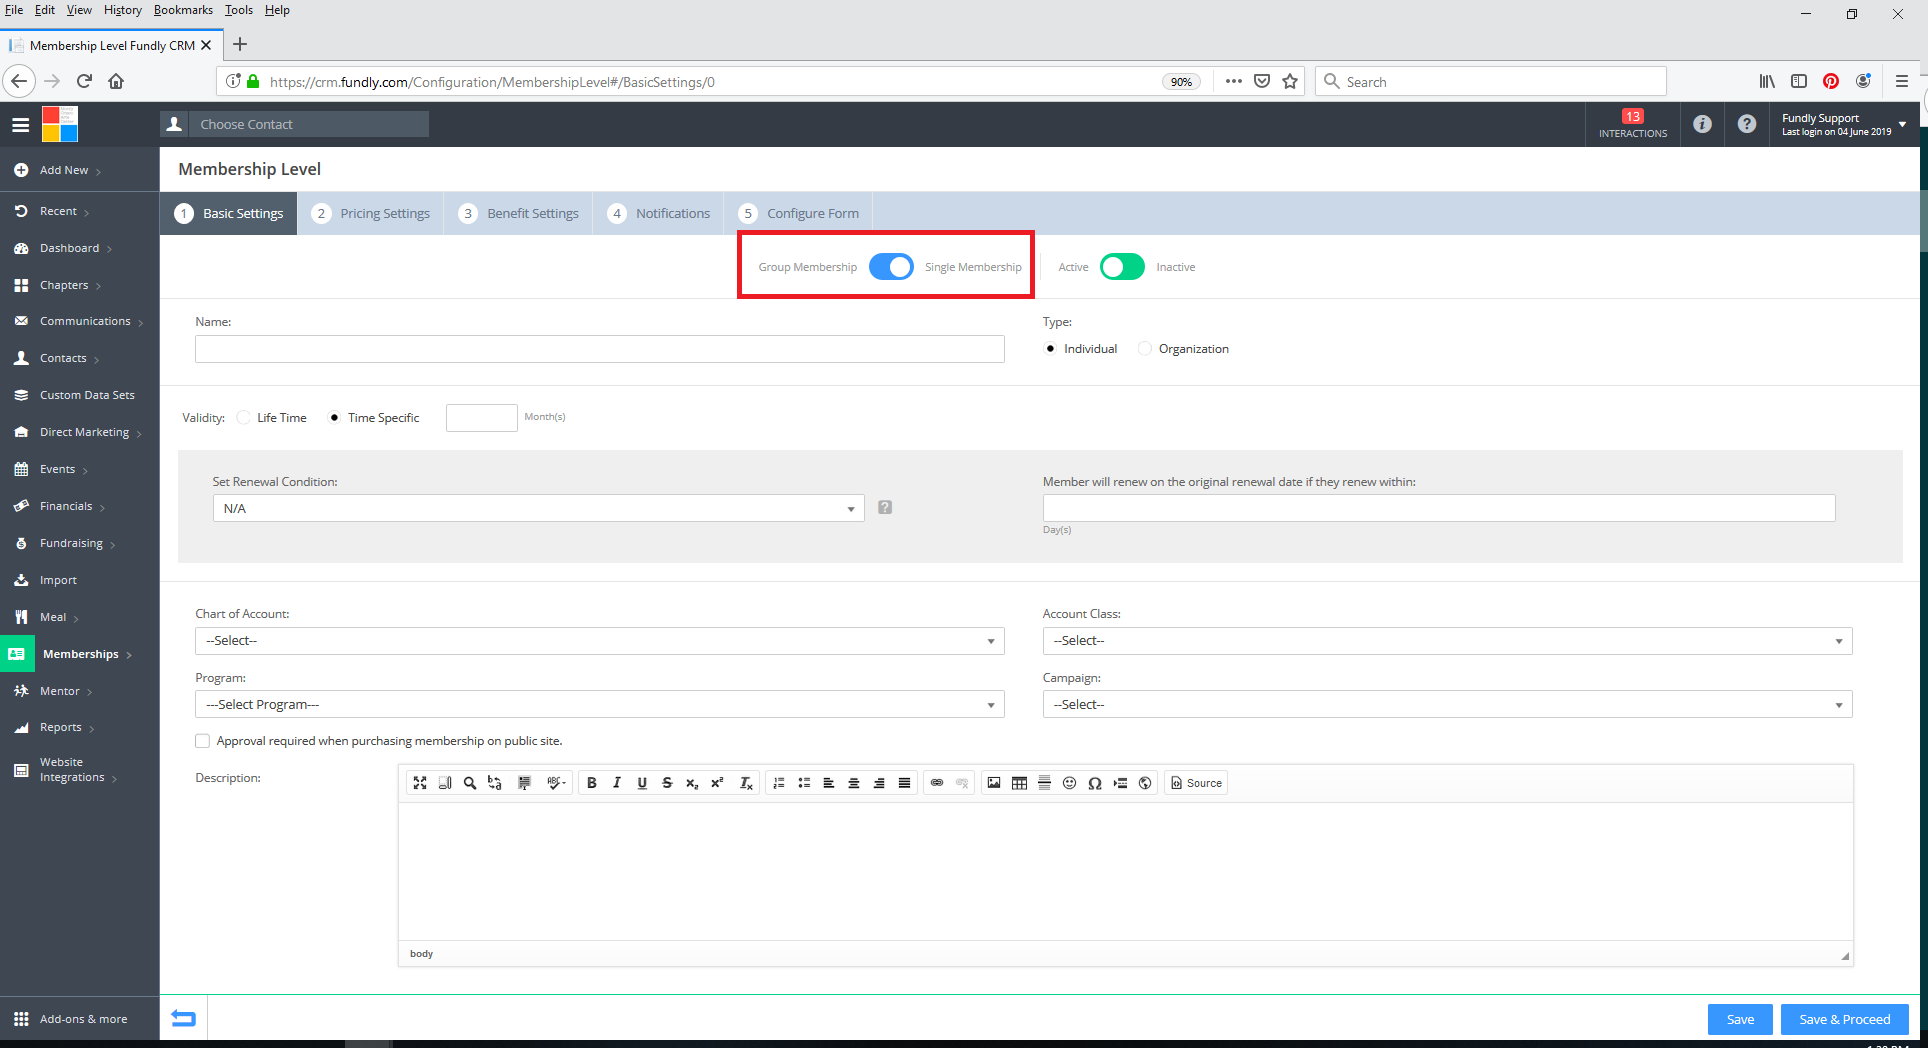
- On Tab #1: Basic Settings, start by indicating if this membership will be a Group Membership (for multiple people on one membership such as families or employees of an organization) or a Single Membership (for a single contact, either organization or individual) with the slider.
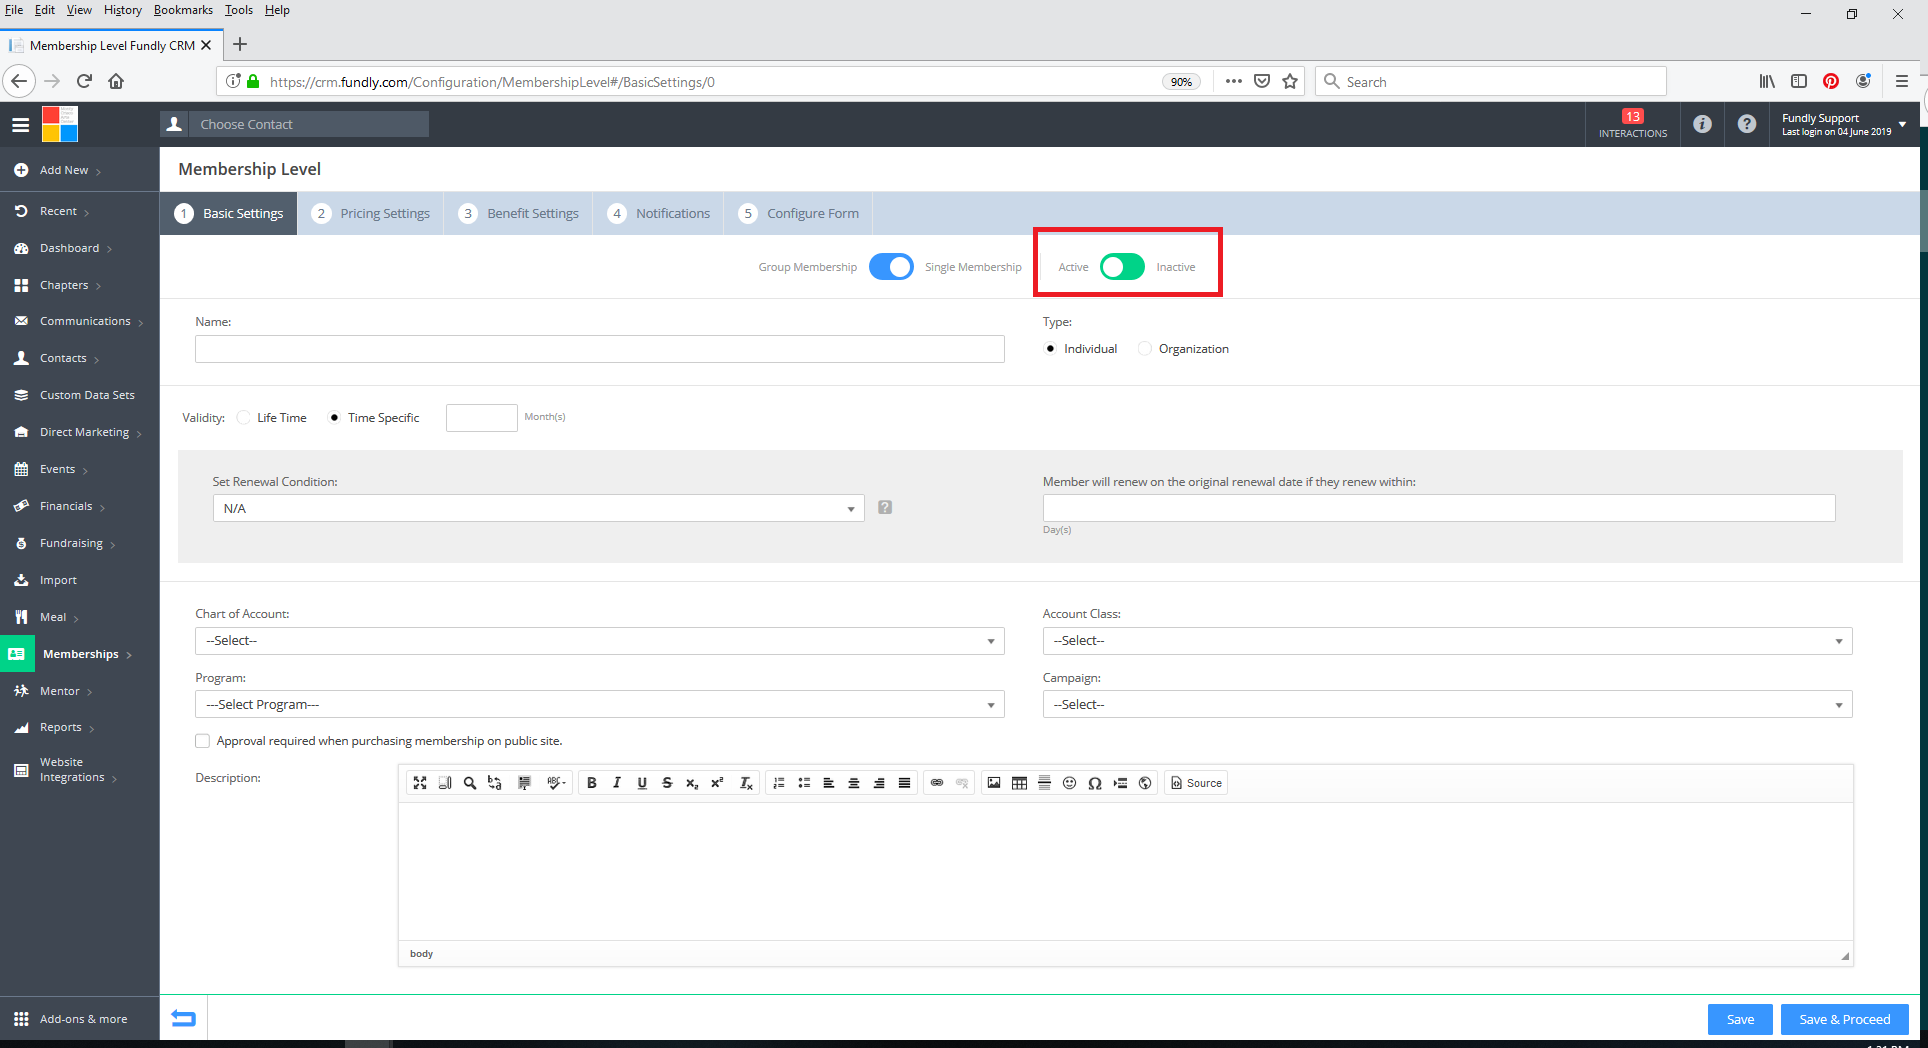
- Use the Active/Inactive slider to indicate if this membership is currently in use.
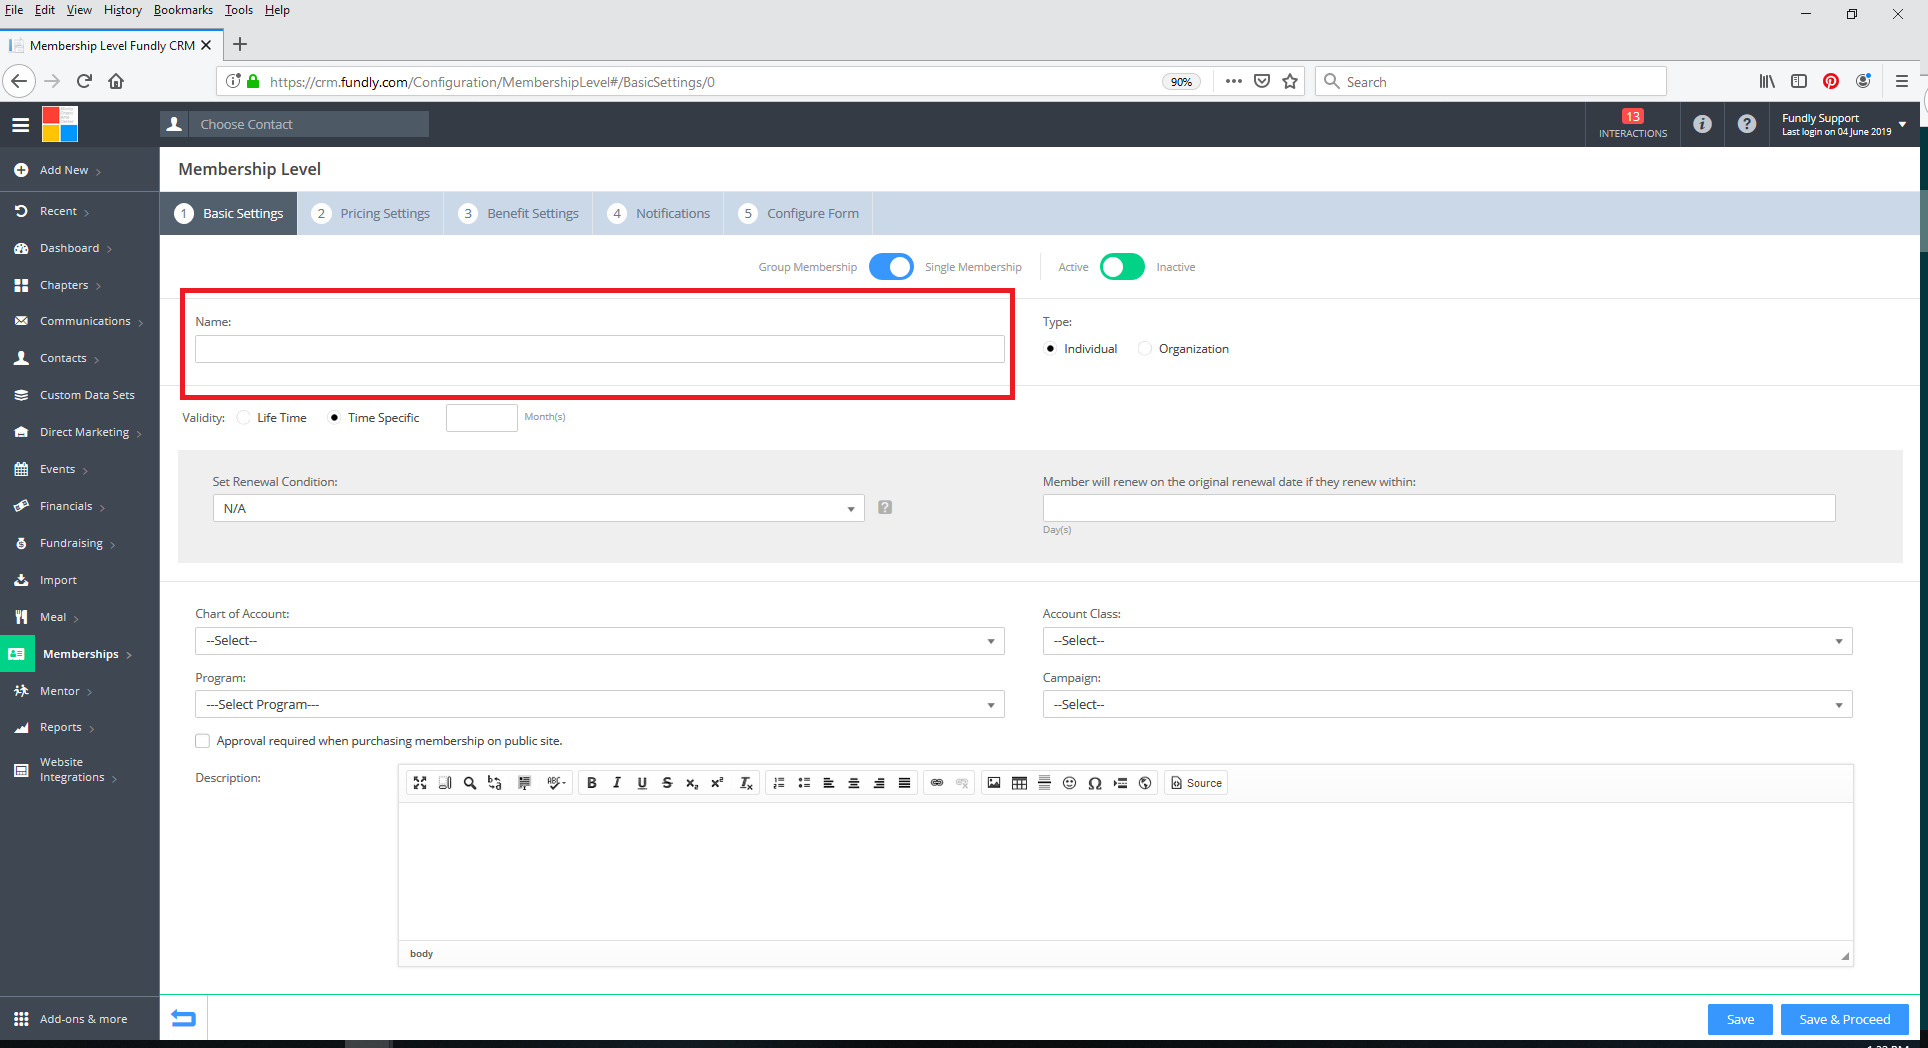
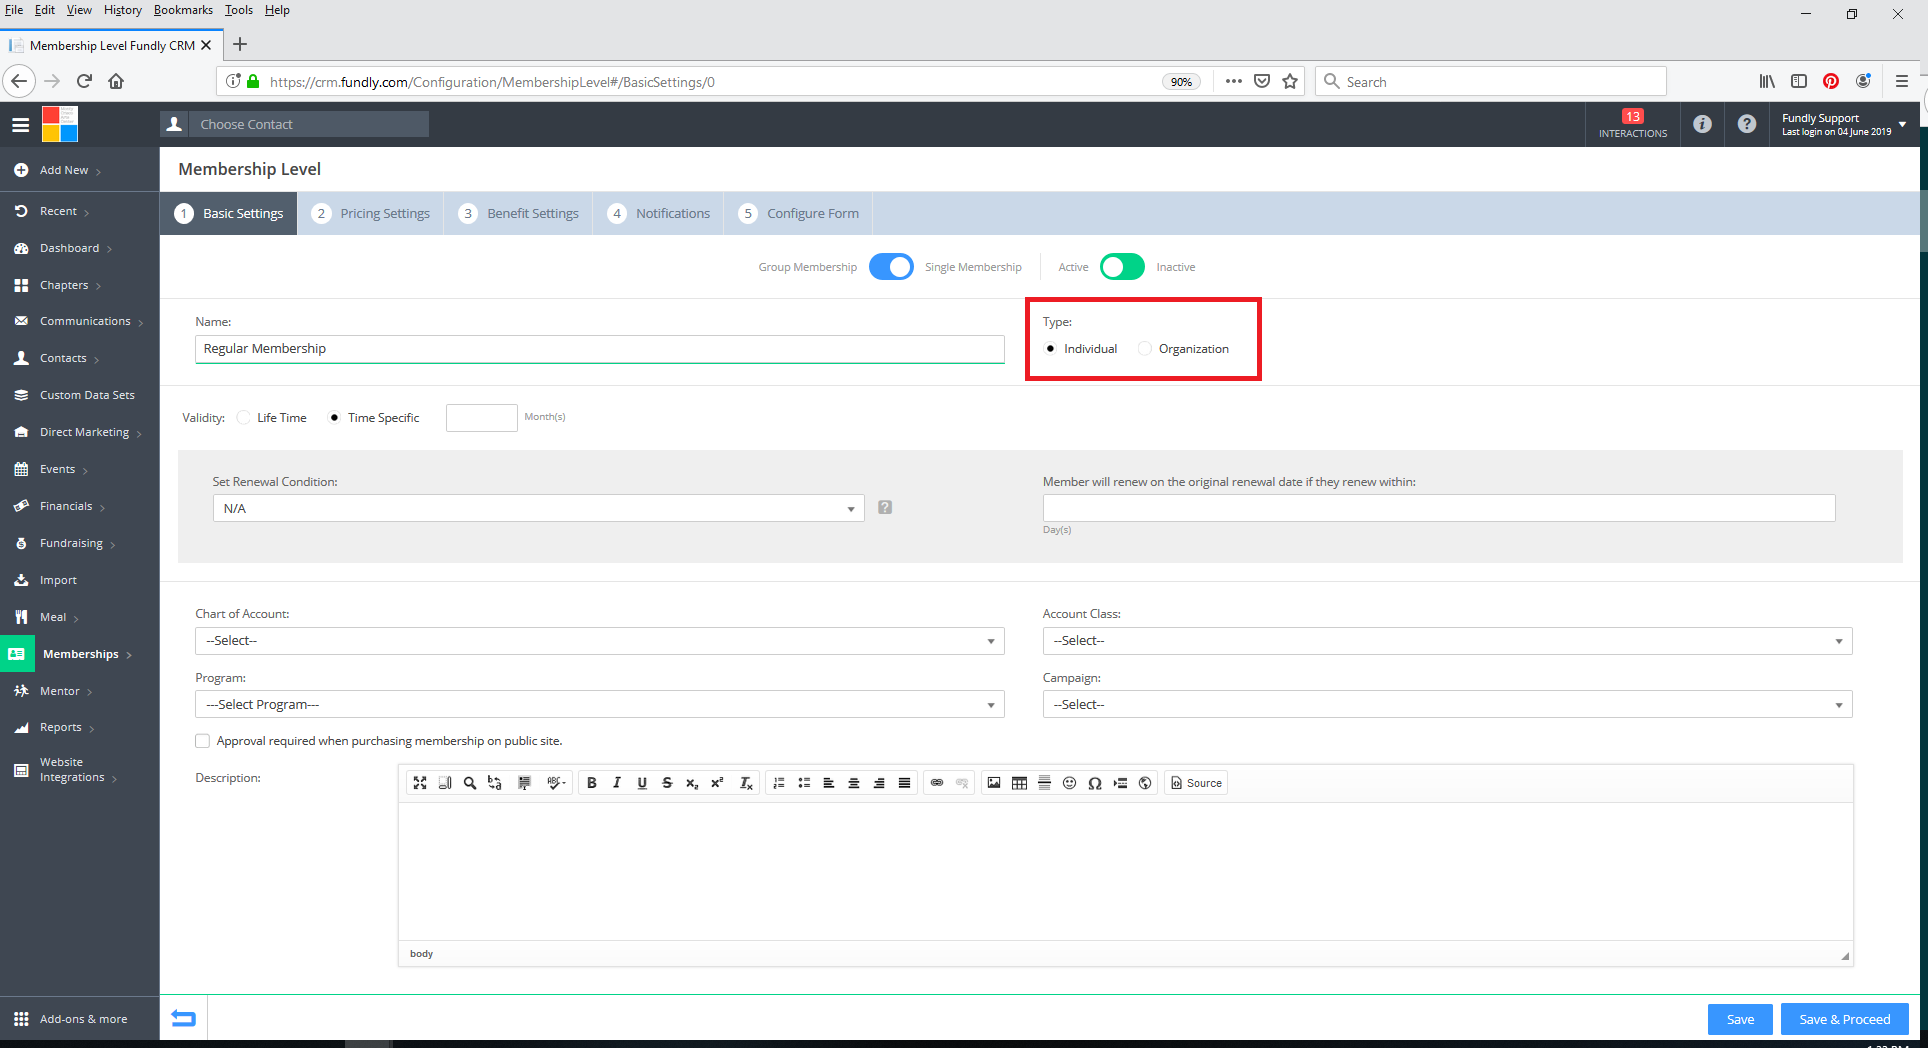
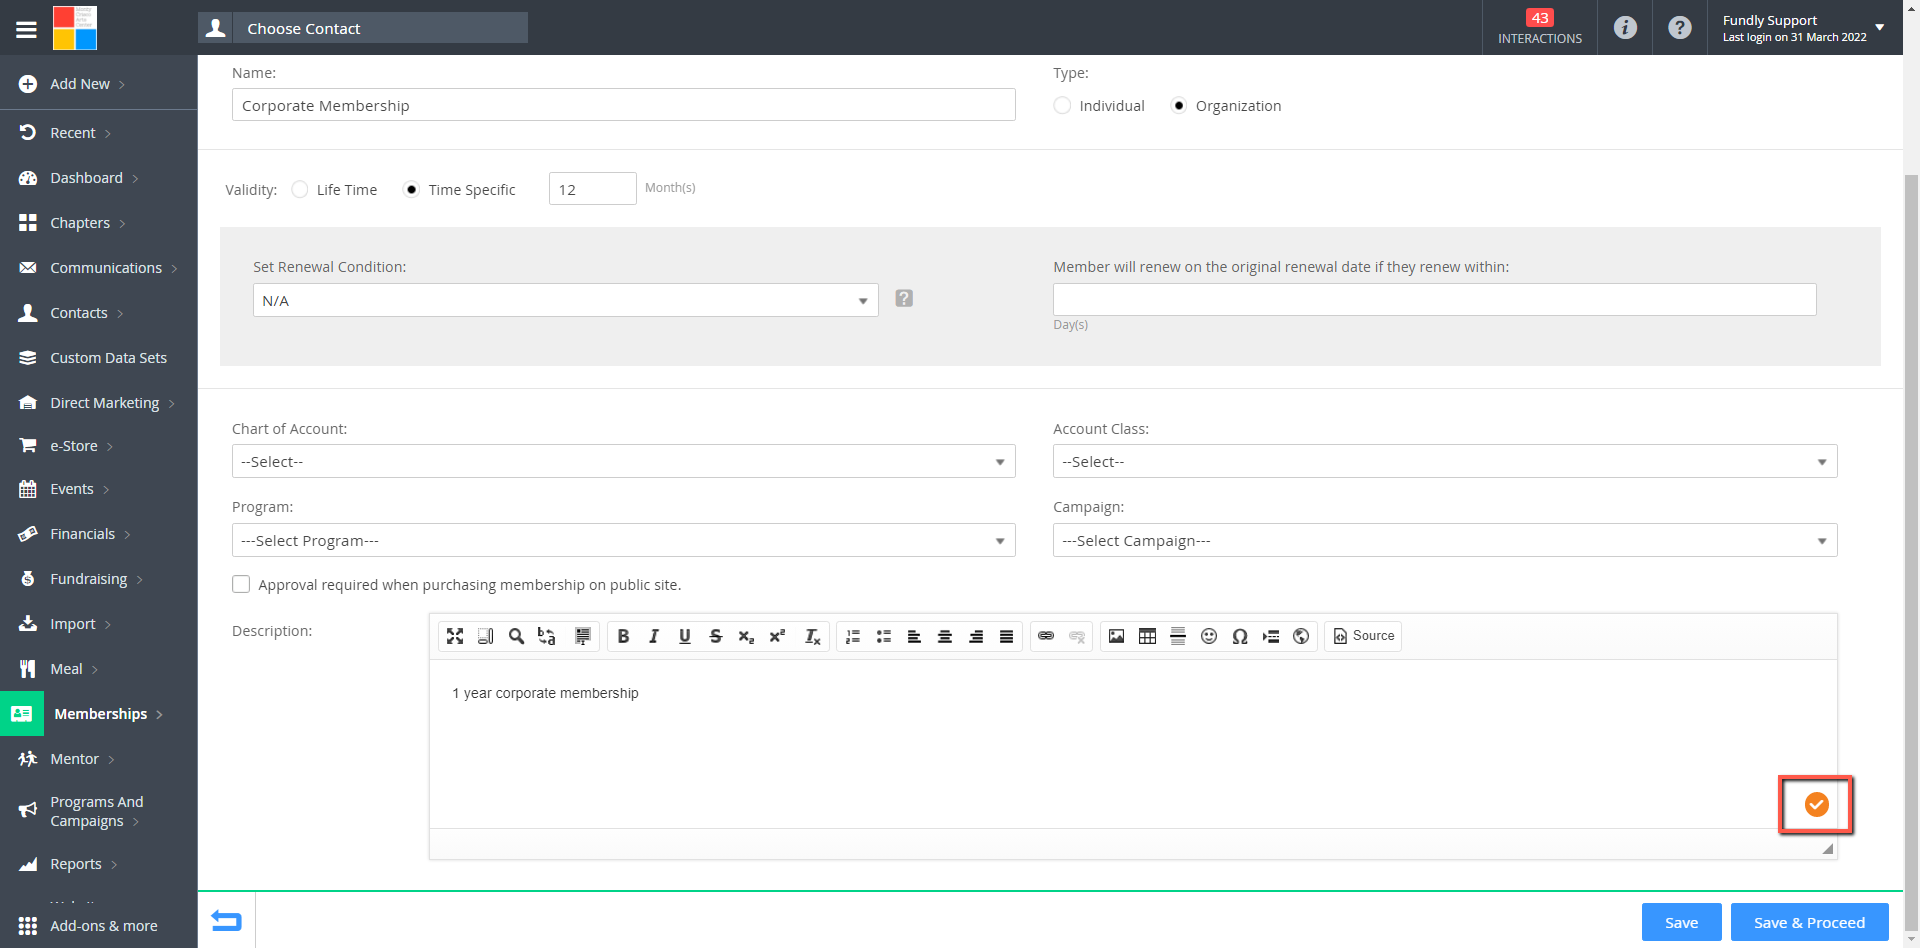
- In the Name field, indicate the name of the membership level as it would be displayed on your public site.
- Next, use the Type radio button to select whether the membership will apply to Individual or Organizational contacts.
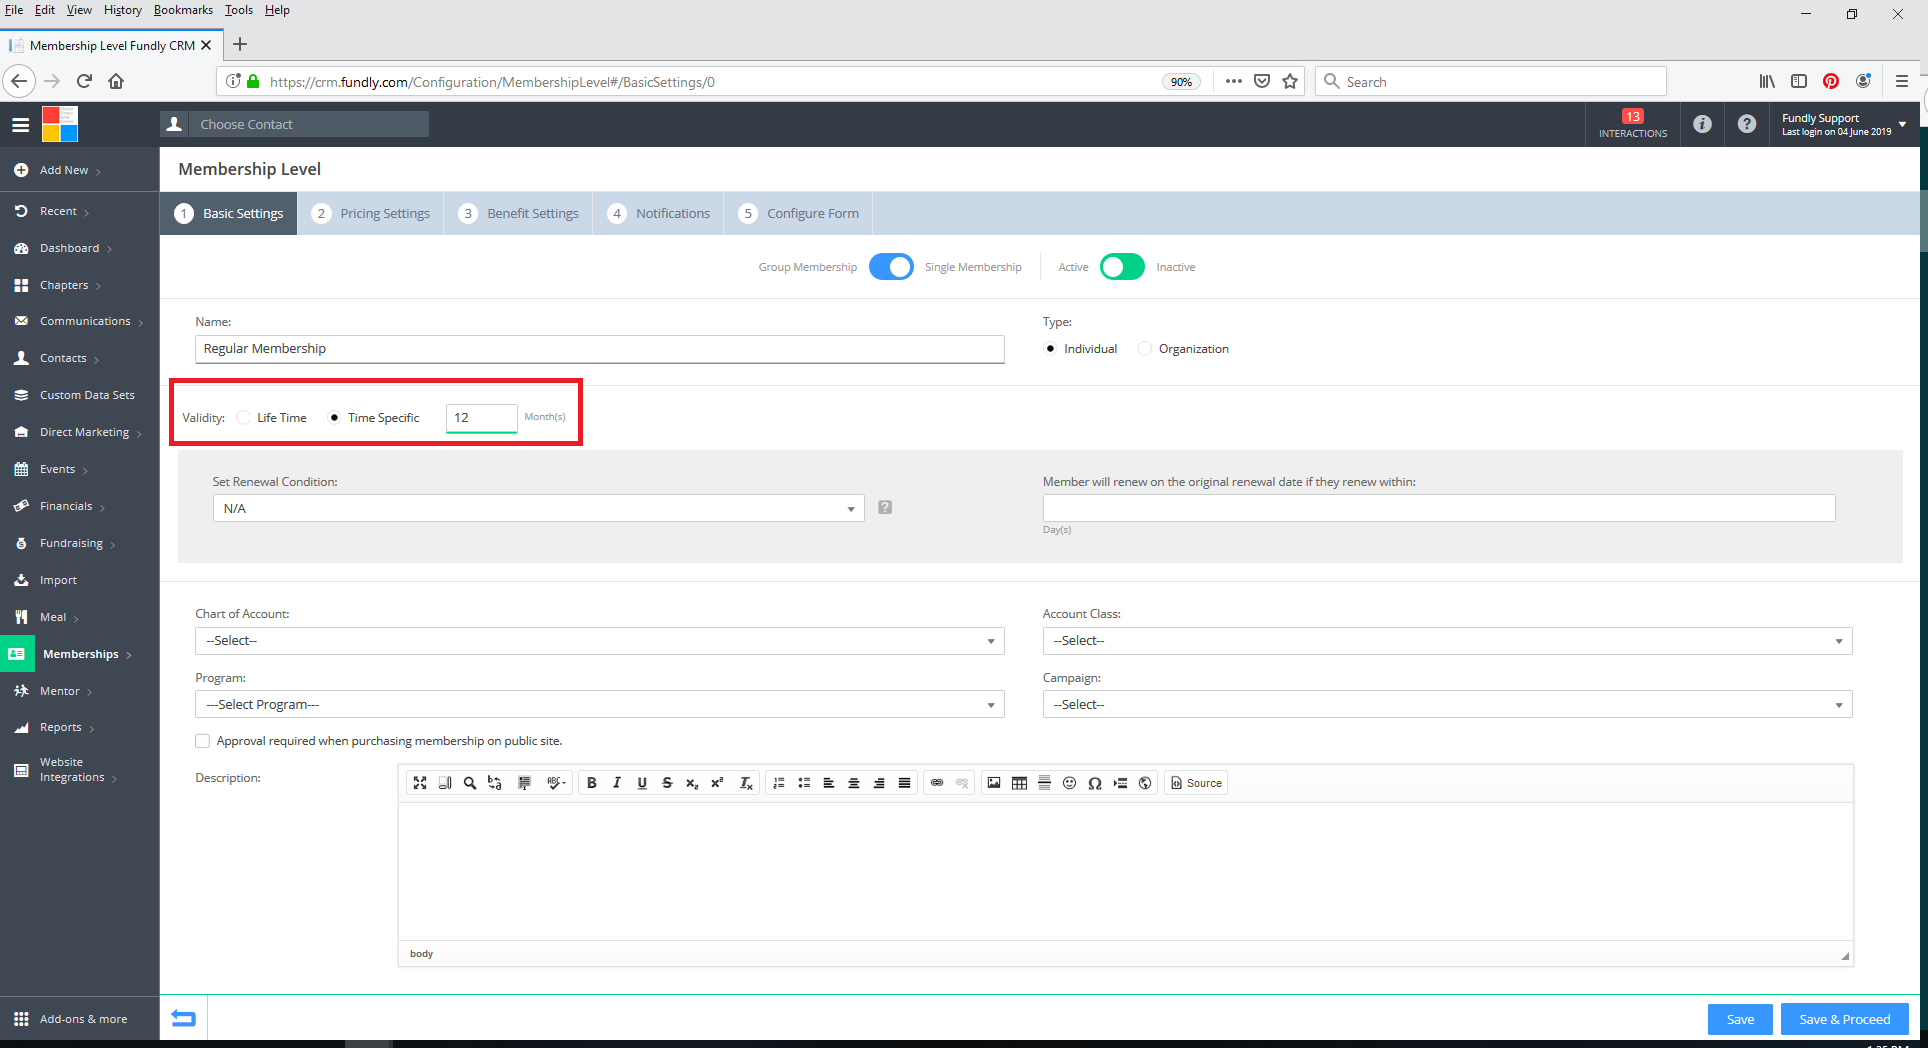
- In the Validity field indicate the membership as either a Lifetime membership (good for infinite time, will never need renewing) or time Specific. If setting this to time specific, indicate the number of months it will be valid (after which time it will expire/need to be renewed).
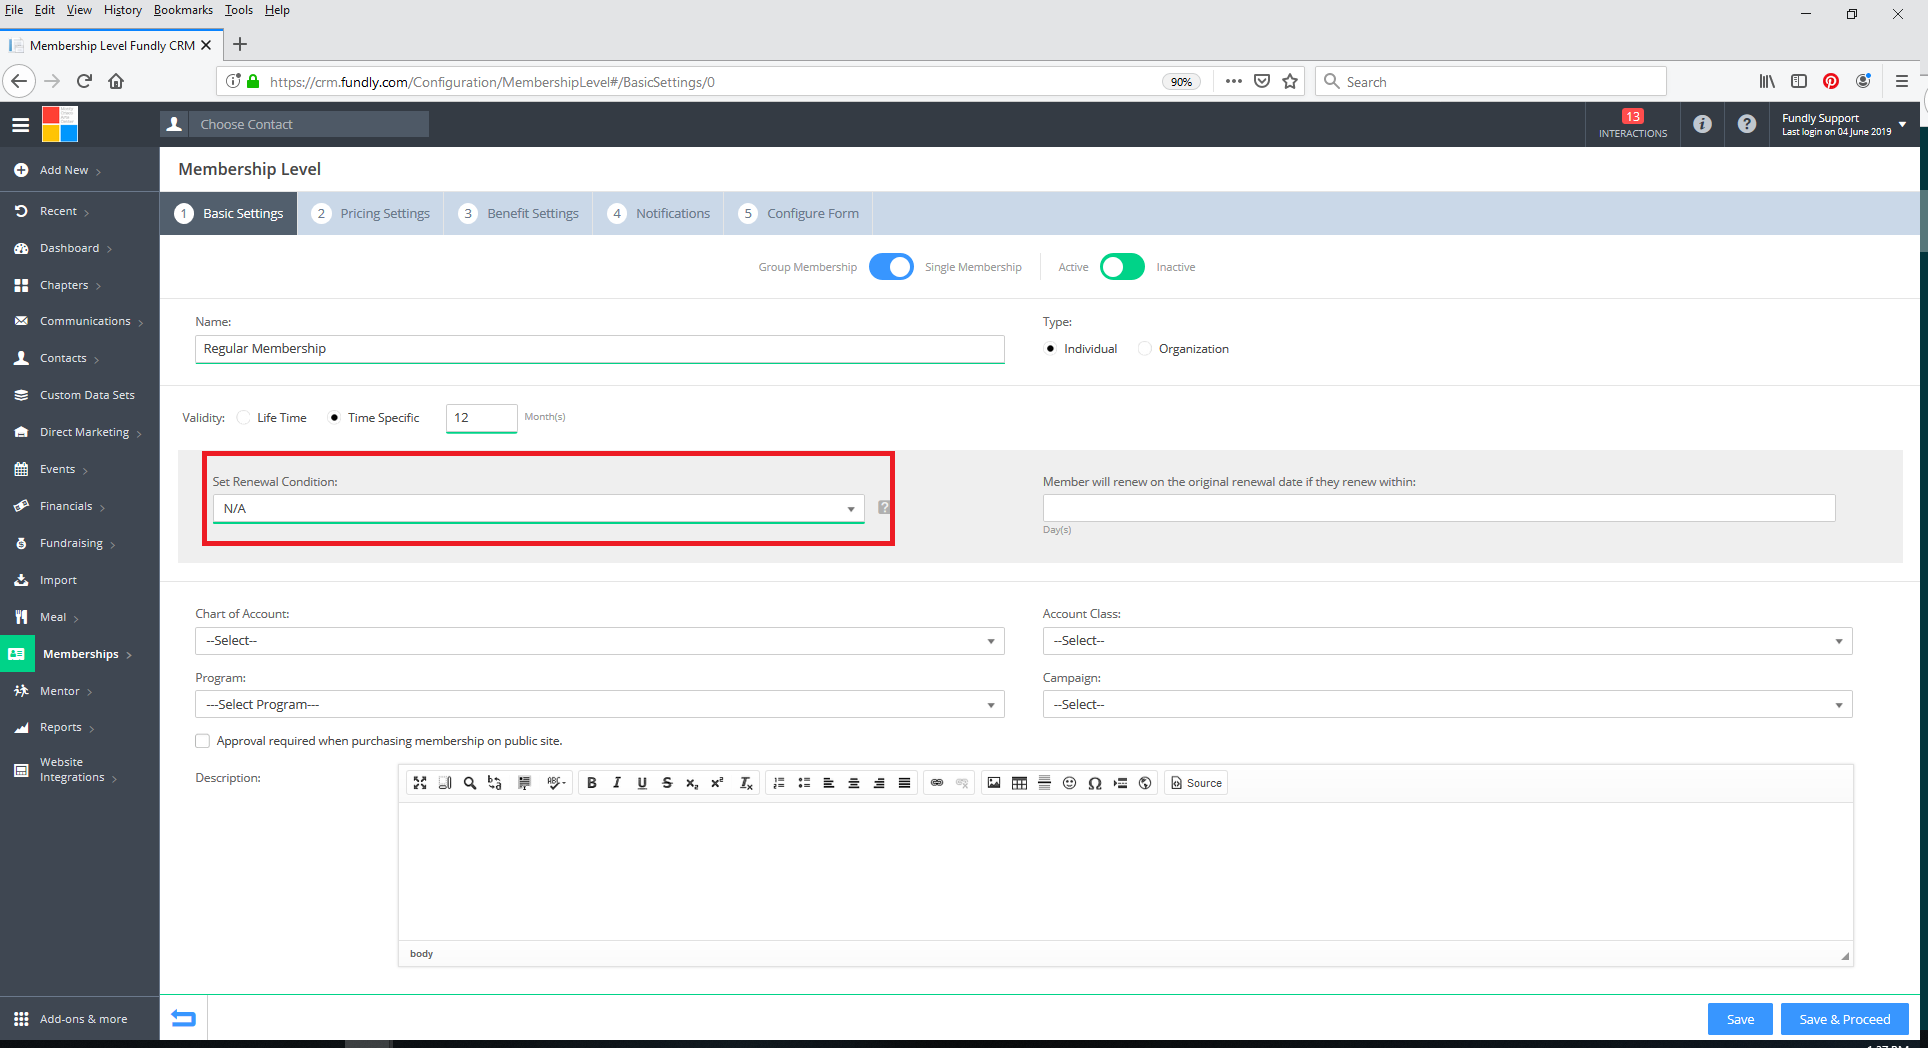
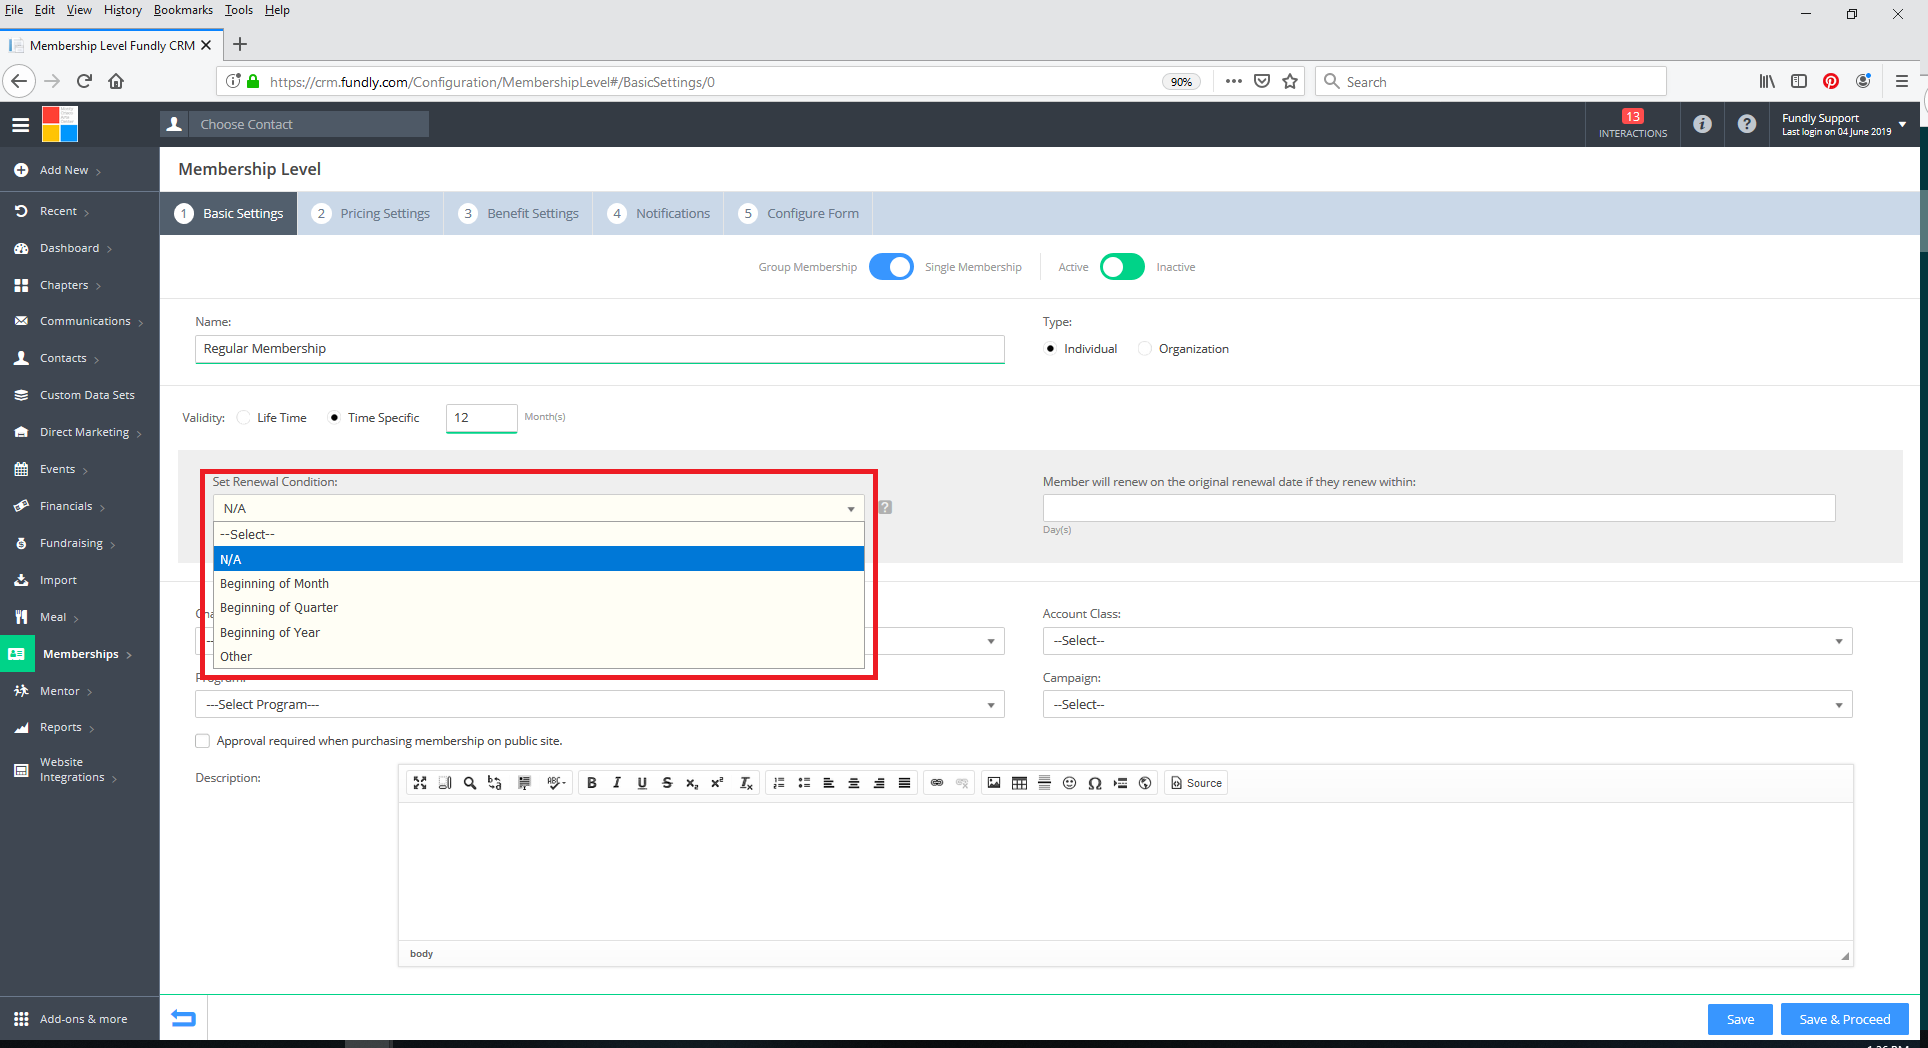
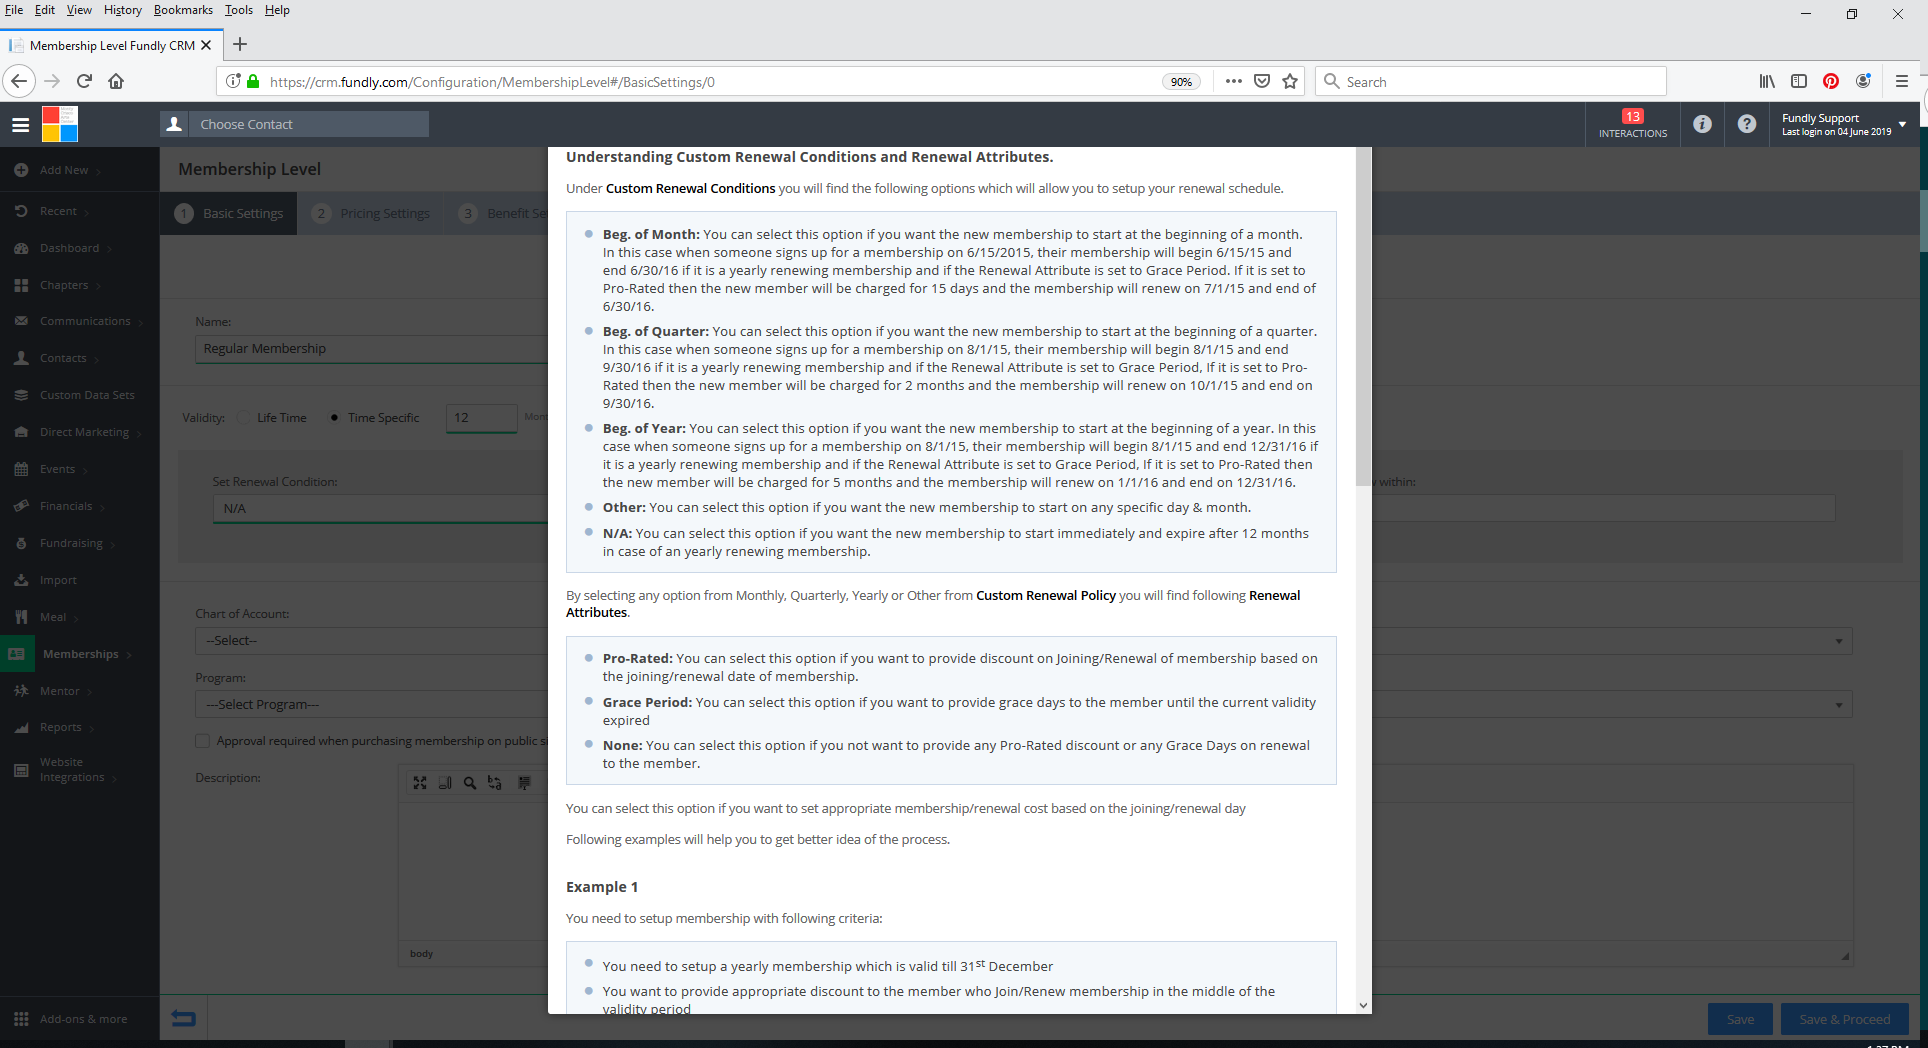
- Next use Set Renewal Conditions to indicate when membership will renew and grace period or pro-ration options. This field is OPTIONAL. Set the renewal condition when you want all of your members to get onto the same renewal schedule. For instance, if you want all memberships to renew/start on January 1st of each year, regardless of when the person signed up to become a member originally, then set the renewal condition to Beginning of the Year.
- If you choose to set a renewal condition, then you will have the option to pro-rate or give a grace period for getting everyone synced up.
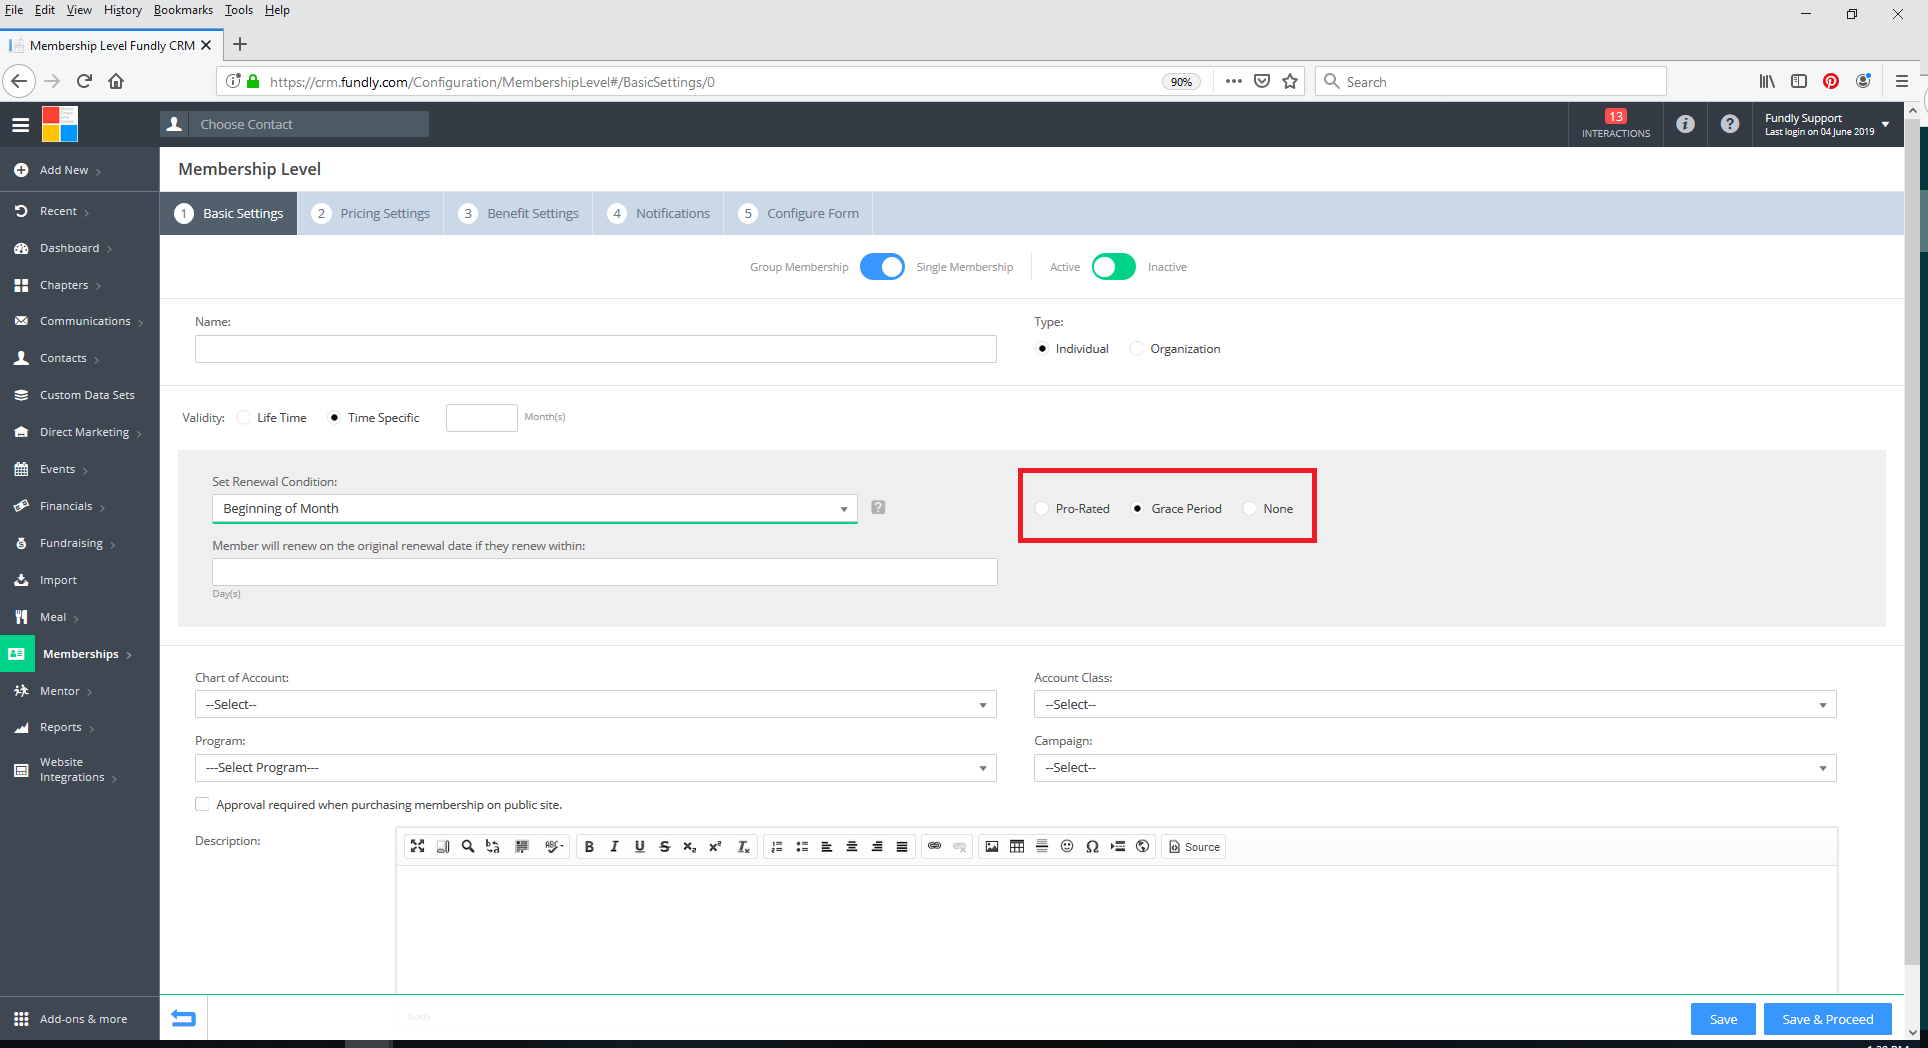
- Pro-rating means that the member will be given a discount/pro-rated cost to compensate for not having the full time period for their first year (for example, if you set the renewal to be the first of the year and someone buys a 12-month membership in June, they only get 6 months out of that membership before they have to renew on January 1st. Pro-rating will pro-rate the cost of the membership and only charge them for the time period they are actually getting, instead of the full year).
- Grace Period means they get the full membership period plus however much extra required to bring them to the next renewal. In this case, if someone buys a 12-month membership in June that has a January 1 renewal date, the member would not need to renew until the NEXT January. They would get an 18-month membership for the price of a 12 month membership (they would get the full January to January membership plus the first six months/June - January would be the grace period). You can also opt to do neither.
- Clicking on the Question mark (?) button next to this field will provide an explanation of each setting, and how they will interact.

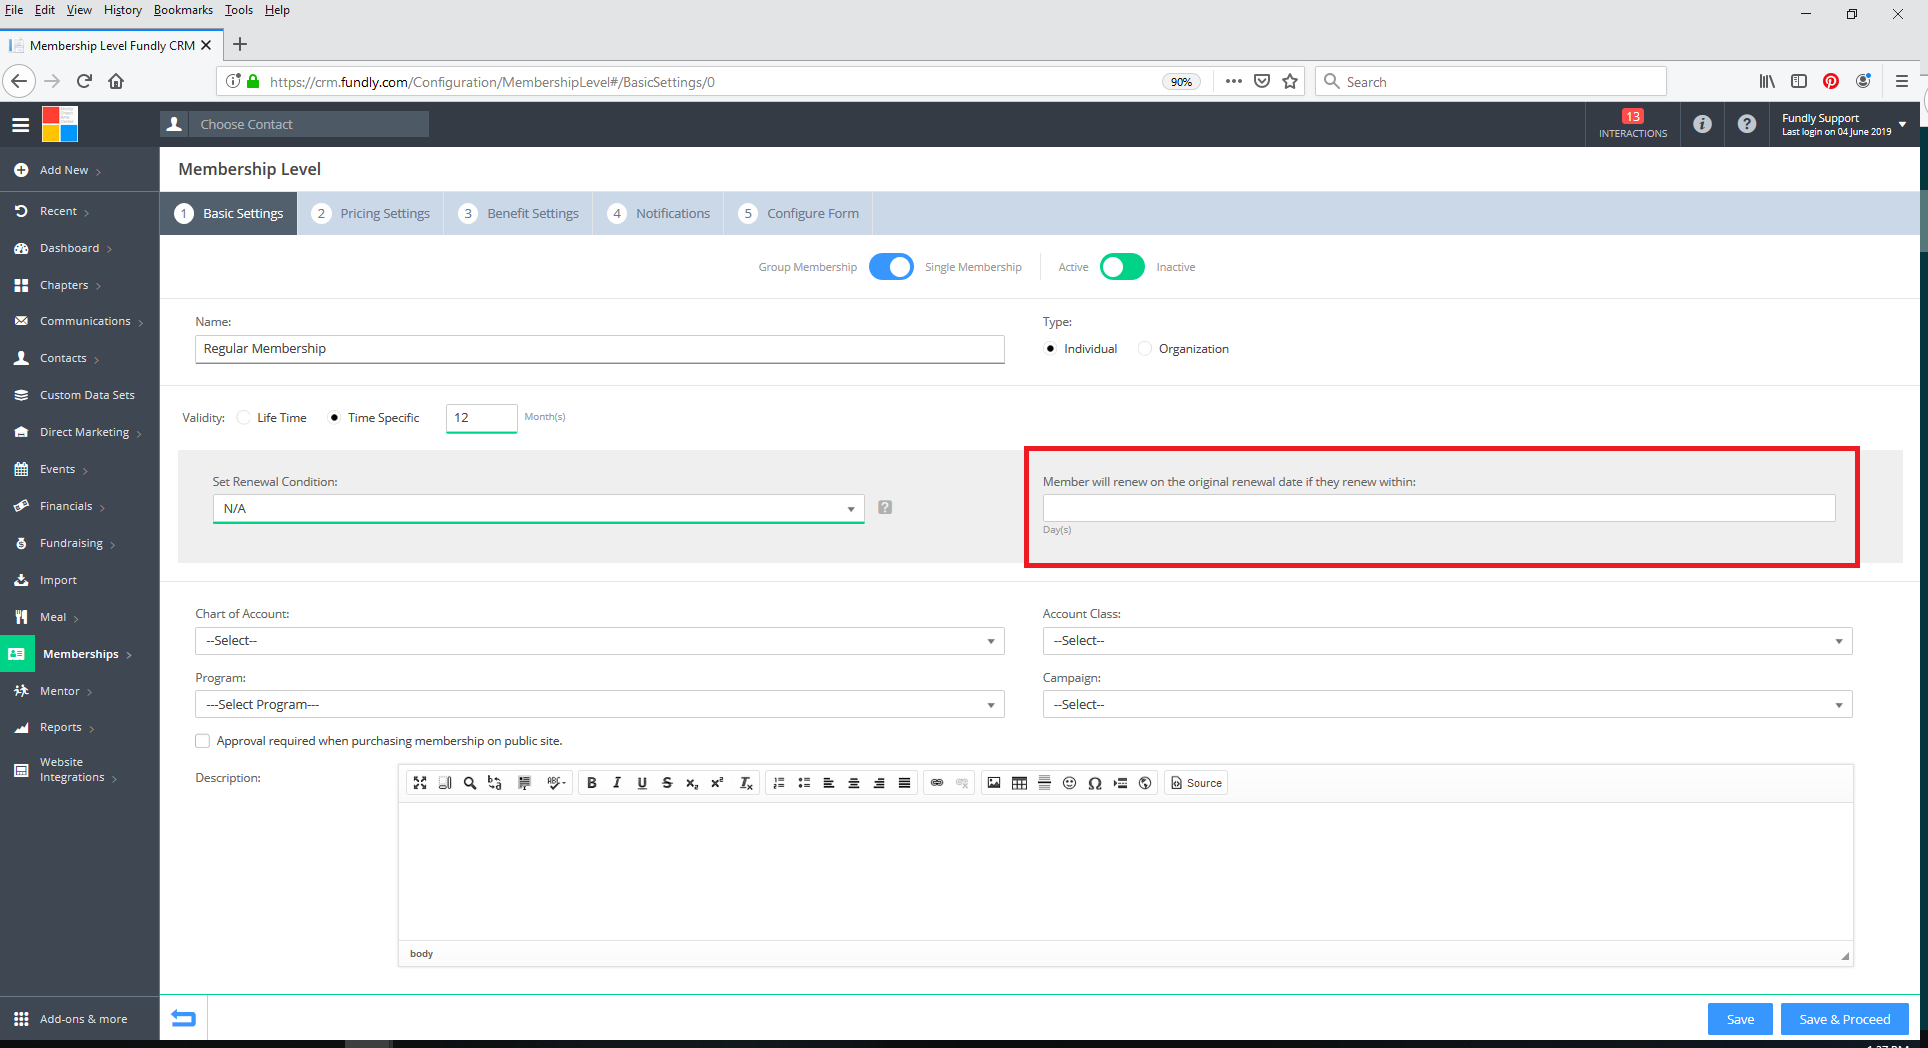
- Next, set the Member Will Renew on the Original Date If They Renew Within field to the number of days (if any) grace period for renewal to be considered renewed on their original membership date. For example, Sally's membership expires on 6/20. She doesn't renew until 5 days late/later on 6/25. If you set a 5-day grace period, the system will show that she renewed on 6/20 and there was no gap/lapse in her membership. Keep in mind, you can backdate memberships when renewing them as well, so it is not entirely necessary to provide a grace period for renewals. This setting/field is OPTIONAL.
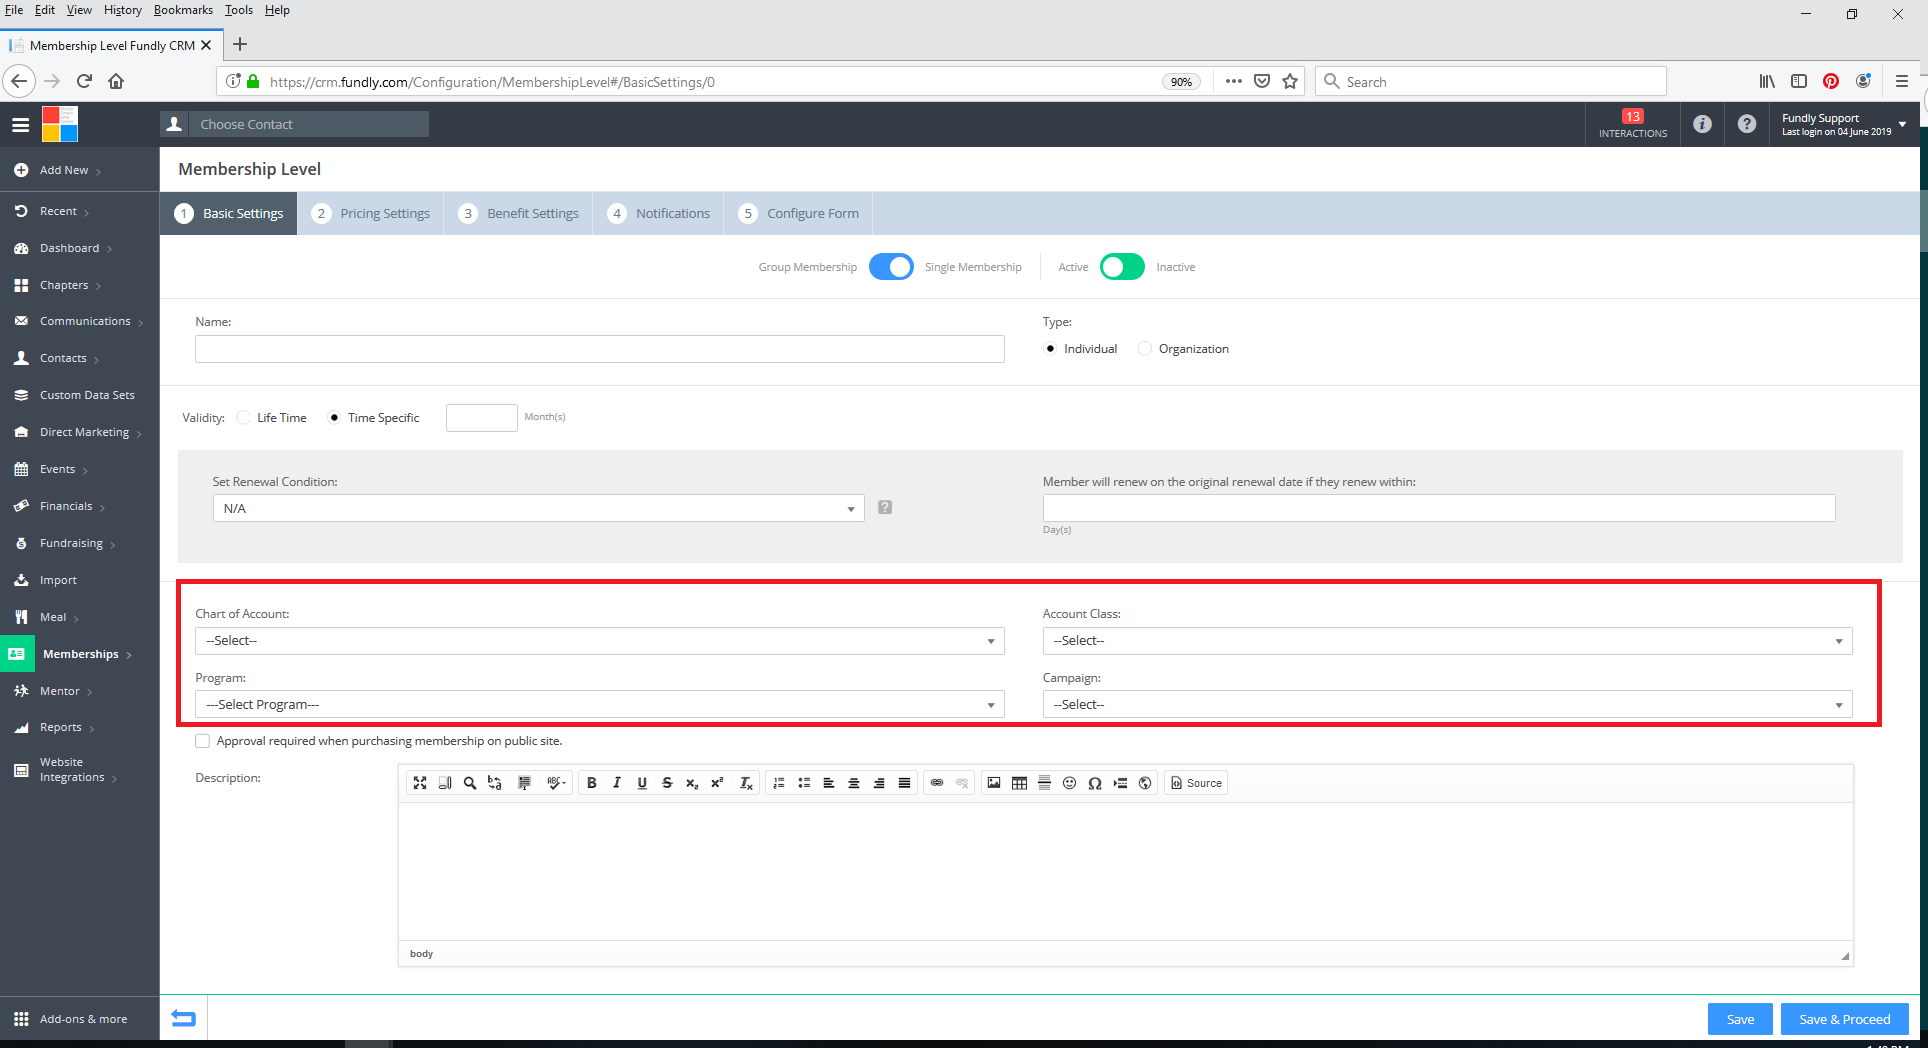
- Next, if this membership is to be tied to a specific Chart of Accounts, Account Class, Program, or Campaign, use the indicated drop-downs to specify this information. These fields are all OPTIONAL.
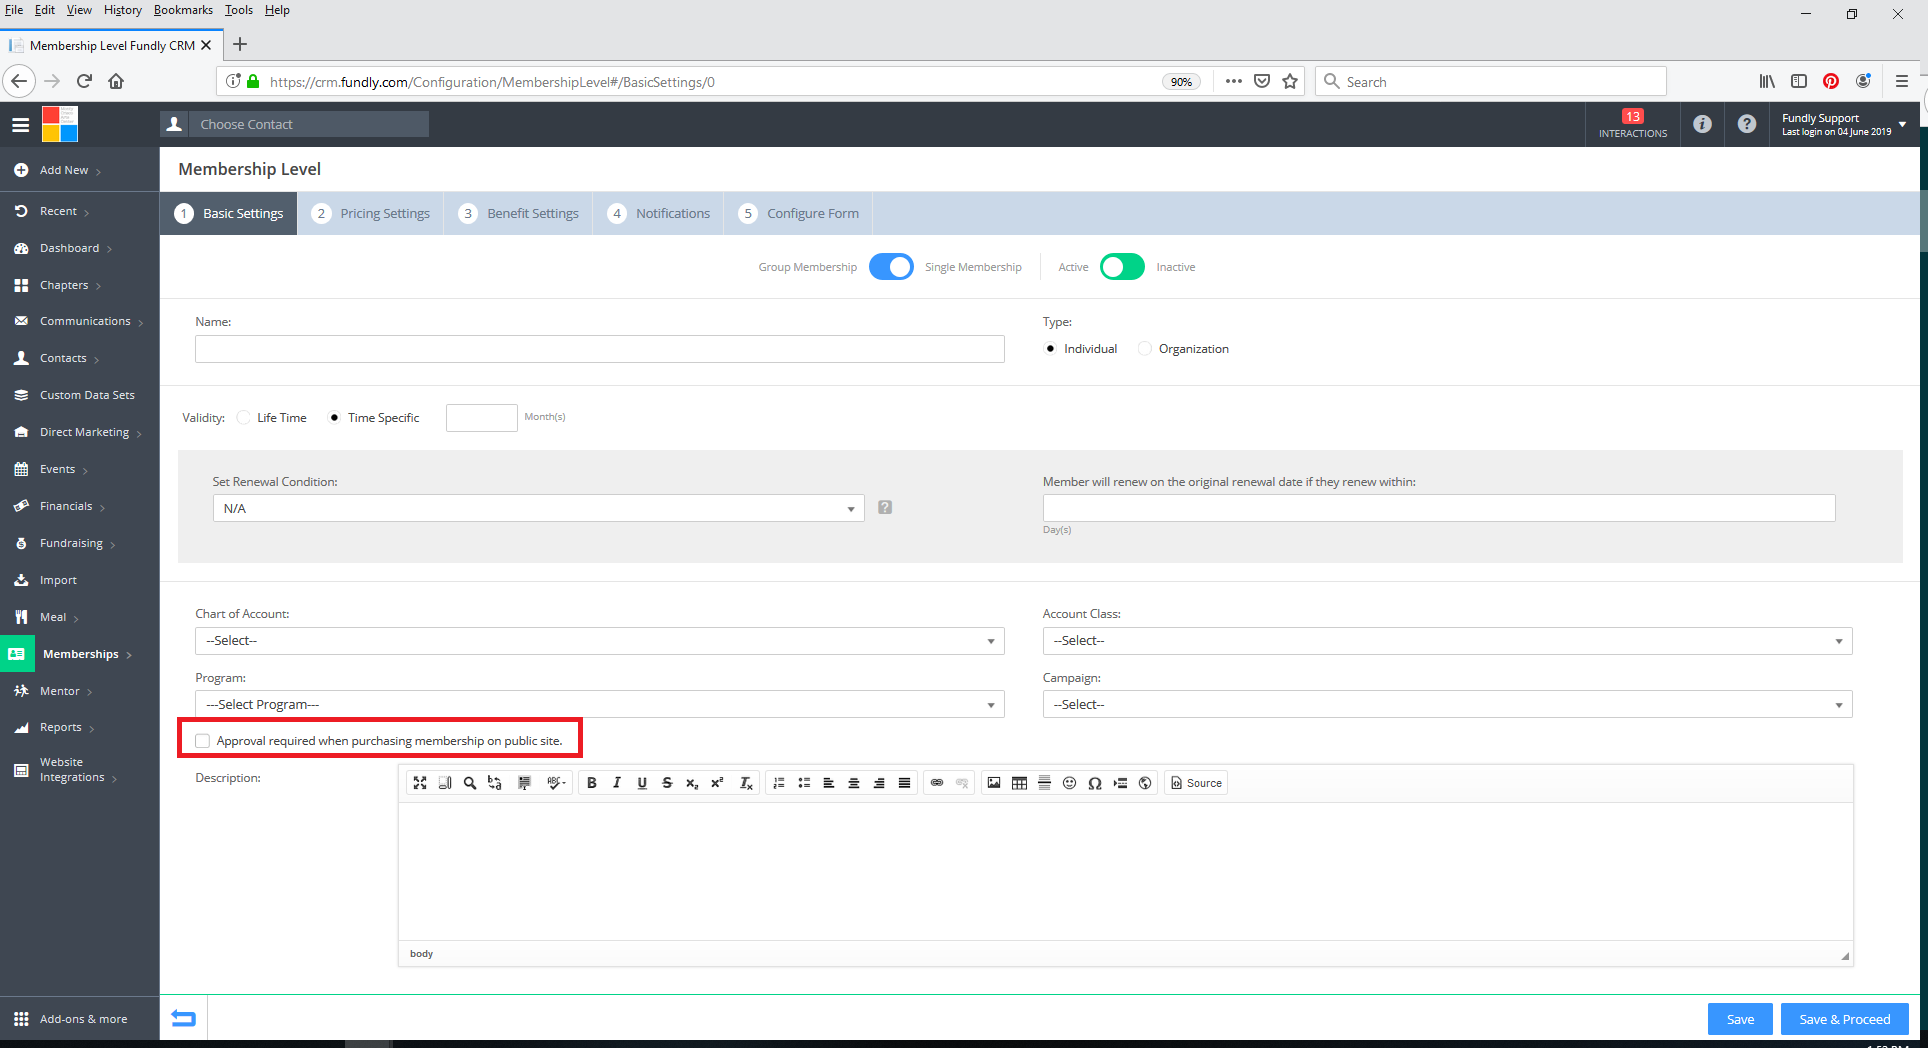
- If a membership requires approval in order to be purchased online, indicate this with the provided checkbox. When this box is checked, online membership purchases will bypass the online cart (and therefore cannot be combined with other purchases online). In addition, the membership will land on the Pending tab on your Manage Memberships Index page and a staff member will need to approve the membership before it becomes active (and before the member's credit card is charged). Use this feature when your memberships have eligibility requirements or require verification before approval.
- Lastly, provide a description for the membership in the Description field. This description will appear online.
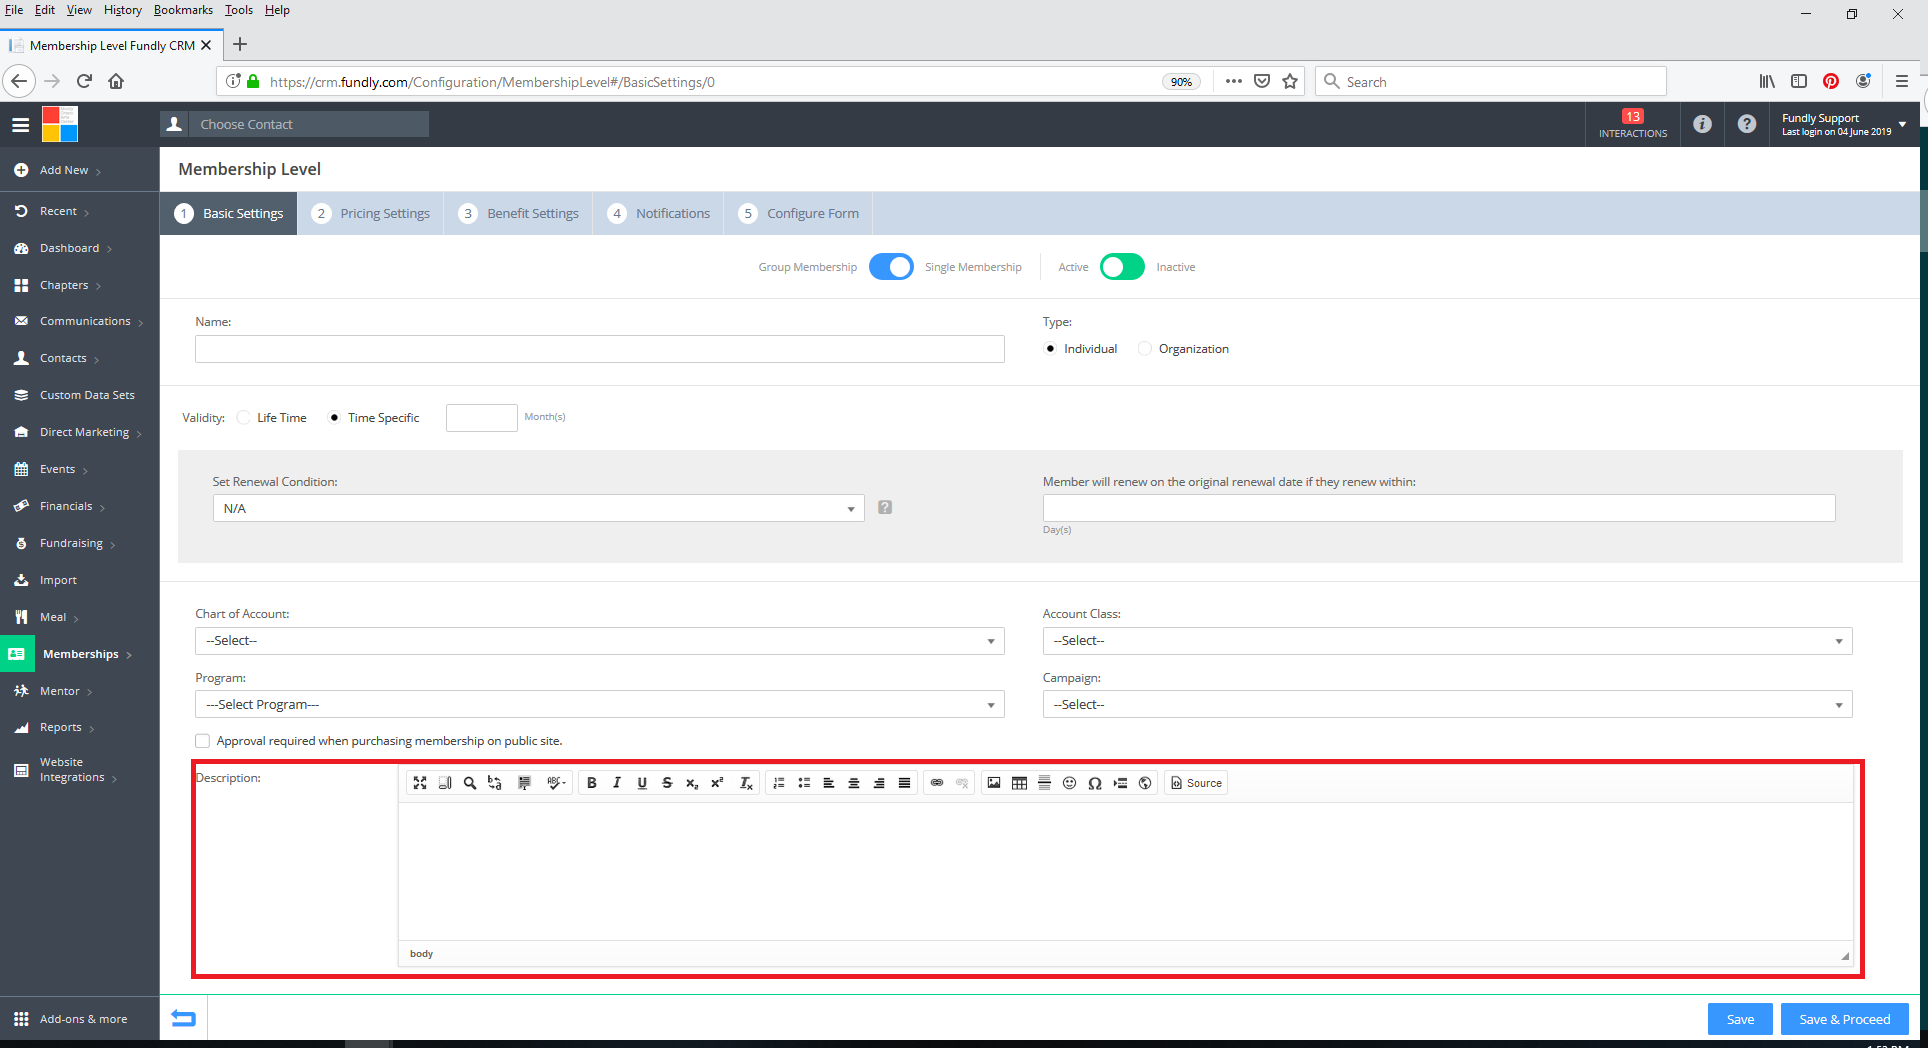
- The Spell checker will help you proofread and will detect the incorrect words or spelling mistakes. Users just need to hover on the marked words for instant correction suggestions or click the dialog icon in the bottom right corner to have the whole text proofread at once. Read this article on How Spell Checker Works to know more details about spell checker.
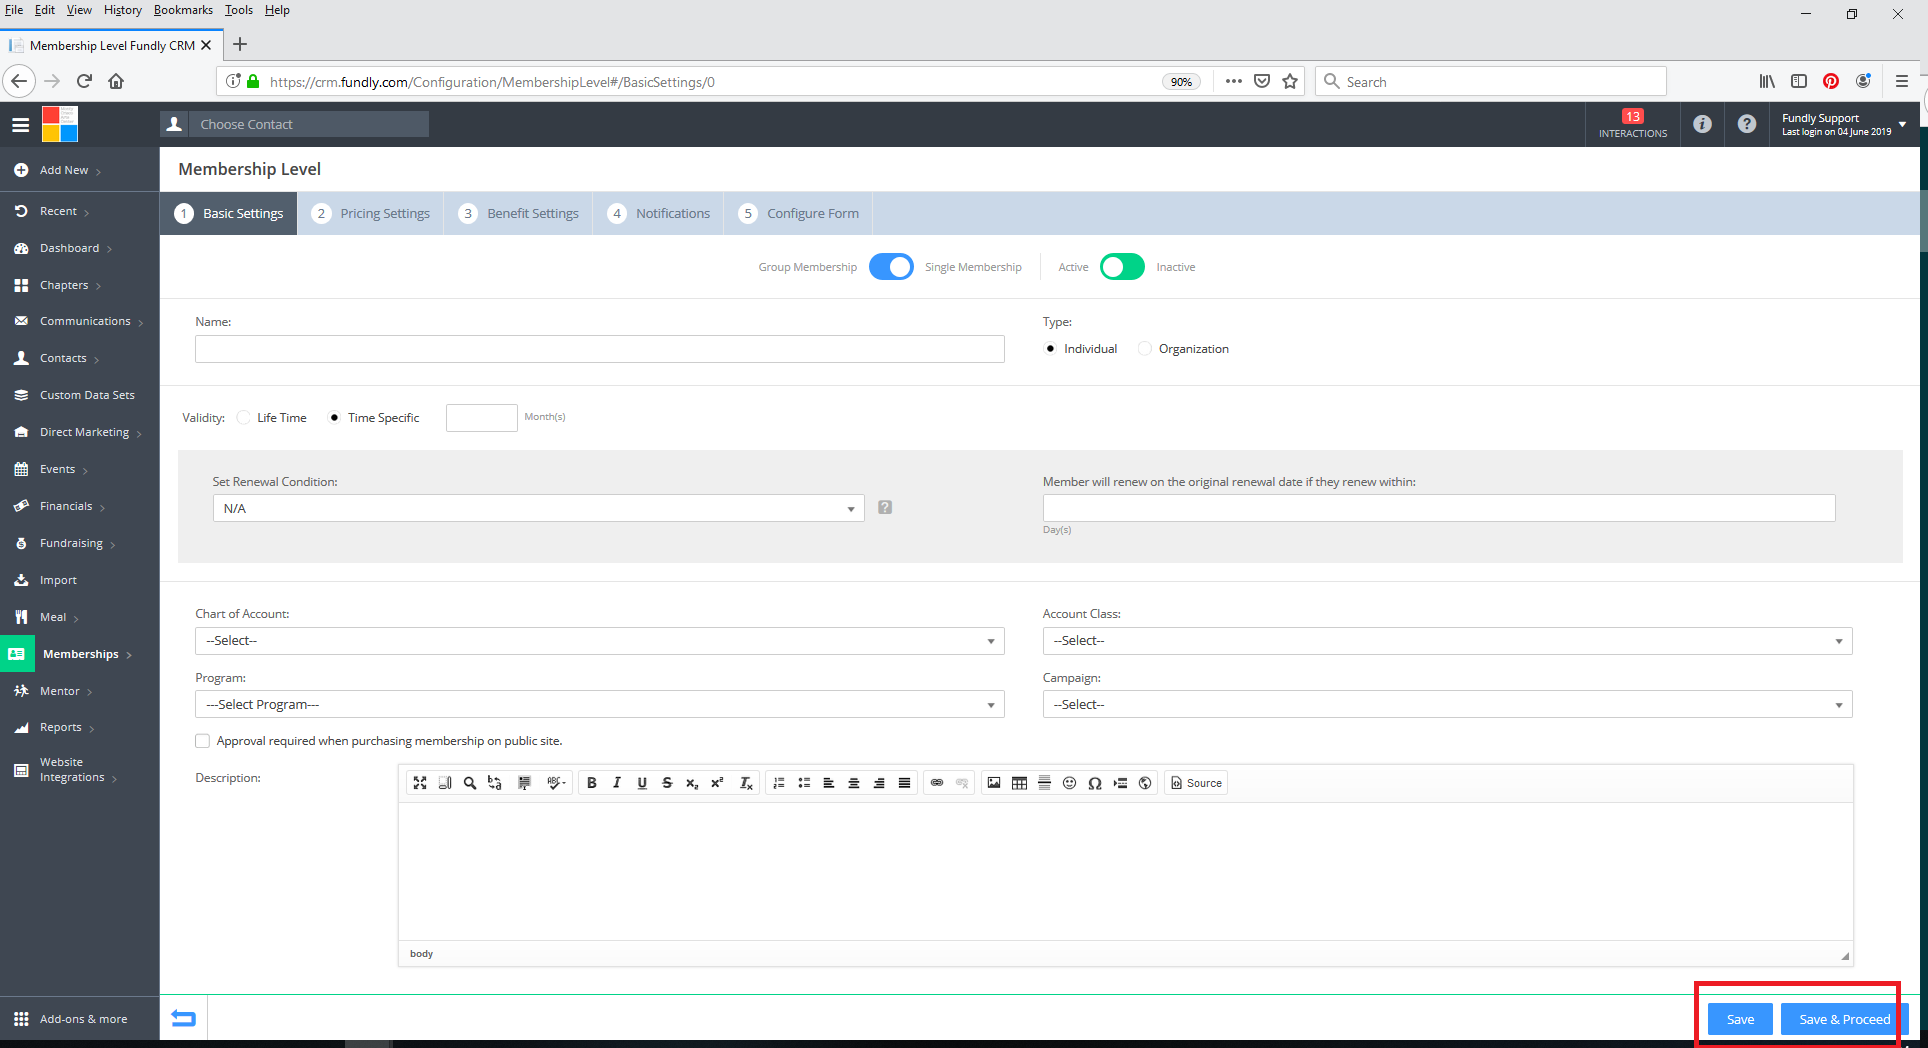
- When you are finished, click the blue Save and Proceed button to move to the next tab or click Save to save a draft and return later.
Comments
0 comments
Article is closed for comments.