Membership Directory Part I: Configure Membership Directory
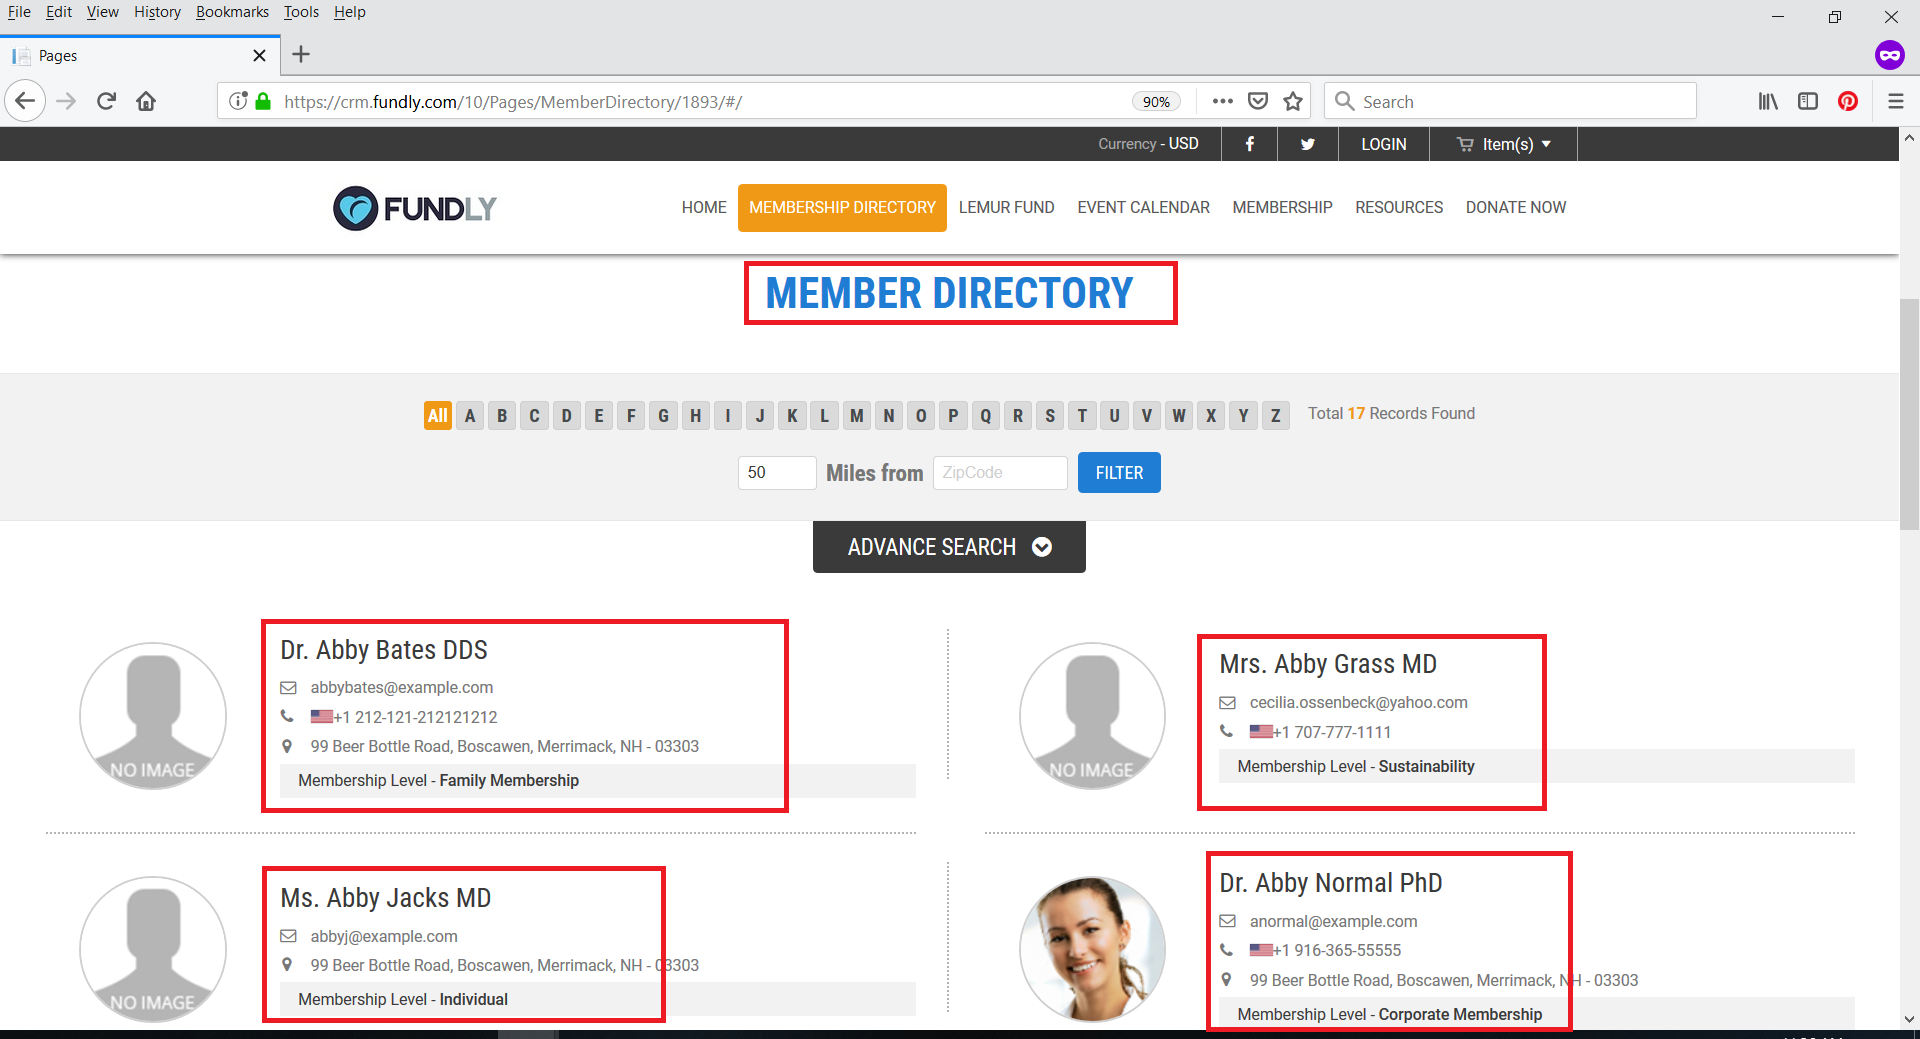
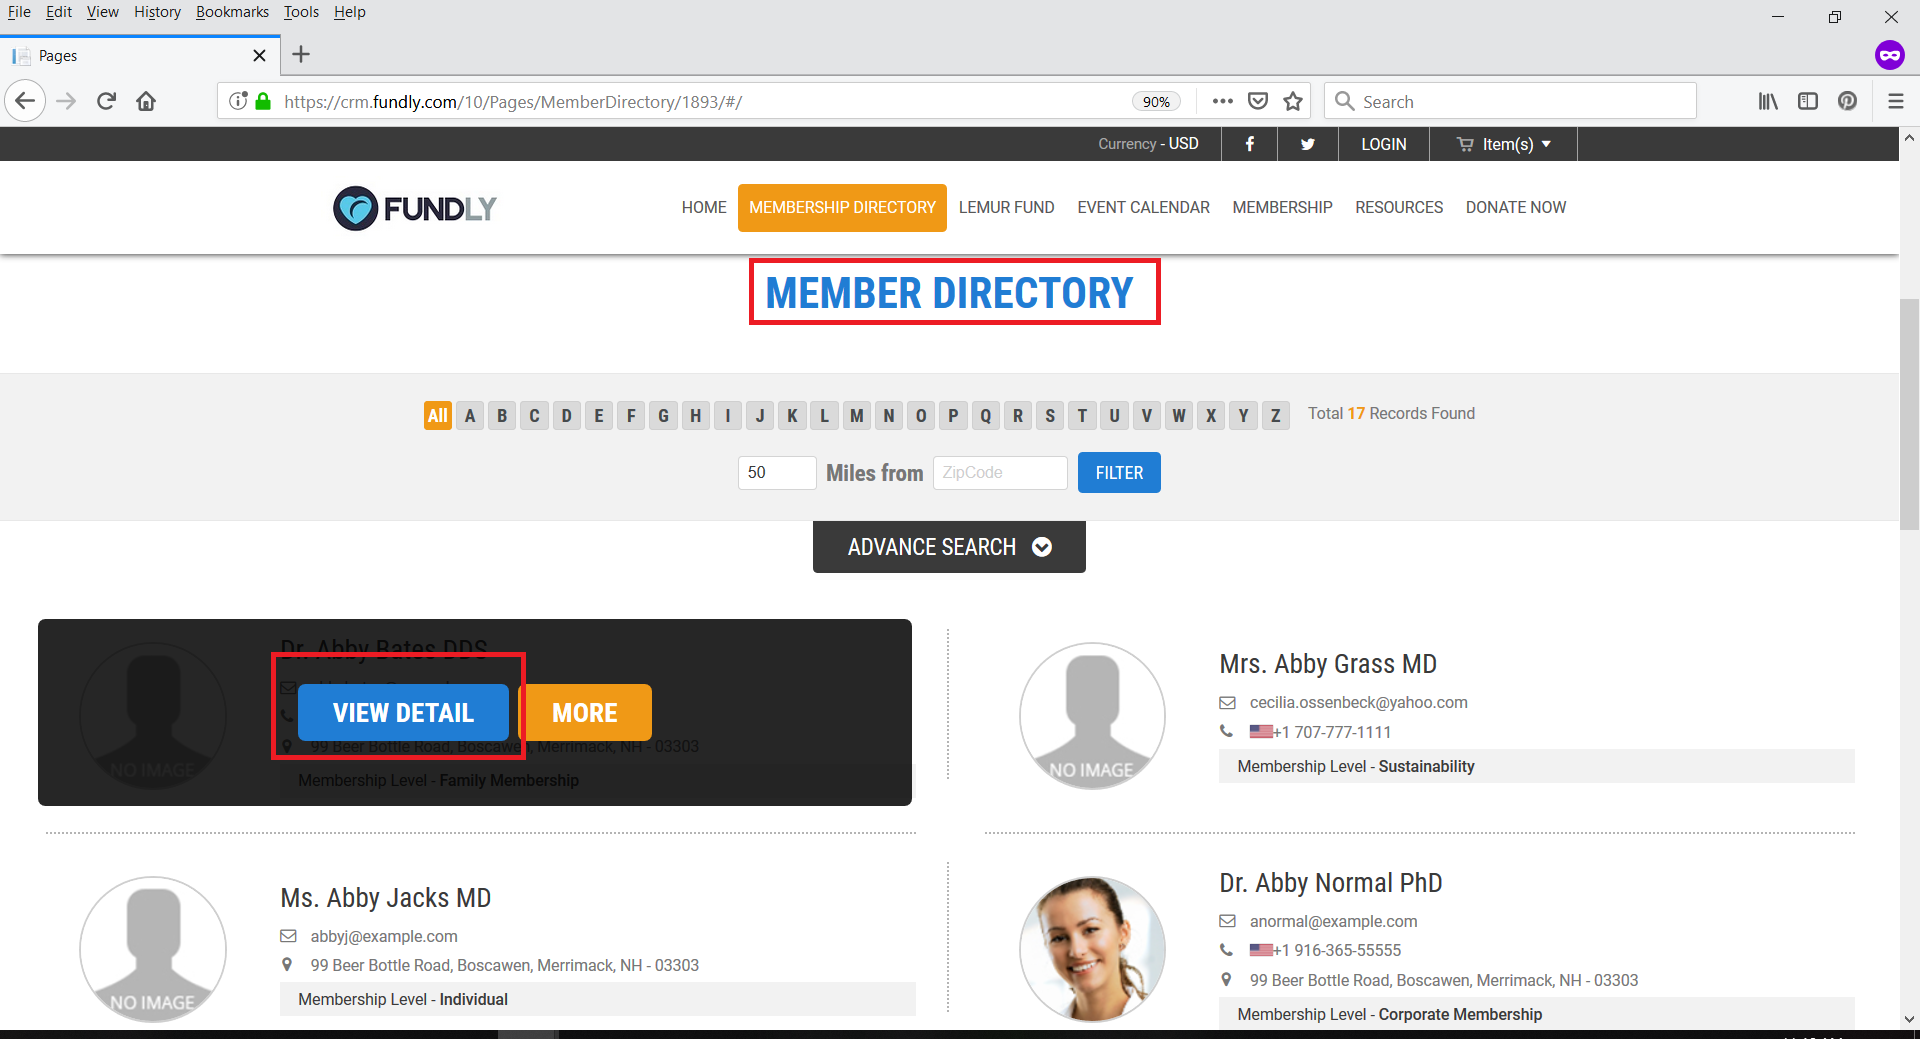
- The Member Directory allows users who have integrated their CRM with their website (via Pages or WordPress Plug-In) to publish the names and selected information about their members to their website in a searchable directory [please note: at this time, website integration via Morweb does not support the membership directory]. The directory can be used for networking purposes or to help potential customers/clients find members of an association (doctors, lawyers, mediators, trainers, consultants, etc.).
- To configure the Member Directory, from the Main Menu, click on Memberships to open the membership sub-menu and then on Membership Directory in the Configurations section.
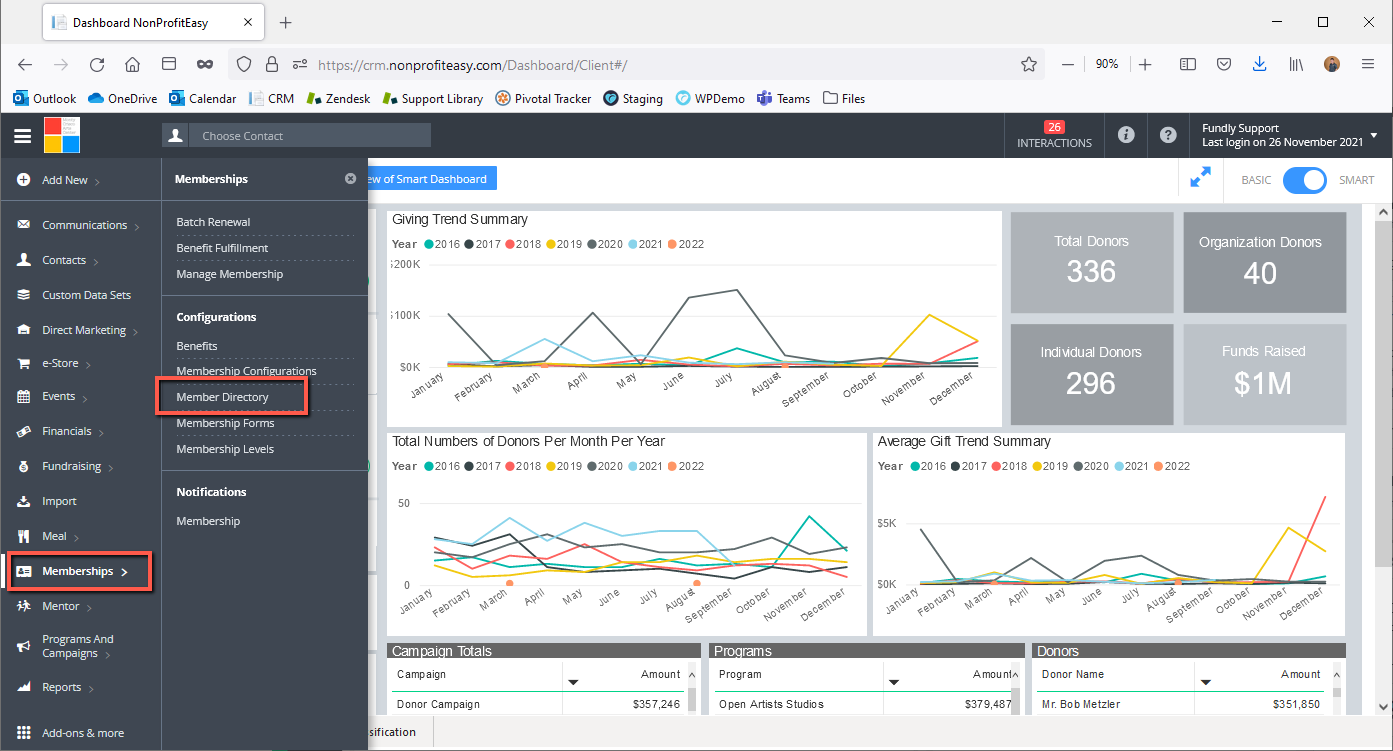
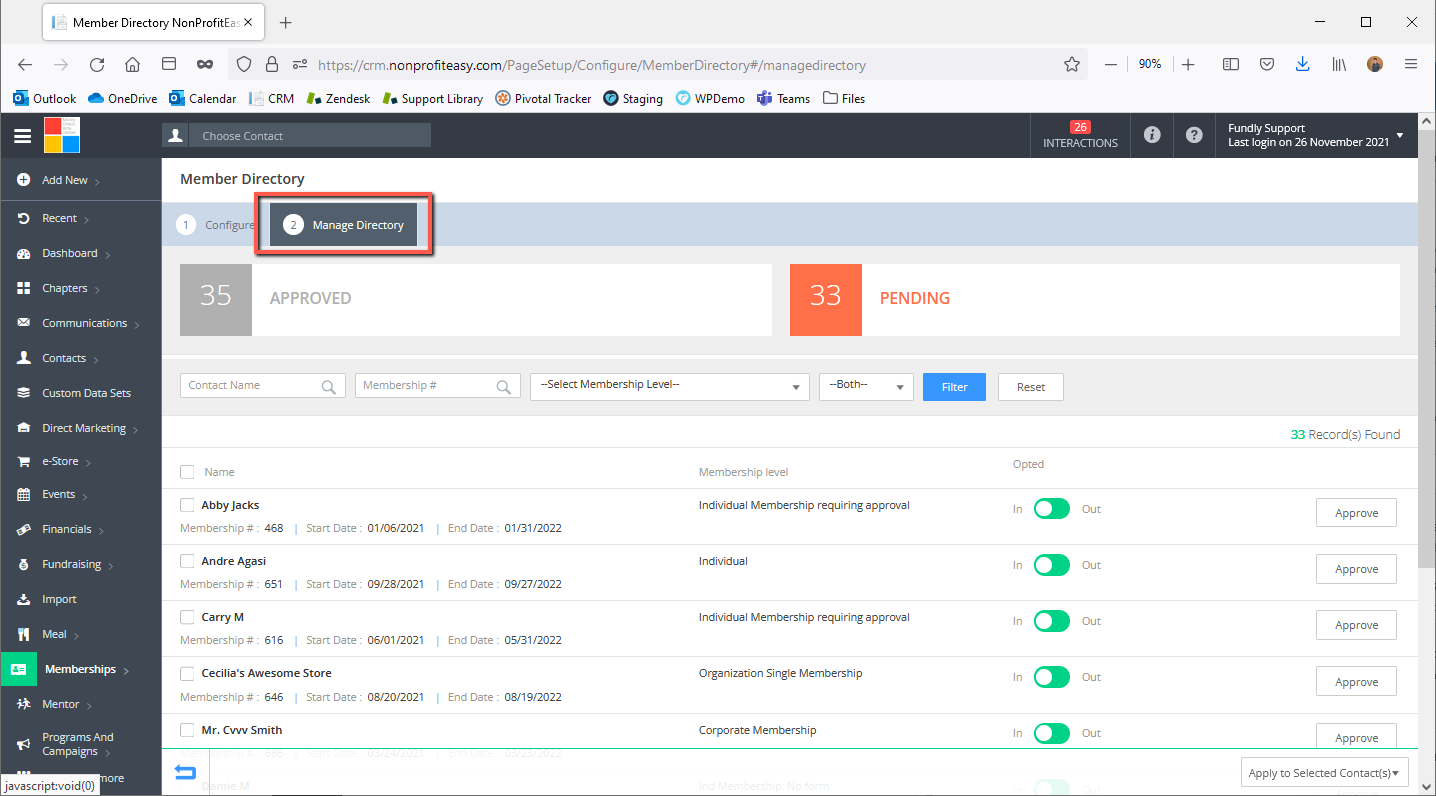
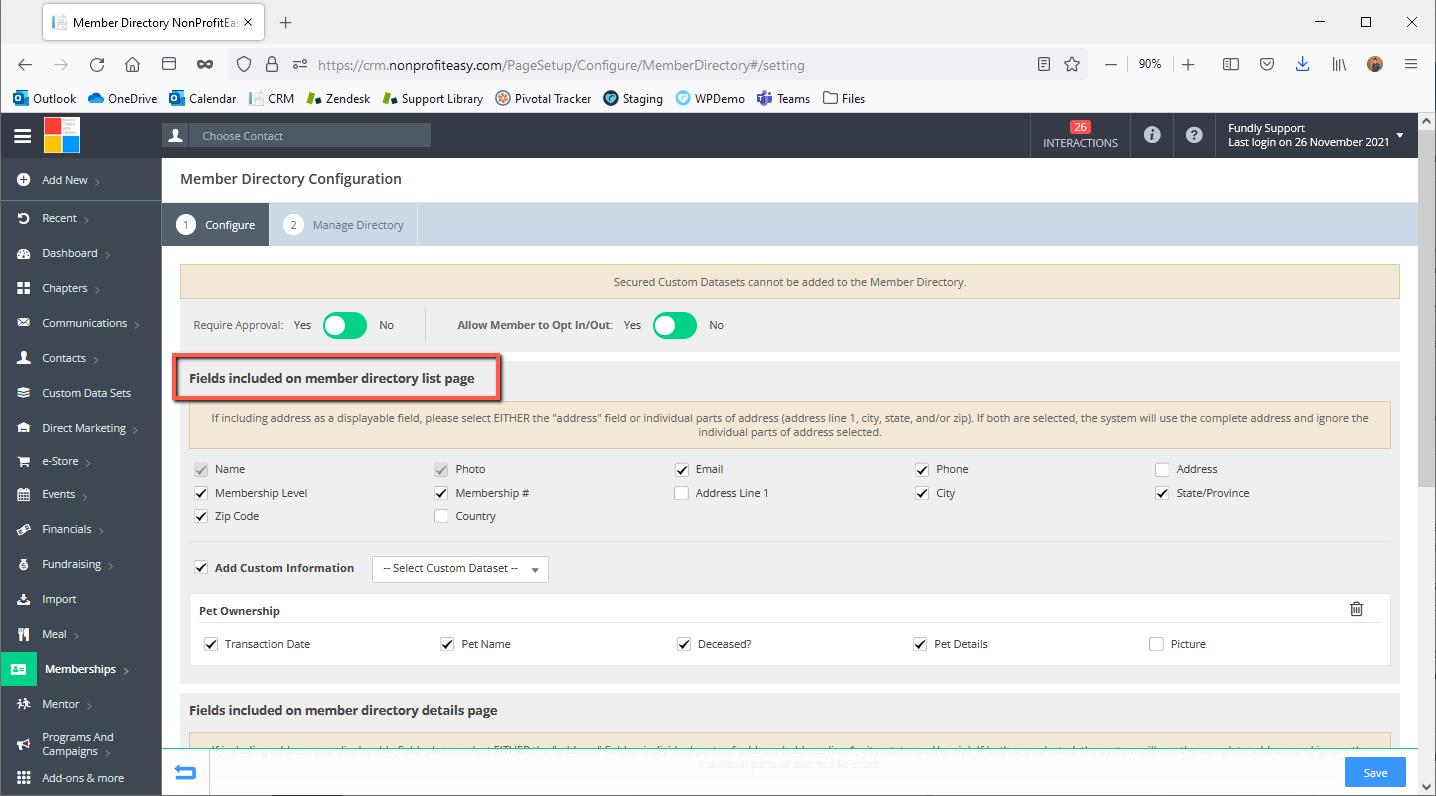
- This will take you to the Membership Directory controls and settings. The Membership Directory area has two tabs: Configure (which controls the settings for your online membership directory) and Manage Directory (which is where you control which members appear in the directory online).
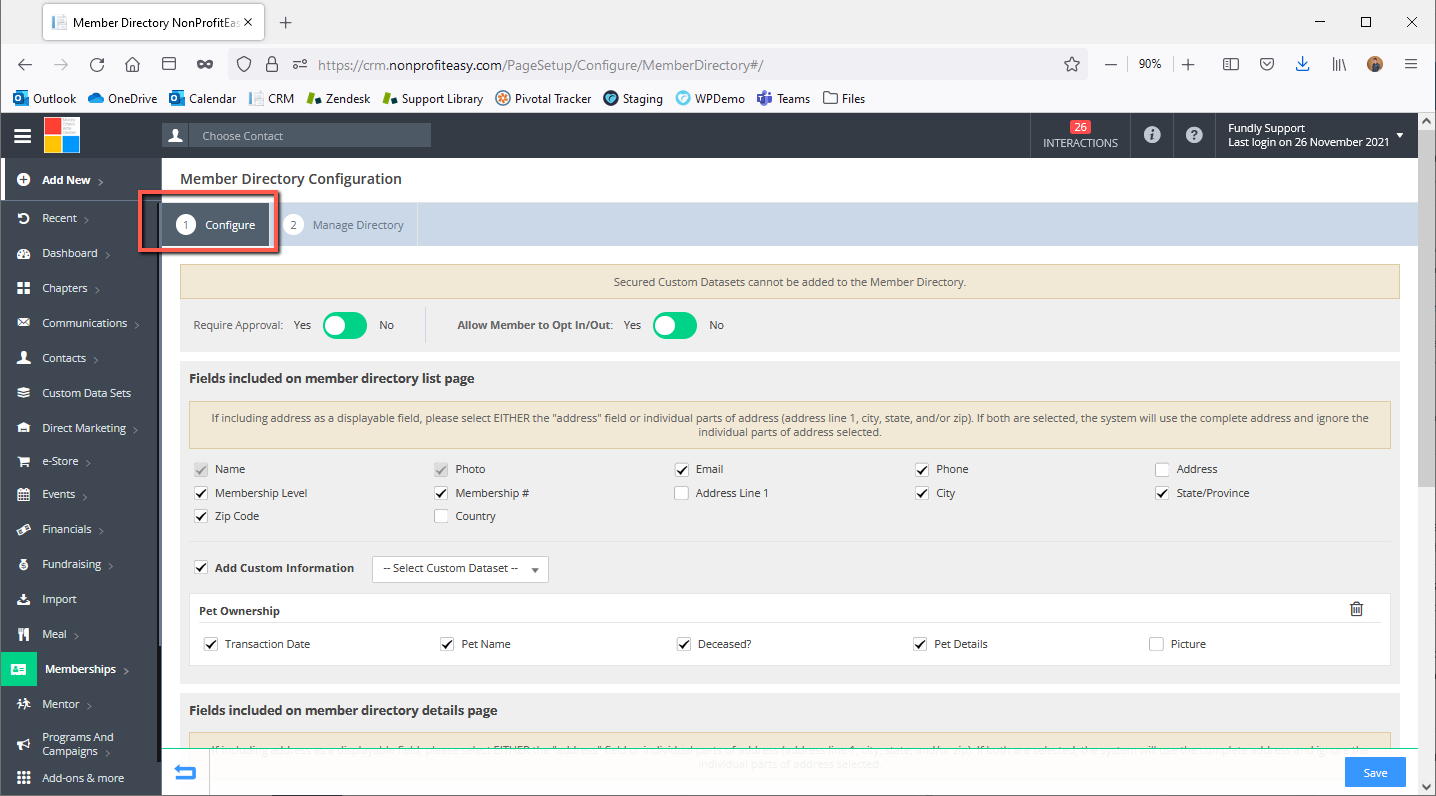
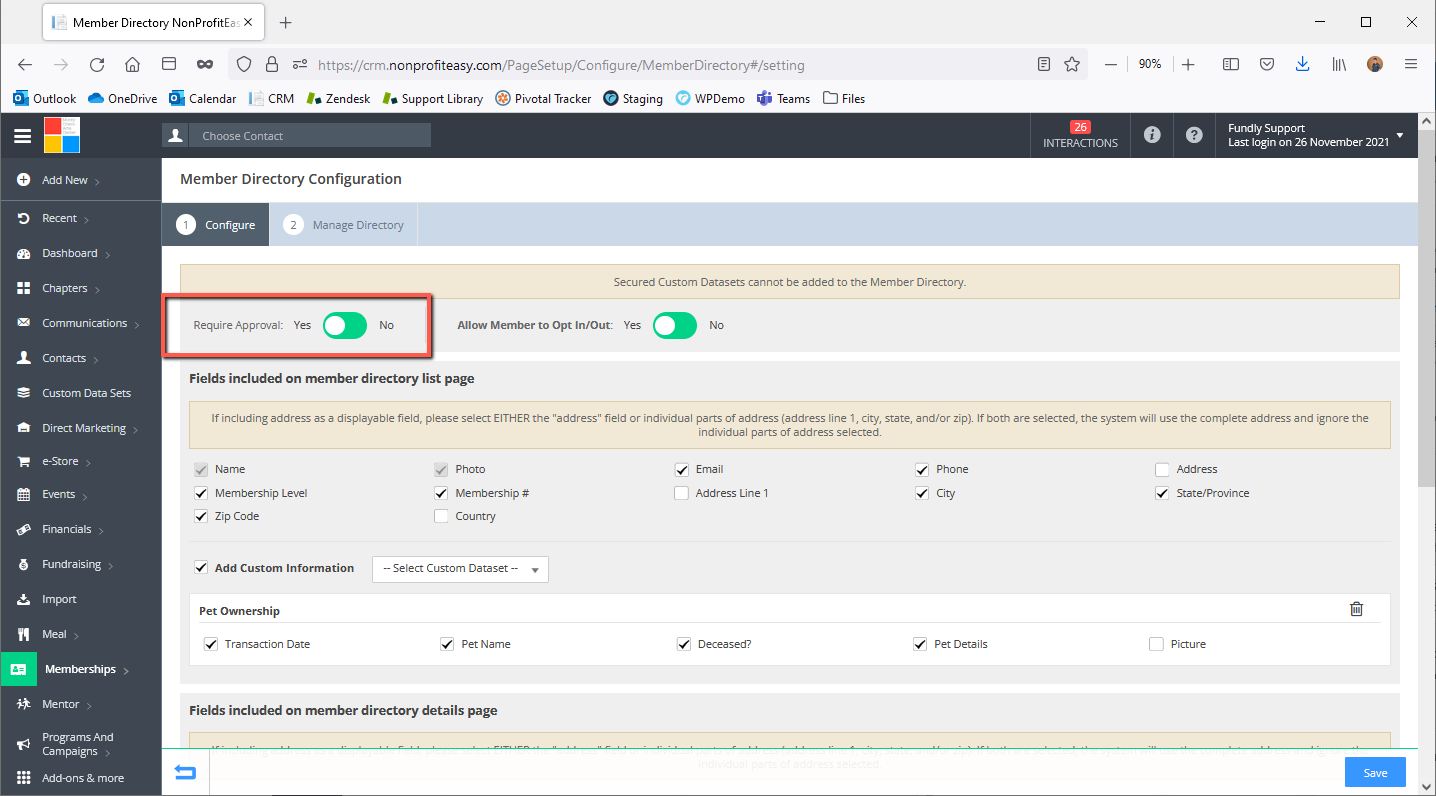
- On the Configure tab, choose whether members require staff approval to appear in the directory (this is different/separate from requiring staff approval for membership, which is set when configuring the membership categories/levels. If a membership requires staff approval, then the member's name will not appear in the Pending or Approved tabs of the Member Directory until the membership has been approved).
- Allow Member to Opt In/Out gives the member the ability to control whether or not their name appears in the directory. You may require that all members appear in the directory (giving them no option to opt out). If you set this to Yes, then when members sign up for a new membership or renew, they will be given an option to be included in the online directory.


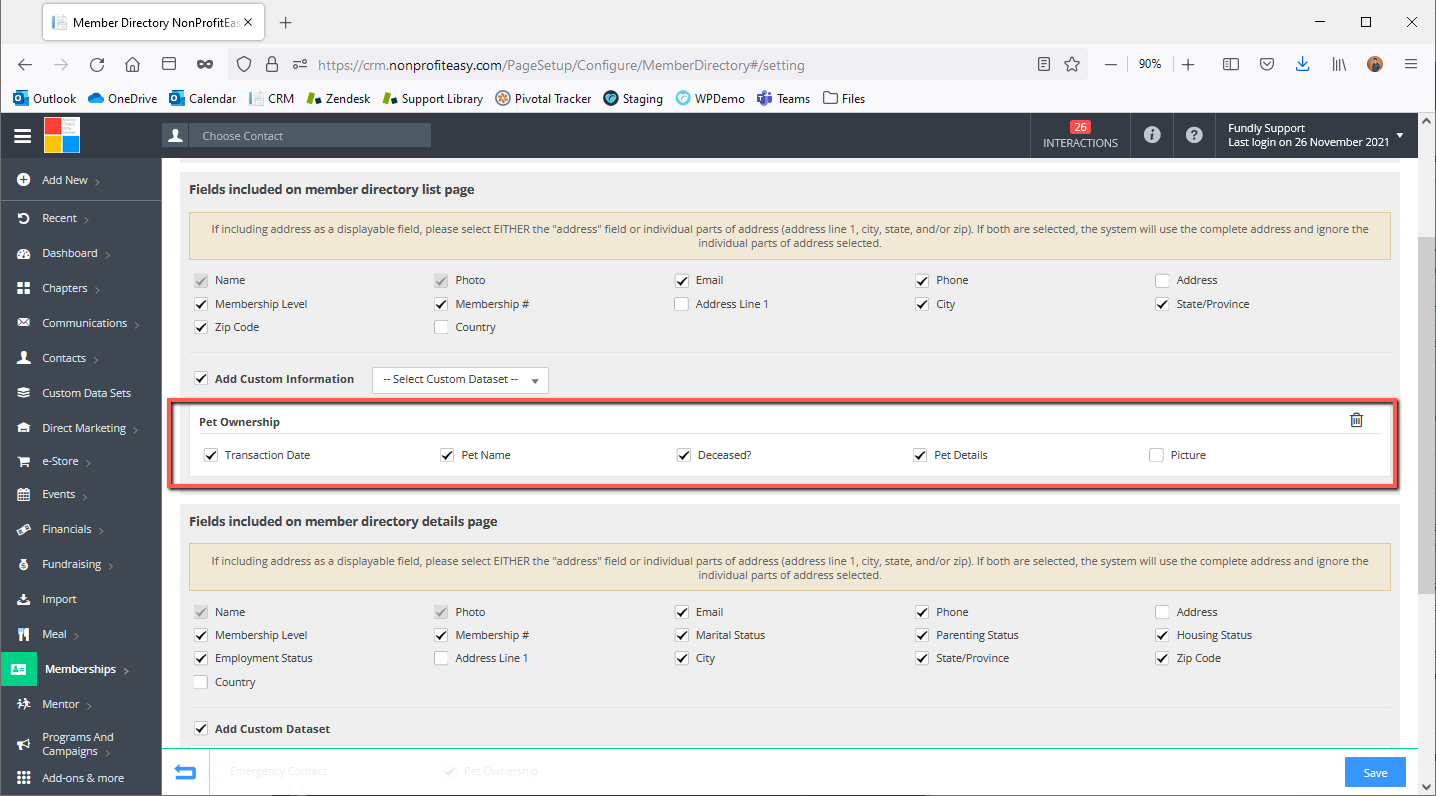
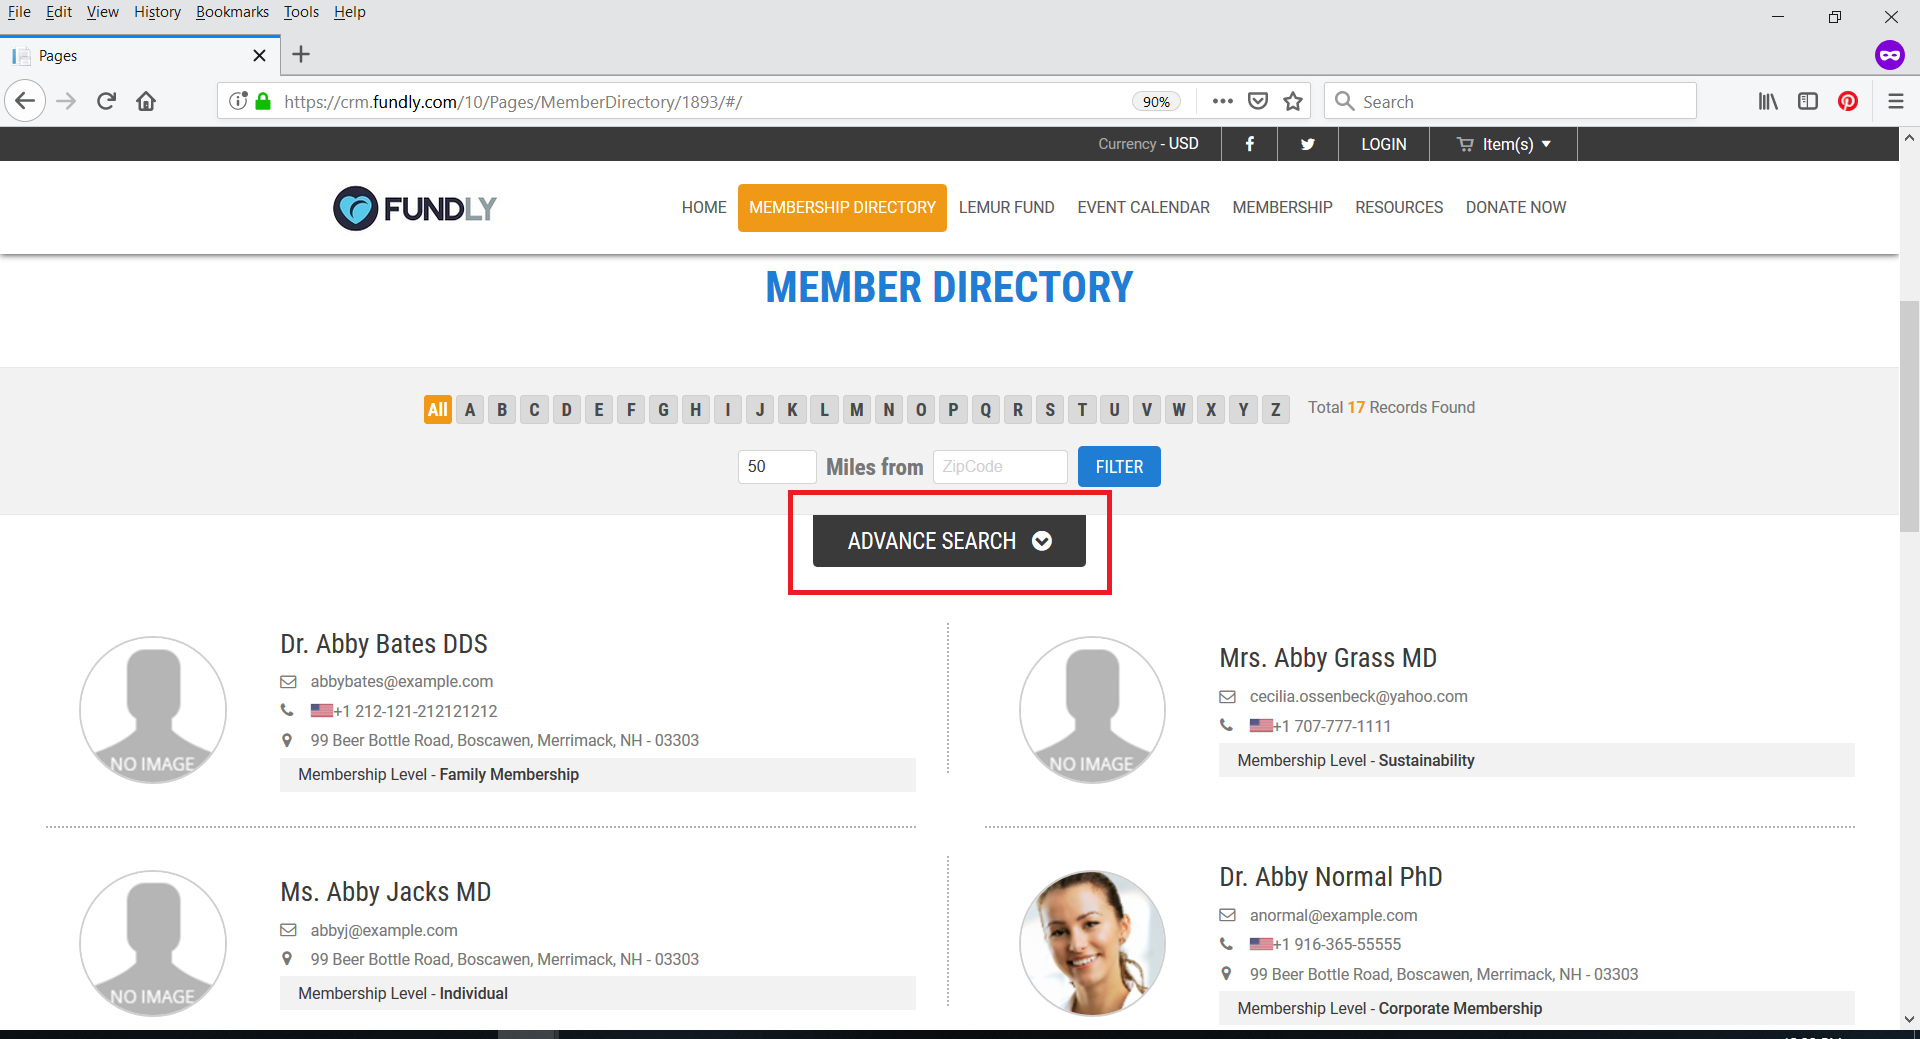
- The Fields to Include on Member Directory List Page section allows you to select which information appears on the main directory index page (the page users arrive at when they click Membership Directory on your website) under the entry for each person/member.
- The Add Custom Information field in this section (the Fields Included on Member Directory List Page section) allows you to add the fields from a custom data set to the Membership Directory index page. The custom data set information appears online in the member directory page when the user hovers over a particular contact and clicks the More button. This will open a pop up window with the custom data set information.
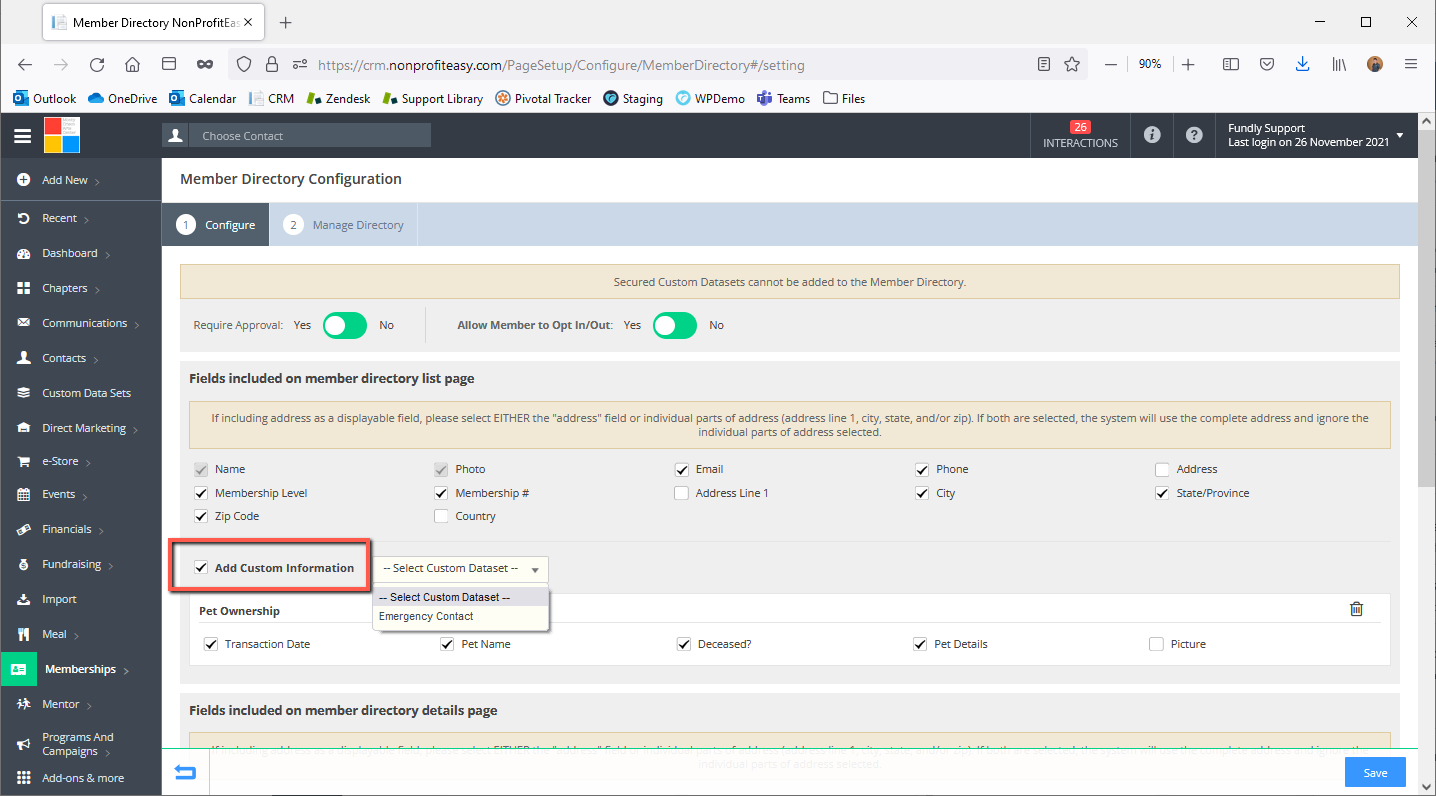


- Add custom data set fields to this section of the directory, start by clicking the Add Custom Information drop down menu and selecting one or more custom data sets. Please Note: only custom data sets that are affiliated with the “member” contact type will be available to select here (keep in mind that if you are using WP Plug-Ins, associating the member contact type to a custom data set makes it also show up/available contacts' public profile area online as well).
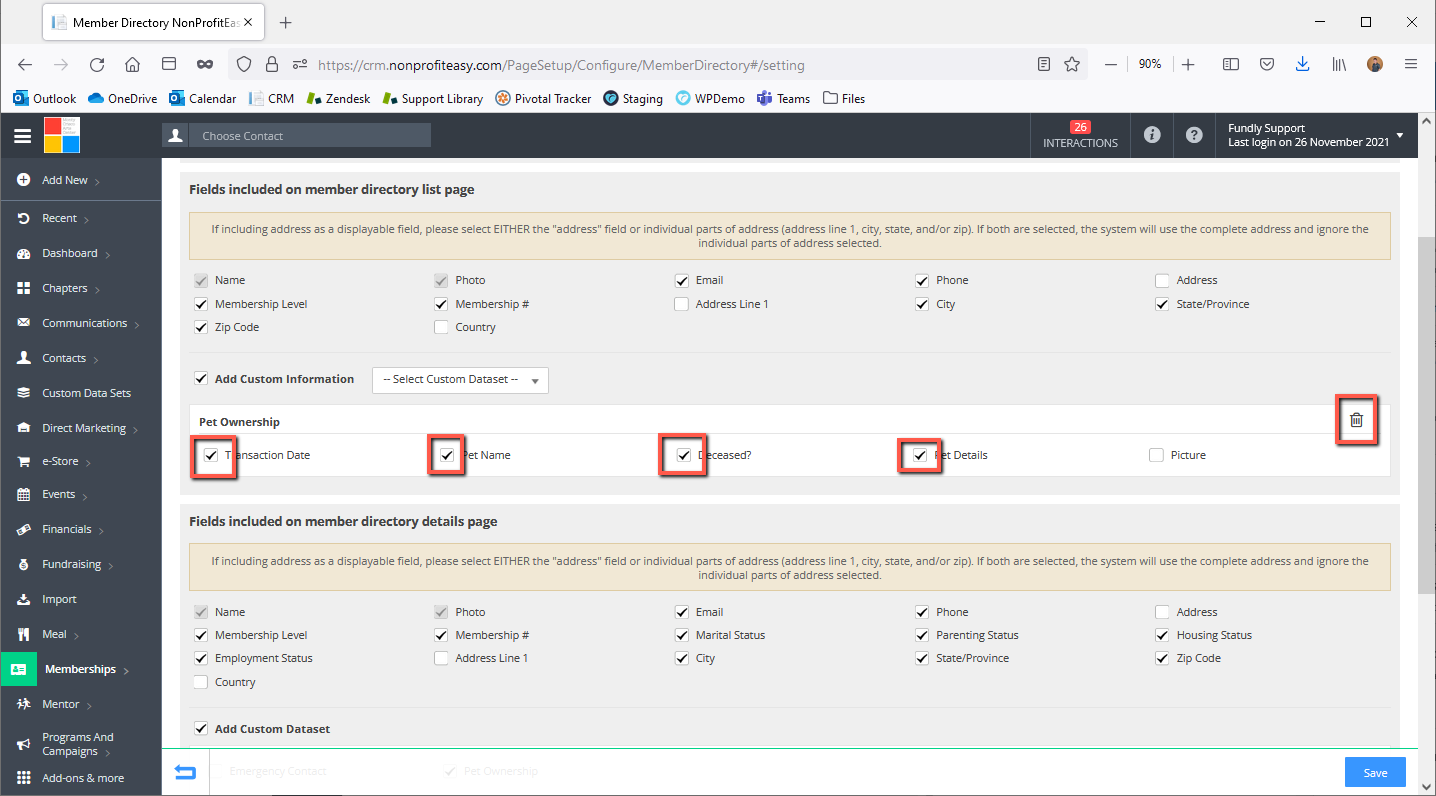
- After selecting a custom data set, it will then appear as an additional section in the member directory list page section. You can then check the box next to each field that you want to appear in the directory list page.
- If you want to remove any custom data set fields from this section, you can simply uncheck the box next to the field name. If you want to remove the entire custom data set from your directory, you can click the trash can to the right of the custom dataset section to remove it entirely from that section of the directory (trashcanning a custom data set will not delete it from your system or remove any of the data stored in it. Please Note: if the "Member" contact type is still associated to your custom data set, then the fields will still appear online in the Public Profile (if you are using our WP Membership Plug-In to integrate your website with CRM). If you don't want these custom data set fields to show up in the public profile area, you will need to also remove the Member contact type from the custom data set.
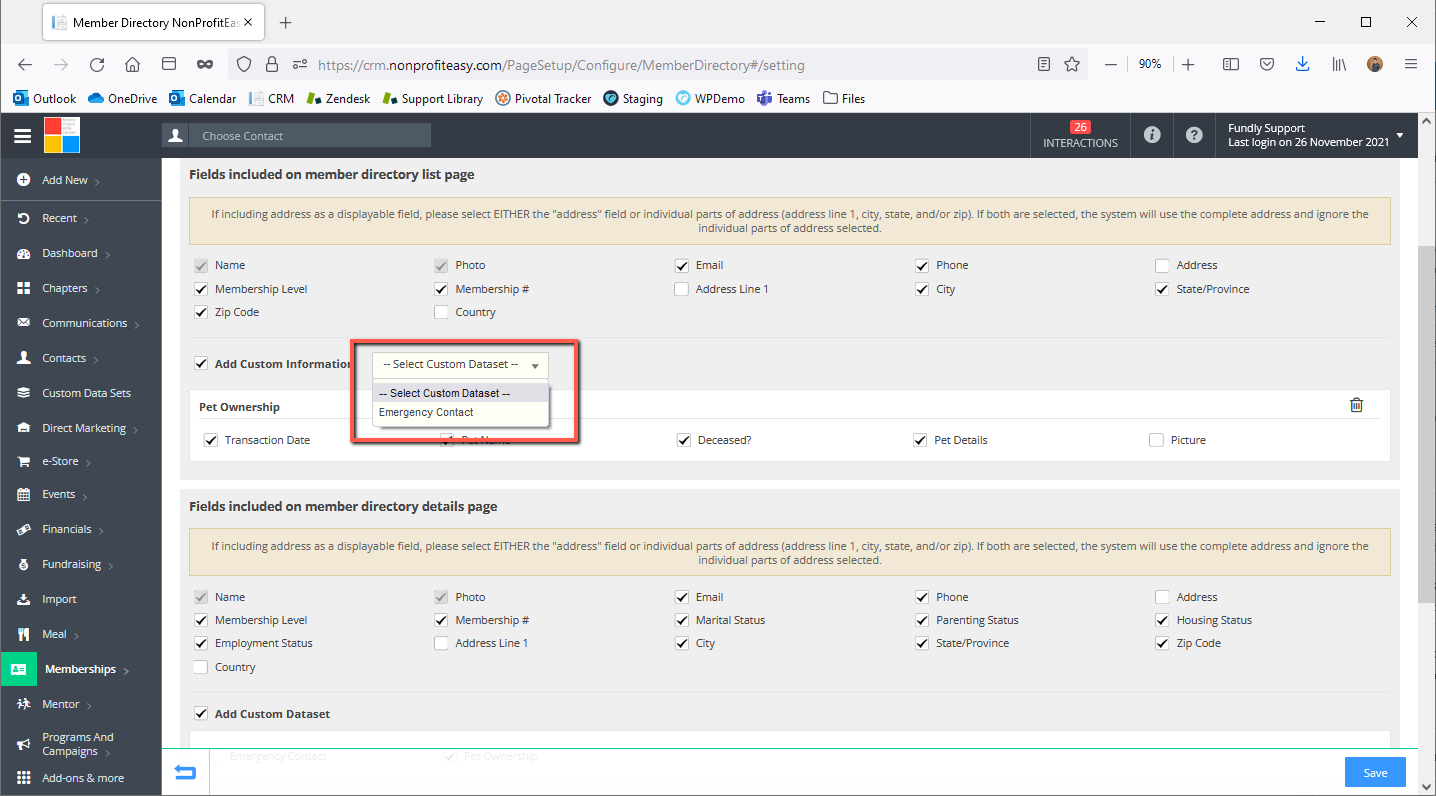
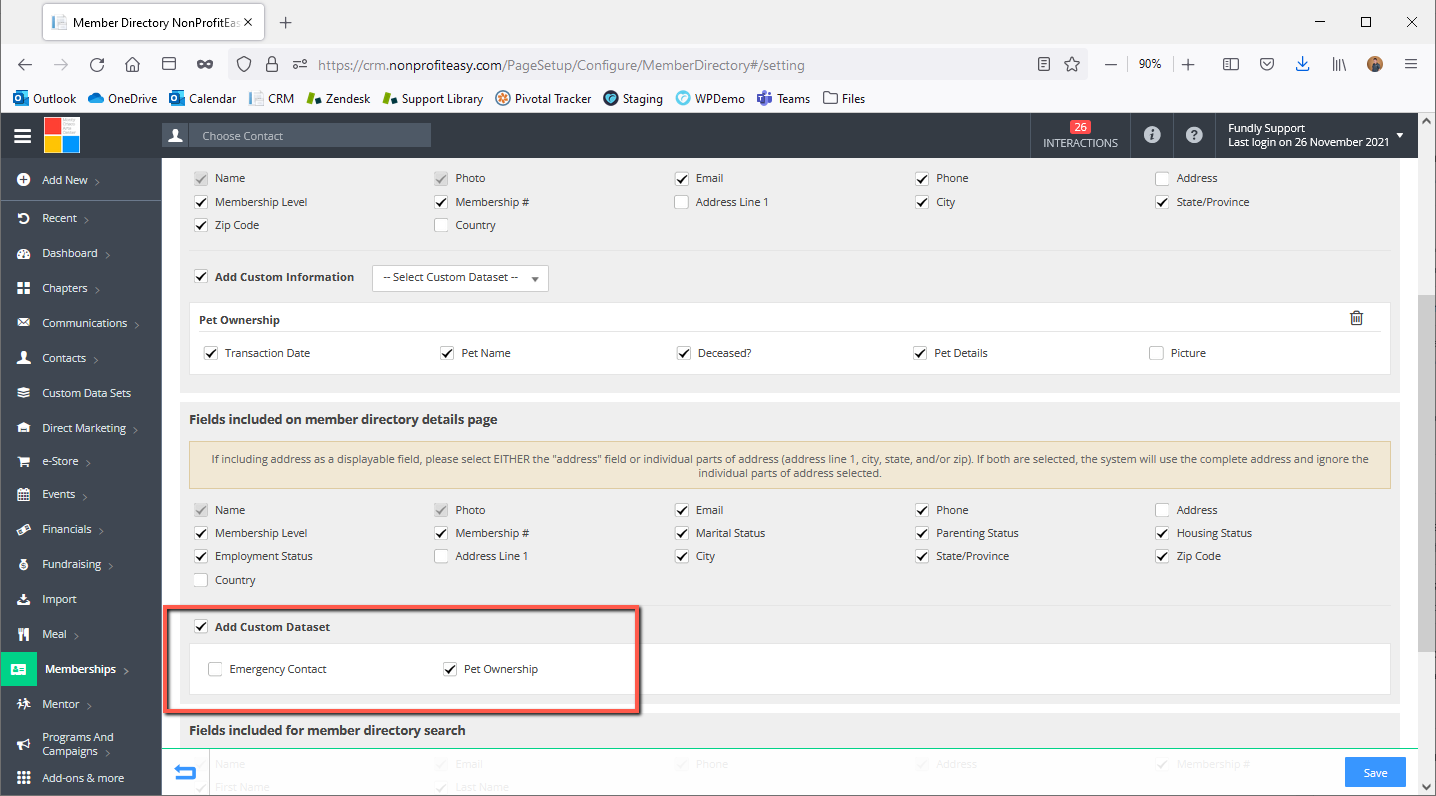
- Fields Included on Member Directory Details Page allows you to select which fields appear on the individual member’s detail page (the page reached when the user hovers over the member's name in the main directory page and clicks More Details).
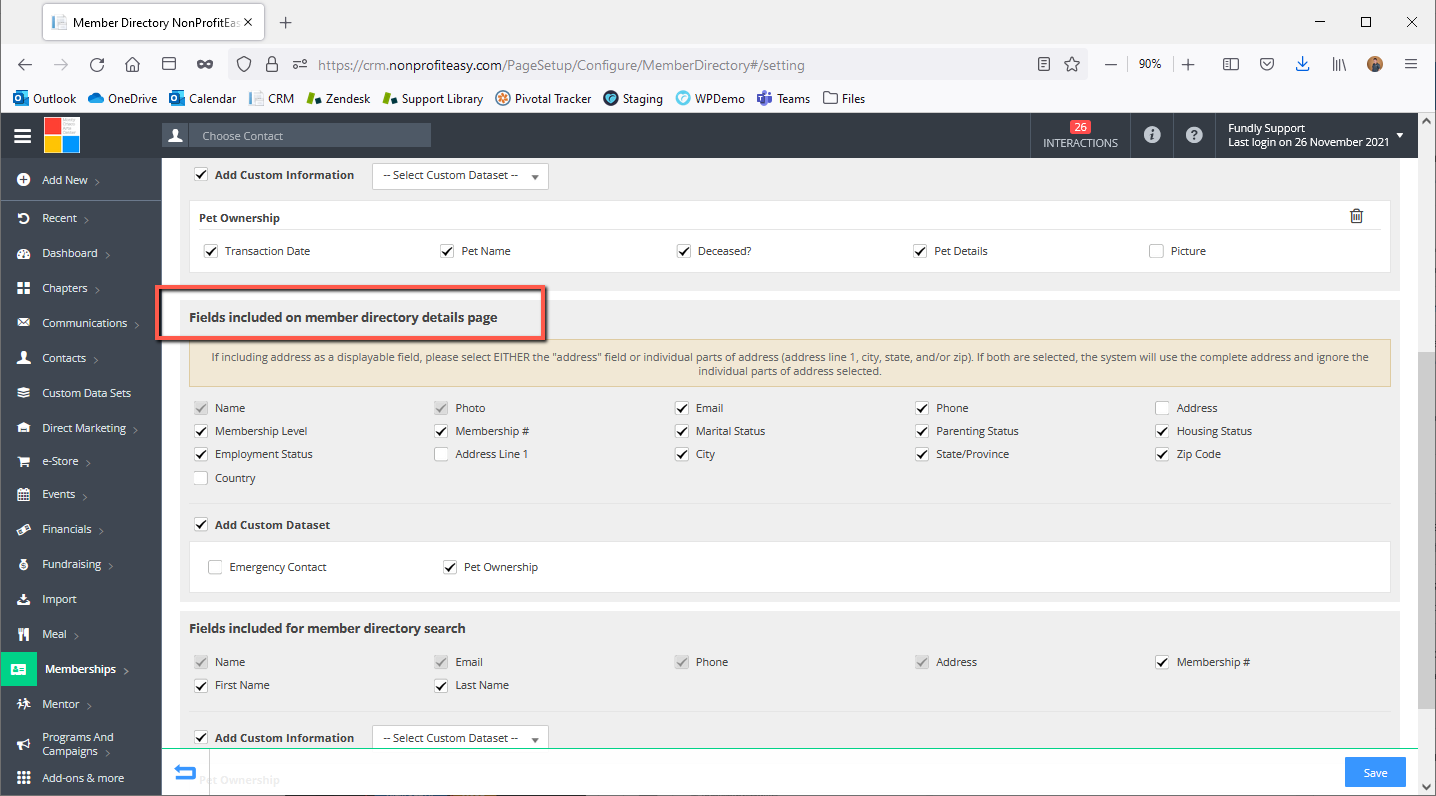
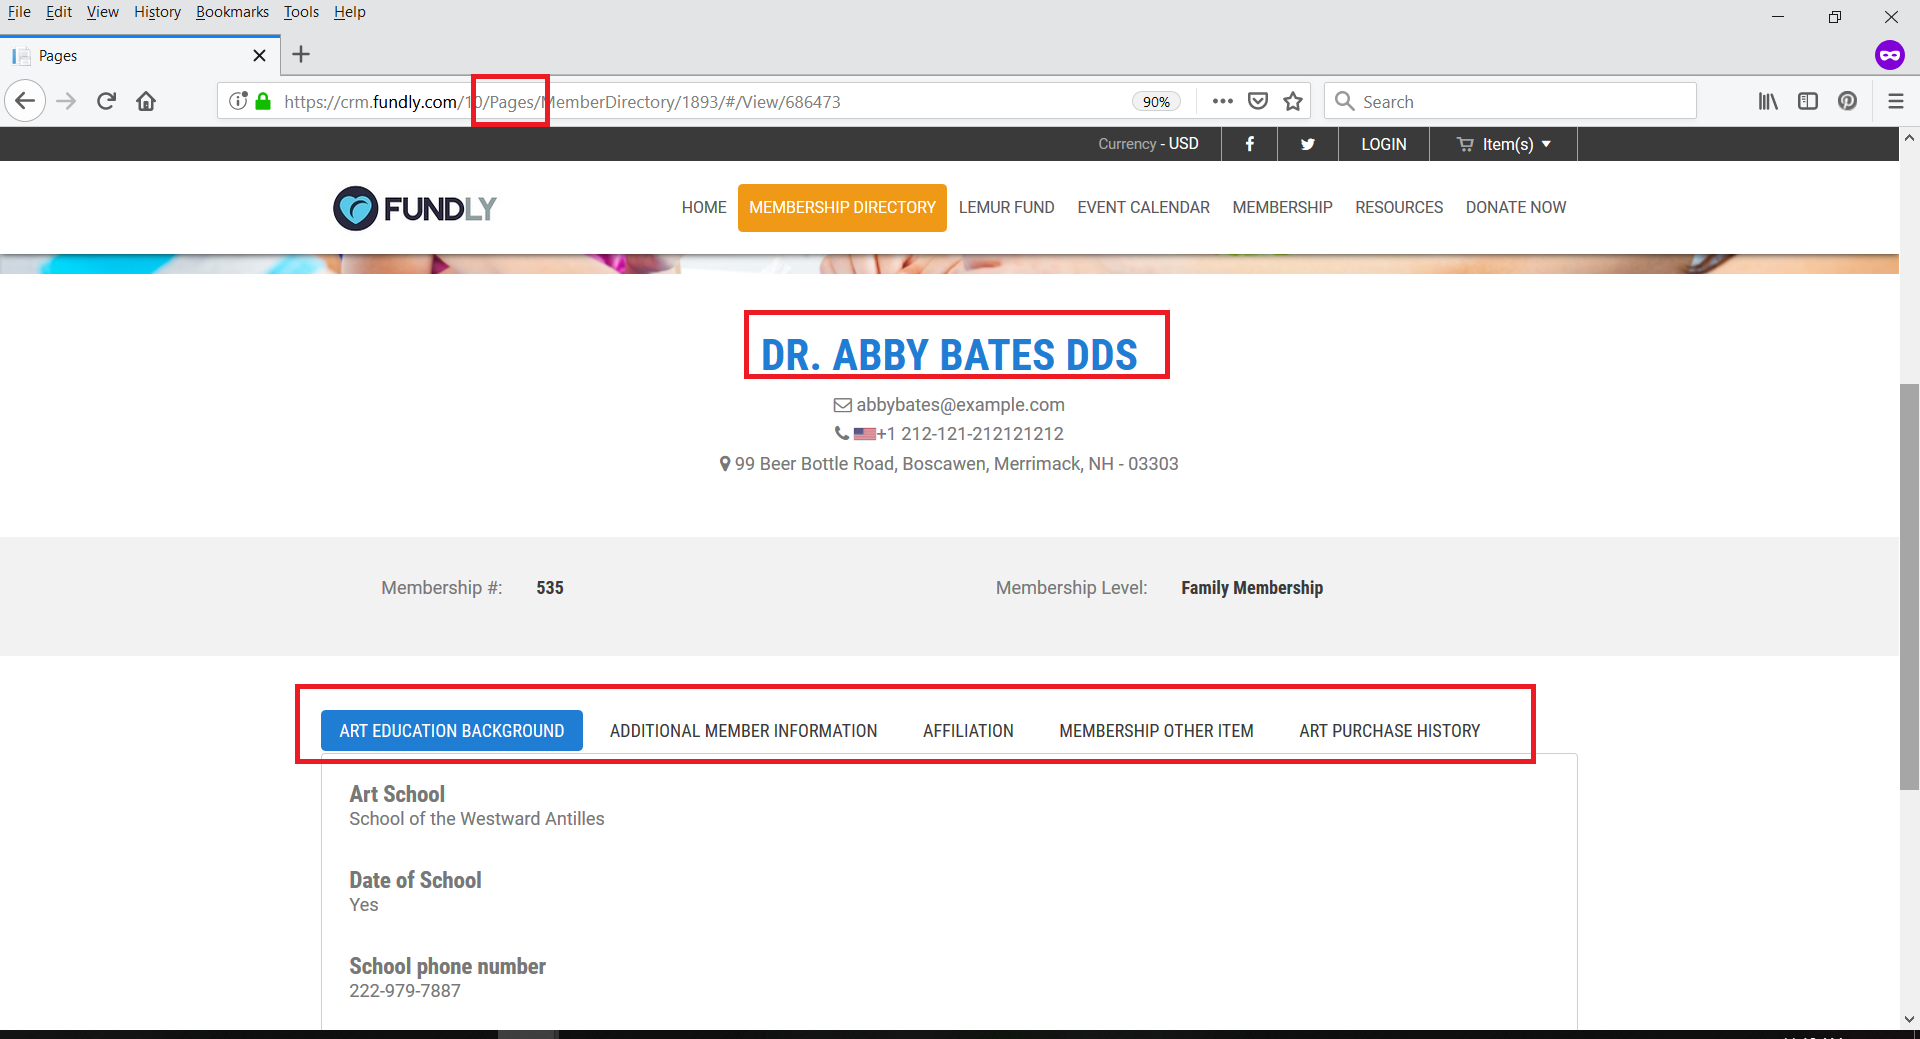
- In this section, as with the member directory list page configurations above, check the box next to the fields you want to appear on each member's detail page. And, as above, you can select custom data set fields that will appear on the member's detail page. However, unlike above, a) all custom data sets associated to the Member contact type will automatically show on the screen (rather than in a drop down menu), and b) you can only select the entire data set; you will not be able to select individual fields within the custom data set. All fields within the custom data set will be available on the member detail page. As such, each custom data set does not get its own section in the Fields Included on Member Directory Details Page section of the directory configurations page. Instead, they are simply listed together in the custom dataset section.
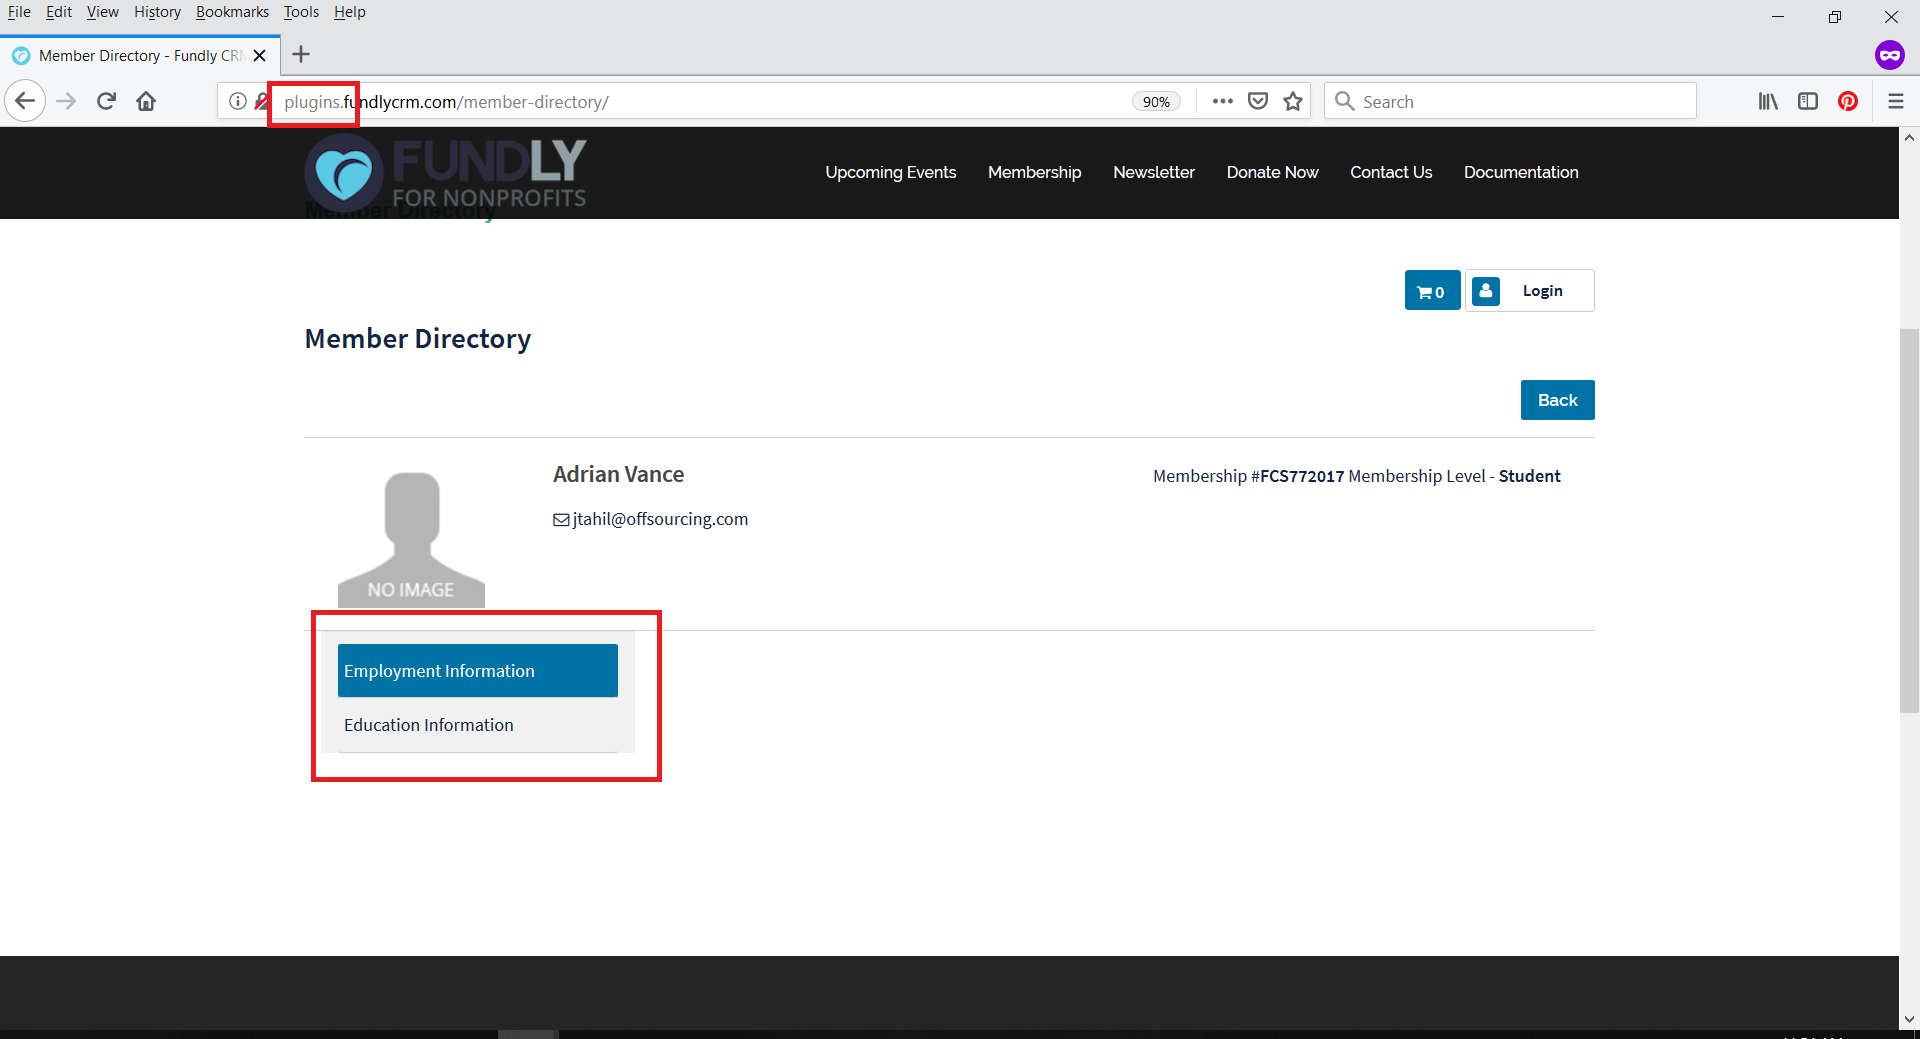
- The custom data sets selected to be included in the member details page will appear as horizontal tabs at the top of the member's detail page if you are using Pages to integration your website with CRM. If you are using WP Plug-ins, the custom data sets will appear as a vertical list on the left-hand side of the screen.
- The Fields Included for Member Directory Search section allows you to configure which fields users can search on within the Advanced Search section of your member directory search screen on your website.
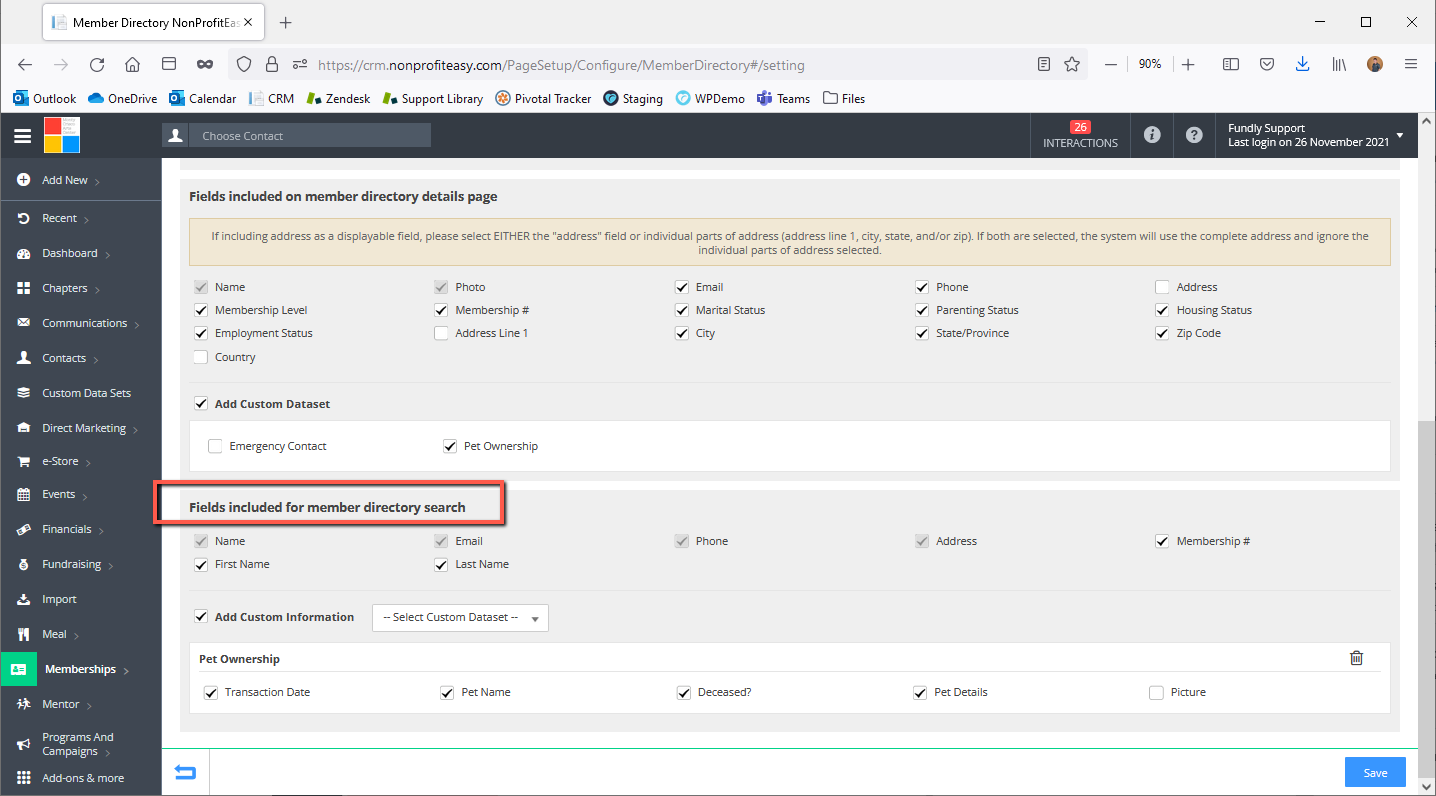
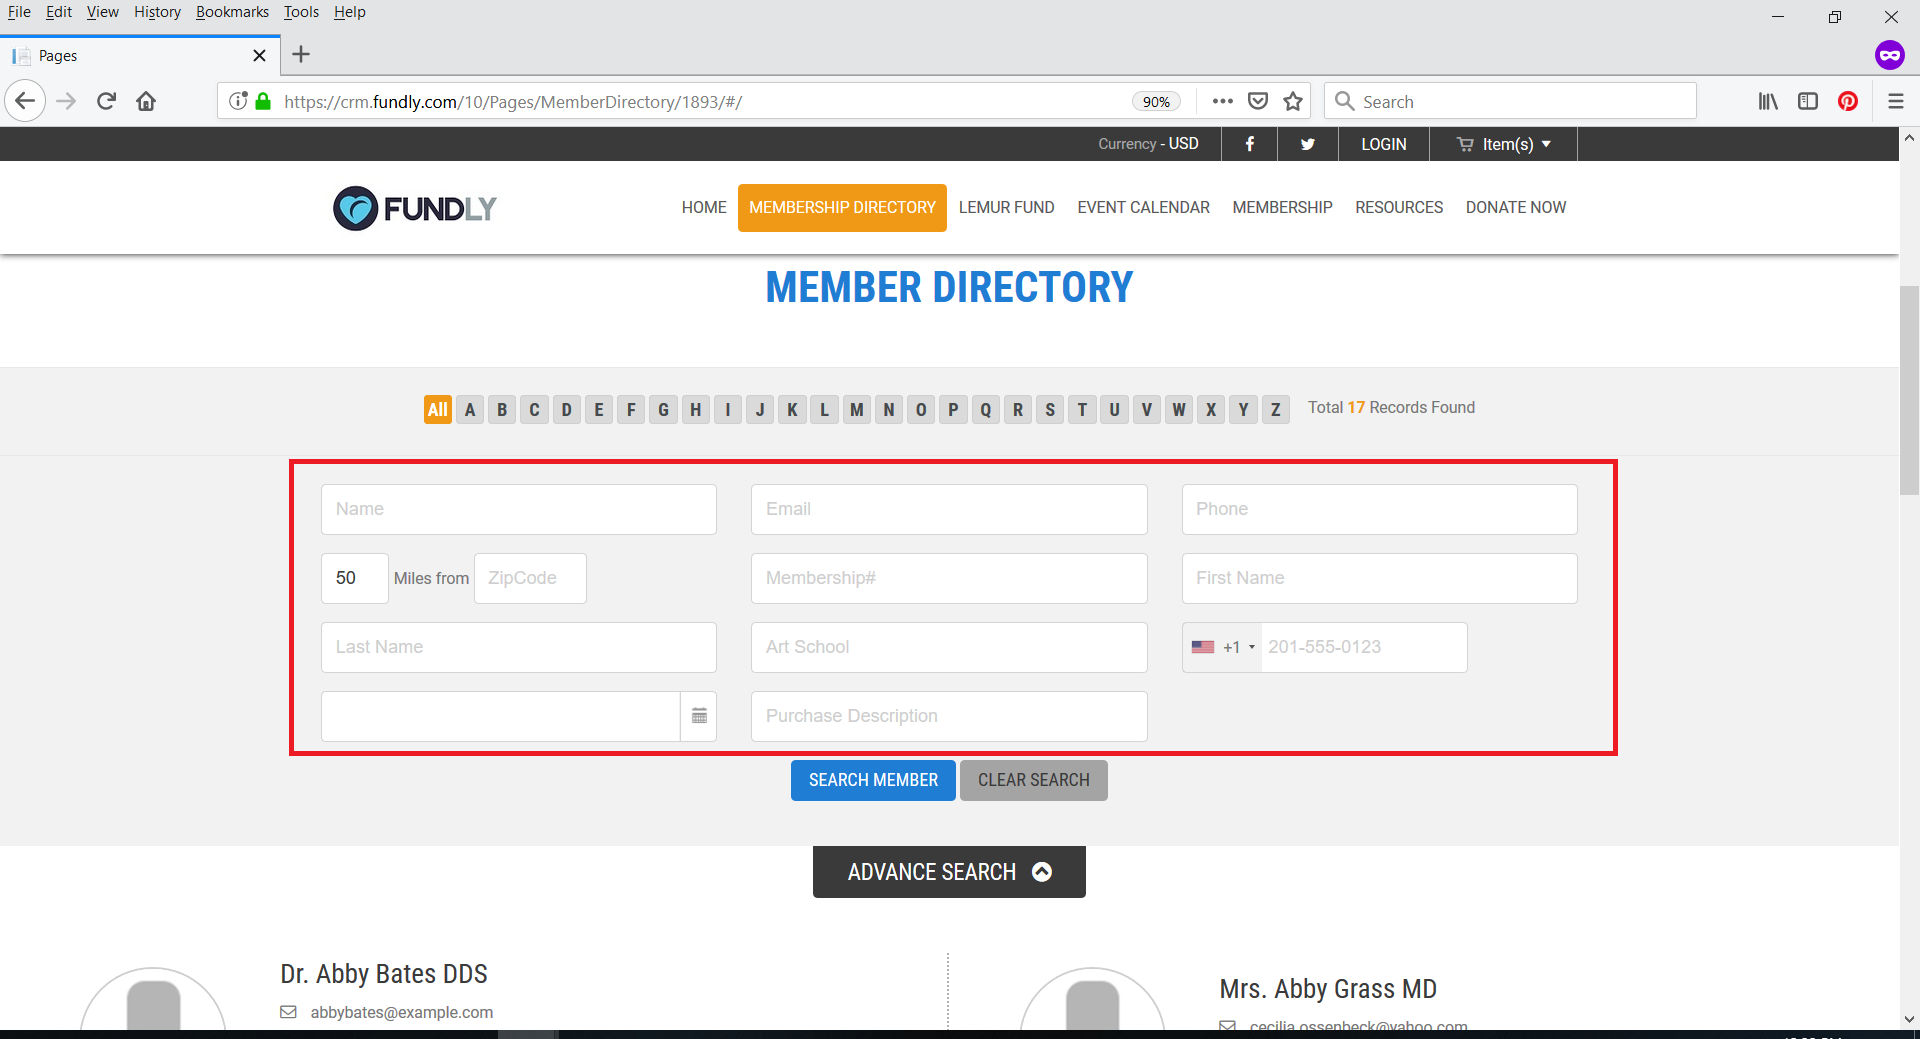
- As with the Member Directory List Page section (the 1st section), you can add custom data set fields to be included on this page by selecting the custom data set(s) from the drop down. Each custom data set selected will become its own sub-section under the Fields Included For Member Directory Search section and then you can select which specific fields to include by checking the box beside each one. As with the other sections, only custom data sets associated with the contact type "Member" can be added into the directory search page.
- When you have finished configuring the information that will display on the Member Directory page, click the blue Save button in the lower right hand corner.

Comments
0 comments
Article is closed for comments.