Configure Delivery Planner
- The Delivery Planner allows the user to configure delivery routes for each meal delivery date and assign a delivery driver/Delivery Angel for each date.
- In order to configure the Delivery Planner for any particular date:
- there must be at least one meal client scheduled to receive meals on the date (the delivery planner date is between the client’s scheduled start and scheduled end dates of service and the client has not indicated they wish to skip meal delivery on the date) (see this tutorial on managing client records)
- One or more Delivery Angels must have been added to the Delivery Angel volunteer opportunity in Connect (see this tutorial on managing delivery angels)
- Delivery Angel(s) must be scheduled to volunteer on the delivery date
- The Meal Planner must be completed for client for the delivery date (see this tutorial on completing meal planning).
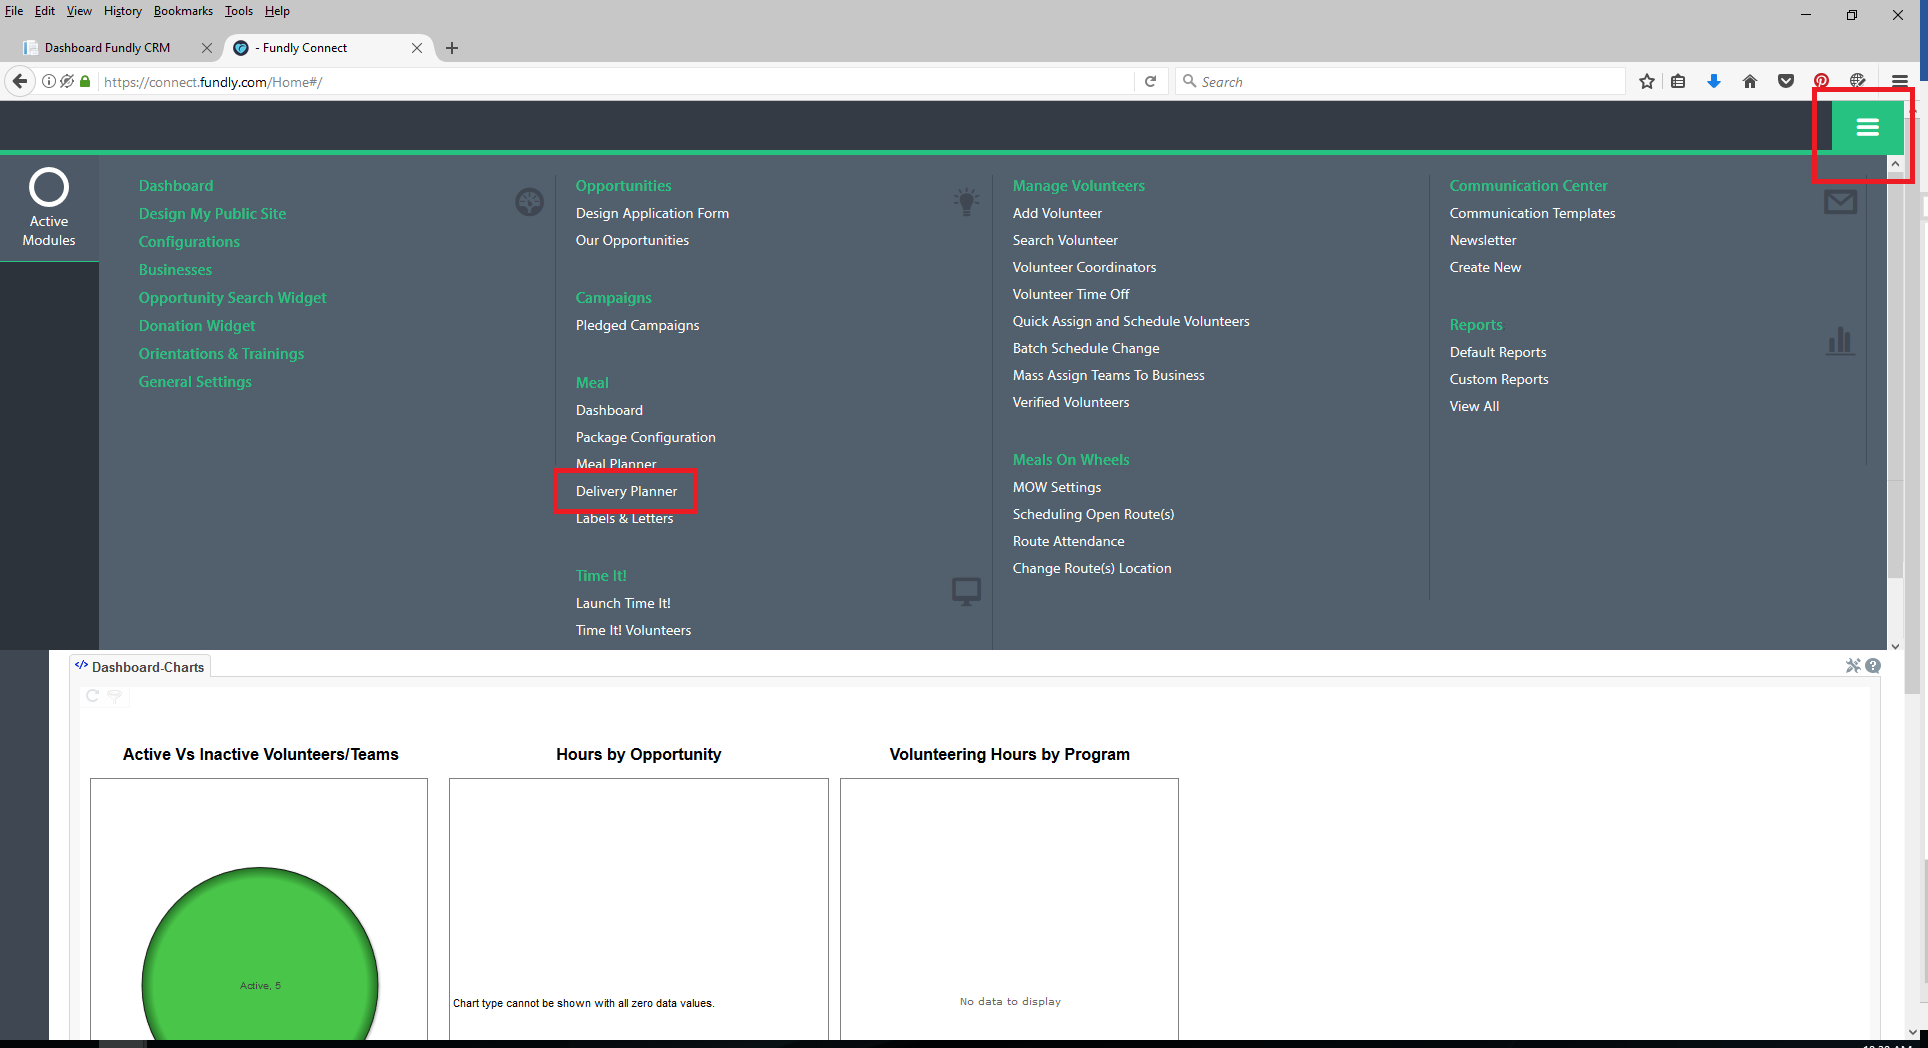
- The Delivery Planner is managed from your Fundly Connect account. To begin, select Delivery Planner from your CRM Main Menu (green button in the upper right hand corner) to be directed to Fundly Connect or log in to your Fundly Connect account and select Delivery Planner from the Main Menu.
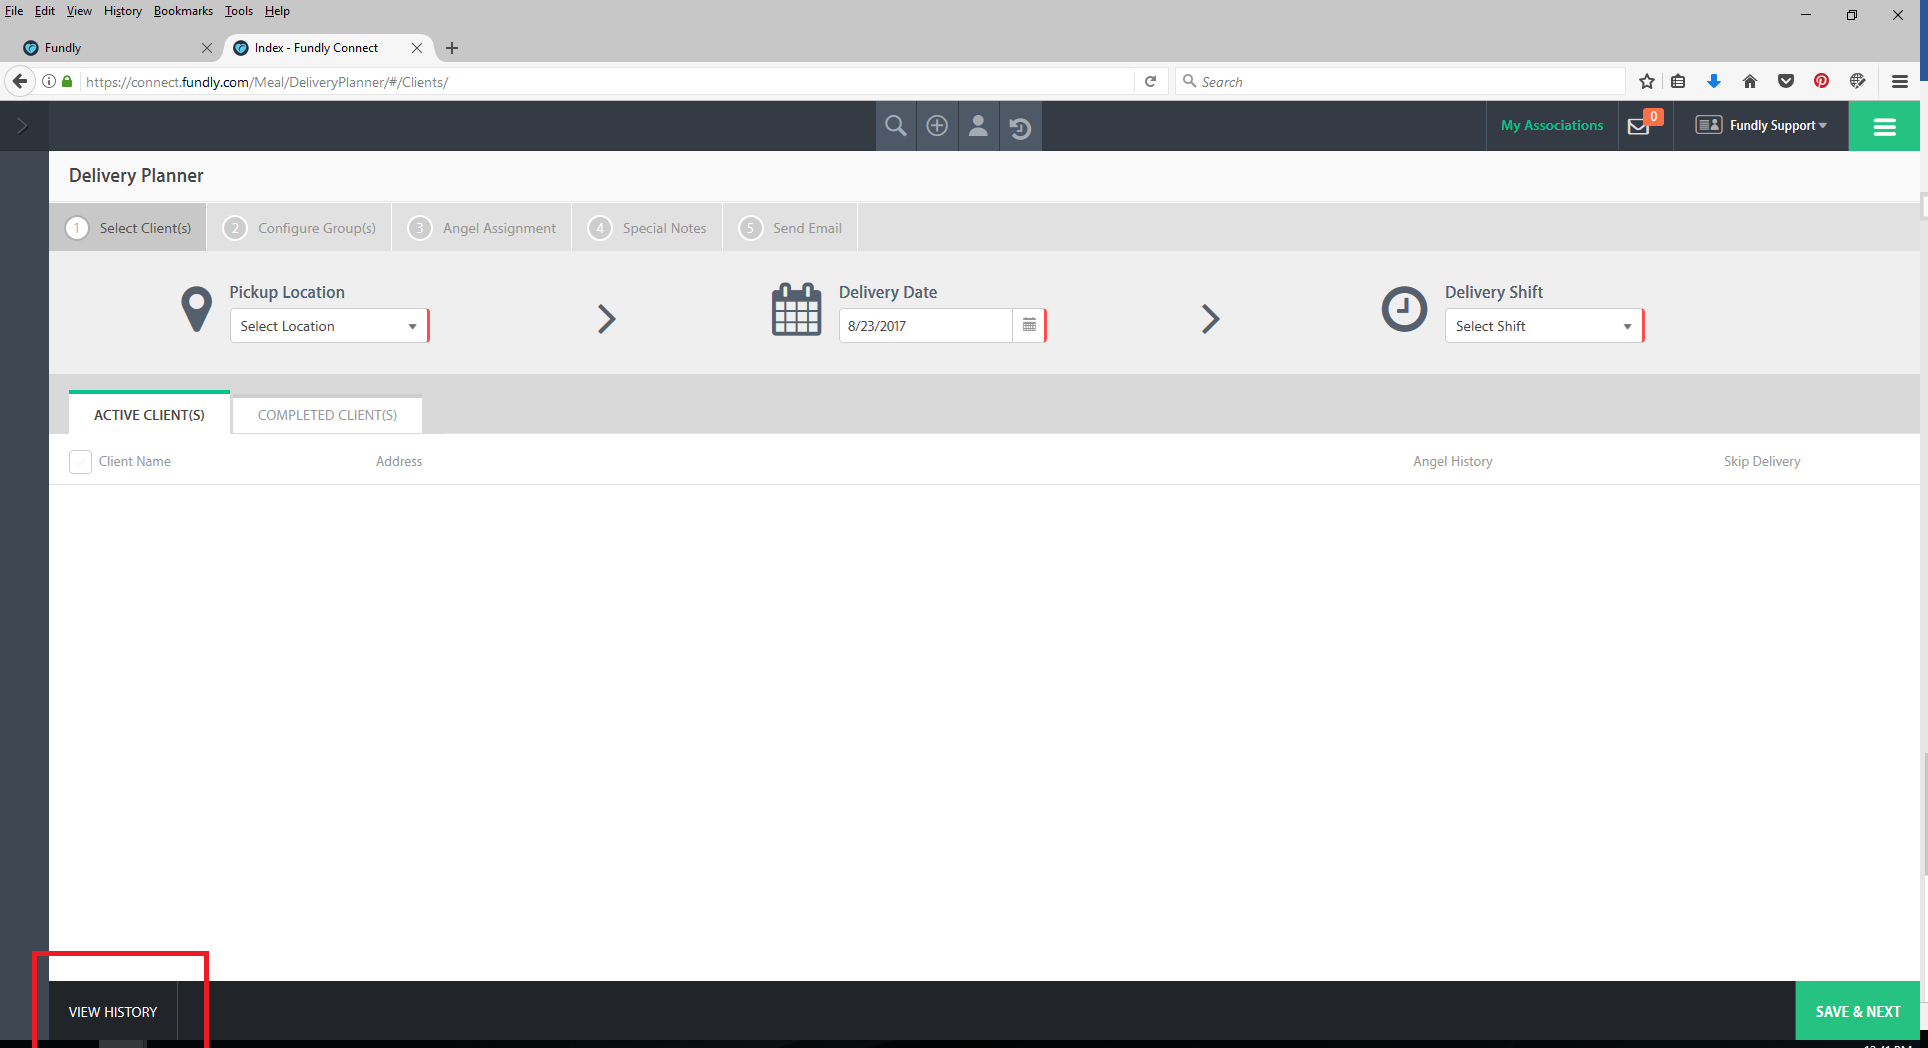
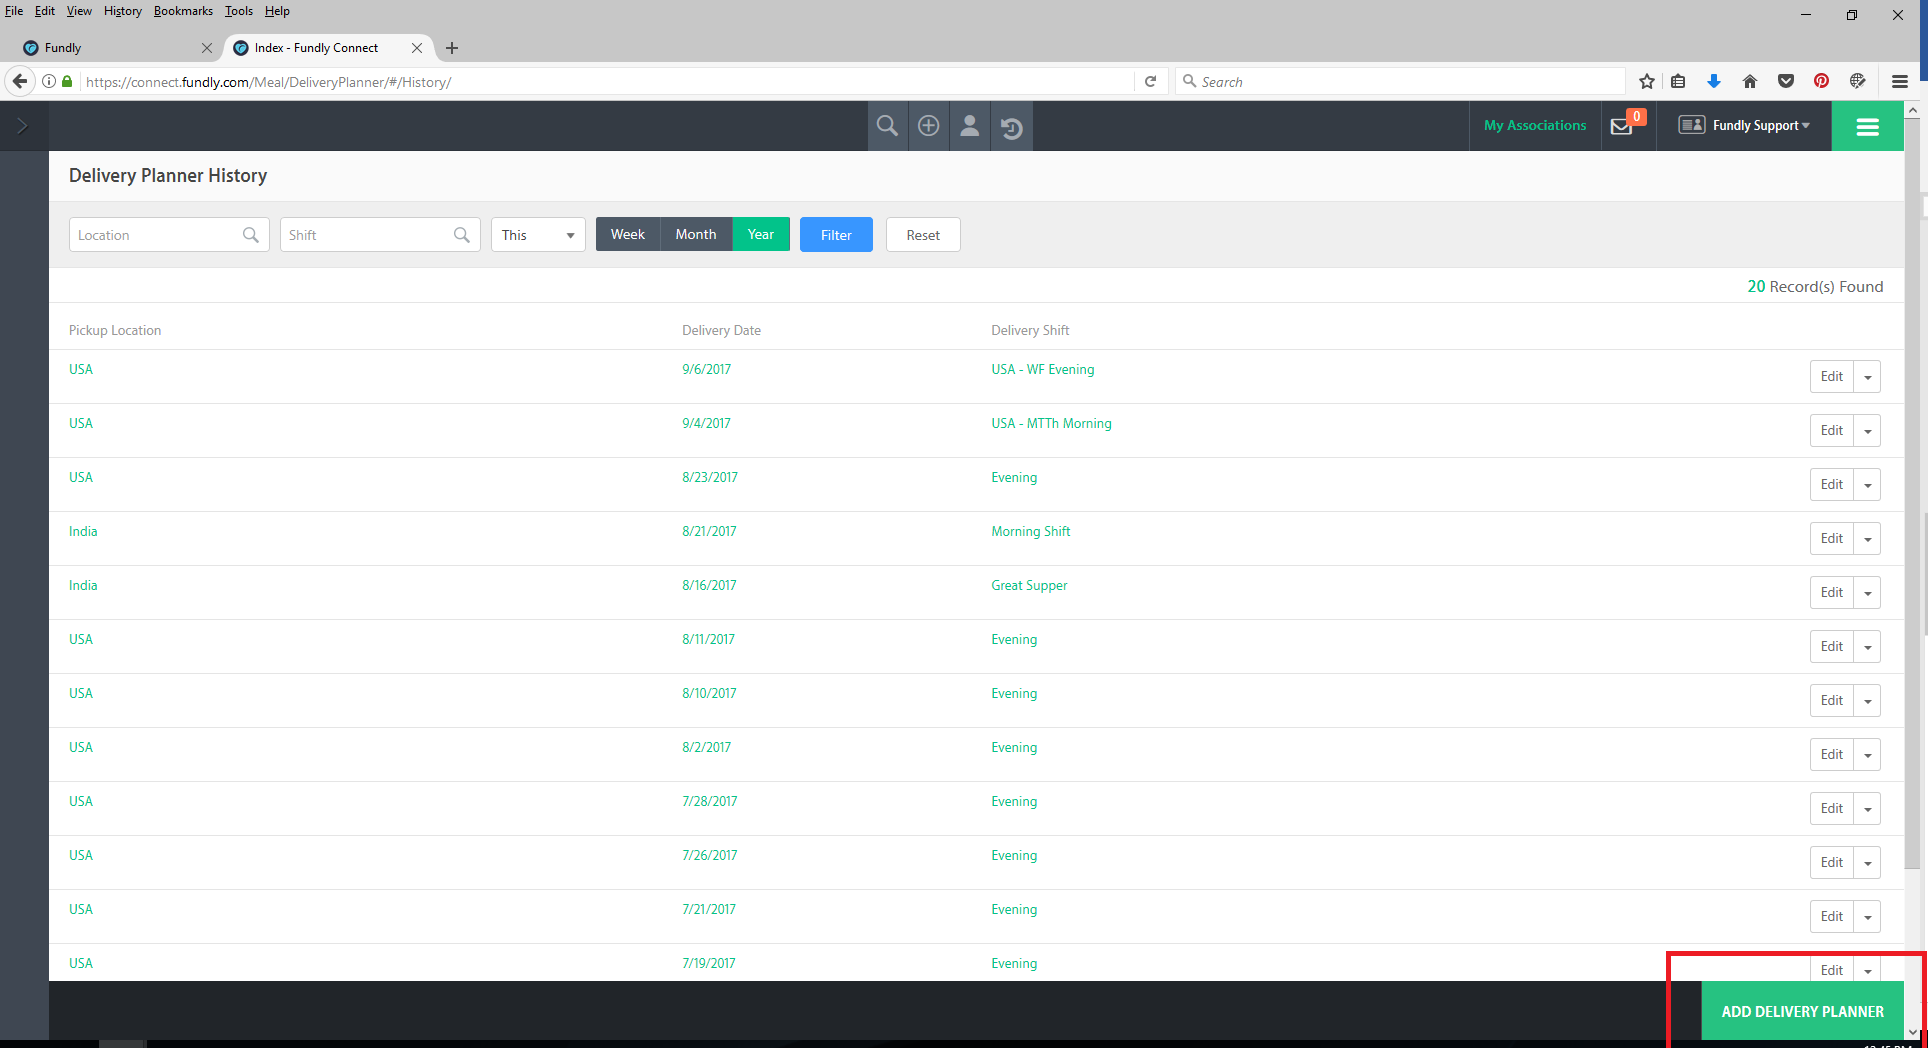
- To see a list of dates for which the Delivery planner has already been completed, click the View History button in the lower left hand corner of the screen.
- On the Delivery Planner History index screen, you will see the list of dates for which meals have already been planned/configured.

- To skip a client that has been scheduled for delivery, to change a Delivery Planner’s configurations (date, pick up location, or delivery shift), or to change Delivery Angel assignments, select Edit from the drop down to the right.
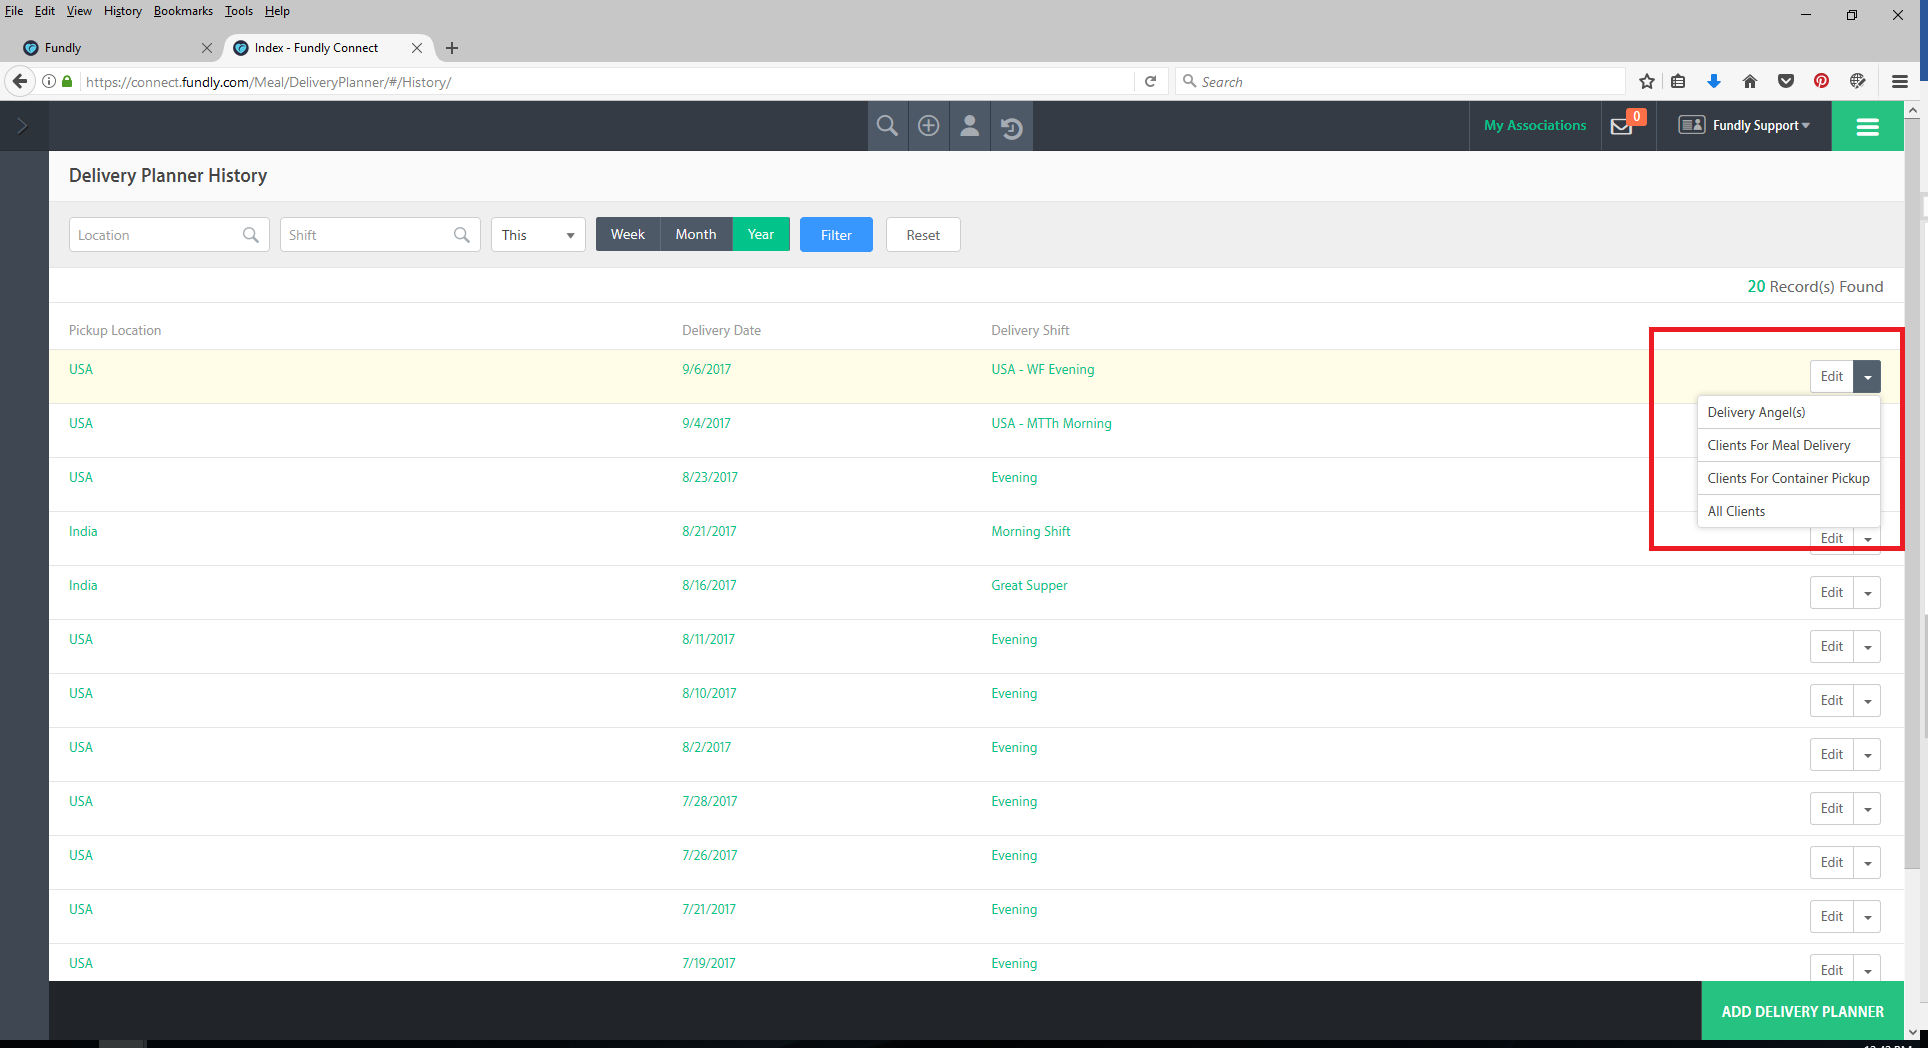
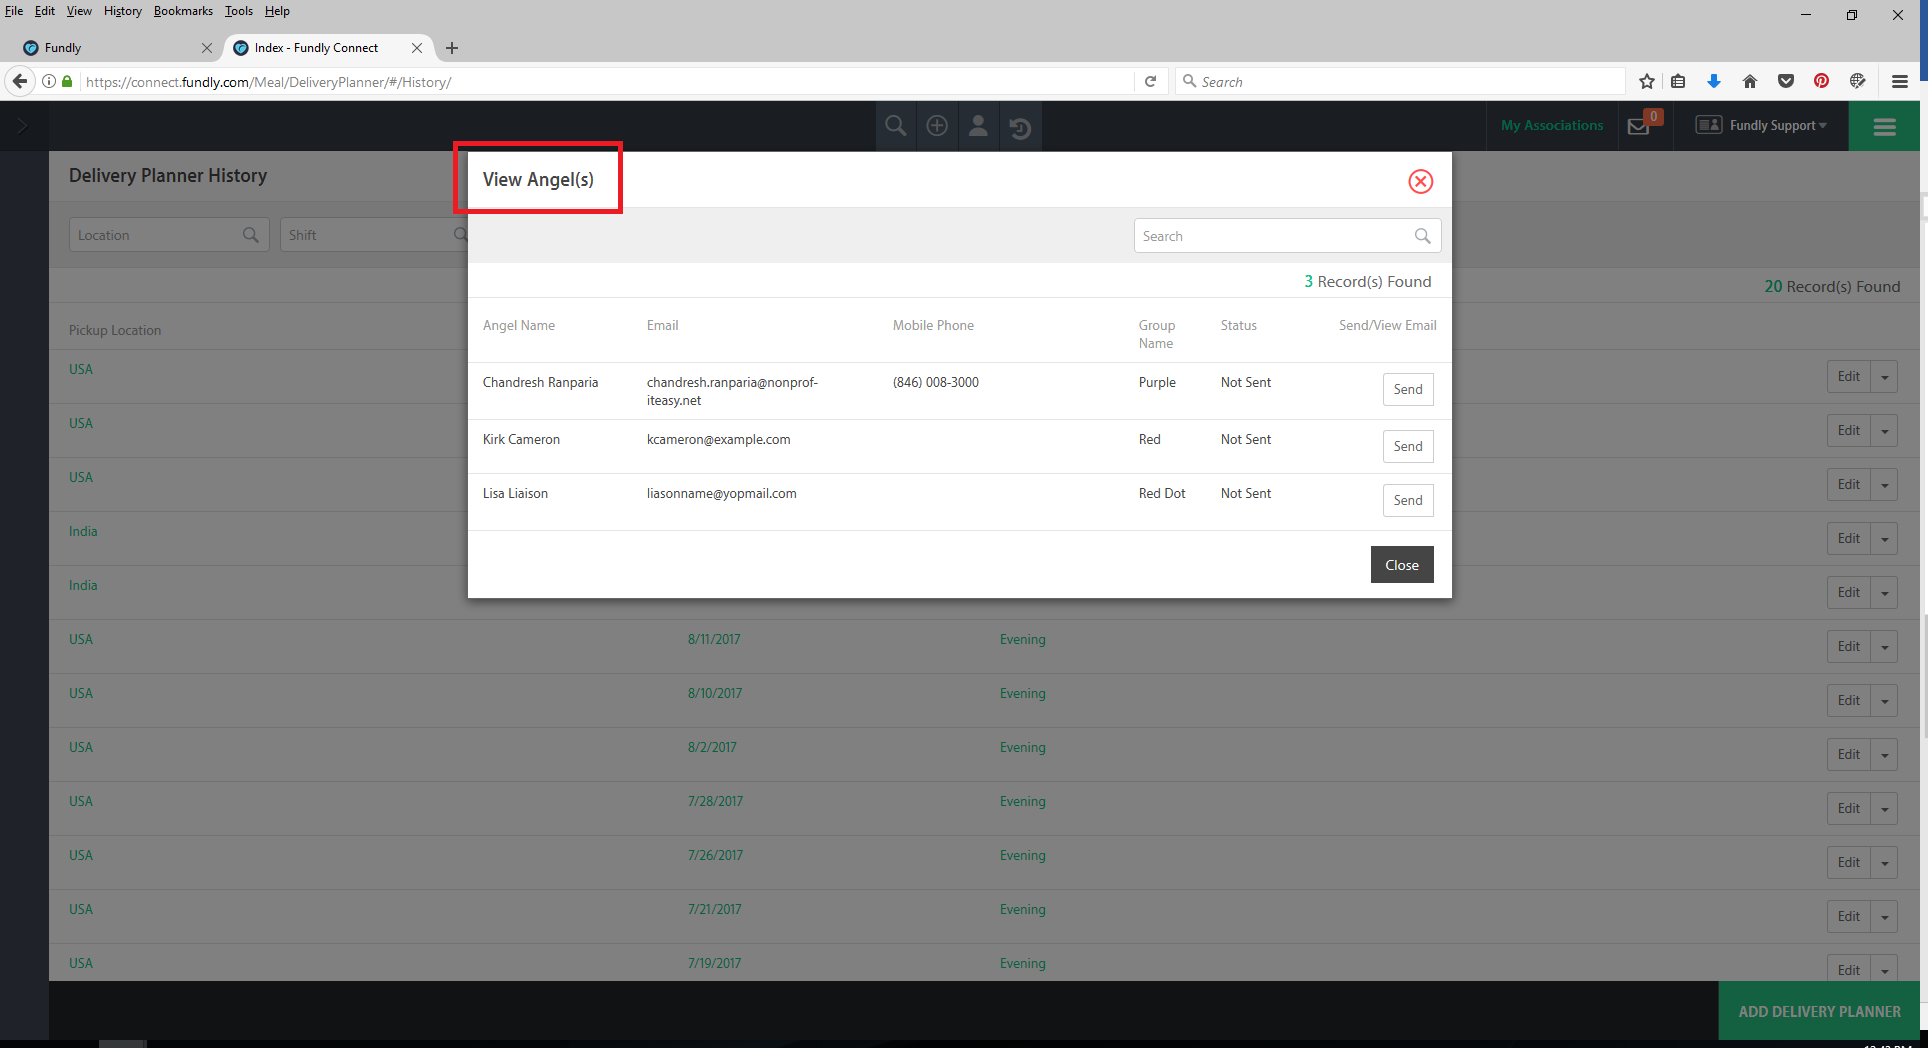
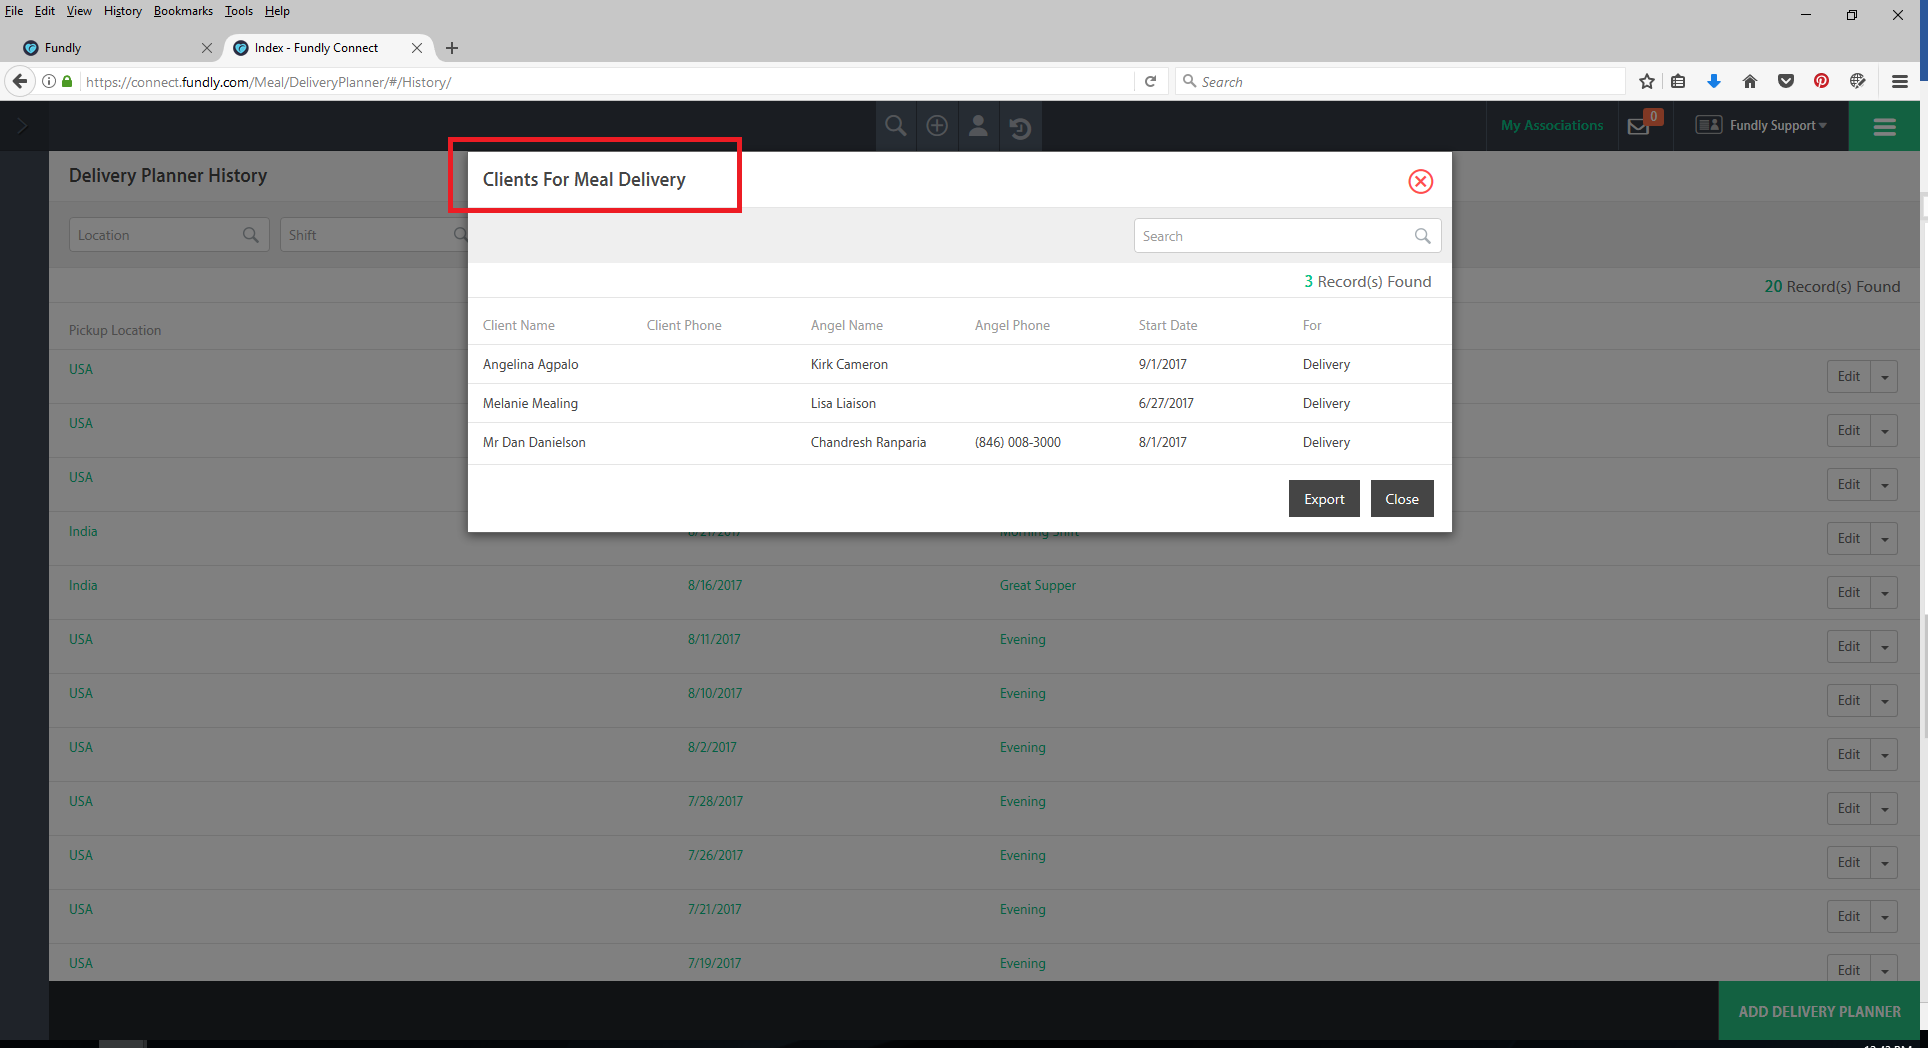
- For each date, you can view the Delivery Angels and their route assignments for the date, the Clients scheduled for delivery, clients scheduled for container pick up, and all clients scheduled for delivery or pick up on the date by selecting from the drop down menu on the right.

- To configure deliveries/routes for a new delivery date, select Delivery Planner from the Main Menu or click the green Add Delivery Planner button in the lower right hand corner of the Delivery Planner History index screen.
- Configuring Delivery routes for any given date is a five-step process. On the first tab: Select Clients, select the pick up location, delivery date, and delivery shift from the drop downs at the top of the screen. The location, dates, and shifts pull from the Delivery Angel Volunteer Opportunity. If you need to edit any of these items, see this tutorial for managing the Delivery Angel Opportunity.

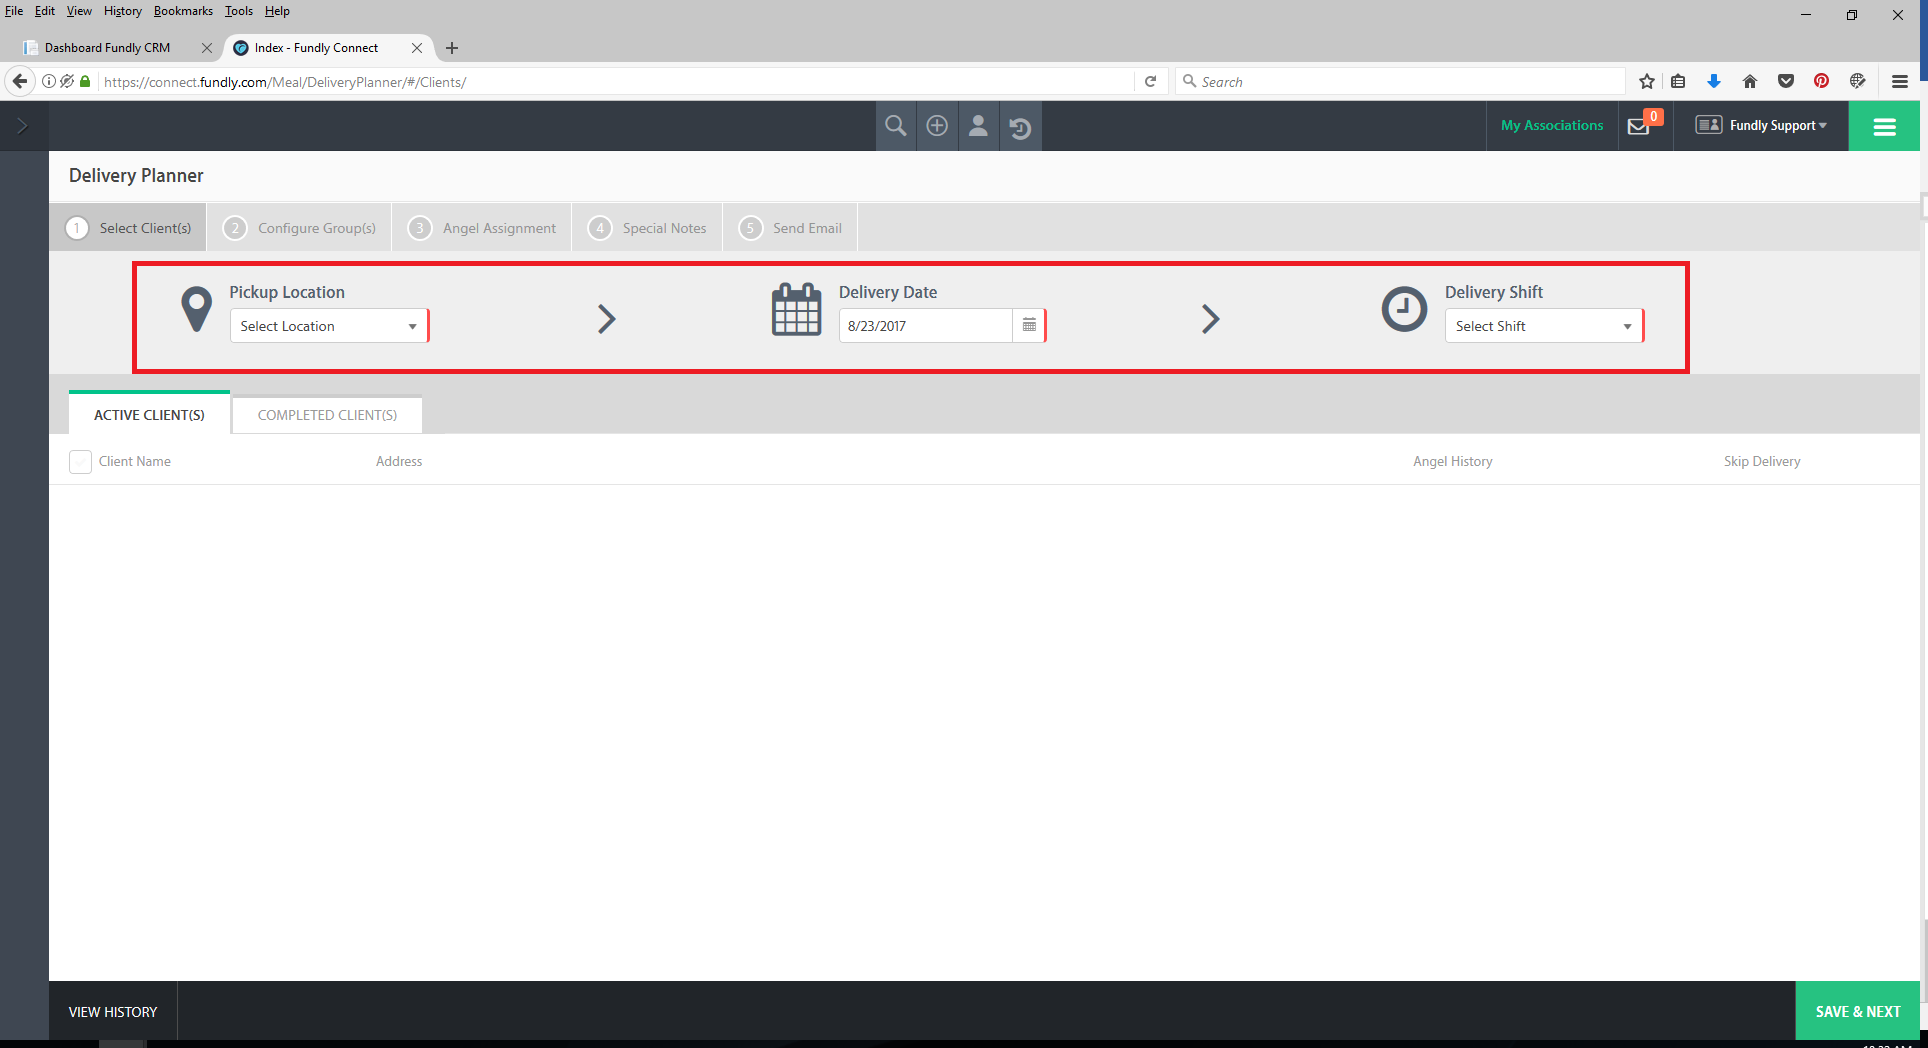
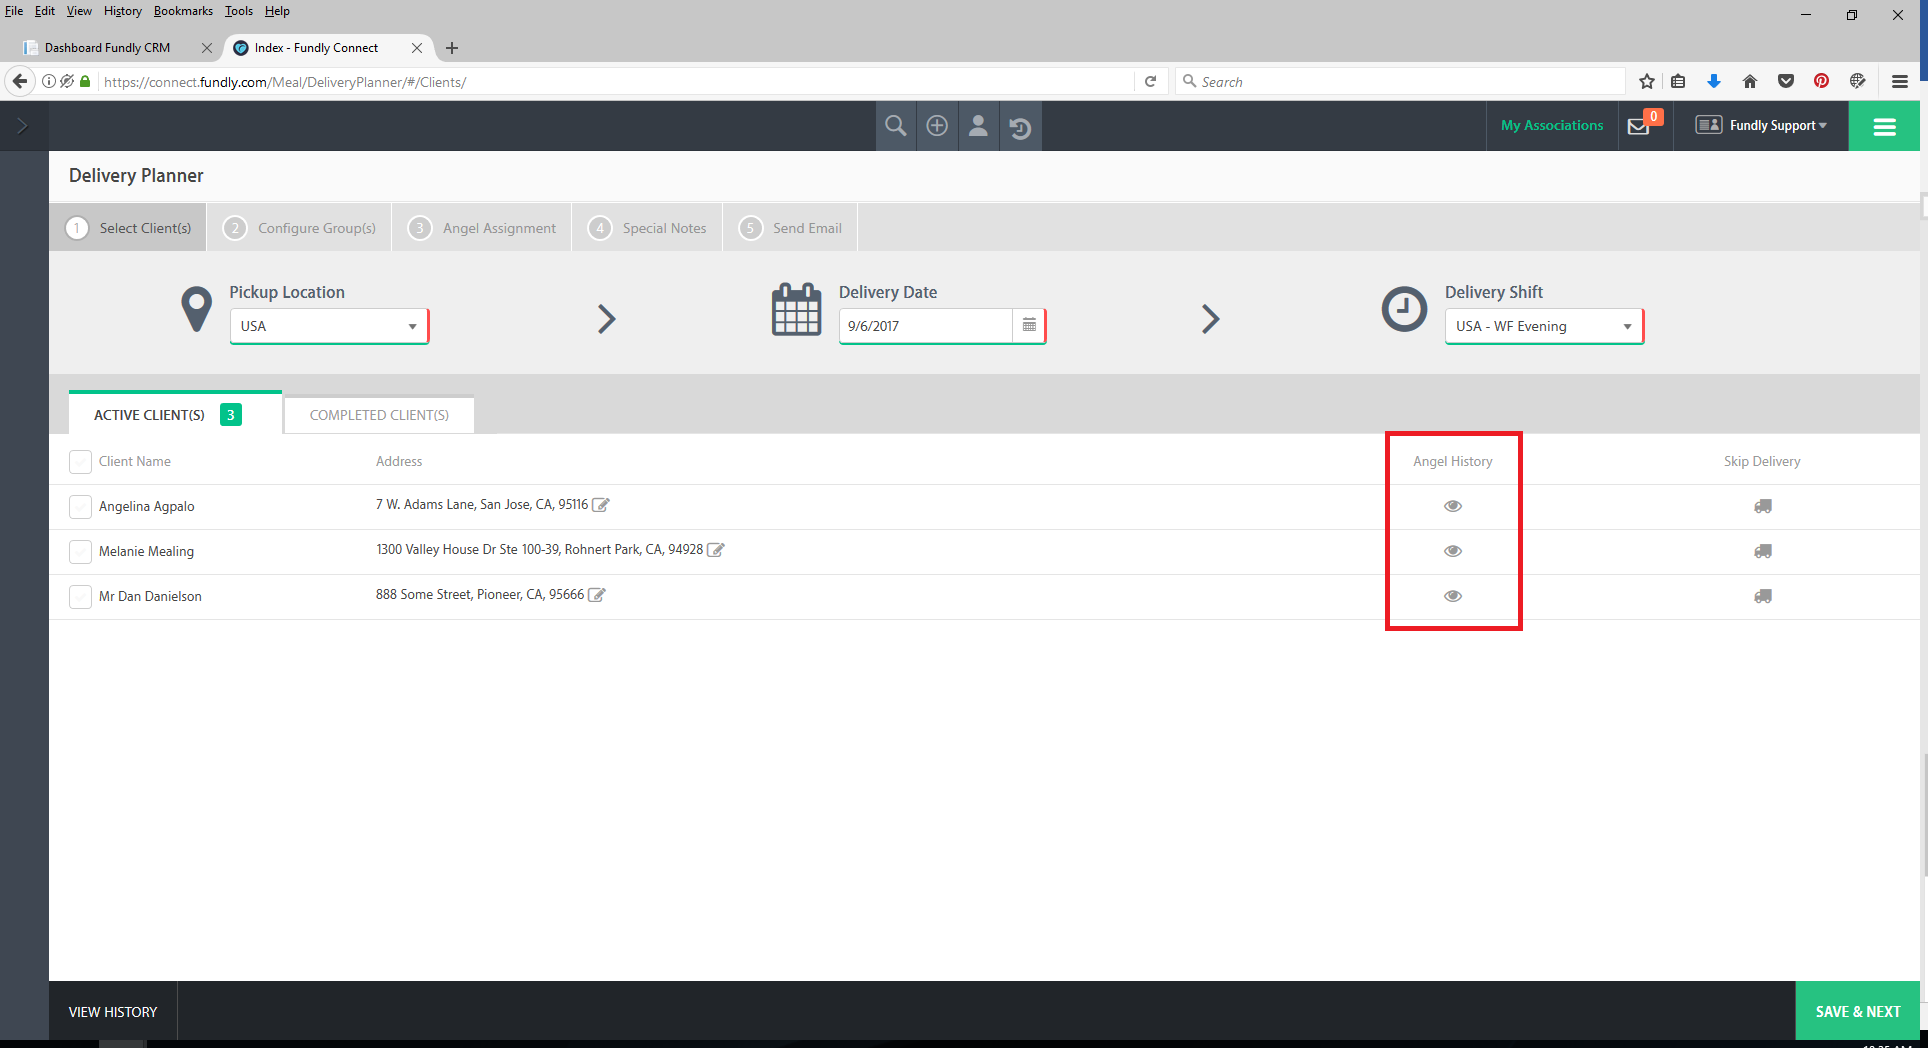
- The system will display a list of Active Clients who need deliveries planned for the date on the Active Clients tab as well as a list of Completed Clients who need container pick up for the date on the Completed Clients tab.
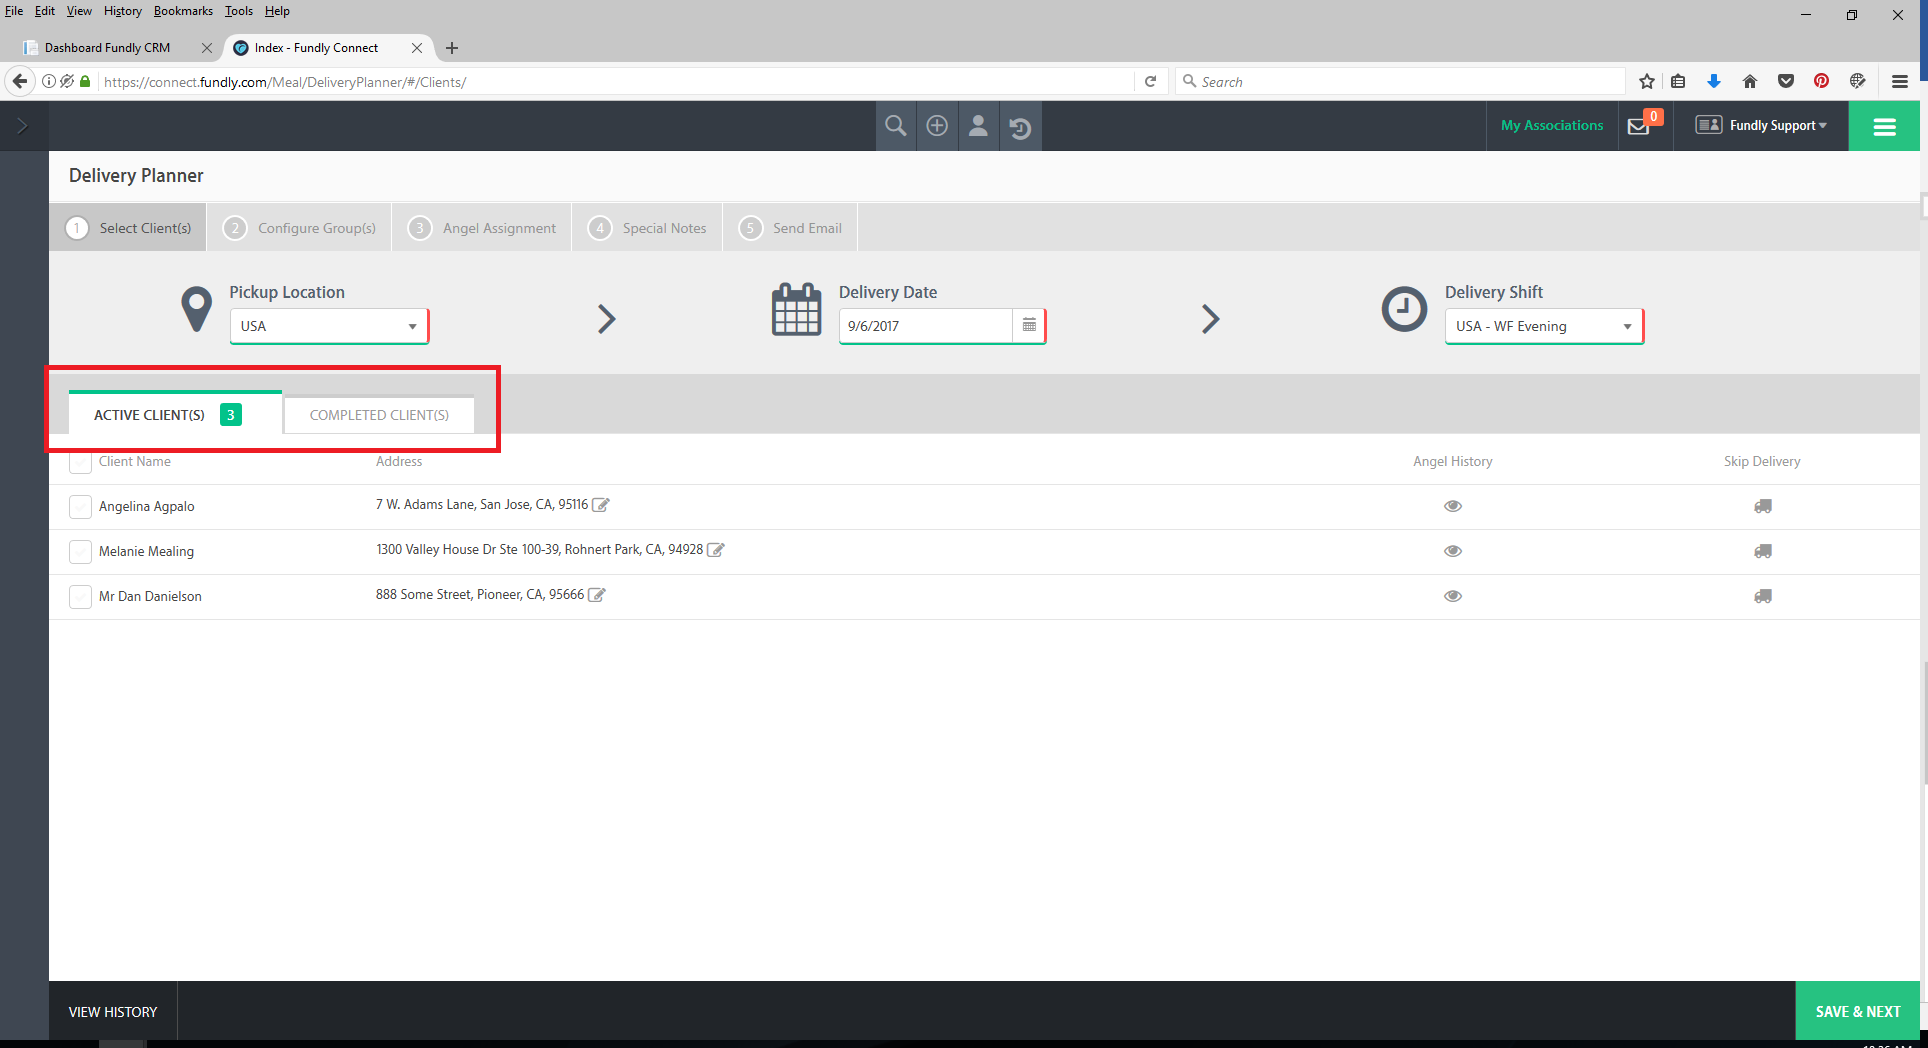
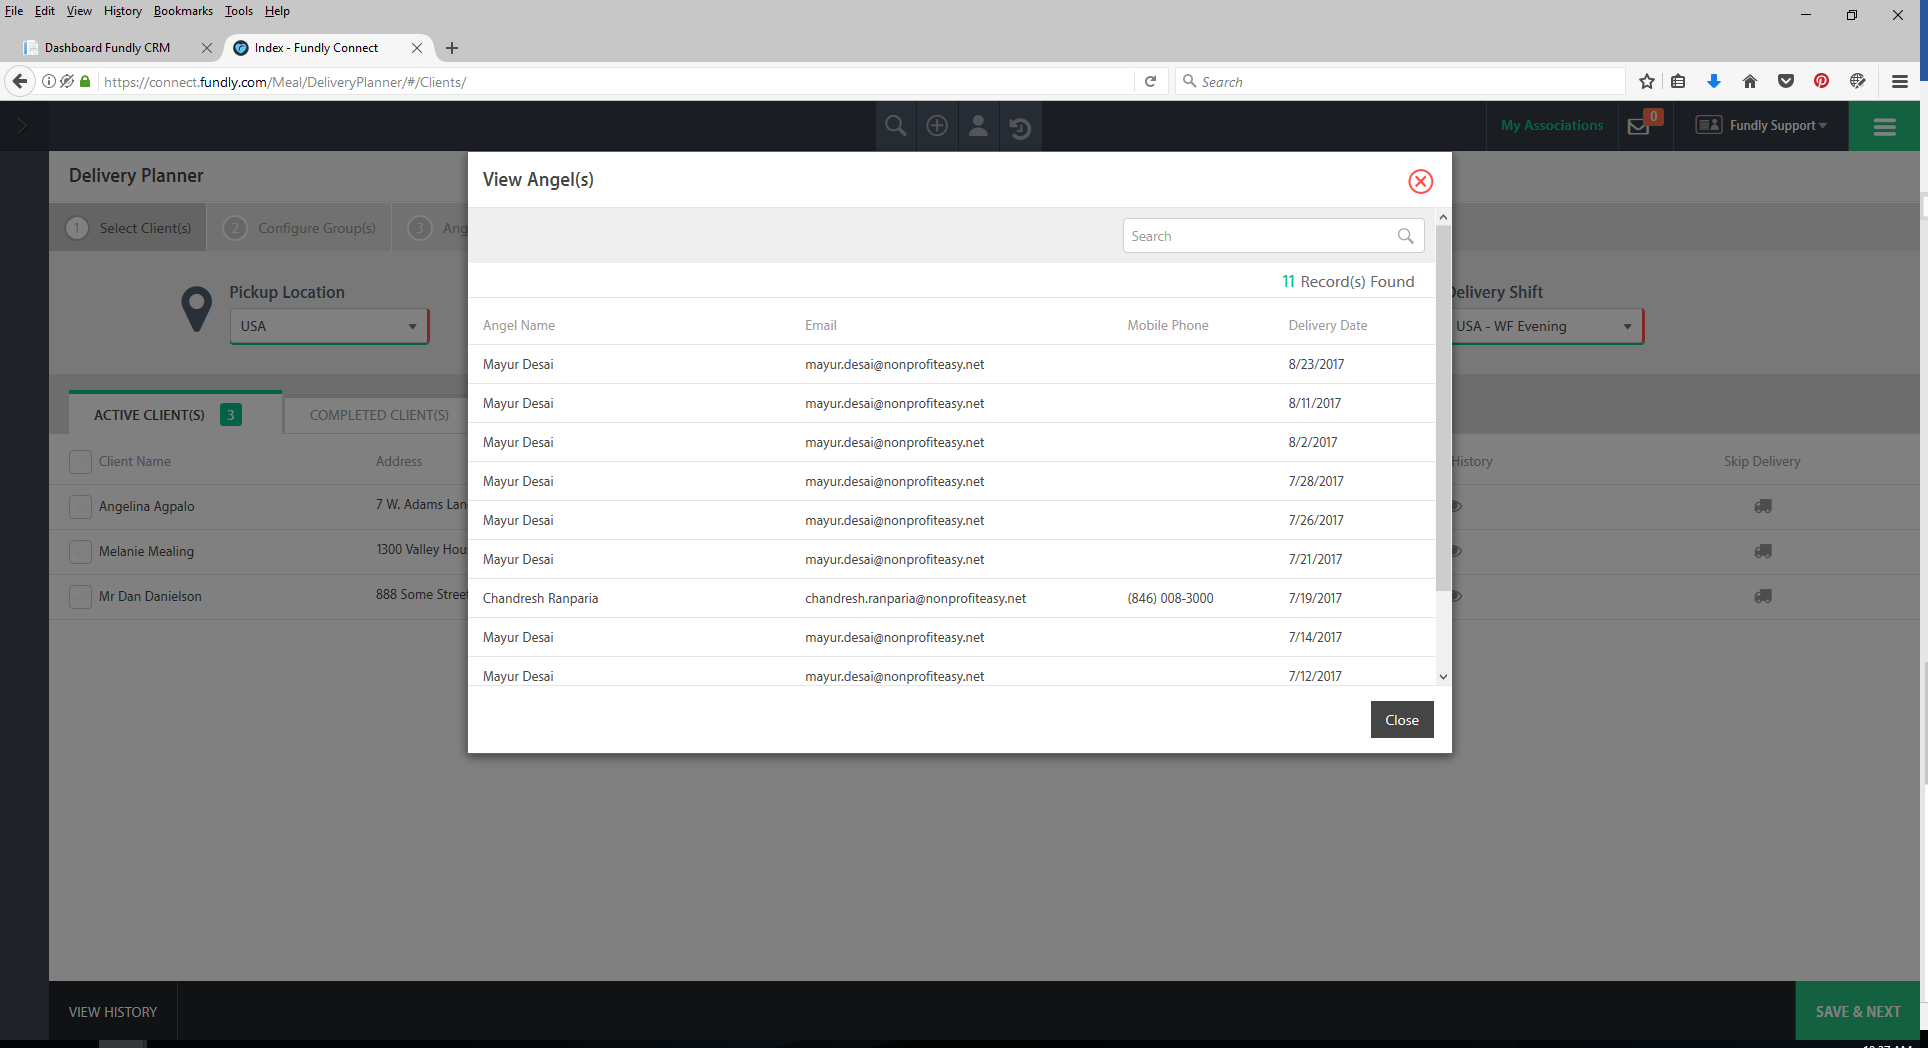
- To view the history of which Delivery Angel has previously been assigned to each client, click the eye icon in the Angel History
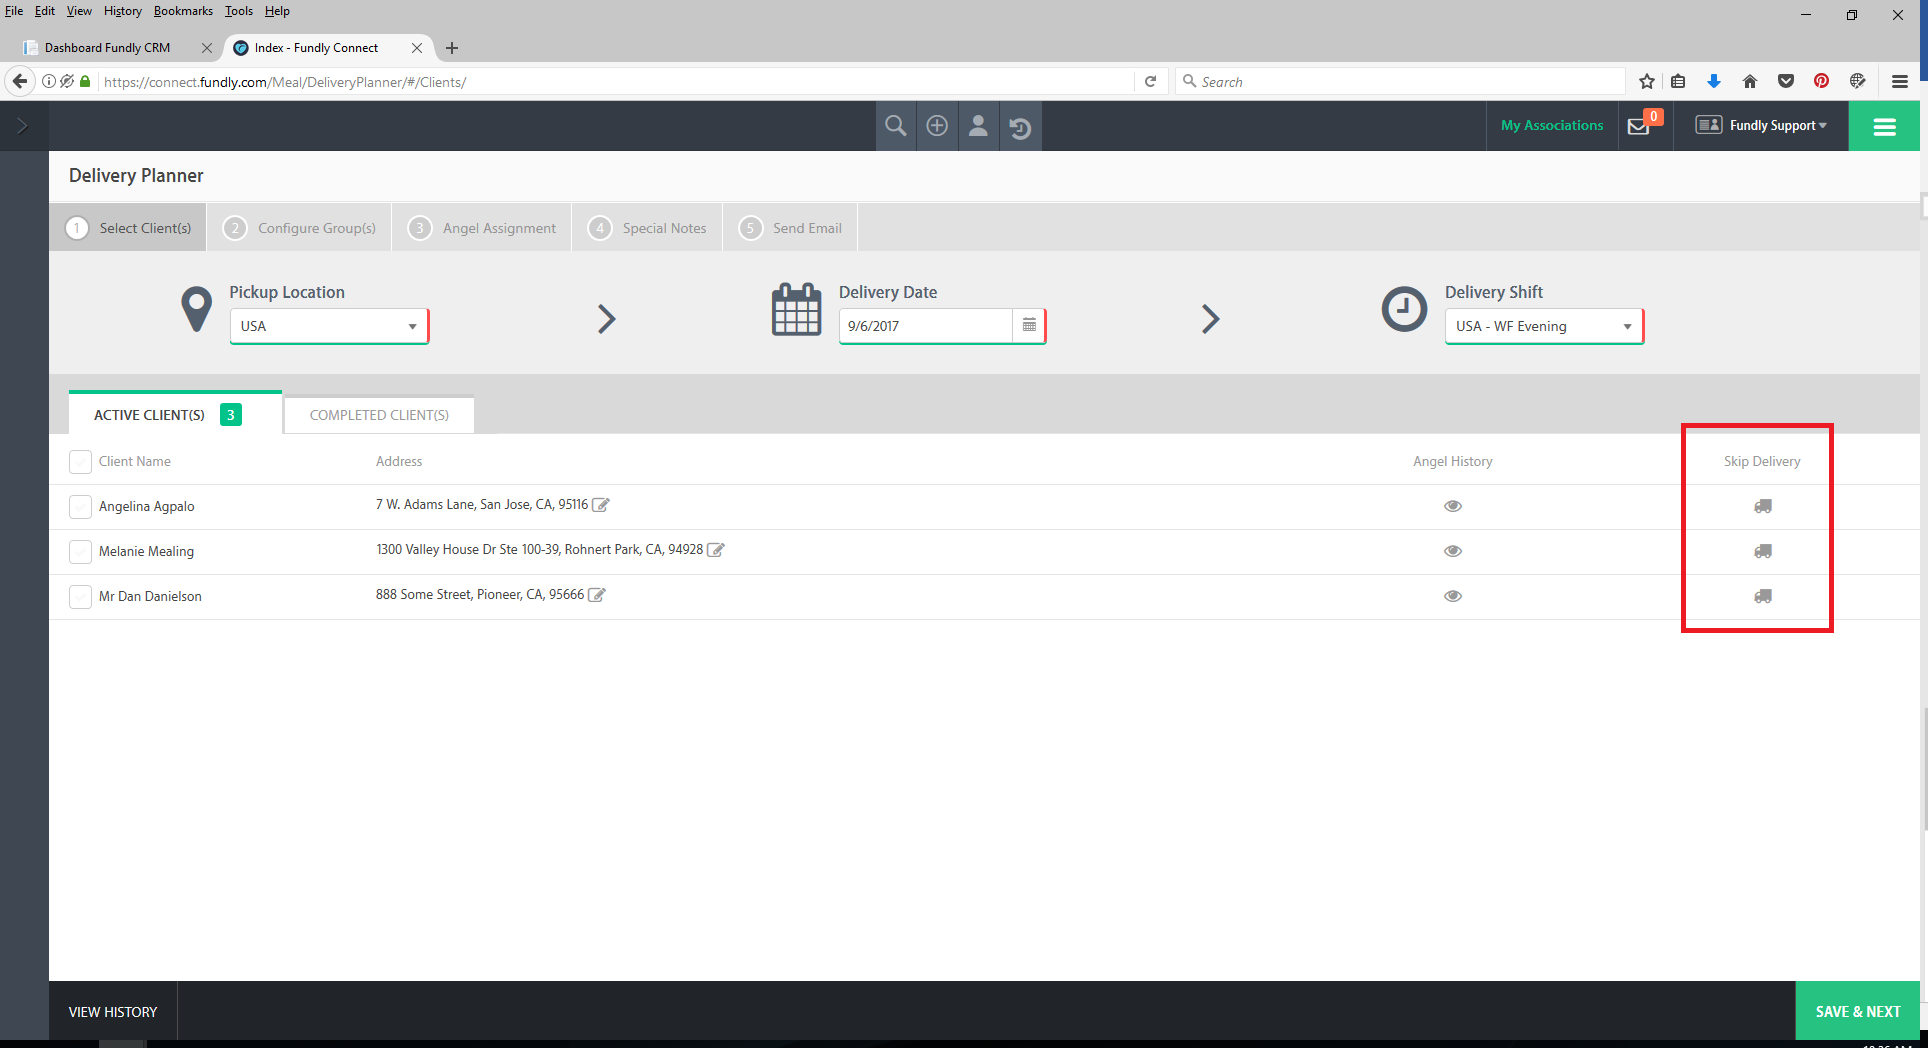
- To indicate the client should be skipped for delivery, click the truck icon in the Skip Delivery column (skipped deliveries can also be indicated on the client contact record on the Client tab. See this tutorial for working with client records).
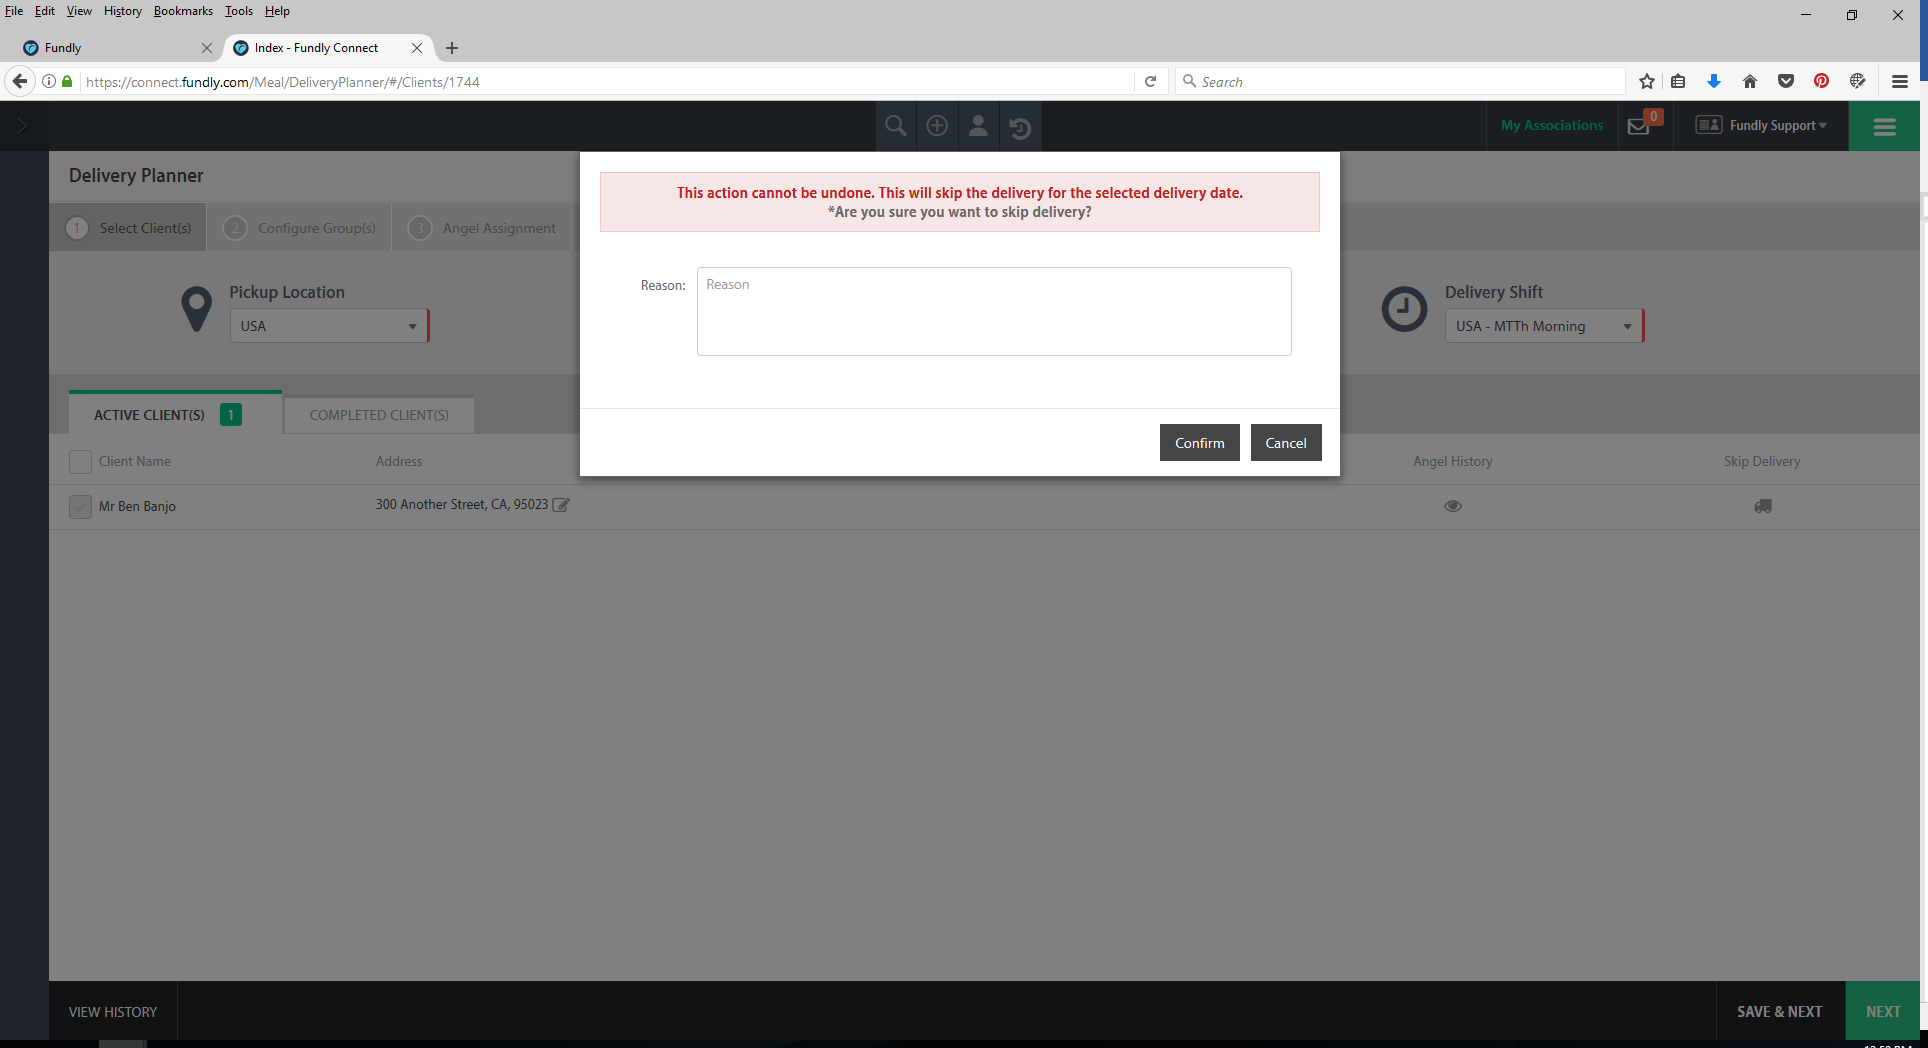
- The skip delivery reason pop up will appear. Enter a reason for skipping delivery and click Confirm. Skipping delivery cannot be undone – client cannot later be scheduled for delivery for that particular date. Skipped clients do not show anywhere on the Delivery Planner; the skipped date will appear on the contact’s record, however, on the Client tab.

- Check the white box to the left of each client’s name for those clients you wish to schedule delivery for ON BOTH THE ACTIVE AND COMPLETED CLIENTS tabs, and then click Save & Next in the lower right hand corner to move to the next tab.

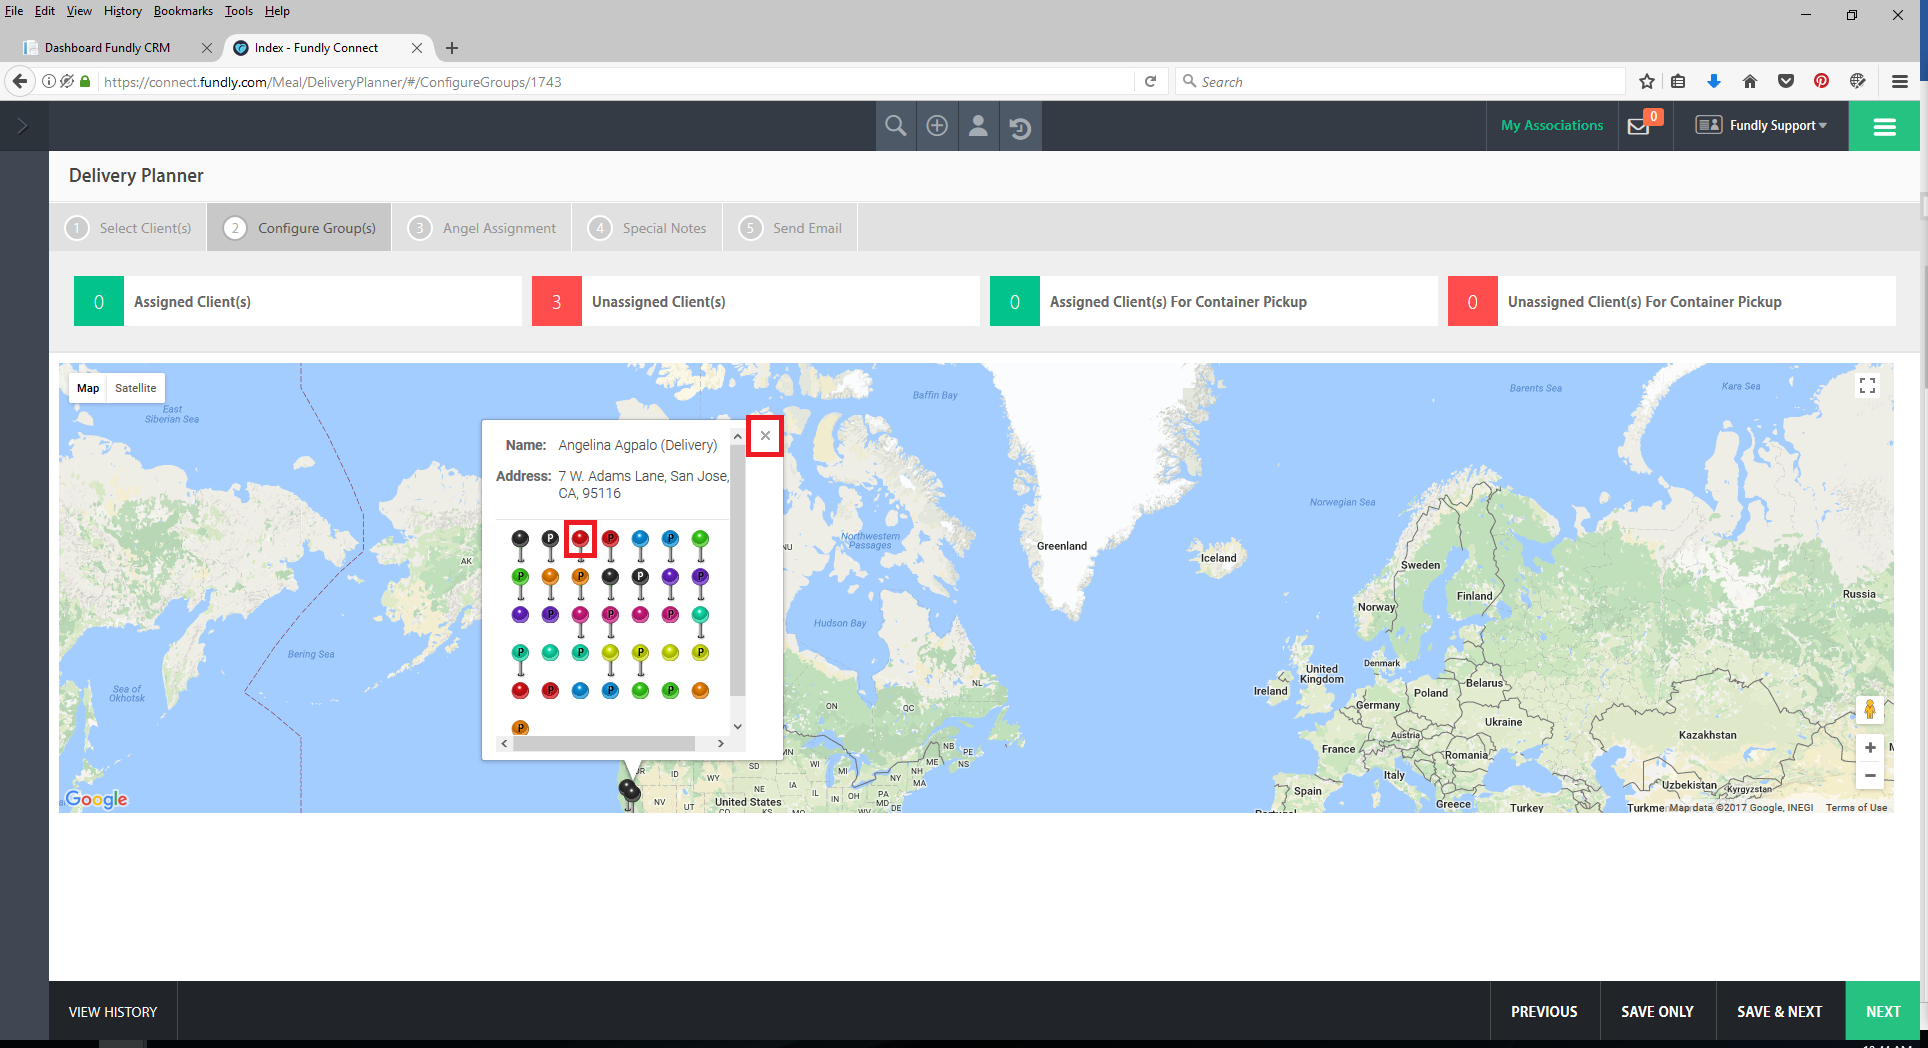
- On the 2nd tab, Configure Groups, the system will display a pin map of selected clients’ delivery addresses. By default, all pins are shown as black, but these pins are NOT assigned the black color – they are unassigned. You must still select them an assign them a color, even if that route color is black.
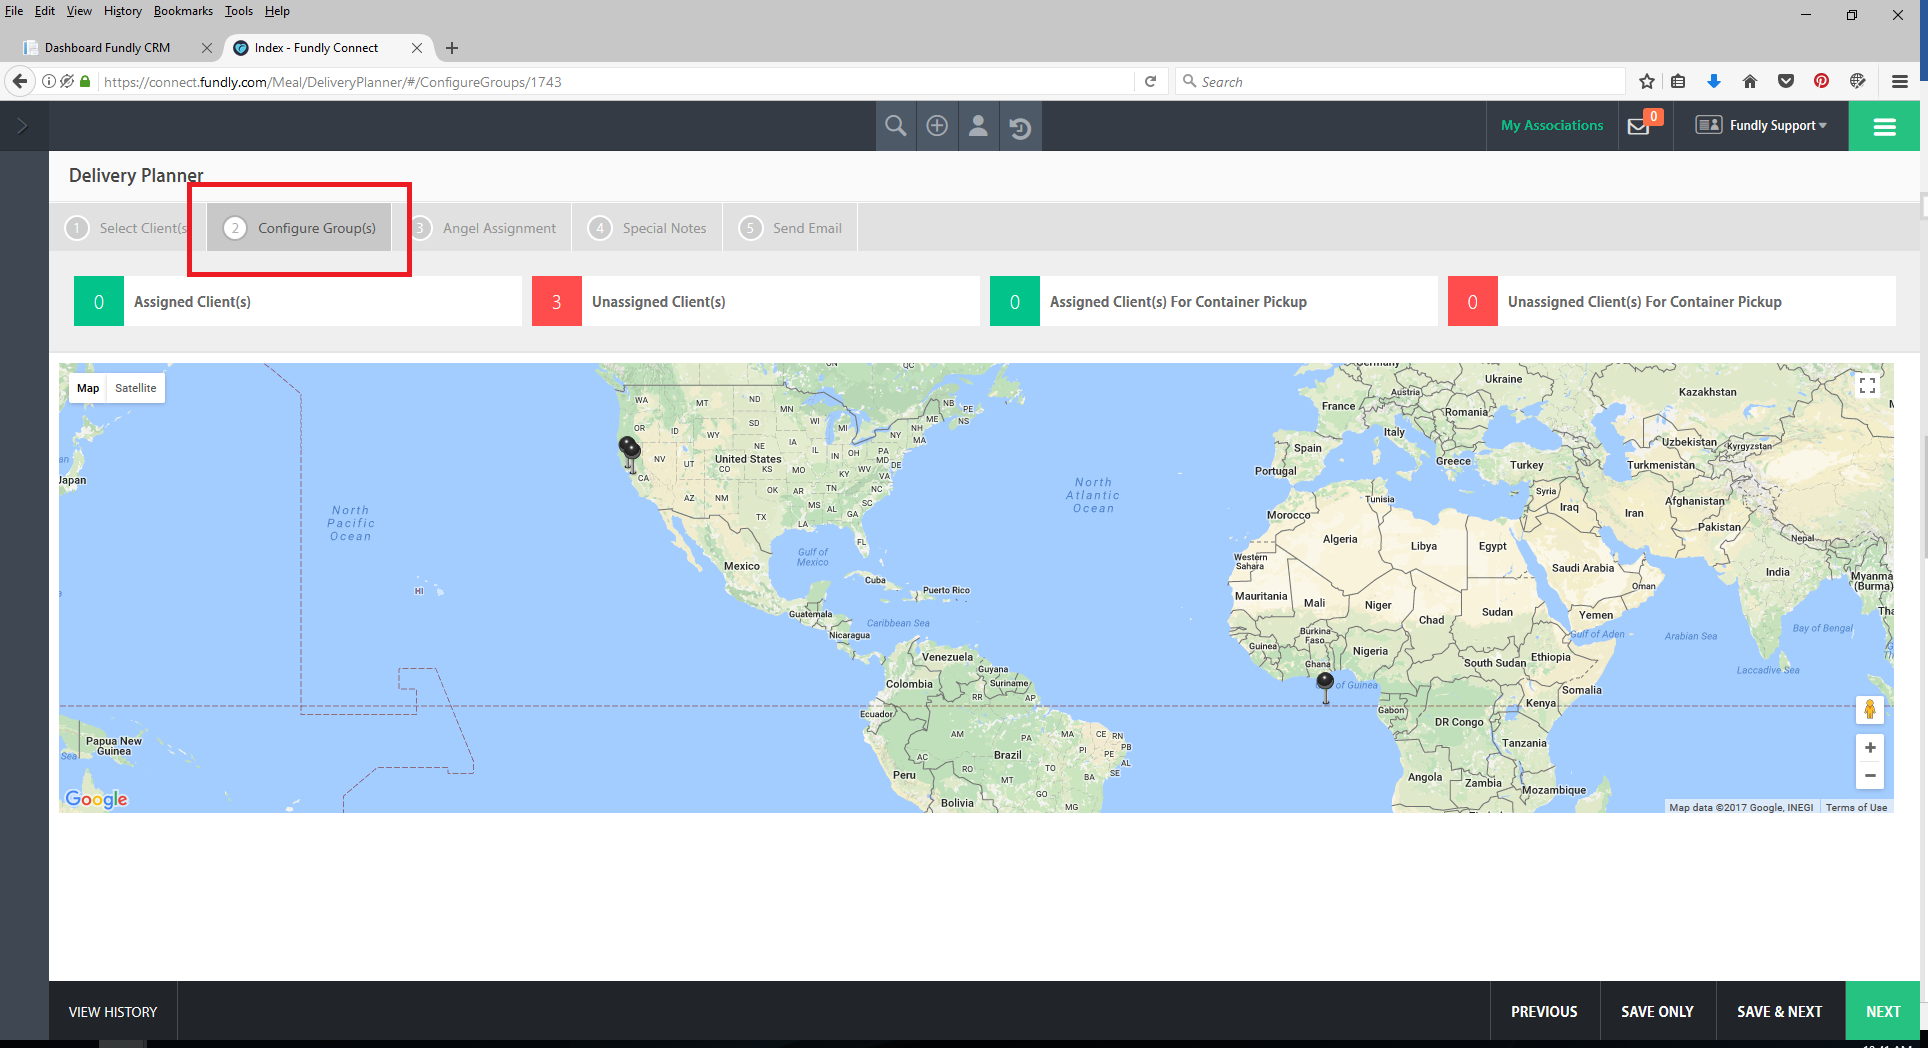
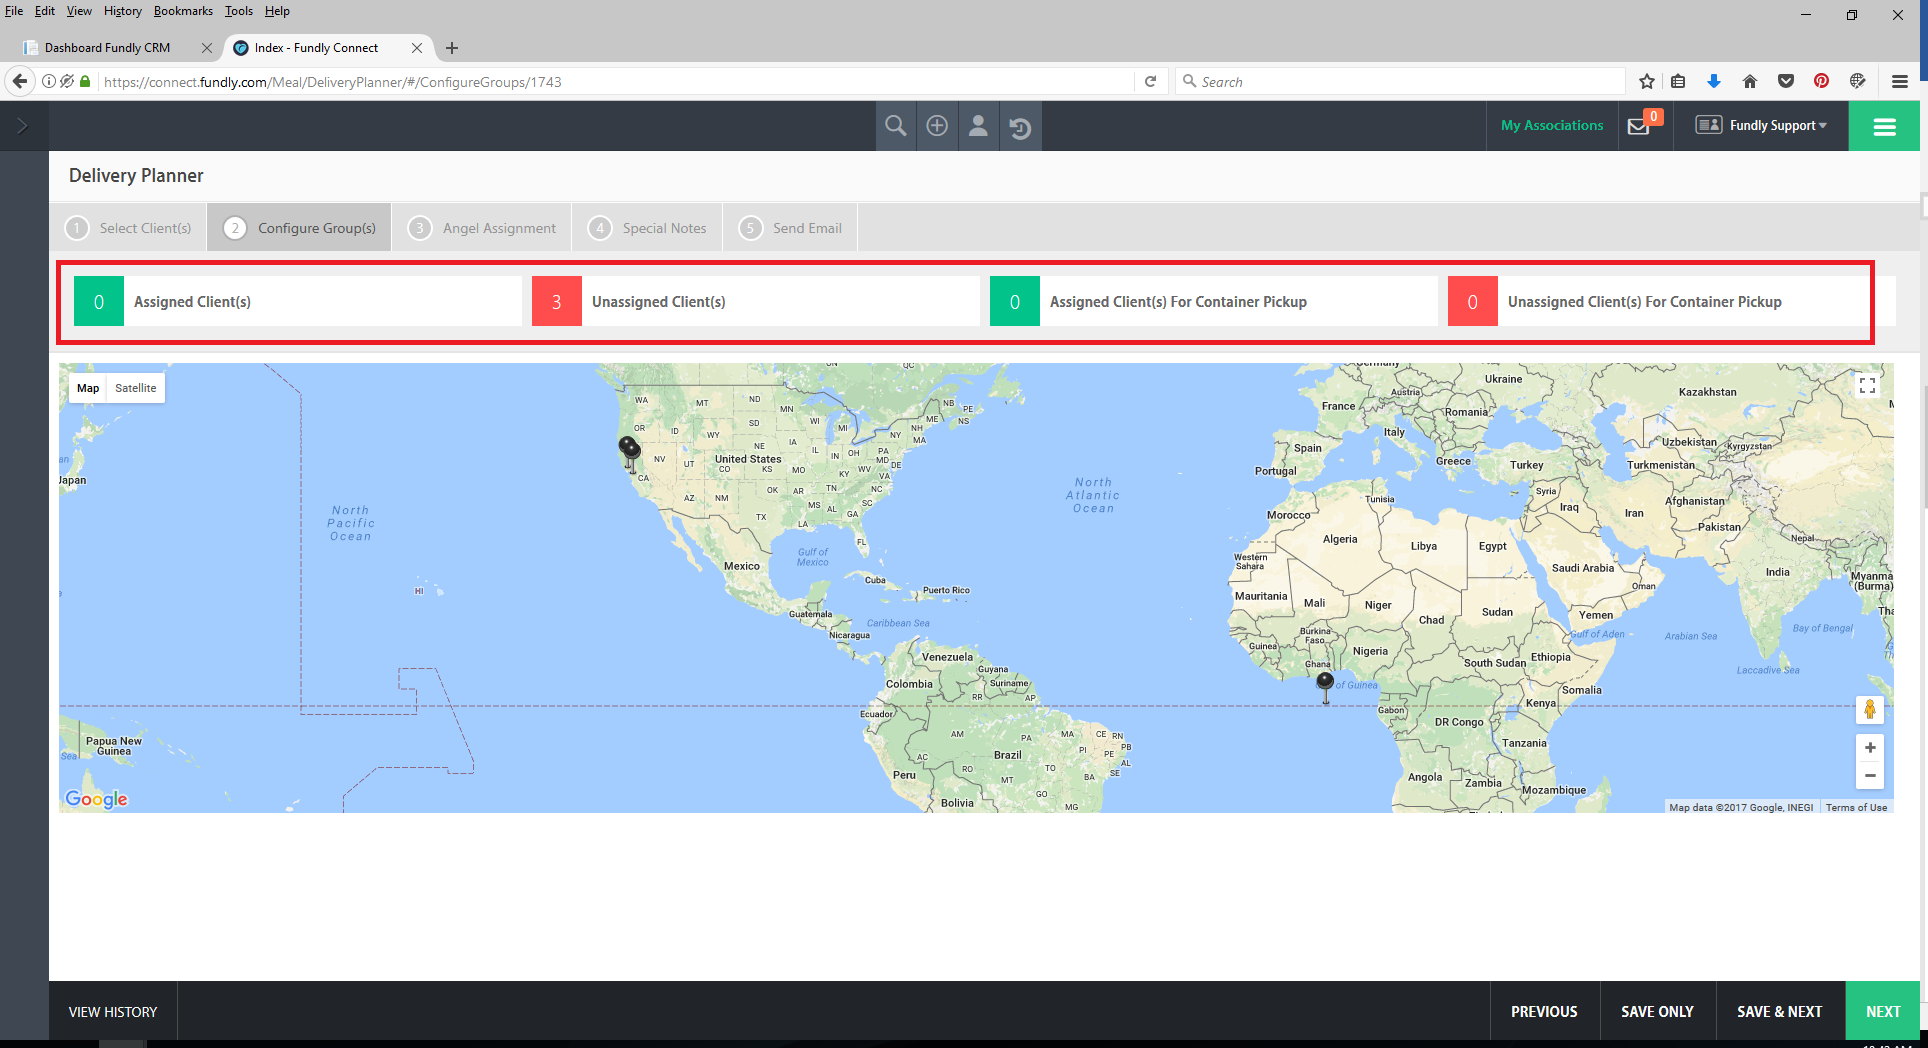
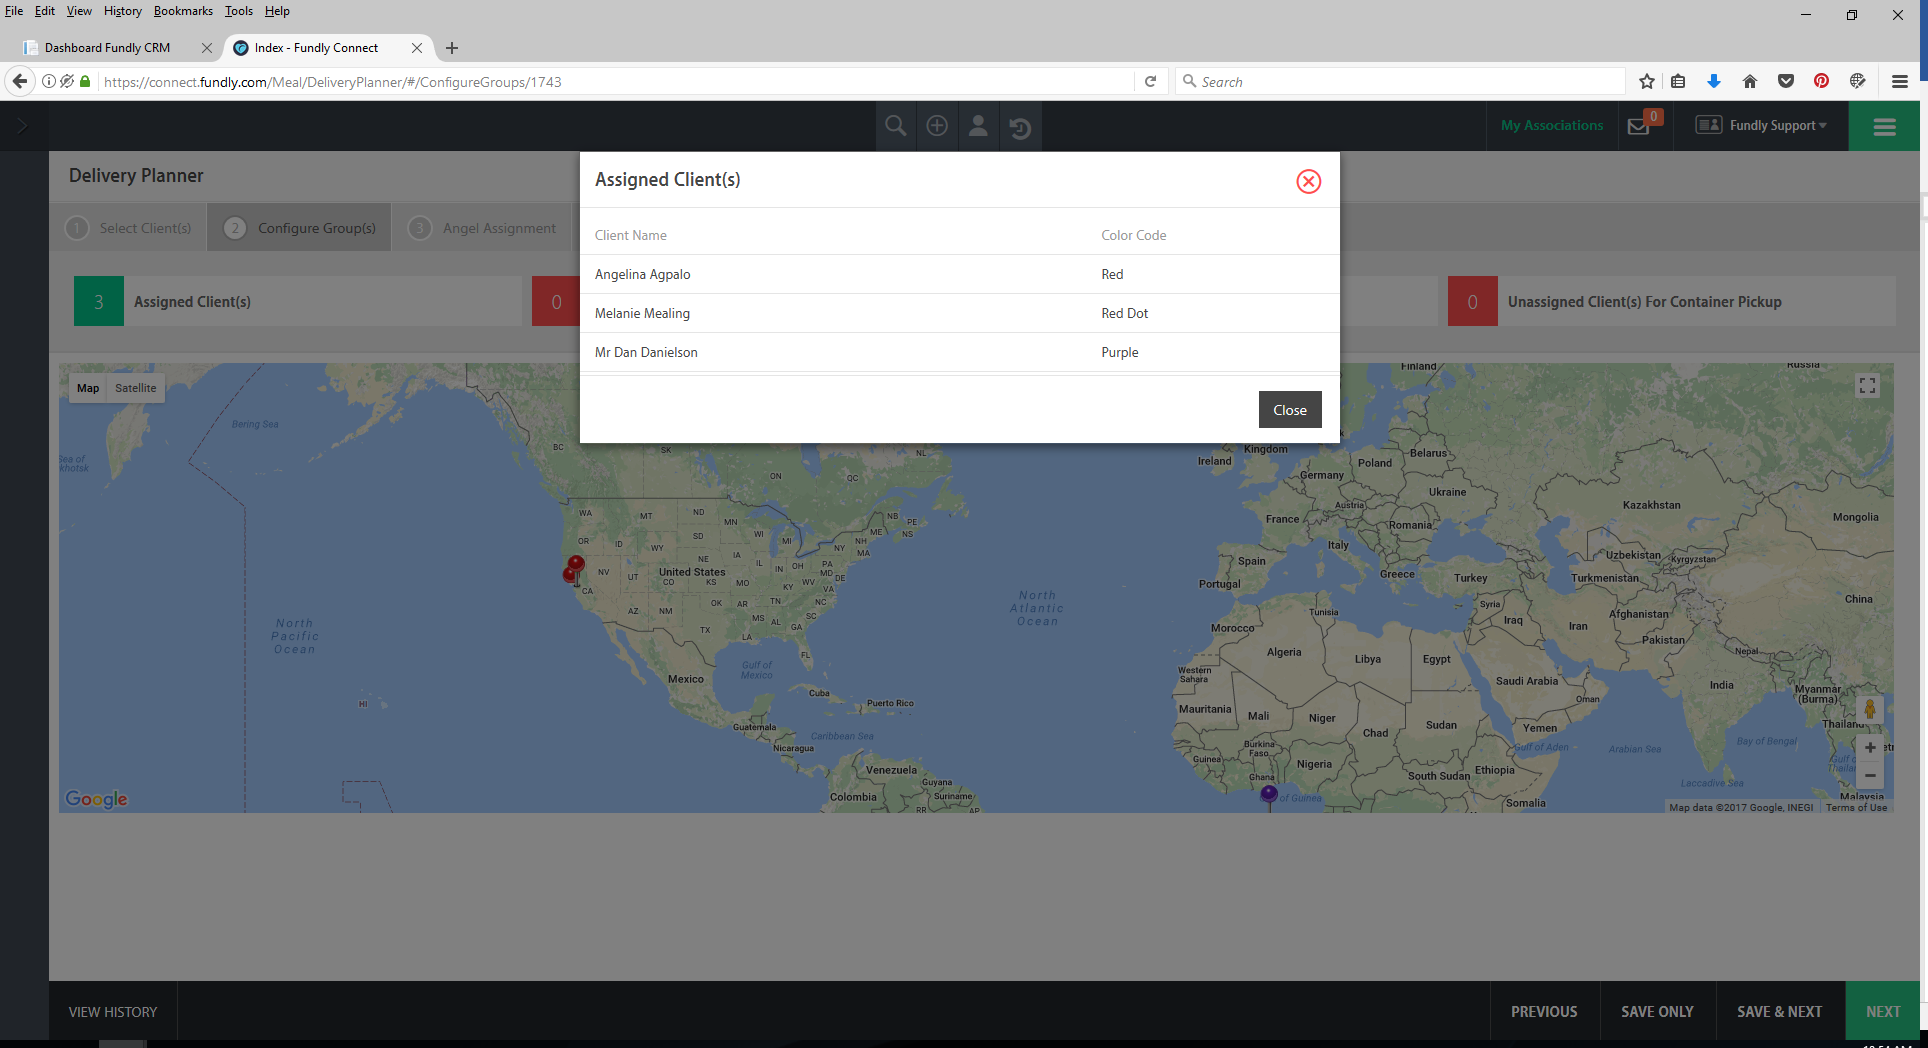
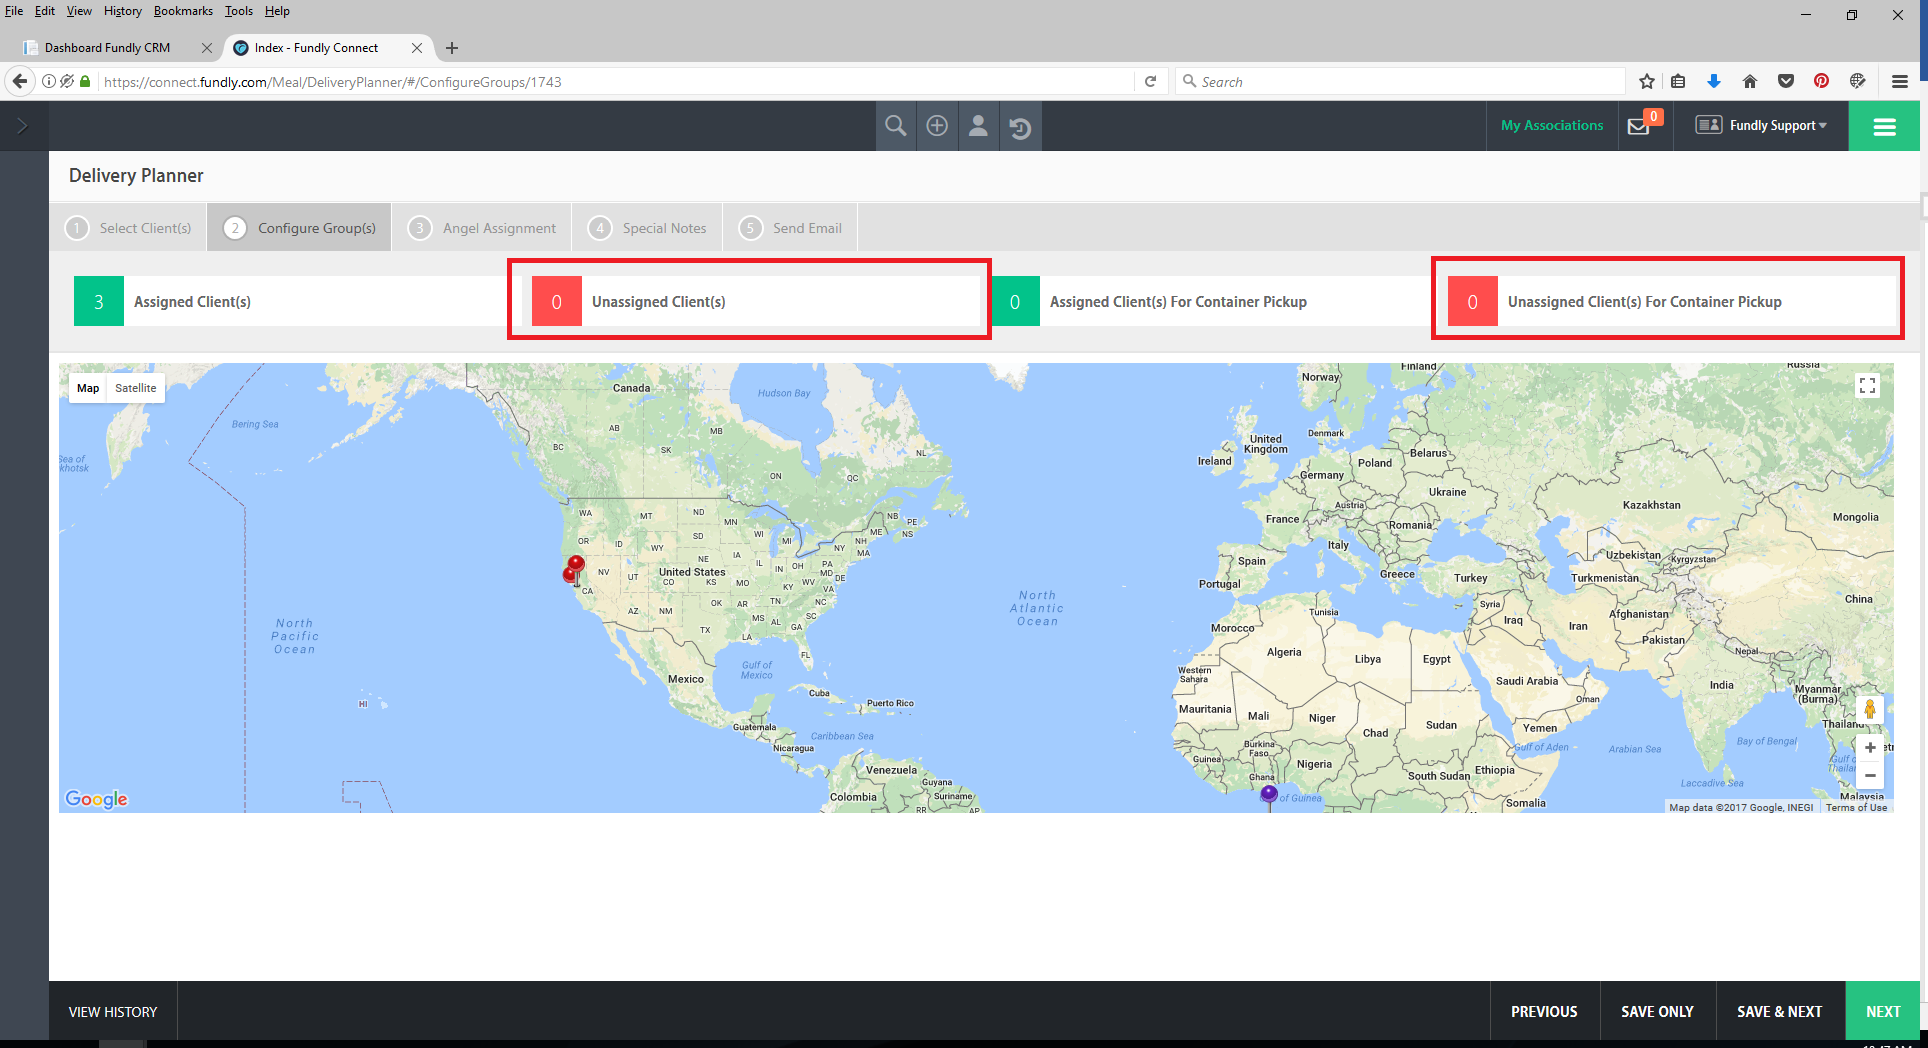
- At the top of the page, the # of clients for meal delivery who have been assigned to a delivery route, the # of clients for meal delivery who have not yet been assigned to a delivery route, the # of completed clients who need container pick up who have been assigned to a delivery route, and the # of completed clients who need container pick up who have not yet been assigned to a delivery route is displayed. Clicking on any of these buttons will bring up a list of clients in that category.
- Routes are assigned by assigning one or more client a route/pin color and then also assigning that route/pin color to the Delivery Angel who will deliver the meals/pick up the containers of completed clients.
- To assign a client to a delivery route/delivery angel, click the pin and then select from the resulting color/route options. A “P” on a pin means the client/location is marked for container pick up (completed clients). Pins of the same color with stems and without stems are two different route/delivery angel assignments.
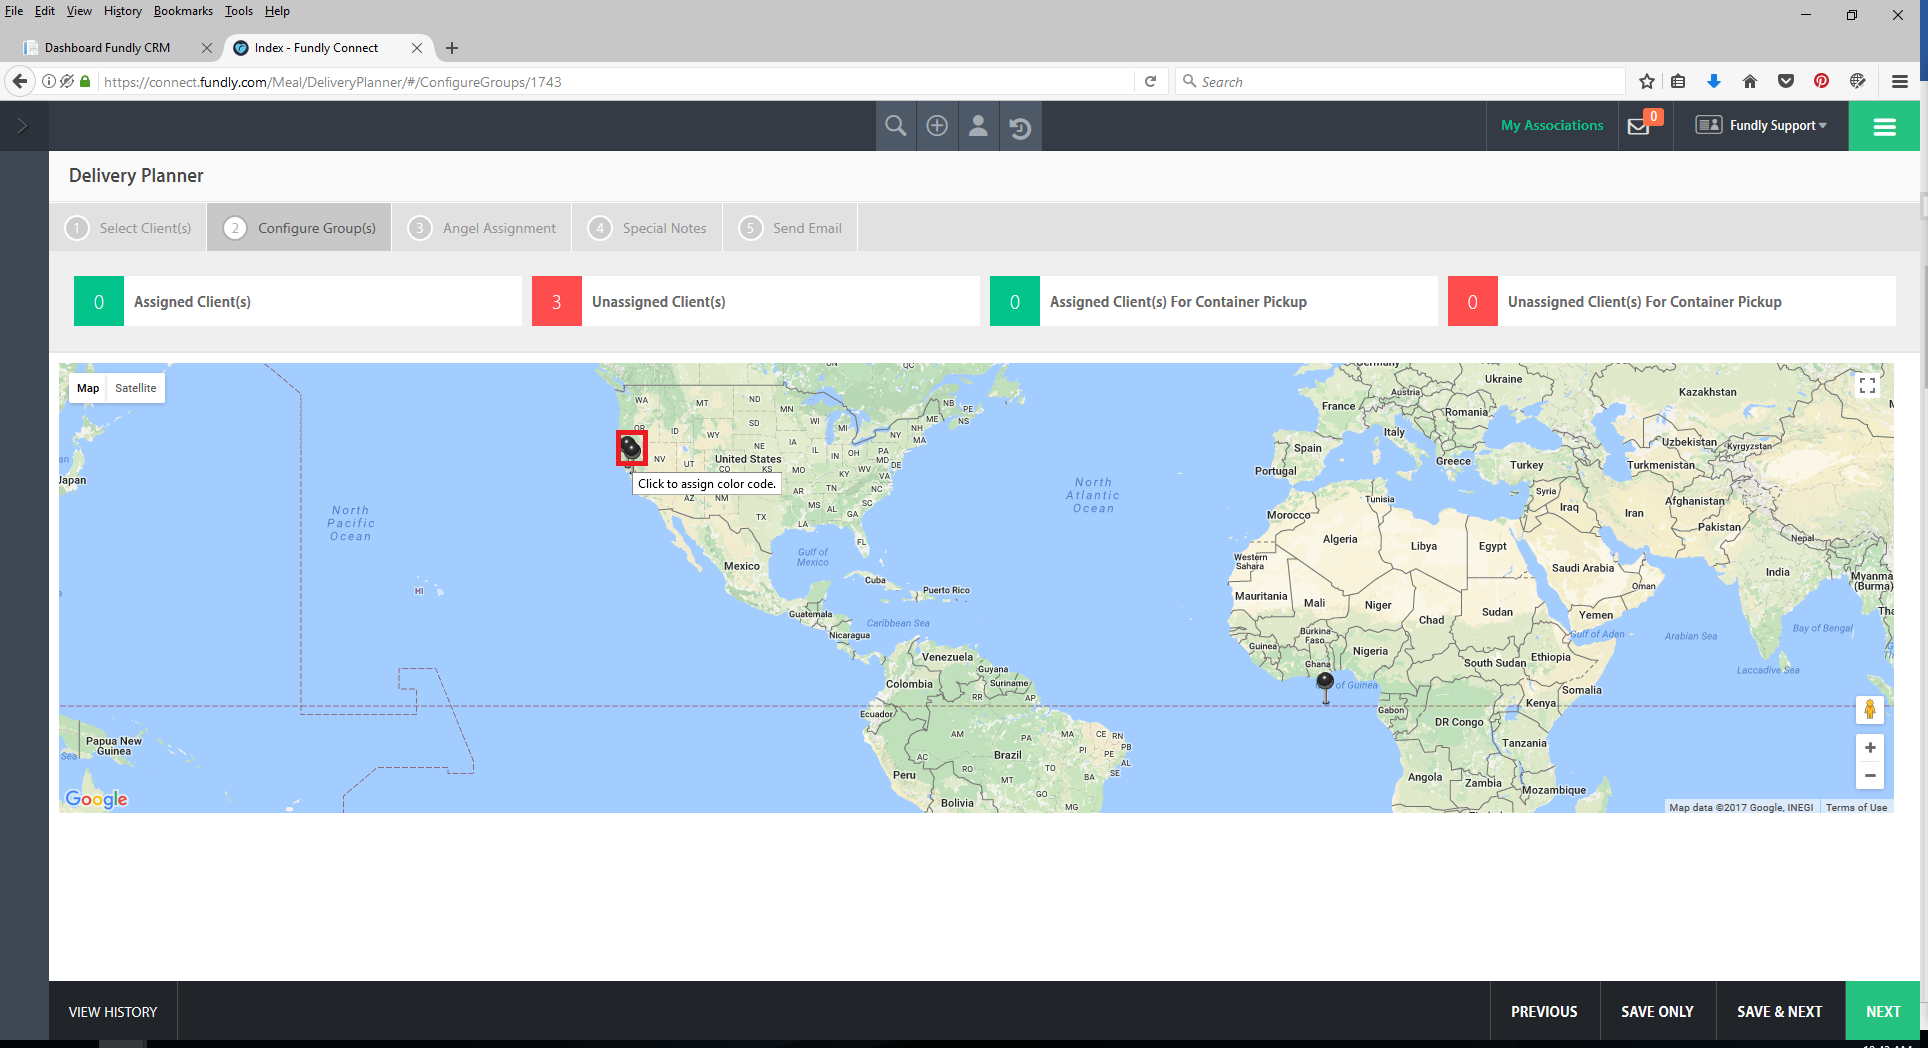
- Click on the desired pin/route color to assign that client to that route, and then click the X in the upper right hand corner of the pop up box to close the route assignment for that client. Repeat this step for every client until all clients have been assigned (# unassigned and # unassigned for container pick up are both 0).
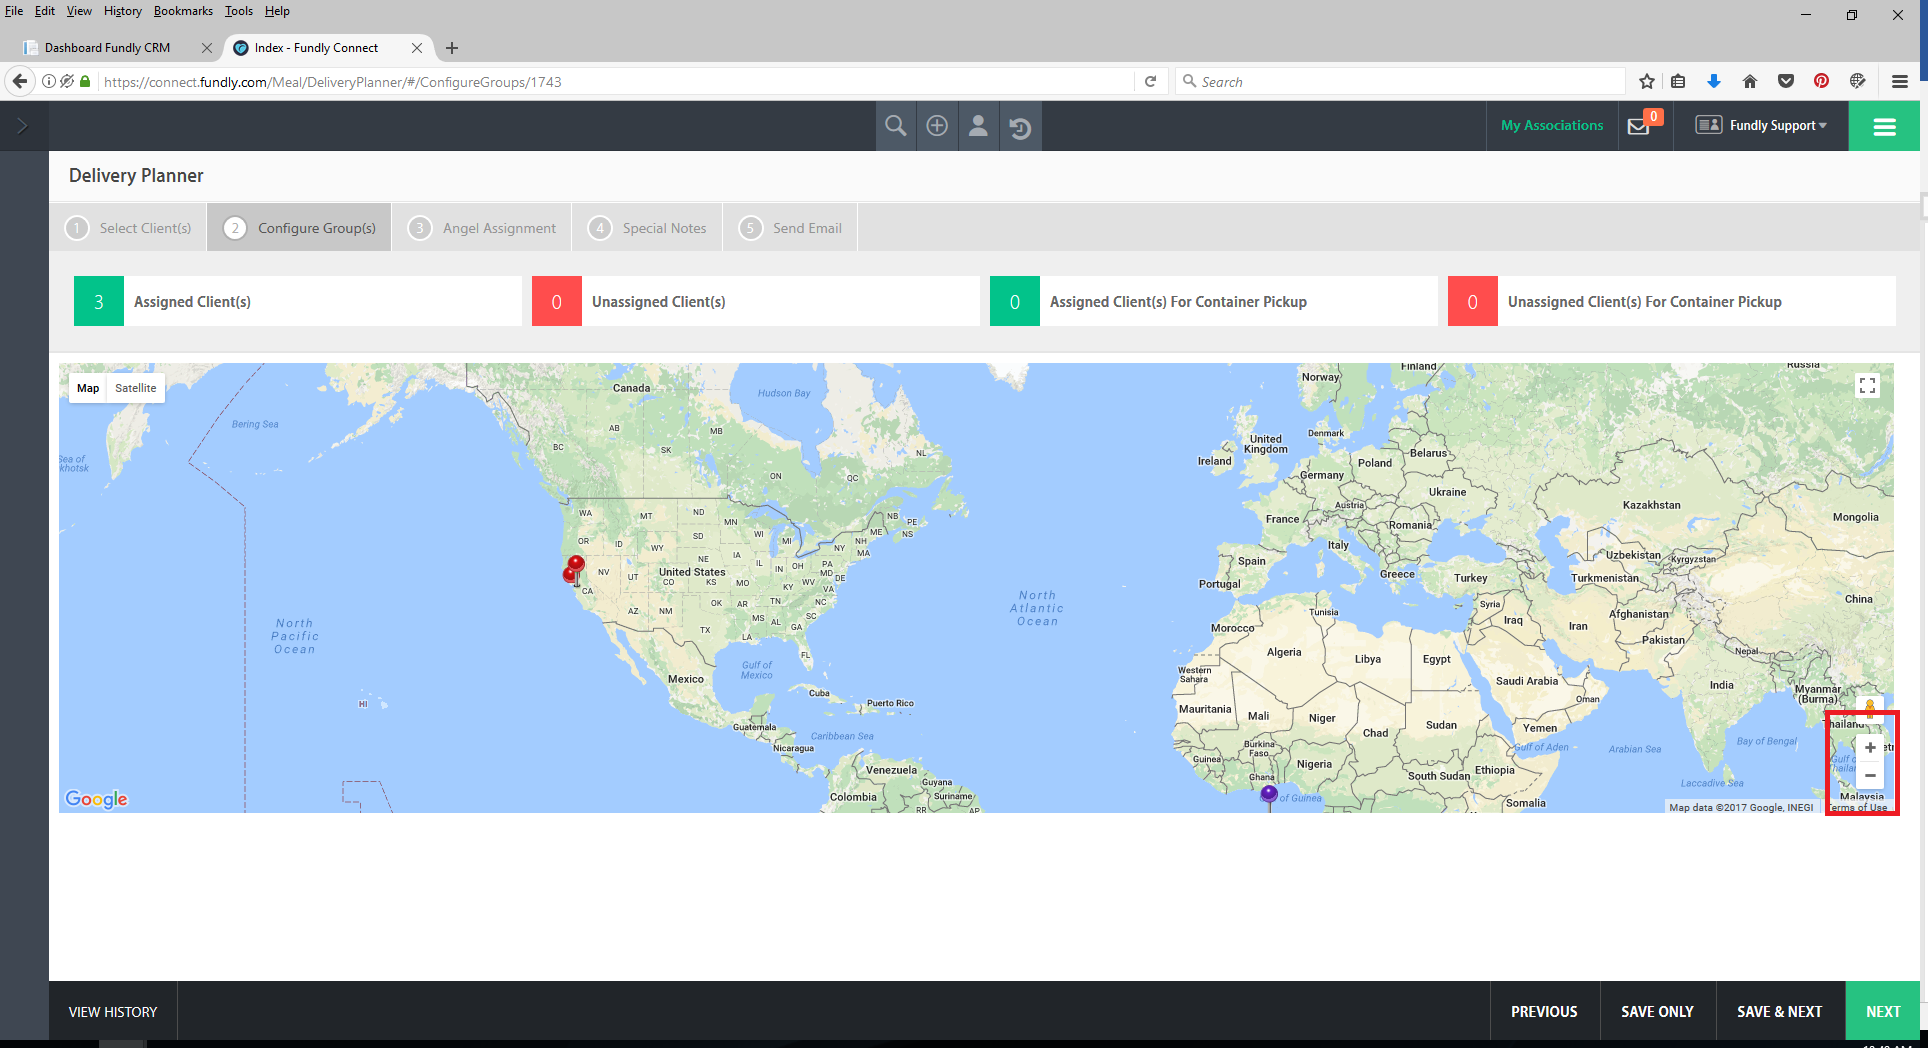
- You can zoom in and out of the map using the + and – in the lower right hand corner to better reach individual locations/pins that might be clustered together and you can also click and drag the map to move around and reach all pins.
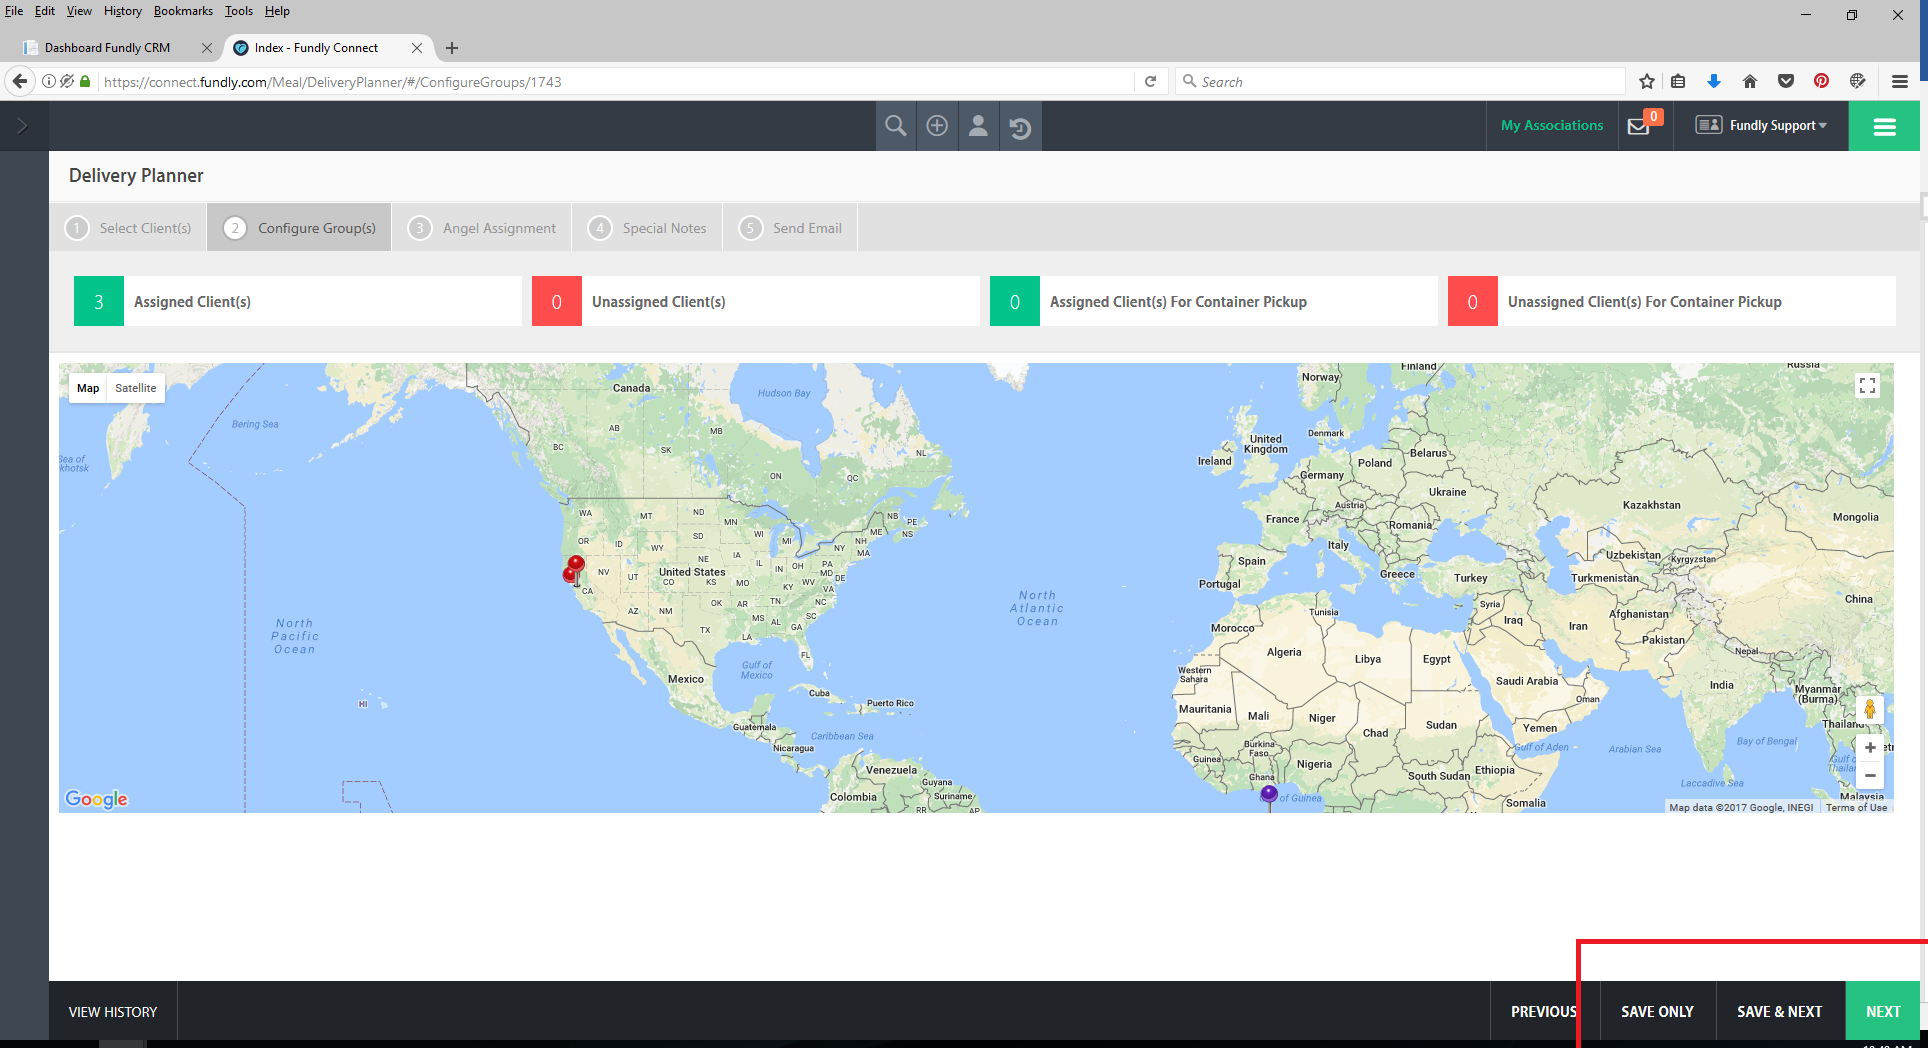
- To save your work and return later, click the Save Only button in the lower right hand corner. To save your work and move to the next step, click Save & Next. Click Next to move to the next step without saving.
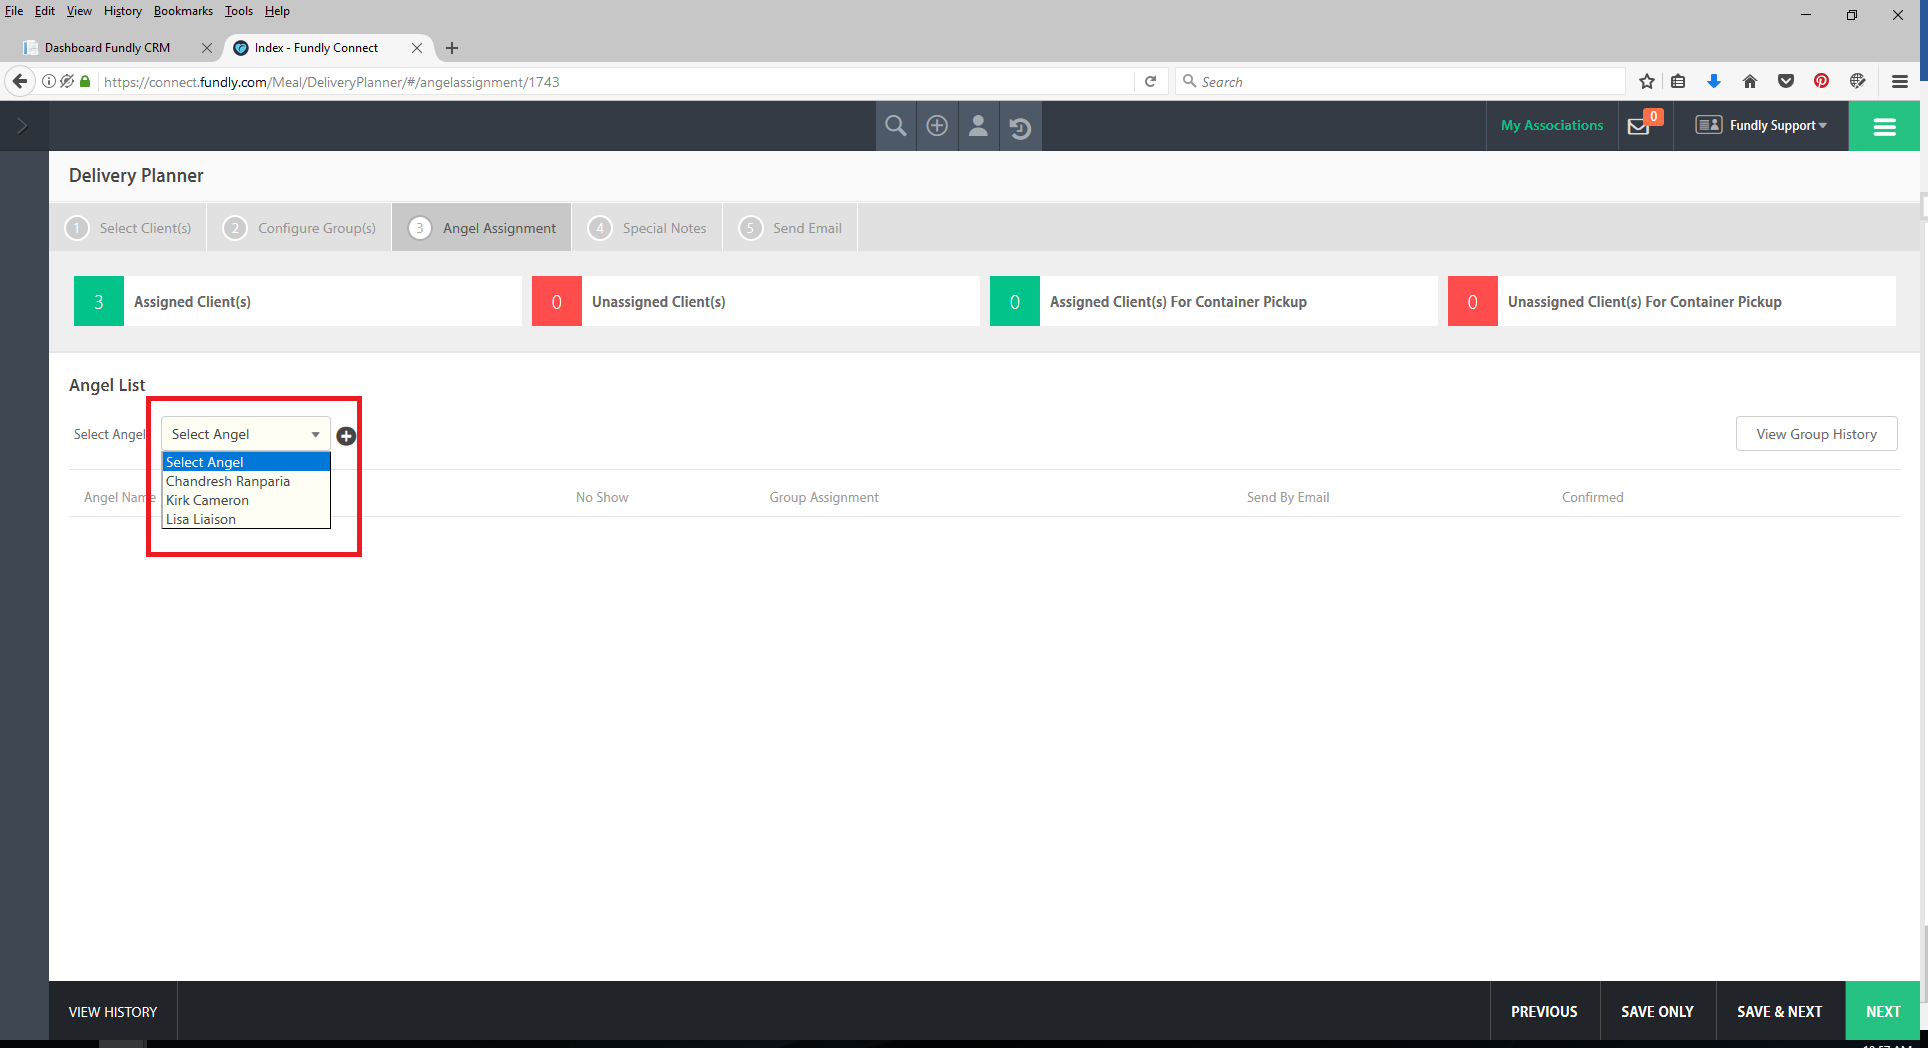
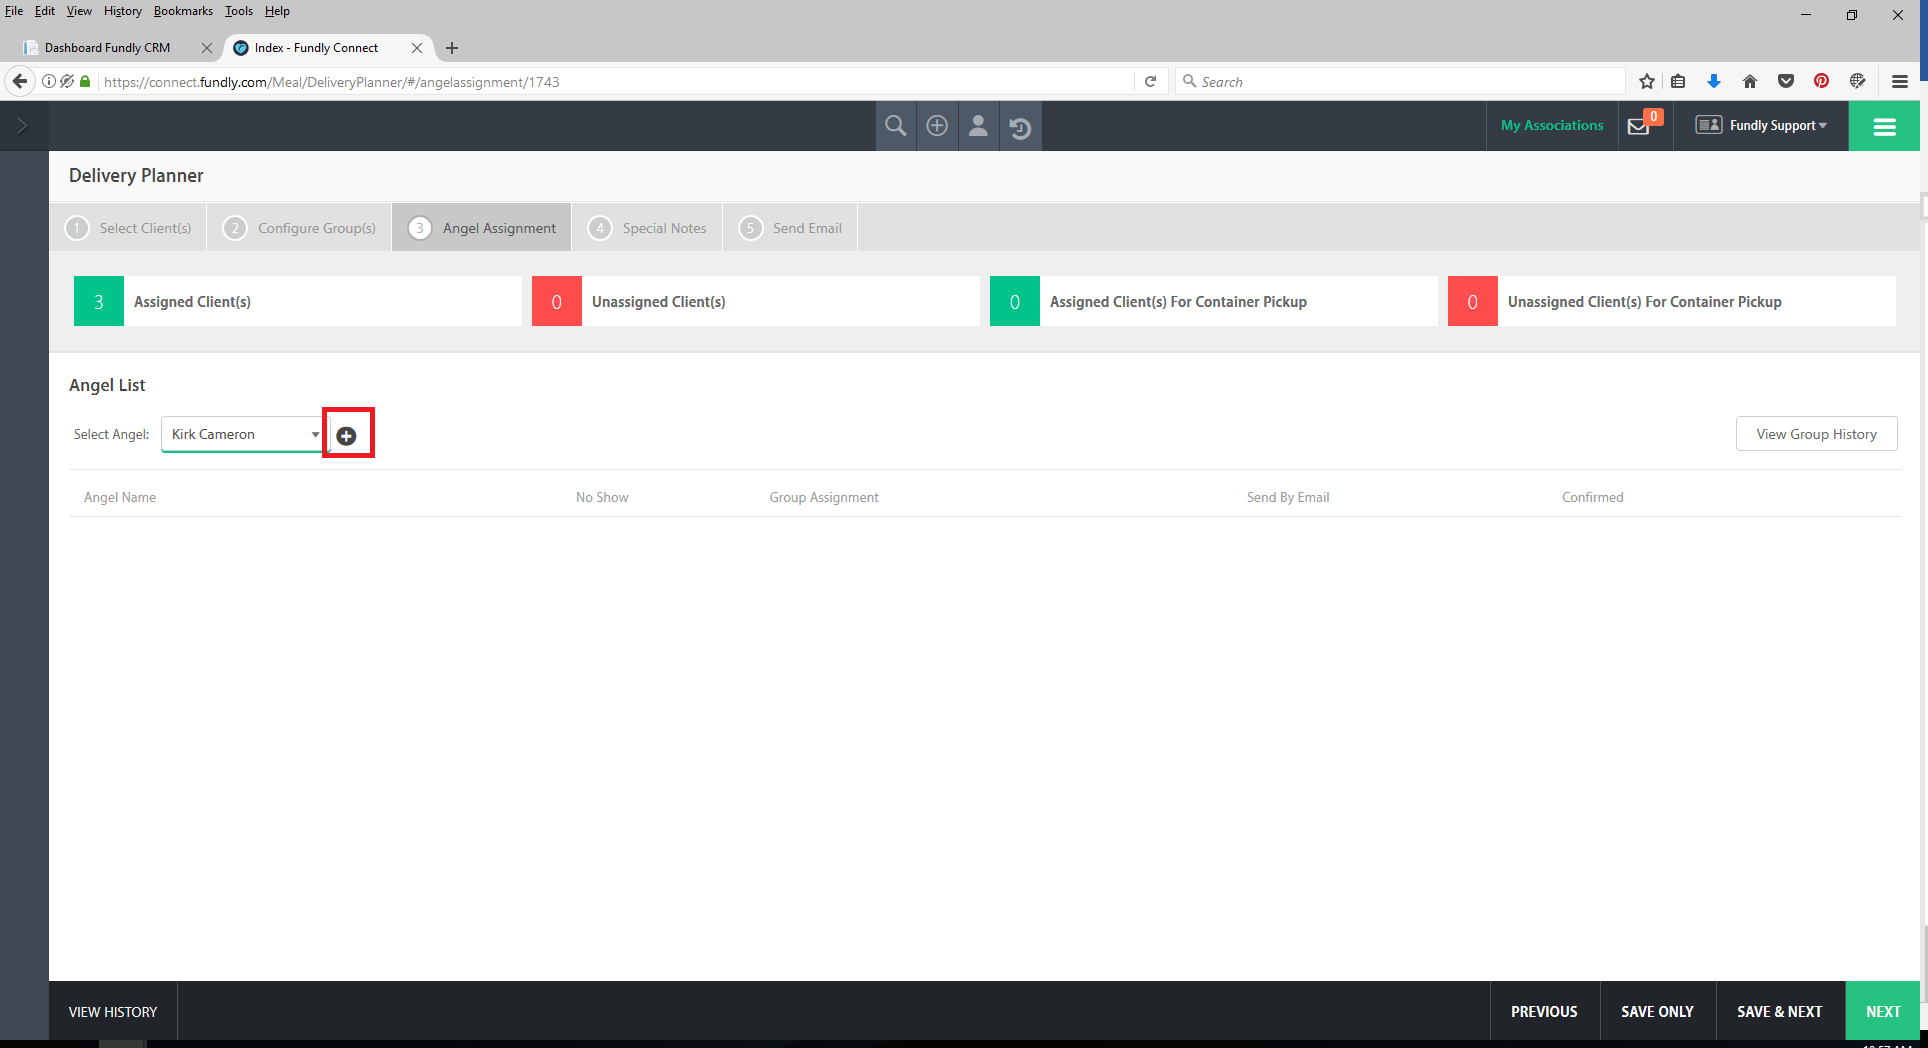
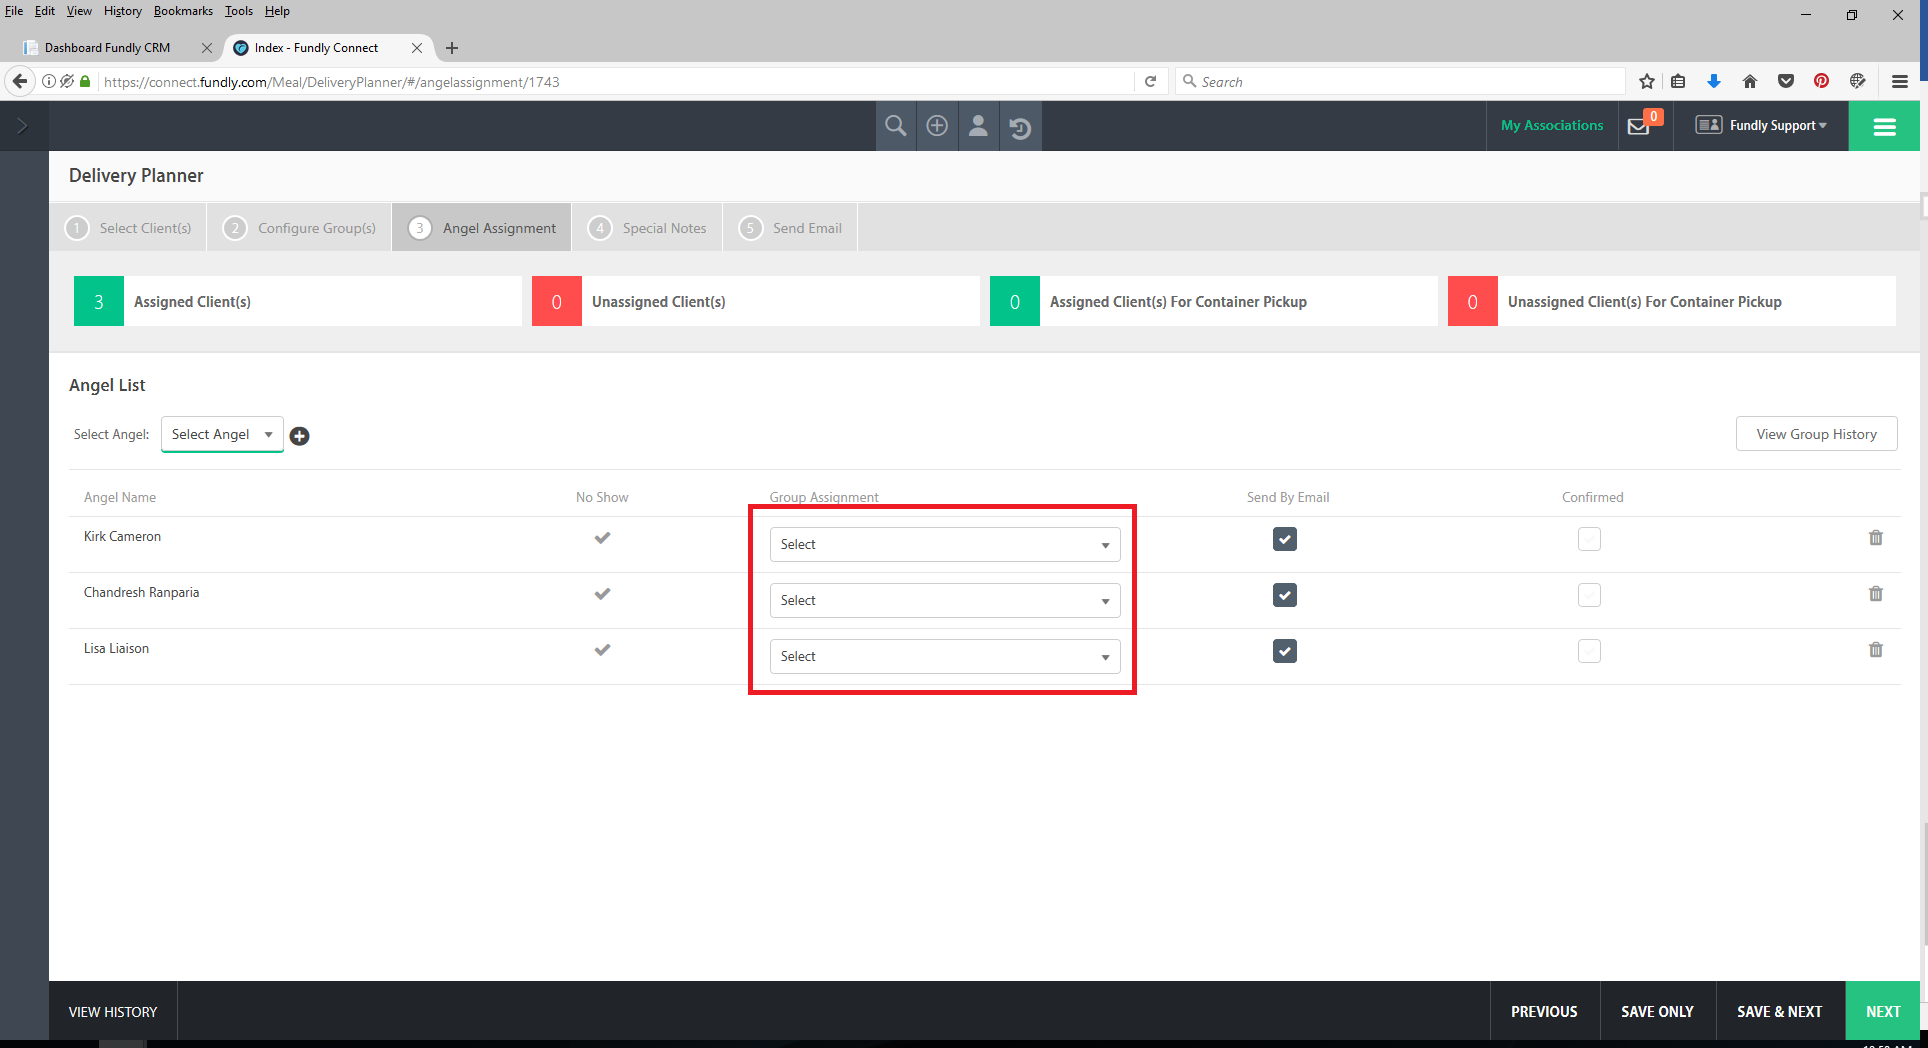
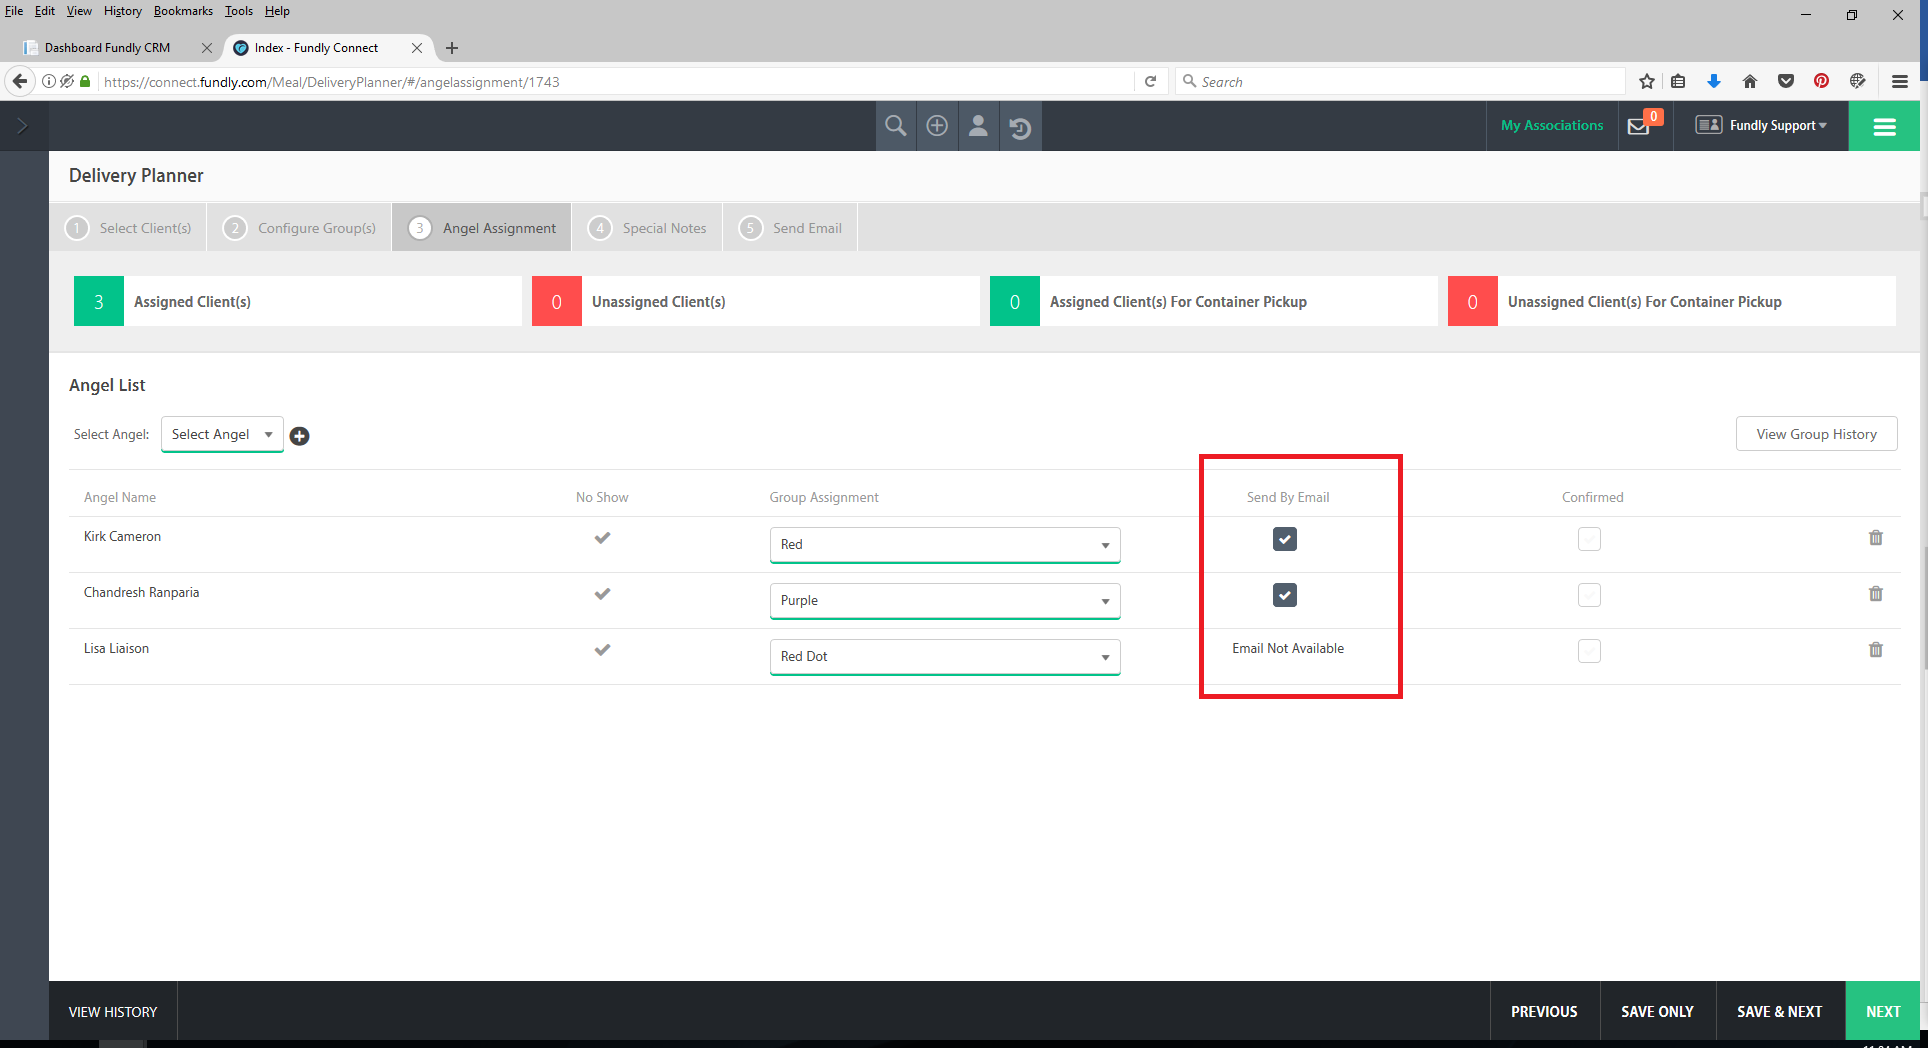
- On tab #3, Angel Assignment, assign the Delivery Angels who will be delivering meals and/or picking up containers to routes. To begin, select a Delivery Angel from the drop down list and then click the black “+” button. The list of available Delivery Angels pulls from the Delivery Angel volunteer opportunity. For an Angel to appear in the list, the Angel must be scheduled to volunteer on the delivery date. See this tutorial on managing Delivery Angel volunteers.
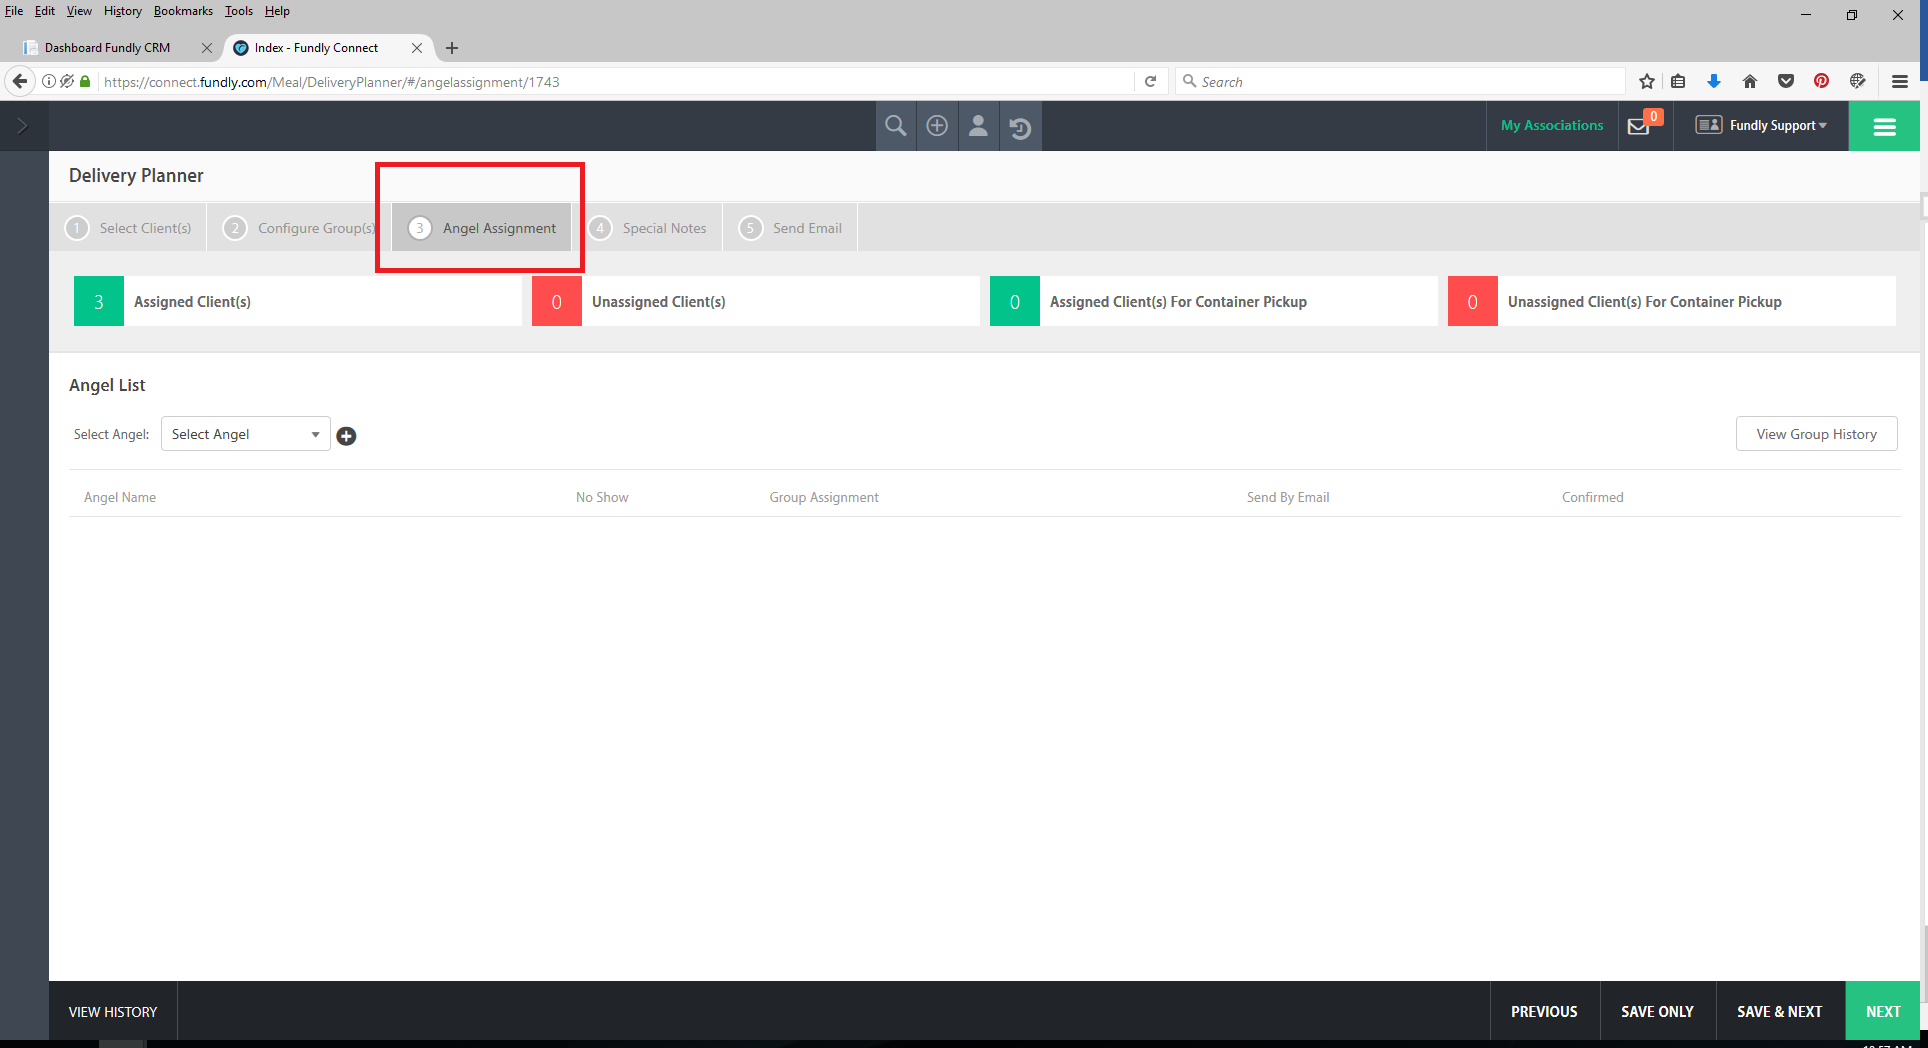
- The View Group History button will show the history of which Delivery Angels have been assigned to which clients for the last four weeks (if applicable) to help in matching Delivery Angels to routes.
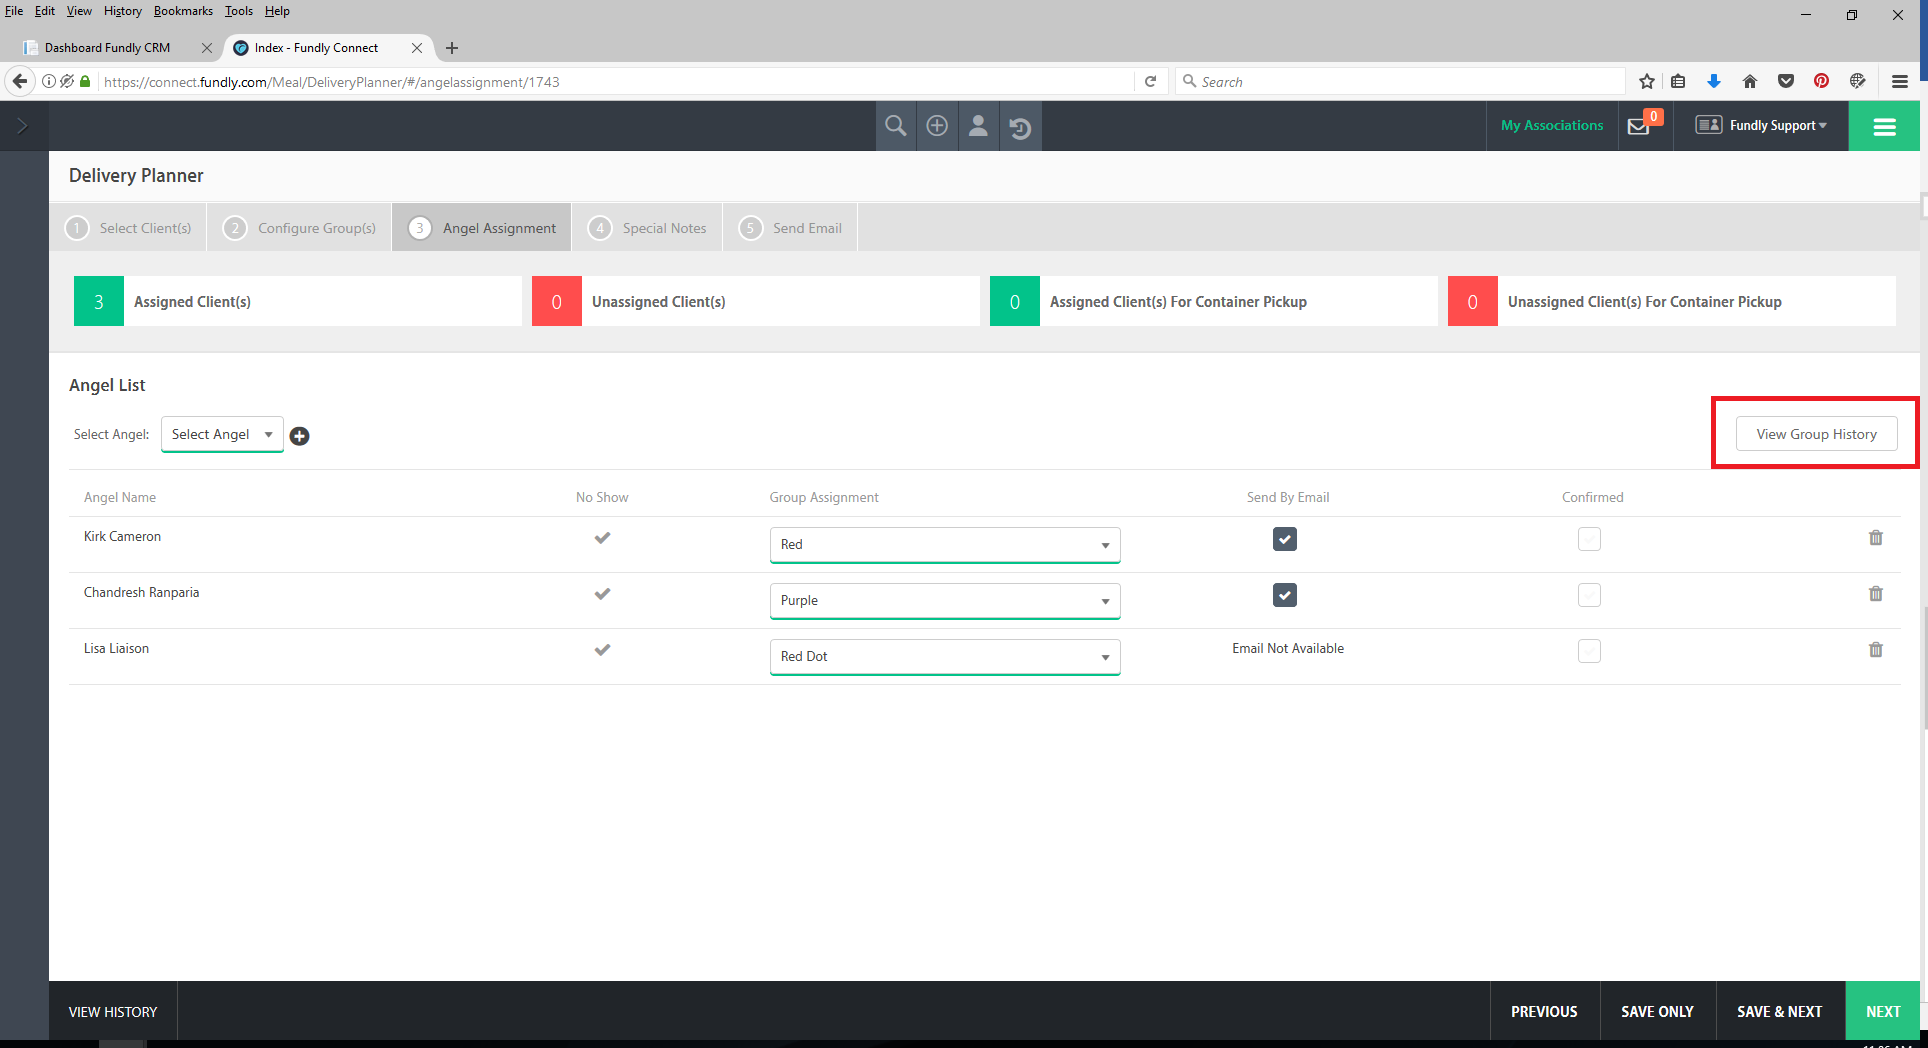
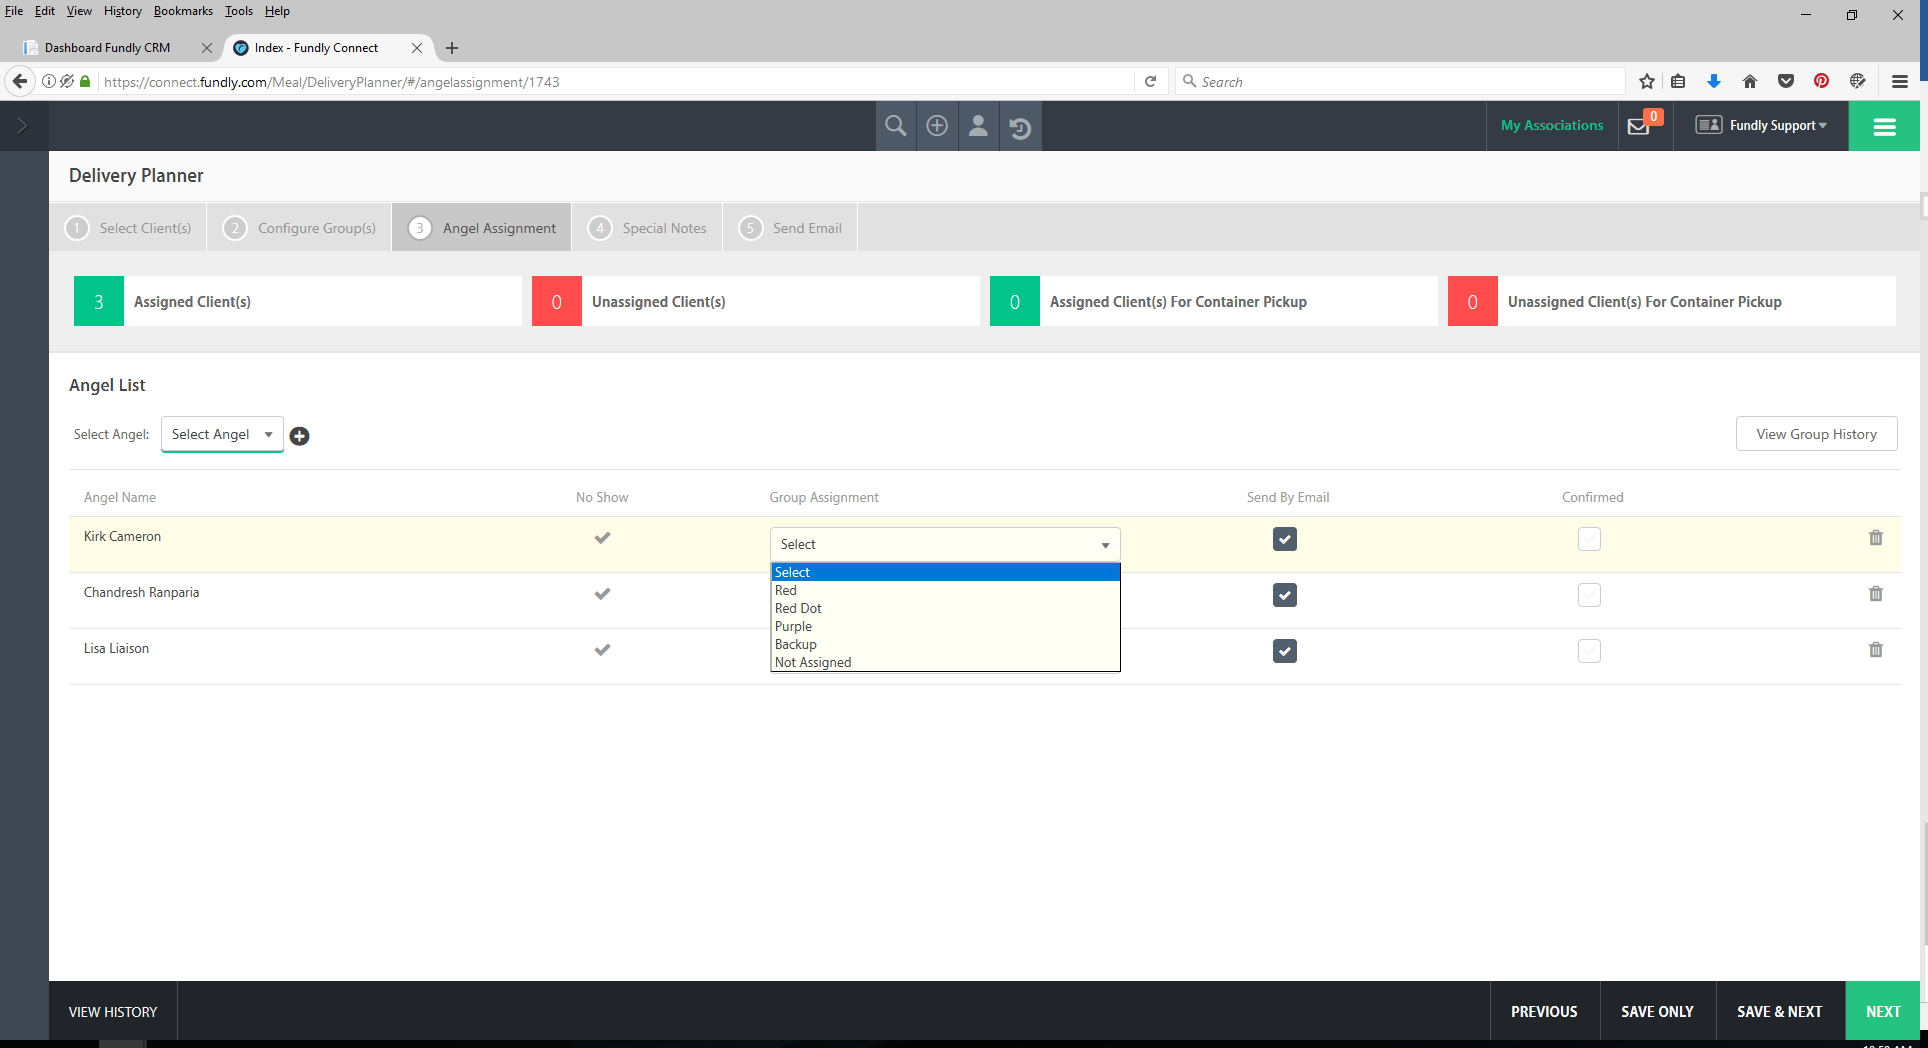
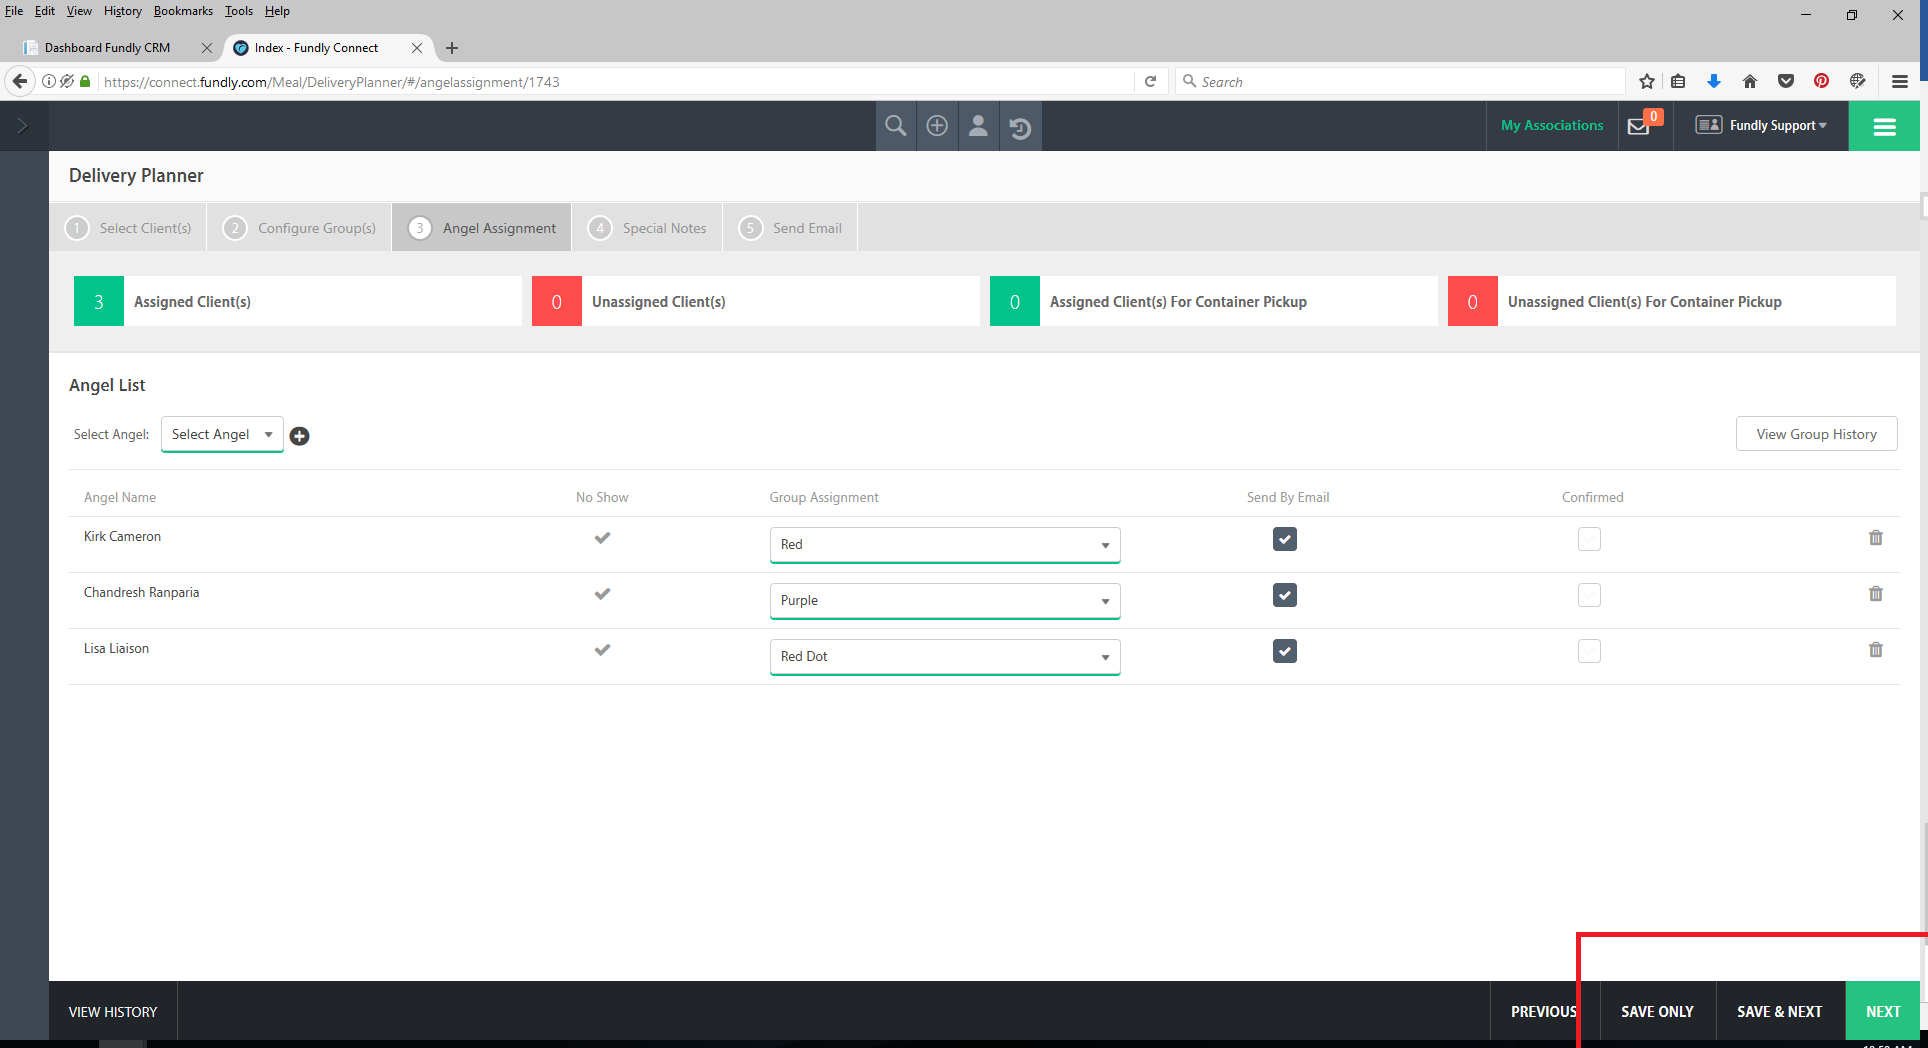
- To assign selected Delivery Angels to a route, click the Group Assignment drop down menu and select the route/pin color to assign to the angel. Repeat this step for each angel. Use the “back up” option to assign back up Delivery Angels to routes in the event the main assignee doesn’t show up or is unable to volunteer on the date. Use the “no assignment” option to indicate that there is no route available/the Delivery Angel is not needed on the date. Every Delivery Angel added to the delivery planner/date MUST have a group/route assignment before you can move to the next step and every route/pin assignment created in Tab #2: Configure Groups MUST have a Delivery Angel assigned before you can move to the next step.
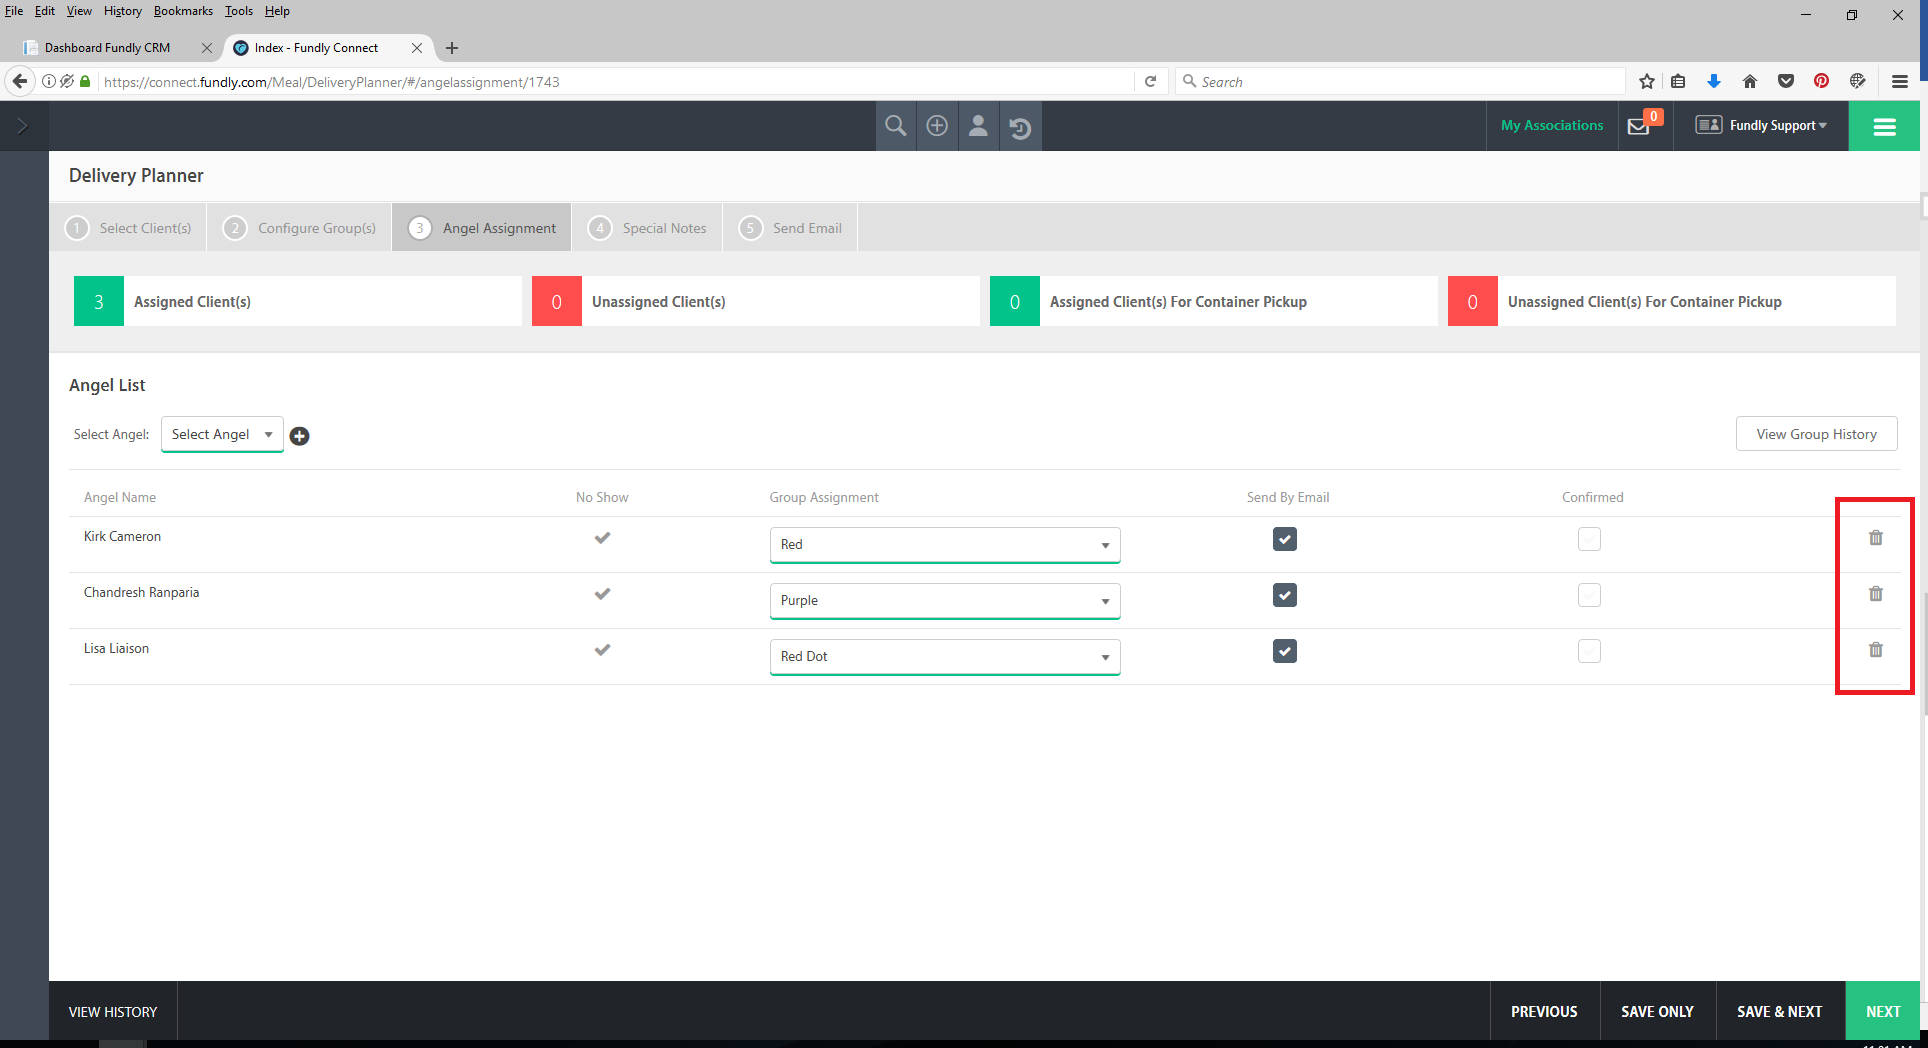
- To remove a Delivery Angel from the delivery date (because the Angel is not available), click the trash can icon to the right of the Delivery Angel.
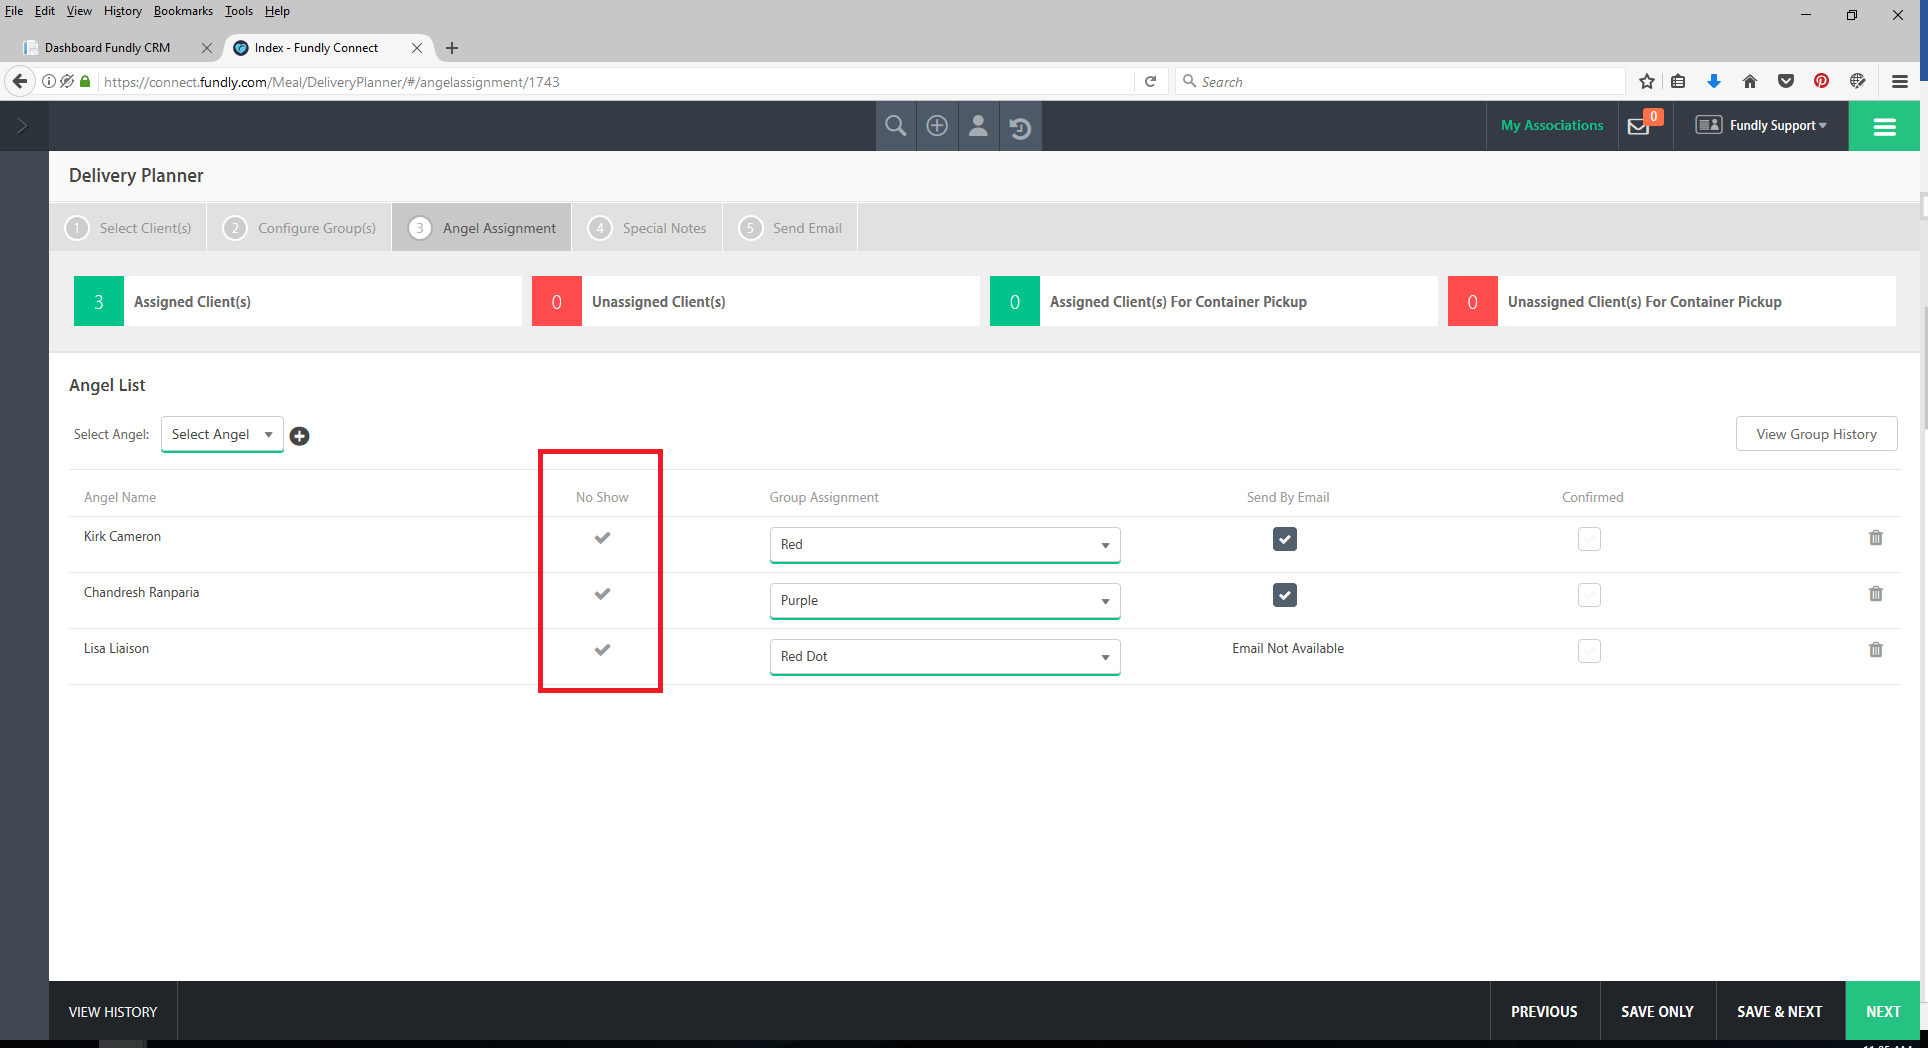
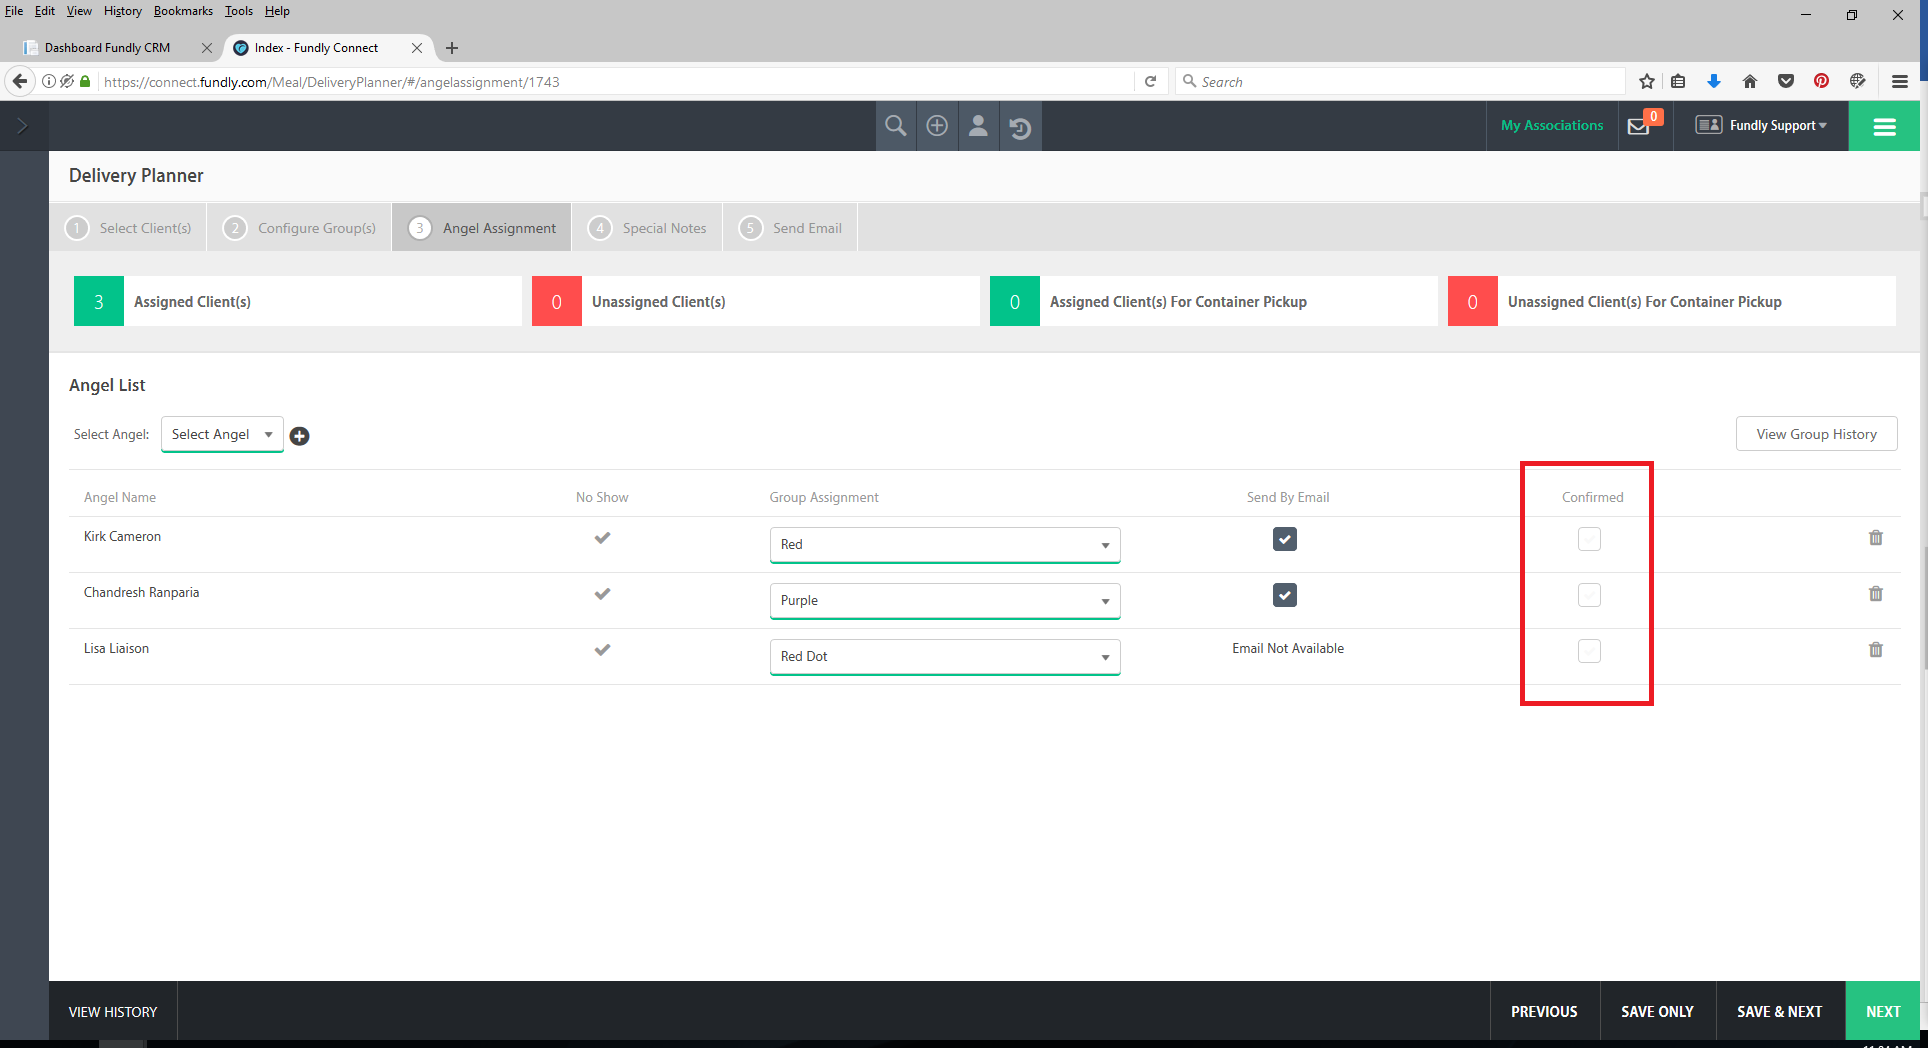
- The No Show column is used to indicate if a Delivery Angel no-showed for their assignment and should be left blank/unchecked for now.
- Click the Send by Email check box to indicate the Delivery Angel will be sent their route assignment/details via email (otherwise, if route assignment must be delivered via pick up or mail, leave the box unchecked).
- Check the Confirmed box when you have confirmed the Delivery Angel is available and has received their route assignment and has confirmed they will proceed with the route as planned.
- To save your work and return later, click the Save Only button in the lower right hand corner. To save your work and move to the next step, click Save & Next. Click Next to move to the next step without saving.
- On tab #4: Special Notes, select the template that will be used to generate the Delivery Angel route assignment letters/emails. Fill in the Sender Name, Sender Email Address, and Subject line of the email Delivery Angels will receive with the route assignments.
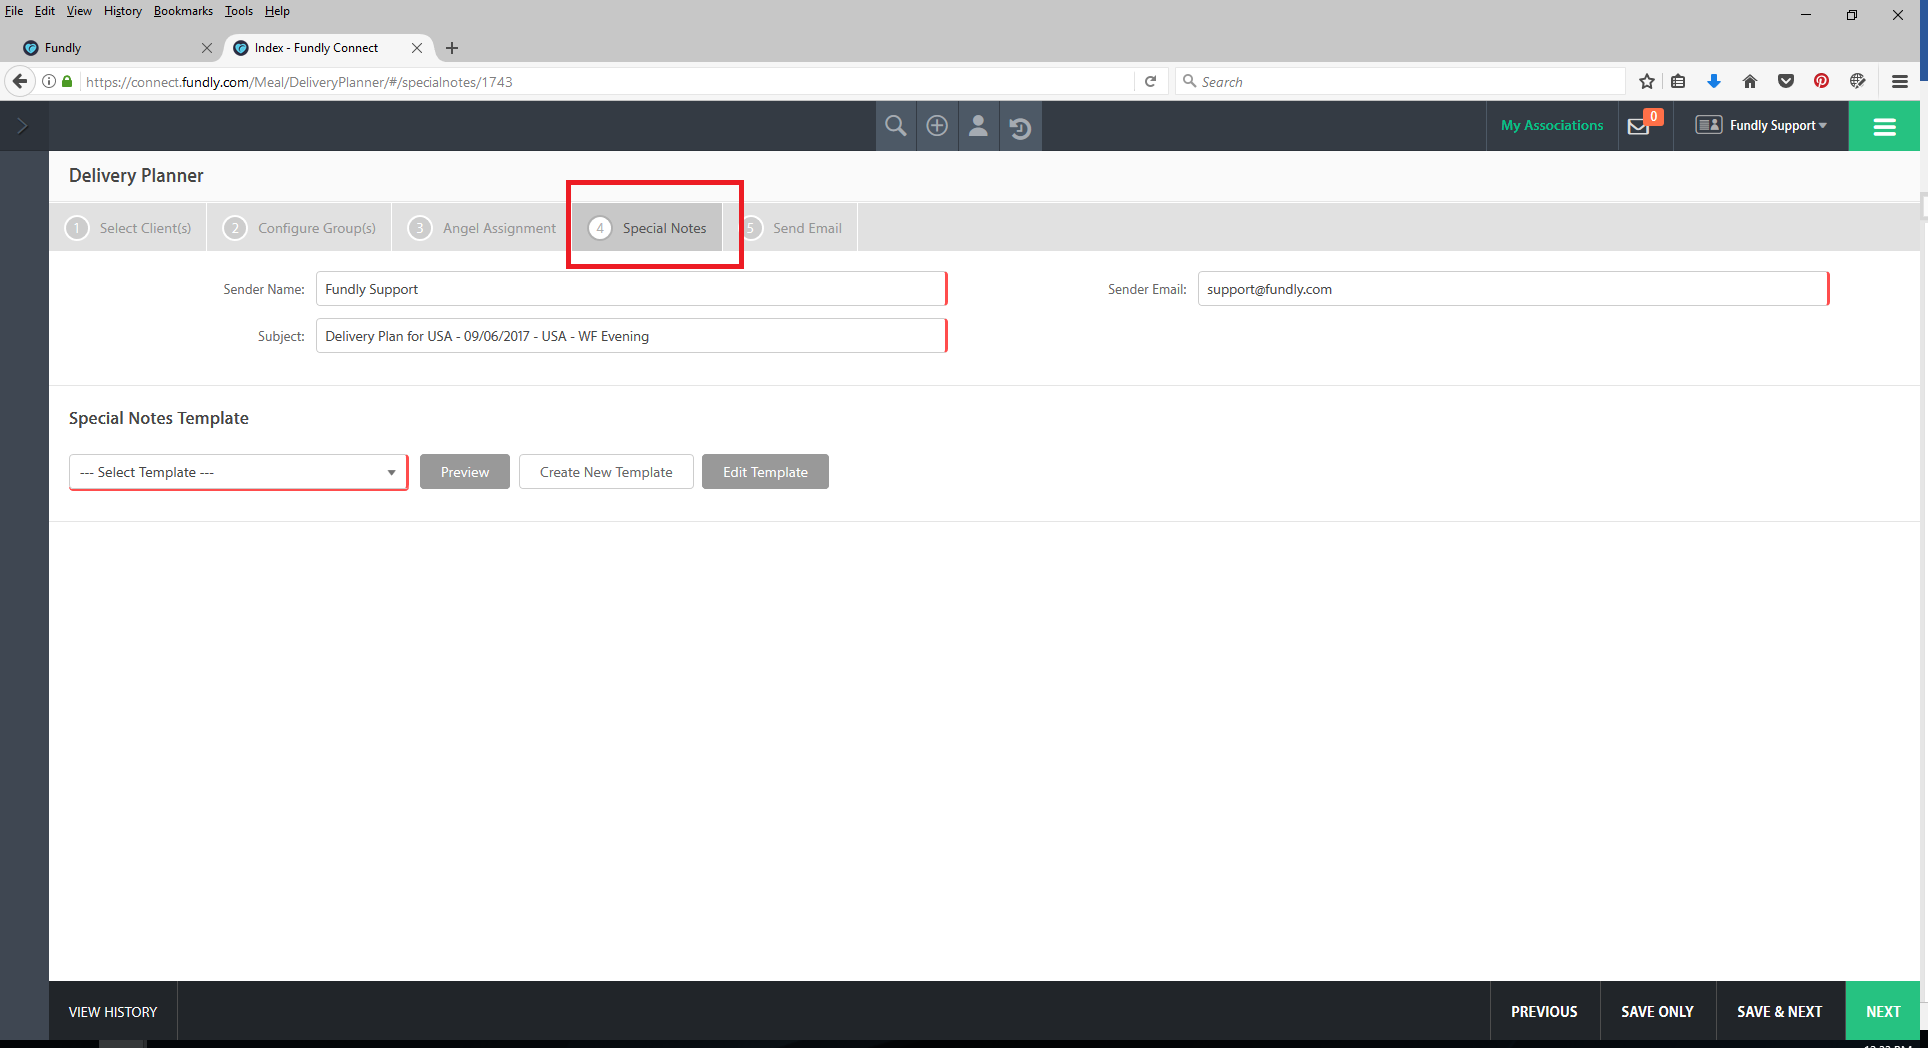
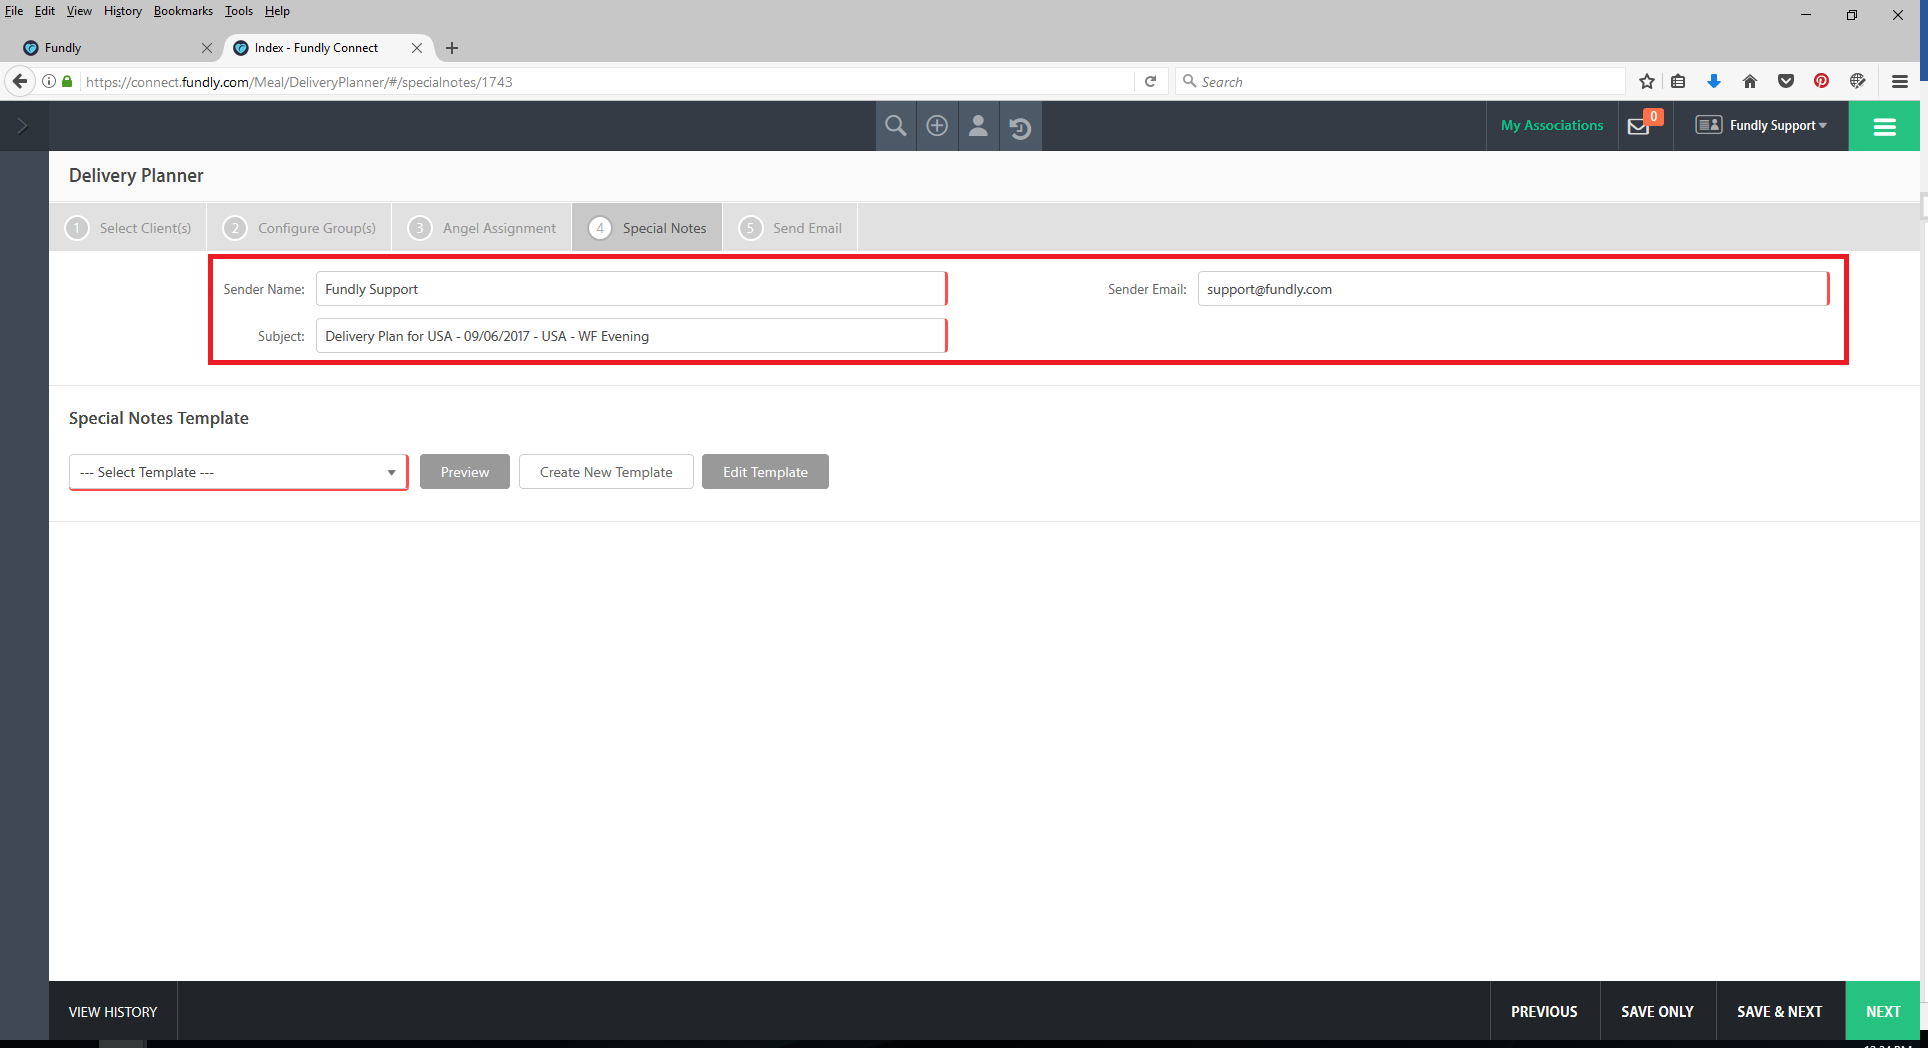
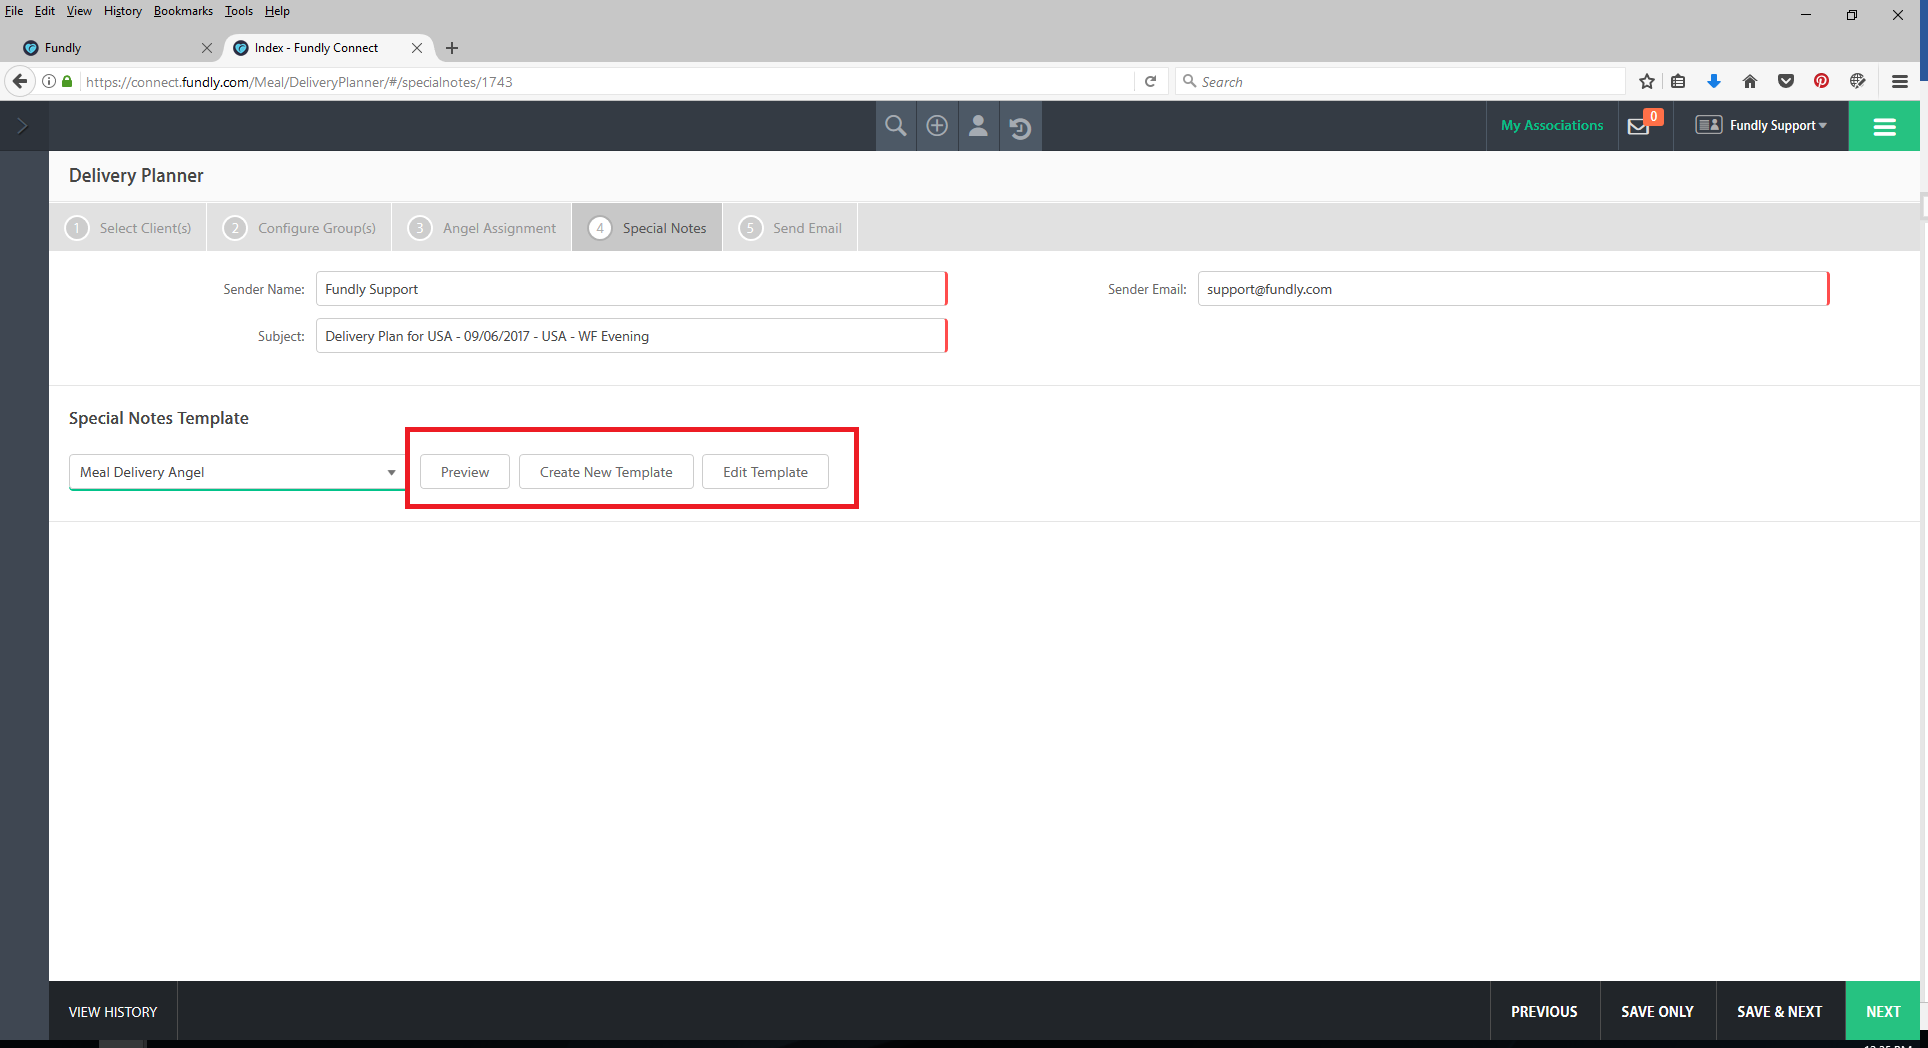
- From the Select Template drop down, select from your available letter templates or click Create New Template to create a new letter template from scratch. Letter templates are configured in the Labels and Letters option of the Main Menu. See this tutorial for help on working with letter templates.

- Once you have selected a letter template, you can Preview it or Edit it via the buttons to the right of the template name.
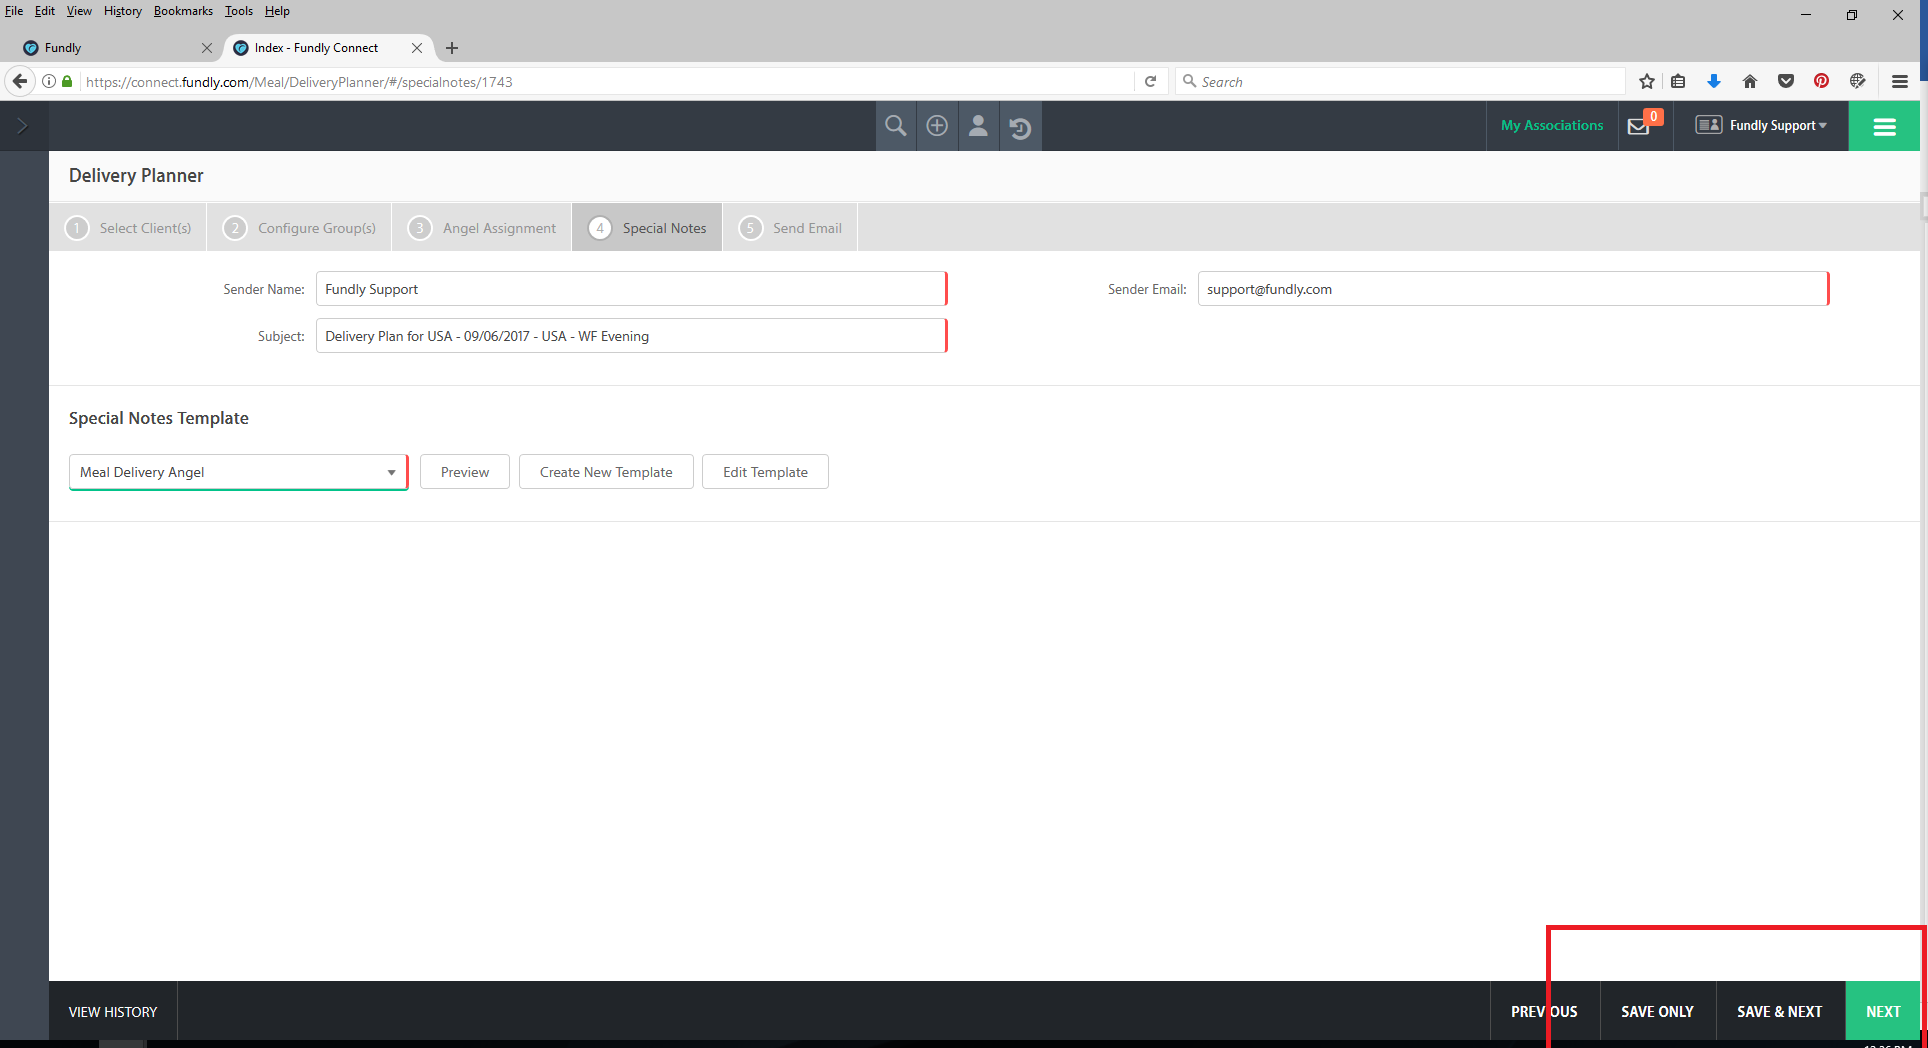
- To save your work and return later, click the Save Only button in the lower right hand corner. To save your work and move to the next step, click Save & Next. Click Next to move to the next step without saving.
- On tab #5: Send Email, you can trigger/send the delivery letter details emails configured on tab #4 to the Delivery Angels. Verify all previous steps have been completed and then click the Email button to send the emails.
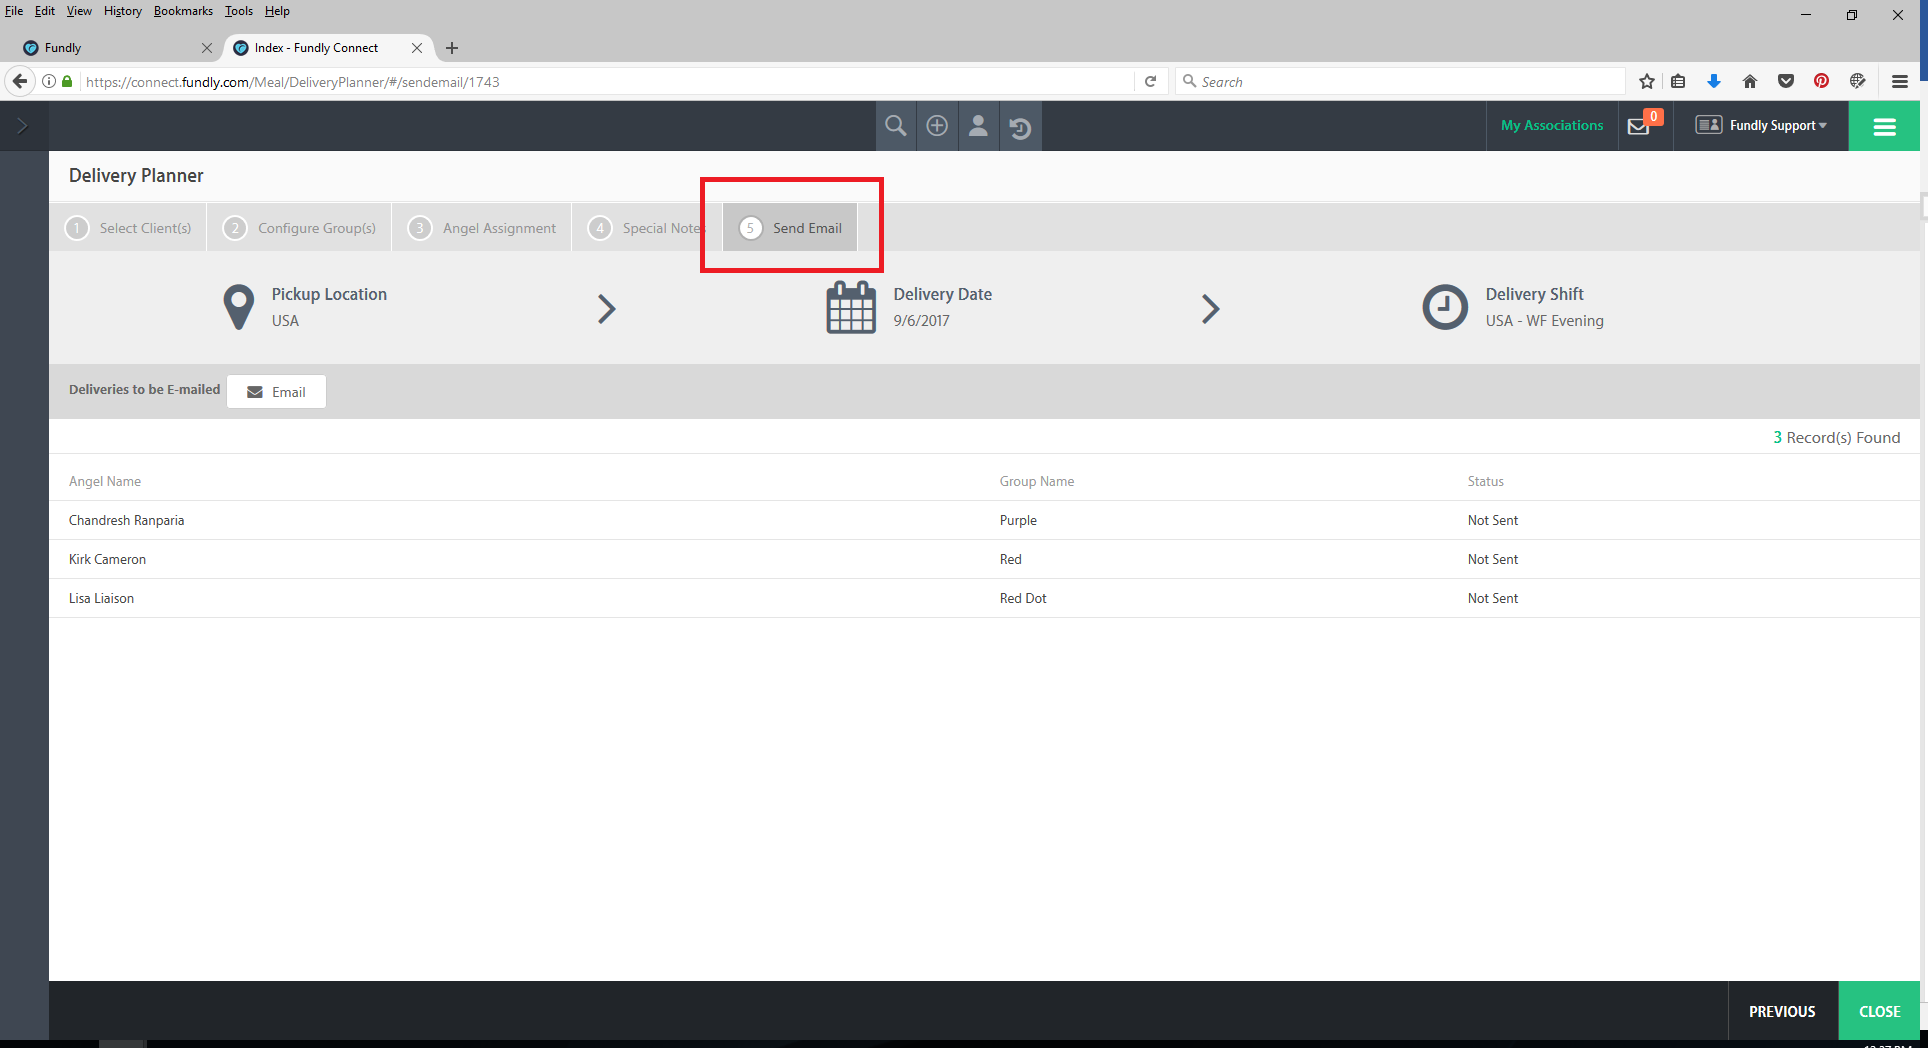
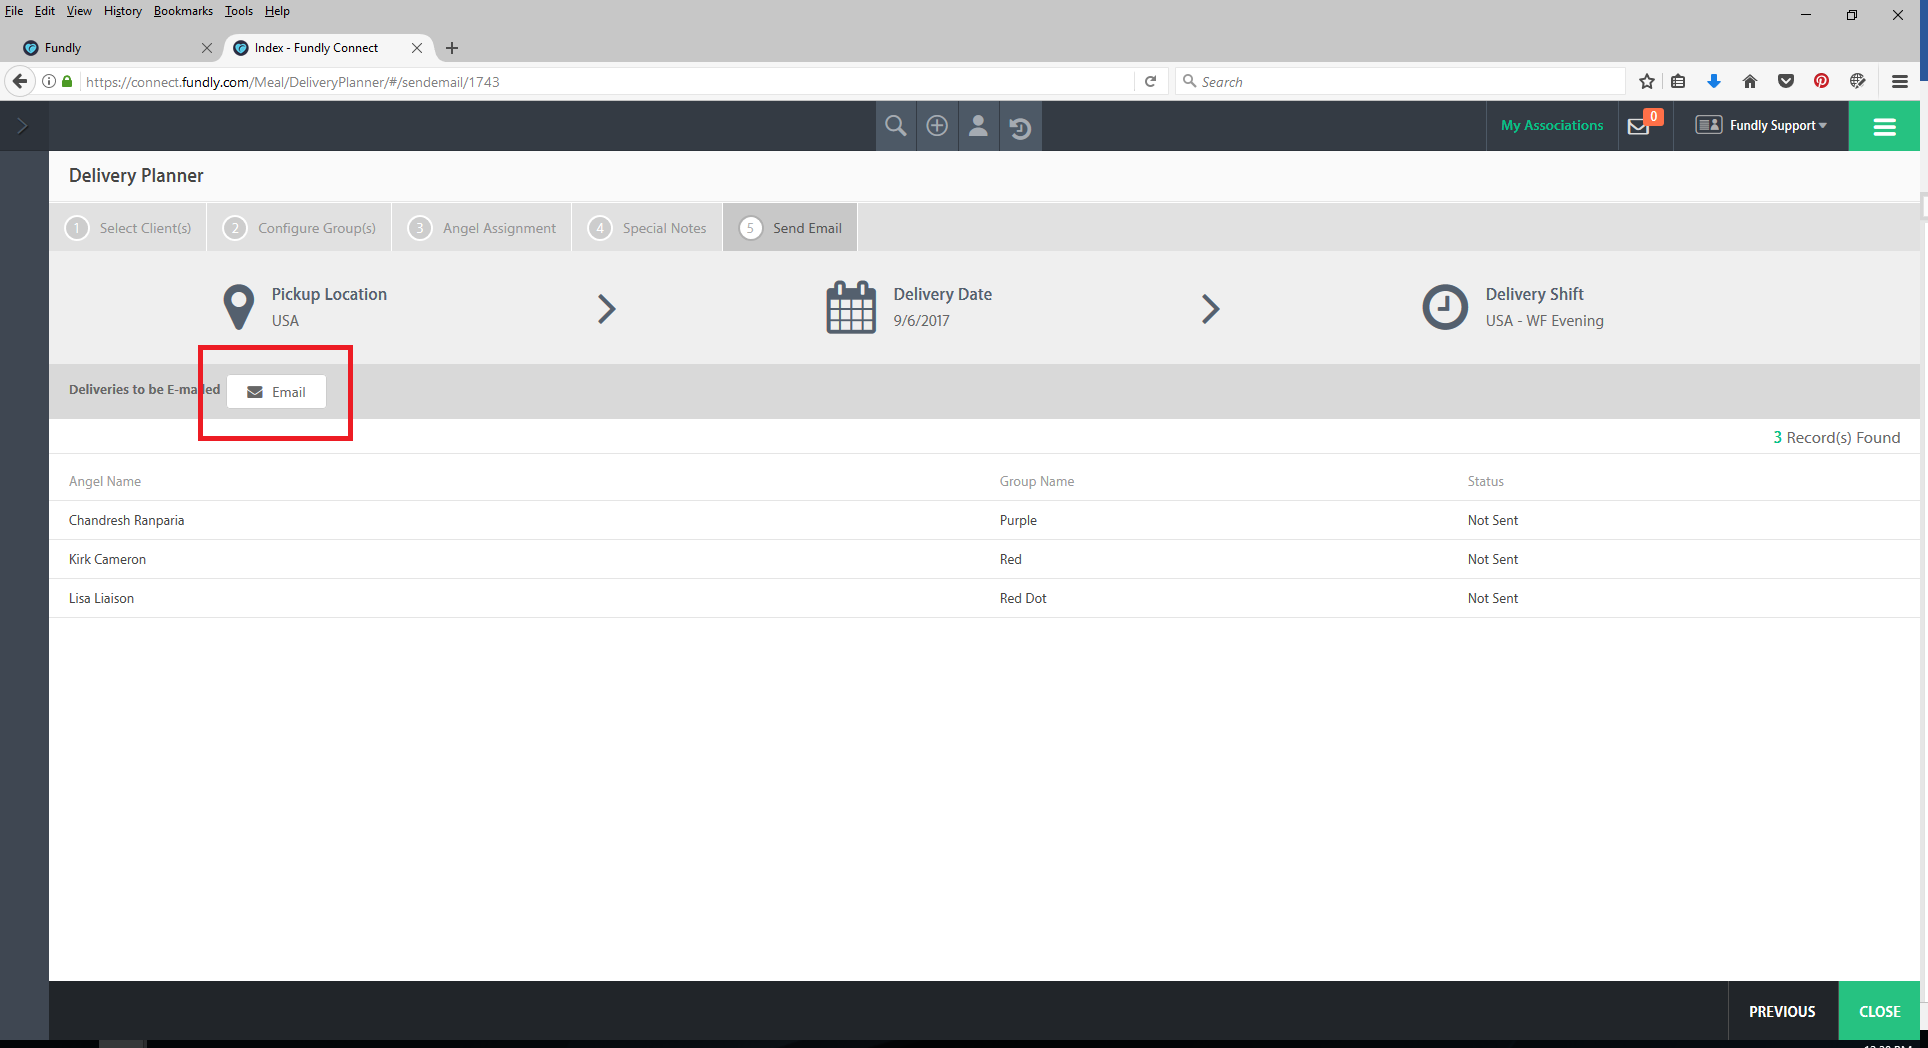
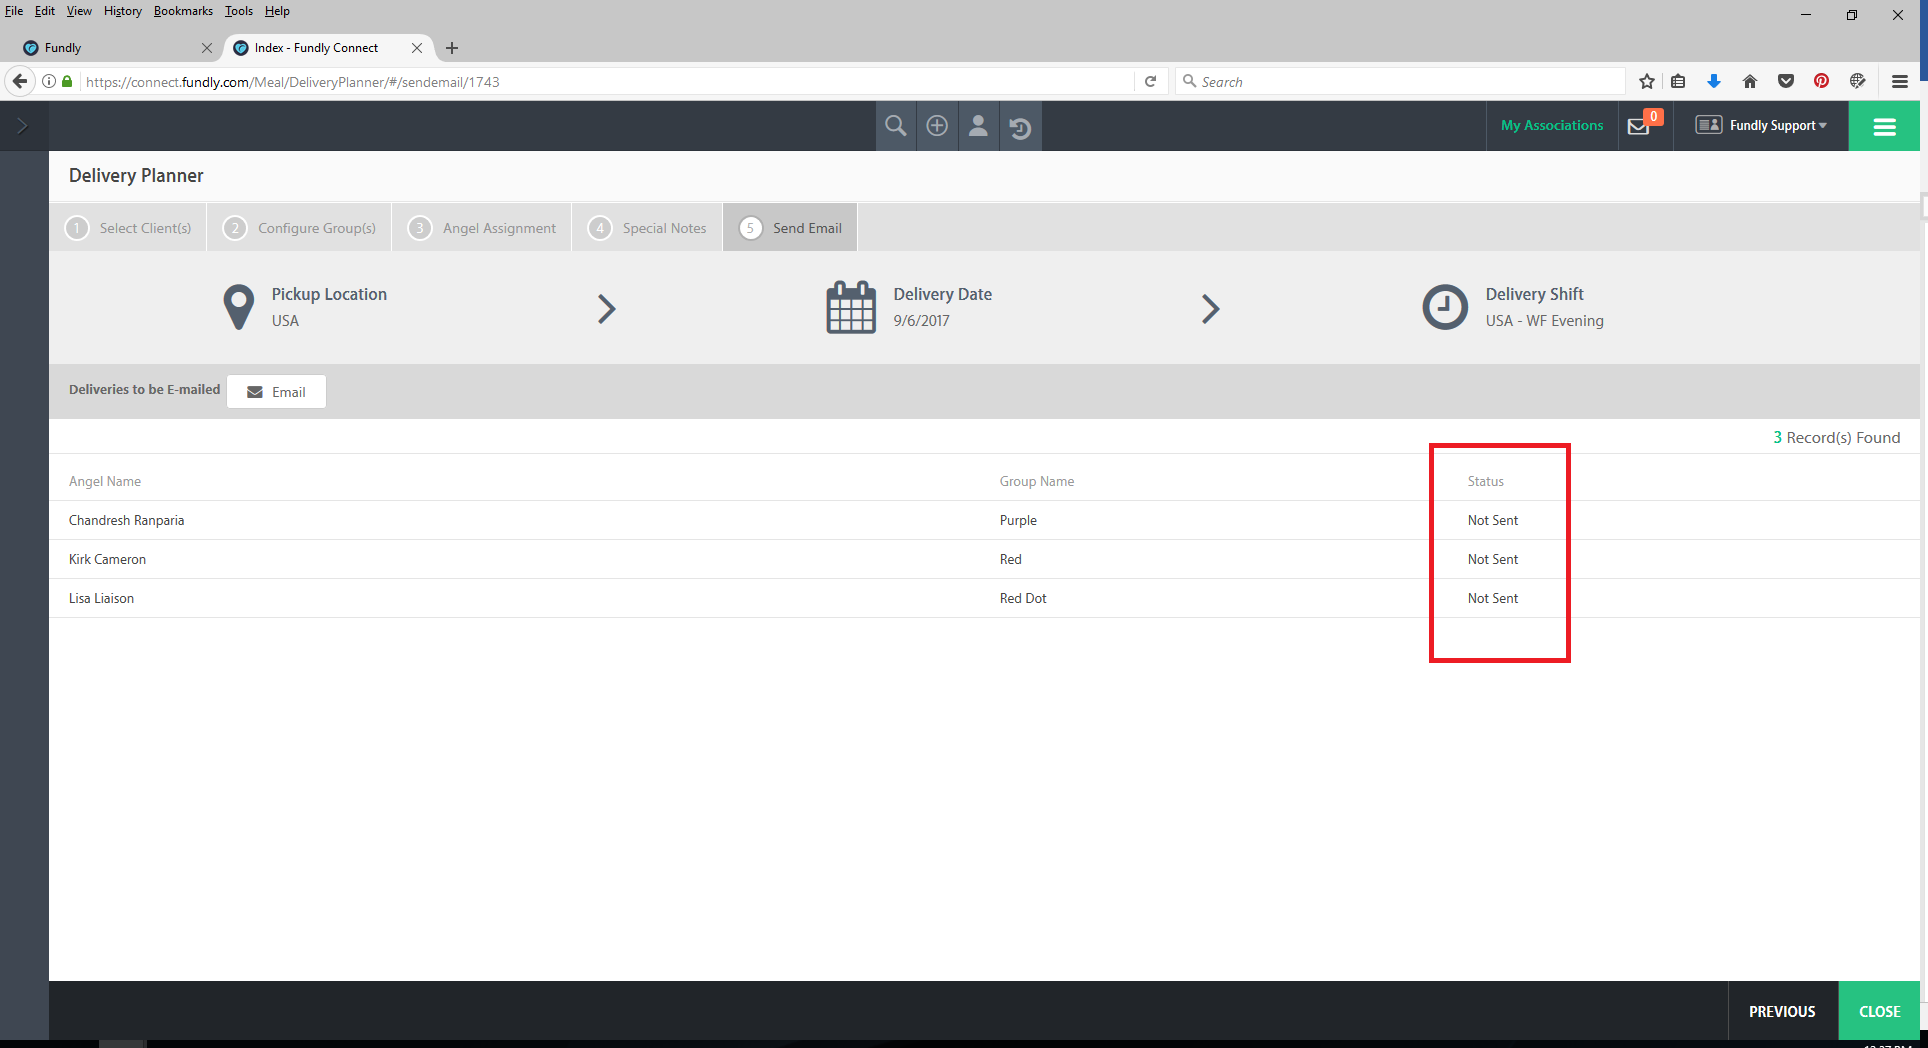
- The email will be sent for processing and then sent to the Delivery Angels. Once the emails are sent, the Status field will change from Not Sent to Sent.
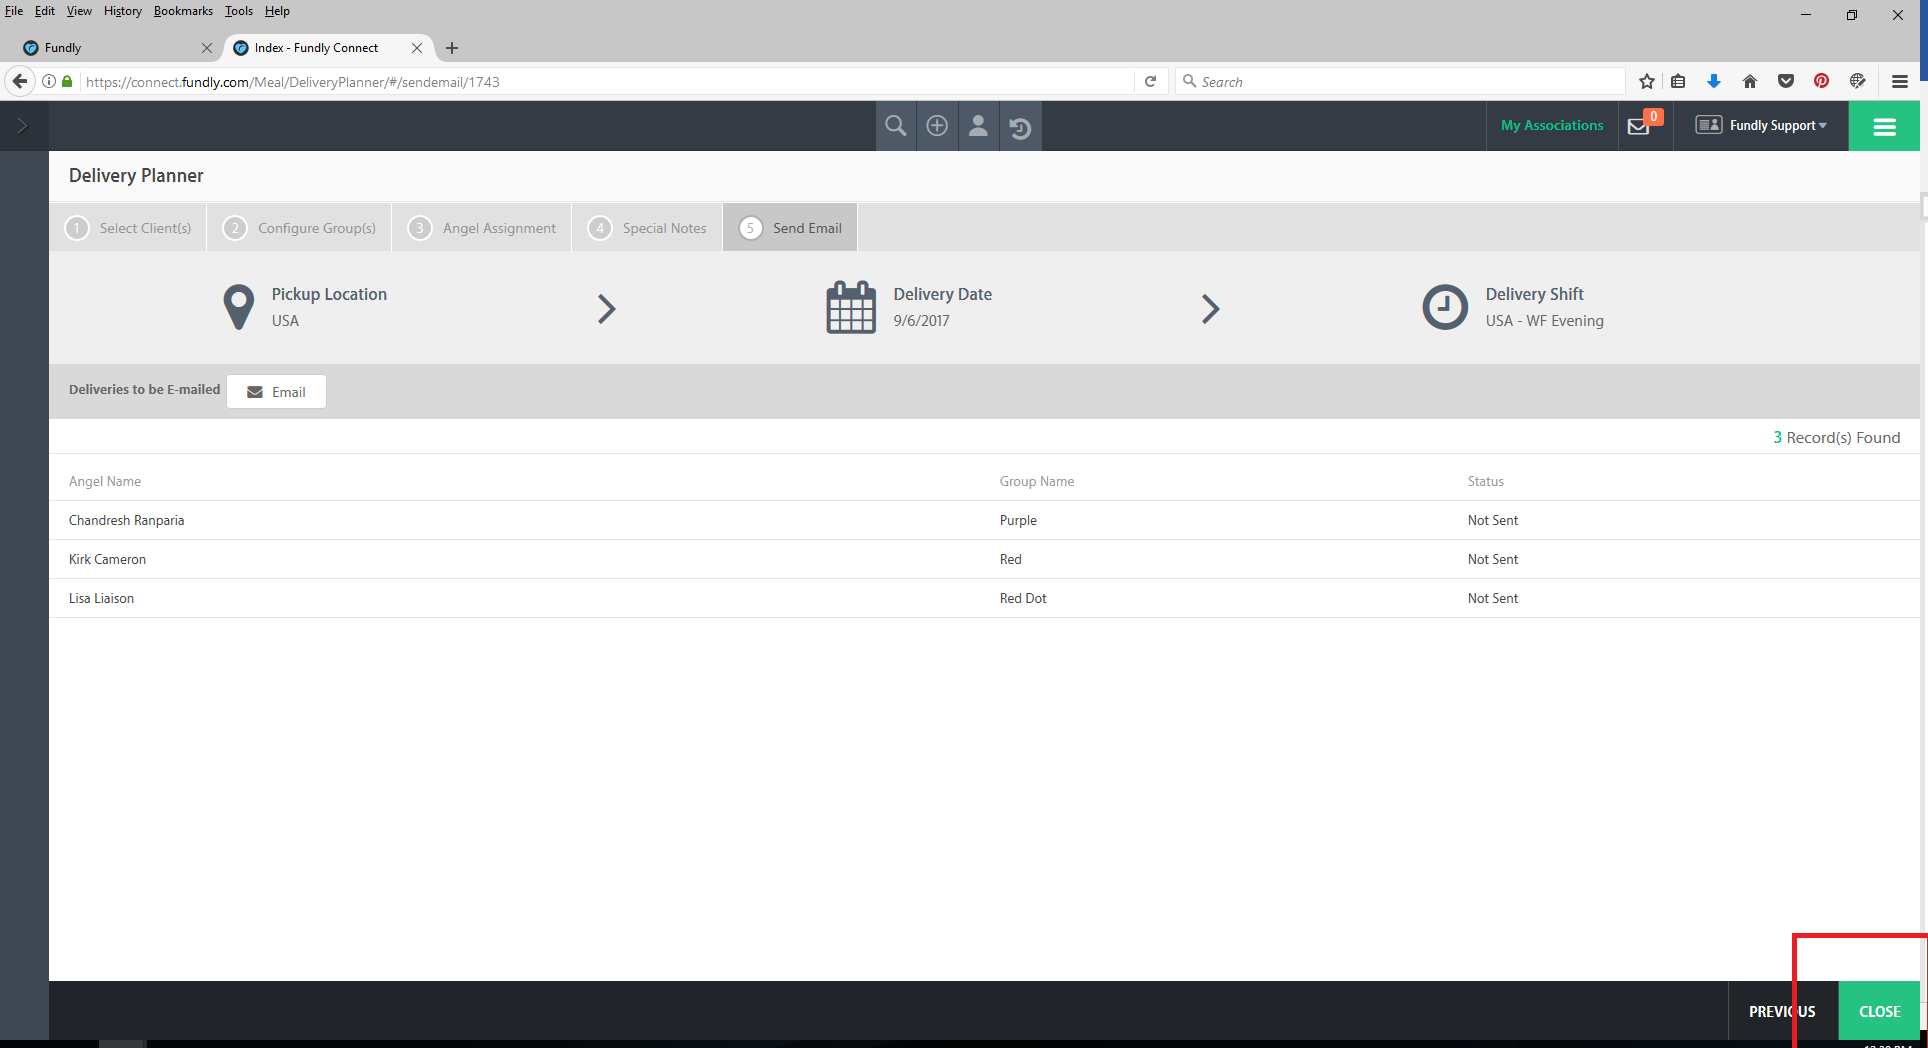
- Once you have completed the Delivery Planner for the selected date, click the Close button in the lower right hand corner to exit back out to the Delivery Planner History home page.
Comments
0 comments
Article is closed for comments.