e-Store Configurations Part III: Add/Edit Products
- The e-Store function inside CRM v2 allows users to sell merchandise to their constituents via direct entry into the system or via an integration with their website. Before adding merchandise/products to the system, you must first configure your default Sales Tax rate (Part I tutorial) and the product categories. The sales tax rate applied to each product is pulled from the product category that item is tied to. Link Funds for donations, product categories are a way of separating items into different categories for the purpose of sorting/categorizing them and for setting different settings/configurations for them. You can have as few or as many product categories as you need to meet your tracking needs.
- To add products/merchandise to your e-Store, you must first configure your default sales tax rate (e-Store Configurations Part I tutorial) and product categories (e-Store Configurations Part II tutorial).
- To add/edit products, start by clicking on e-Store on your CRM Main Menu and selecting Products under Configurations on the sub-menu.
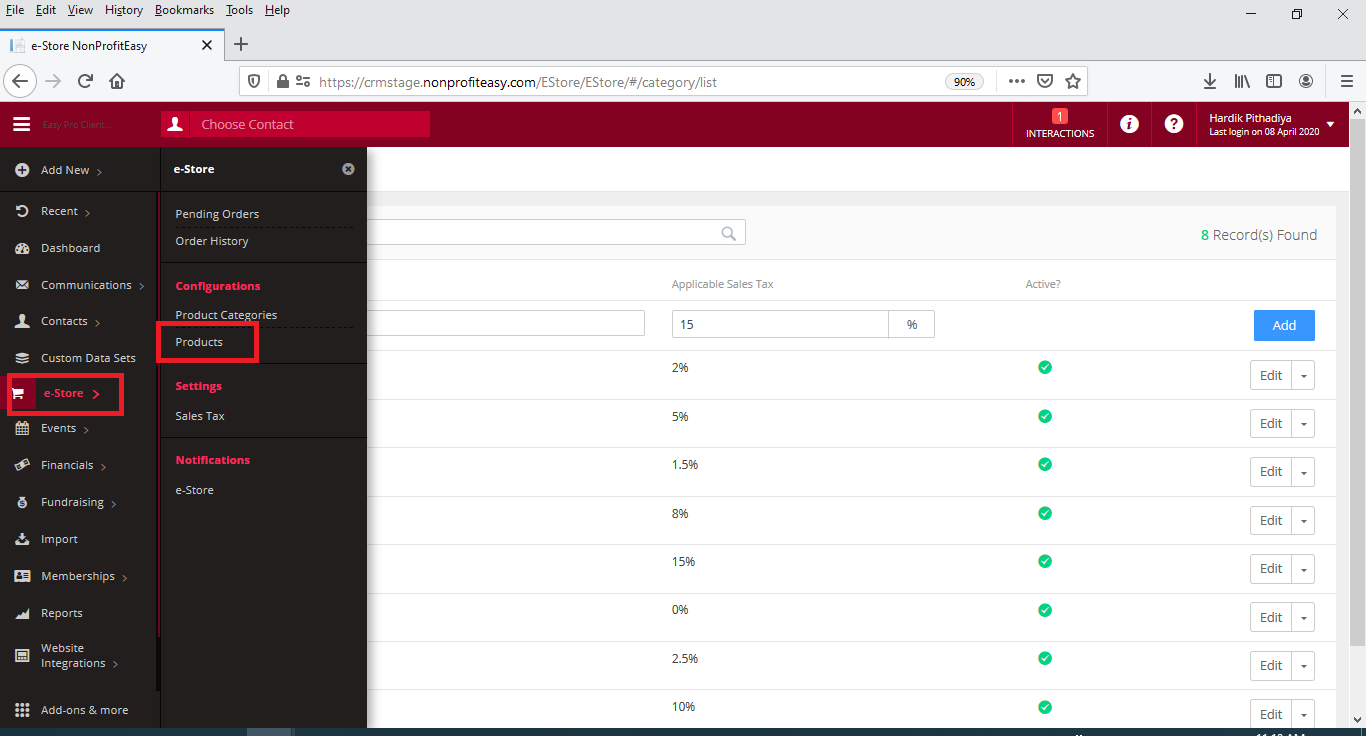
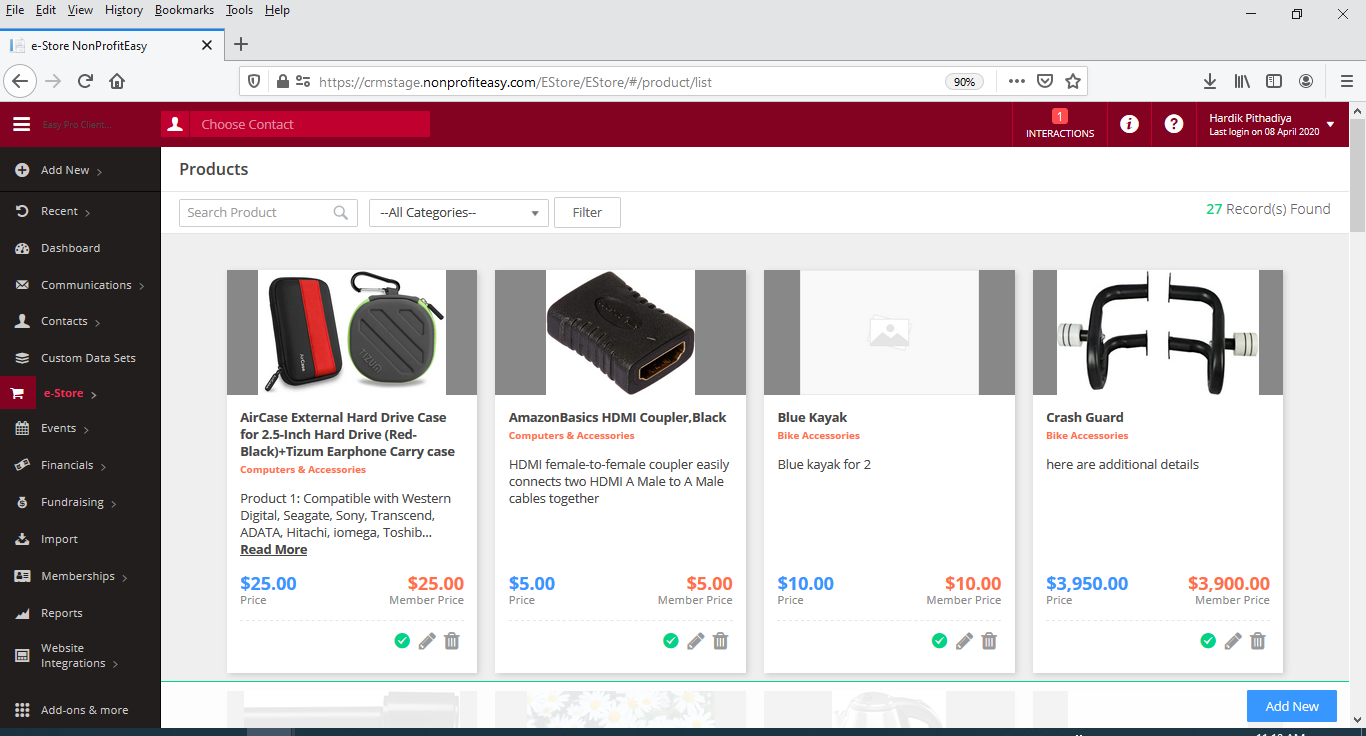
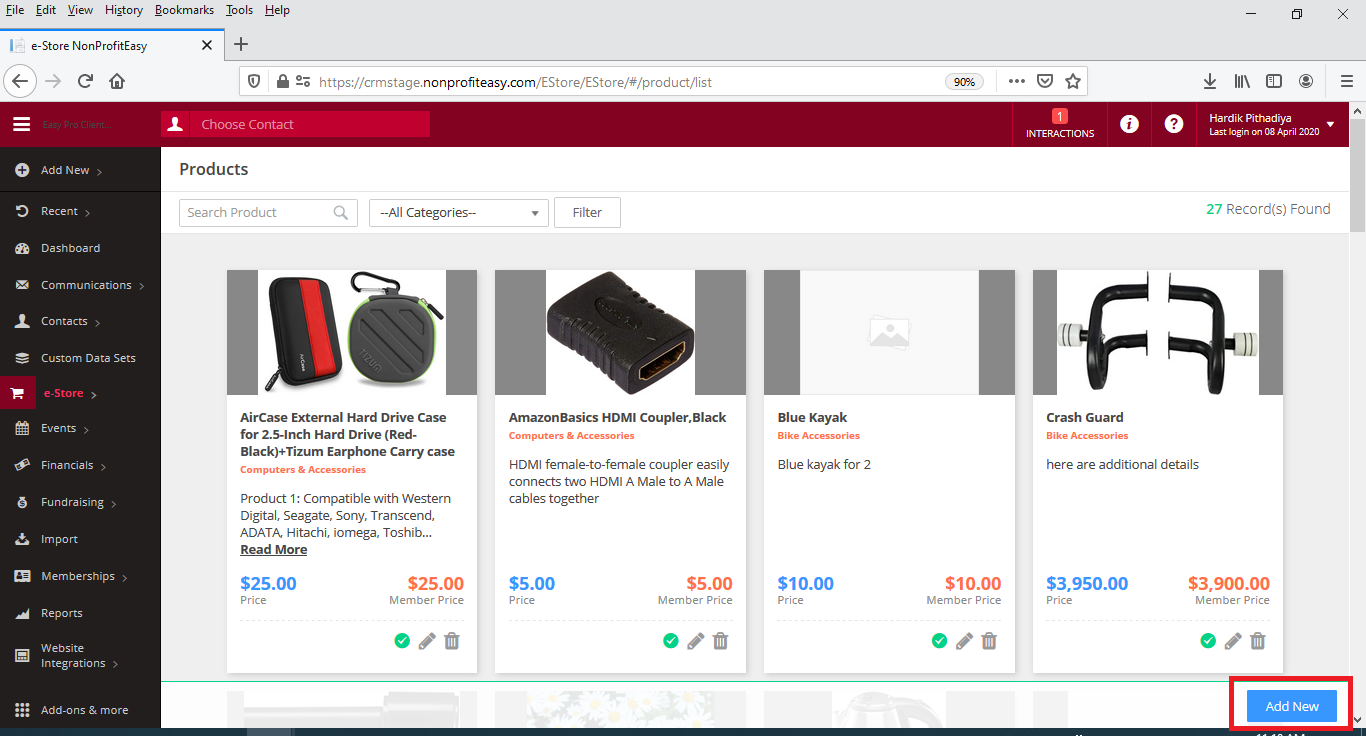
- This will take you to the e-Store Products index page.
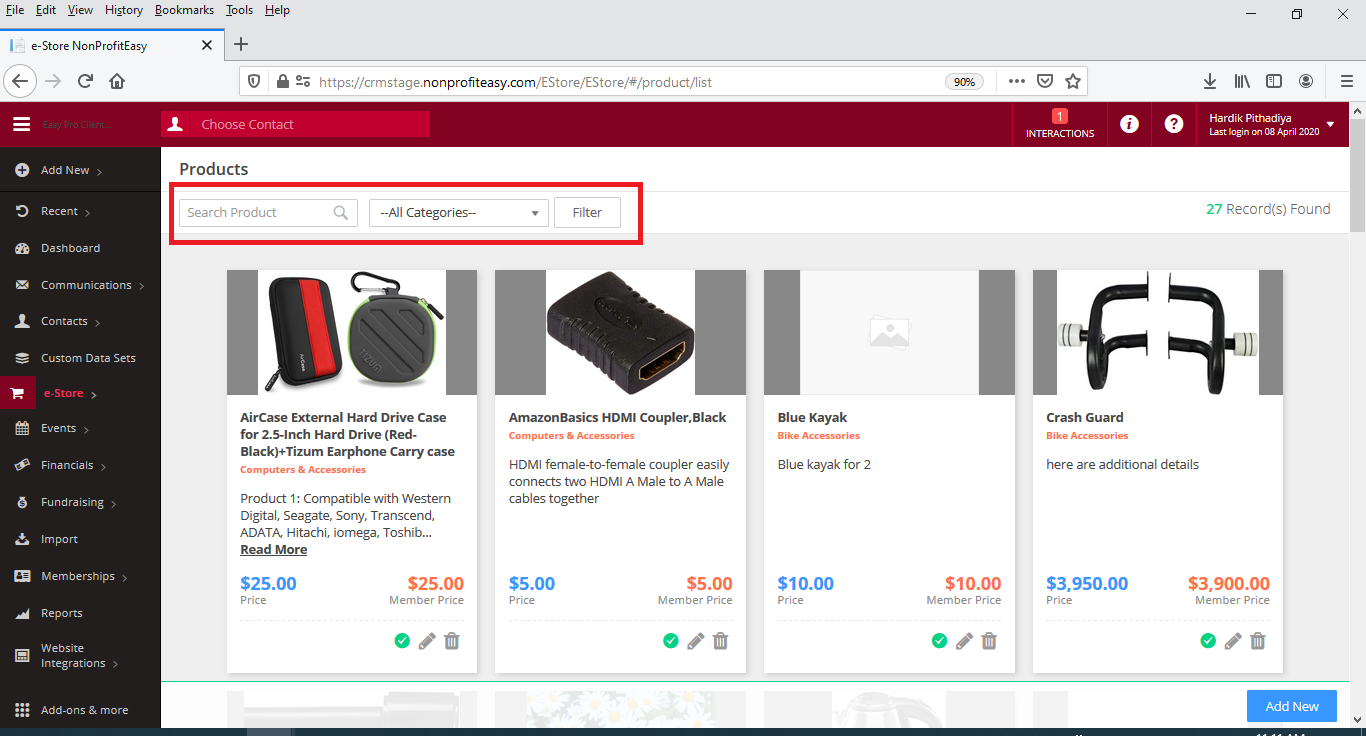
- You can search the existing products by typing a search term in the search bar and/or searching a product category and clicking the Filter button.
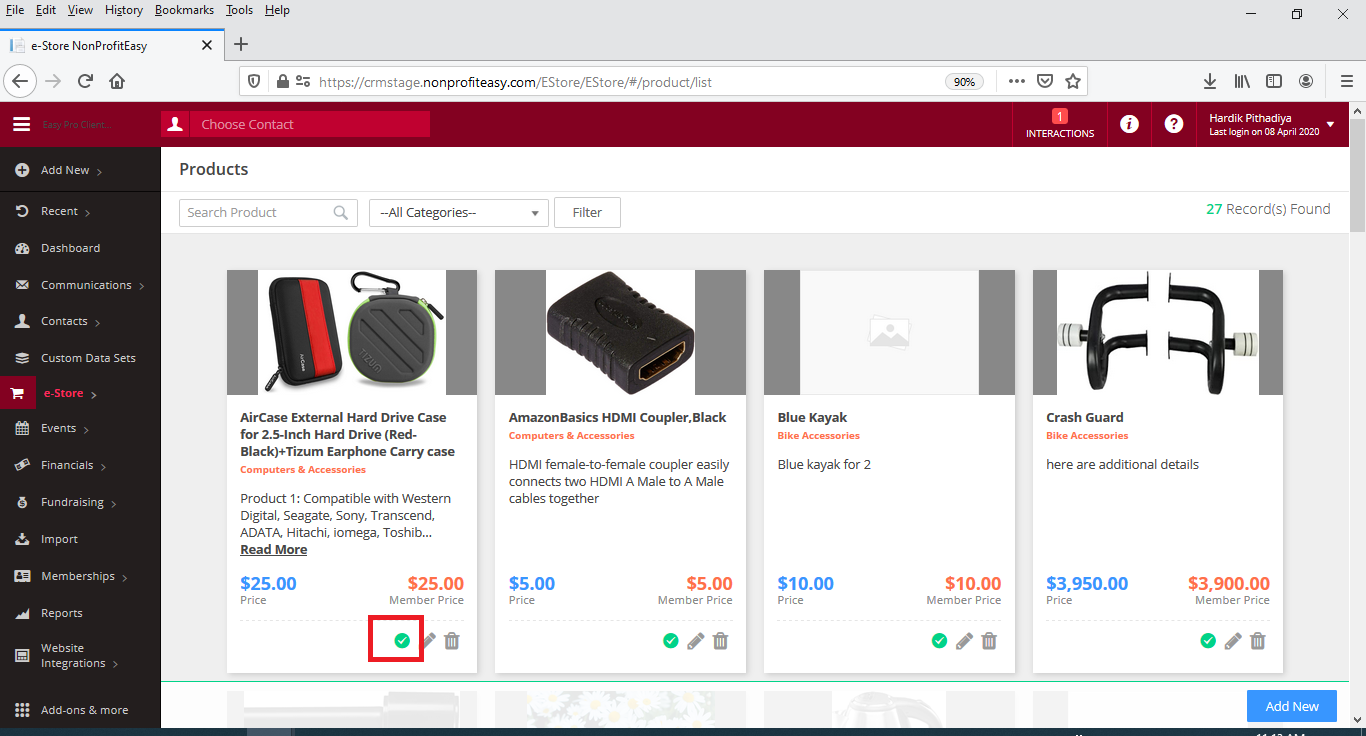
- To inactivate (archive)/activate any existing product, click the check mark under the item. Green indicates the item is active/available for purchase; gray indicates the product is inactive.
- To delete any product, click the trashcan icon underneath the item.
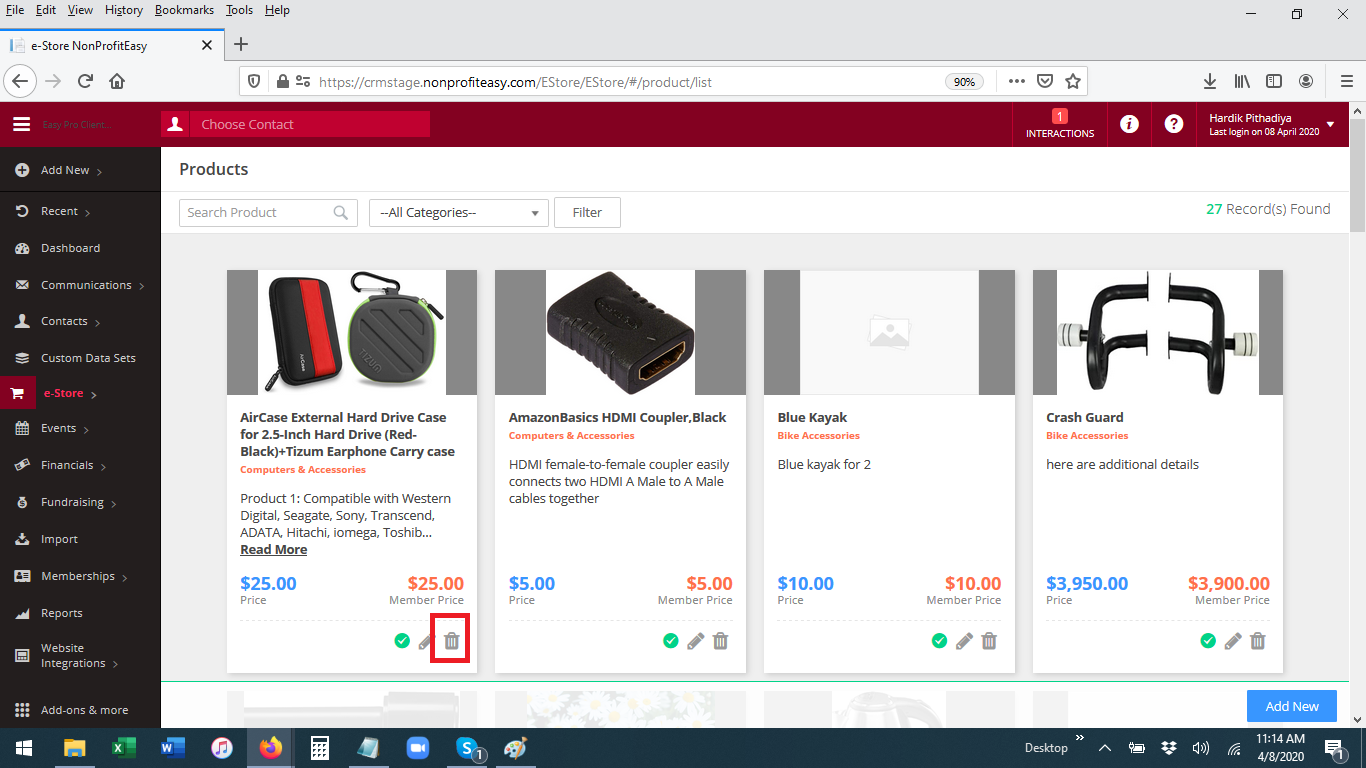
- To edit any product, click the pencil icon under the item (this will take you to the Add/Edit product screen which is detailed below).

- To add a new product to your e-Store, you can EITHER click the blue Add New button in the lower right of the product index page OR, when adding or editing a product, clicking the Save and Add New Product button in the lower right.
OR

- This will take you to the Add/Edit product screen.

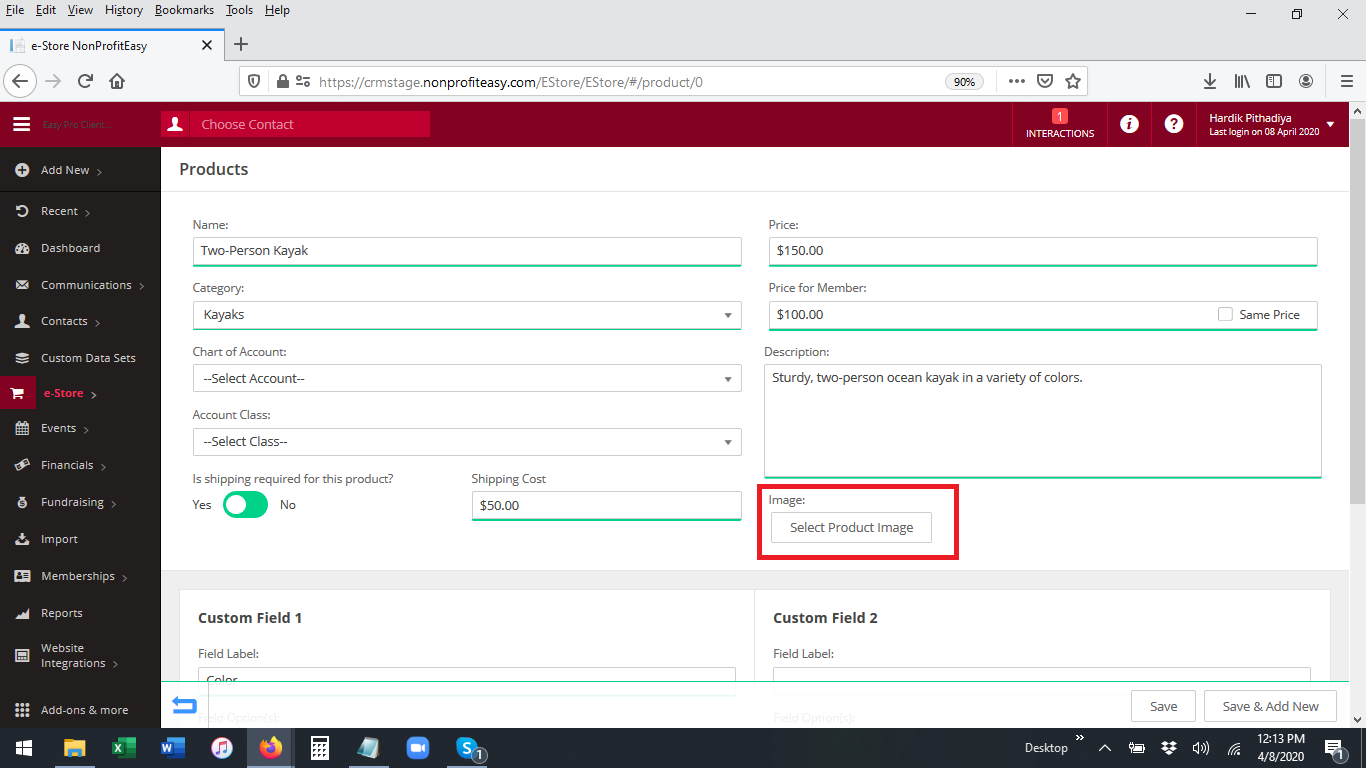
- Start by giving your product a name (this WILL be visible to the public on your e-Store public page).

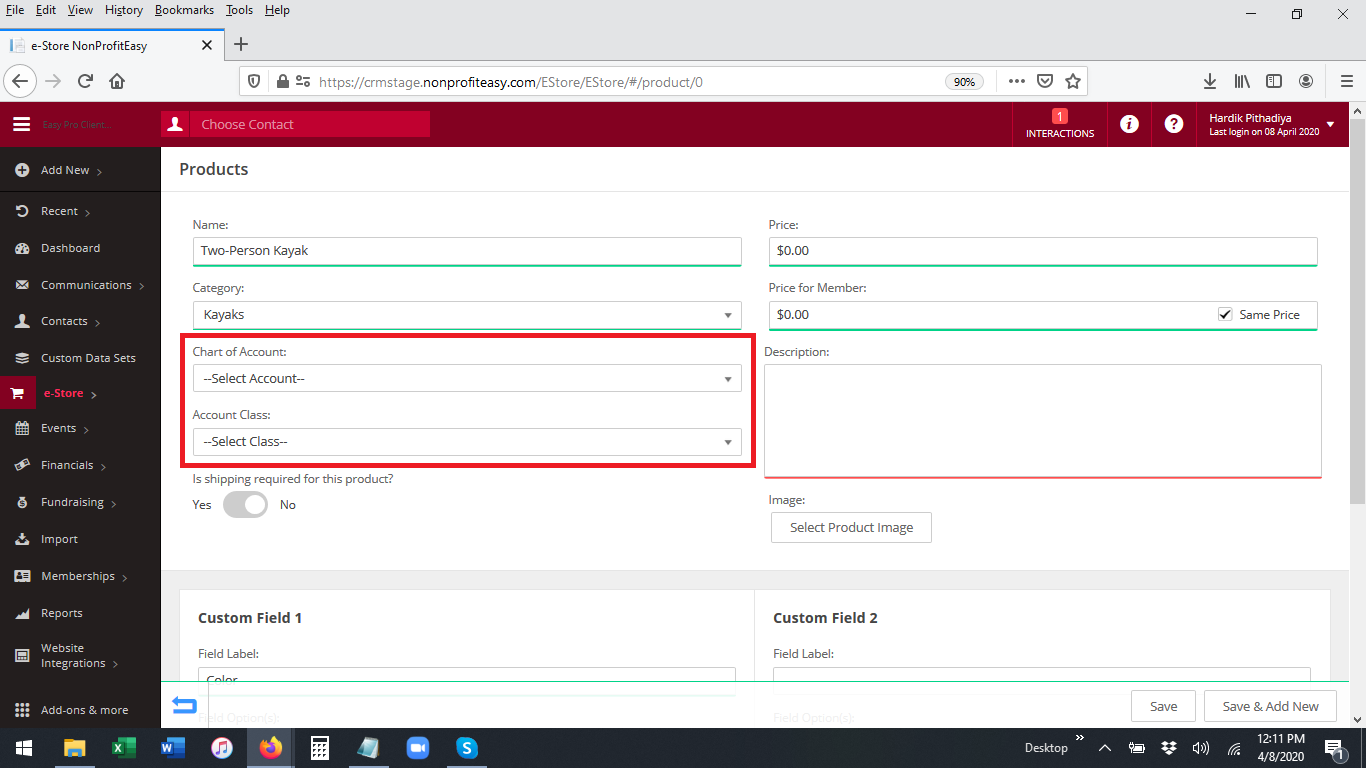
- Next, select a product category for your item (required). The product will determine the sales tax rate/amount that is charged for the item/product when it is purchased. You cannot add new categories from here; these must be configured ahead of time at Main Menu: e-Store: Configurations: Product Categories.
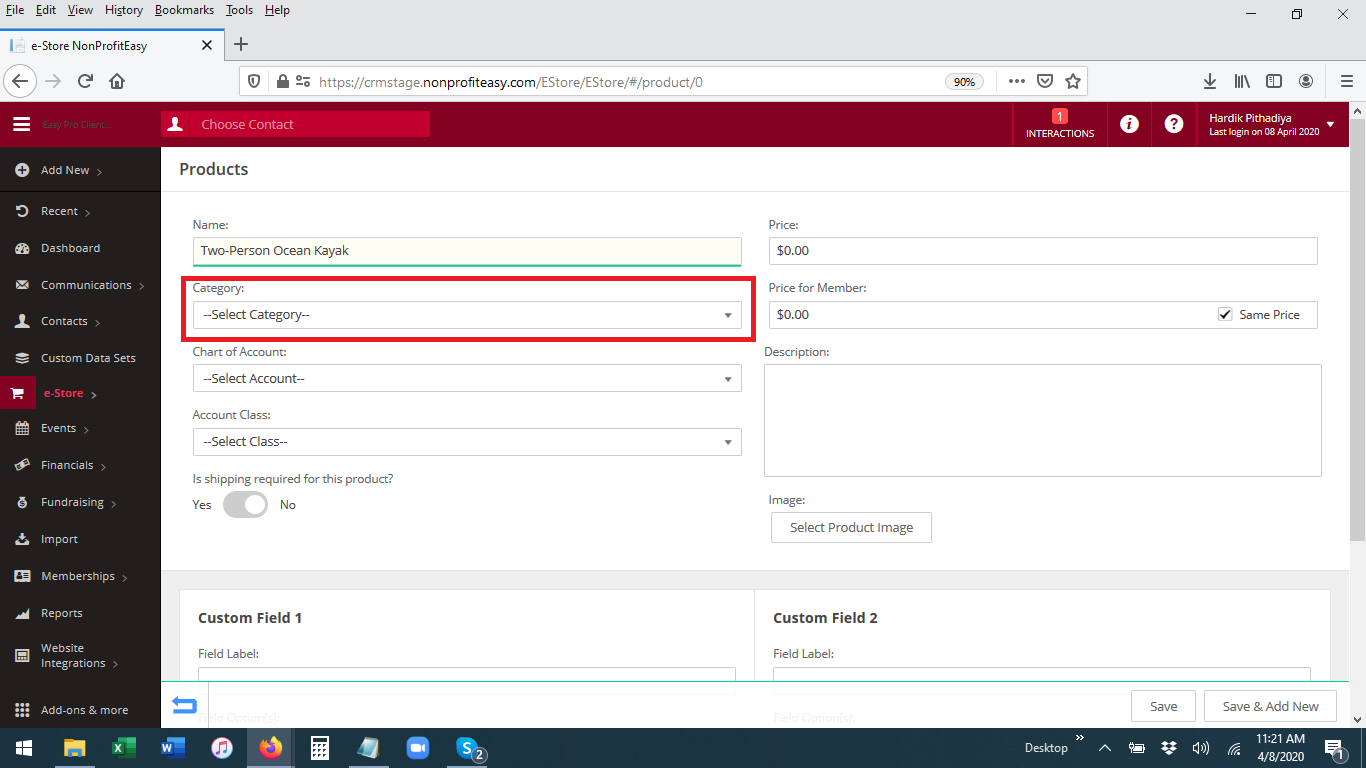
- If you wish to link sales of this item to a particular Chart of Accounts (general ledger accounting code) and/or Account Class, select these from their respective drop down menus. These are optional fields. New Chart of Accounts and Account Classes cannot be configured/added from here; these must be configured ahead of time at Main Menu: Financials: Configurations.
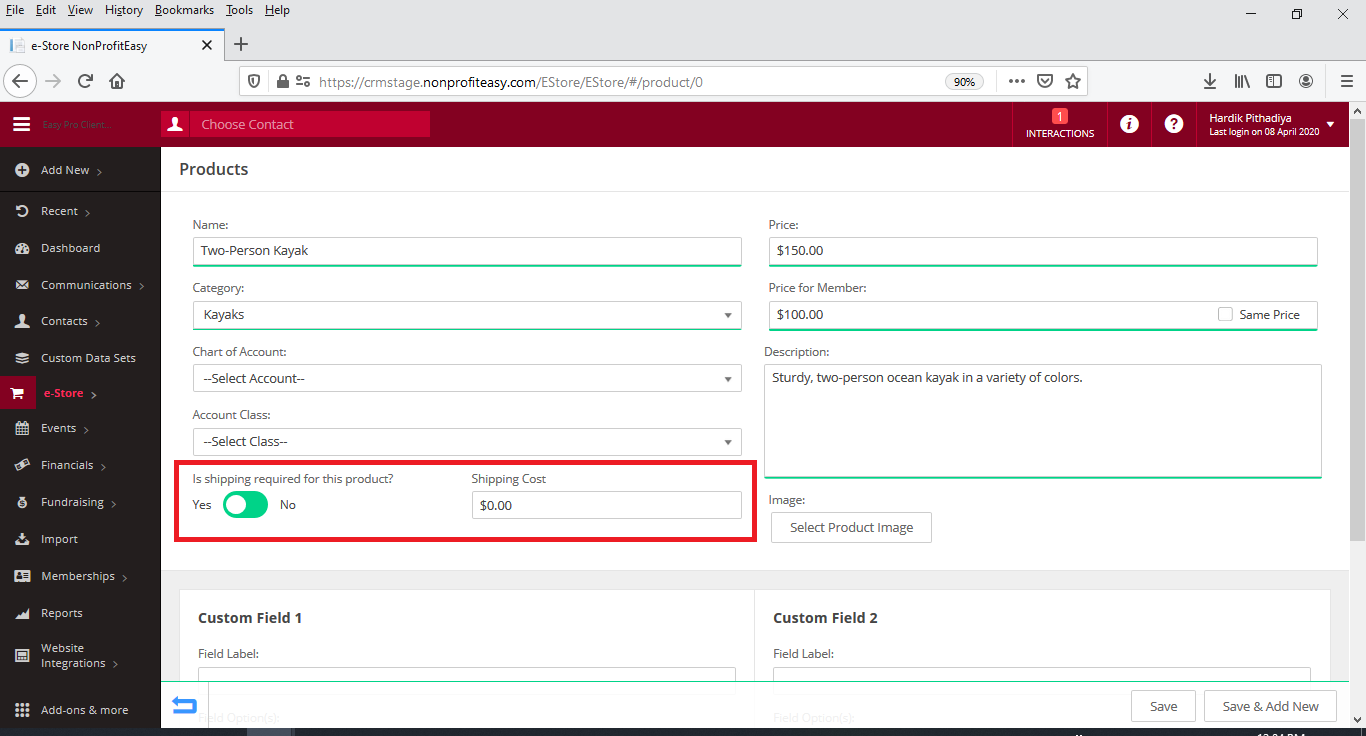
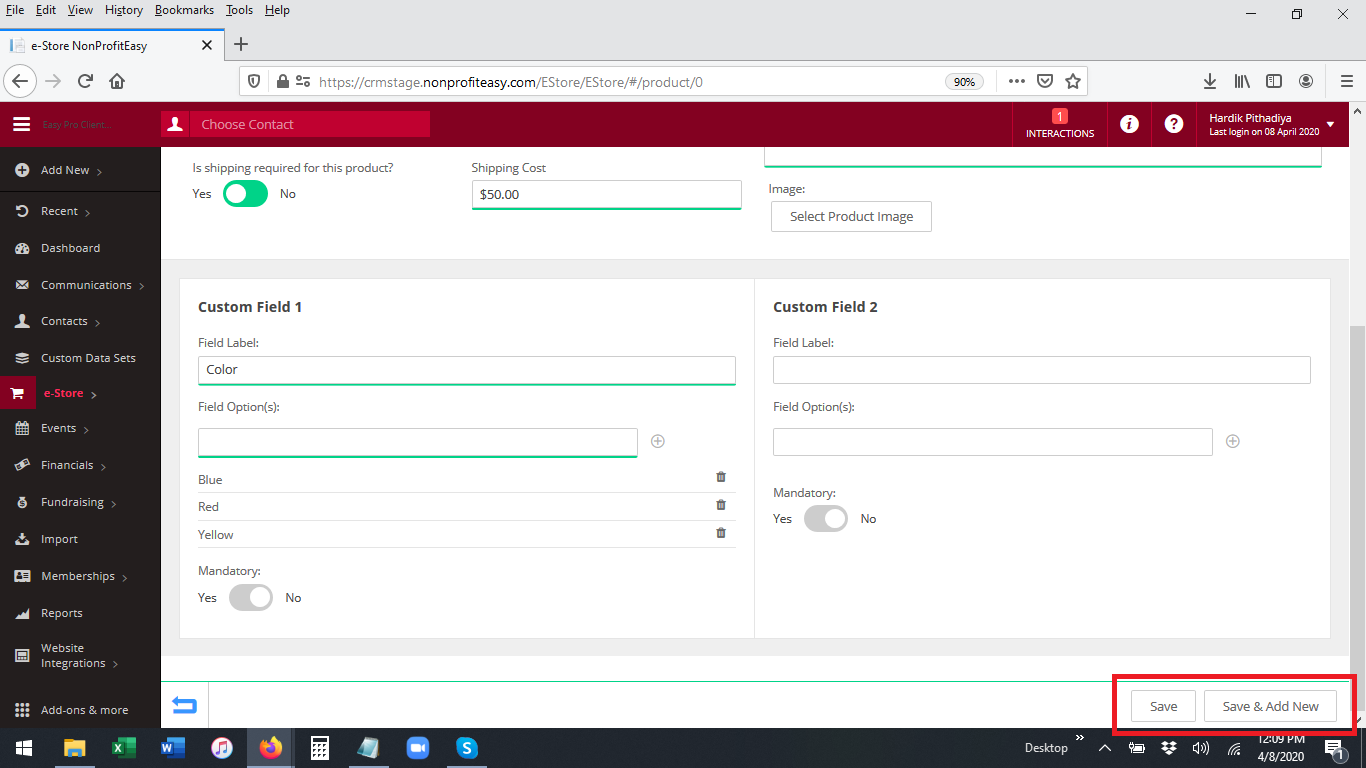
- If this product requires shipping, set the shipping slider to yes. If the slider is set to "No," the system will not collect an address from purchasers. If set to "Yes," the system will prompt the user to enter an address (and address will be required). If you indicate shipping is required, you will also be prompted to enter the cost for shipping (if purchaser pays for shipping/if shipping is an extra charge on top of the cost of the product).
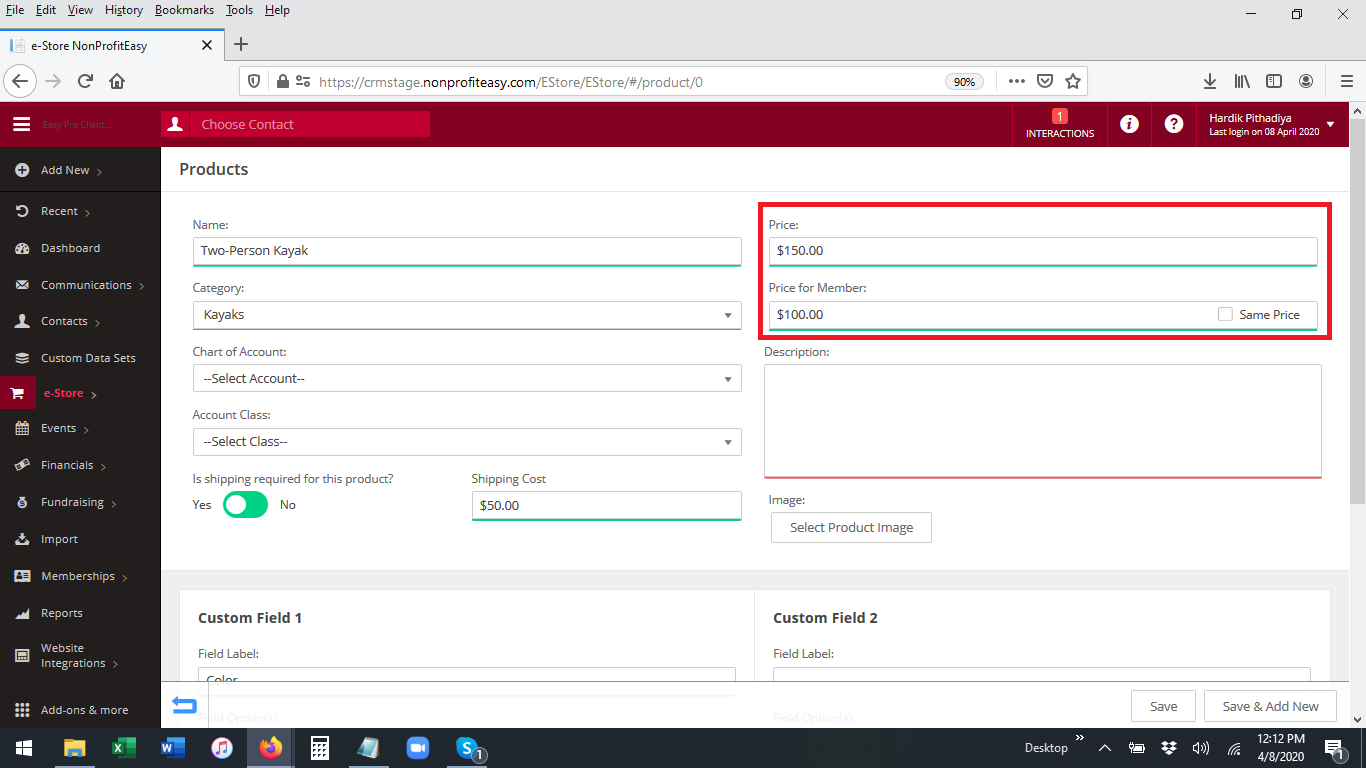
- In the Price field, set the price for the item. You can set the same price or a different price for Members. In order for a purchaser to receive the member price, the system must recognize them as a member (they must check out using a name and email address that exactly match what is on file in your CRM). The Same Price checkbox will set the member price the same as the non-member price. To set a custom/different price for members, uncheck the box and then enter the member price in the box.
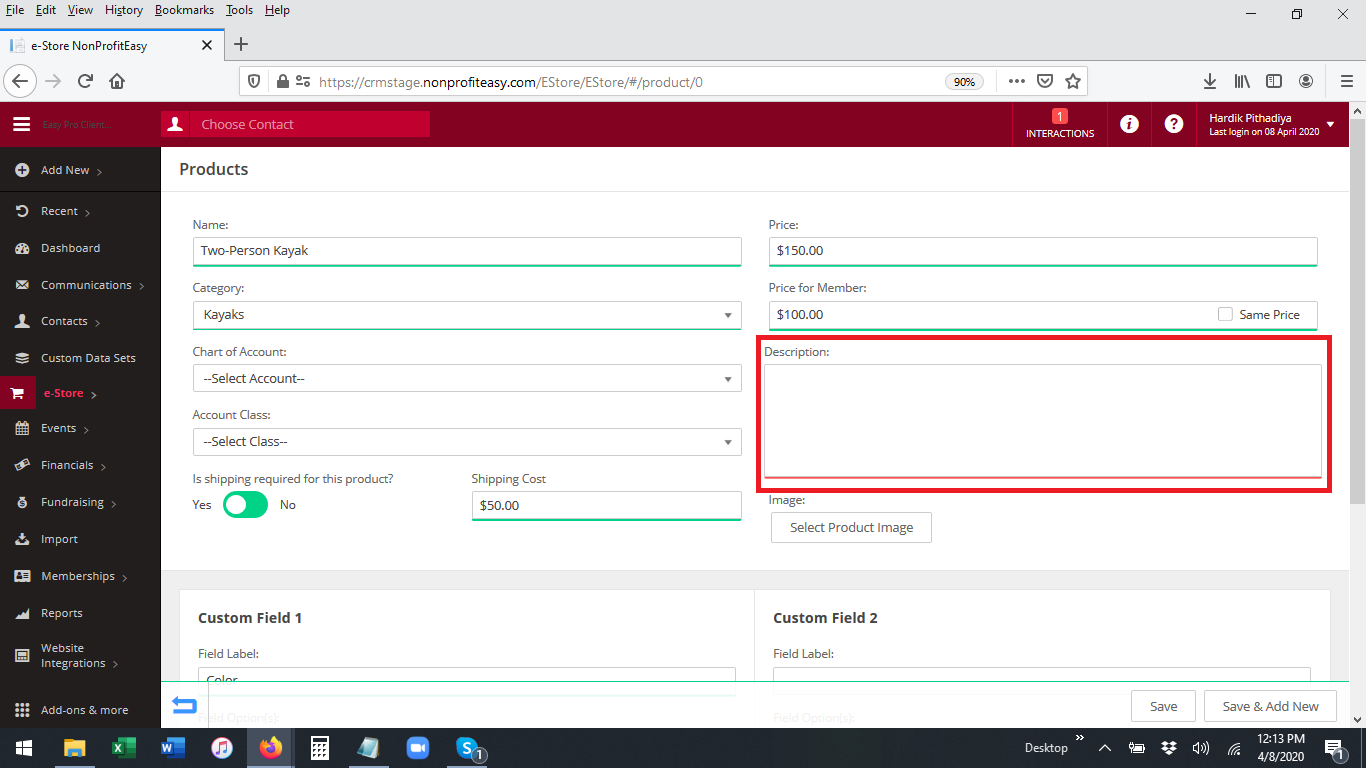
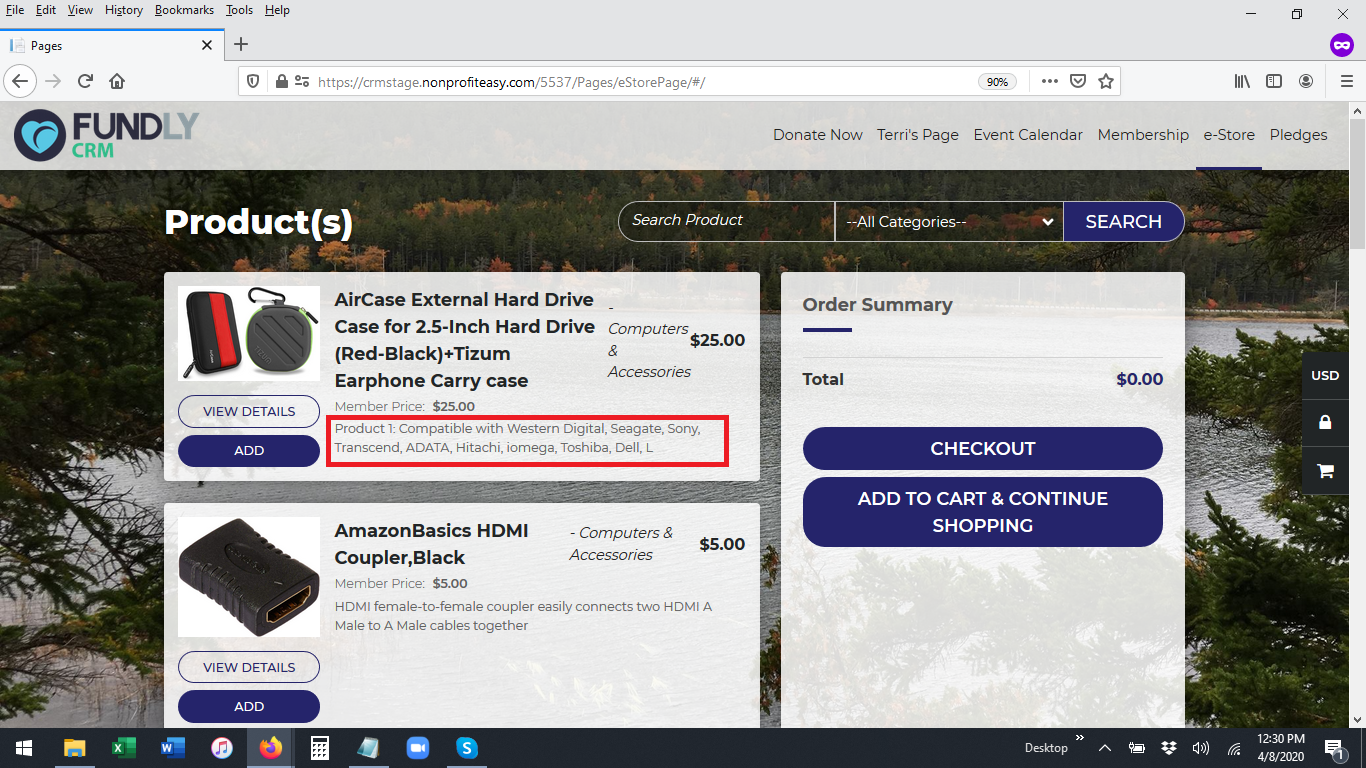
- In the Description field, enter a description of the item (required). On your front facing public e-Store page, only the first 100 characters (including characters) display on the product index page. If online users click the "View Details" button, they will see the full description.
- You can upload an image of the product by clicking on the Select Product Image button and then selecting an image from your CRM image library (or adding a new image to the image library). If you do not add an image for the product, then only text will display online (in the product index page you'll see a blank image placeholder, but online that will not show).
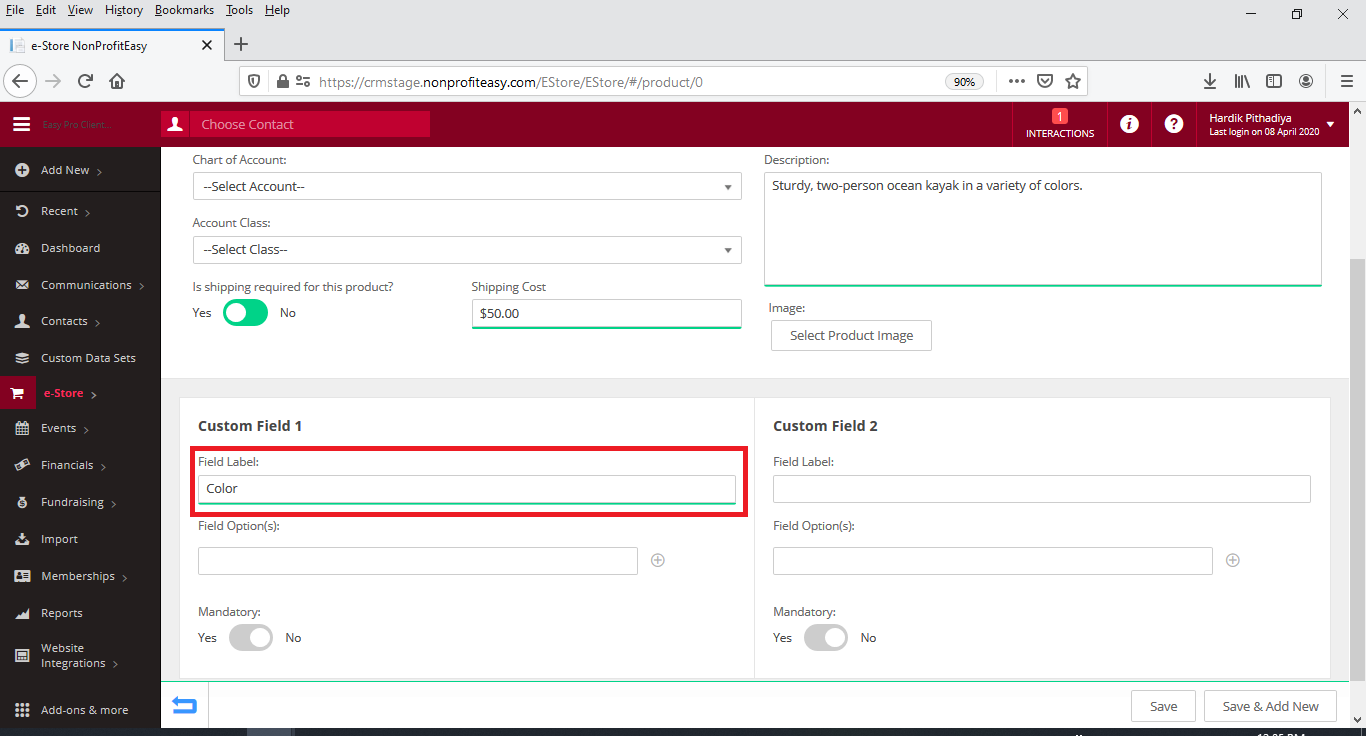
- Custom Field 1 and Custom Field 2 can be used to collect custom data related to the product from the purchaser such as size and color options.
- Start by adding a field label/name of the field/text you want to display to the purchaser to indicate the type of information you are attempting to collect.
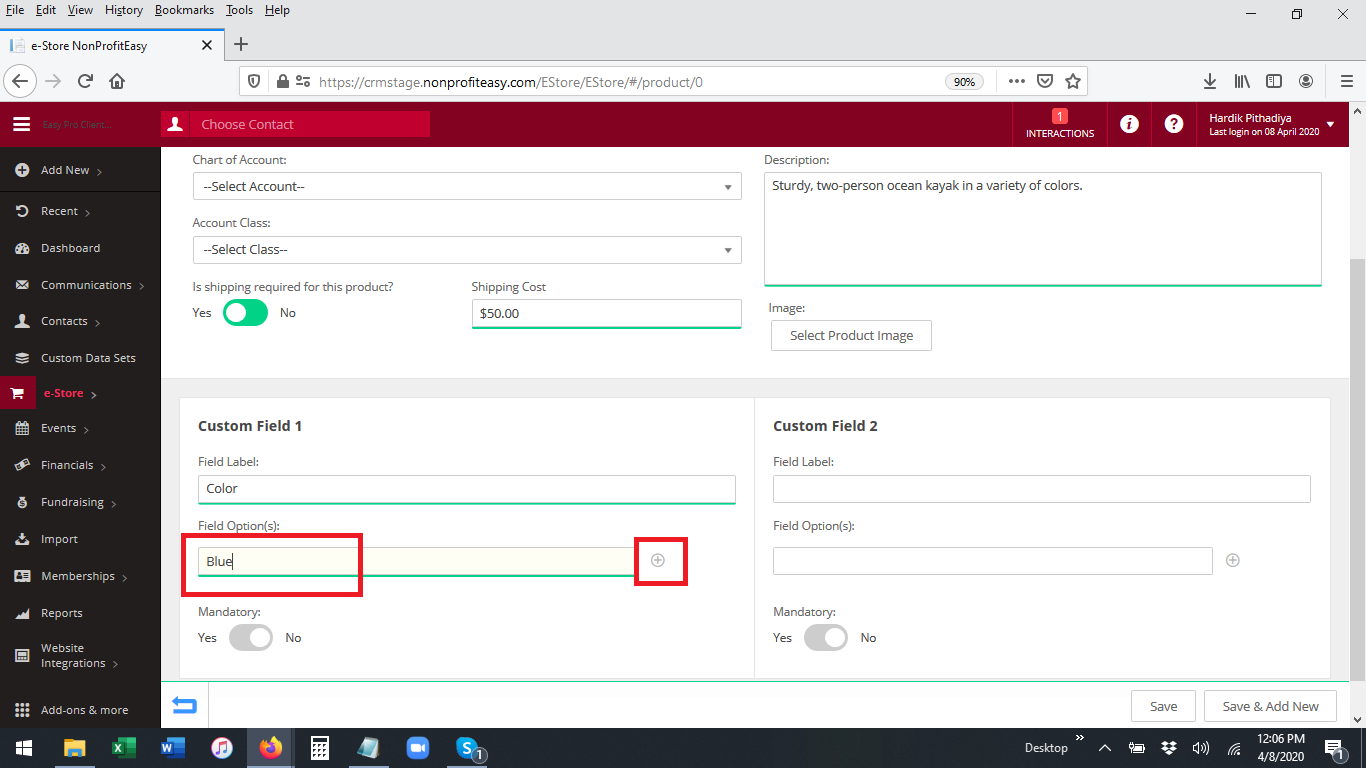
- Next, add an answer choice/response - type the choice/option in the Field Option(s) box and then click the + (plus) sign to add it to the list of answer options. Continue typing options and clicking the plus to add each to the list until you have all possible options.
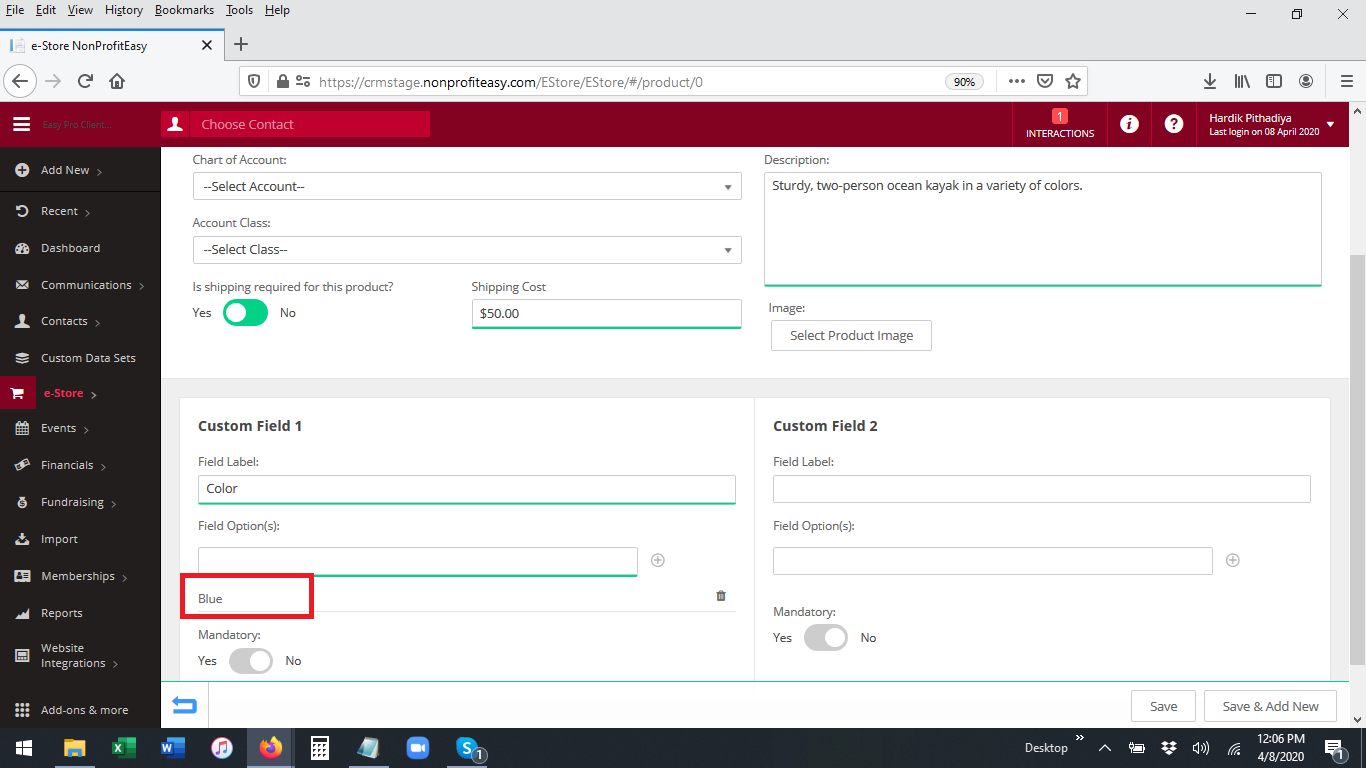
- You can delete any custom answer option by clicking the trashcan to the right of the item.

- The "Mandatory" setting for these fields indicate if users MUST provide an answer/selection for this field. If Mandatory is set to "No," then user can check out without providing an answer to these custom fields. If you must have this information to complete their order, then set Mandatory to "Yes."

- Start by adding a field label/name of the field/text you want to display to the purchaser to indicate the type of information you are attempting to collect.
- When you have finished configuring your product, click the Save button in the lower right to save the changes and return to the products index page OR Save and Add New to save the changes to this item and then add a new item (this will take you to a blank Add/Edit Product page).
Comments
0 comments
Article is closed for comments.