e-Store Configurations Part II: Add/Edit Product Categories
- The e-Store function inside CRM v2 allows users to sell merchandise to their constituents via direct entry into the system or via an integration with their website. Before adding merchandise/products to the system, you must first configure your default Sales Tax rate (Part I tutorial) and the product categories. The sales tax rate applied to each product is pulled from the product category that item is tied to. Link Funds for donations, product categories are a way of separating items into different categories for the purpose of sorting/categorizing them and for setting different settings/configurations for them. You can have as few or as many product categories as you need to meet your tracking needs.
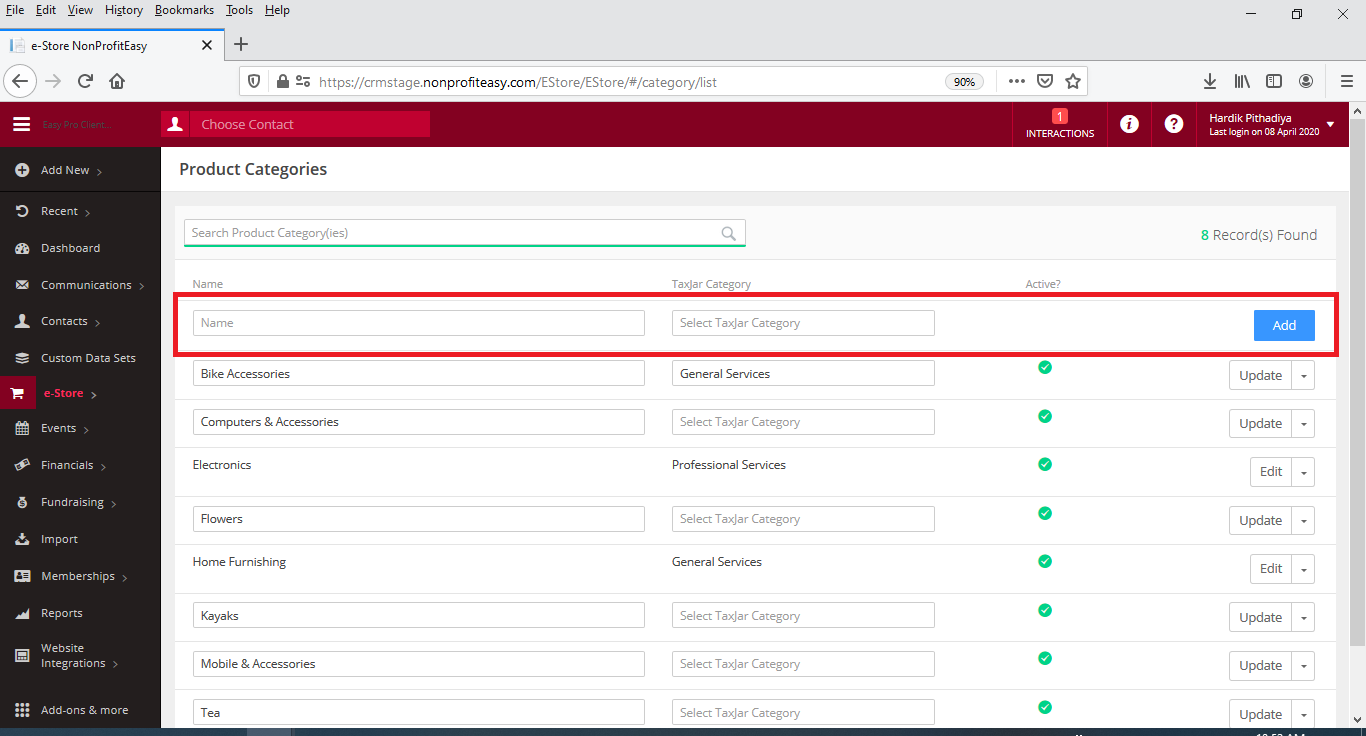
- To configure product categories, click on e-Store on the CRM Main Menu and then click Product Categories under configurations on the sub-menu.
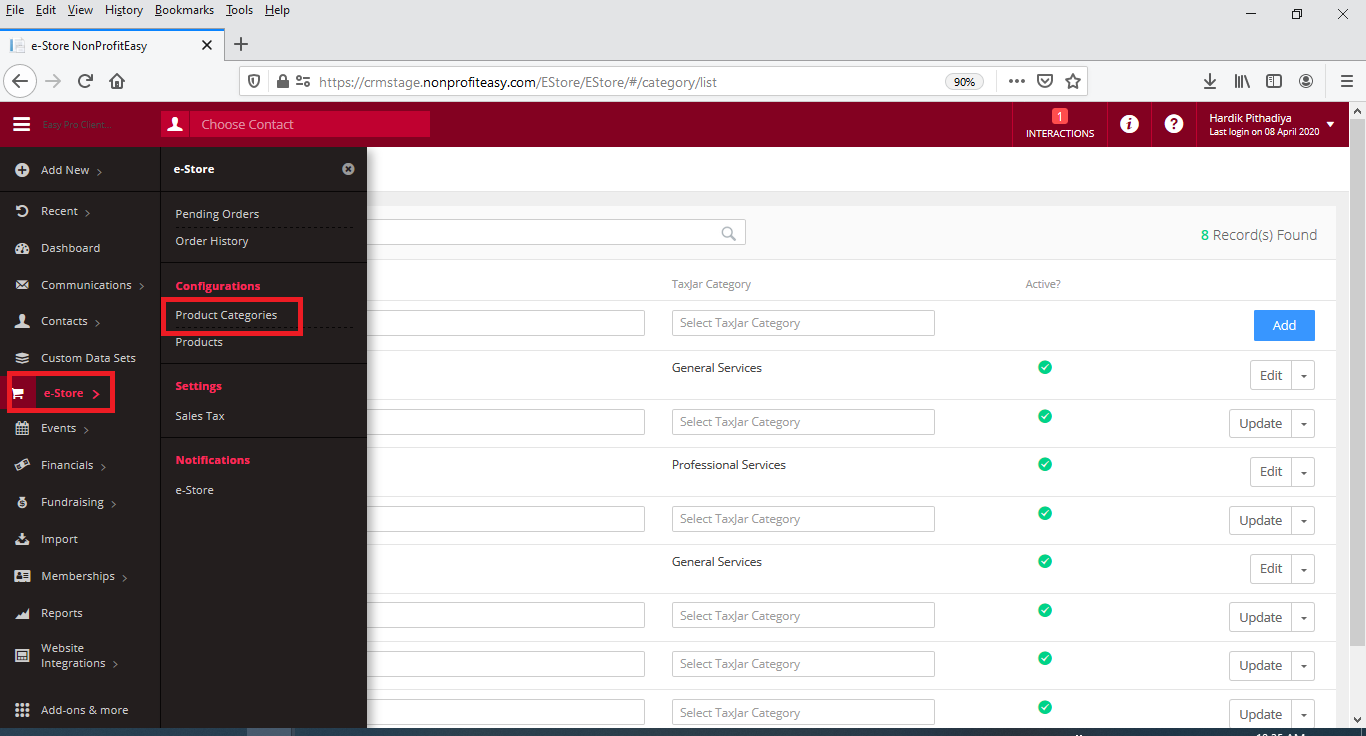
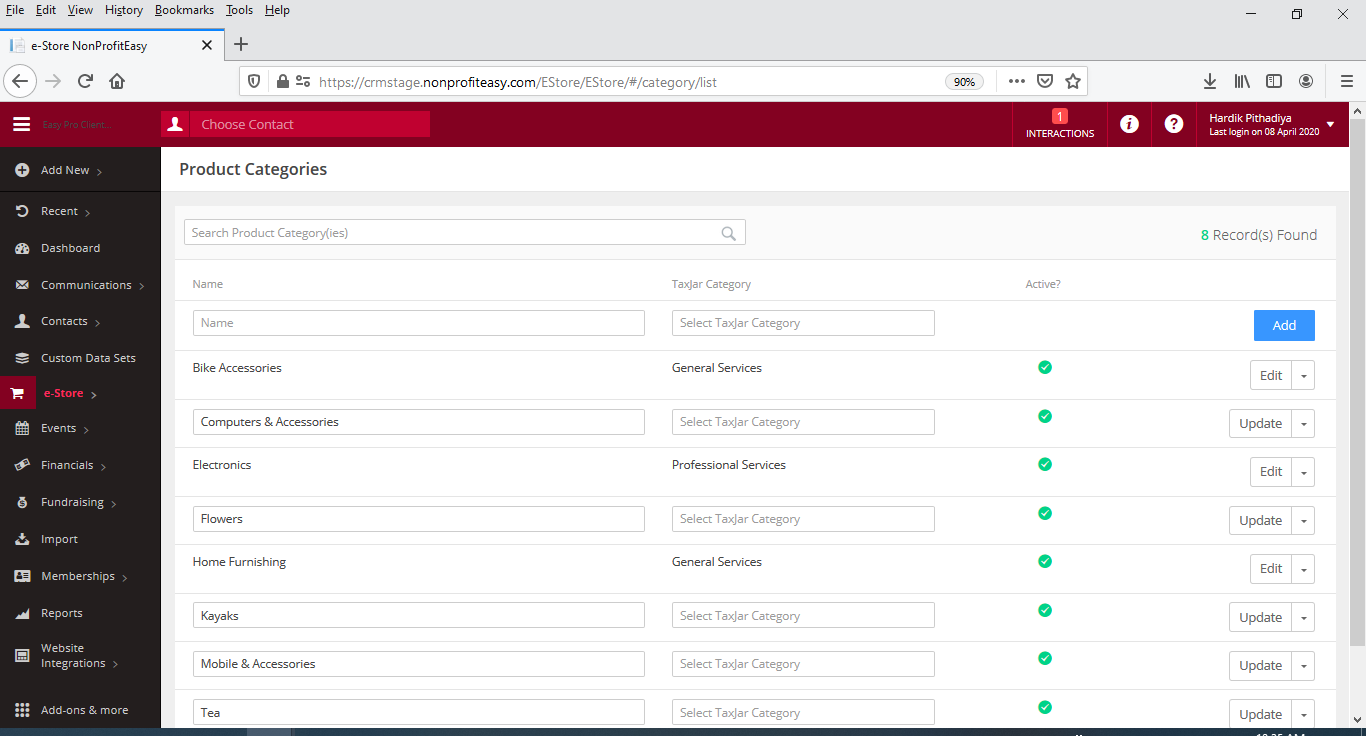
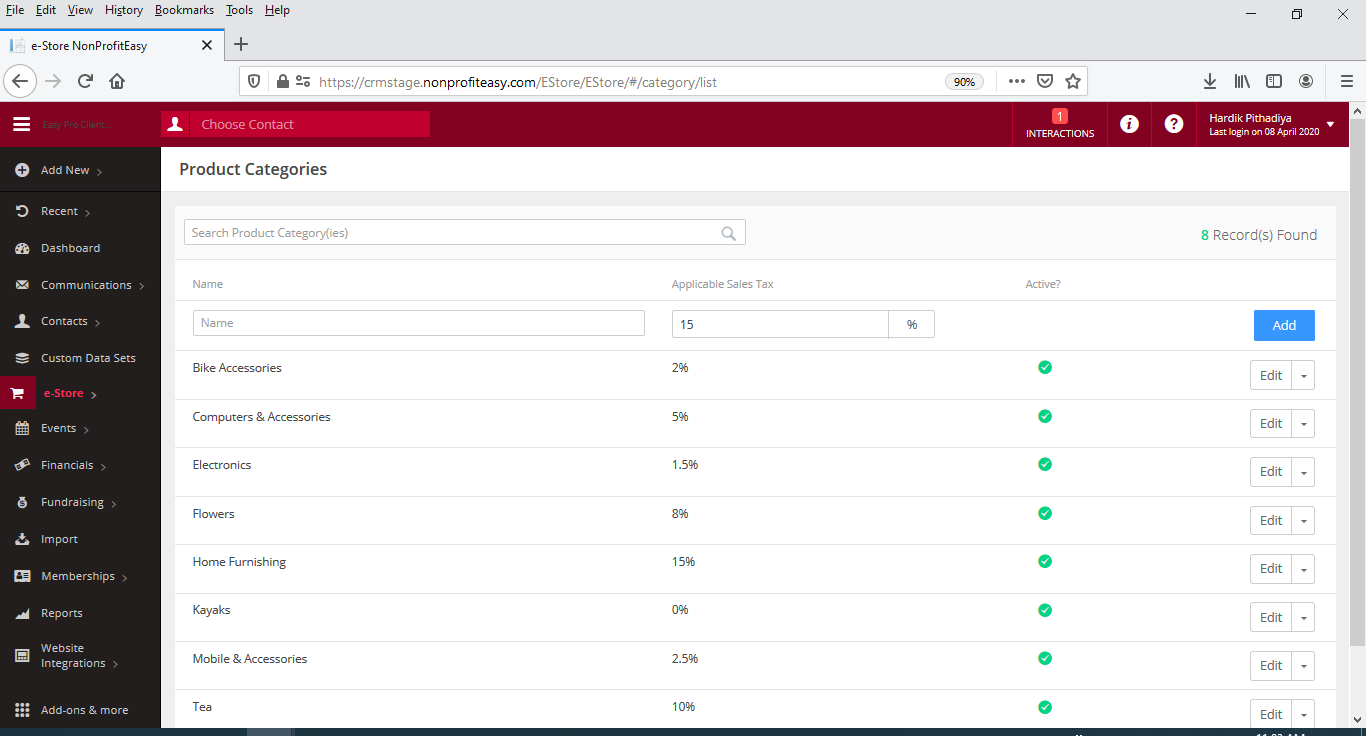
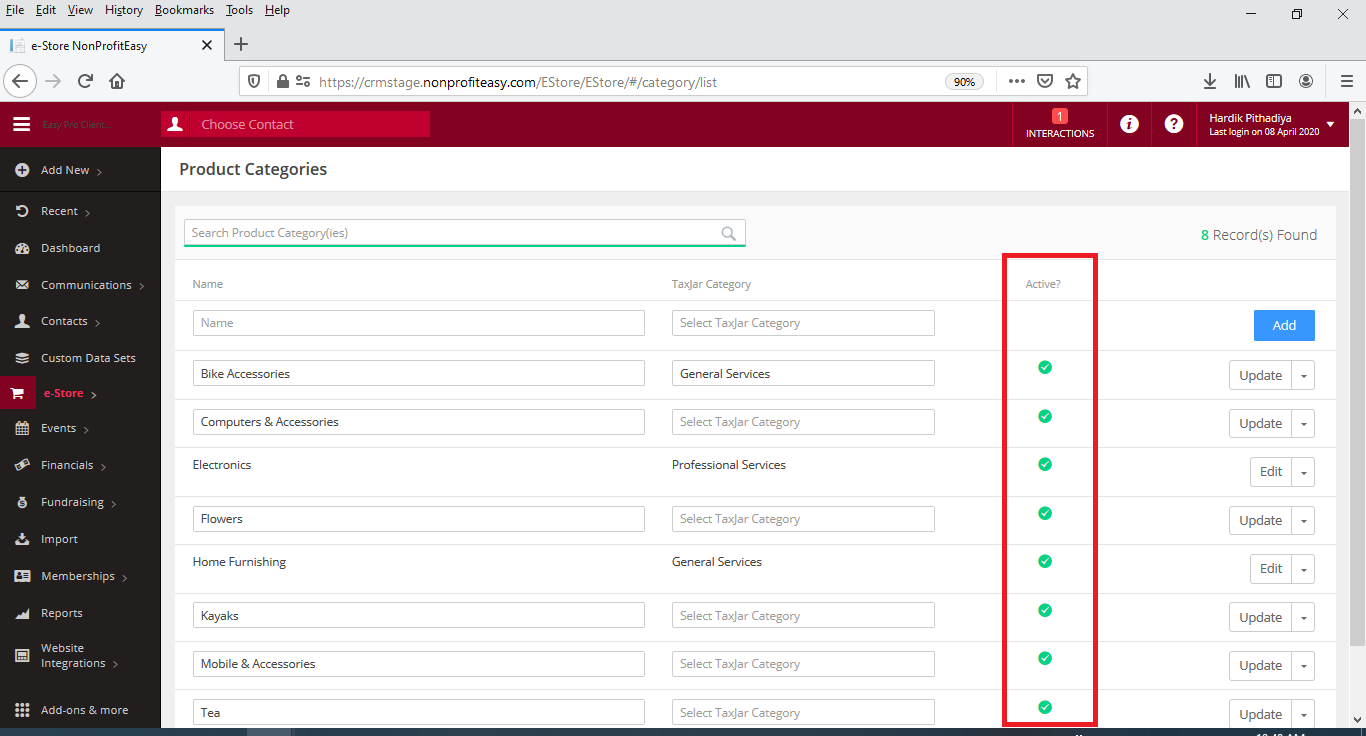
- This will bring you to the Product Categories index page. Your product categories page will look slightly different depending on if you are using TaxJar to compute the sales tax rate or manually setting the sales tax rate.
With TaxJar
Manually Set Tax Rate
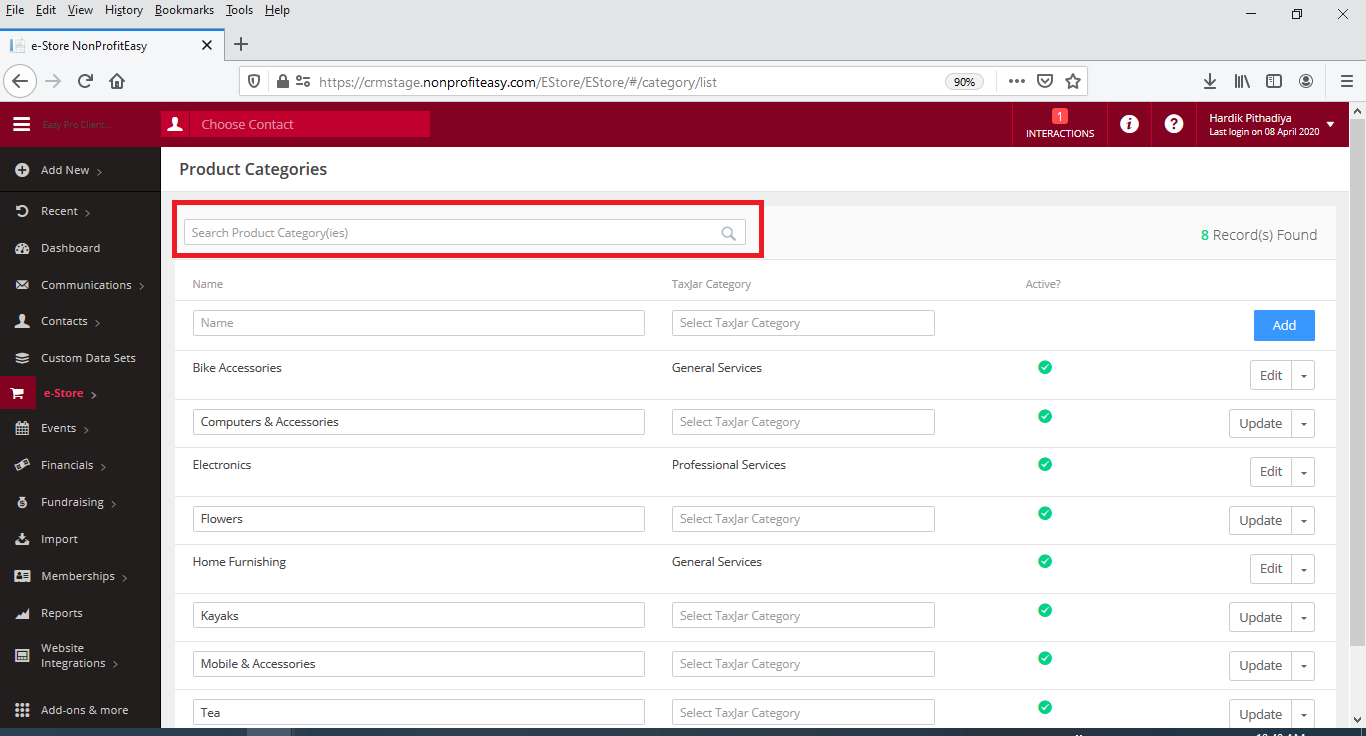
- You can search the list of existing configured categories using the Search Bar. Type your search term and hit the enter key. Please Note: you cannot use the search bar to search by TaxJar category when TaxJar is enabled; you can only search by CRM categories/keywords.
- You can activate/deactivate any category by clicking the check mark in the "Active?" column. A green check mark indicates the category is active; a gray check mark indicates the category is deactivated/inactive (no longer can be assigned to products).
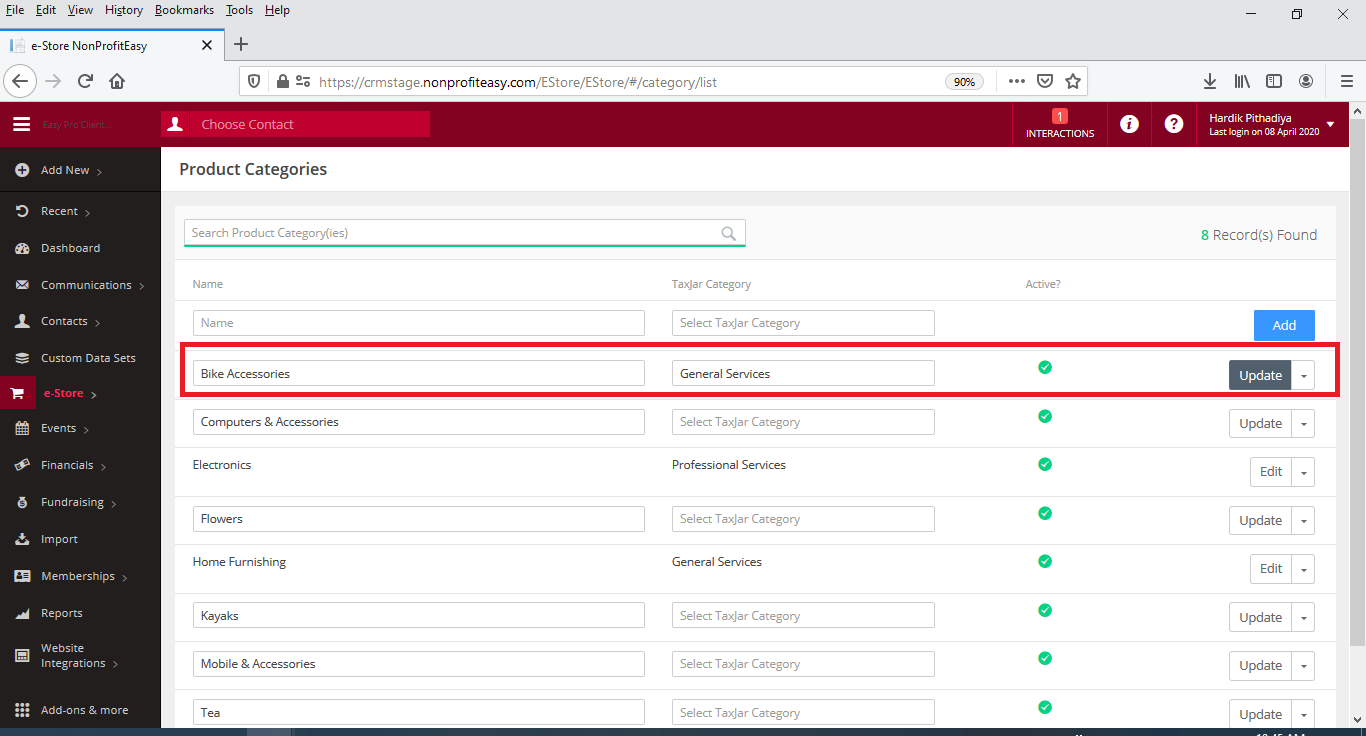
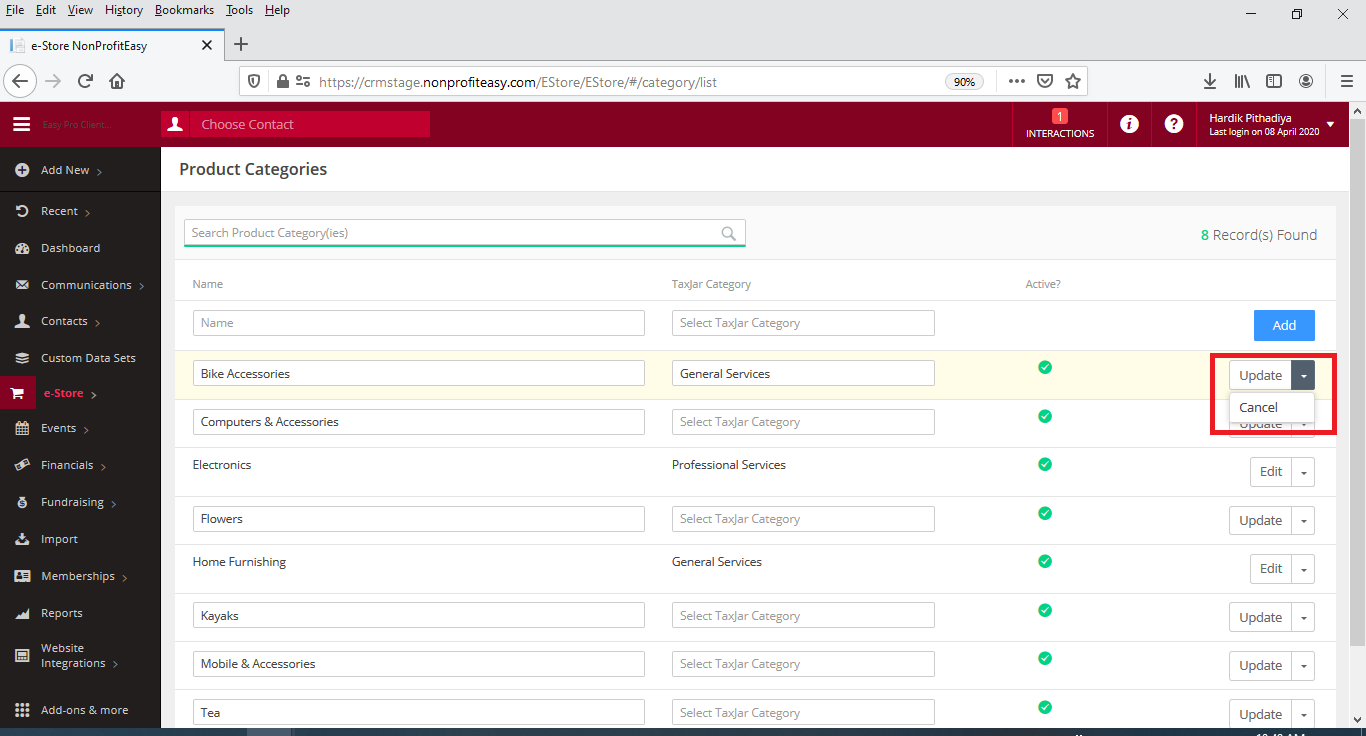
- To edit any product category, click the drop down to the right of the category and select Edit. Edit the category's name and/or TaxJar Category (if using TaxJar)/sales tax rate (if manually entering) and then click the Update/Cancel drop down to the right of the line being edited and select Update to save changes. Choose Cancel to undo the changes.
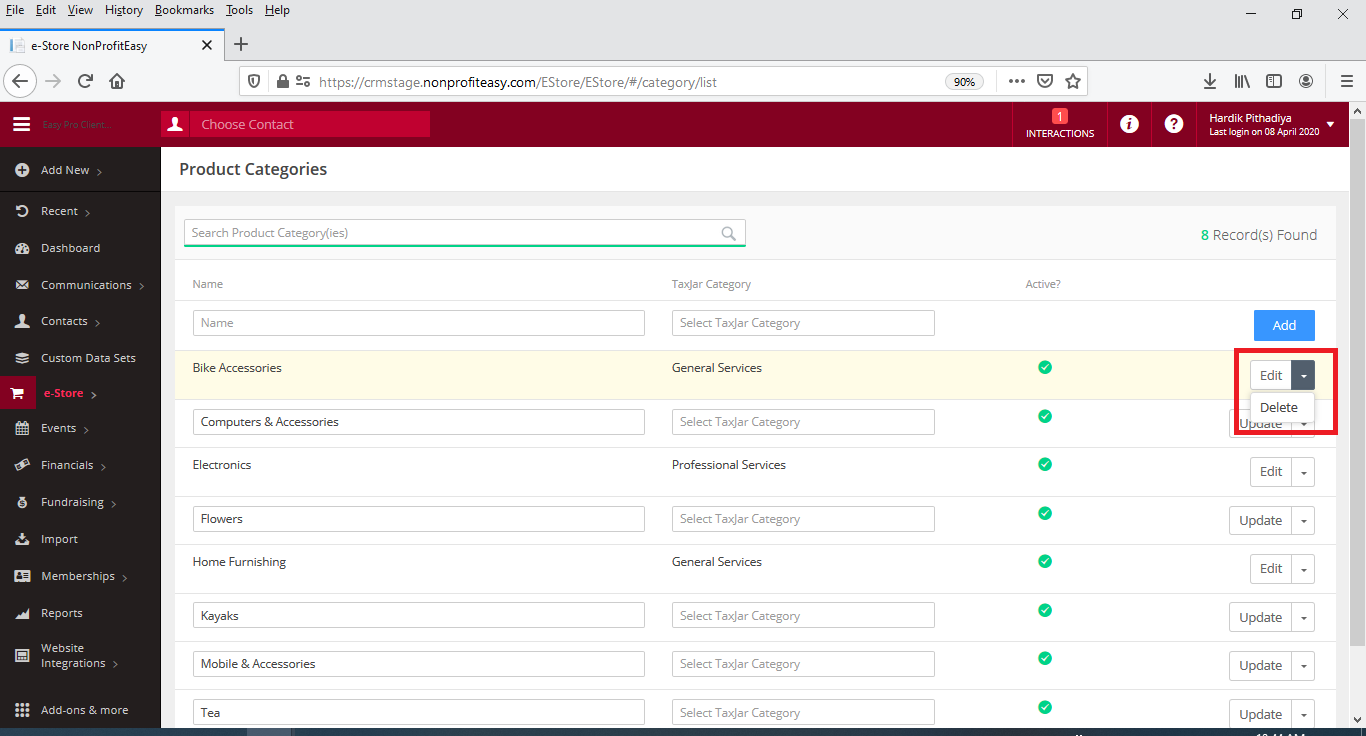
- To delete any product category, click the drop down to the right of the category and select Delete.
- To add a new product category, type the name of the product category in the blank Name field at the top of the list of configured categories, add the TaxJar category (if using TaxJar)/add the sales tax rate (if manually setting sales tax rates), and click the blue Add button on the right.
Comments
0 comments
Article is closed for comments.