e-Store Manage Orders Part I: Add Order
- This tutorial covers the ways to add e-Store orders for merchandise to your system via direct entry (directly into CRM) (orders can also be added online if you have integrated your website with our CRM but that process is covered in a different tutorial).
- In order to add orders to the system, you must first have configured your default sales tax category, product categories, and products in the system.
- There are a number of ways to add orders to the system; from simplest to most complex they are:
- From the QuickAdd Menu - Add Order
- From View Contact - scroll down to the e-Store widget and click the + sign
- From Pending e-Store Orders - click the Add New button in the lower right
- From Create/Edit Order - click "Save and Add New" to add another/a new order
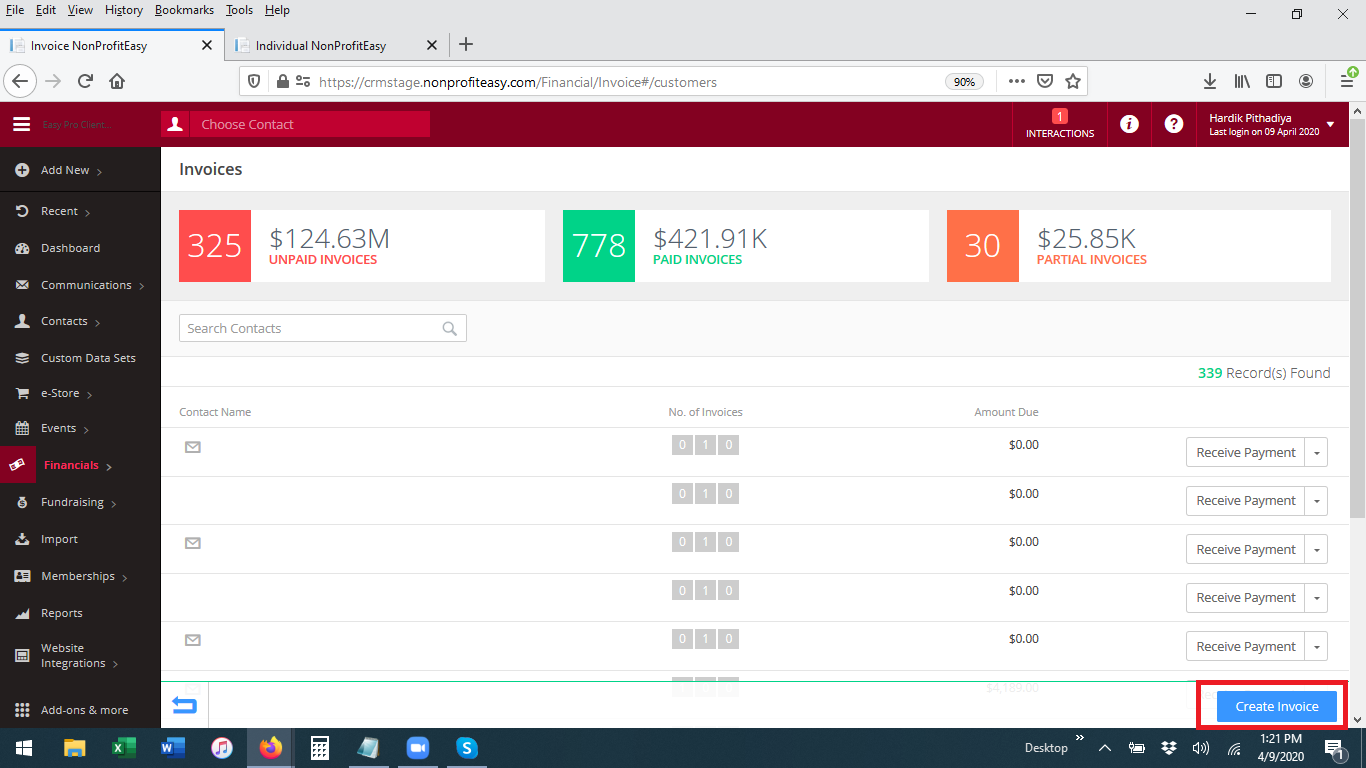
- From Create Invoice (from QuickAdd Invoice, or Add New from Invoices Index area)
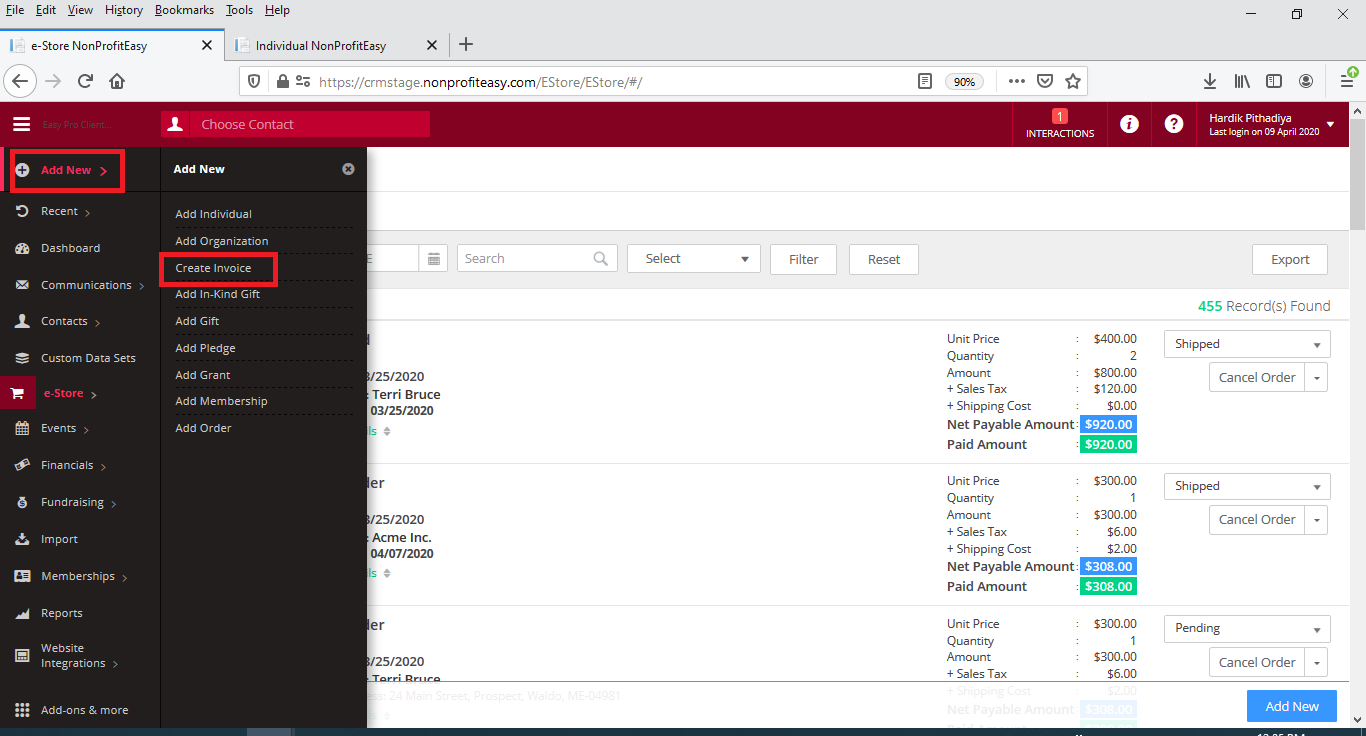
- Adding Order from the Quick Add Menu:
- On the Main Menu click the Quick Add menu (Add New) and then select Add Order from the sub-menu.

- One the resulting Create Order screen, start by entering the purchaser name in the Contact Name field (if the contact is not already in your system, you can add them "on the fly" by typing the name and hitting enter. The system will bring up a pop up box asking if you want to create an individual or organization contact record and then will bring up the quick add contact box. Enter whatever information you know about the contact and then click save to return to your in progress order entry).
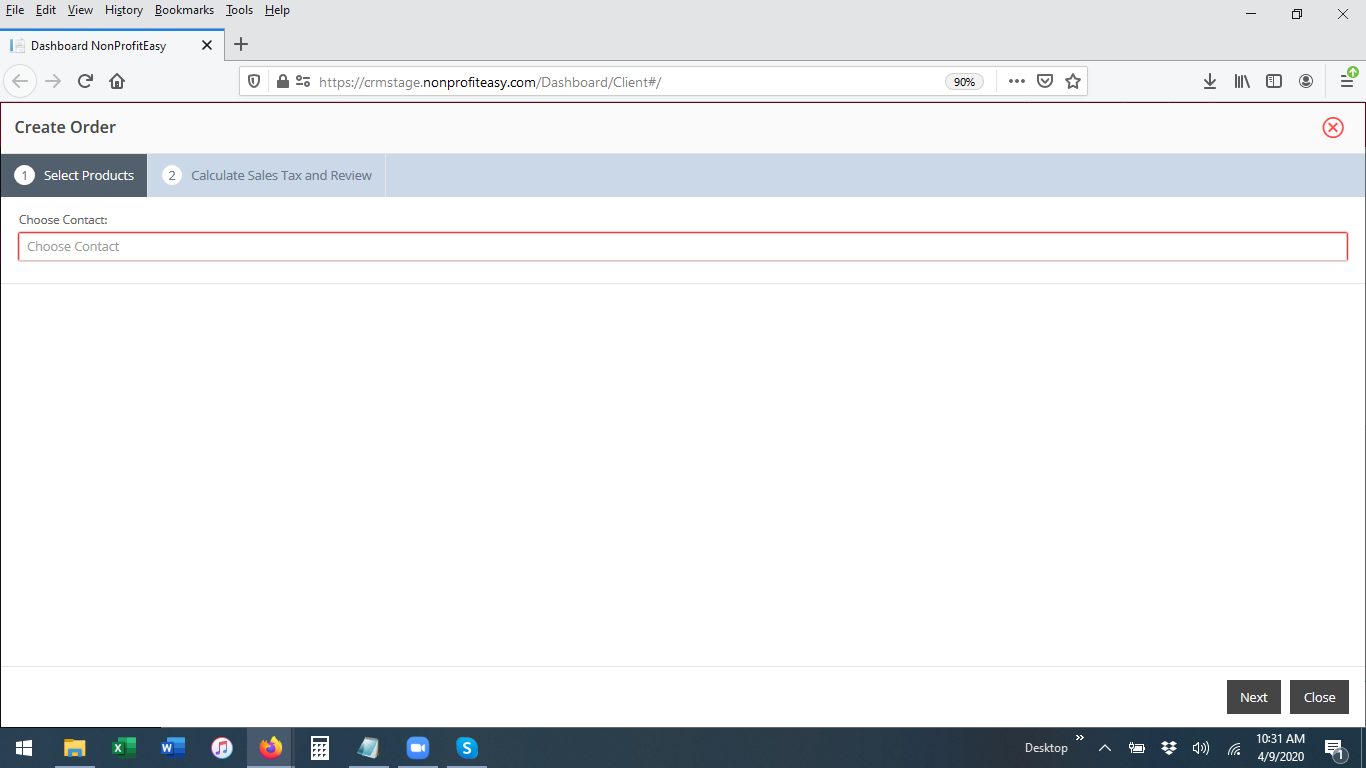
- As soon as you enter a name, the screen advances to Select Product. There is no way to change/edit the name selected at this step (you can change it after selecting products).
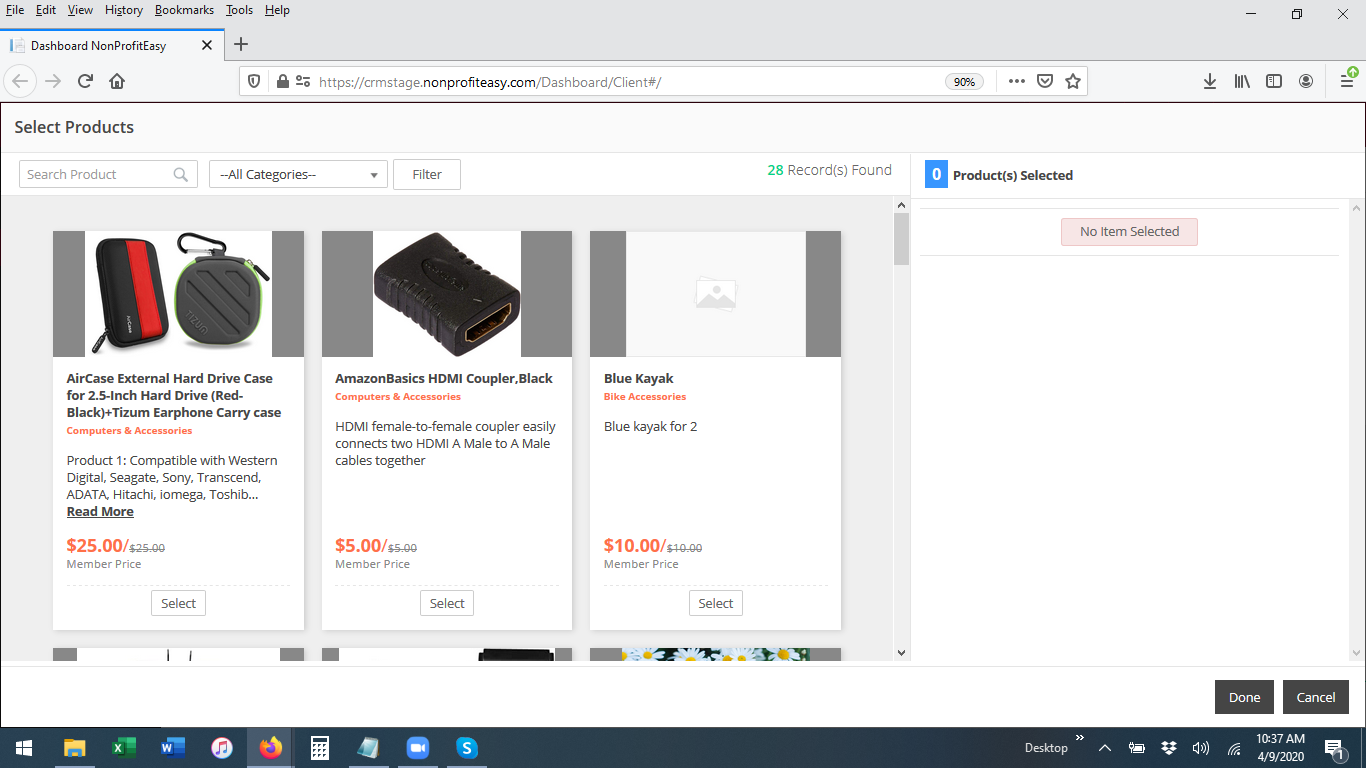
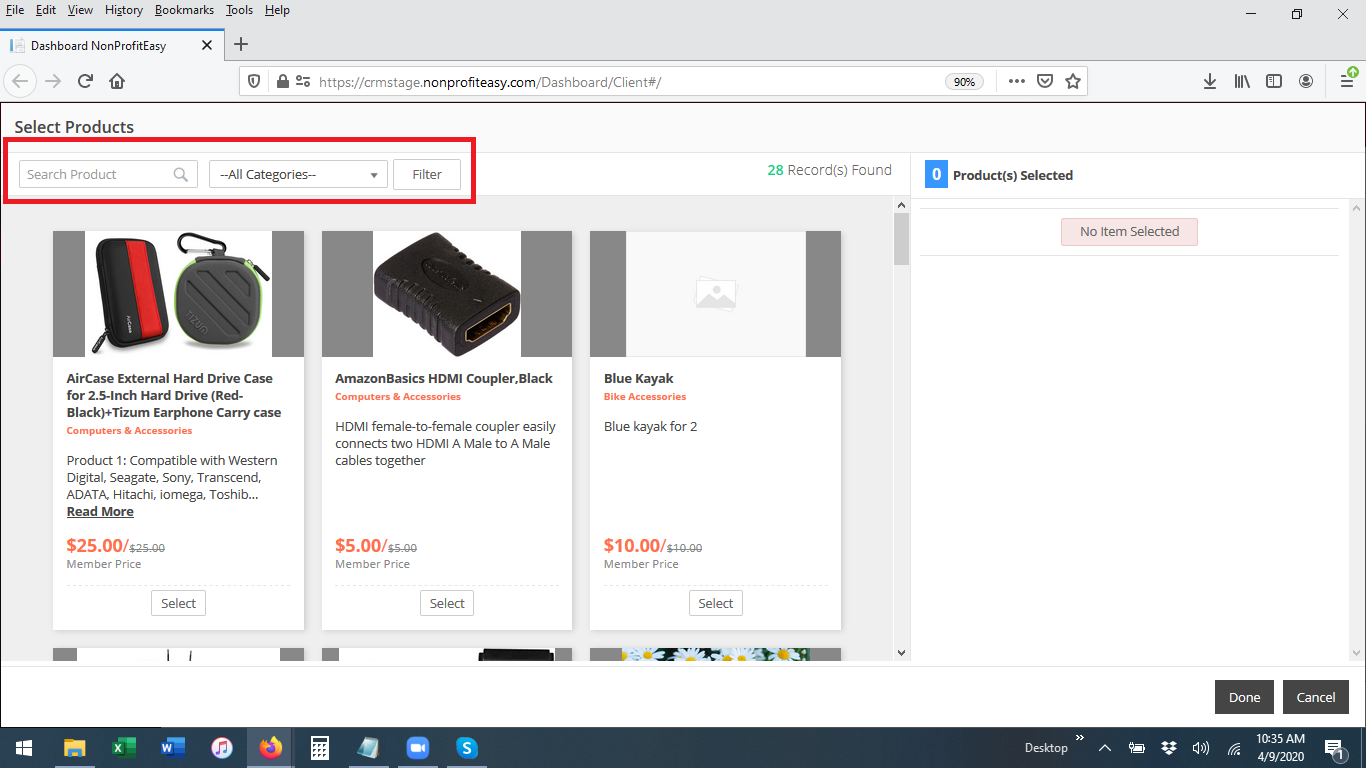
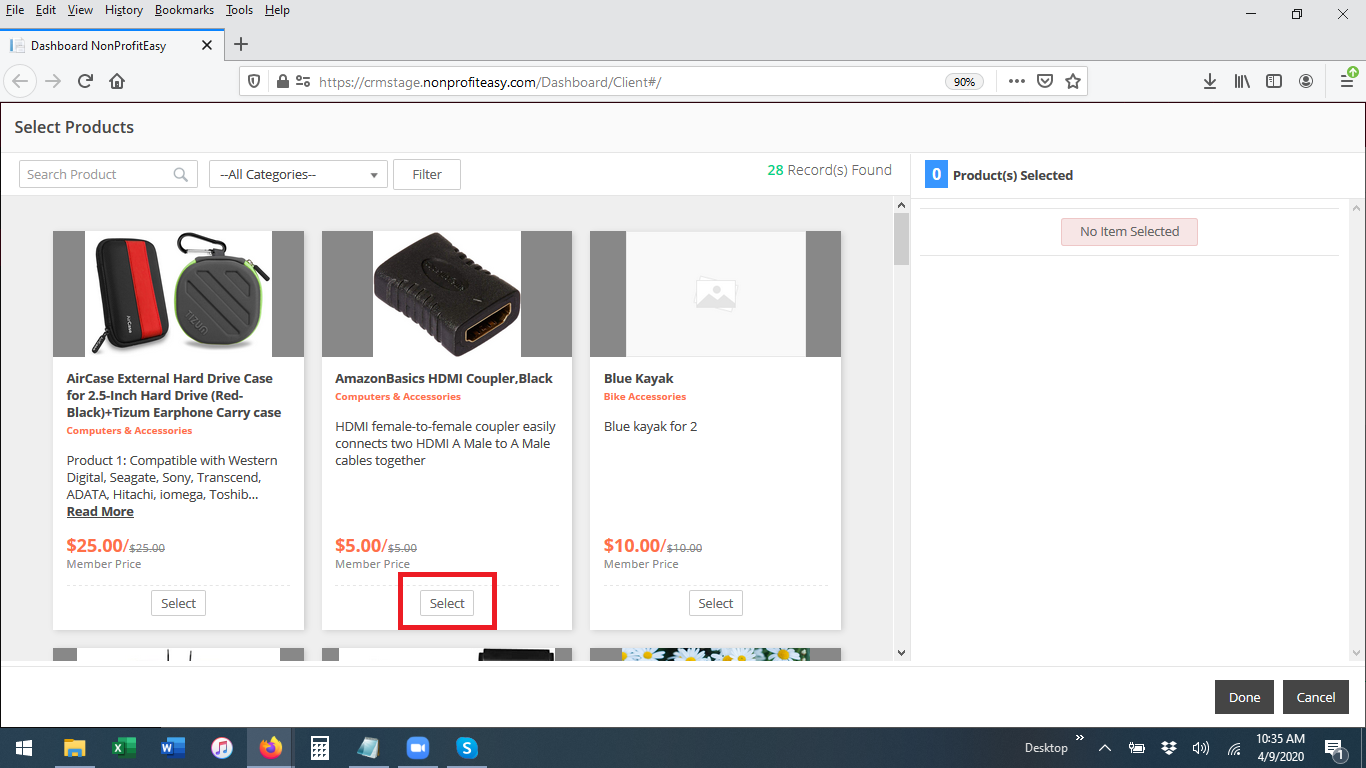
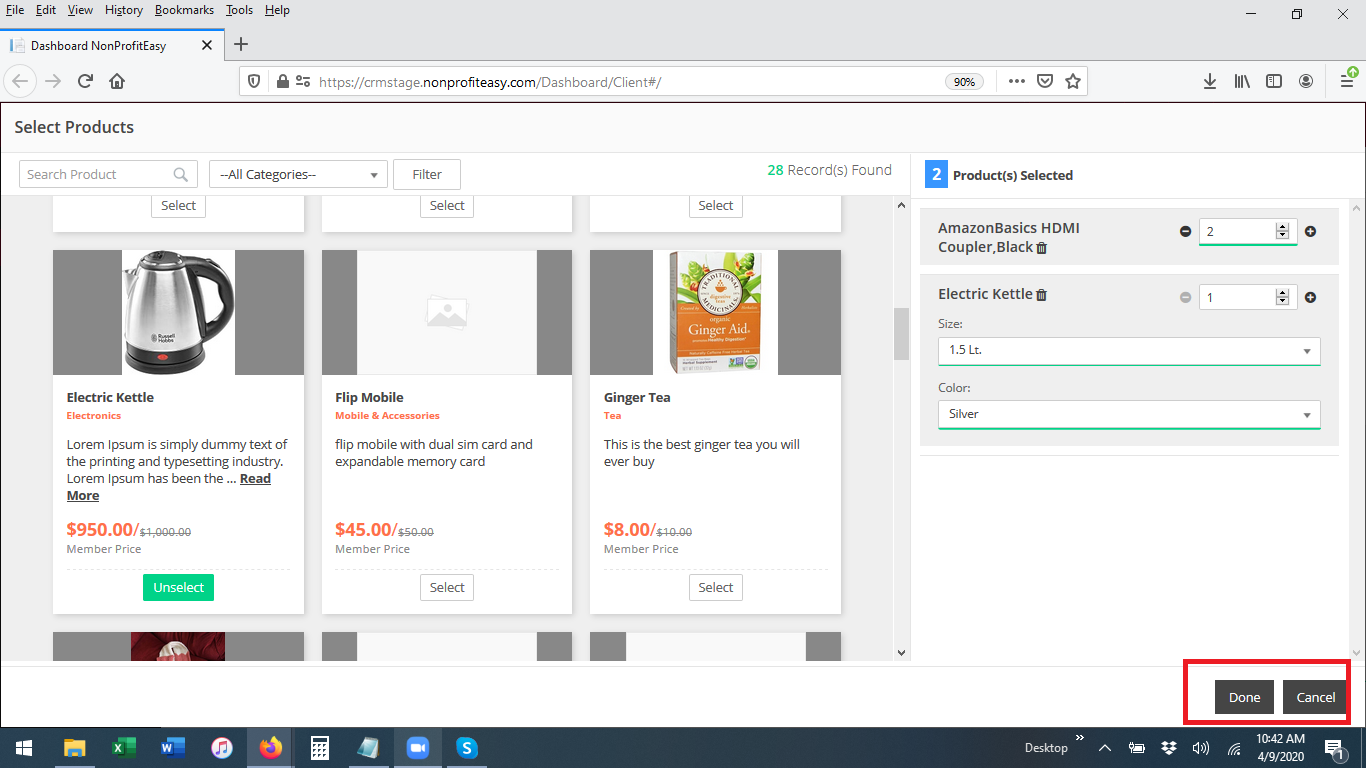
- On the Select Products screen, select the products being ordered. You can only select from previously configured items - there is no ability to add new products here.
- You can search products by keyword or category using the search bar at the top of the screen.
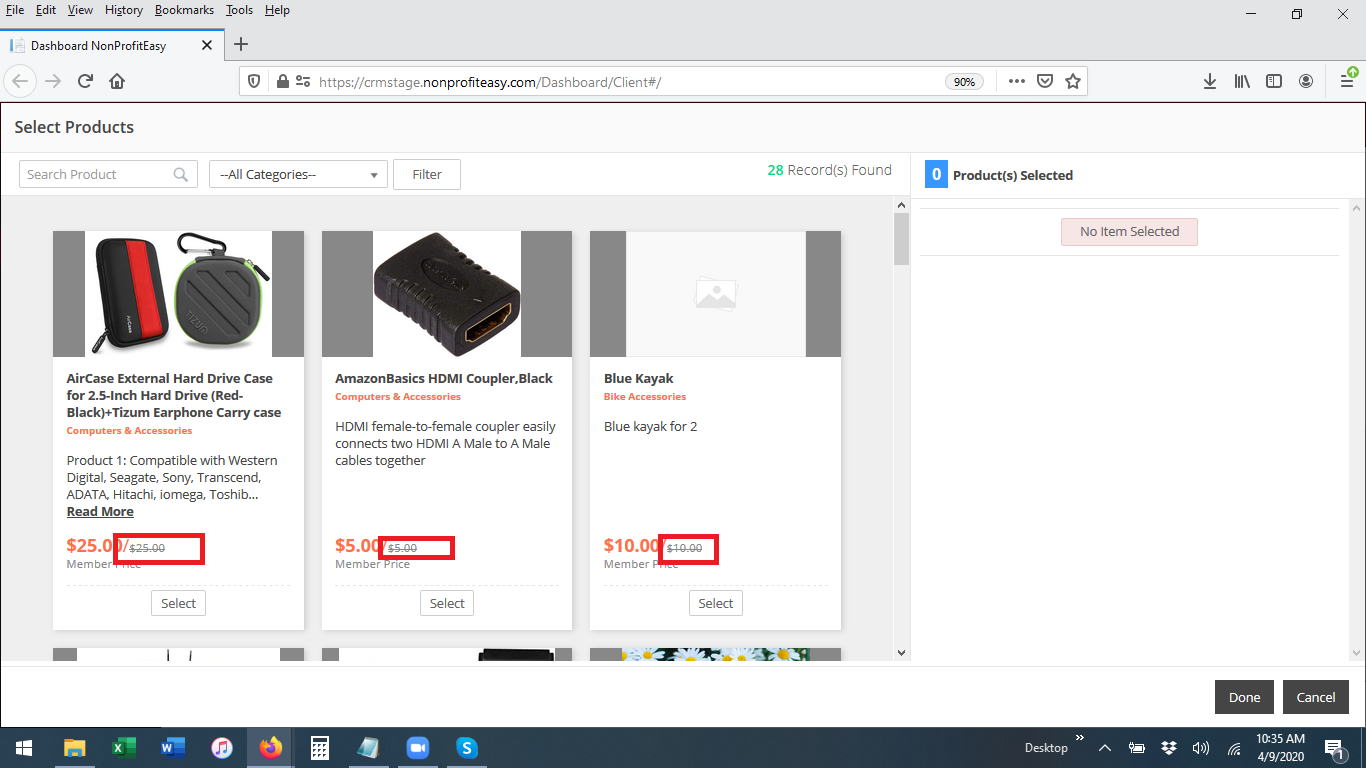
- If the purchaser selected is not a member, then the member price of each item will be crossed out to show that the purchaser is not eligible for the member price.
- Add a product to the order by clicking the Select button centered beneath the item's details.
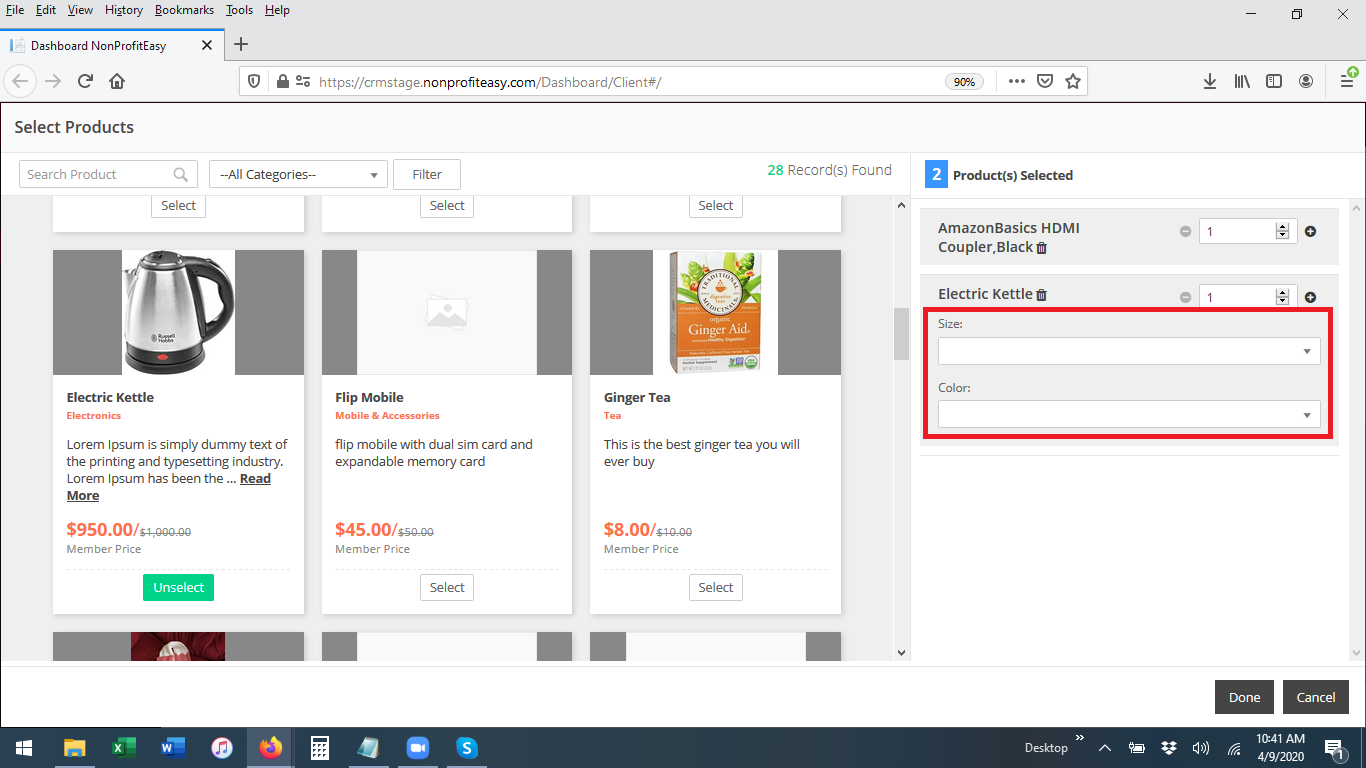
- The item will then be moved to the right hand order panel. You can change the quantity by using the up and down arrows or the plus/minus signs.

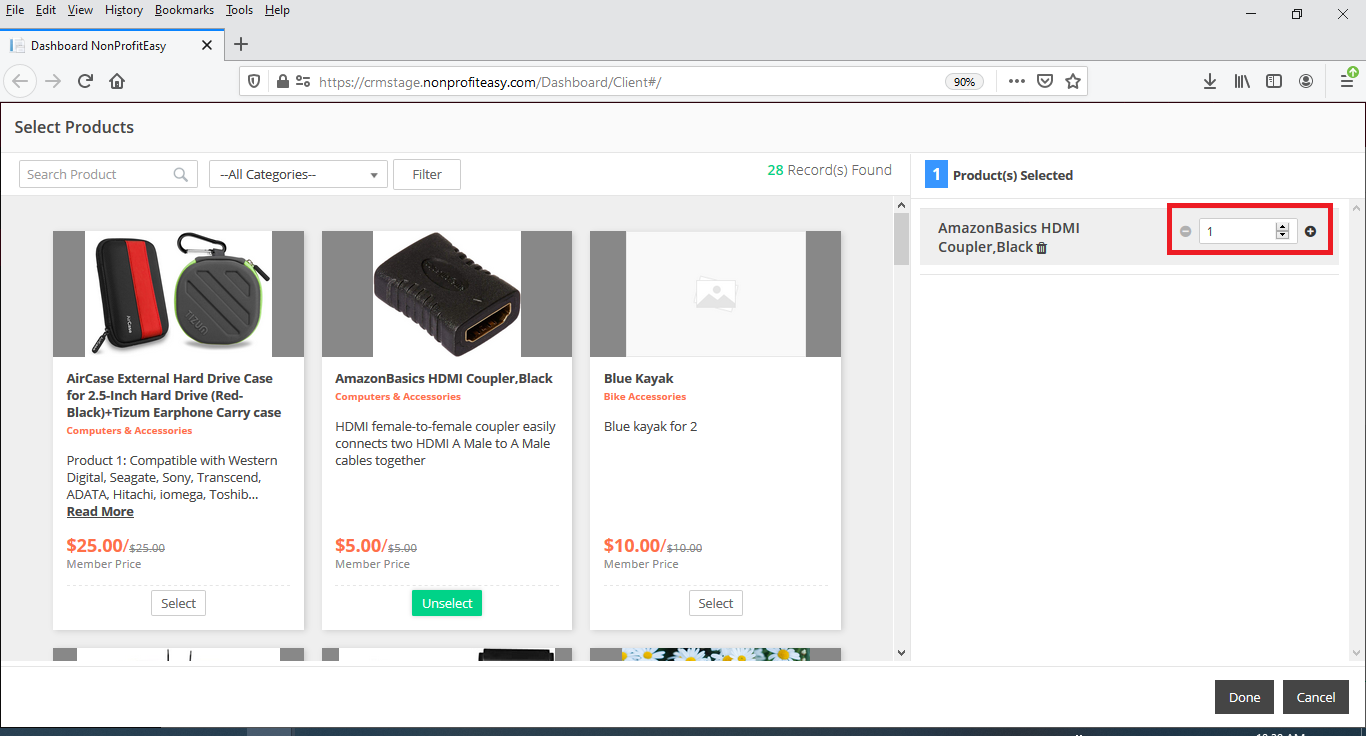
- If the item has custom fields to be filled out, they will show in the right hand panel and user can then select the specific size/style/color, etc.
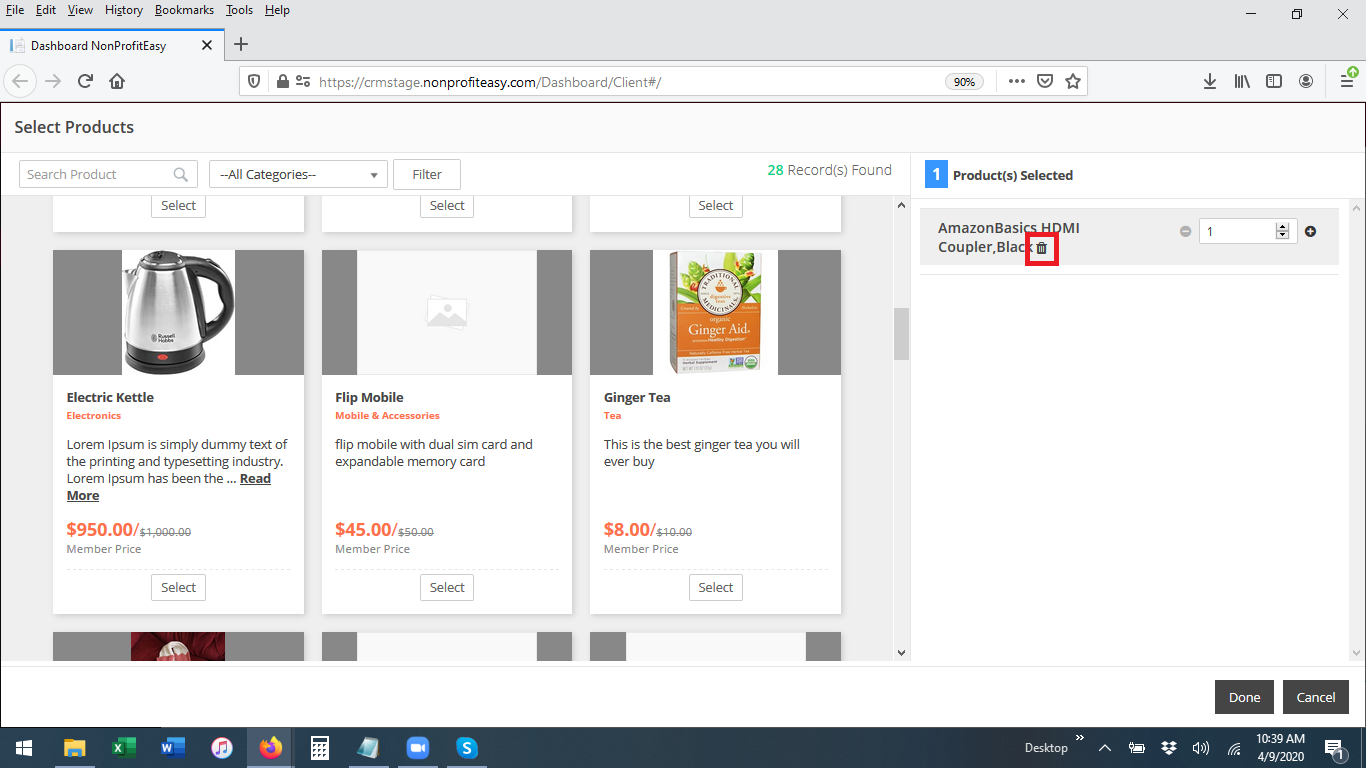
- To delete any item from the order, click the trashcan icon next to the item's name in the order panel.
- After selecting all items for the order, click the Done button in the lower right to advance to the next tab.
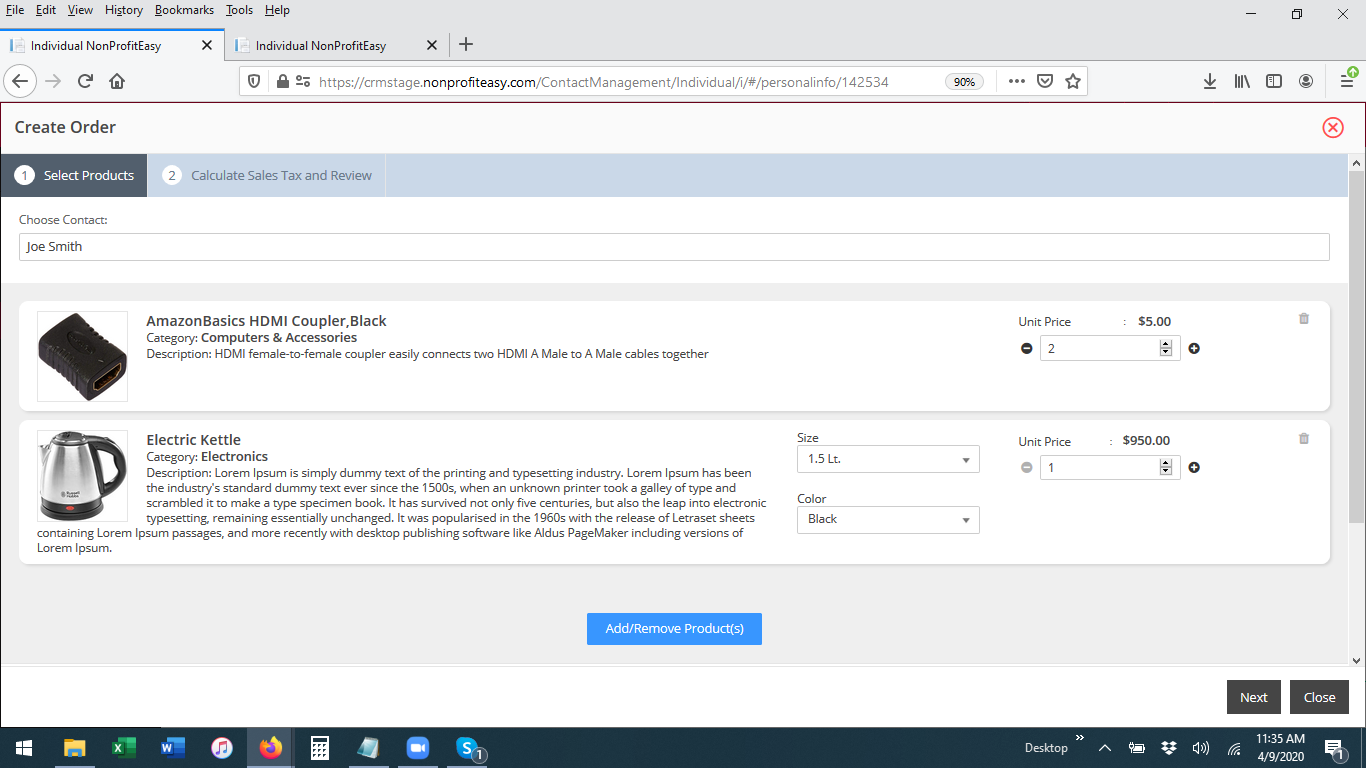
- On the next screen, you have the option to change the purchaser name, quantity of remove any items added to the order, add more items to the order (click the blue Add/Remove Item(s) button).
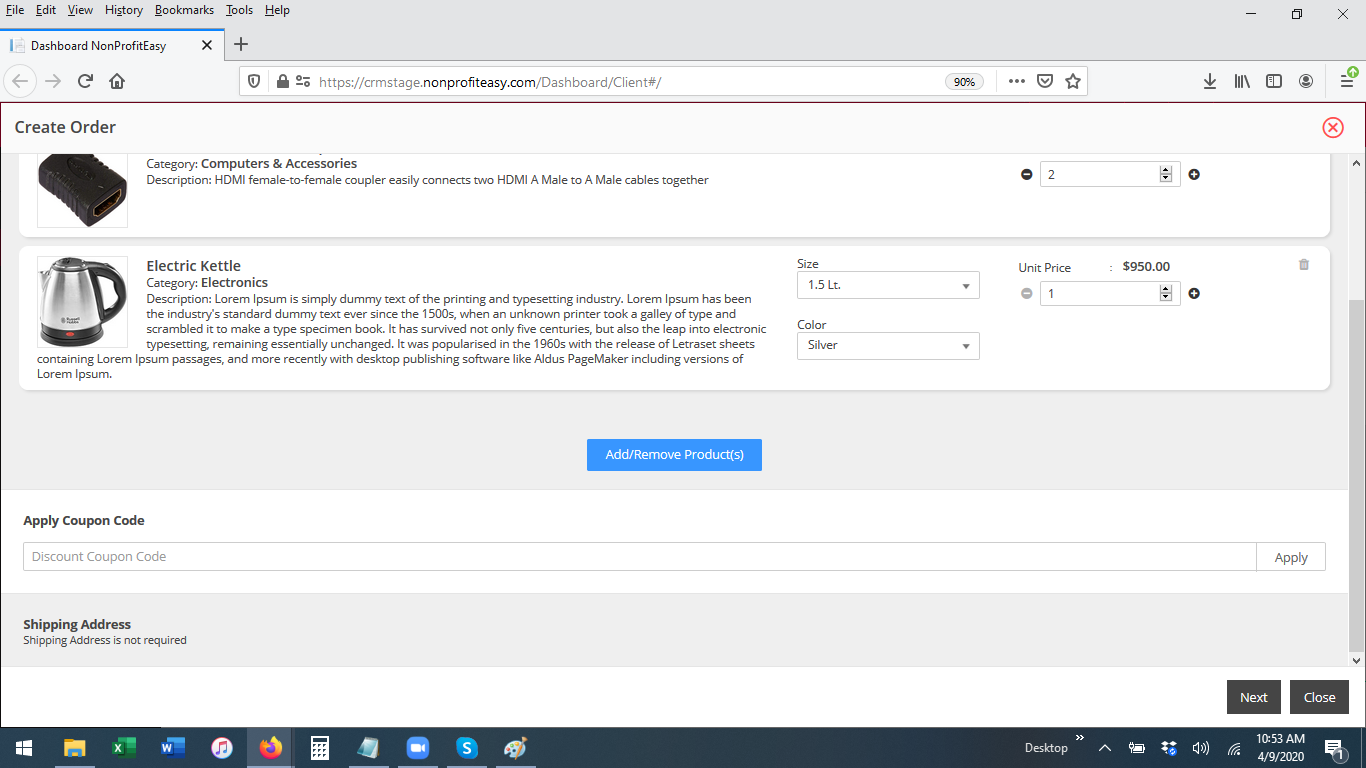
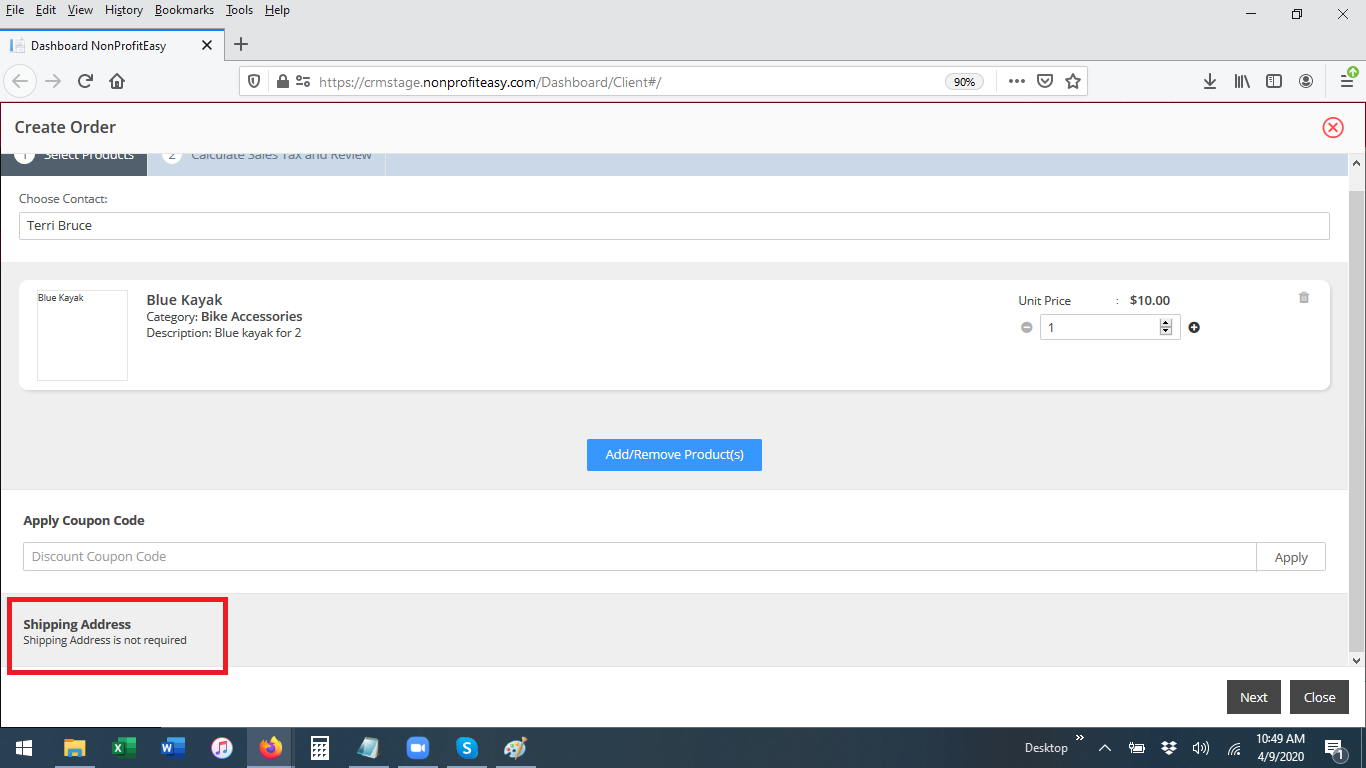
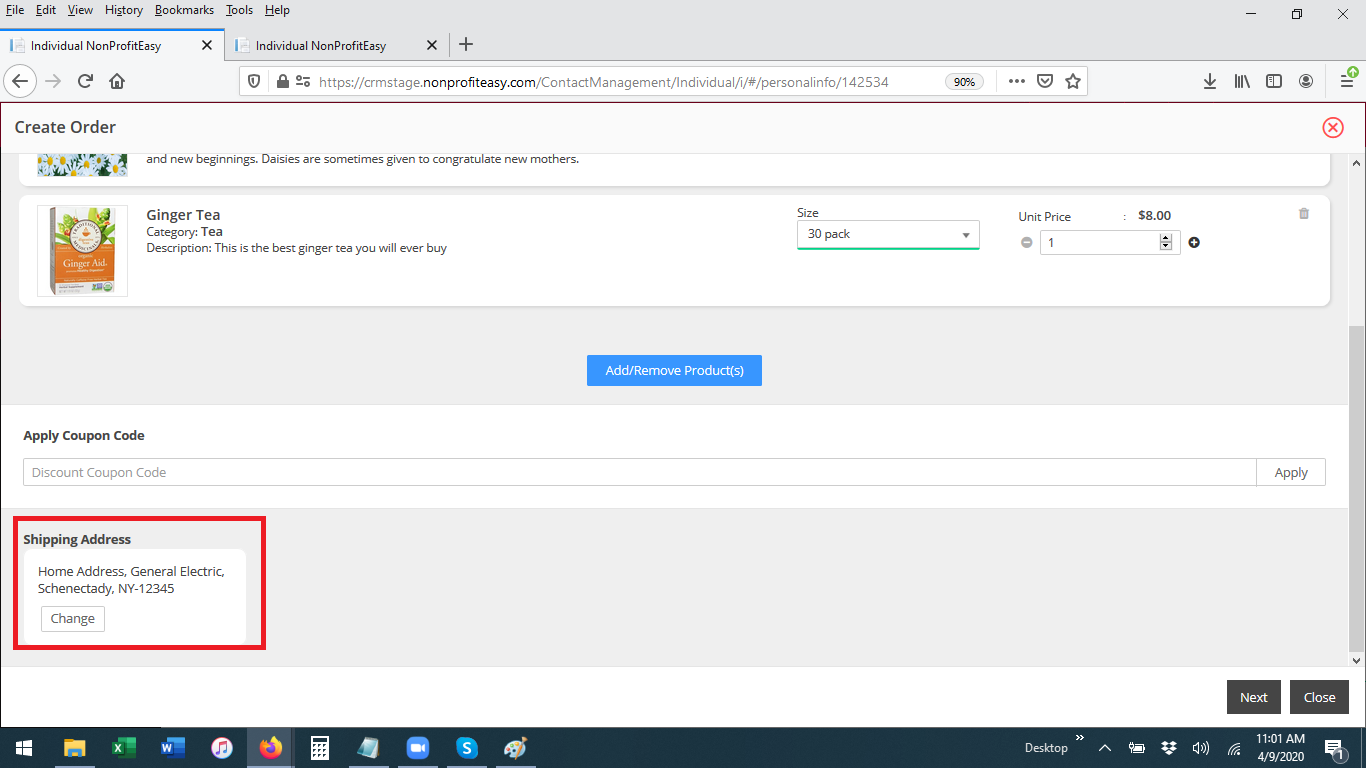
- Once you have finalized the purchaser name and items to be ordered, scroll down to add a discount/coupon code if applicable, and a shipping address if required.

- If none of the products in the order require a shipping address, the shipping address field will indicate "Shipping Address is Not Required."
- If shipping address is required:
- If contact already has a shipping address on their record, this will show as the default shipping address.
- If contact does not have a shipping address on their record, but does have a mailing address, the mailing address will show by default.
- If contact does not have a mailing address on their record but does have an other address, the other address will show by default.
- You can change the selected/default shipping address (select from an existing address or enter a new address) by clicking the Change button.
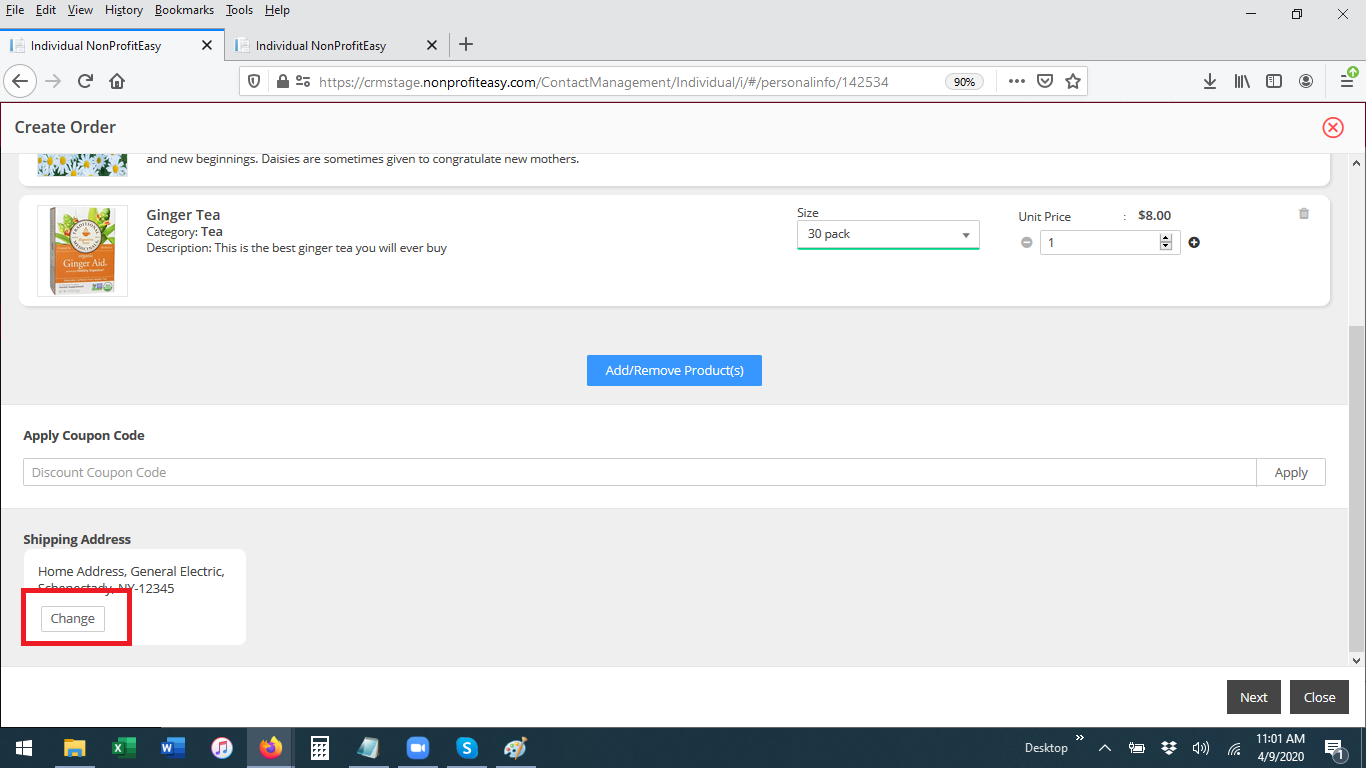
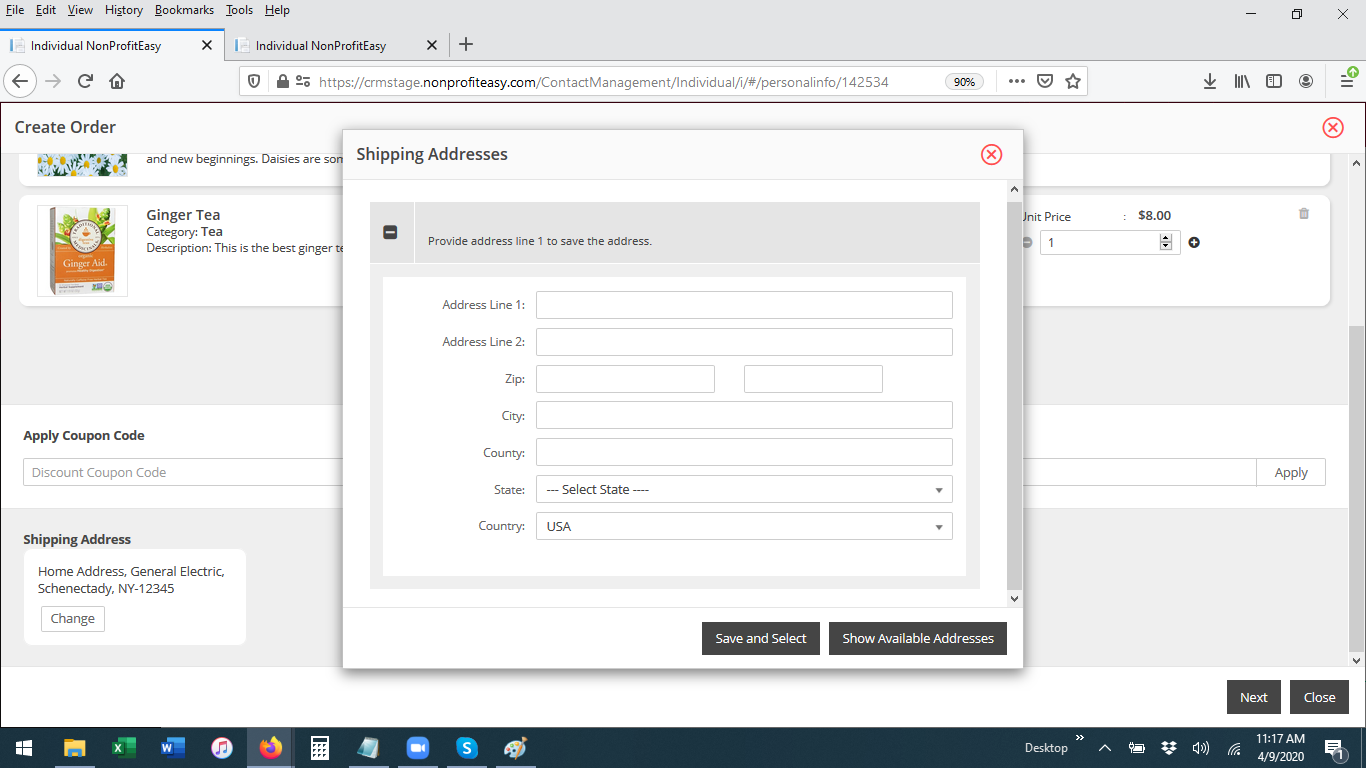
- In the resulting pop up either click the Select button next to any existing address or click the Add New Shipping Address button to add a new address.

- If adding a new address, in the resulting Shipping Address pop up, enter a new address and click Save and Select to save the new shipping address or click the Show Available Addresses button to cancel and return to the list of existing addresses.
- If contact already has a shipping address on their record, this will show as the default shipping address.
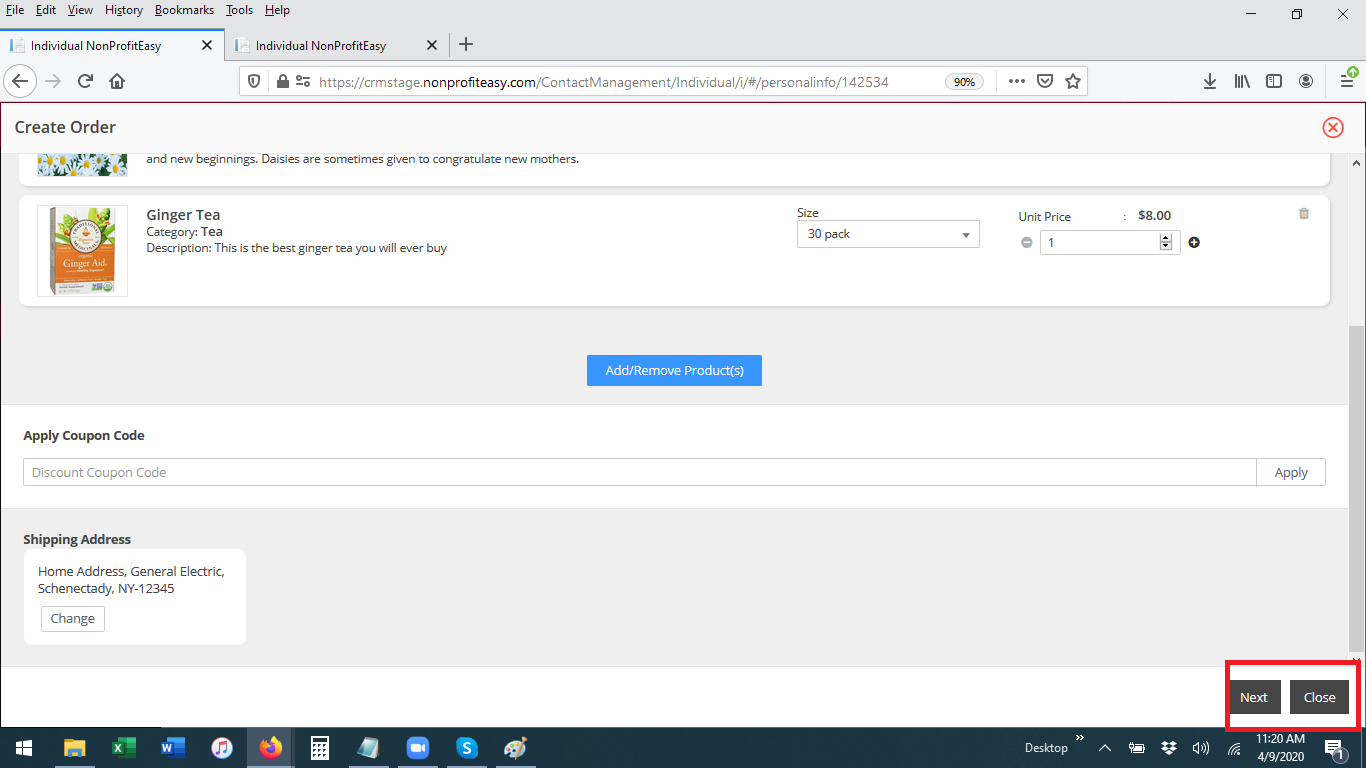
- When you have finalized the order and Shipping Address (if required), click the black Next button in the lower right to proceed to the next step.
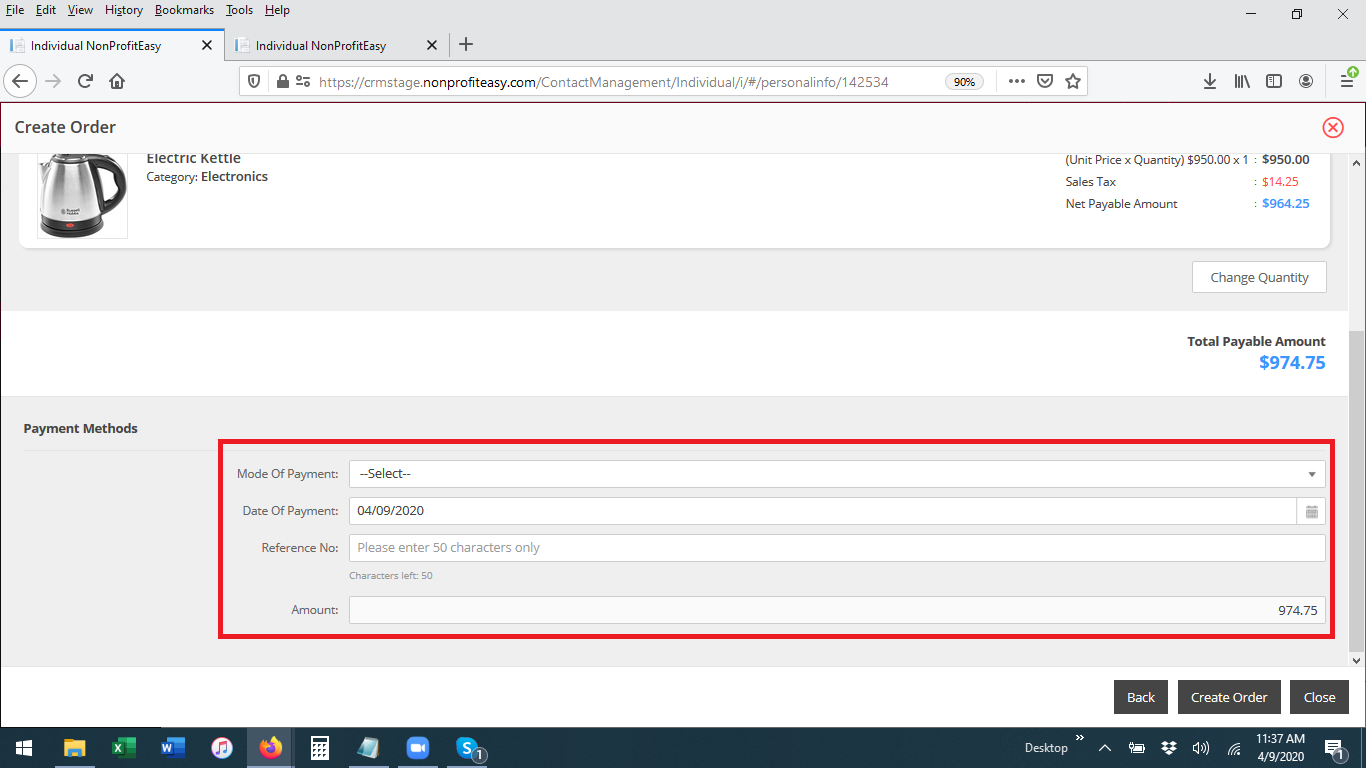
- On the next screen, any applicable Sales Tax will be calculated/added to the order. You will have the opportunity to change item quantities and/or update the shipping address one last time.
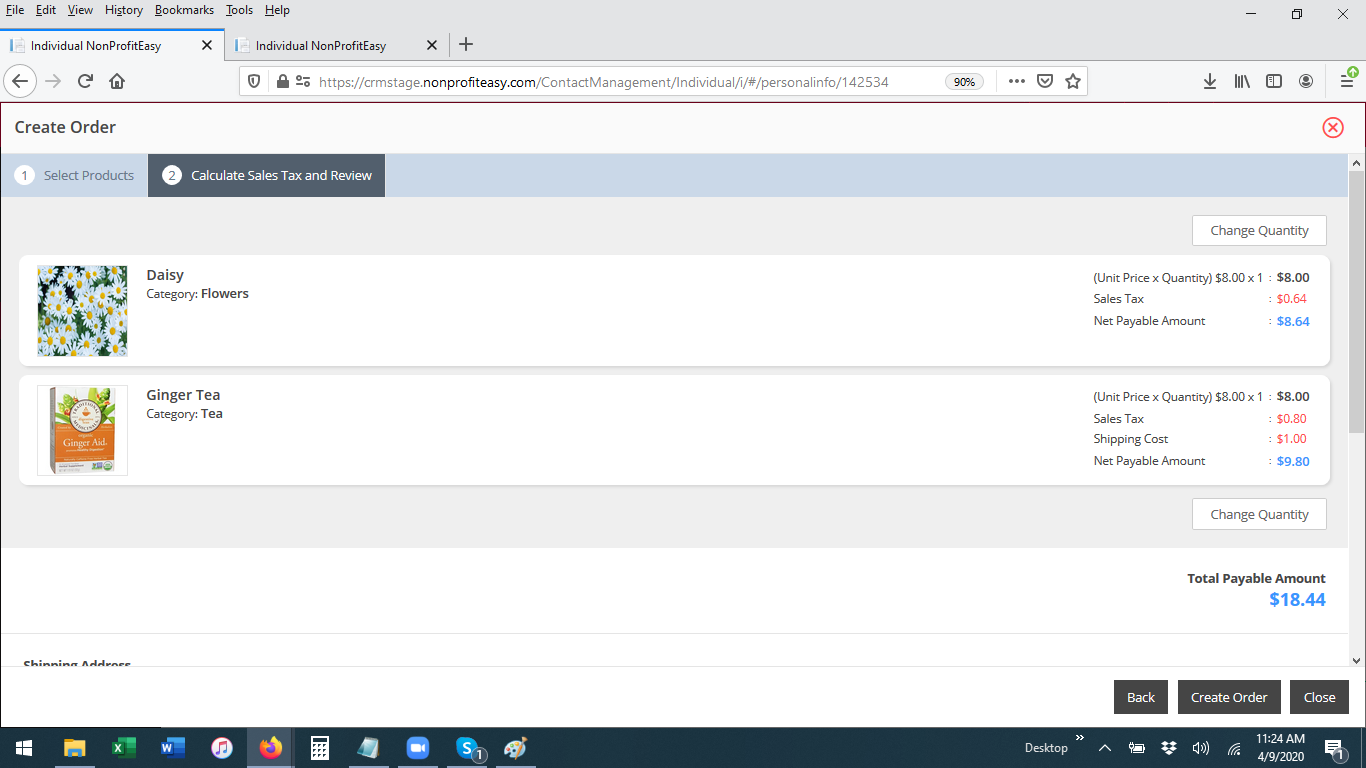
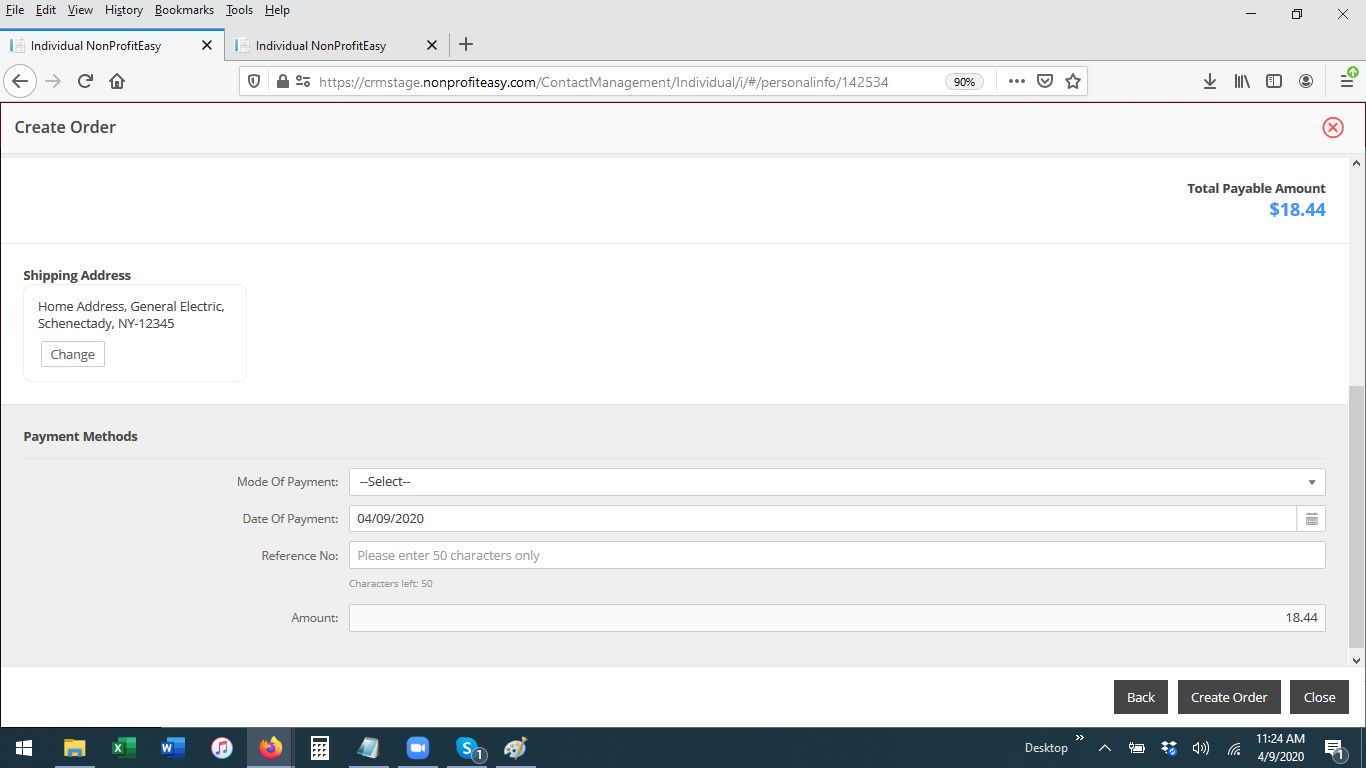
- After finalizing the order and shipping address, scroll to the bottom of the page to receive payment (if payment has been received). It is not required to enter payment/you can proceed without payment.
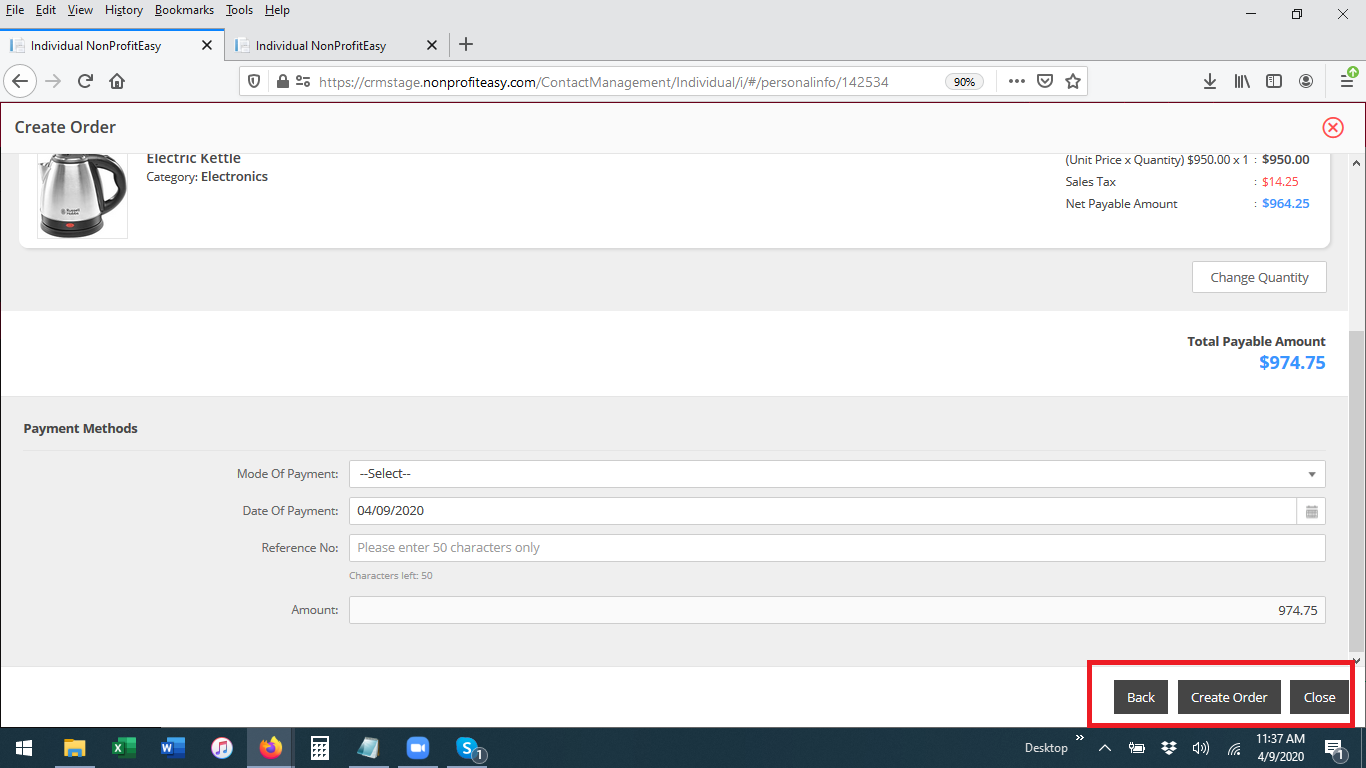
- When you are done, click the Create Order button in the lower right to save/process the order.
- The order will now be found on Main Menu: e-Store: Pending Orders and will be awaiting fulfillment. You will also see the pending order on View Contact: e-Store Orders widget. Please Note: every item in an order will be recorded as a separate order; in the above example, Joe has ordered 2 HDMI adapters and 1 Electric Kettle. The two HDMI cables will show as one order and the Electric Kettle will show as a second order. This is by design. You can learn more about this in the Manage Pending Orders tutorial.
- On the Main Menu click the Quick Add menu (Add New) and then select Add Order from the sub-menu.
- Create Order from View Contact
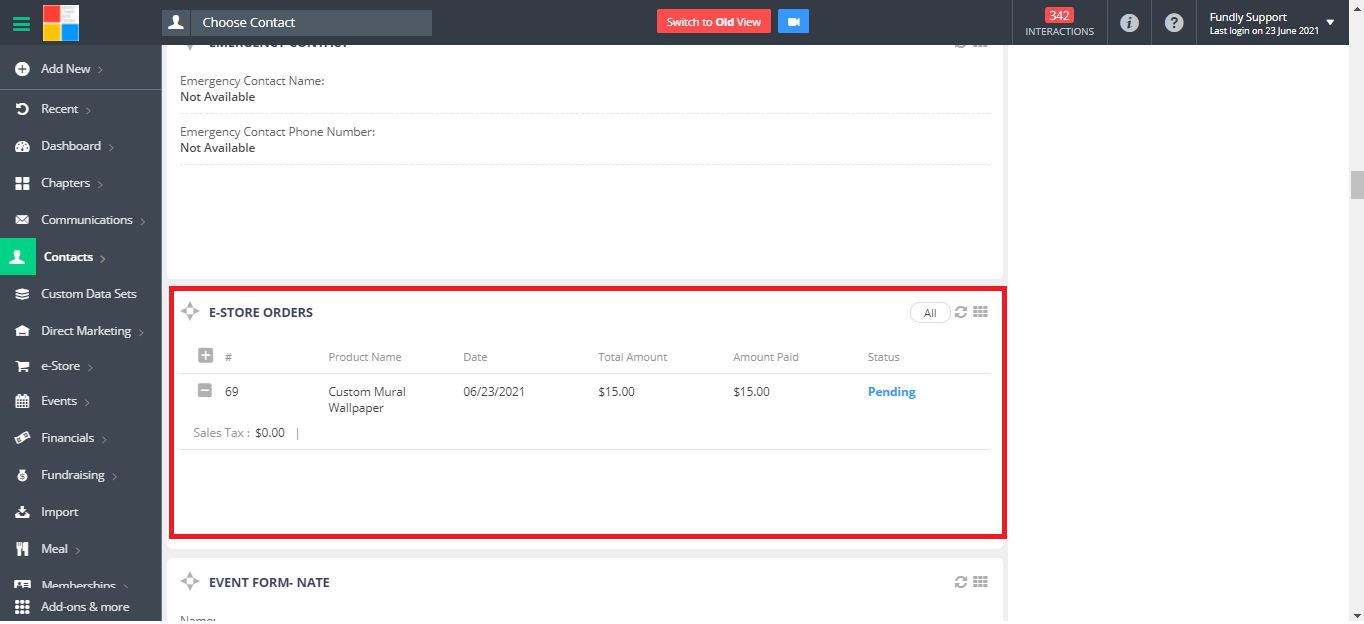
- View the contact's record and scroll down to the e-Store Orders widget (you may have to turn this widget on by clicking on the Blue color gear icon on left hand side and select E-store order under Other category).

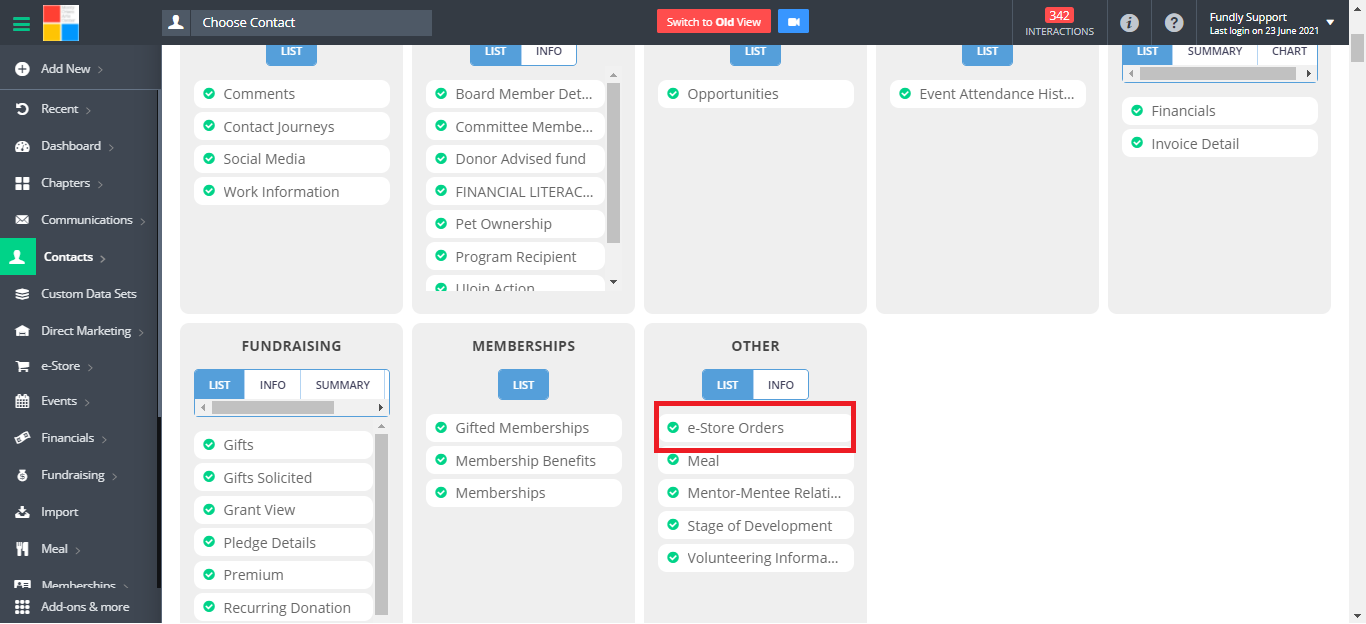
- Here you will see all of the contact's previous orders. This is a view only widget and you can view all the e-store orders by clicking on the All button.

- View the contact's record and scroll down to the e-Store Orders widget (you may have to turn this widget on by clicking on the Blue color gear icon on left hand side and select E-store order under Other category).
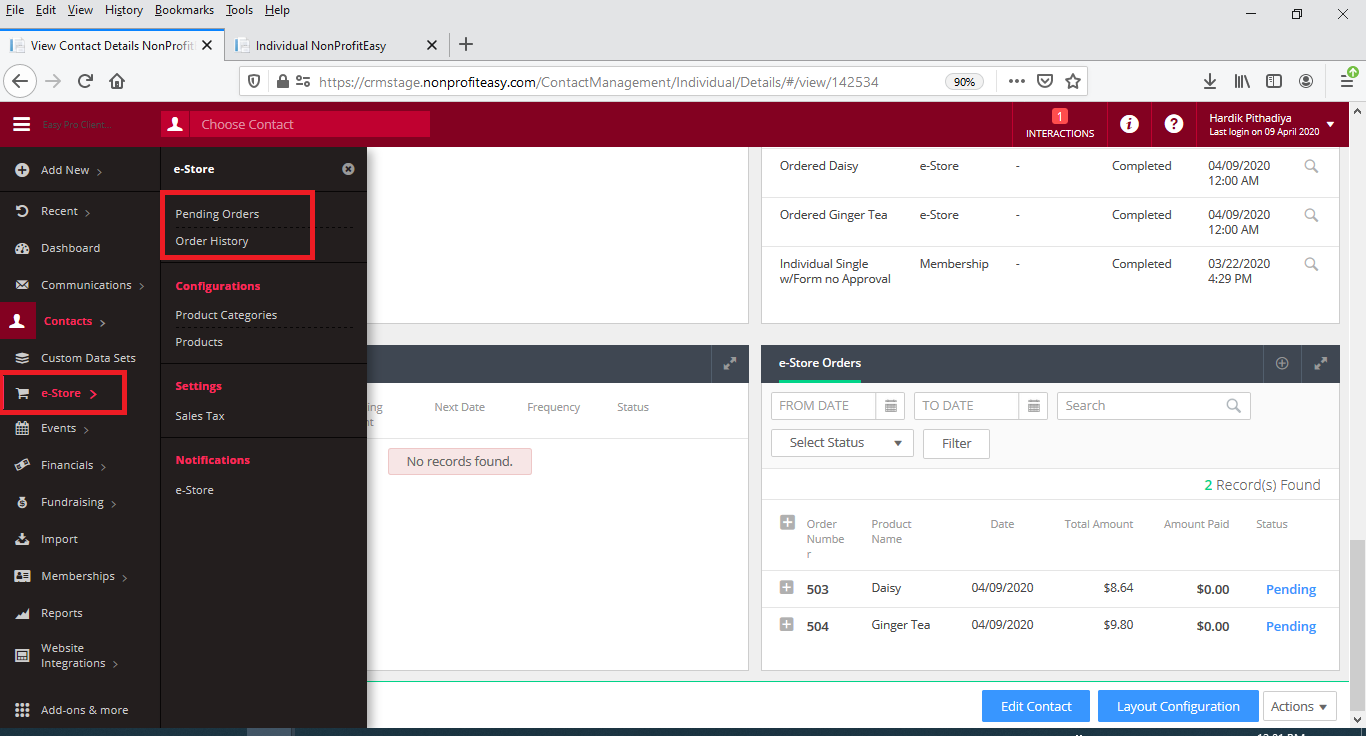
- From Main Menu: e-Store: Pending e-Store Orders or Order History:
- Go to Main Menu: e-Store and select Pending Orders or Order History from the sub-menu.
- Click the Add New button in the lower right
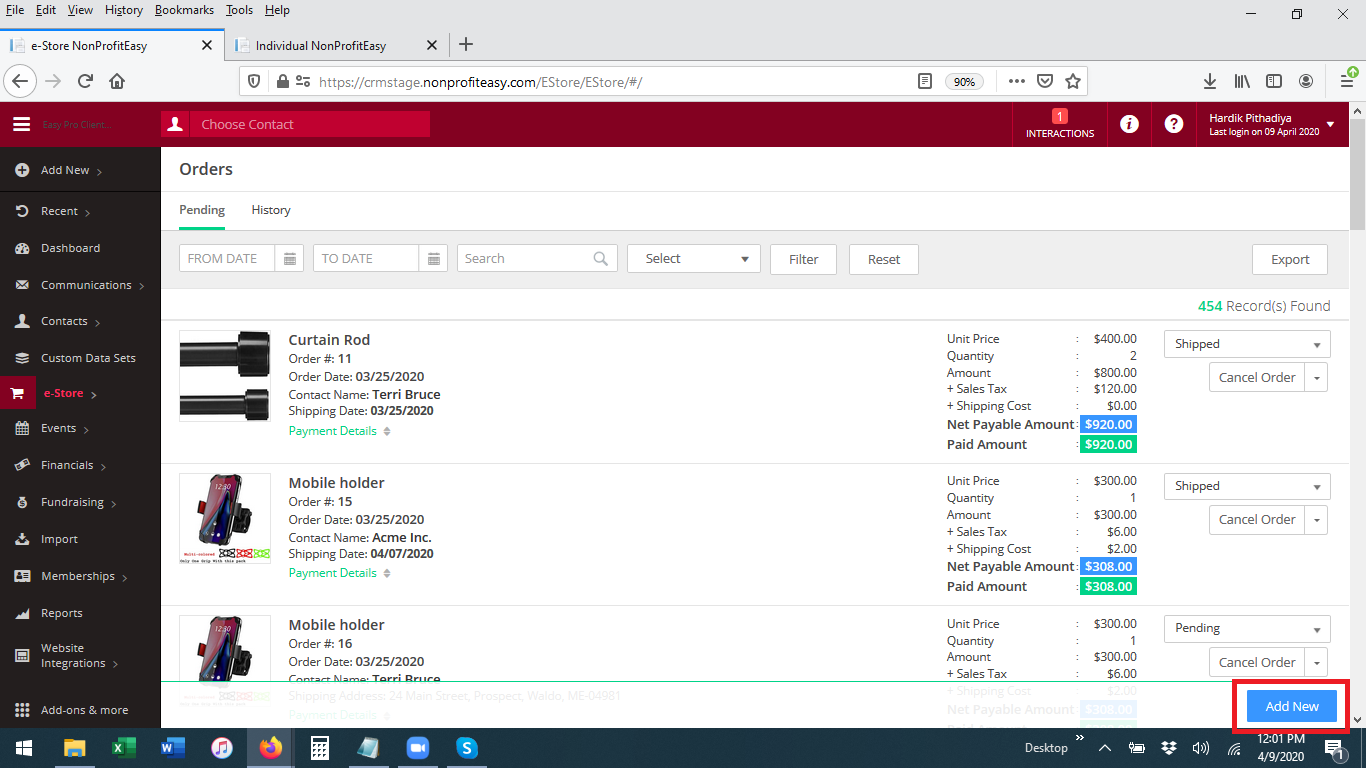
- This will bring you to the Select Purchaser screen and from here the flow is the same as adding an order from the Quick Add Menu as detailed above.
- Go to Main Menu: e-Store and select Pending Orders or Order History from the sub-menu.
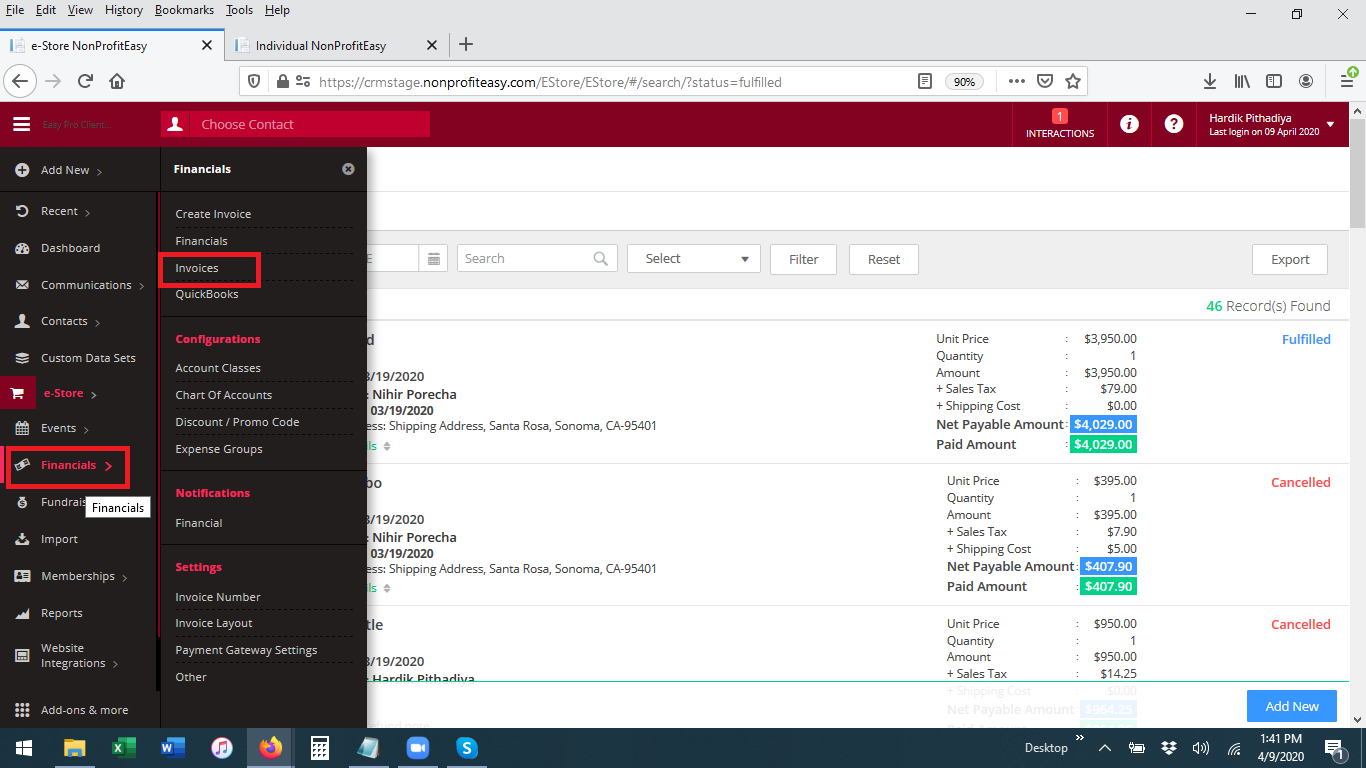
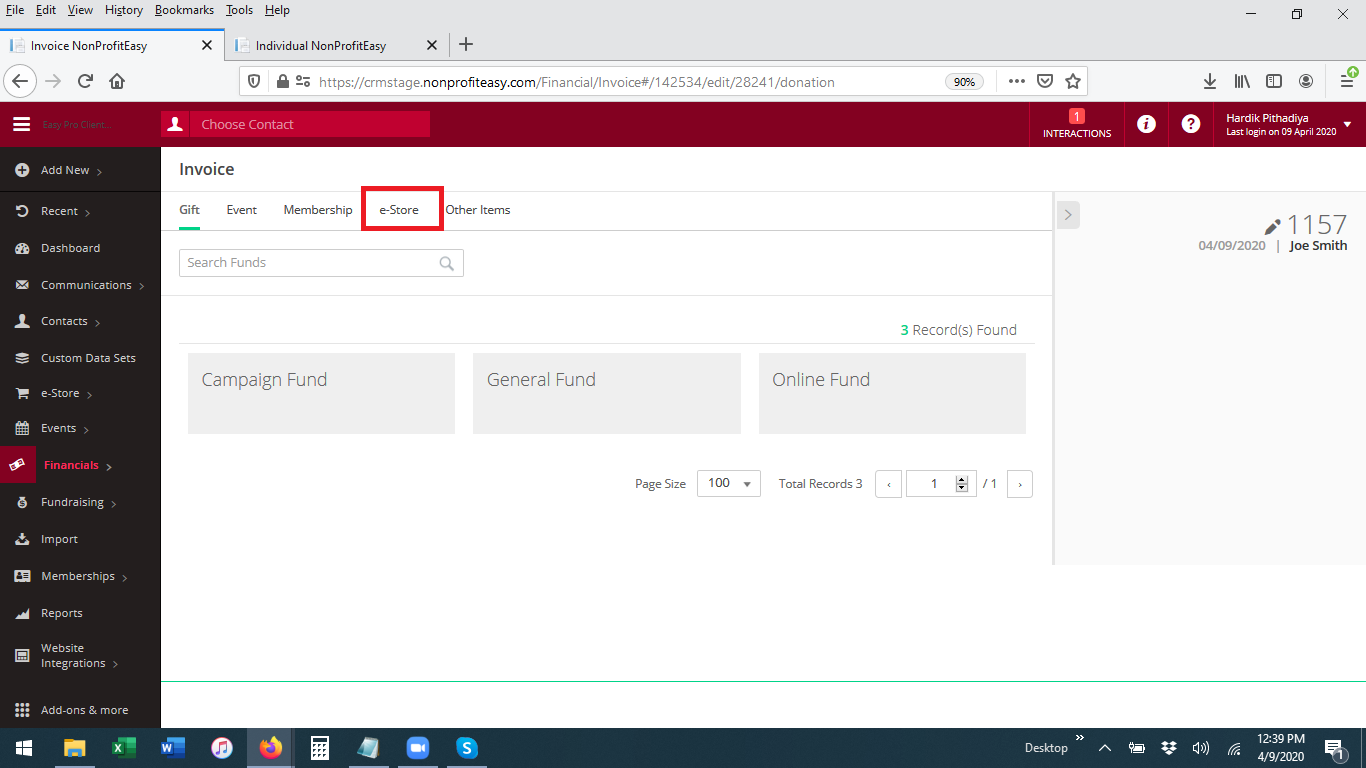
- From Create Invoice (from QuickAdd Invoice, or Add New from Invoices Index area)
- On the Main Menu click Create New (Quick Add menu) and then select Create Invoice from the sub-menu OR go to Main Menu: Financials: Invoices and select Add New in the lower right.
OR
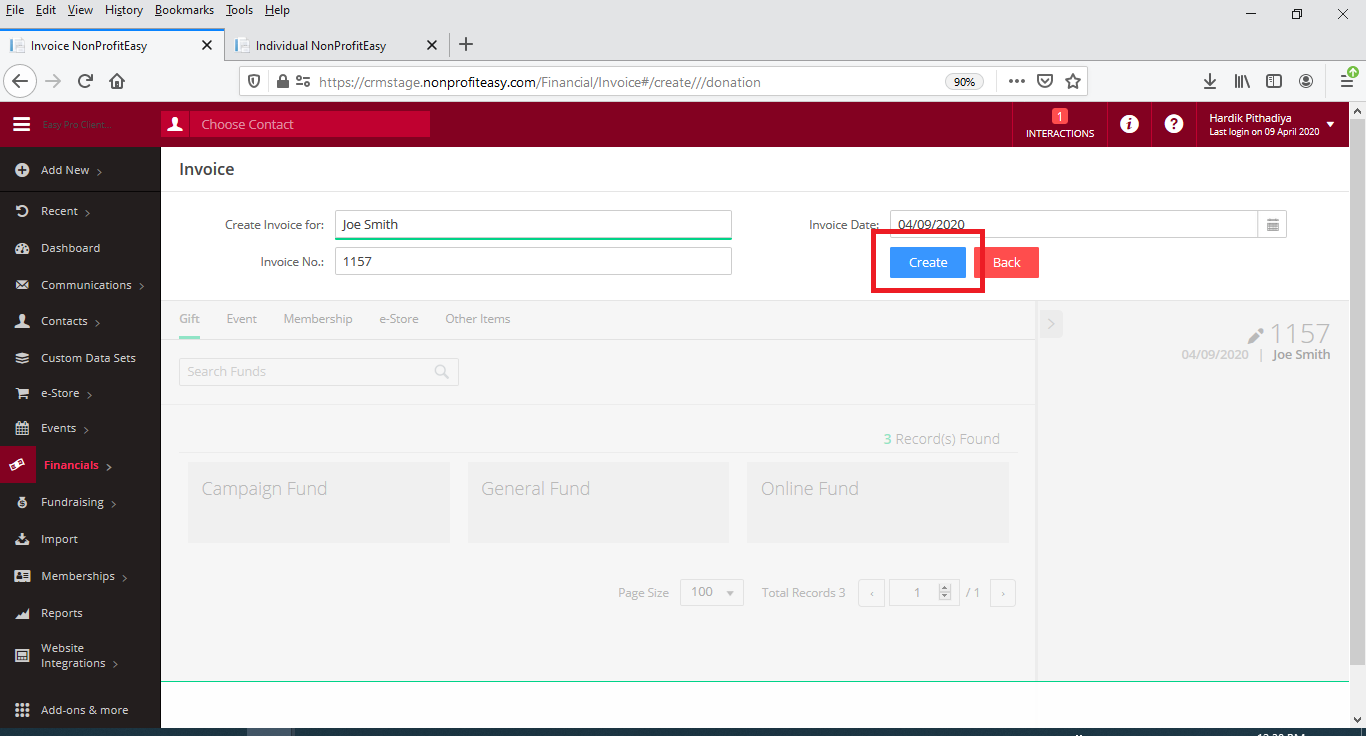
- On the first step, select the purchaser name (you can Quick Add a new contact if needed), set the Invoice Date, and click the blue Create button.

- Click on the e-Store tab.
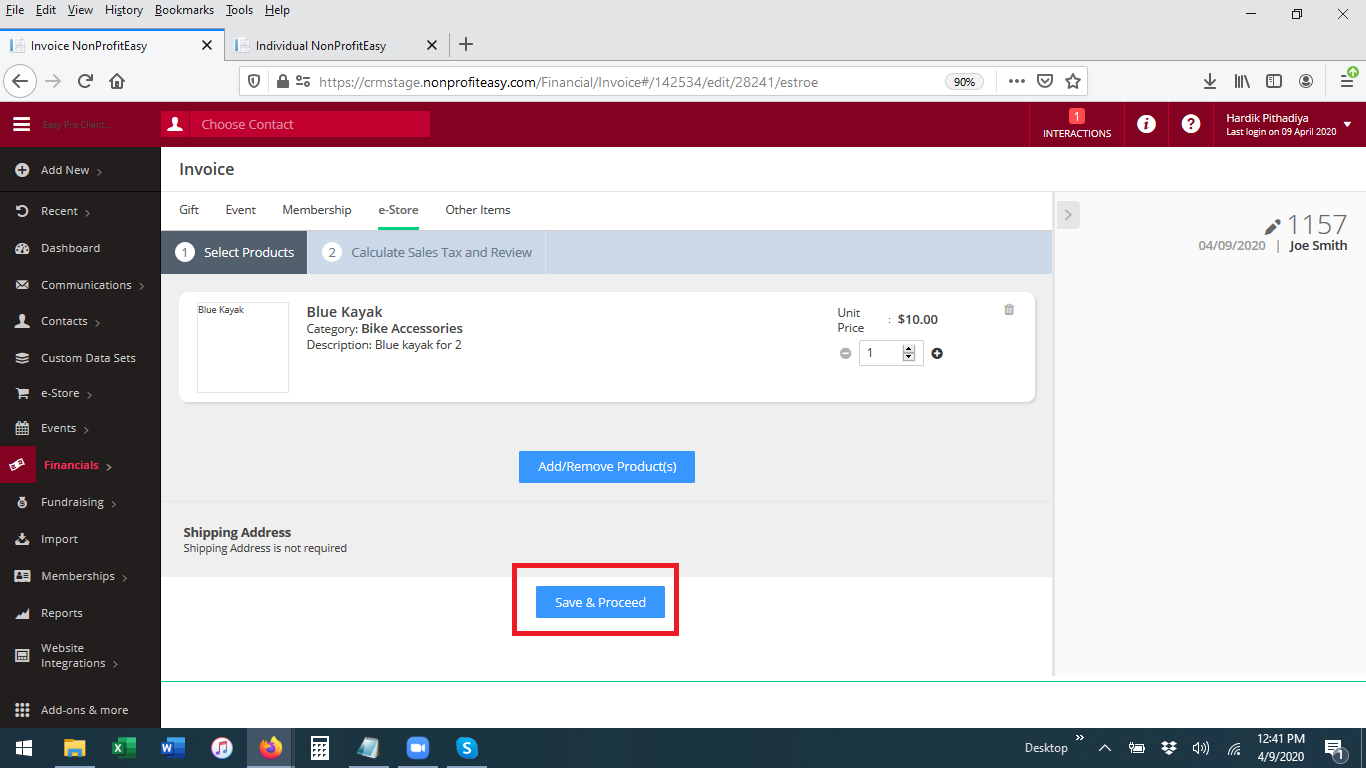
- Select products and add them to the order as detailed in the QuickAdd Order section above and click Done.
- Use the blue Add/Remove Product(s) button to go back one screen and update the products in the order and/or add shipping address (if required) as detailed in the QuickAdd Order section.
- When done finalizing the products and shipping address click the blue Save and Proceed button.
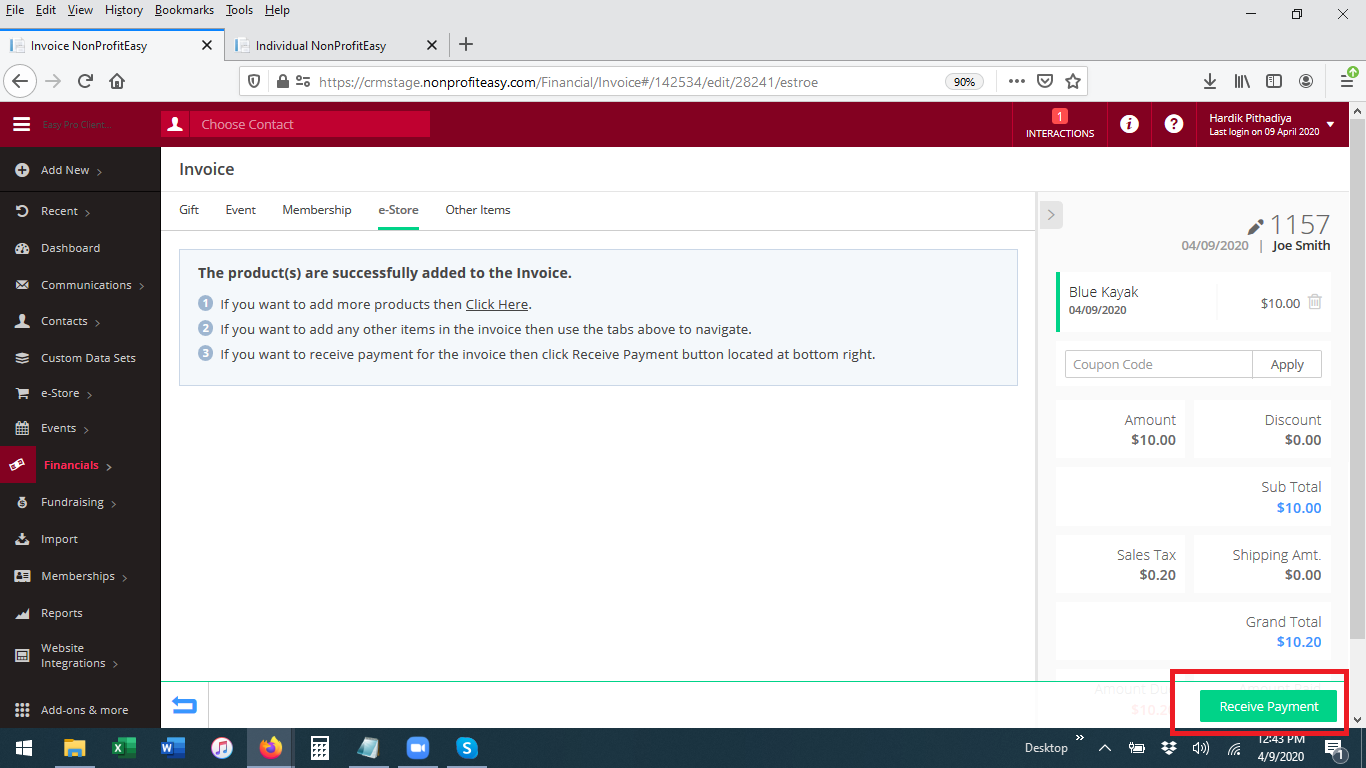
- On the next screen, applicable Sales Tax has been added. Review the order, change any product quantities if needed, and then click the blue Save button to add the items to the Invoice.

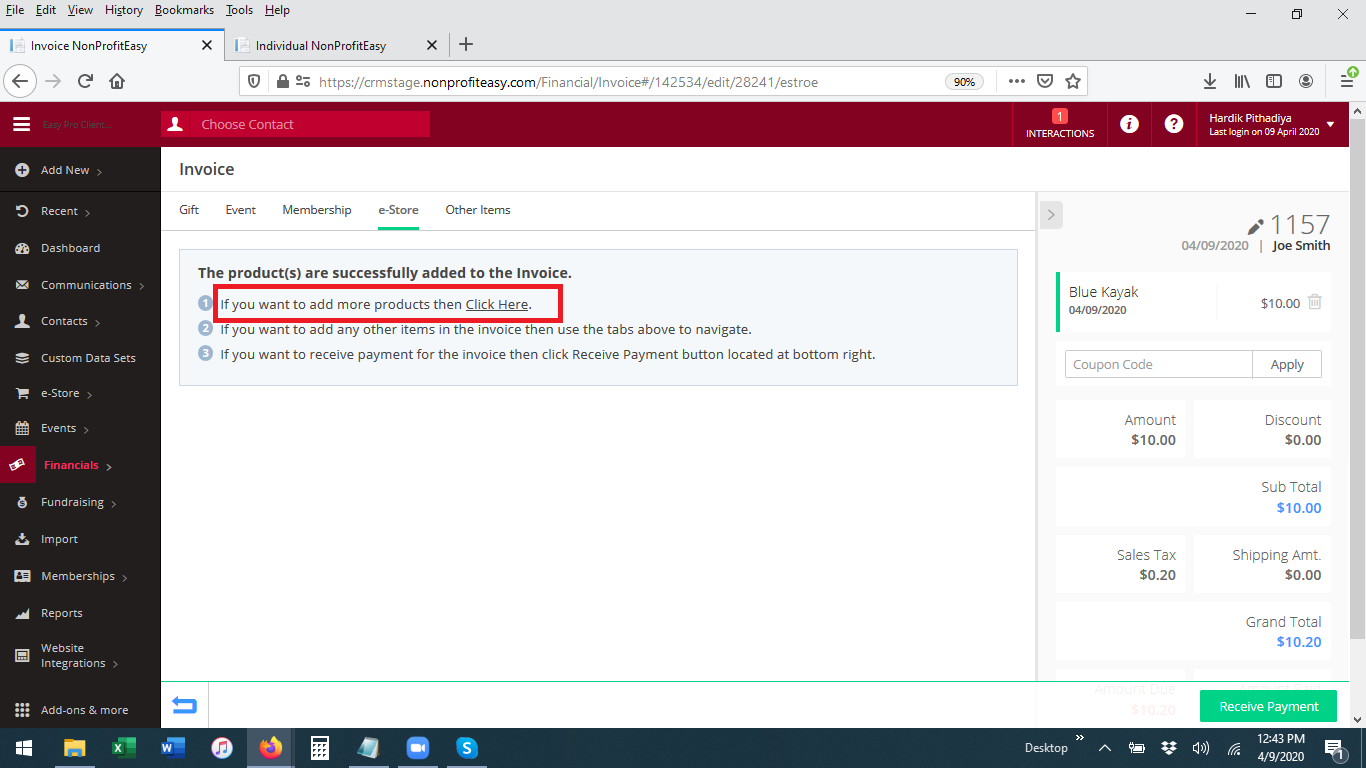
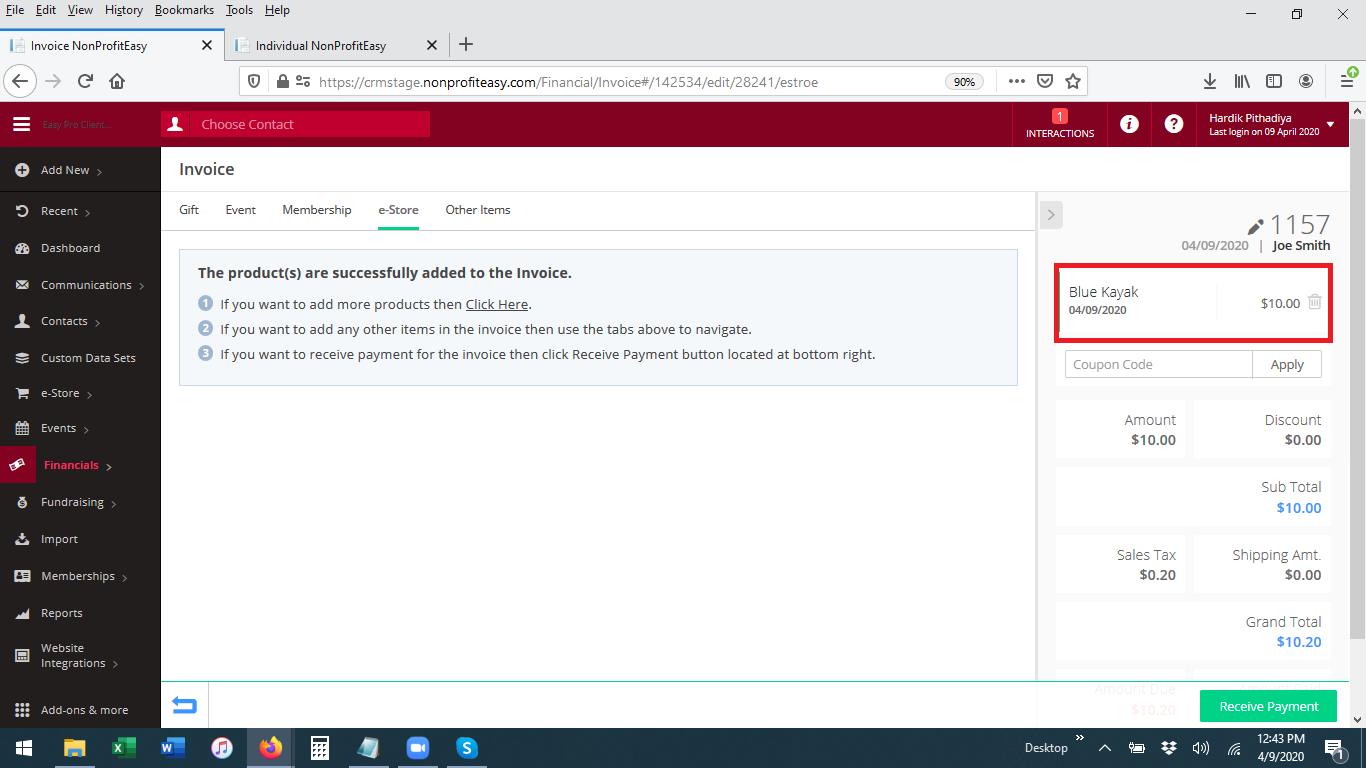
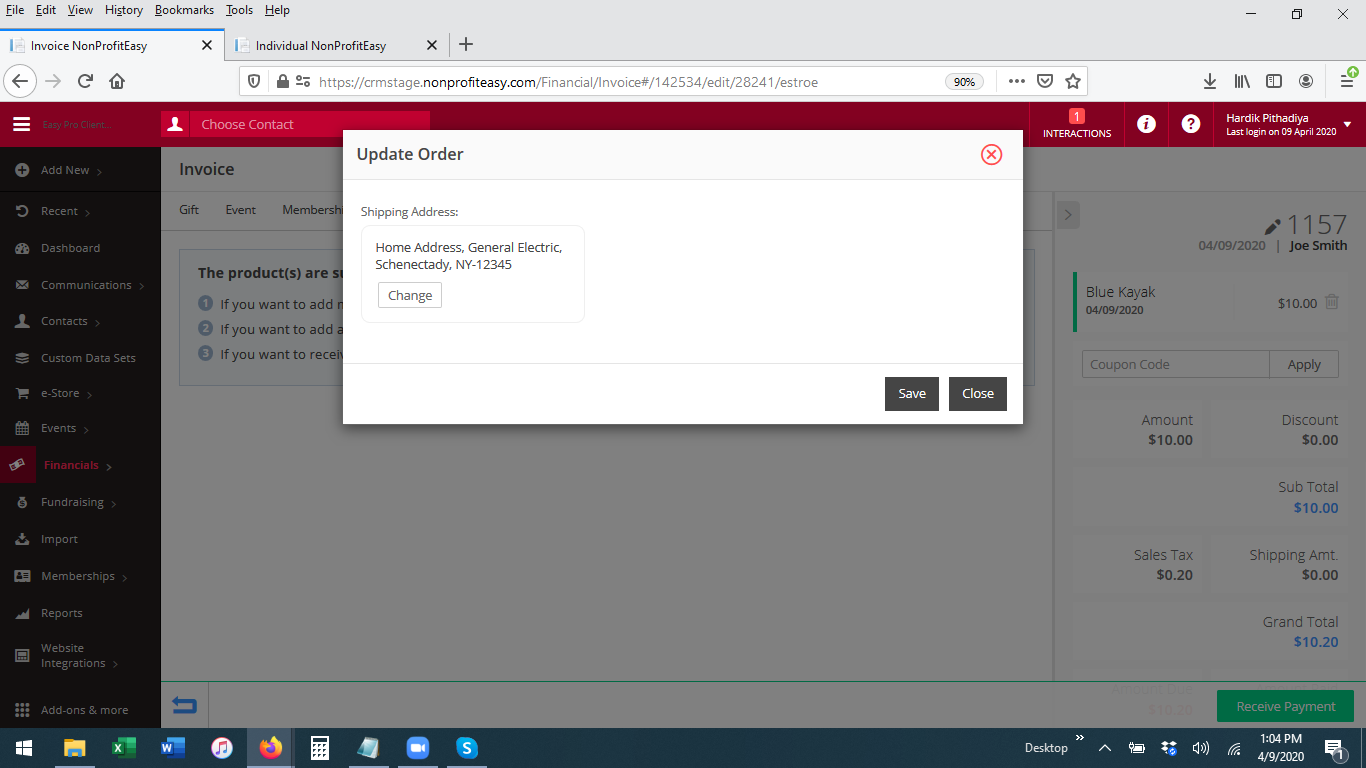
- This will take you to Edit invoice screen. From here you can exit out if you are done (and payment is not yet received), receive payment by clicking the green Receive Payment button in the lower right, delete any item from the invoice by clicking on the trashcan next to the item in the right hand panel, change the shipping address by clicking on the item on the invoice, or add additional items to the invoice by clicking the link on step #1 of the instructional text.
OR
OR
- On the Main Menu click Create New (Quick Add menu) and then select Create Invoice from the sub-menu OR go to Main Menu: Financials: Invoices and select Add New in the lower right.
Comments
0 comments
Article is closed for comments.