Import Utility: Importing Organizational Contacts Part V - Map Fields
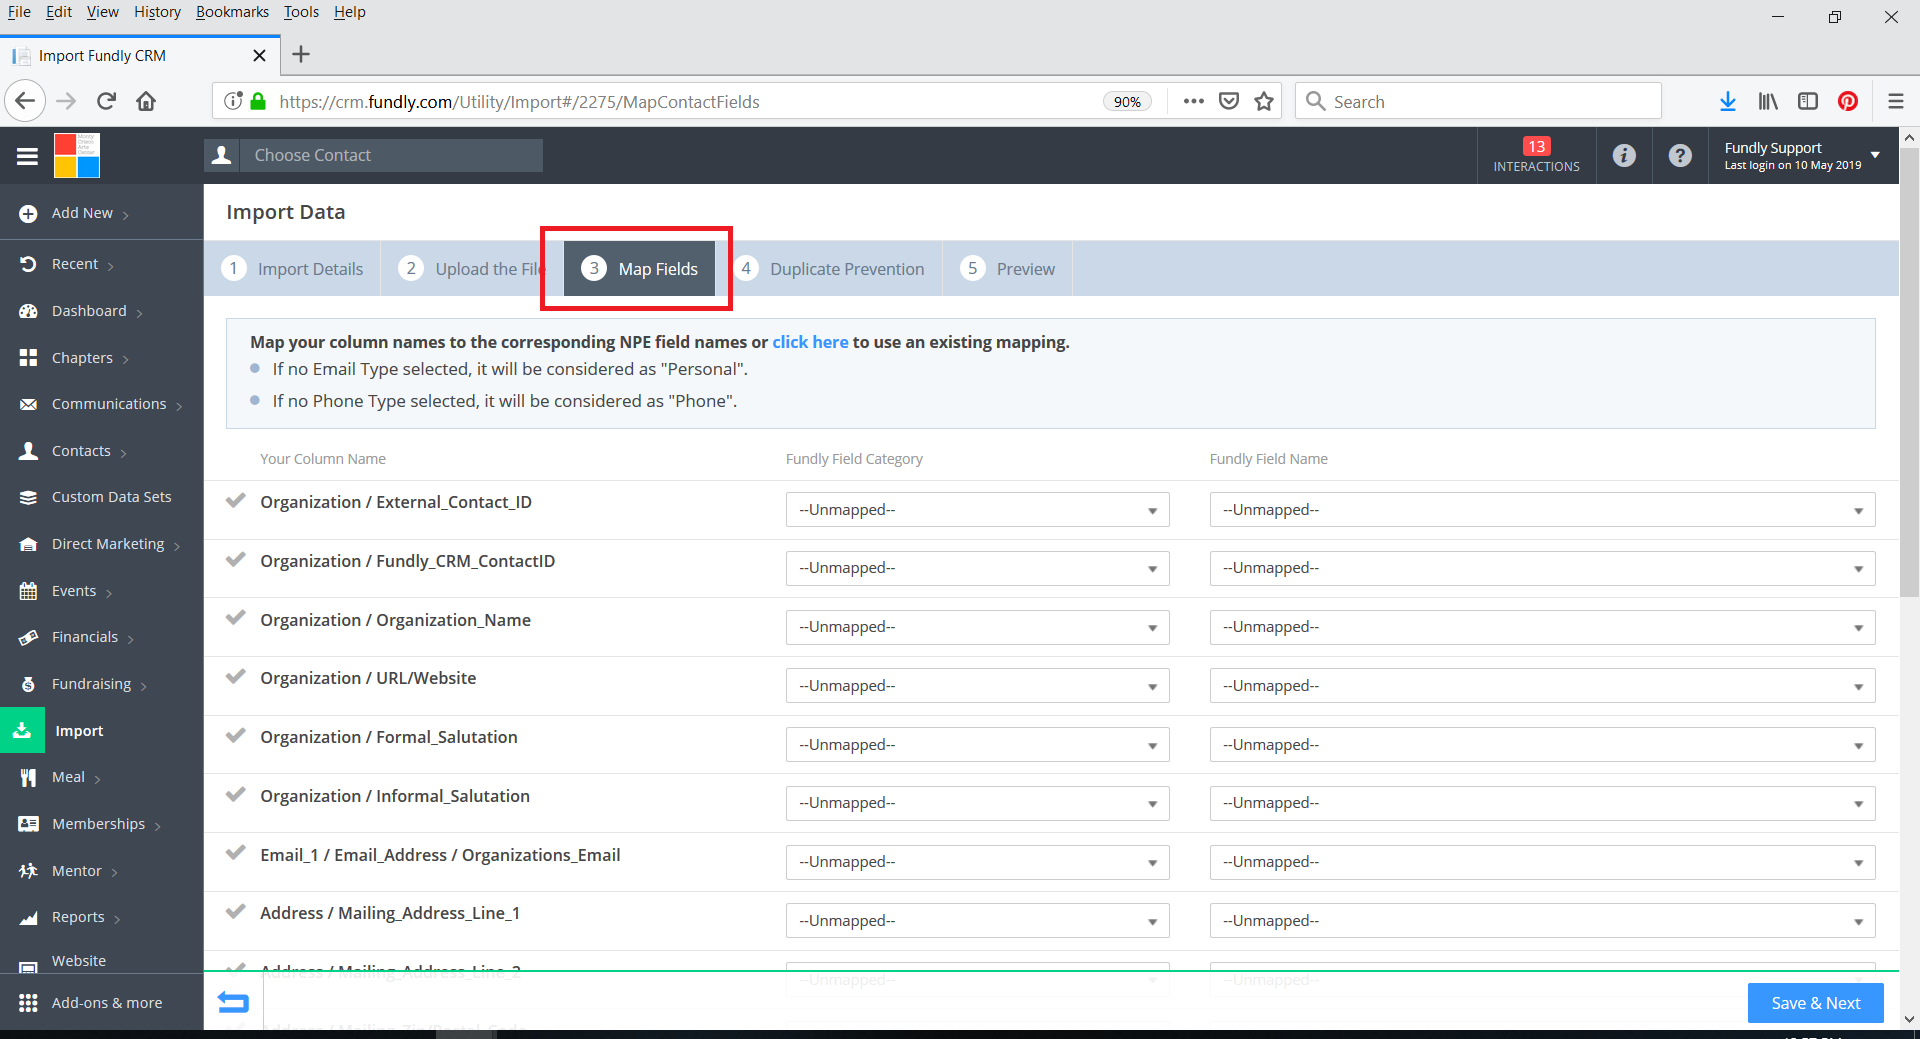
- On Tab #3: Map Fields, you will tell the system which field in Fundy CRM to put the data in each of your data file's columns.
- It's important to understand that your column headers in your spreadsheet can be called ANYTHING. The column names in your spreadsheet do not control where the data goes in Fundly CRM; instead, your field mapping settings control where the data ends up. You could call your column headers Huey, Dewey, and Louie, if you wanted, and if you told the import utility that the data in the column labeled Huey was to be saved to the Special Comments field in Fundly CRM, that is where the data would go.
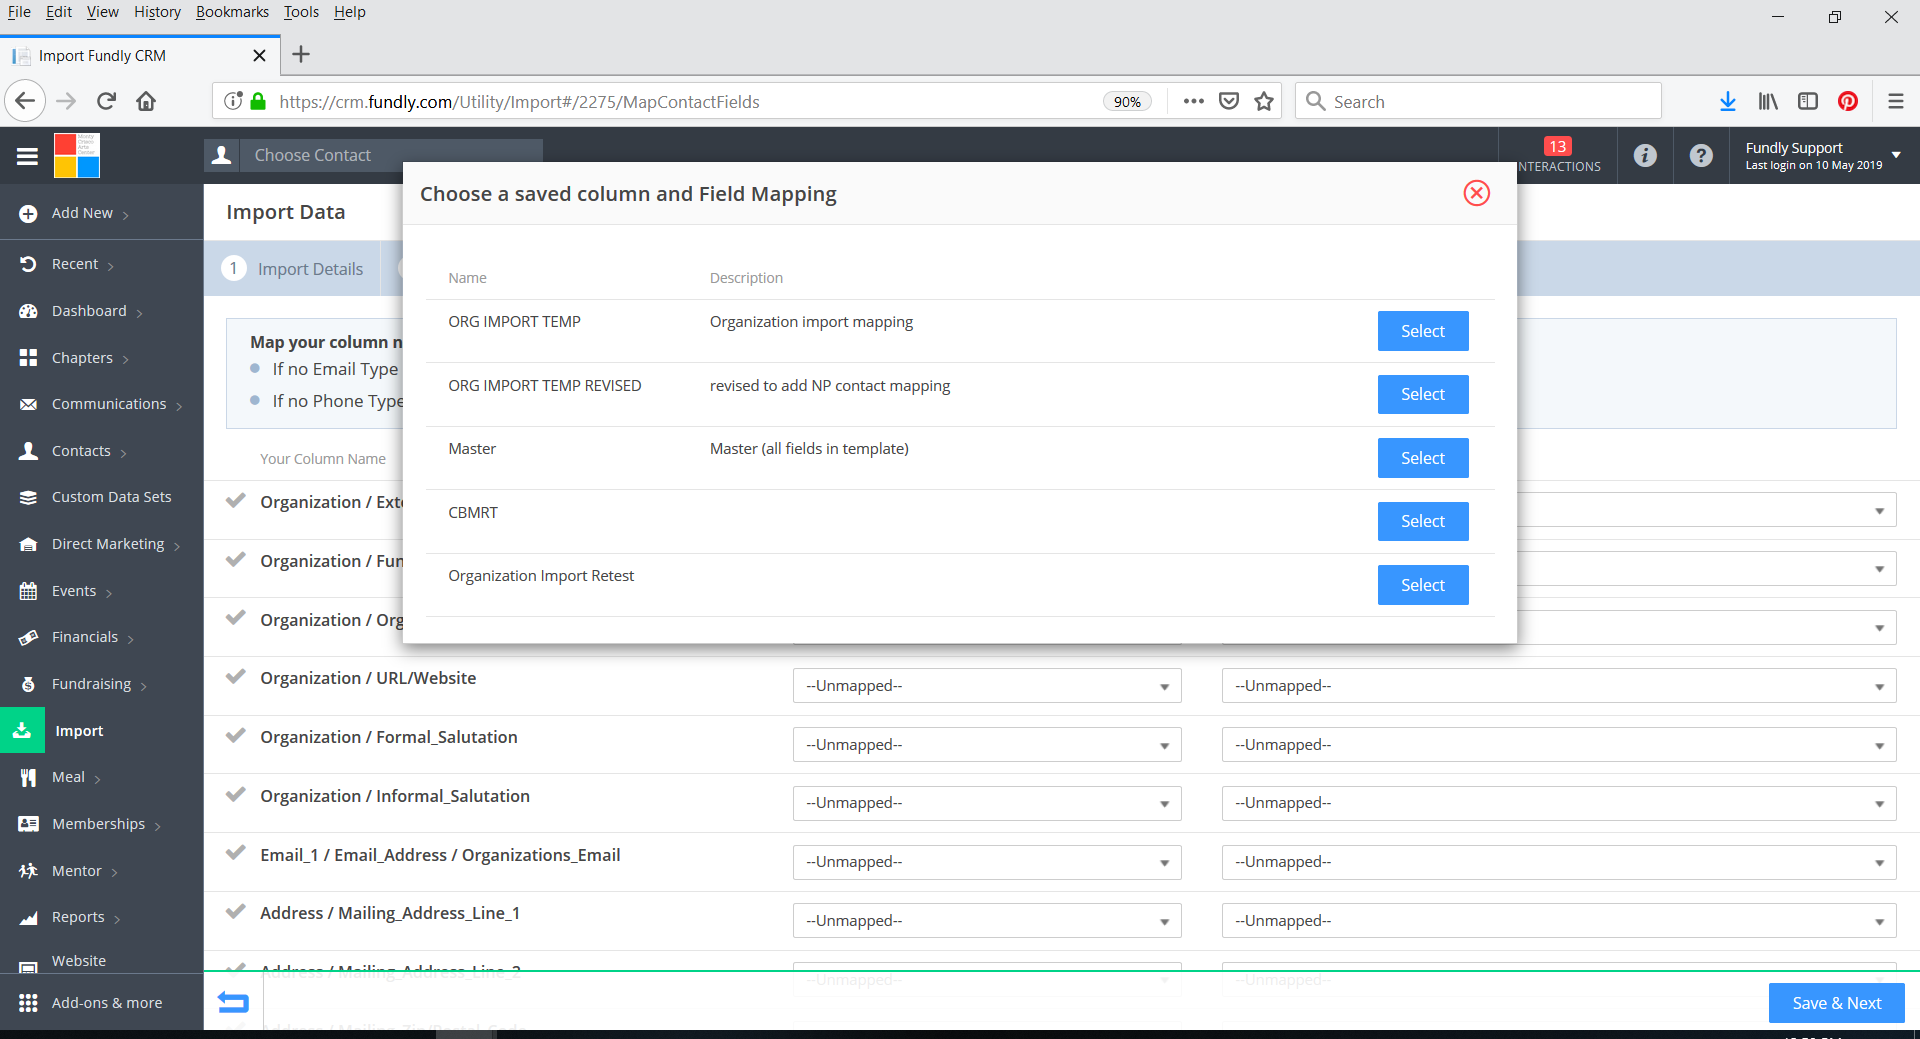
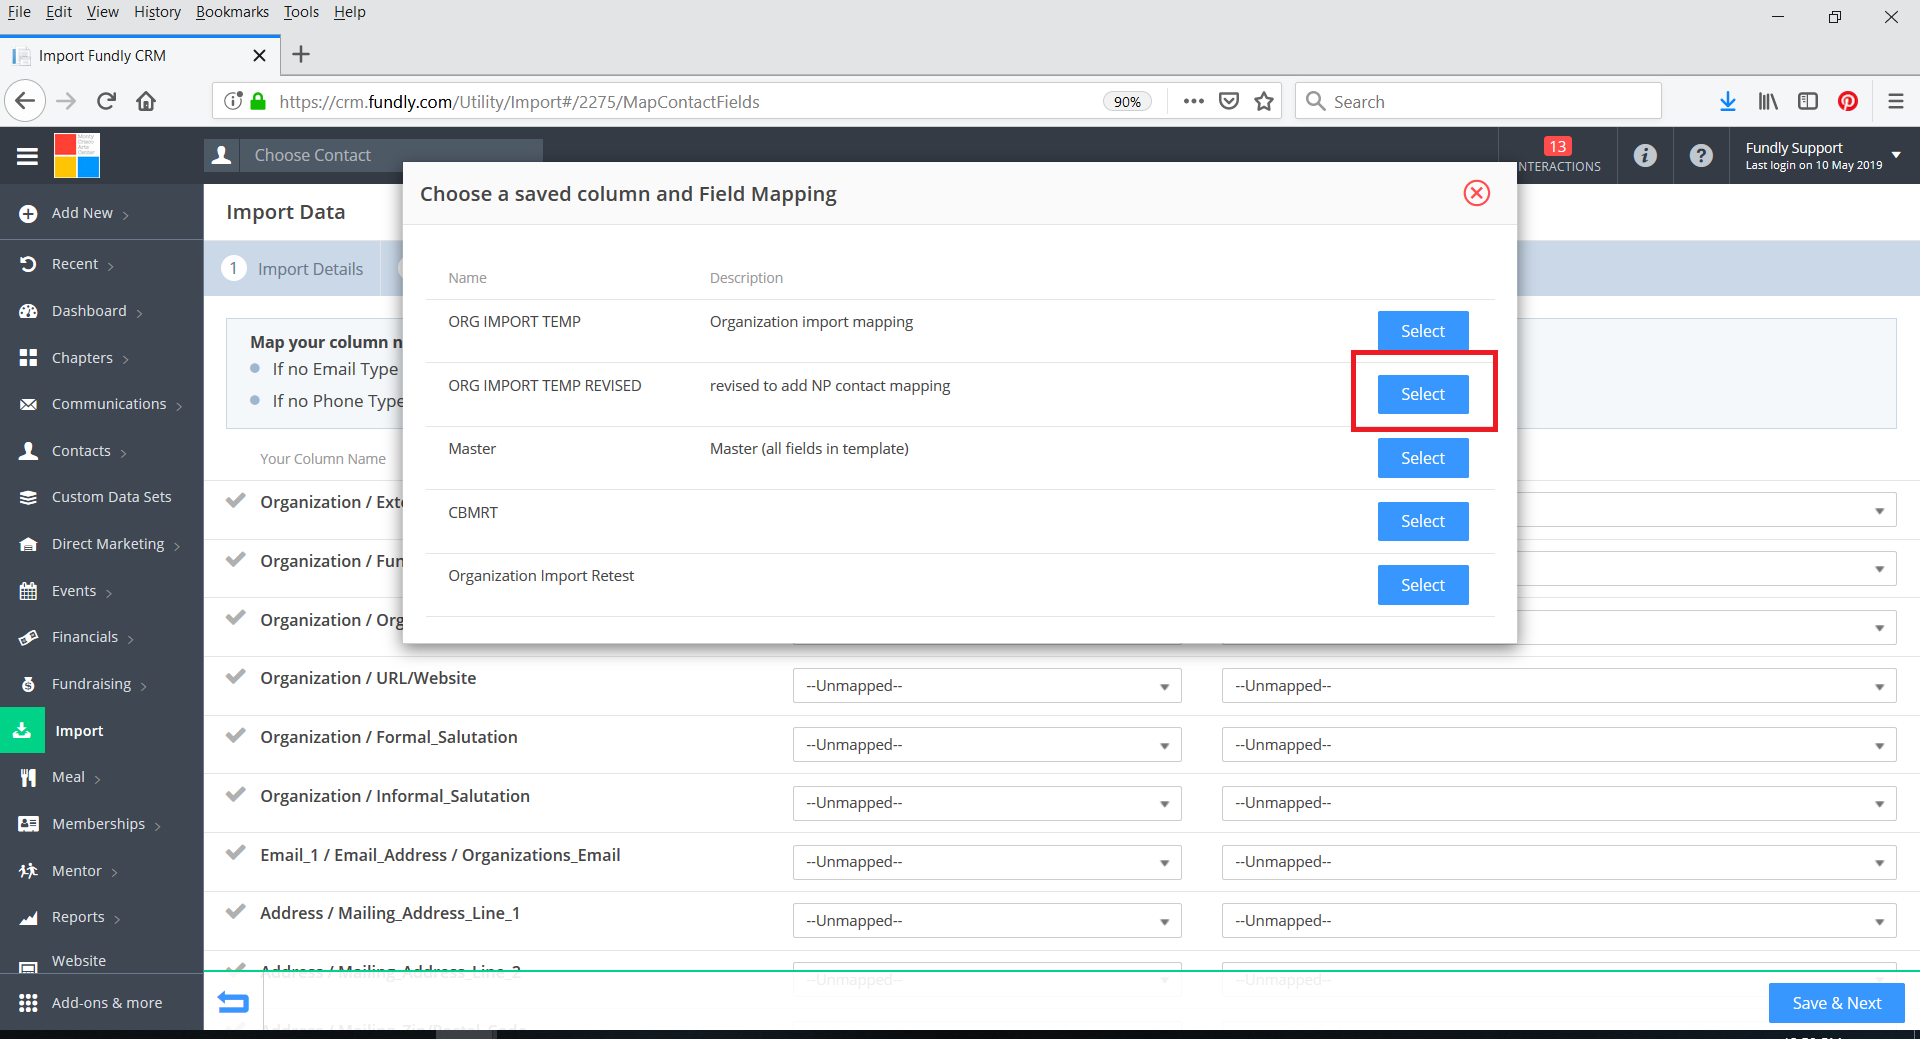
- If you have have a field mapping layout already saved (see step #16 below), you can click the blue "click here" at the top of the screen to use your saved field mapping. Select the saved field mapping off the list by clicking the blue Select button to the right of the field mapping scheme/name and it will populate the saved settings. You can then make any edits if needed to the field mapping.

- If you do not have a saved field mapping that you want to use, then begin by going down the list and indicating which field in Fundly CRM each of your spreadsheet columns should be saved to. You will go row by row and indicate first the Fundly Field Category (middle column) and then the Fundly Field Name (right hand column) for each column of your spreadsheet.
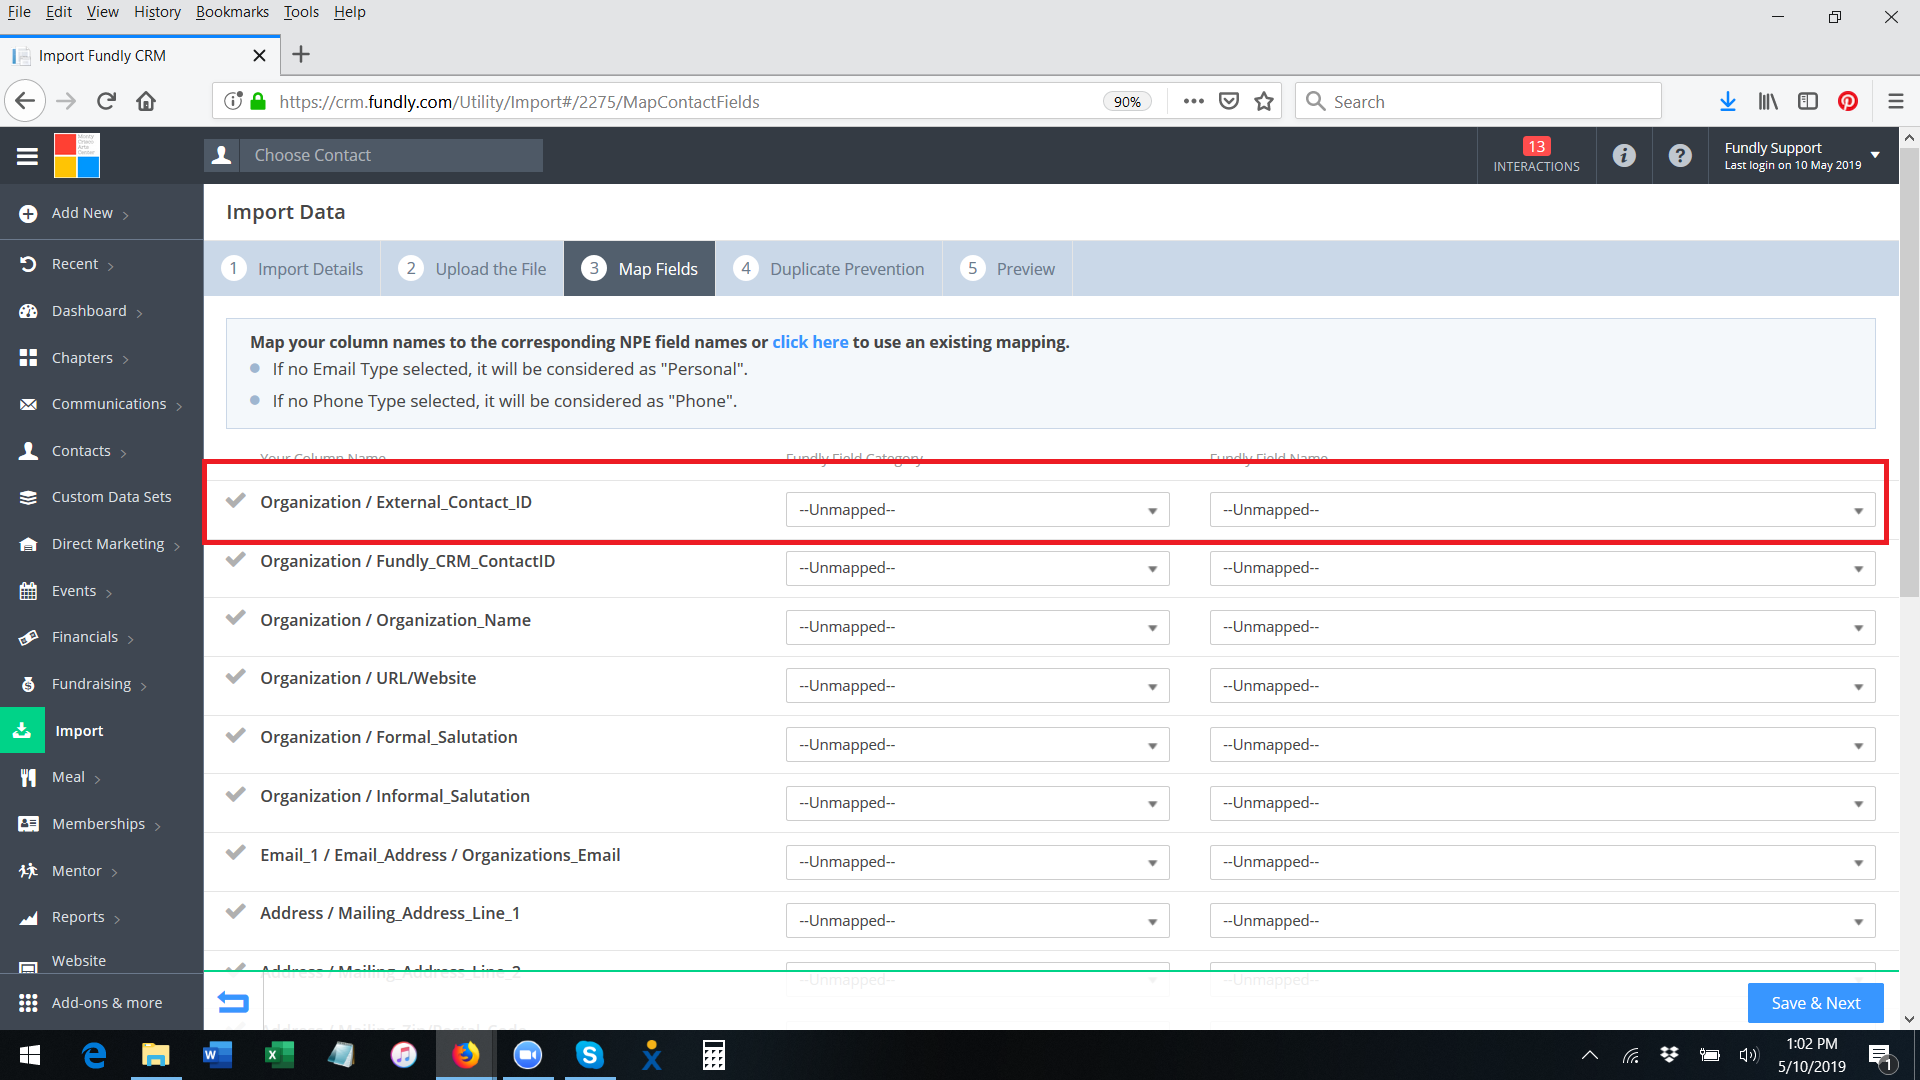
- The column on the left is the list of column names/headers from your spreadsheet (here is where you can see that naming your columns something easily identifiable is best. If you haven't been clear in your column headers, you might not remember what data is actually in that column).
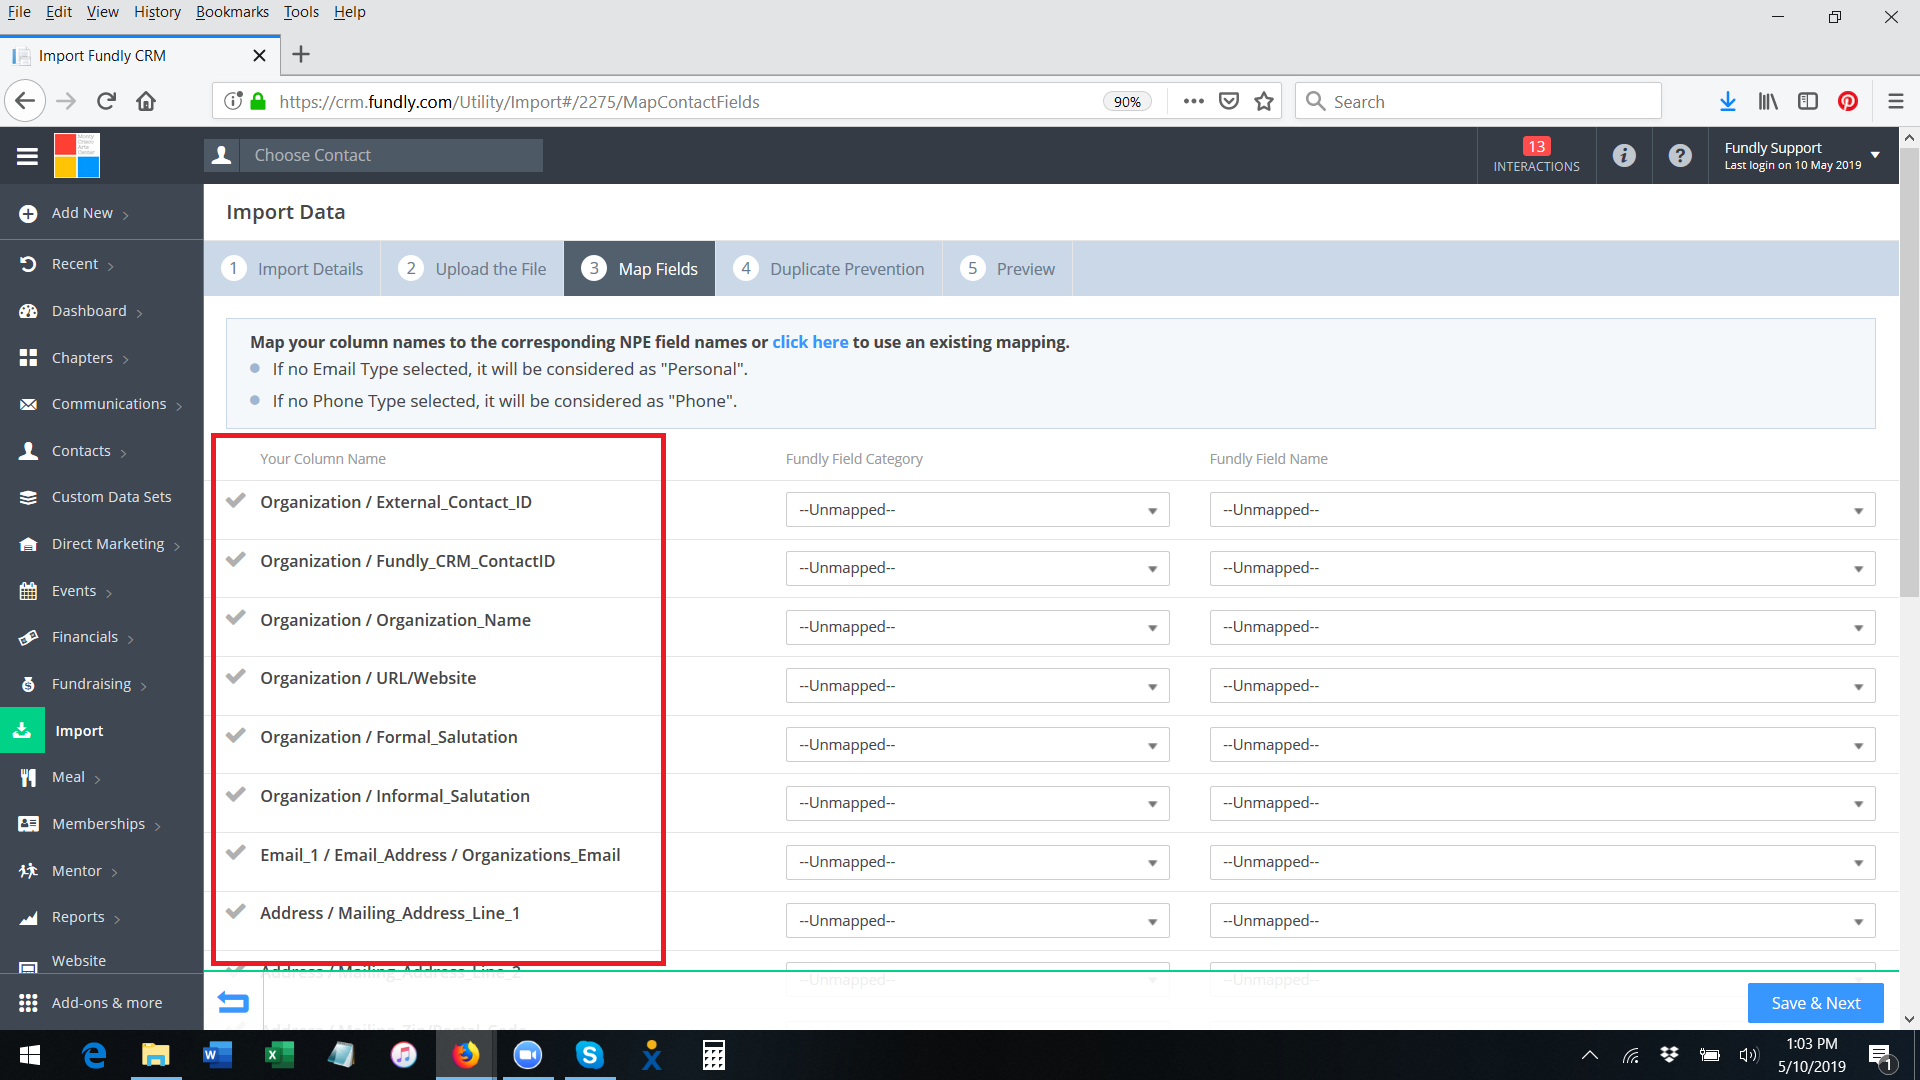
- You will also see here why deleting any empty columns from your spreadsheet is beneficial - it makes the list of columns on the left much shorter and you do not have to hunt through a long list of columns to map just the ones that actually have data.
- Leave any columns that do not have data (or have data you don't want to import into Fundly CRM) in your spreadsheet unmapped.
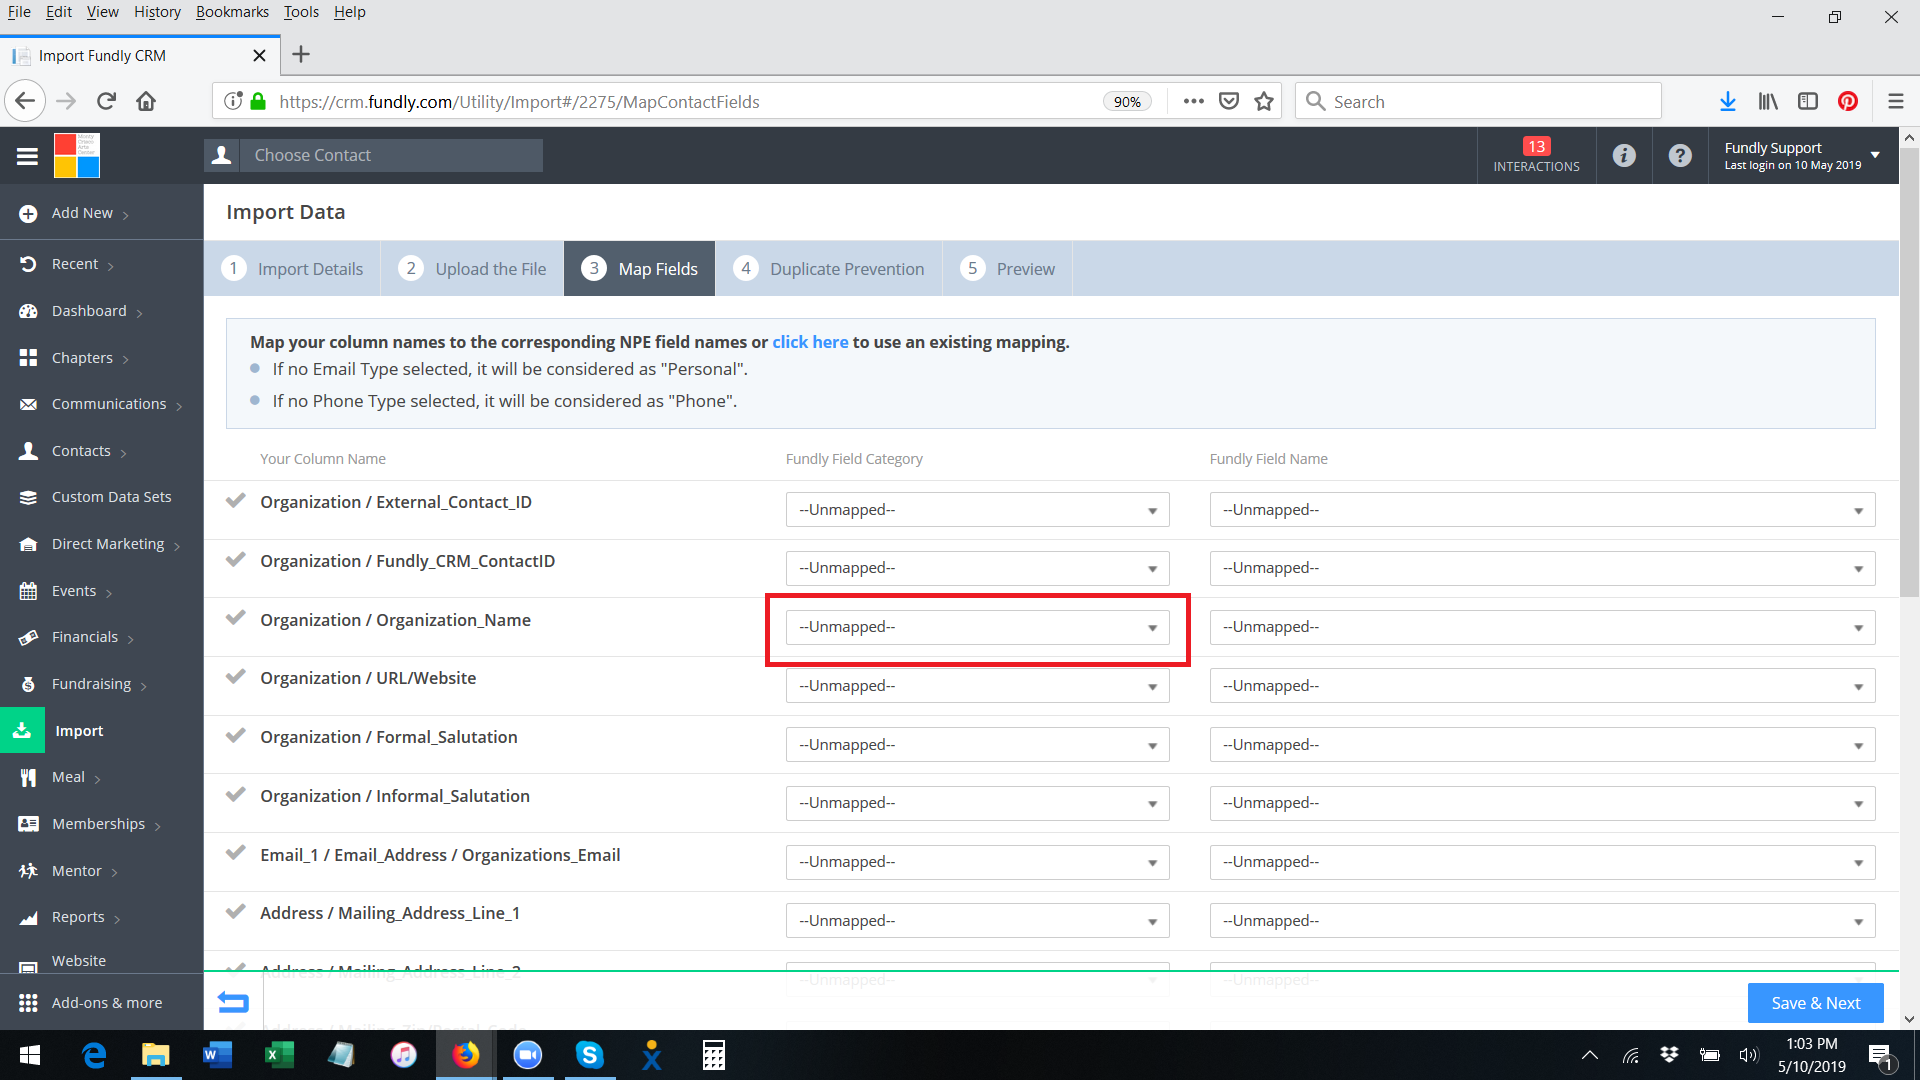
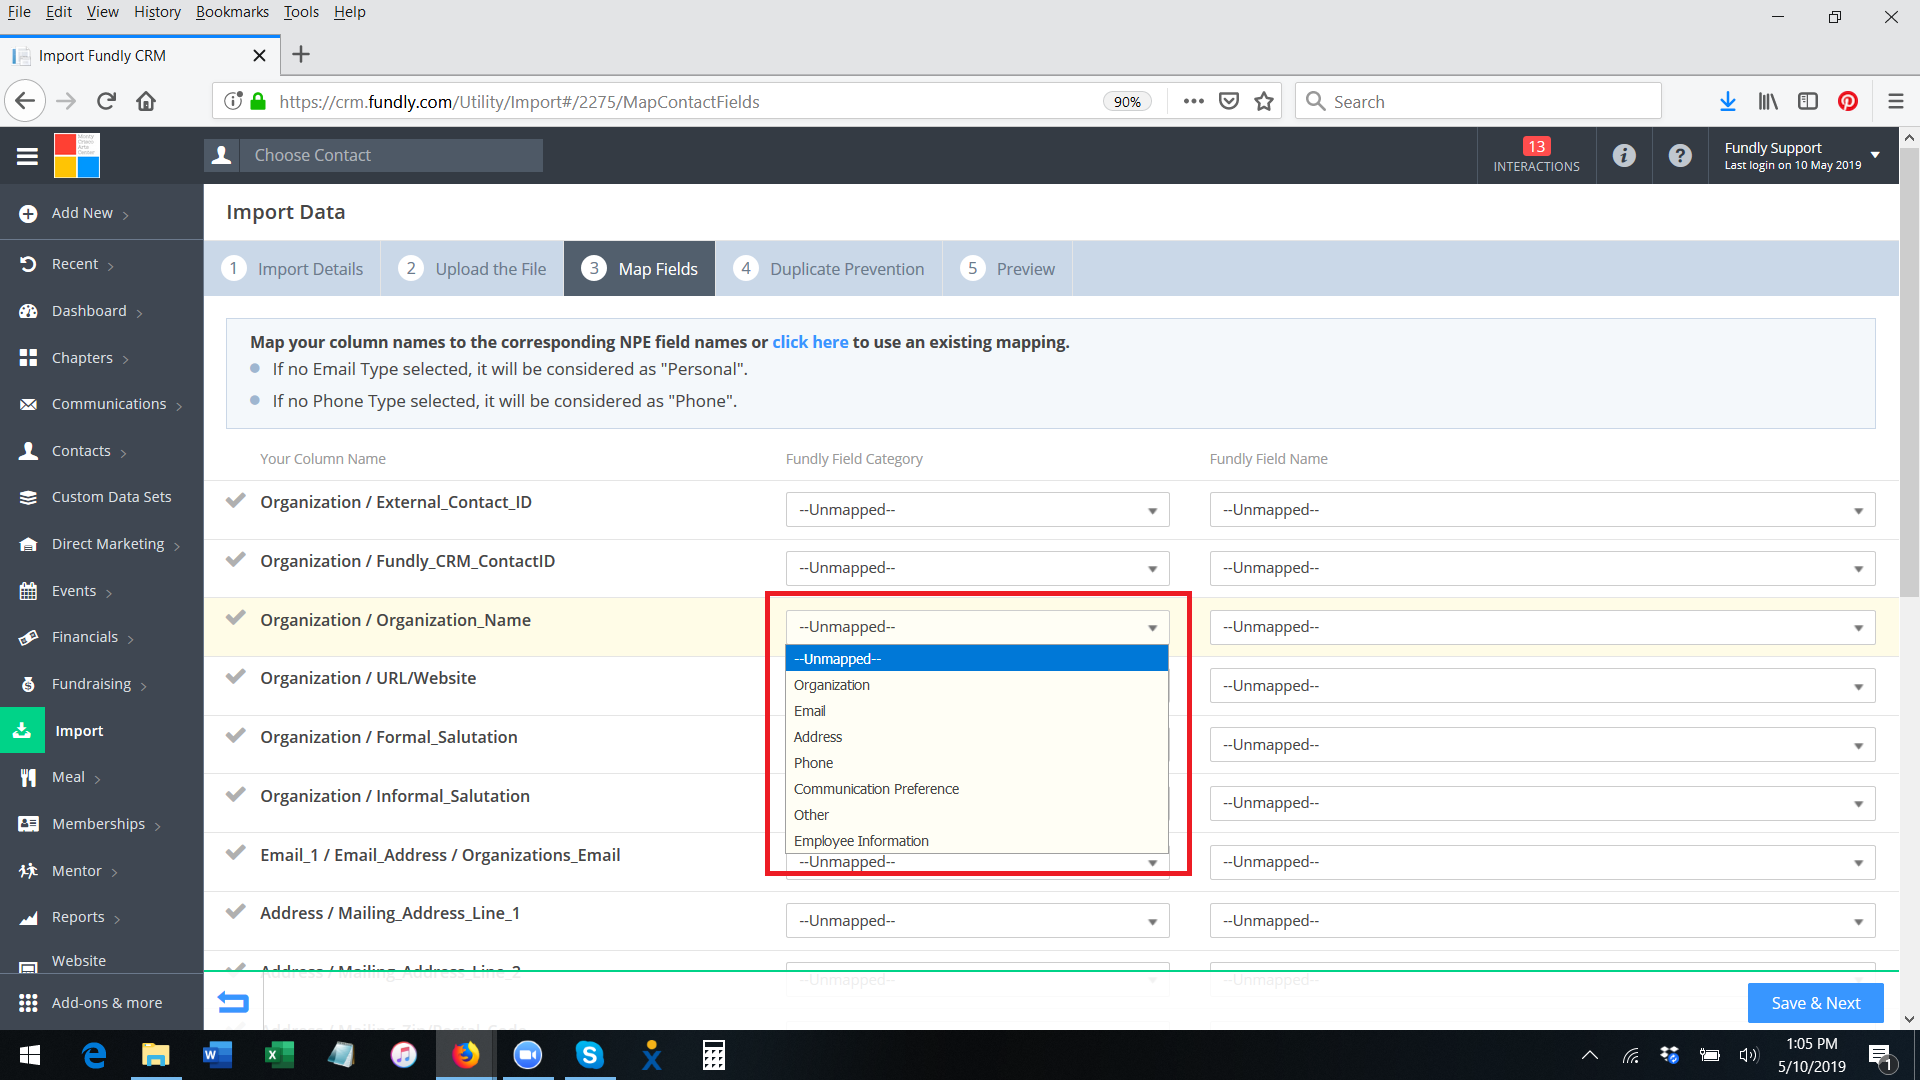
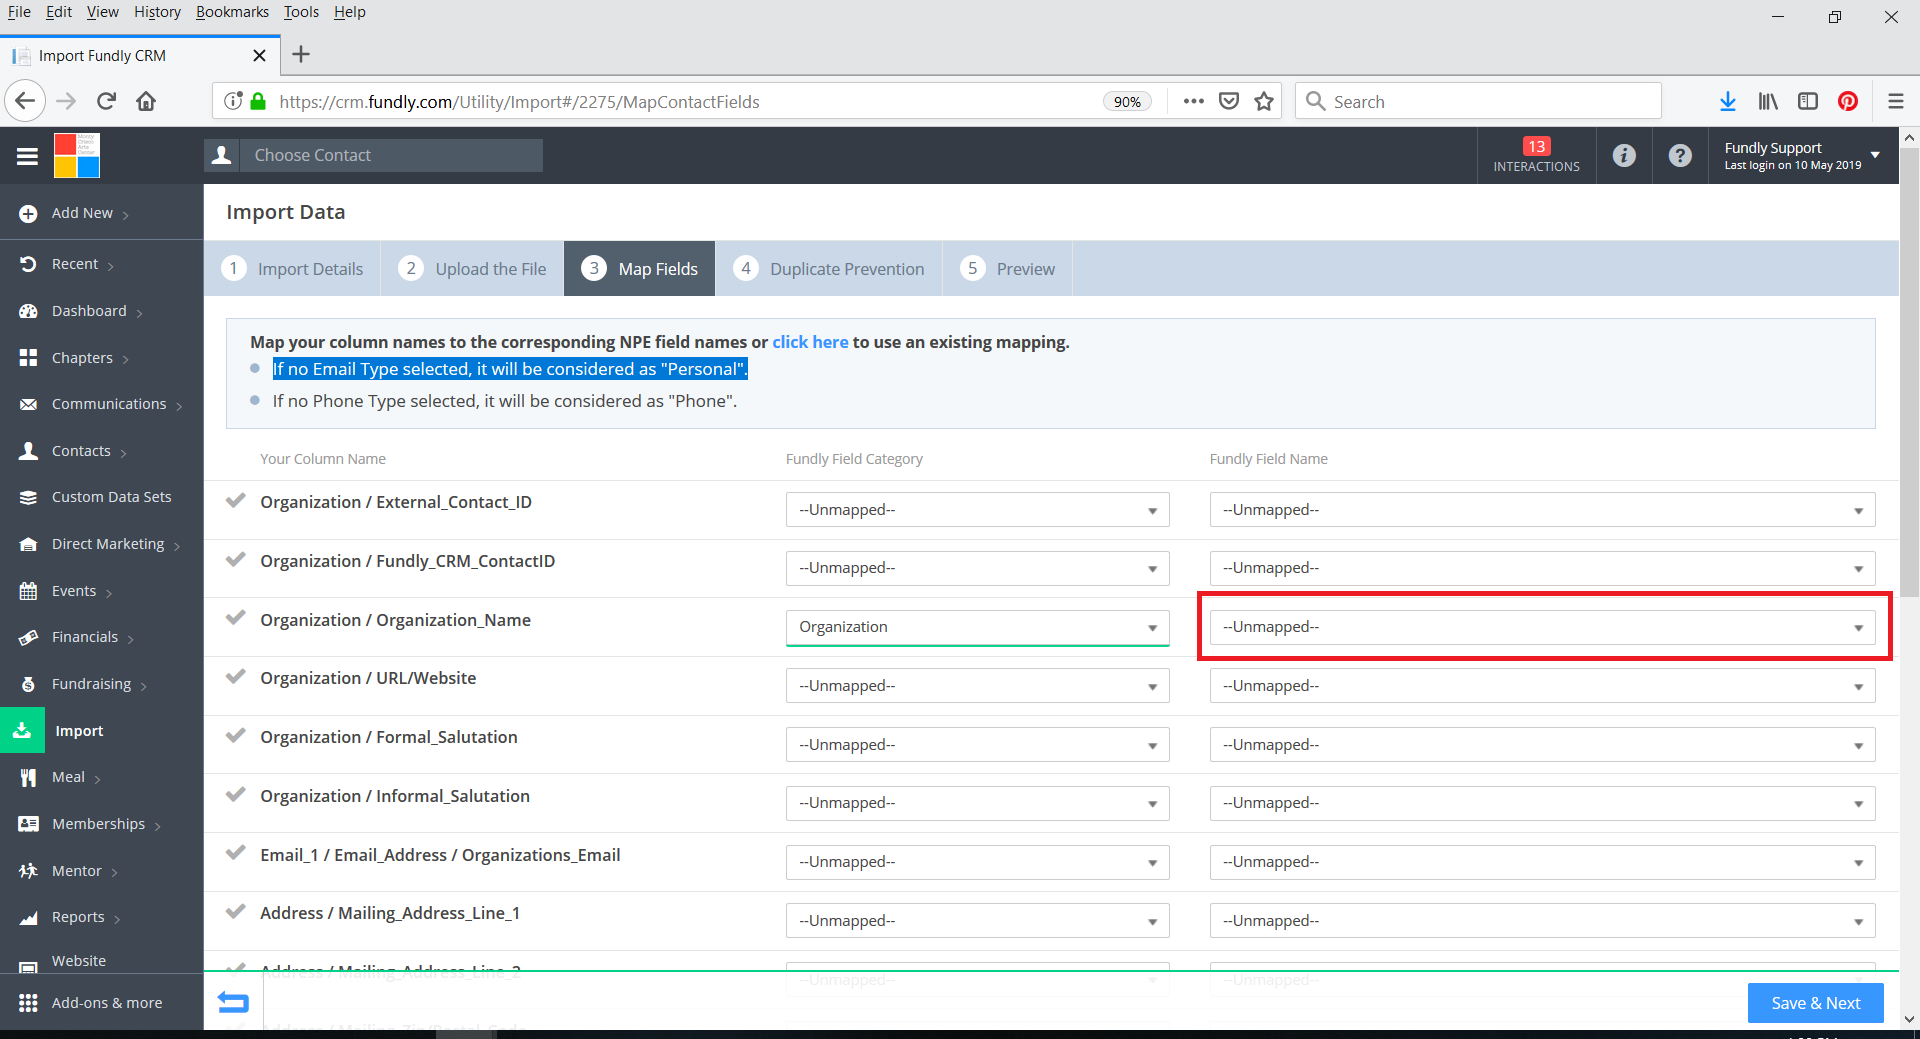
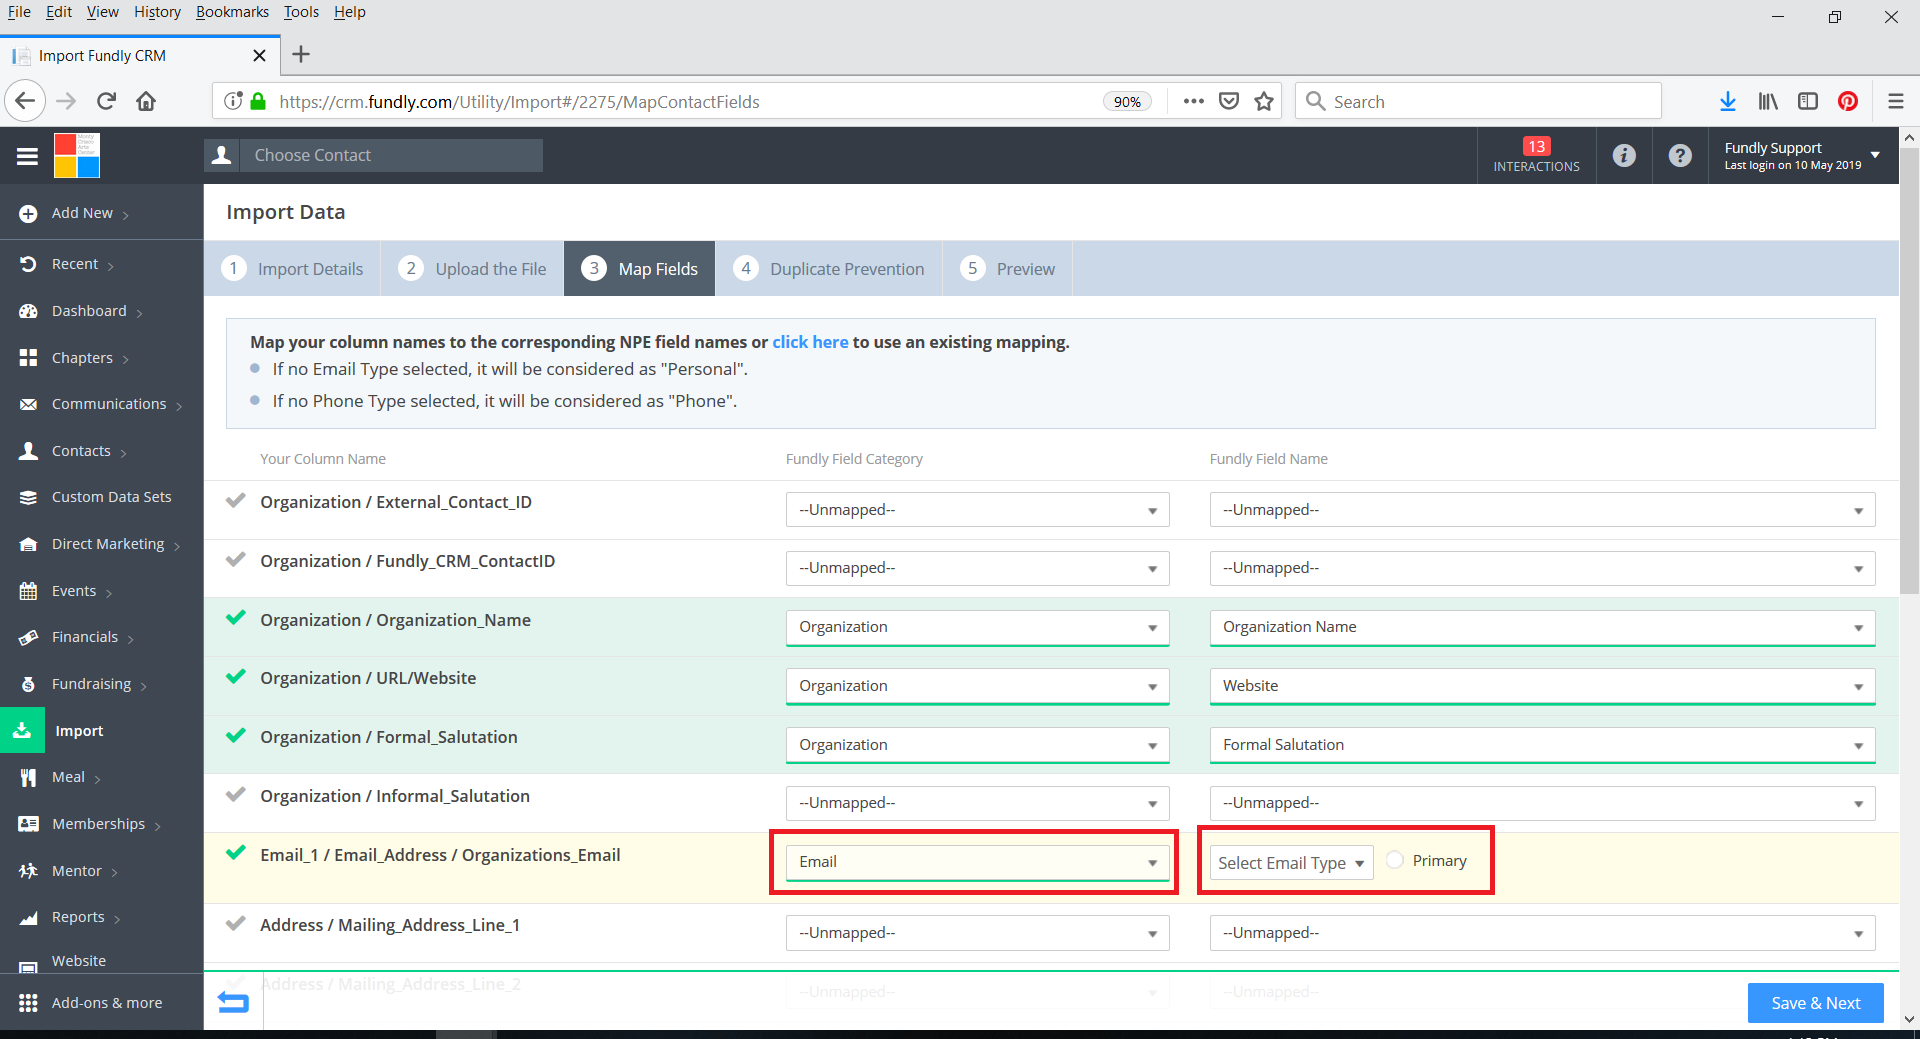
- The middle column is the Fundly CRM Field Category. In the example below, our data file doesn't have anything in the External Contact ID or Fundly CRM ID fields so we will leave those unmapped. We will start our mapping with the Organization Name field. We start by opening the Fundly Field Category drop down list and selecting the category (think of category as data tables, similar to Reporting and Advanced Search in Fundly CRM). In our import template, the part of the column name (in the left hand column) before the slash (/) is the category/table name to help make field mapping easier for you. The organization name field in Fundly CRM (where we want to save the data in the organization name column in our spreadsheet) is located in the Organization category, so we have selected that in the third screen shot below.

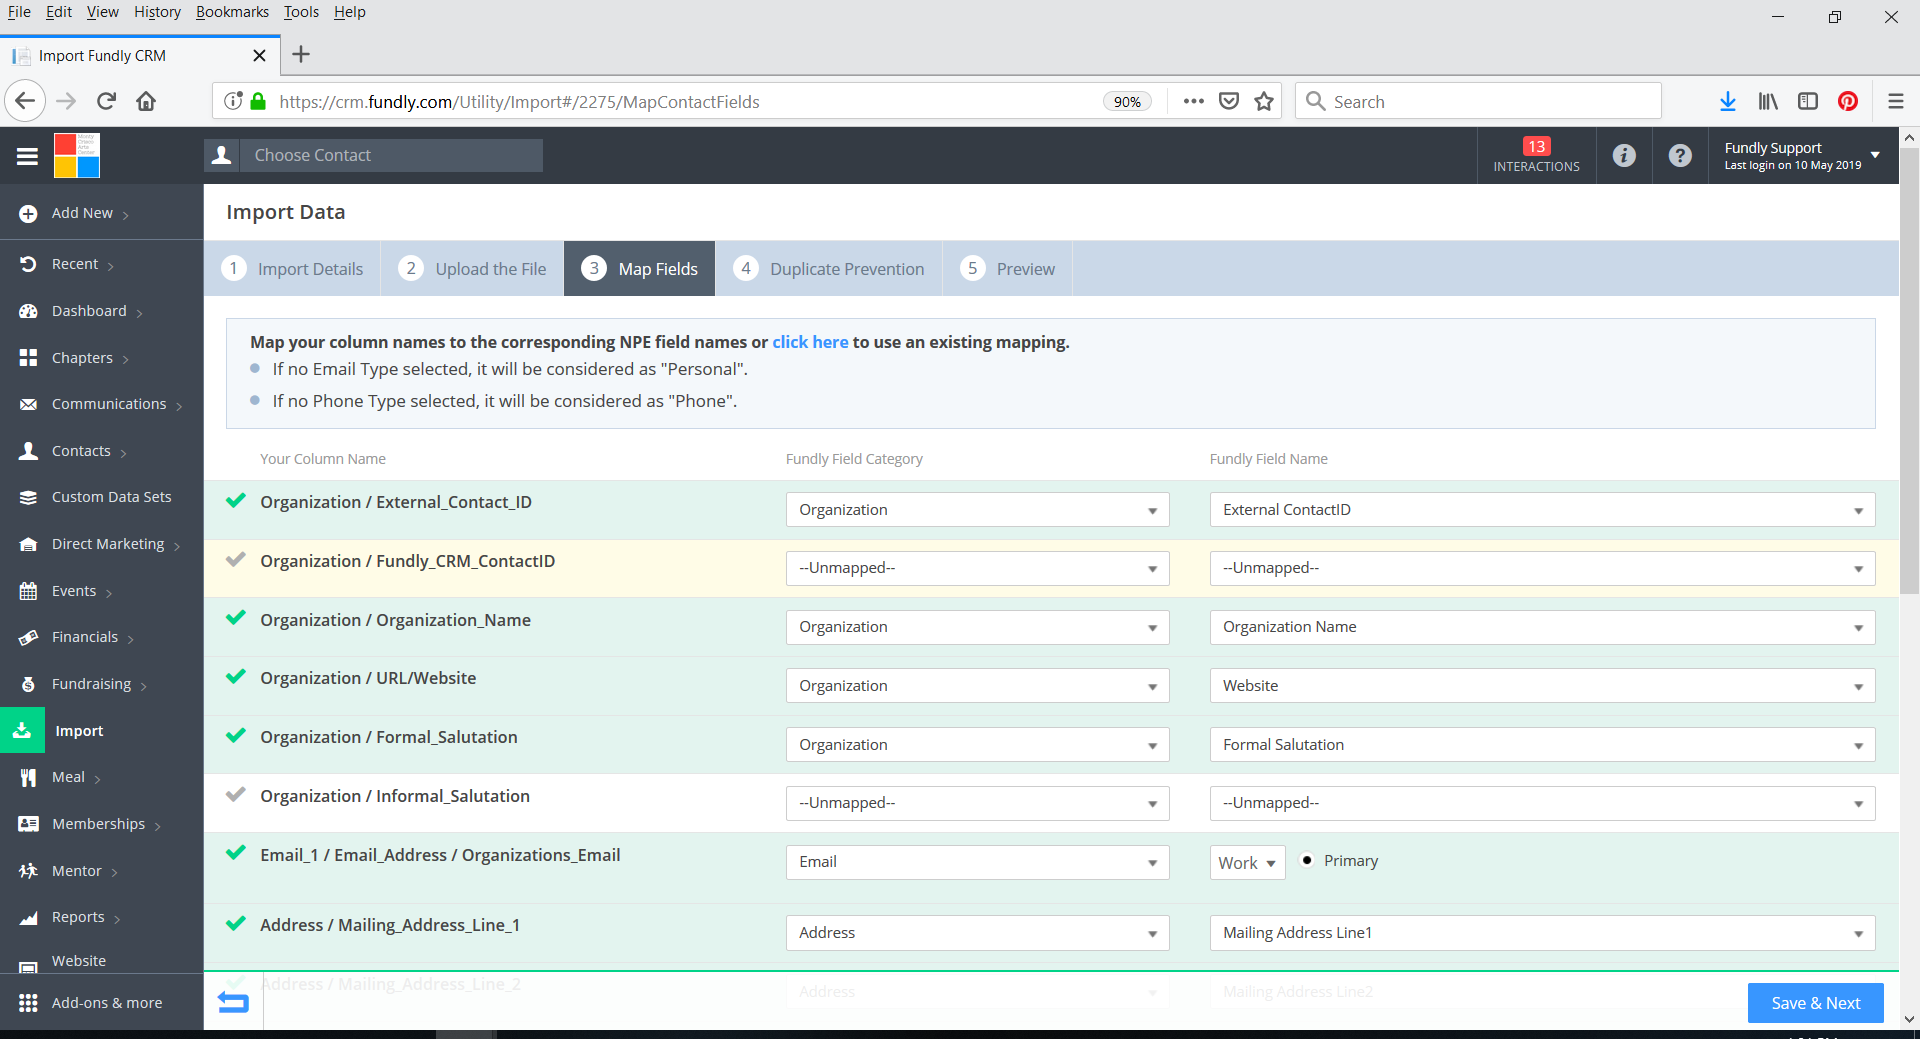
- Next, in the last column/the column on the right (Fundly Field Name), select the name of the field in Fundly CRM where you want to save the data in this column of your spreadsheet. The list of fields that populates in this last drop down is based on what you selected for the category in the middle column. We want to save the data in the Organization Name column of our spreadsheet to the Organization Name field in Fundly CRM, so that is what we have chosen in the second and third screenshot below.

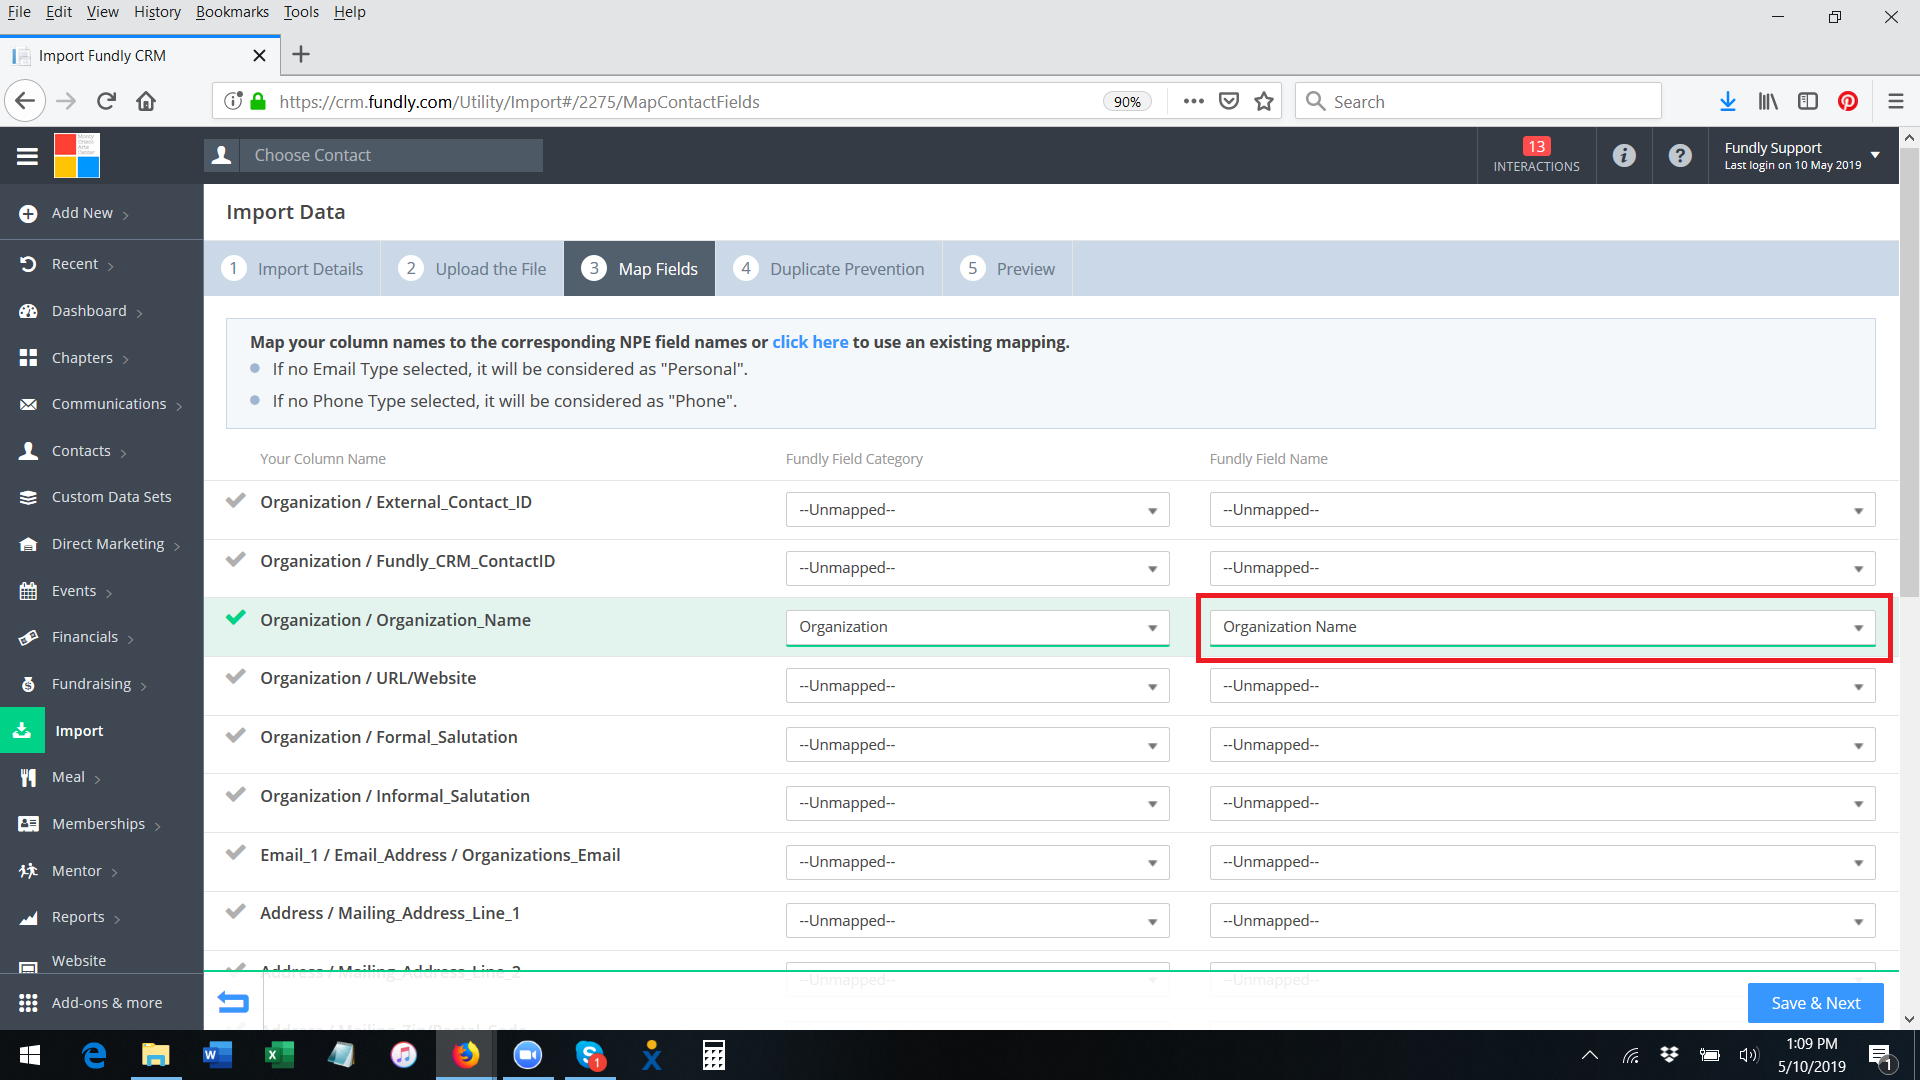
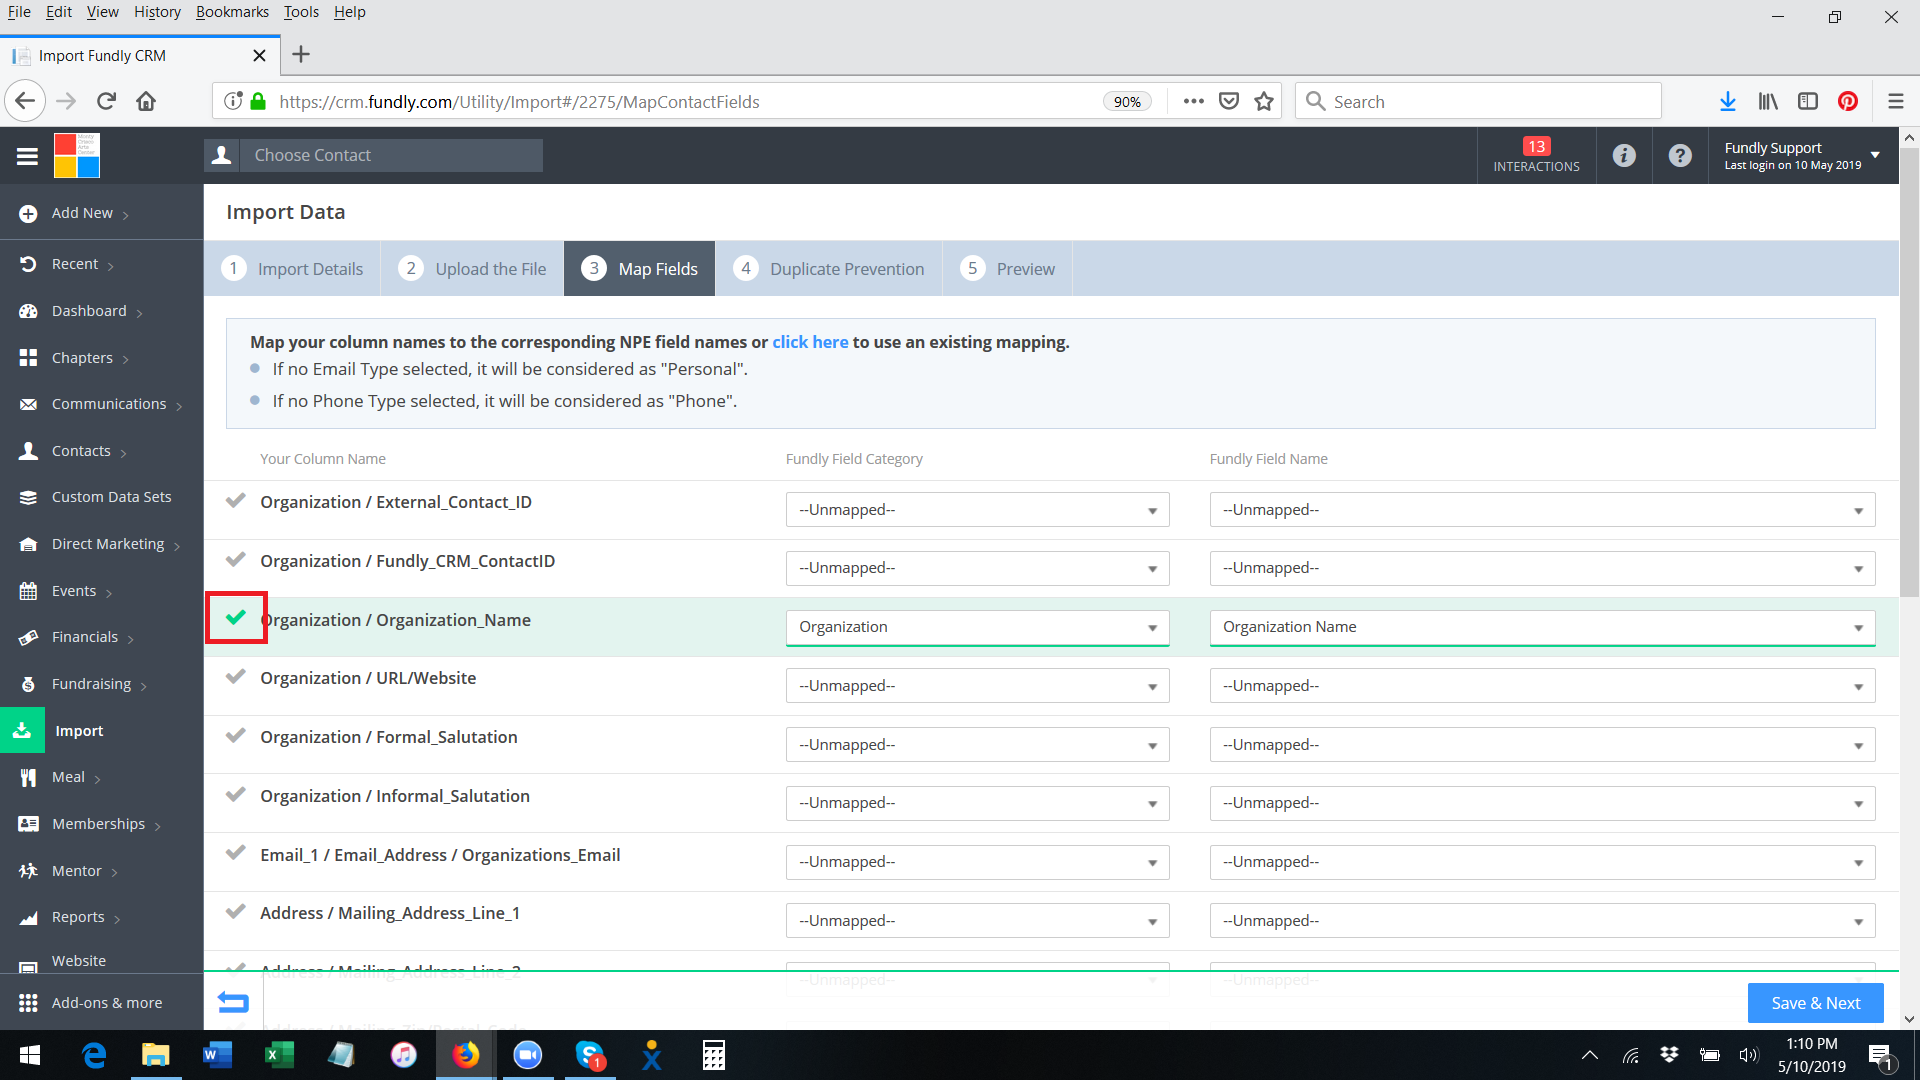
- When you have mapped a field, the row will highlight in green and a green check mark will appear to the left of the row. This only indicates that the row/field has been mapped; it is not any kind of data validation or check (that is, the check mark is not saying that you mapped the data to the correct field or that the data in that column of your spreadsheet has no errors. The check mark simply means that column of your spreadsheet has been mapped).
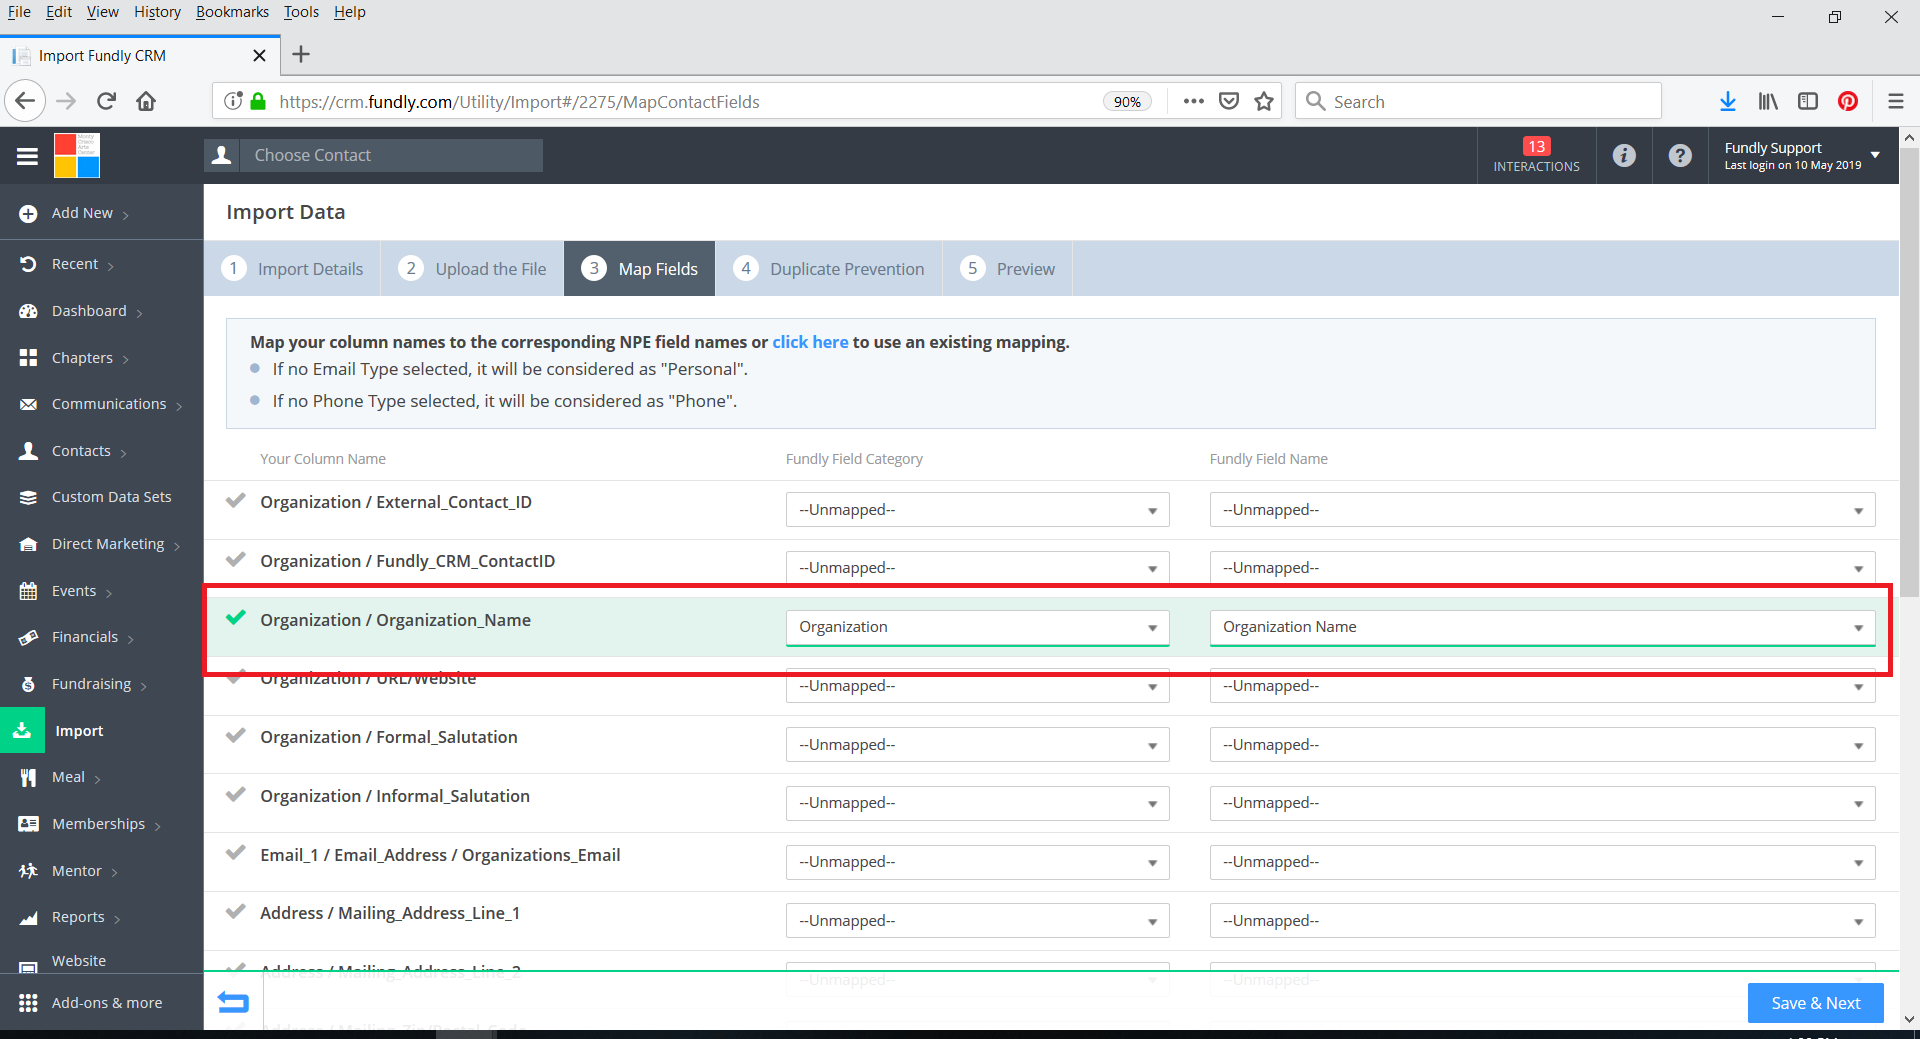
- Here, in this screen shot, we've mapped the Organization Name, Organization Website, and Formal Salutation fields to show you what correct field mapping looks like.

- When mapping e-mail address(es):
- After selecting the Email as the Fundly CRM Field Category, you will have the option to map the e-mail type (work/personal/etc.) and to indicate if all the e-mail addresses in that field/column should be marked as the primary e-mail for that contact.

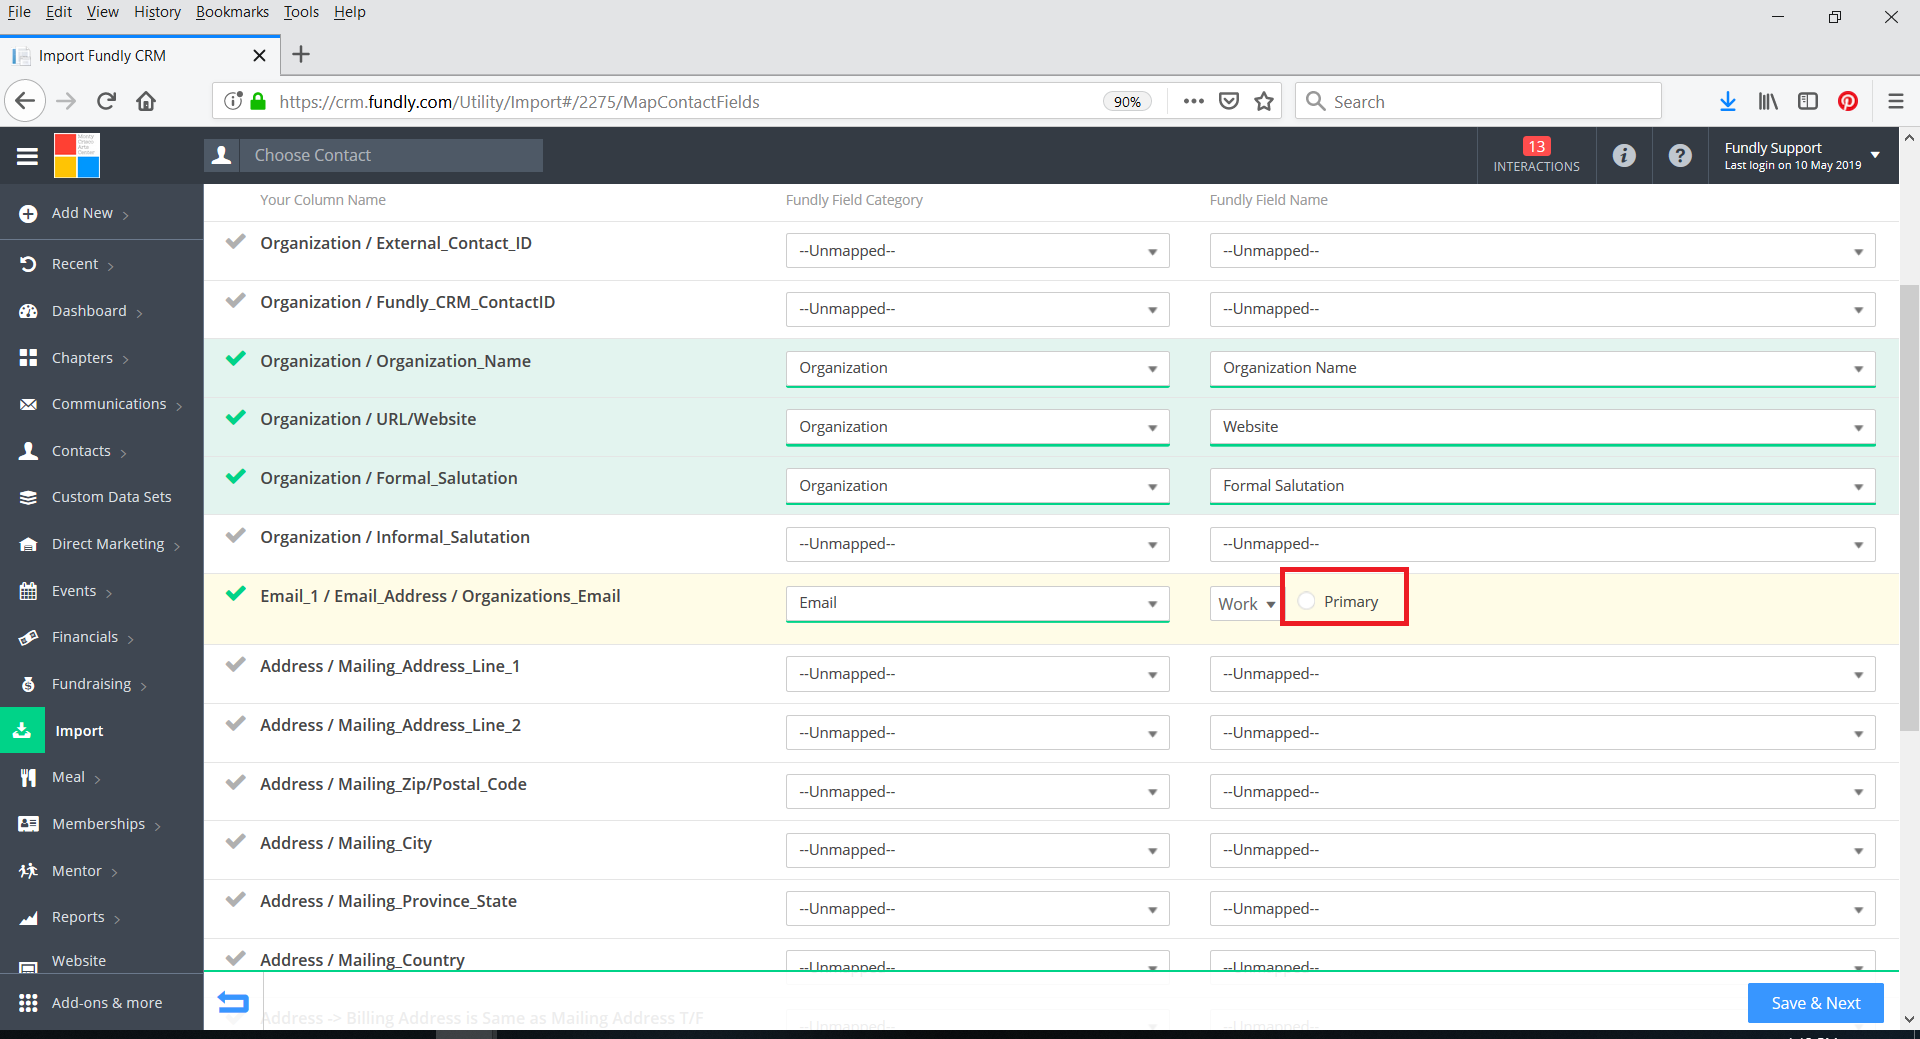
- After selecting the Email as the Fundly CRM Field Category, you will have the option to map the e-mail type (work/personal/etc.) and to indicate if all the e-mail addresses in that field/column should be marked as the primary e-mail for that contact.
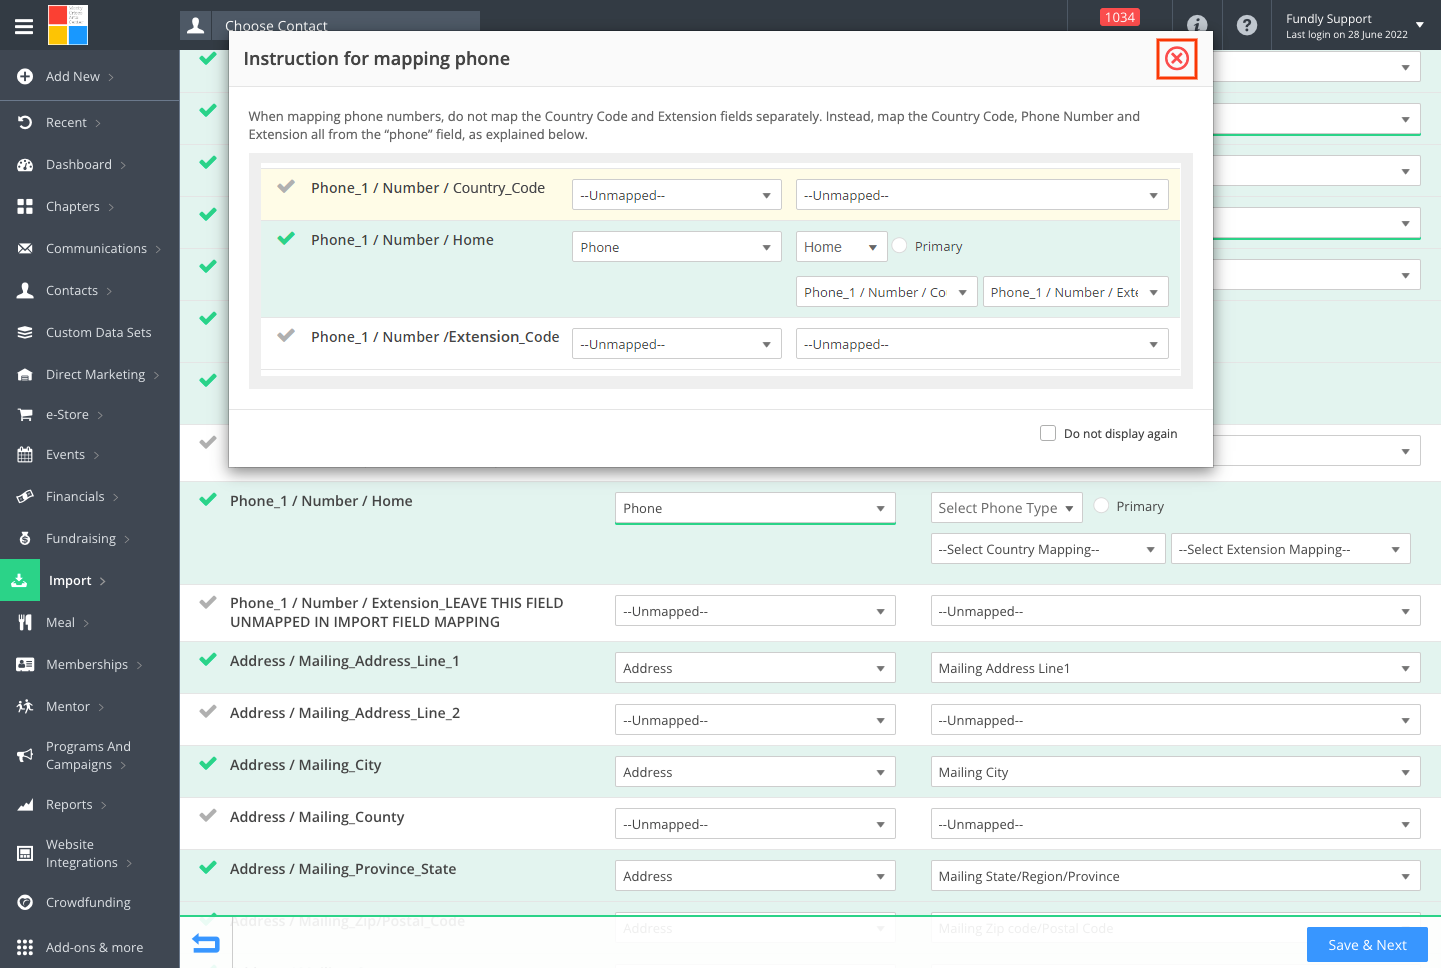
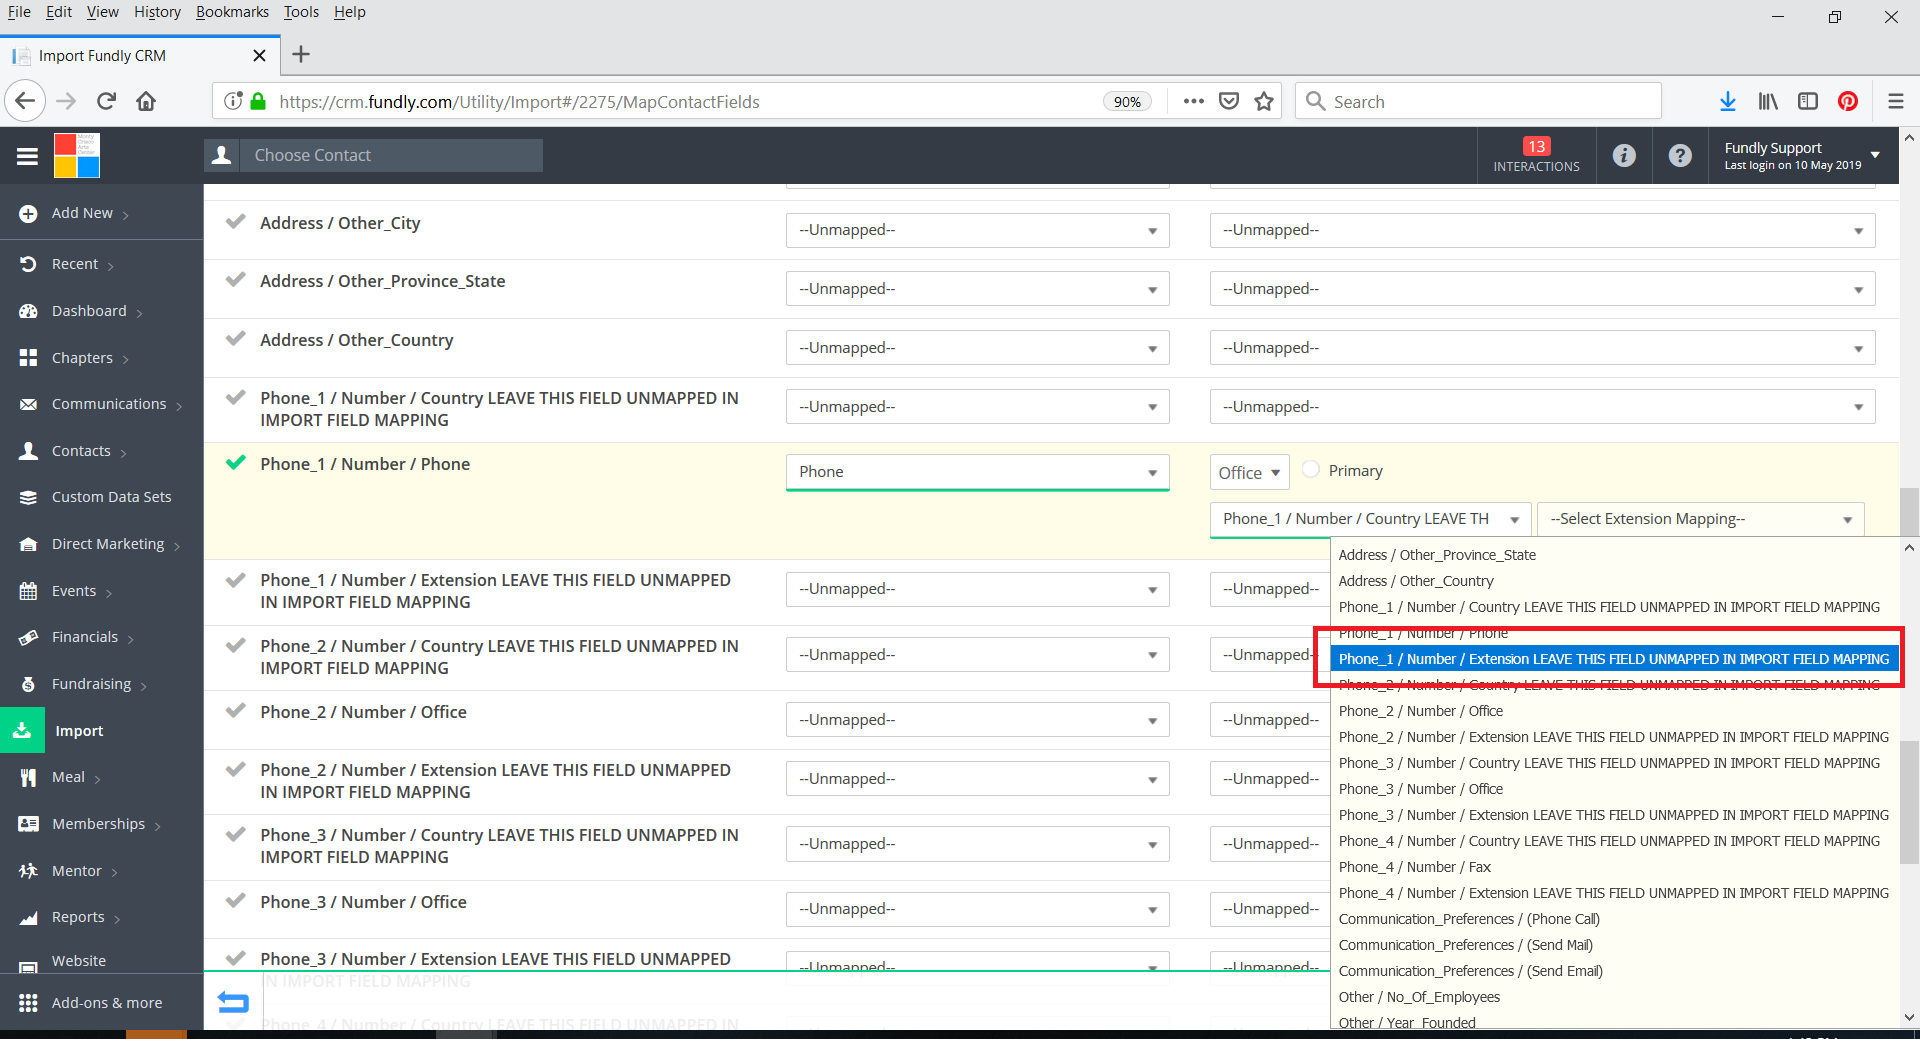
- When mapping phone number(s):
- Leave the column in your spreadsheet that contains the country code UNMAPPED.
- Leave the column in your spreadsheet that contains the phone number extension UNMAPPED.
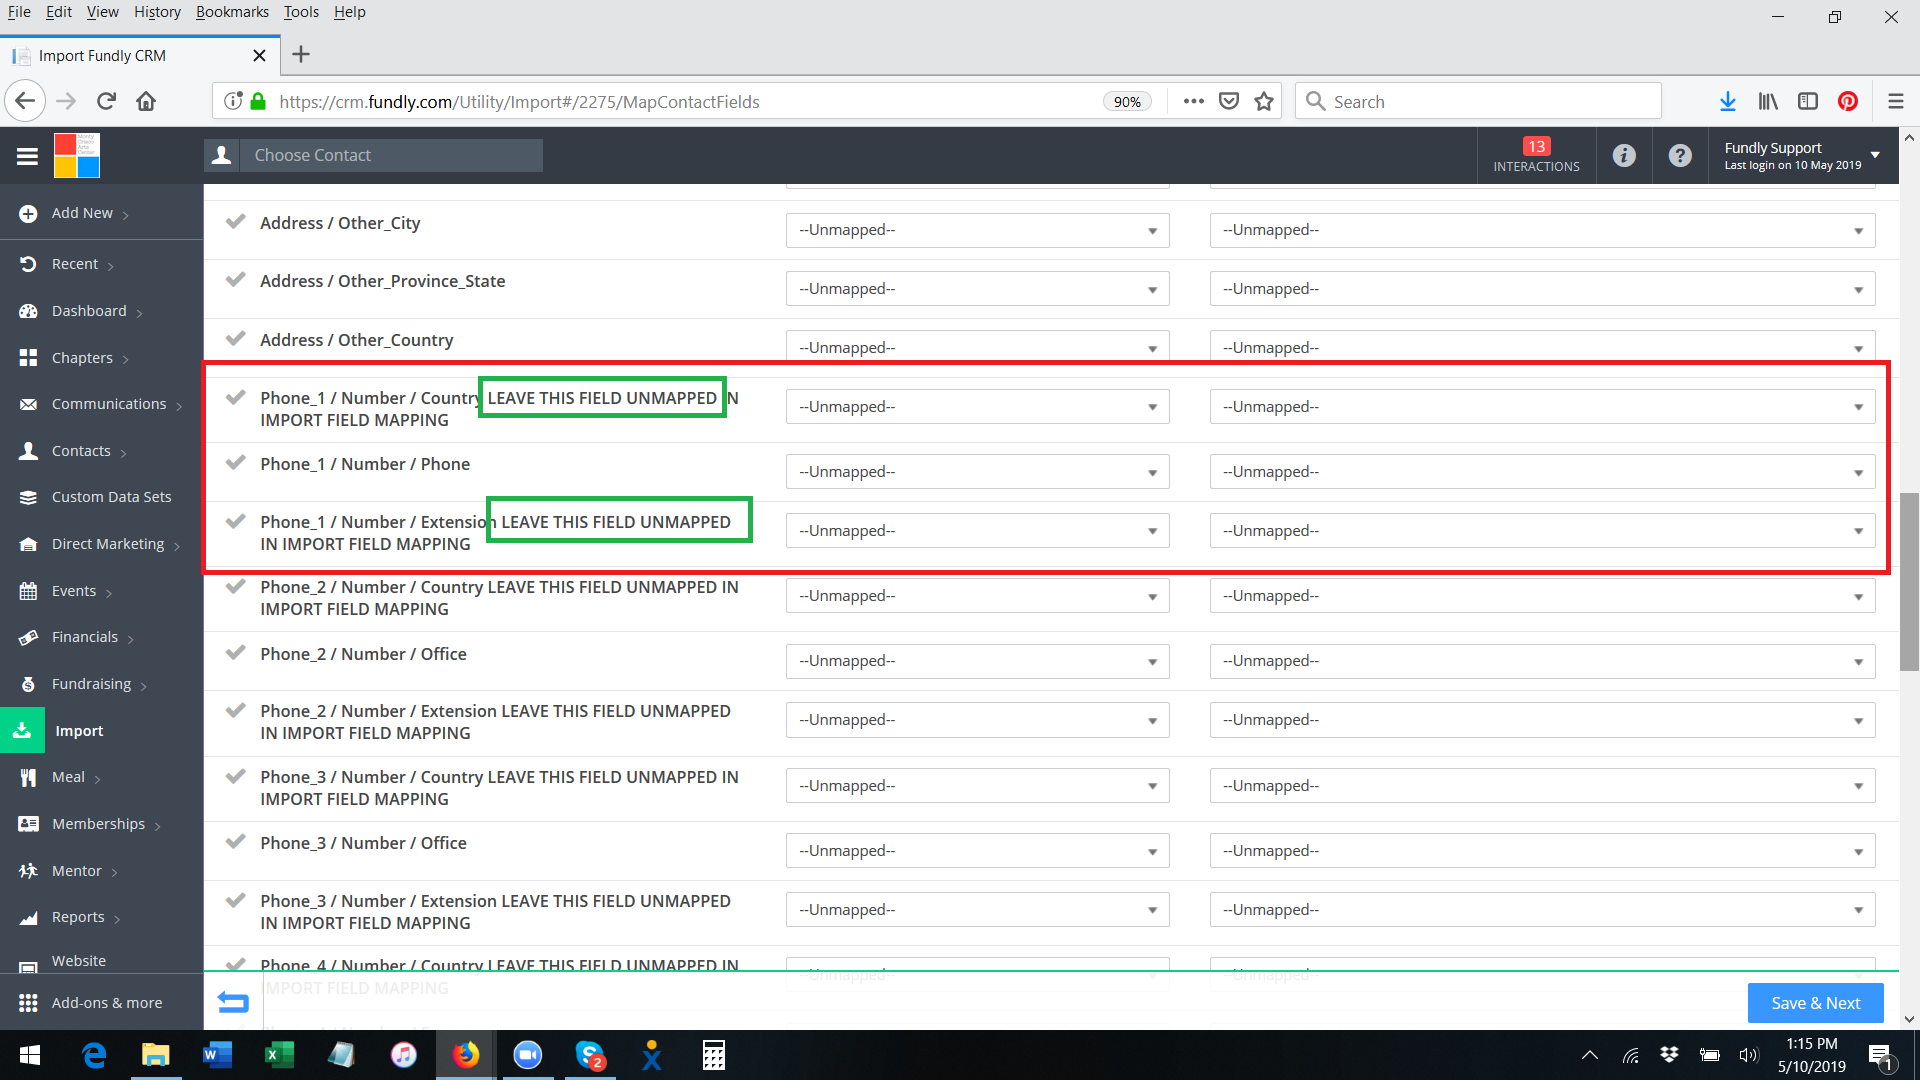
- Instead of mapping these two items into separate Fundly CRM fields, you will map them all into the phone number field. However, these items do need to be in their own columns in your spreadsheet, as indicated in our import template.
- The first time you click into the phone number field category column, a pop up window will appear, reminding you to leave the country code and extension unmapped.

- You can prevent this pop up from appearing again during this import by clicking the "do not show this again" box.
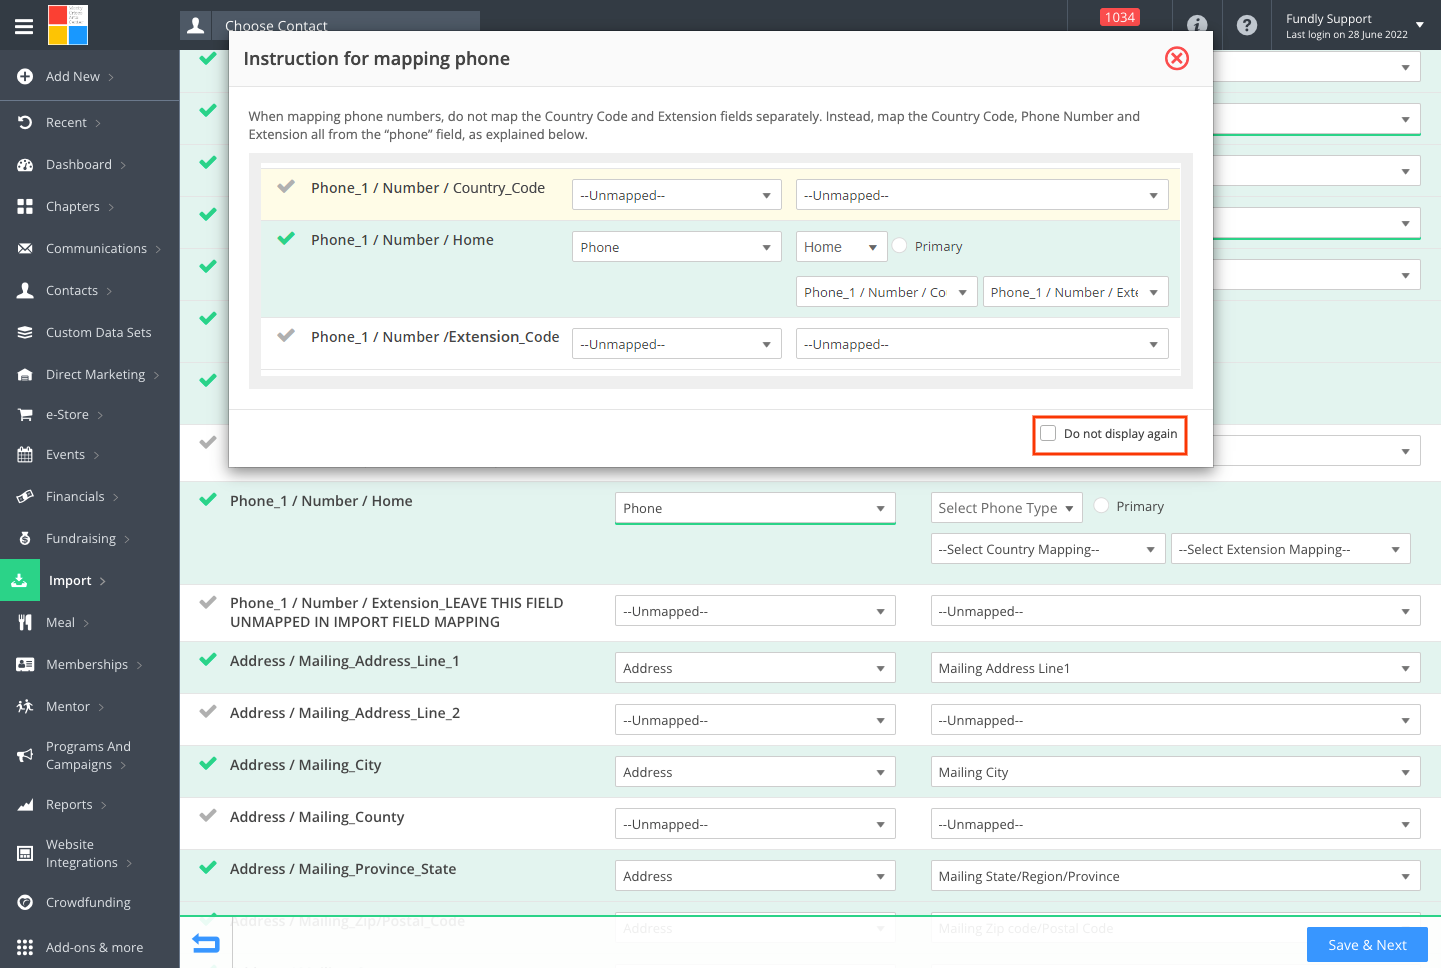
- You can close the pop up by clicking the red X in the upper right hand corner.
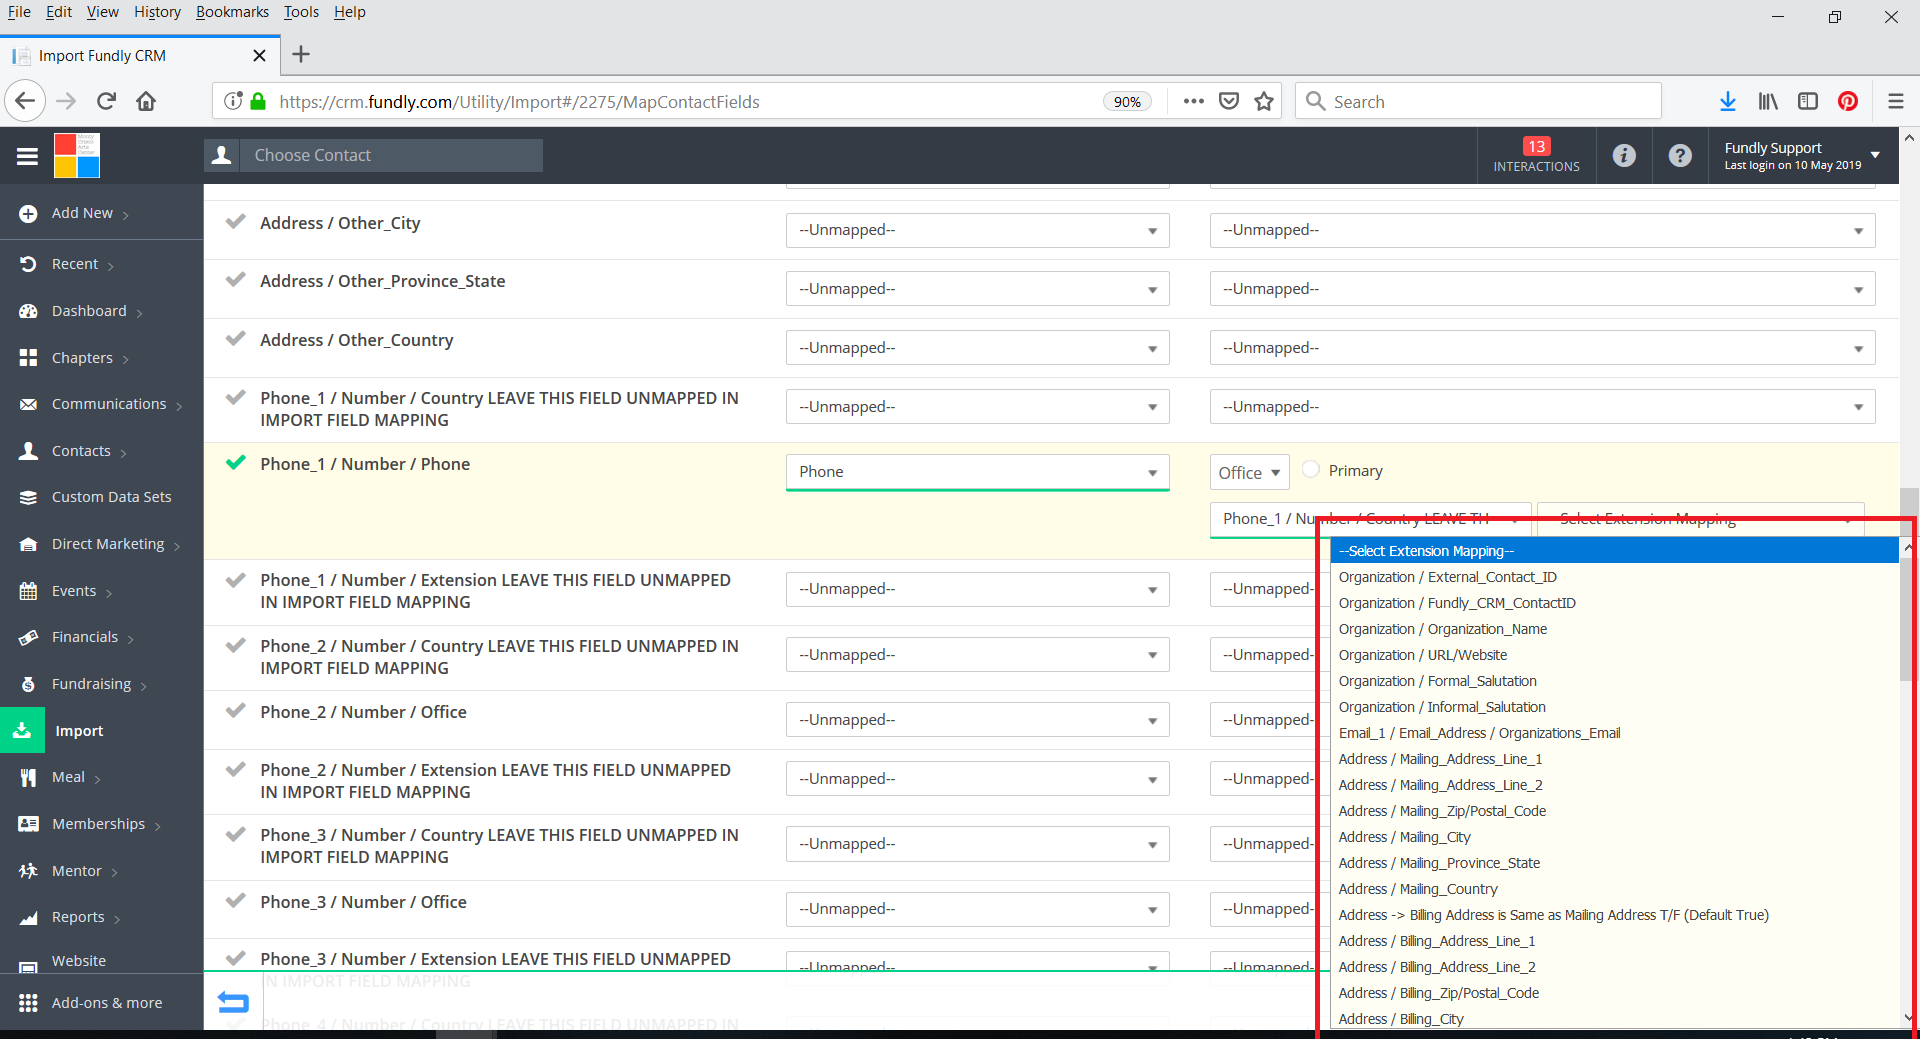
- After selecting the category "Phone" in the middle column, four fields/settings will appear in the right hand column.
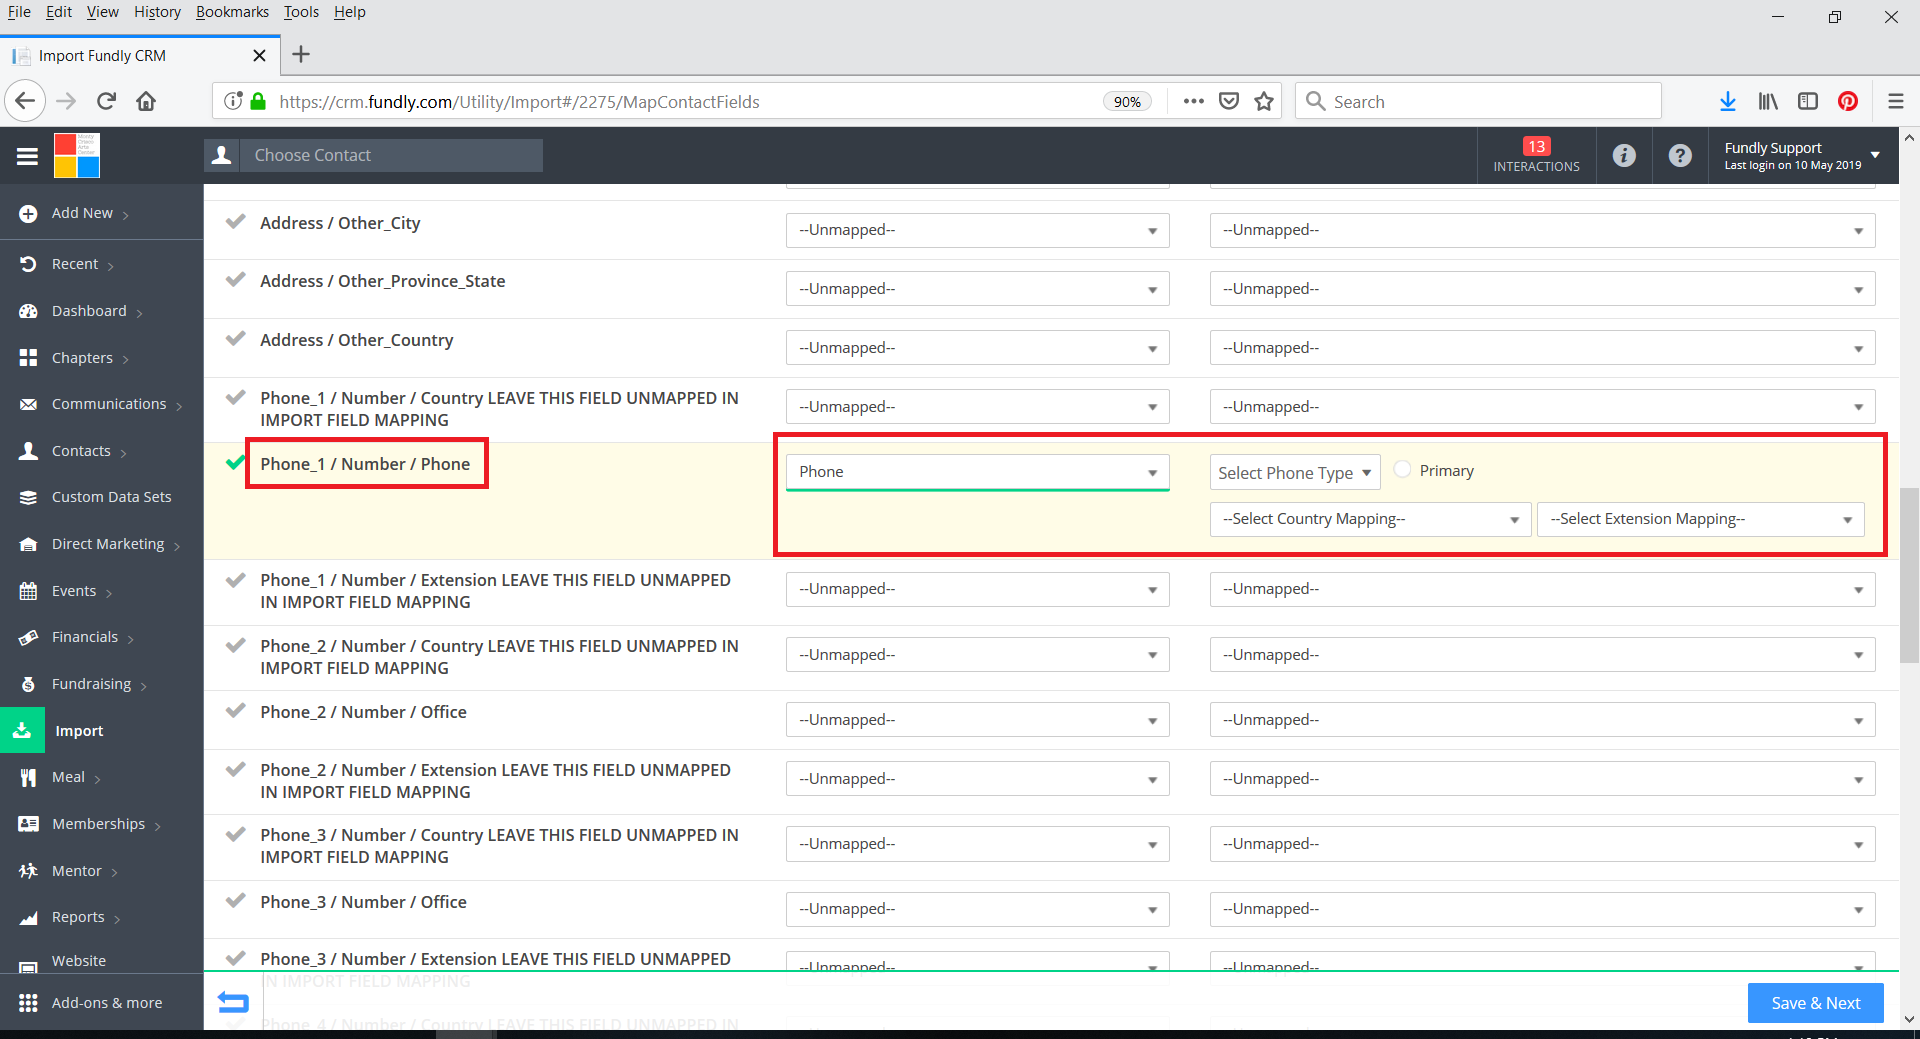
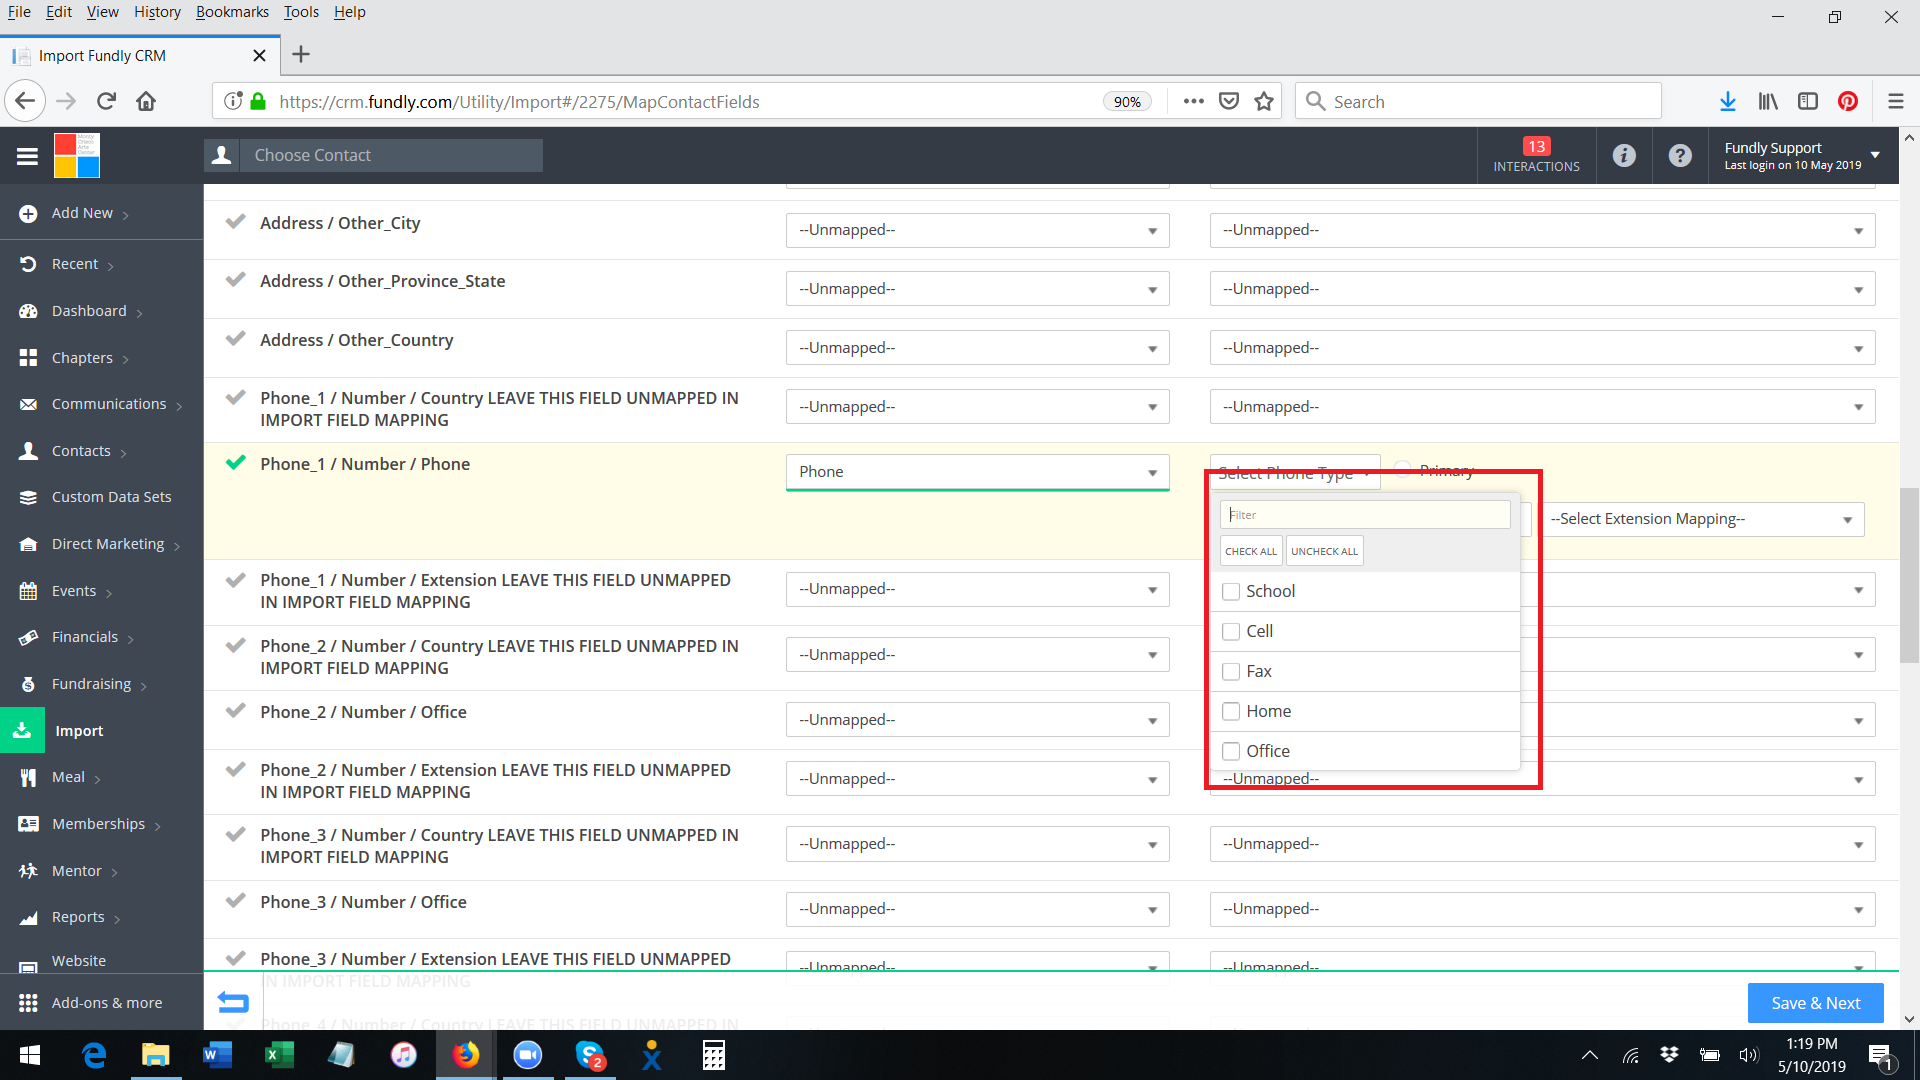
- Click the Phone Type drop down to assign every phone number in this column of your spreadsheet a particular type (if you leave this blank, all phone numbers in that column will be assigned the type "personal").

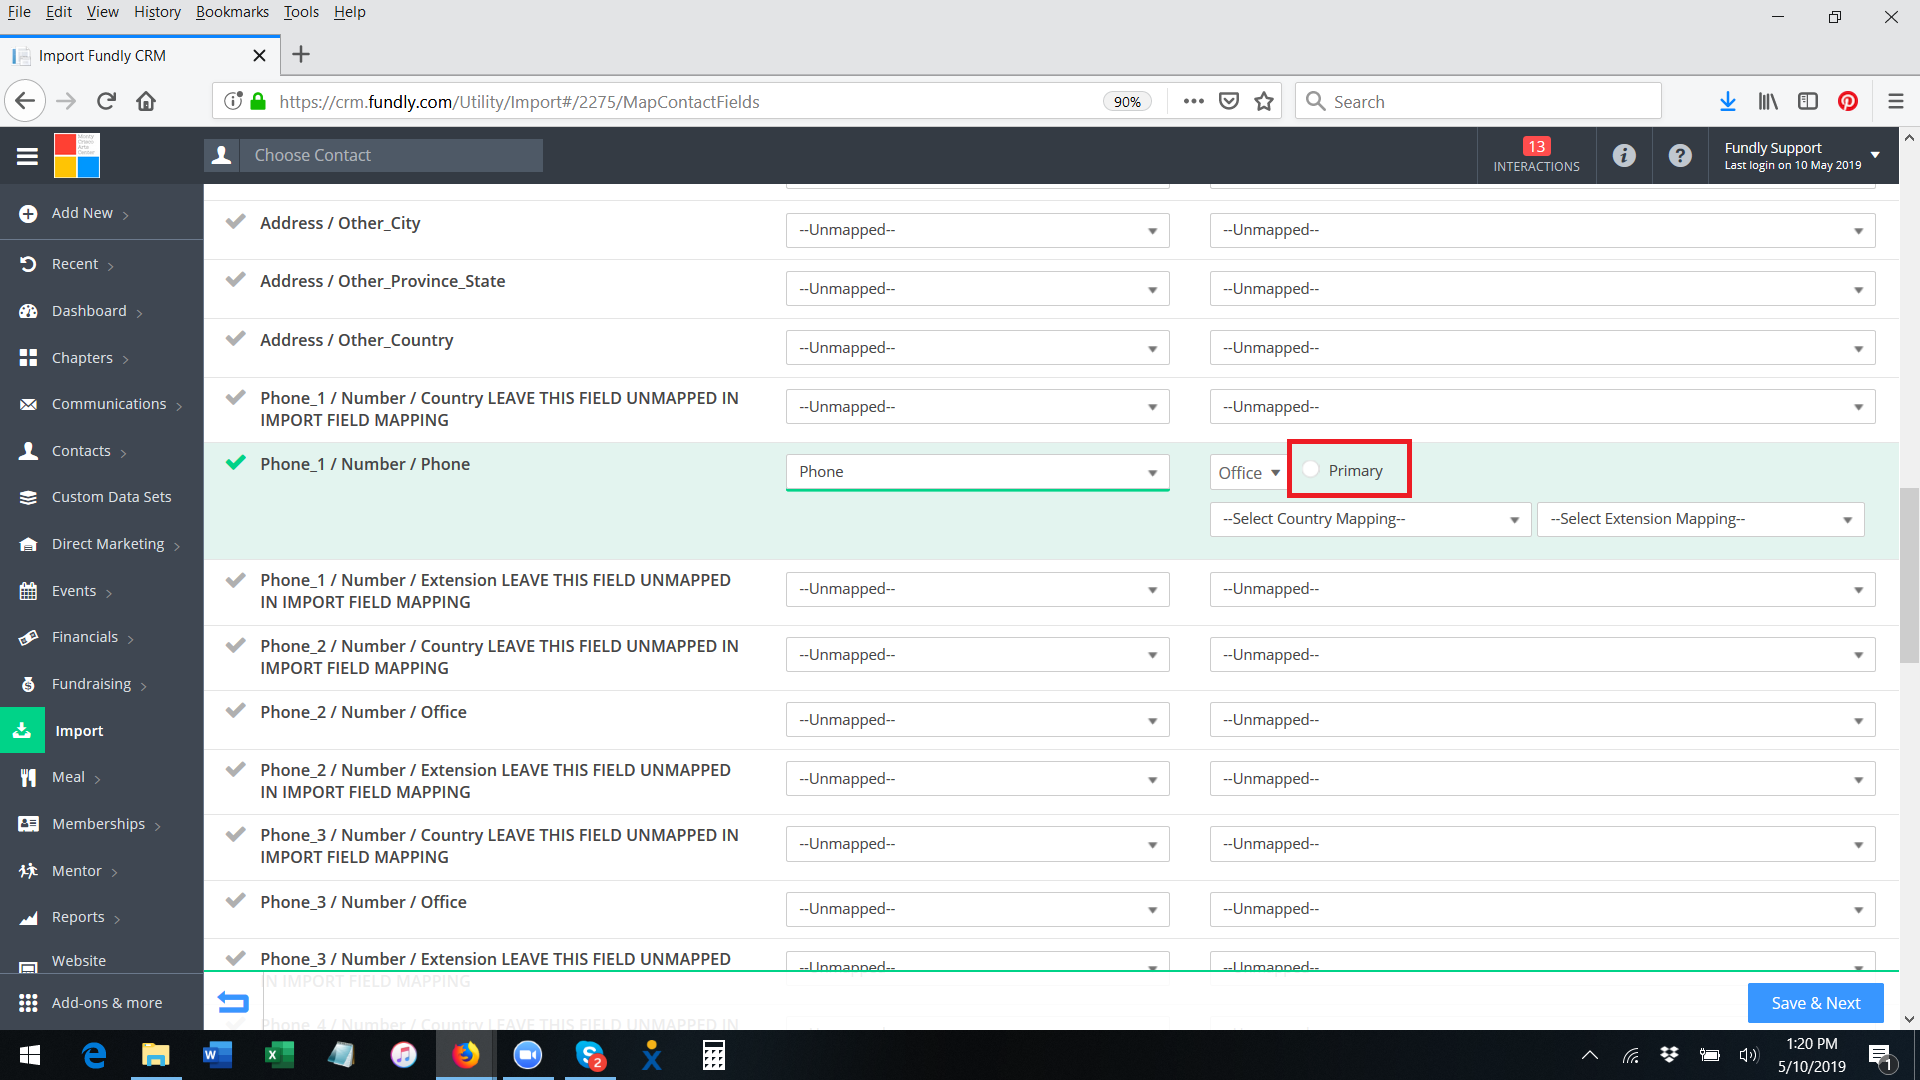
- If you want all of the phone numbers in this column of your spreadsheet to be marked as the primary phone number for each contact, click the Primary radio button.
- Next click the Country Mapping drop down and select the column in your spreadsheet that has the country code for each phone number.

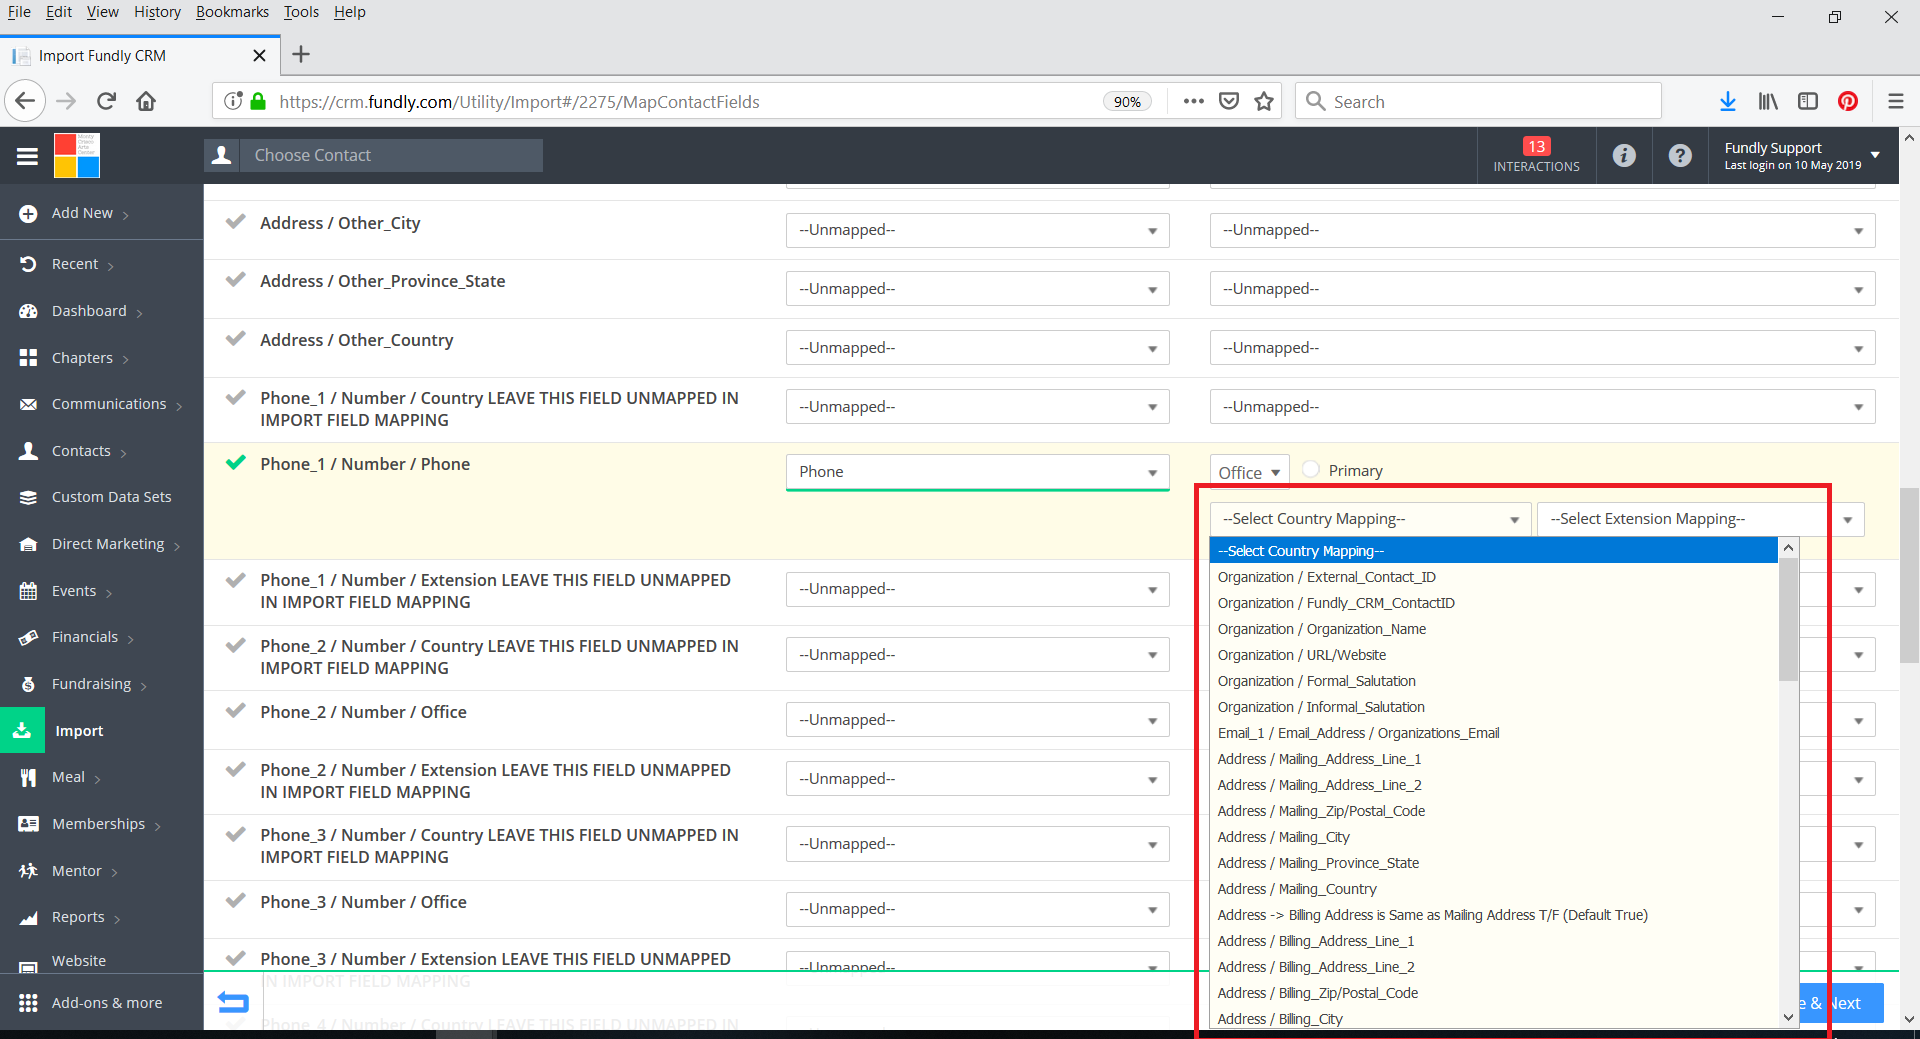
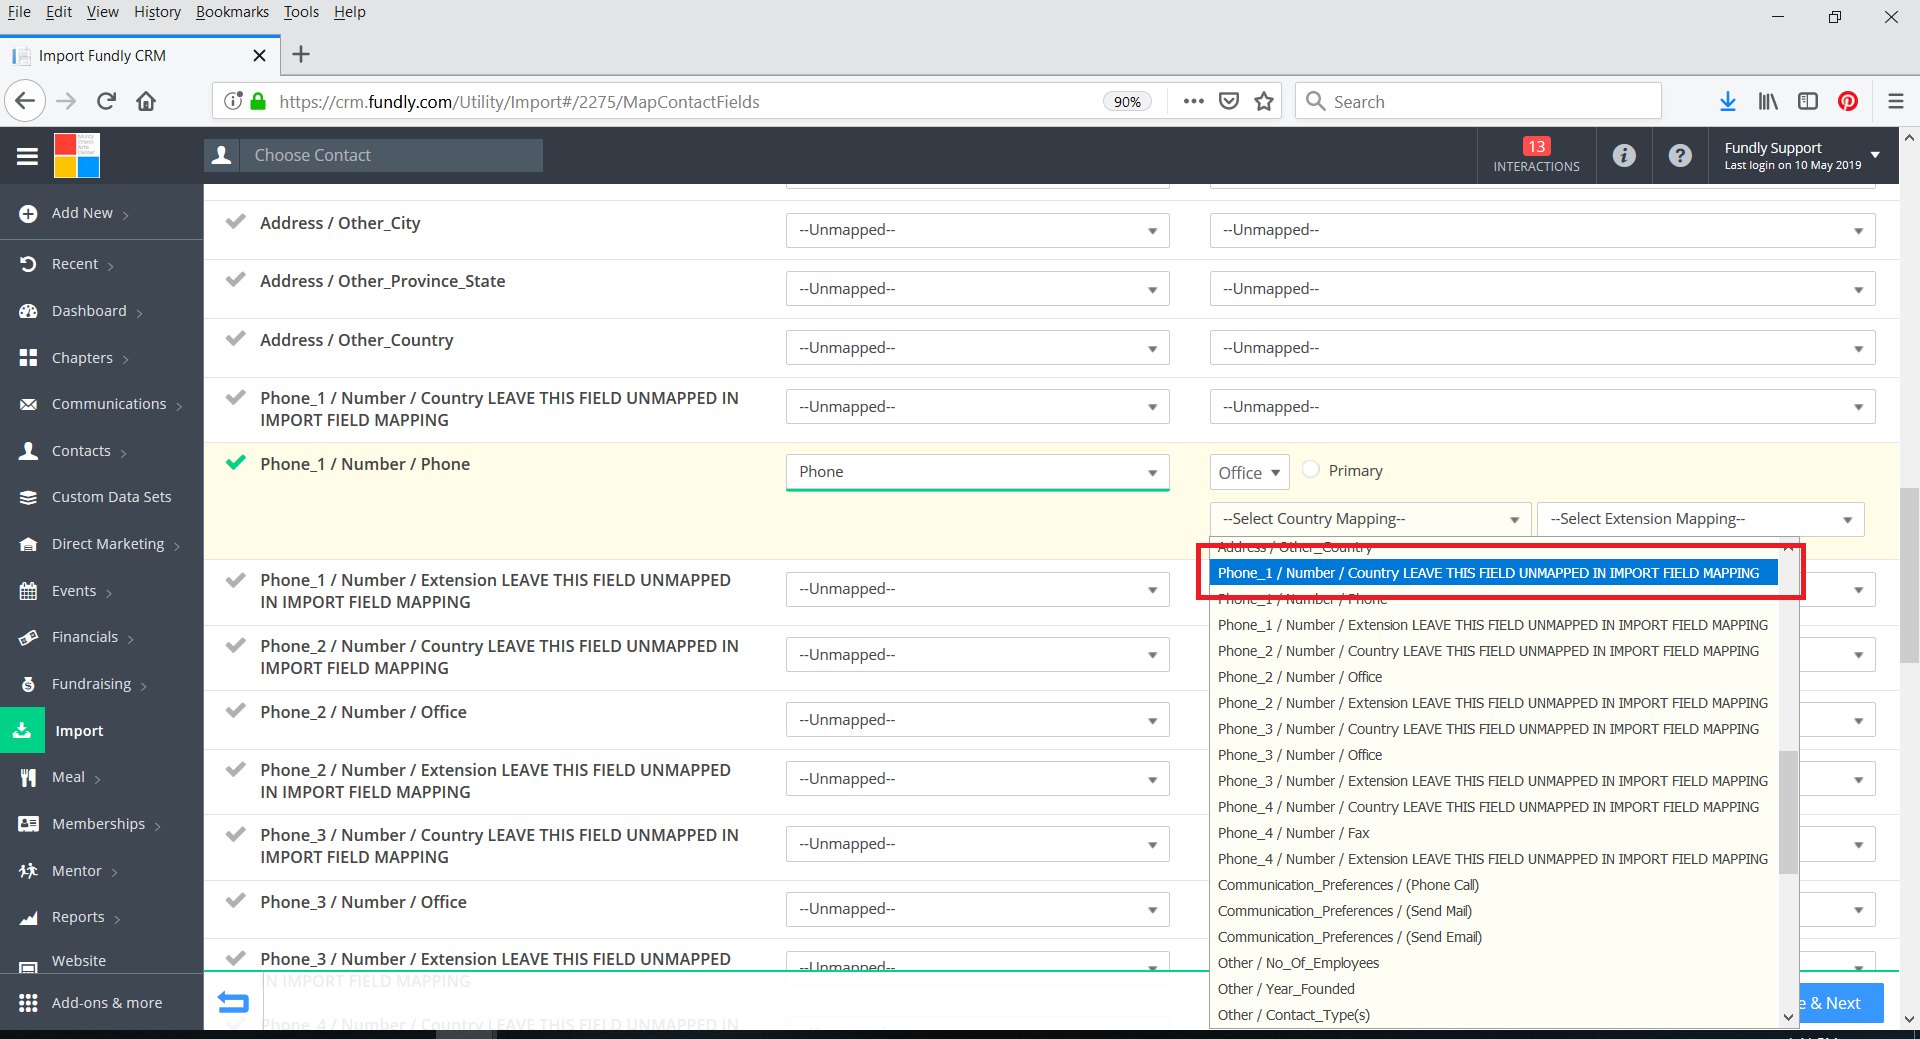
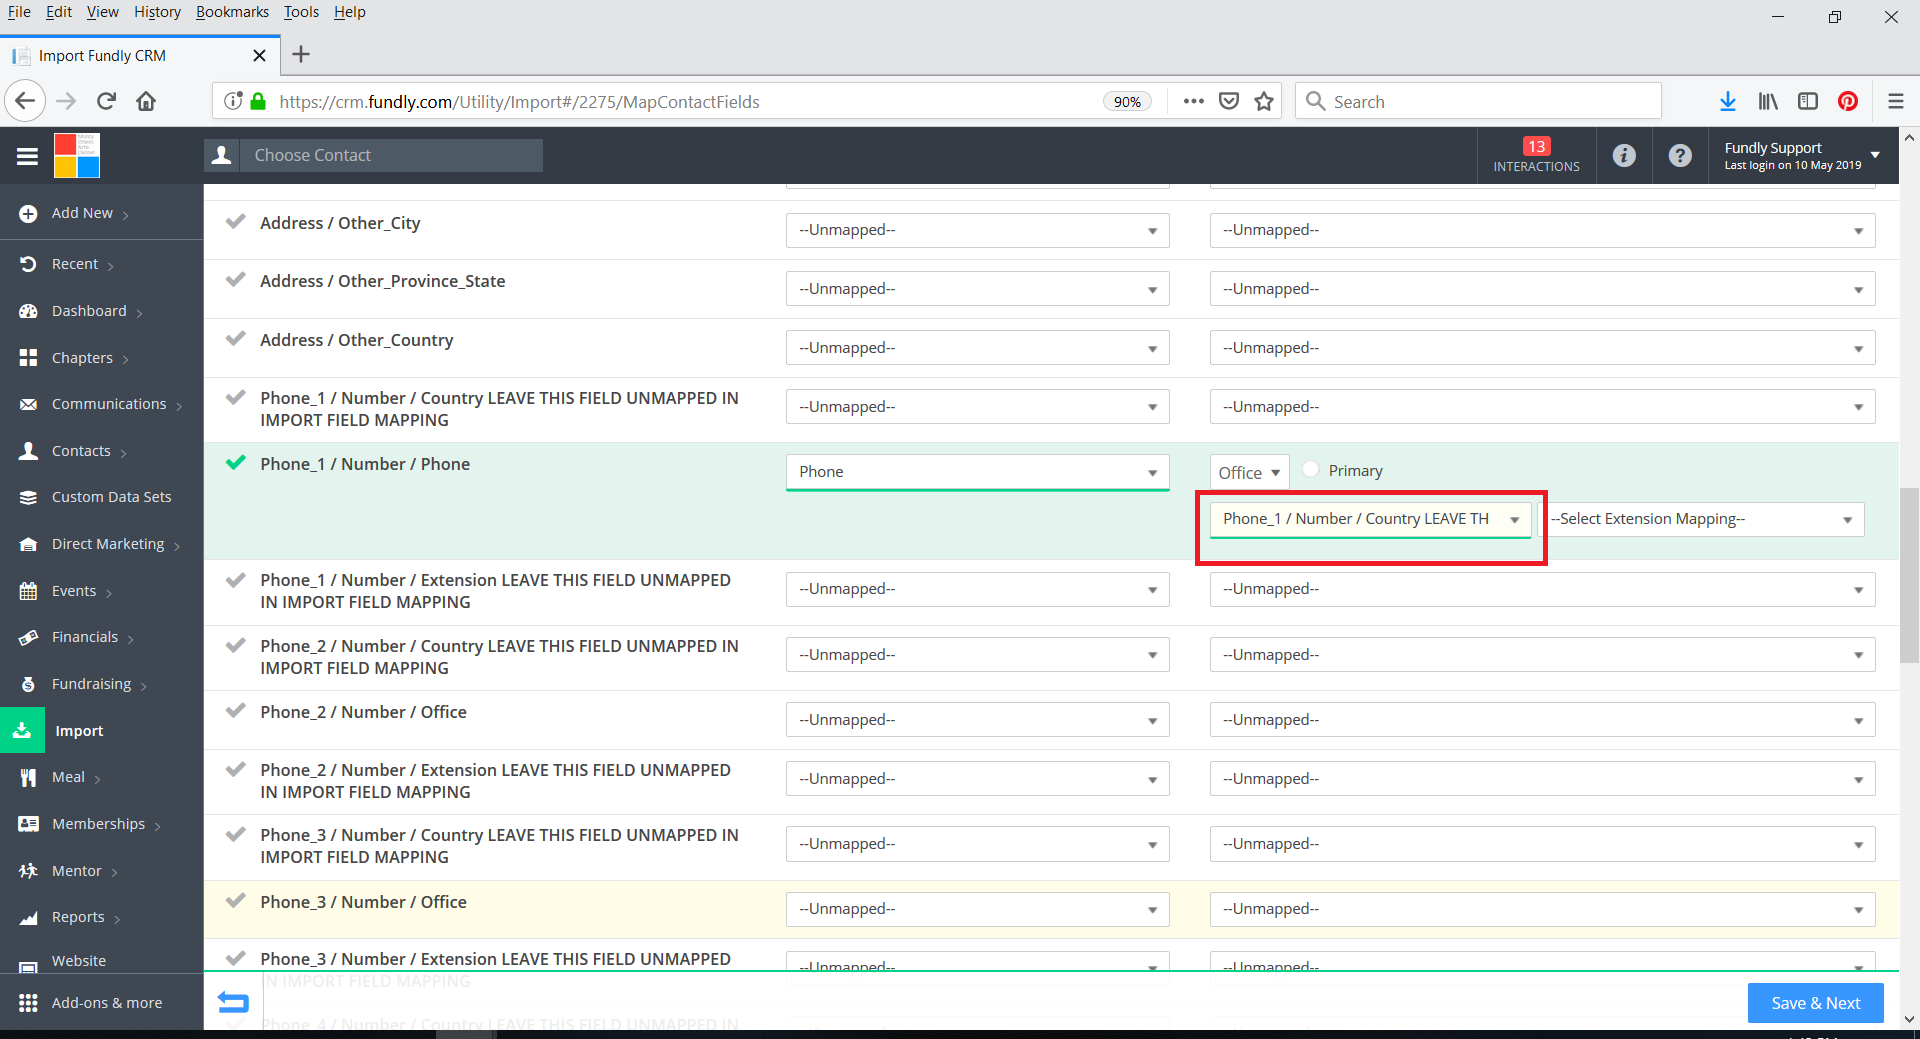
- Lastly, if you have any phone numbers with extensions, click the Extension Mapping drop down and select the column in your spreadsheet that has the phone number extensions.

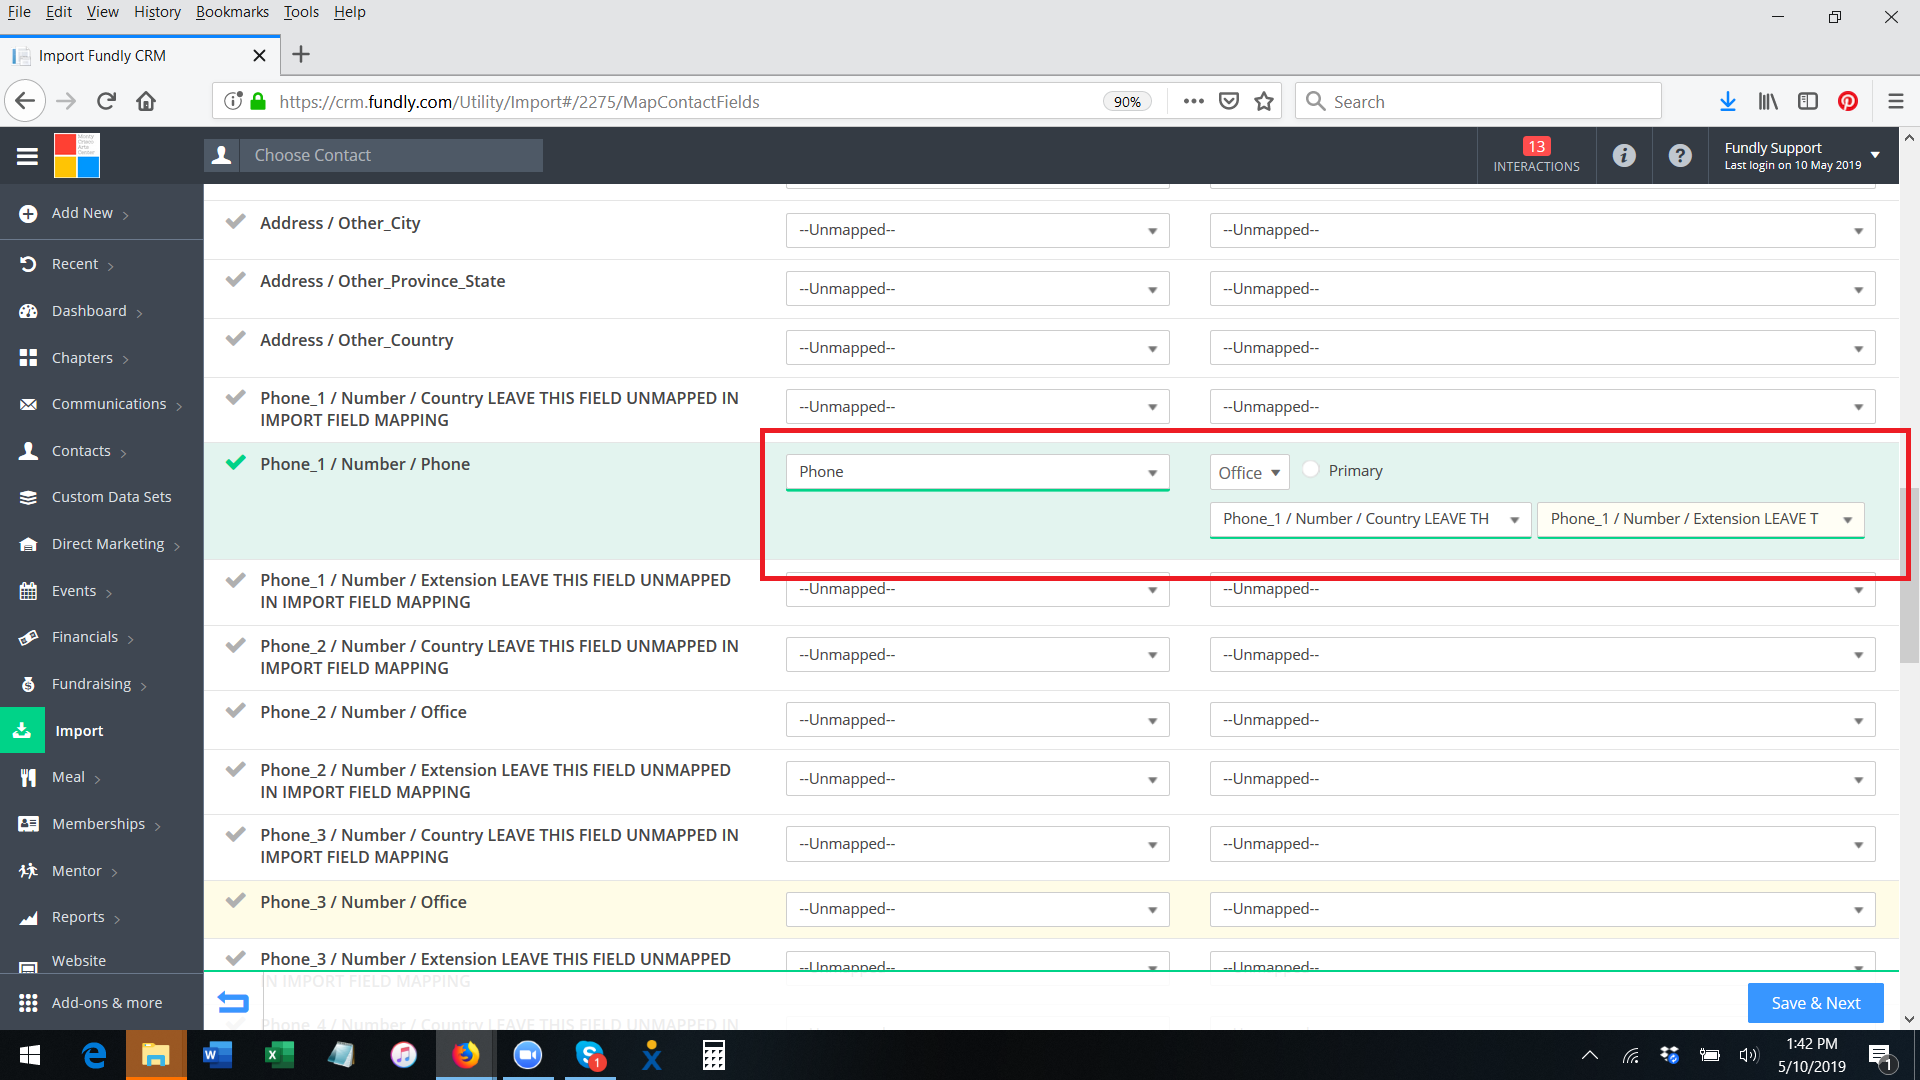
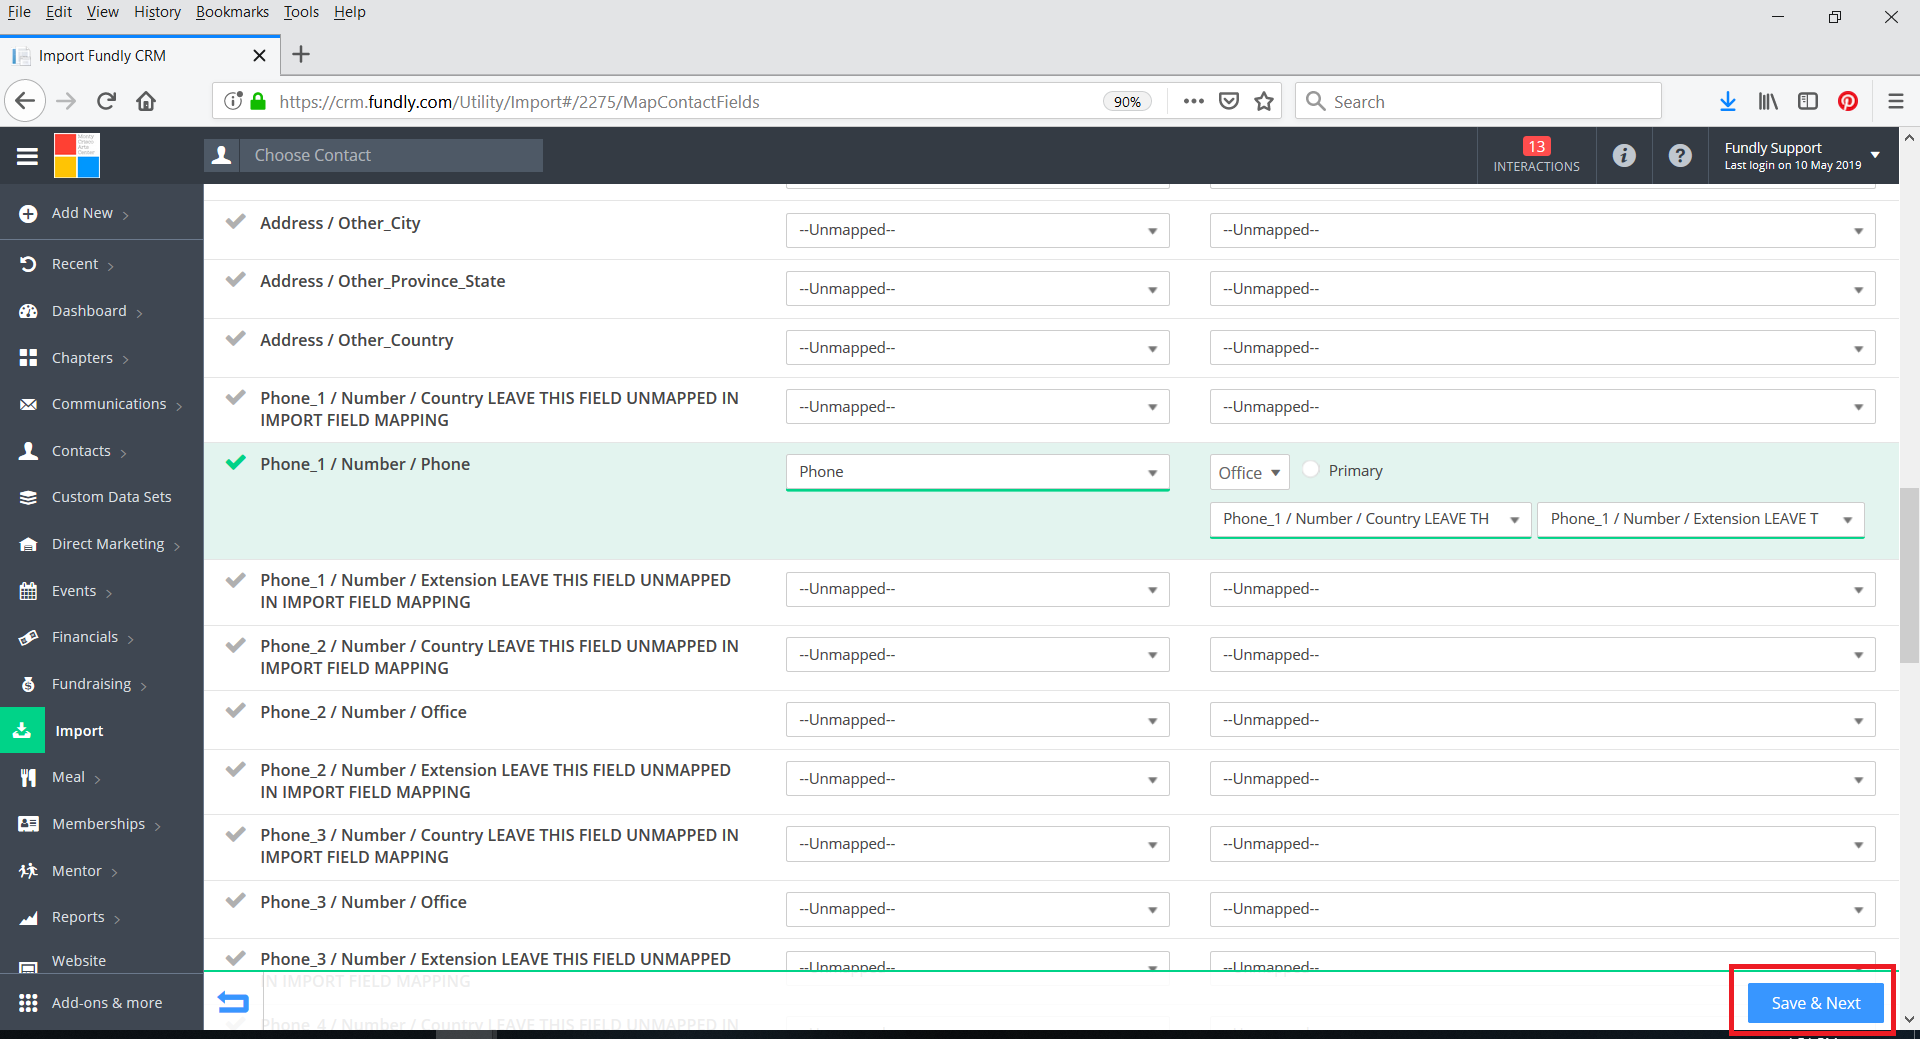
- Here, we present a screenshot of the finalized field mapping for the Phone Number #1 column of our spreadsheet. Repeat the above steps for any additional phone number columns in your spreadsheet.
- When mapping Addresses:
- Remember that if you include any part of address, all the fields in the block will update. If you are updating existing records, if you leave out any part of the address in the field mapping, you risk wiping out existing data.
- Pay close attention to make sure your have mapped CounTY to the CounTY field and CounTRY to the CounTRY field. It's very easy to mix these two up since they look so similar when glancing at the field names quickly.
- Please Note: if you are using External ID or Fundly CRM ID as your duplicate prevention key for this import batch, you MUST map that field (External ID or Fundly CRM ID) in the field mapping. Additionally, if you include an employee, primary organization contact, and/or a Primary NP Contact name in the same row as the primary contact, you MUST map External ID/Fundly CRM ID for that field as well in the import. Failure to do so will result in an error in the import.
- After mapping all of your fields, click the blue Save & Next button in the lower right to move to the next tab. Alternatively, you can click the blue Back arrow in the lower right to exit without saving and return to finish the draft import batch at a later time.
- If you have left any columns of your spreadsheet unmapped, a pop up notification will appear, alerting you to this fact. If you meant to leave some columns unmapped (that is, if you have columns in your spreadsheet that have data you don't want to import into Fundly CRM), then click OK. Otherwise, click Cancel to close the notification and return to the Field Mapping tab to map the unmapped fields.

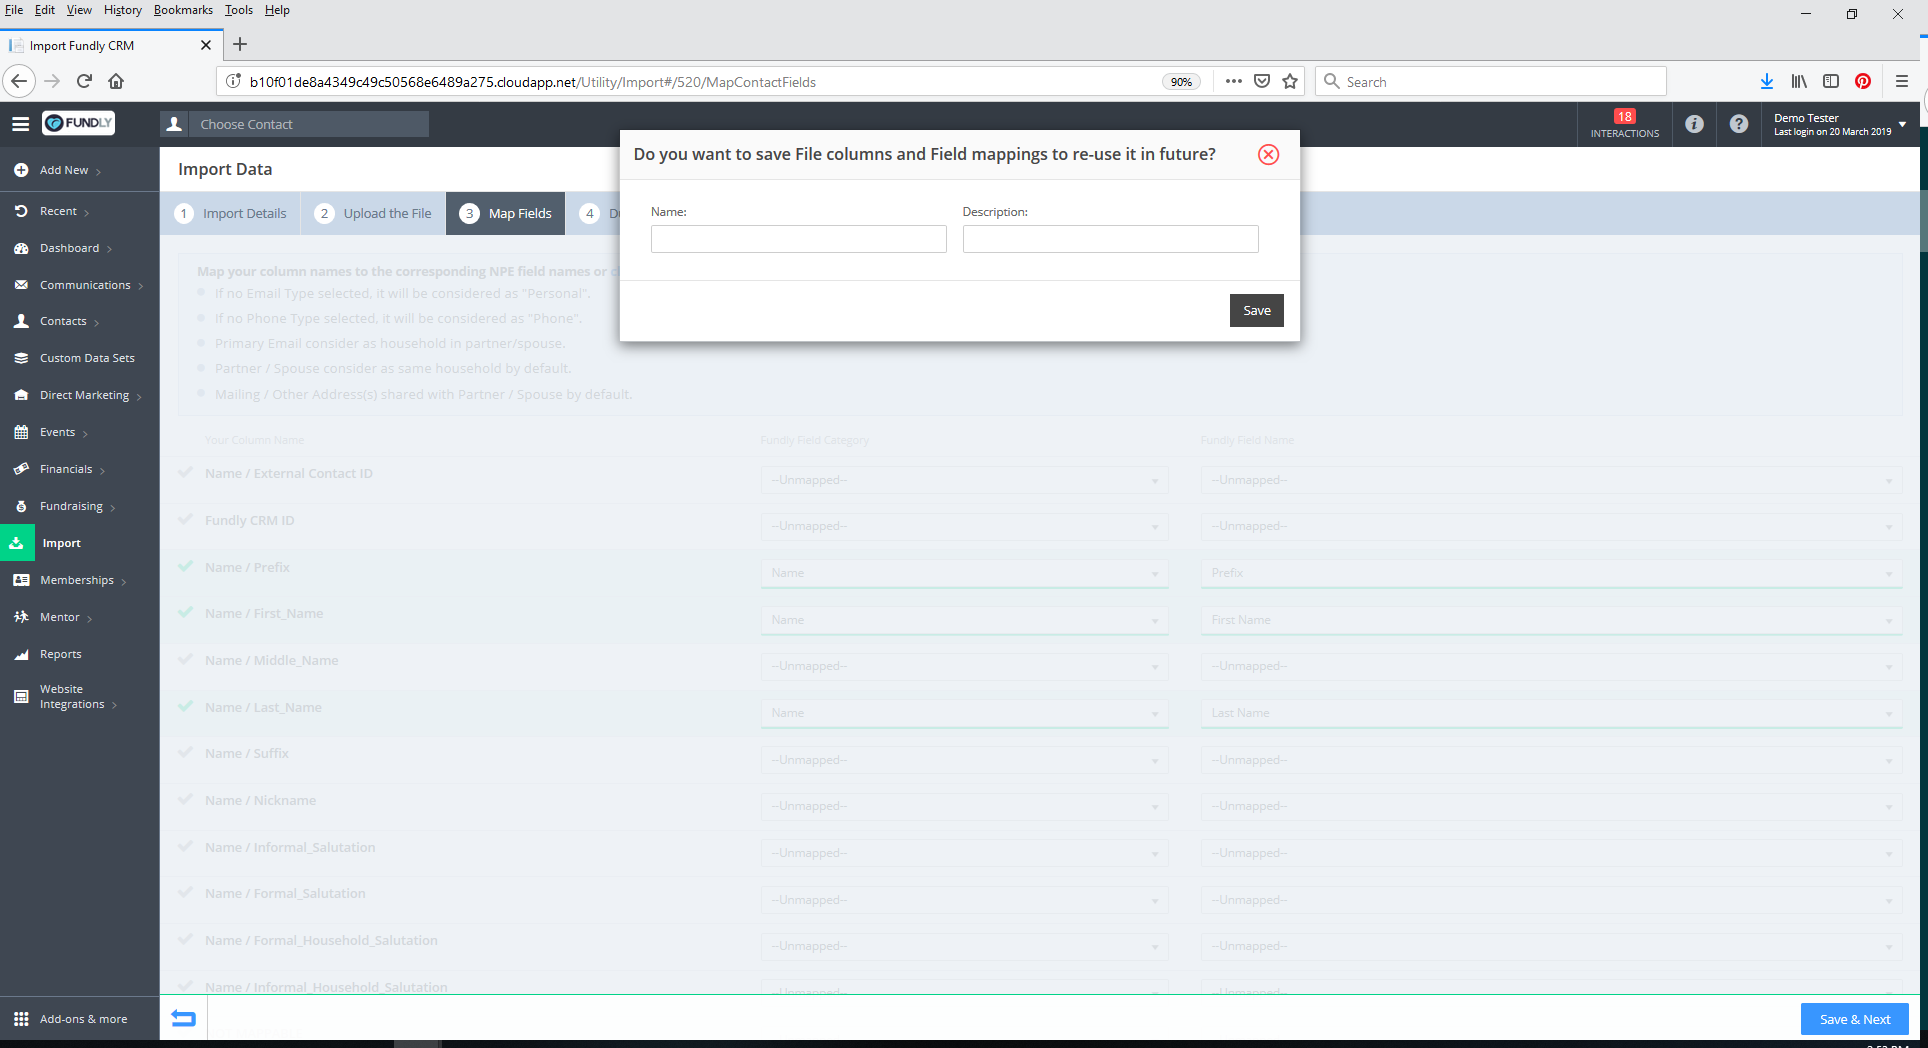
- Next, a pop up window will appear asking you if you would like to save your field mapping layout.
- Saving the field mapping layout will save the association between spreadsheet column names and the Fundly CRM Category and Fundly CRM field. You can re-use this layout in the future; when you import a data from a spreadsheet with the same column names, the system will automatically map those columns to the same Fundly CRM Category and Field as you have mapped them this time.This is presented as a time saver/convenience for future imports, so you don't have to remap every column from scratch. It's not required to save your field mapping; it's entirely optional.
- To save your field mapping, give the field mapping layout a descriptive Name and a Description. Best practice is to give the field mapping layout a descriptive name that will remind you of the type of import/data this mapping is laid out for. For instance "Individual Contacts with Email Addresses" or something like that.
- Click Save to save the field mapping and move to the next tab or click the red X in the upper right to close the pop up without saving any field mapping and move to the next screen.
- See our Import Utility: Importing Organizational Contacts Part VI - Duplicate Prevention tutorial for next step.
Comments
0 comments
Article is closed for comments.