
Contact Records Part I: Viewing Contact Records
- Contact Information (Personal and Work Info, Communication Preferences, Newsletter Categories, etc.)
- Contact Types
- Contact Change Log
- Contact Timeline
- Contact Tags
- Types of Widgets And Their Features
- Widgets That Update Overnight
- Customize Layout
- There are two types of contact records: Individual Contact and Organizational Contact
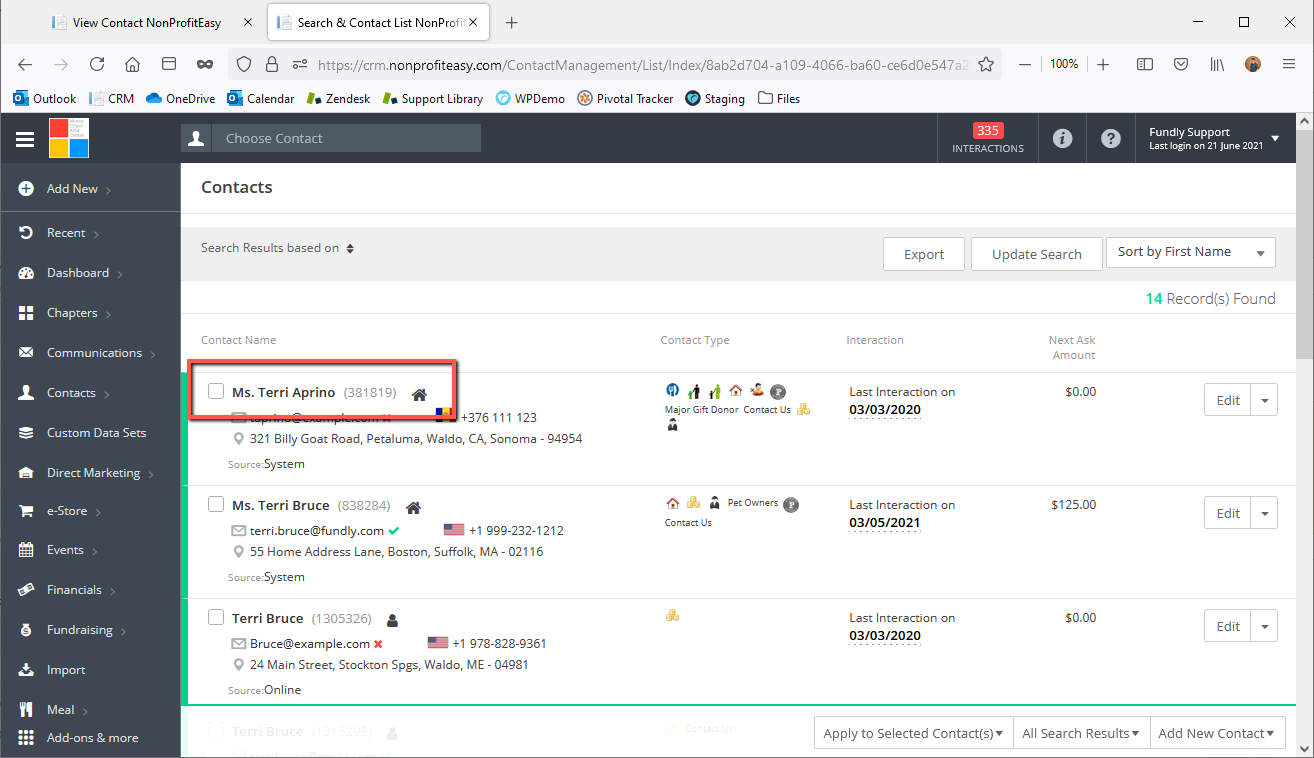
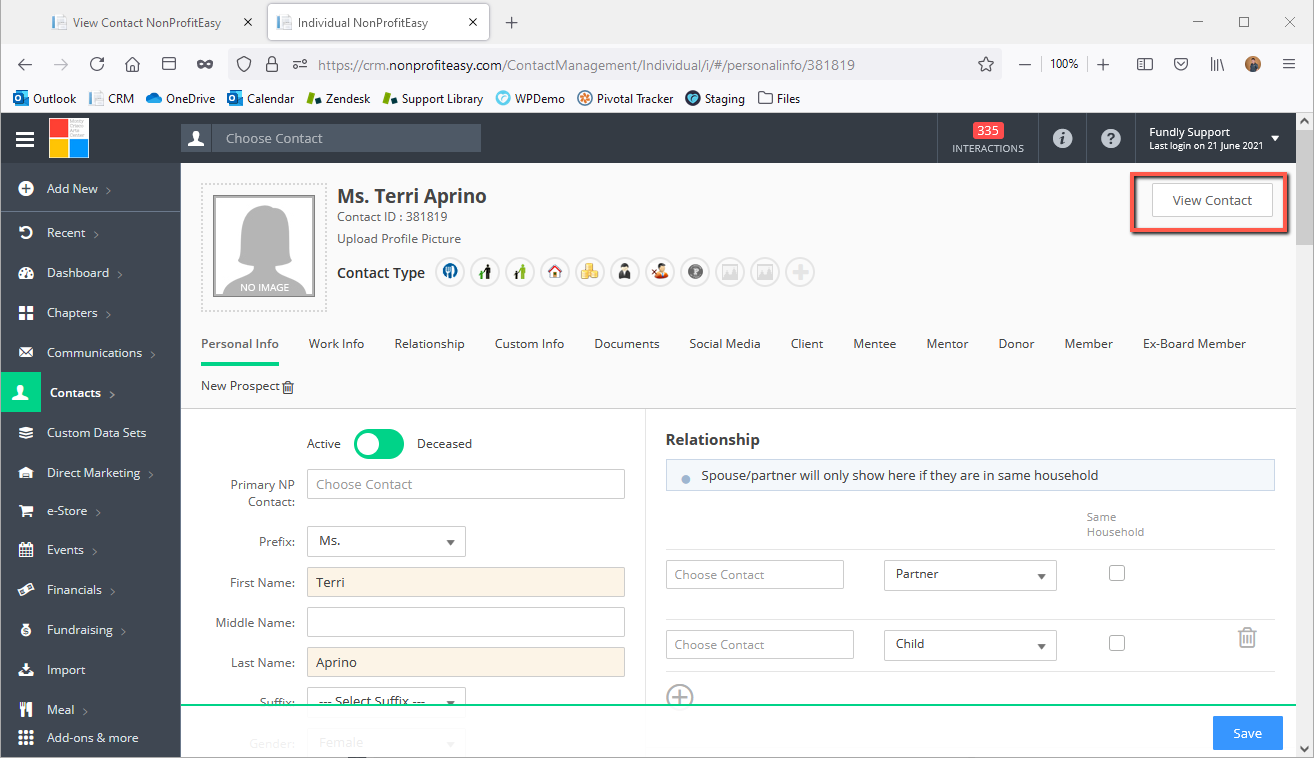
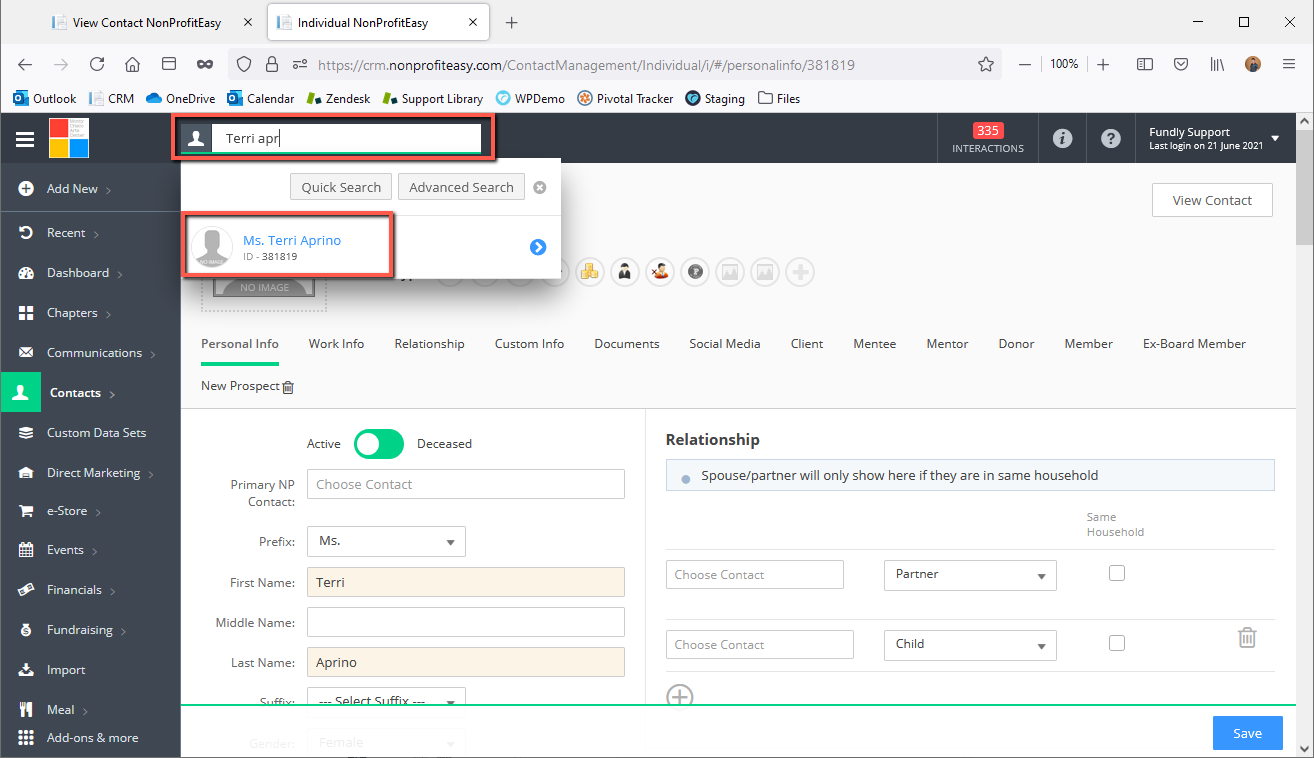
- Contact records can be viewed by clicking on the contact name from the search results screen OR by clicking view contact while editing a contact OR by using Direct Search (if you last viewed a contact record, direct search will take you to view contact. If you last edited a contact record, Direct Search will take you into Edit Contact, from which you can then view contact).
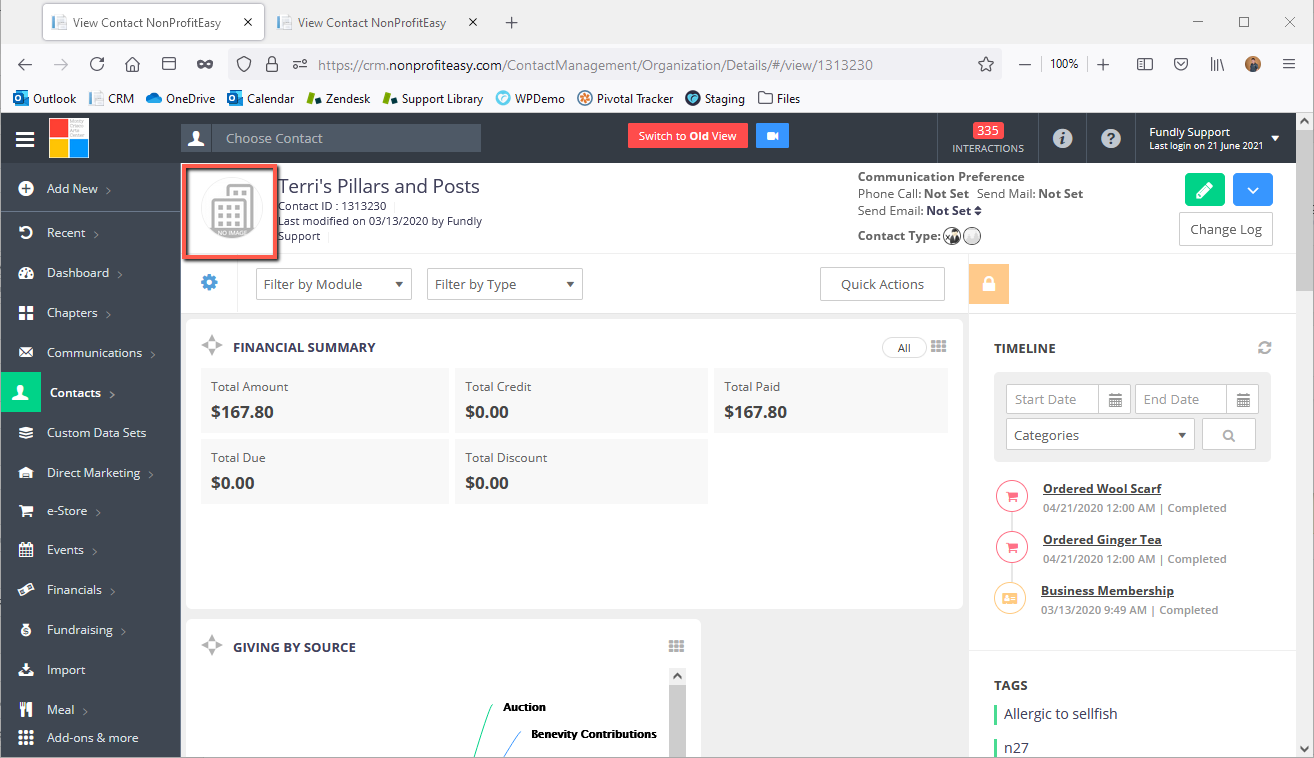
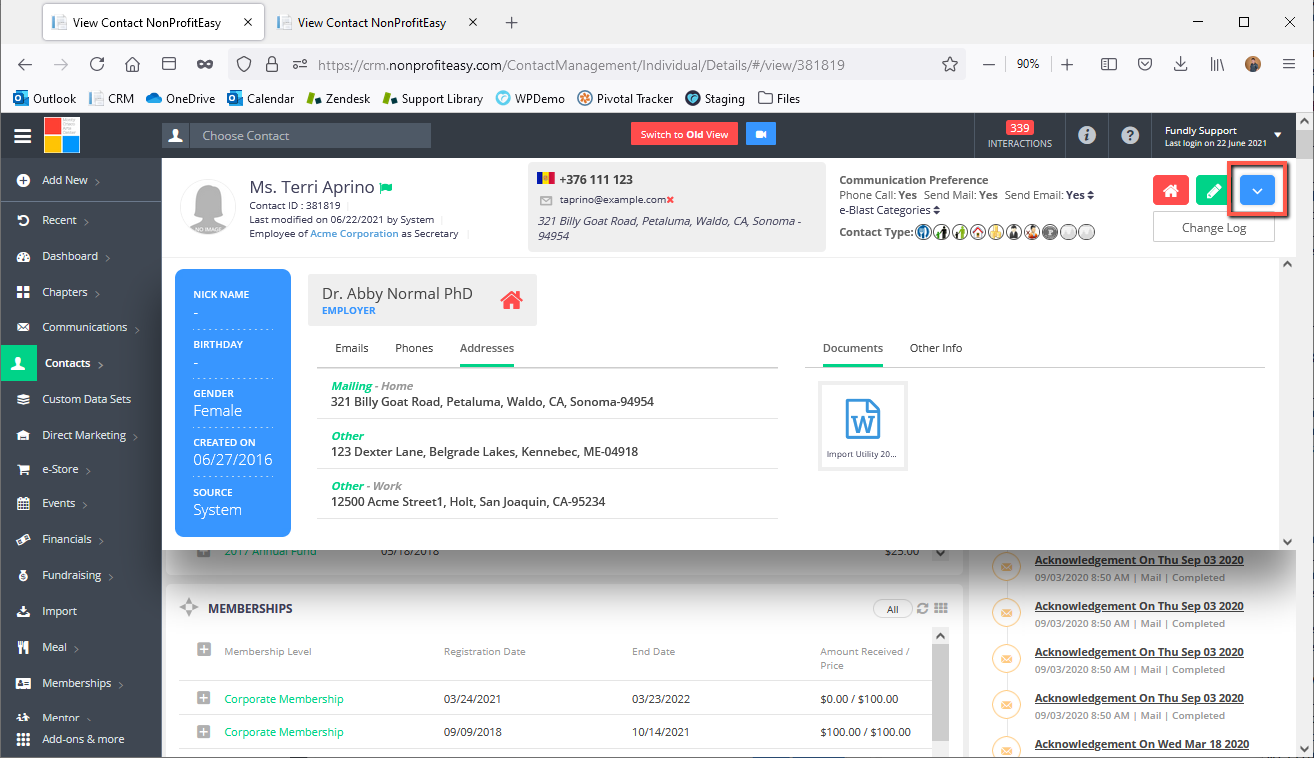
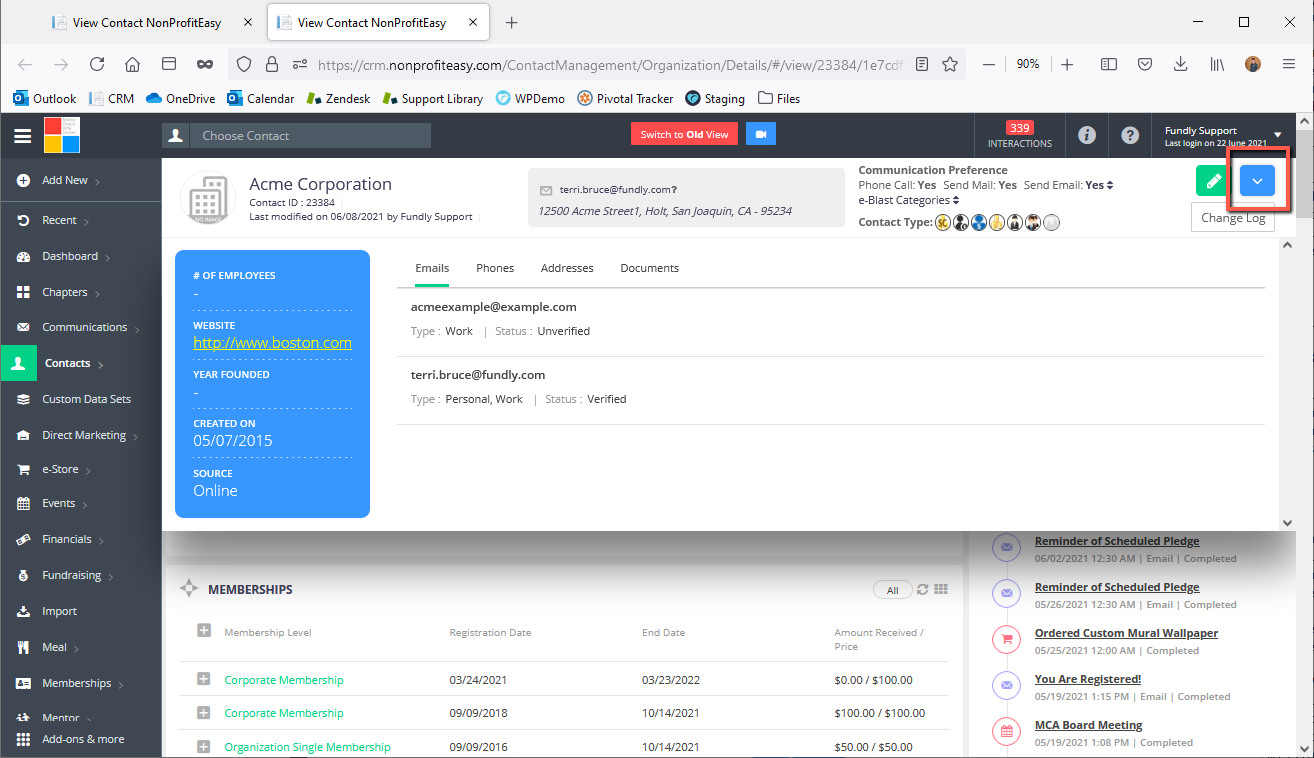
View Contact Information - If an image/picture is uploaded for the contact, it will display to the left of the contact’s name. If not, a placeholder/blank image will display. For individual contacts, if gender is specified, then a female silhouette will show if gender is female and a male silhouette if the gender is male. For organizations, the default image is a building.
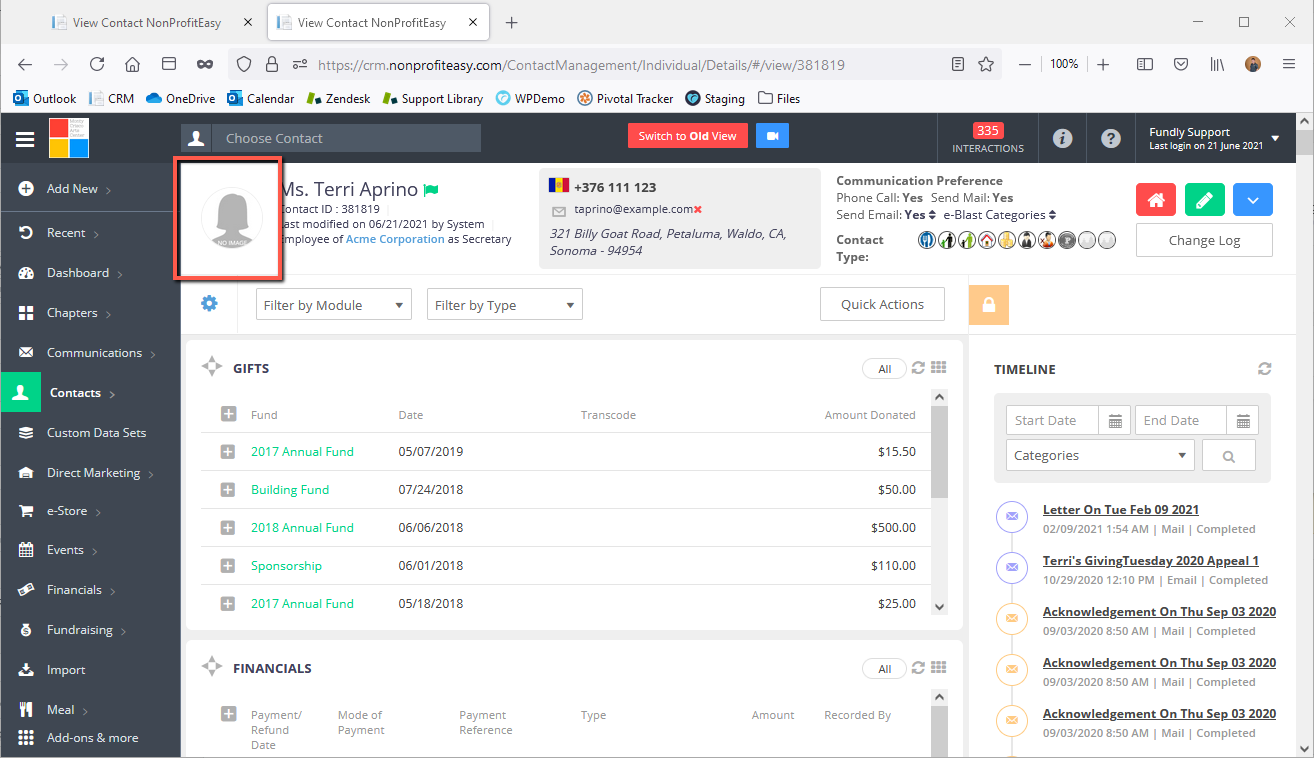
- Below the contact name will display the Contact ID – this is a unique identifier assigned by CRM. You can use this ID to search for contacts in Quick Search and Full Search and use this ID for duplicate prevention when importing records.

- Last Modified Date will show as:
- Online if through public website as a guest or through Fundly Connect or Fundly Pro sync
- User Name if through a CRM user
- Contact’s public profile user name if the contact has logged into their public profile and updated information via your website.

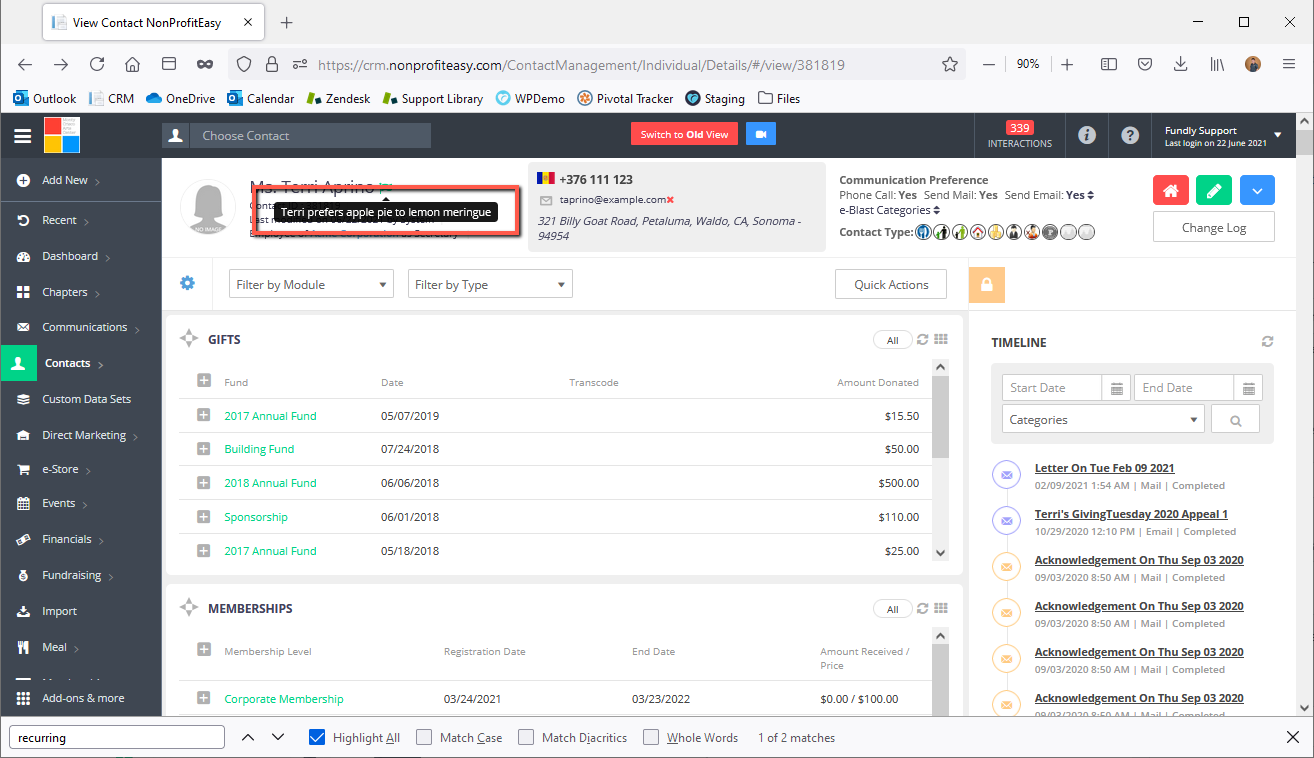
- Crucial Information is information relevant to the health, welfare, and safety of the contact or your staff. It will show up as a green flag next to the contact’s name if any is entered on the contact’s record. Hovering over the flag will reveal the details.

- The employer information and job title will be displayed under the contact ID number, if an individual is employed and the organization is a contact in CRM.

- The primary NP contact will also displayed under the employee info for individual contacts and under the last Modified date for organization contacts. See this tutorial to know what is primary NP contact.


- PRIMARY phone number, PRIMARY email address, and PRIMARY mailing address will display in the contact header. All other emails, phones, and addresses are found in the addtional info tab - the blue drop-down arrow on the upper right.

- Communication Preferences also display in the contact header. No contact can be sent an email through CRM if their communication preference for Send Email is set to No or Not Set; it must be set to Yes for the contact to receive any kind of email communication including donation acknowledgements, newsletters, event notifications, etc.

- Hovering on the upside arrow on the Send Email Preference will show the subscription history.

- Hovering over the Newsletter Categories will show you which newsletter lists the contact is subscribed to and any unsubscribe information. Unsubscribed by will show:
- MailChimp if unsubscribed by user/contact via MailChimp (only applicable if you have integrated your CRM with MailChimp)
- Contact's name if unsubscribed via a newsletter sent via CRM (by clicking the unsubscribe link at the bottom of the newsletter)
- Staff member user name if unsubscribed directly in CRM by a staff member
- "System" when unsubscribed due a spam complaint from SendGrid our bulk email provider (either contact marked your email as spam or contact's email provider flagged your email as spam).

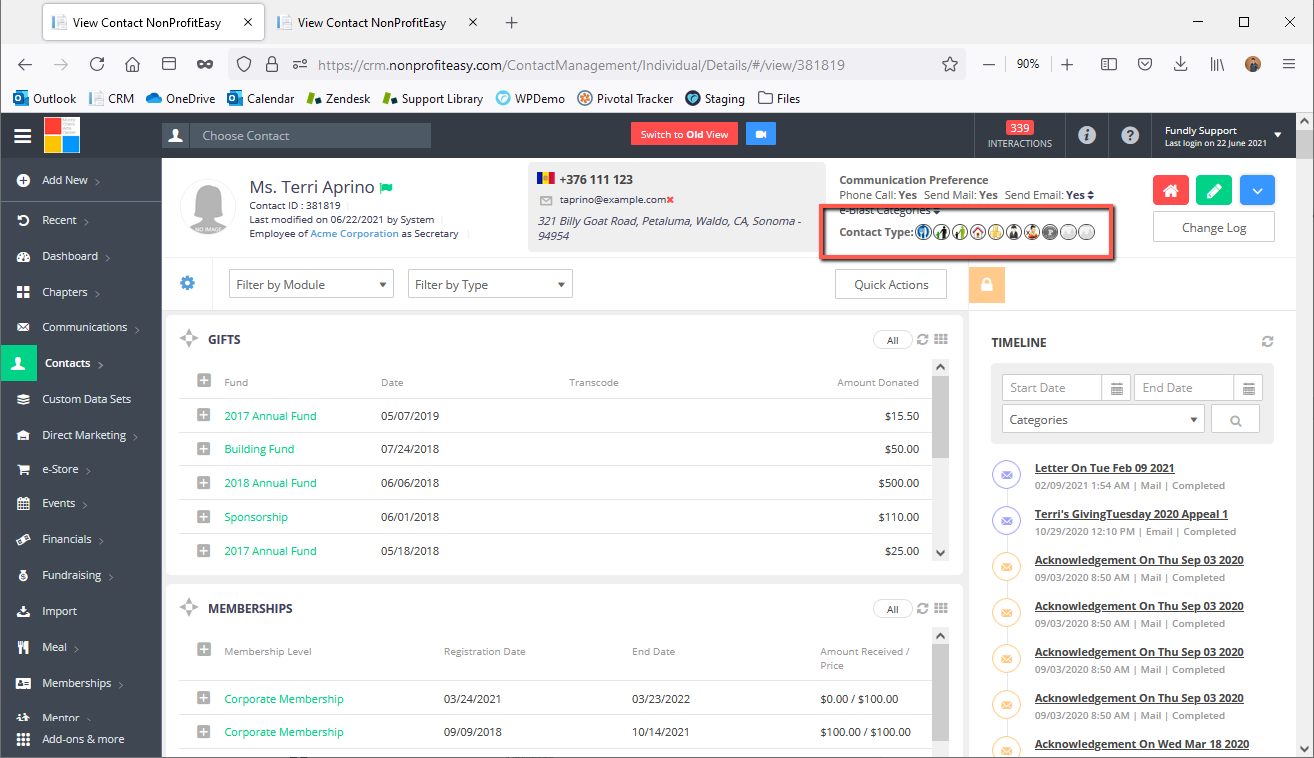
- Under the Communication is the e-blast categories, which will also show all the categories that the contact is subscribed to on hover. This will only show if the Send Email communication preference is set to Yes.
Contact Types - Contact Types will show up on the contact header under the communication preference. Hovering over a contact type will reveal the contact type’s names/details. Please Note: the Member and Donor contact types will still show on a contact record (if previously assigned to that contact) even if you have the Membership and/or Fundraising modules turned off.
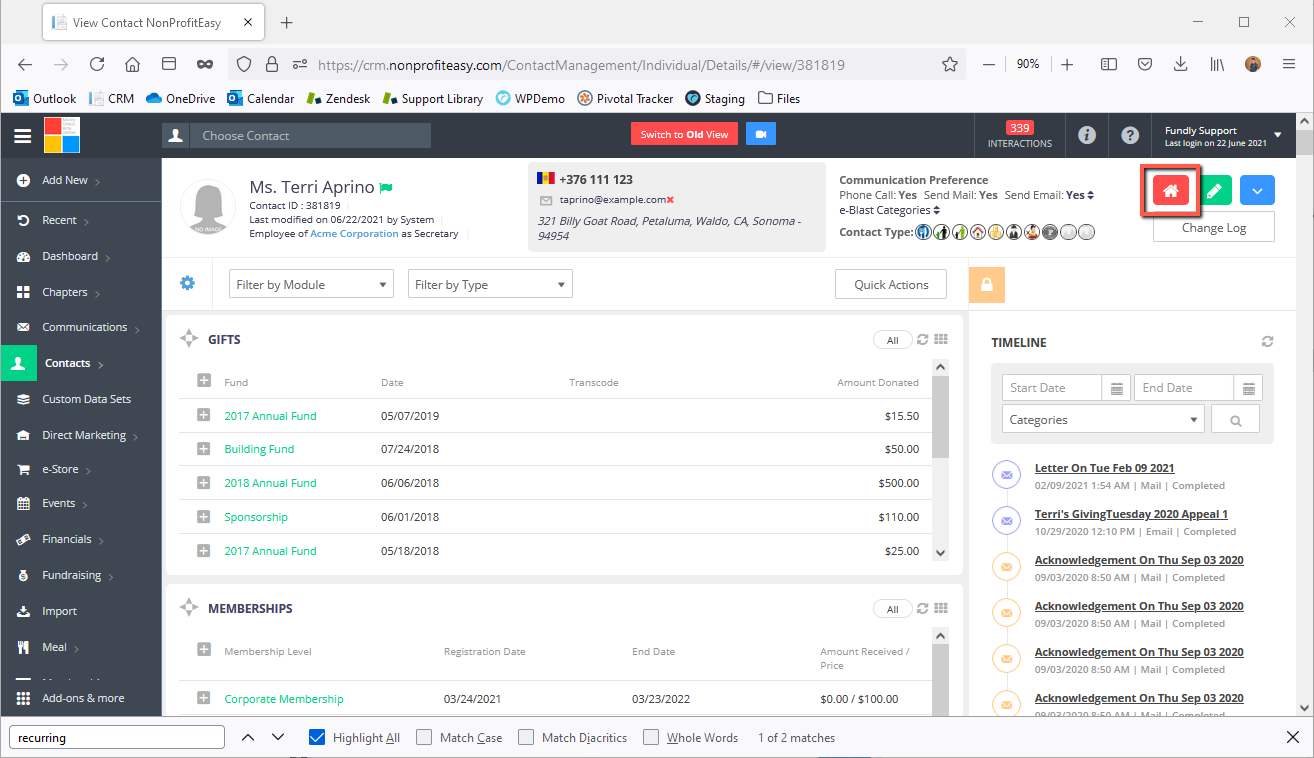
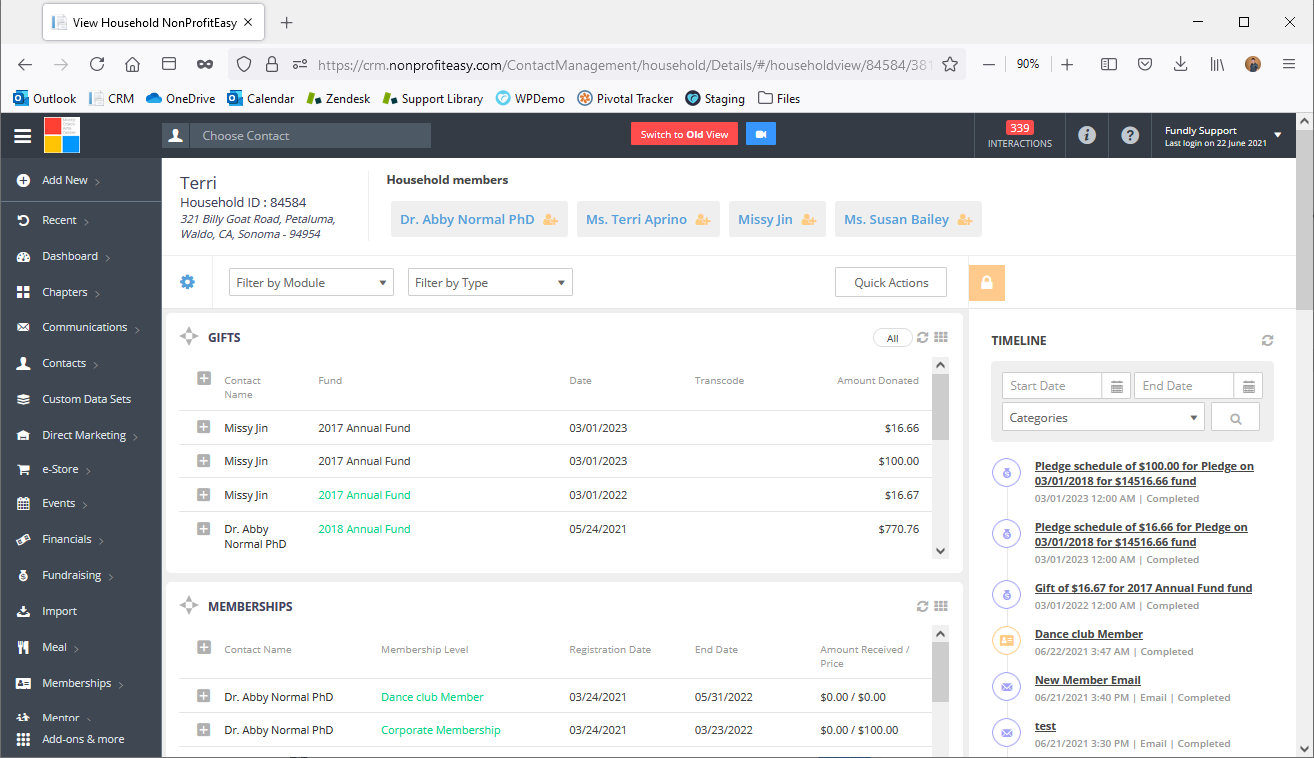
- If an individual contact is in a household, they will have the Household View (House Icon). Clicking this will take you into a “roll up” view that will show information for the entire household/all contacts in the household together.
- The green pencil icon is the EDIT button. Click this to make changes to the contact record.

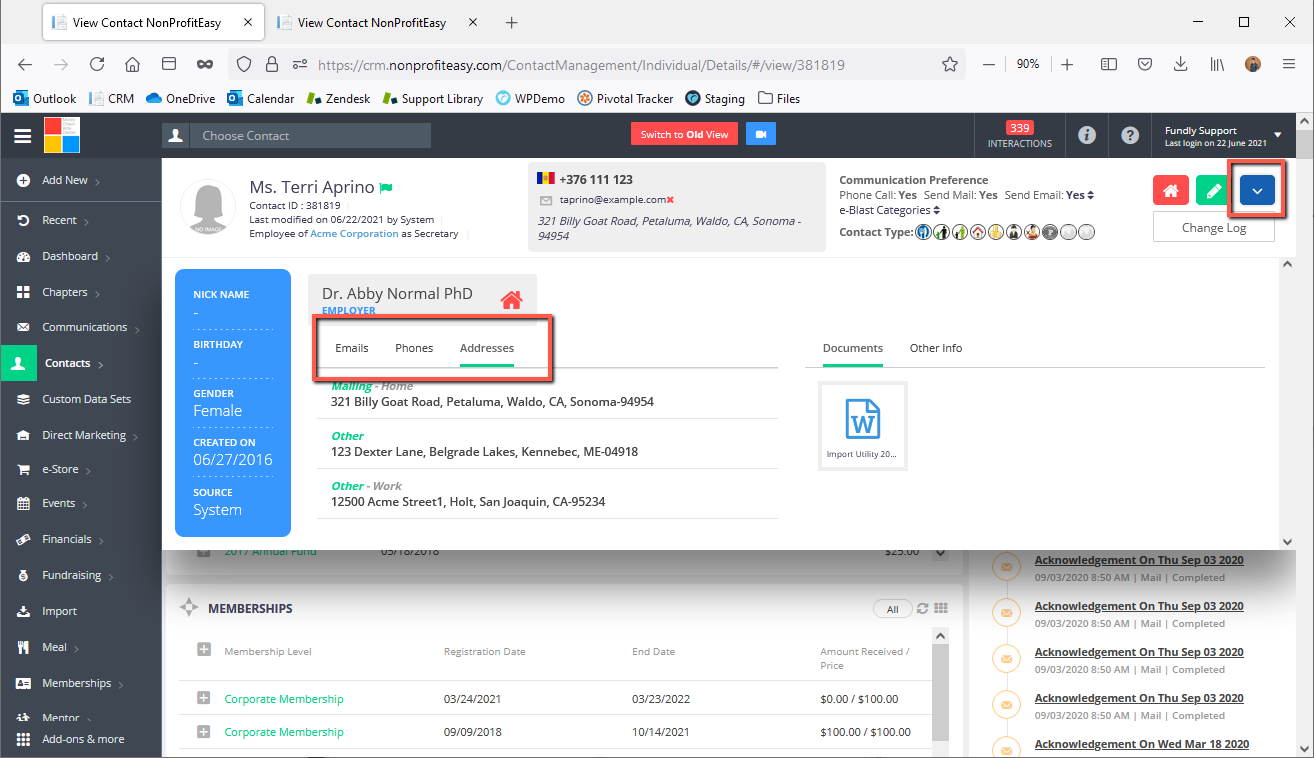
- The blue drop-down arrow will display all additional Personal Info (for individuals)/Organization Info (for organizations), documents, other phone numbers, email addresses, or addresses, and some of the contact’s demographic/basic information.
- Email addresses in the header will display:
- a green check mark and the word verified (if you hover it) if you have successfully send the contact an email via CRM
- a red X (and the word bad if you hover over it) if you have attempted to send the contact an email through the system but the email was undeliverable. Additionally, the reason the email is marked as bad will display in the Email & Phone area (see this tutorial for more information on bad email statuses)
- a gray check mark (and the word unverified) if you have never attempted to send the contact email through the system.
- In the additional info tab, its will be displayed (written) its status and email type.

Change Log
- The Change log will show the Changes made to the contact records. Click here to know more about what change log is and how it works.
Timeline -
Beside the quick action menu is a lock icon that allows you to lock/unlock the timeline.

- The timeline displays a record of all engagement with the contact: event registrations, memberships, donations, tasks and interactions, and communications sent to the contact. You can click on the timeline entry to view the entry details.
Note: System does not delete the timeline entry in real-time, as deleting is resource consuming process. We have weekly scheduler, which runs during the weekend to clean up such entries. So entries will be deleted from timeline over weekends.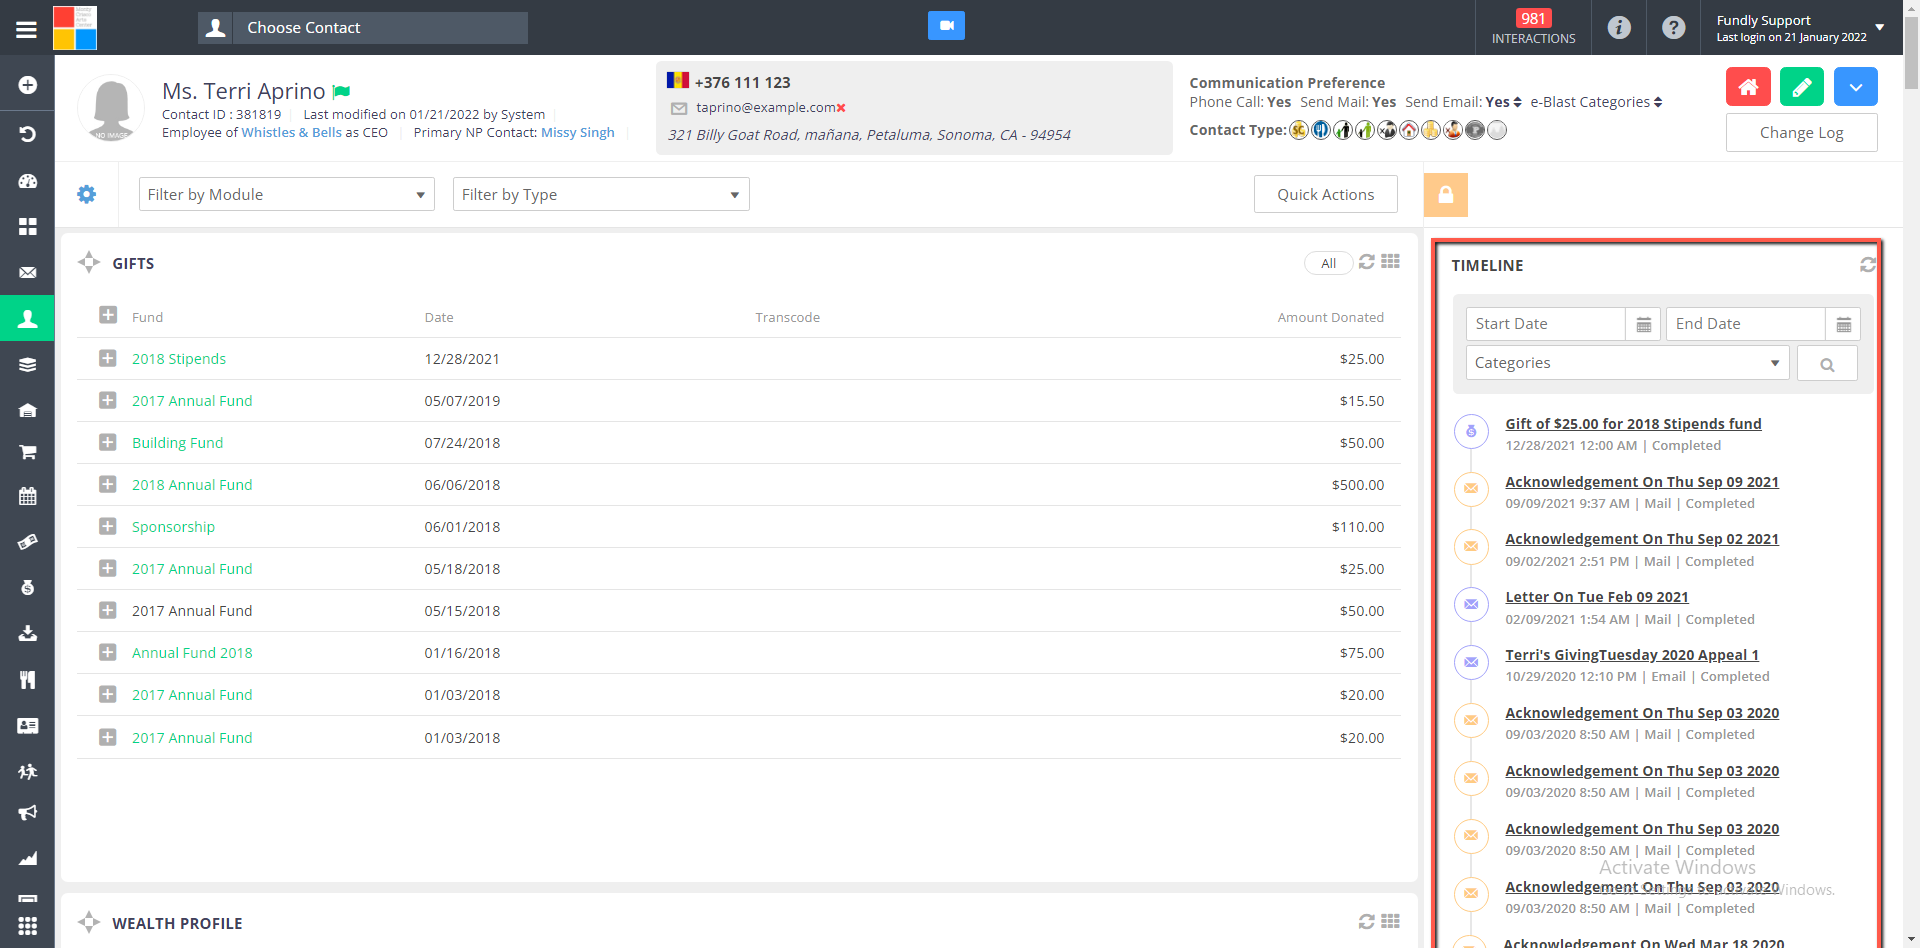
- You can filter timeline entries by start date, end date and categories(event registrations, memberships, donations, tasks and interactions, and communications sent to the contact).

Back to top
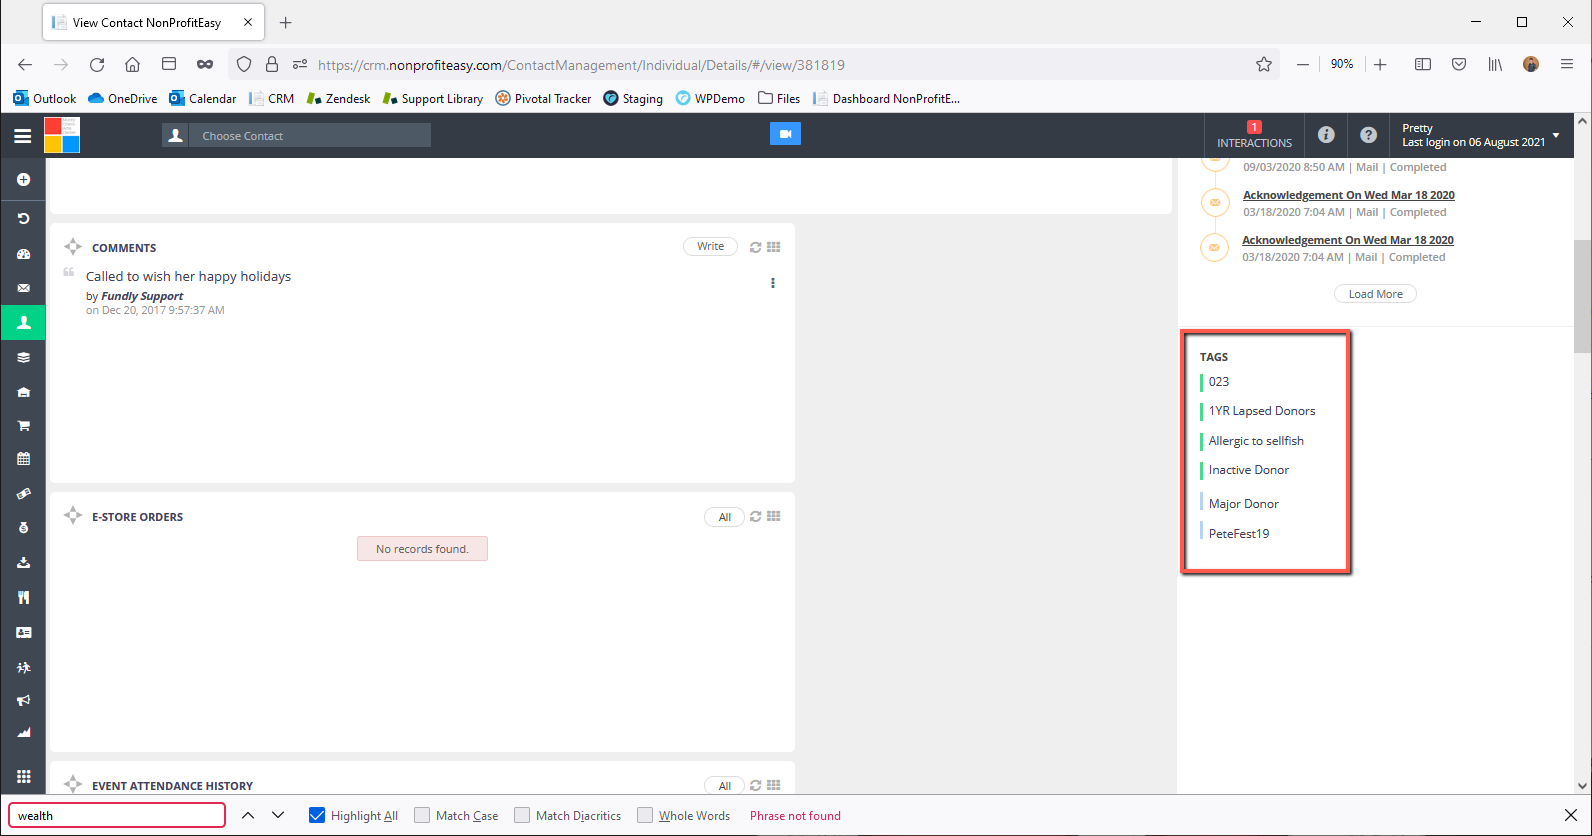
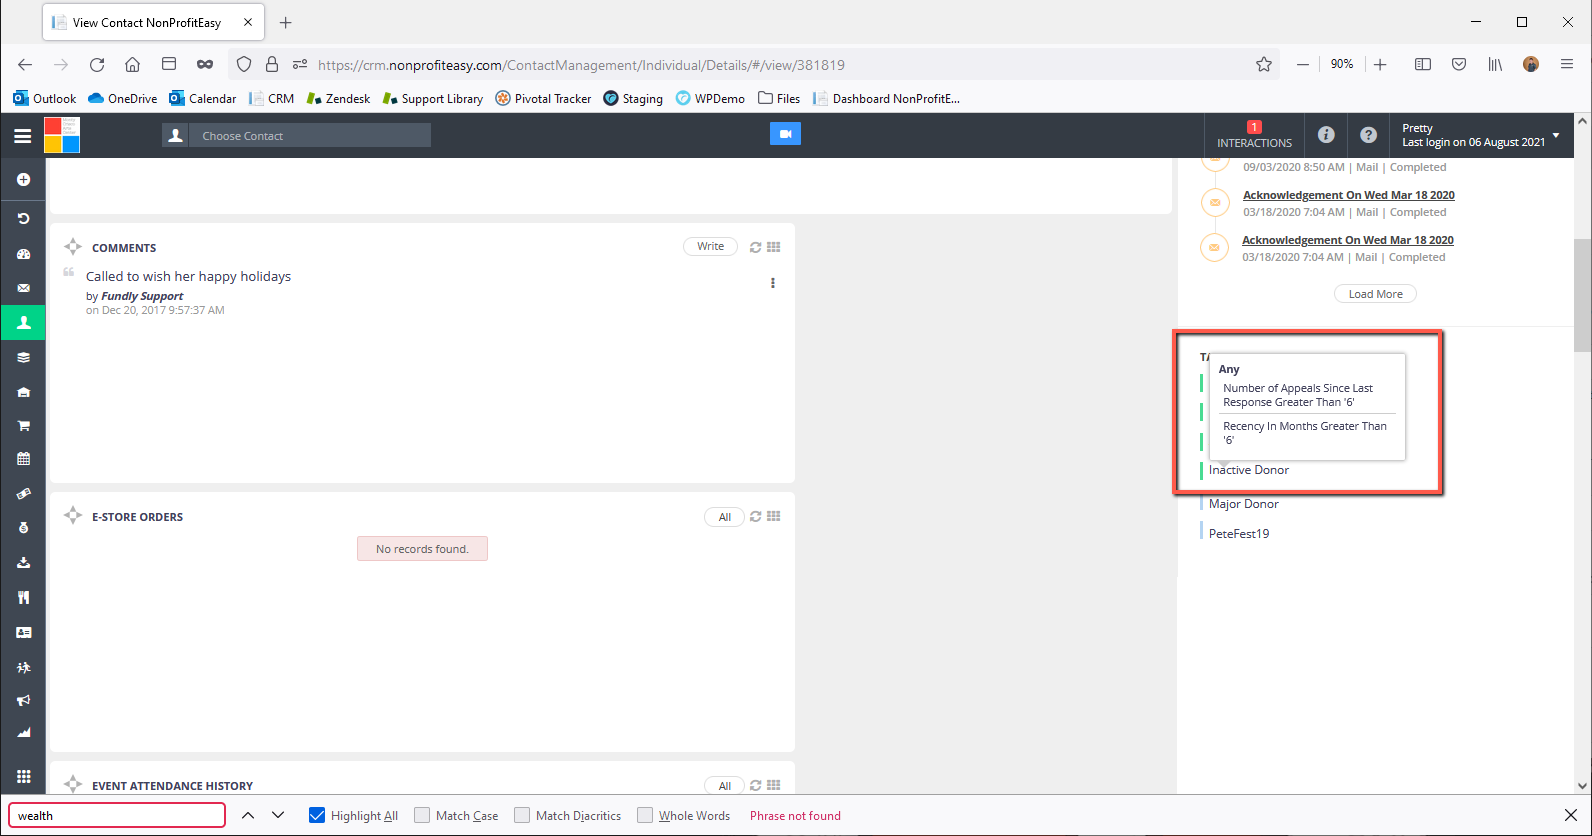
View Tags
- Tags display below the Timeline. There are two types of Tags – regular tags that are manually entered by staff and Smart Tags, which are rules the user gives the system for when it should automatically apply or remove a tag to a contact record. Smart Tags will have a green bar on them and will display the rule used to apply the tag to the record when the user hovers over the tag.
Types of Widgets and their features
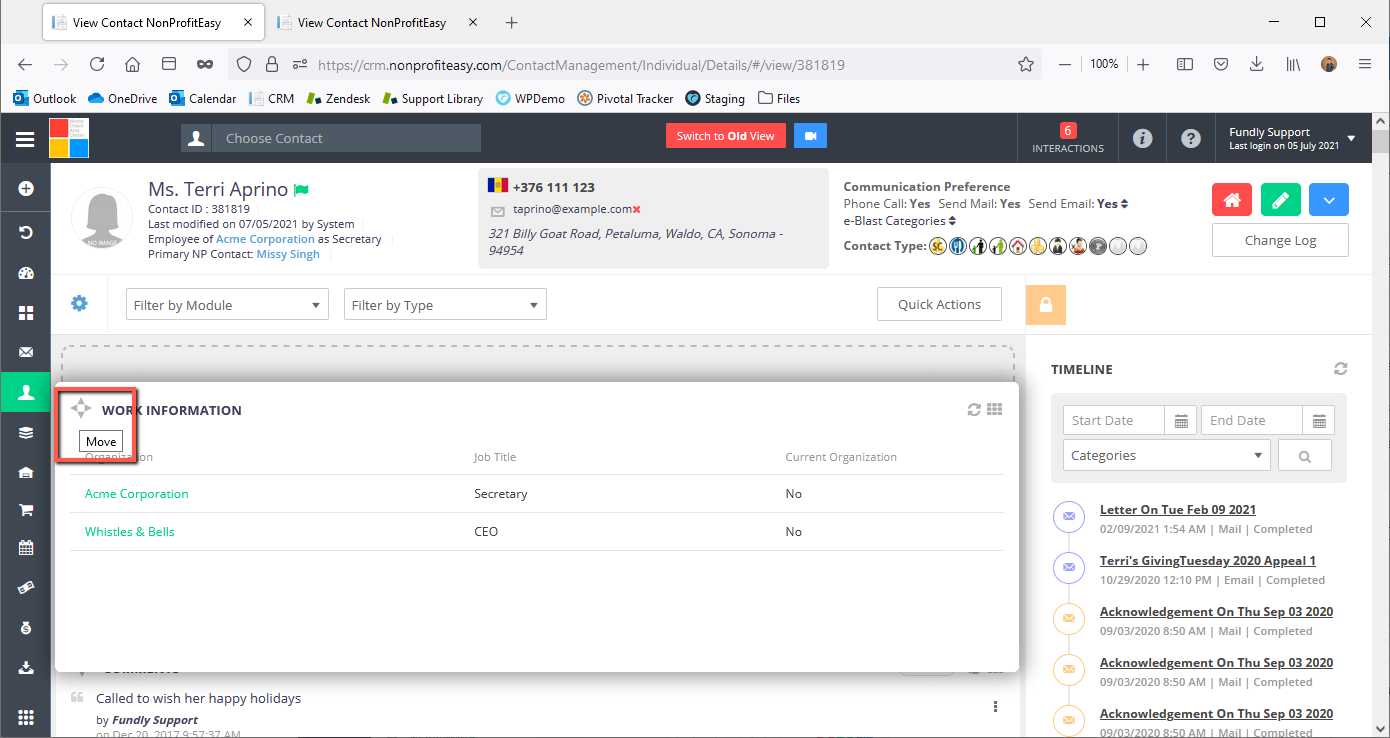
- In each widget, you will see the 4 headed arrow on the top left of the widget which will allow you to drag the widget to change their order and a 3x3 box icon on the top right which will allow you to resize the widget.

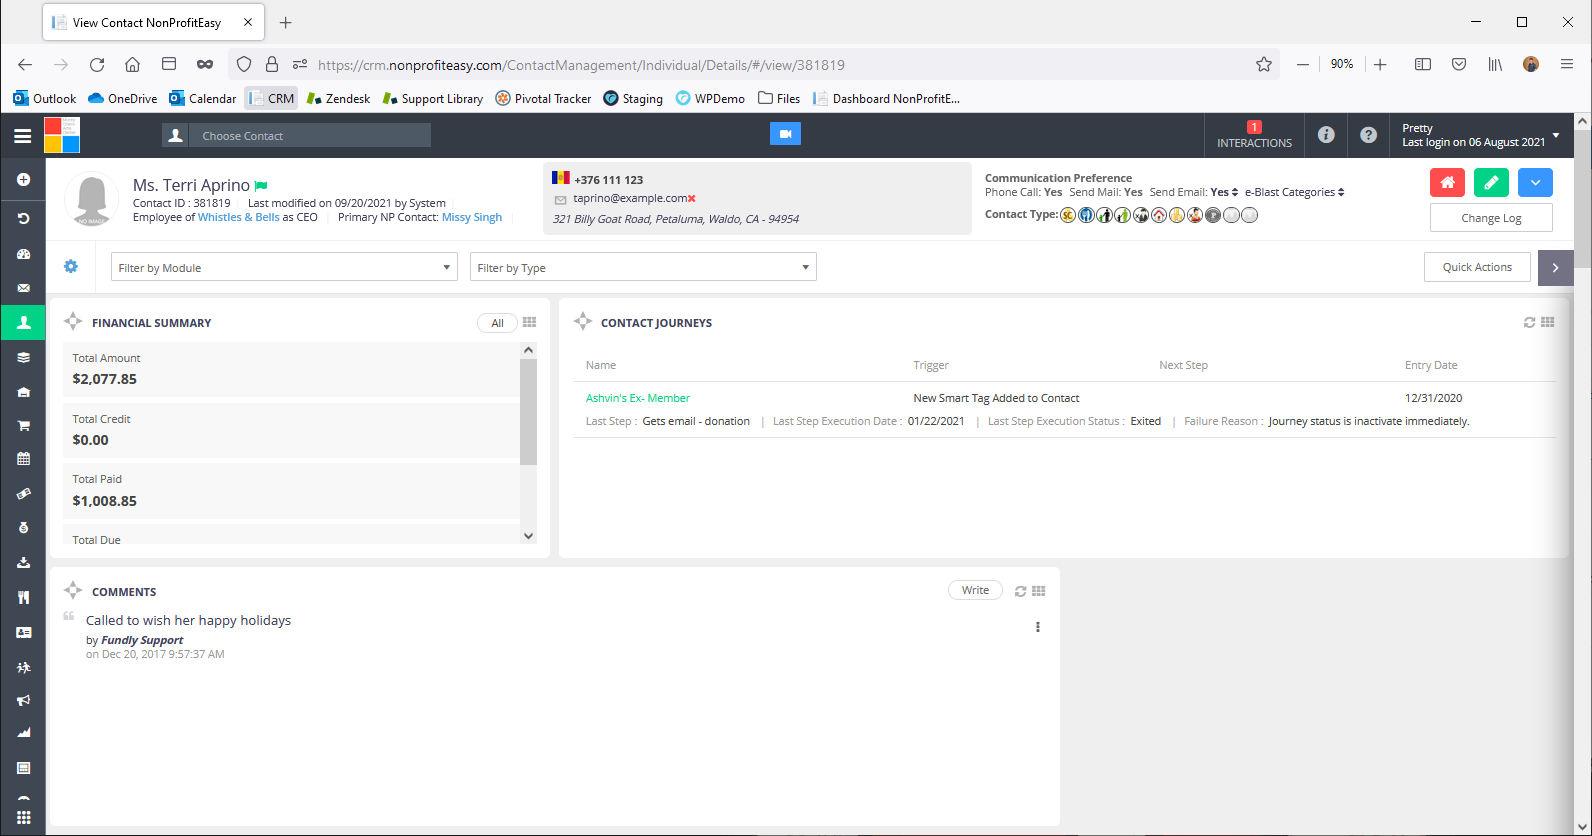
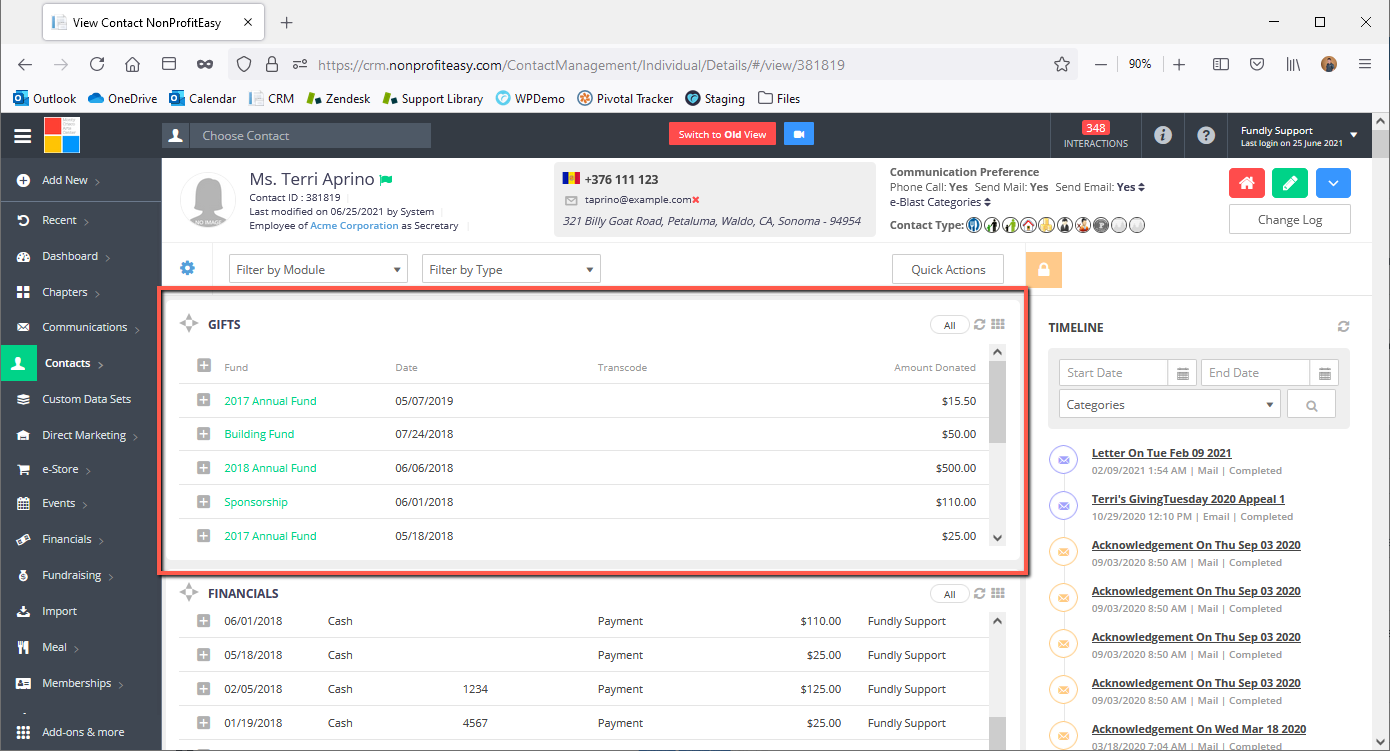
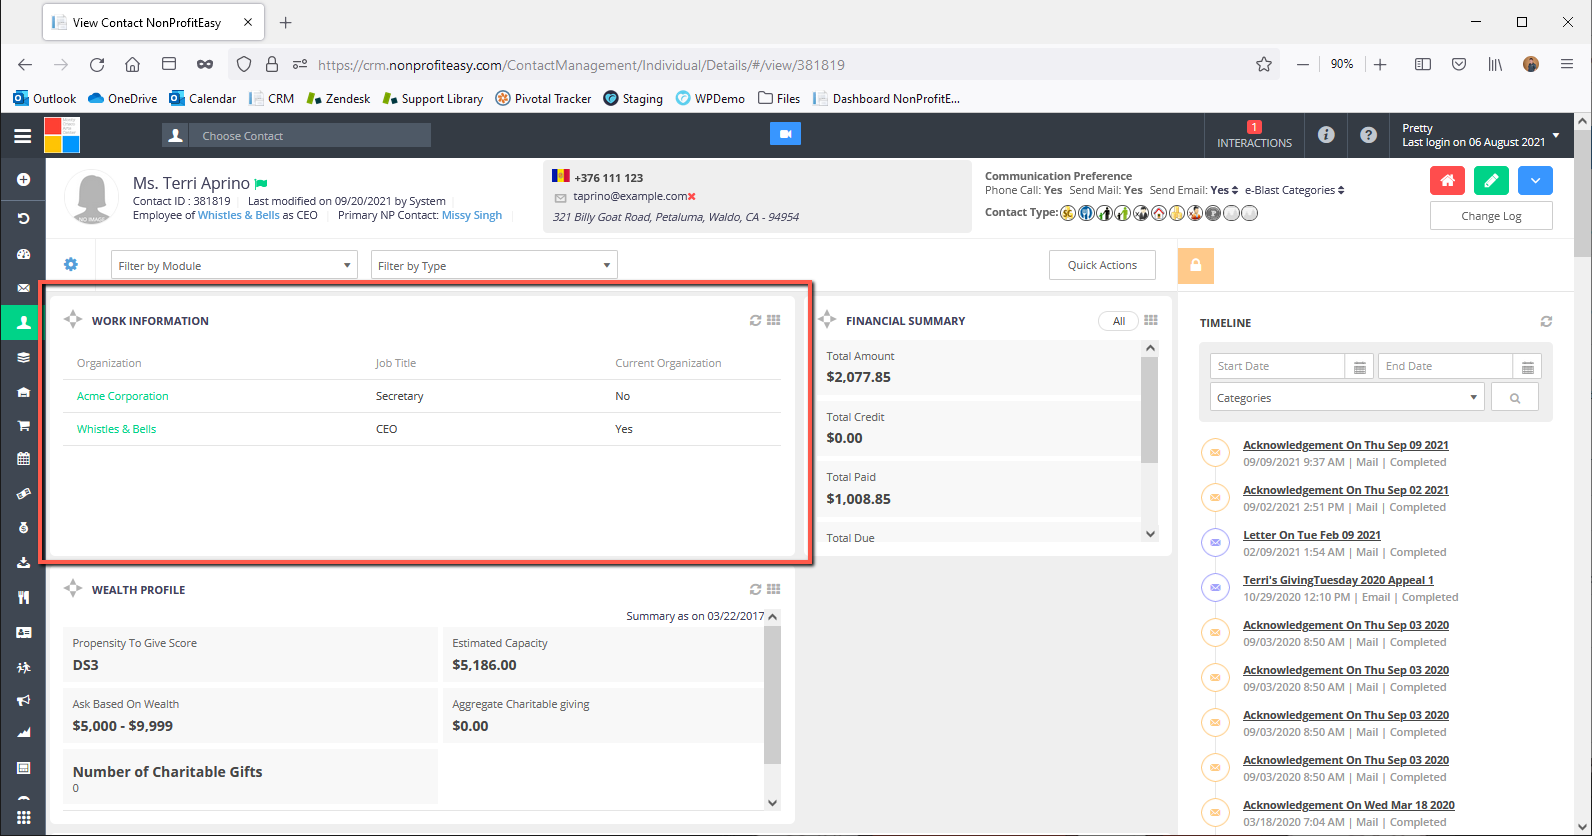
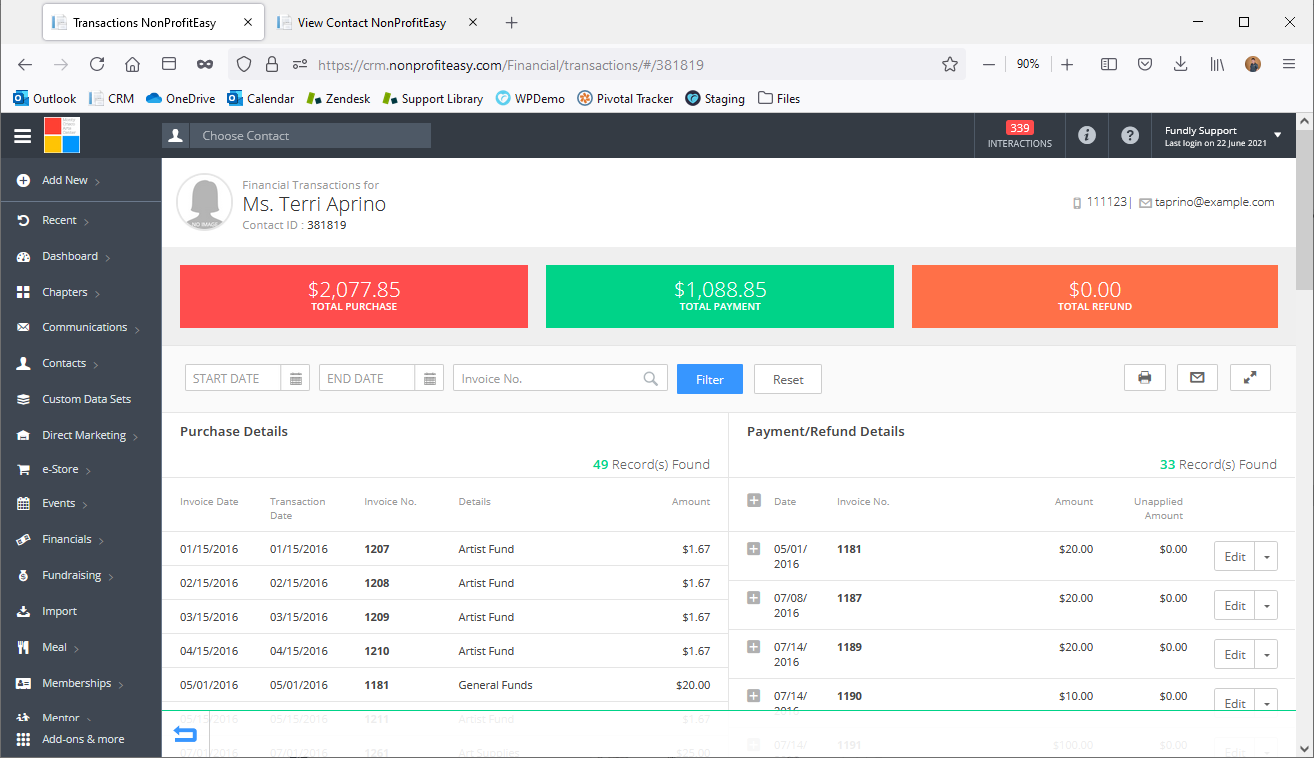
- The Financial widget shows details of PAID financial transactions; the Gifts widget shows just financial transactions related to donations/gifts (this is a sub-set of the financial details tab). Click the View All button at the bottom of either tab to see all transactions.

- Please Note: Unpaid pledges will not show on the Financial Details or Giving Details tabs. You can see unpaid pledges in the Pledge Details widget. Also, soft credit donors will not have an entry on their Giving Details or Financial Details tabs. Instead, their donations will show in the Soft Credit widget.


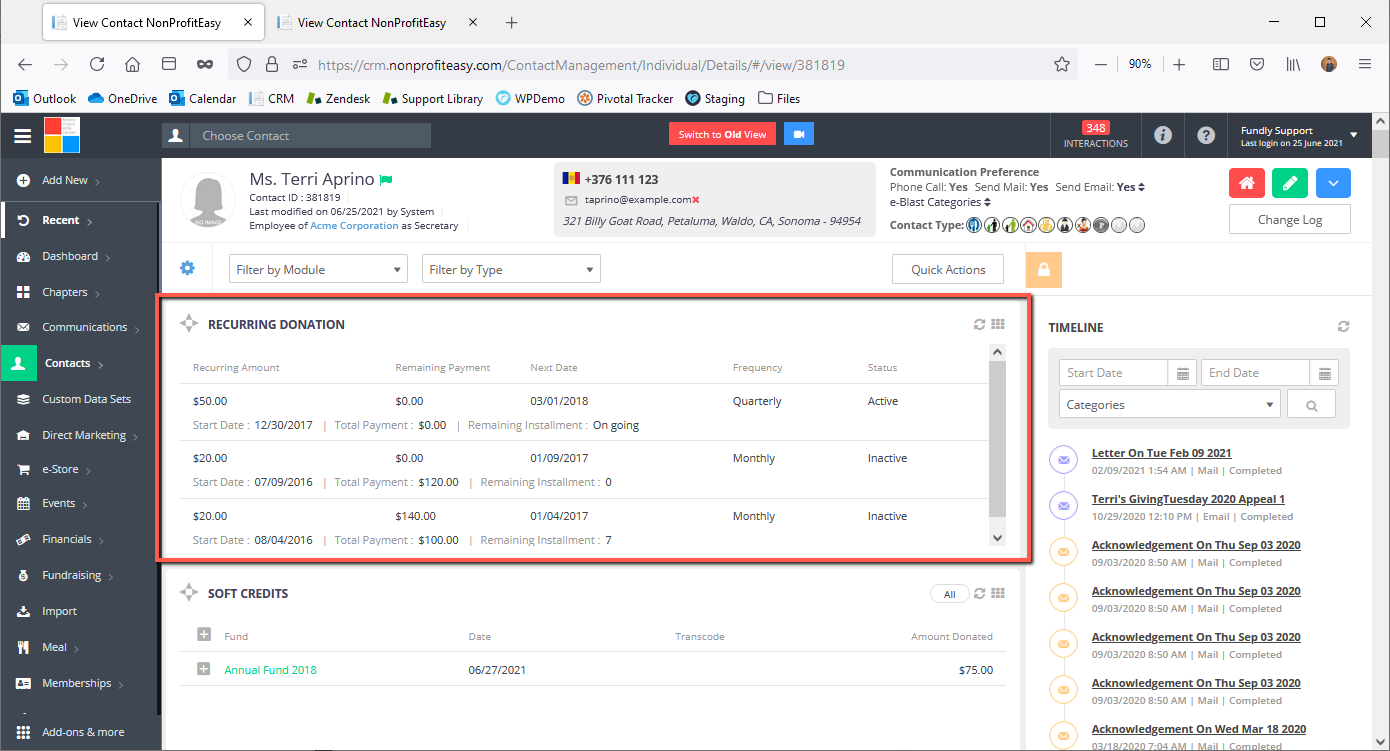
- Recurring Donations WILL show on Giving Details and Financial Details. They also have a separate widget to view them. You can manage recurring donations on the recurring gift profile index screen. Main Menu ; Fundraising: Recurring Gift Profile.
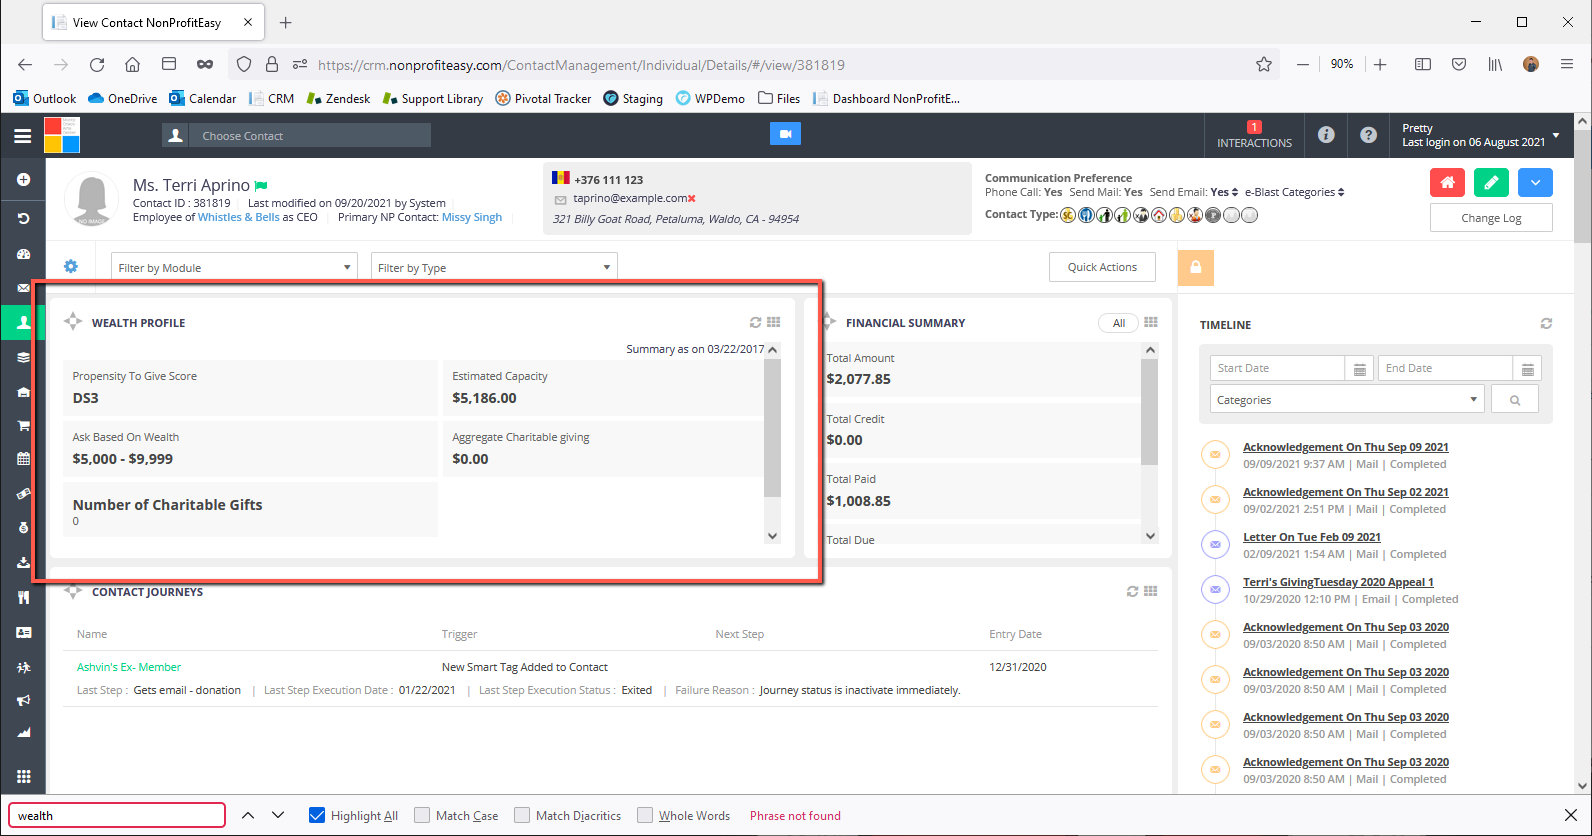
- If you previously used our integration with Donor Search (no longer available), the Donor Search Wealth Profile data has also its own widget. If you have run a Donor Search search on your contacts in the past, the information will populate here. If not, you will see only placeholder data. Please Note: it is no longer possible to update the Donor Search data in NPE as this integration is no longer available.
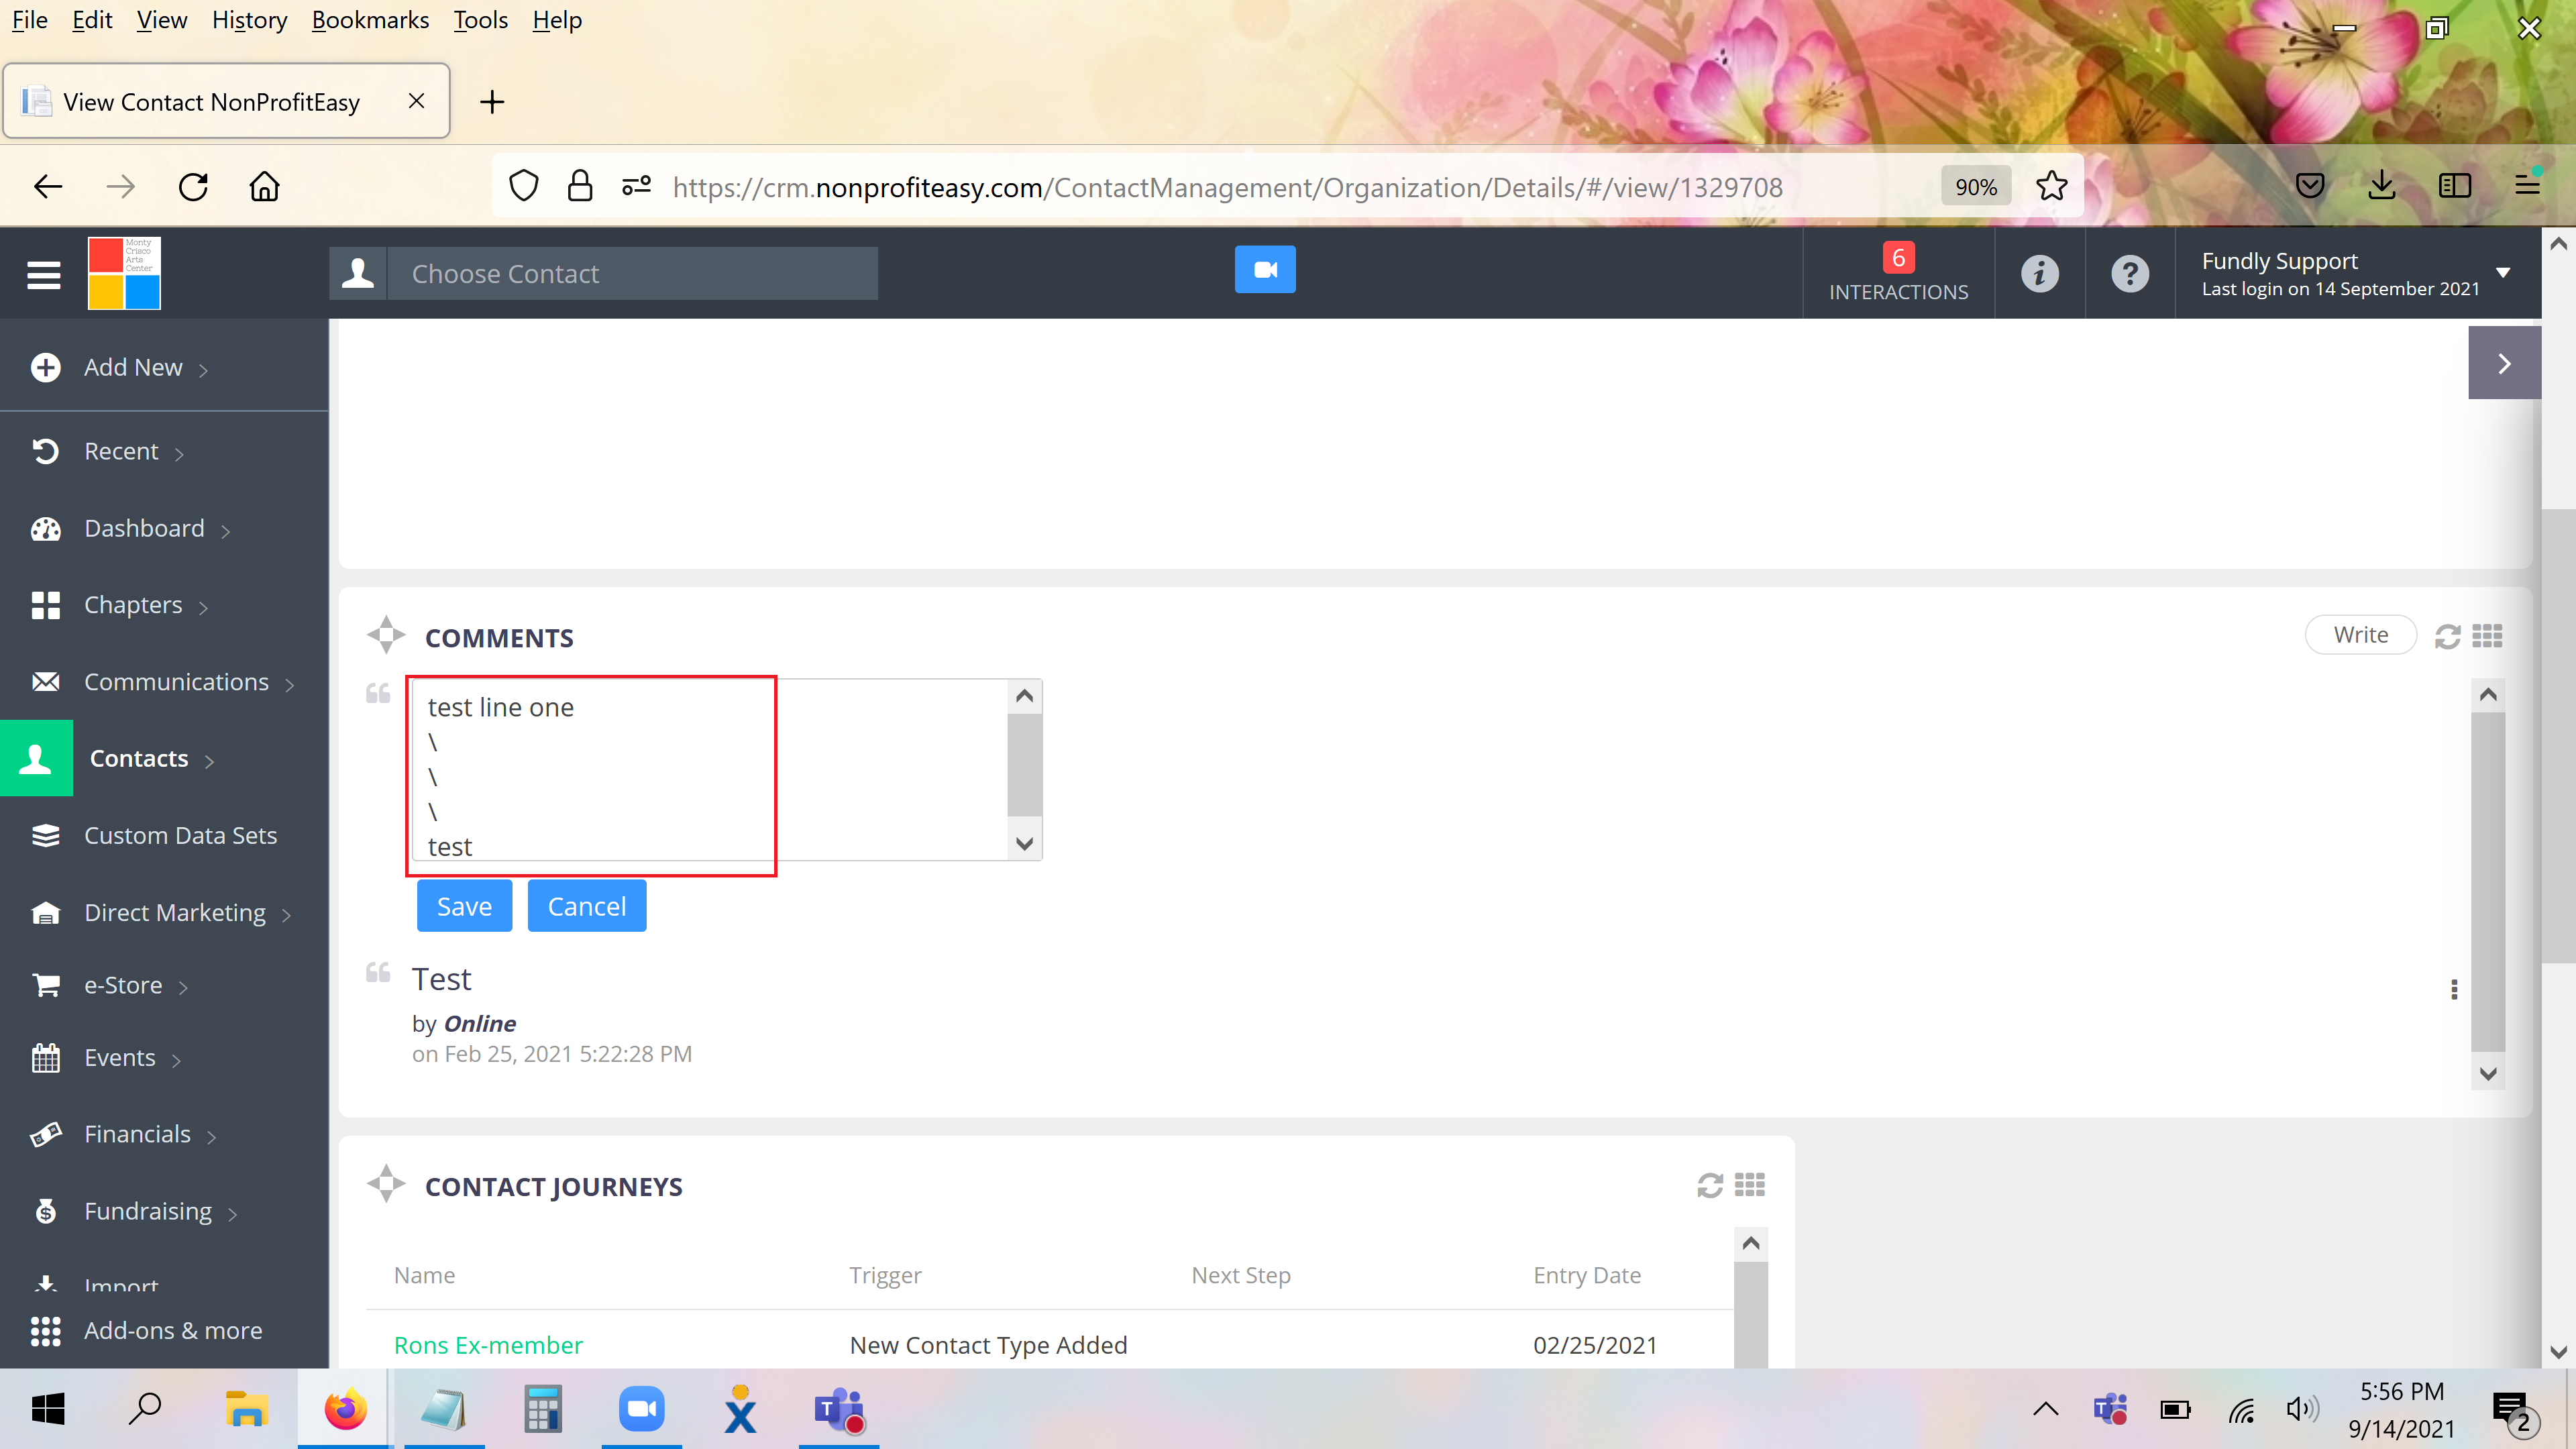
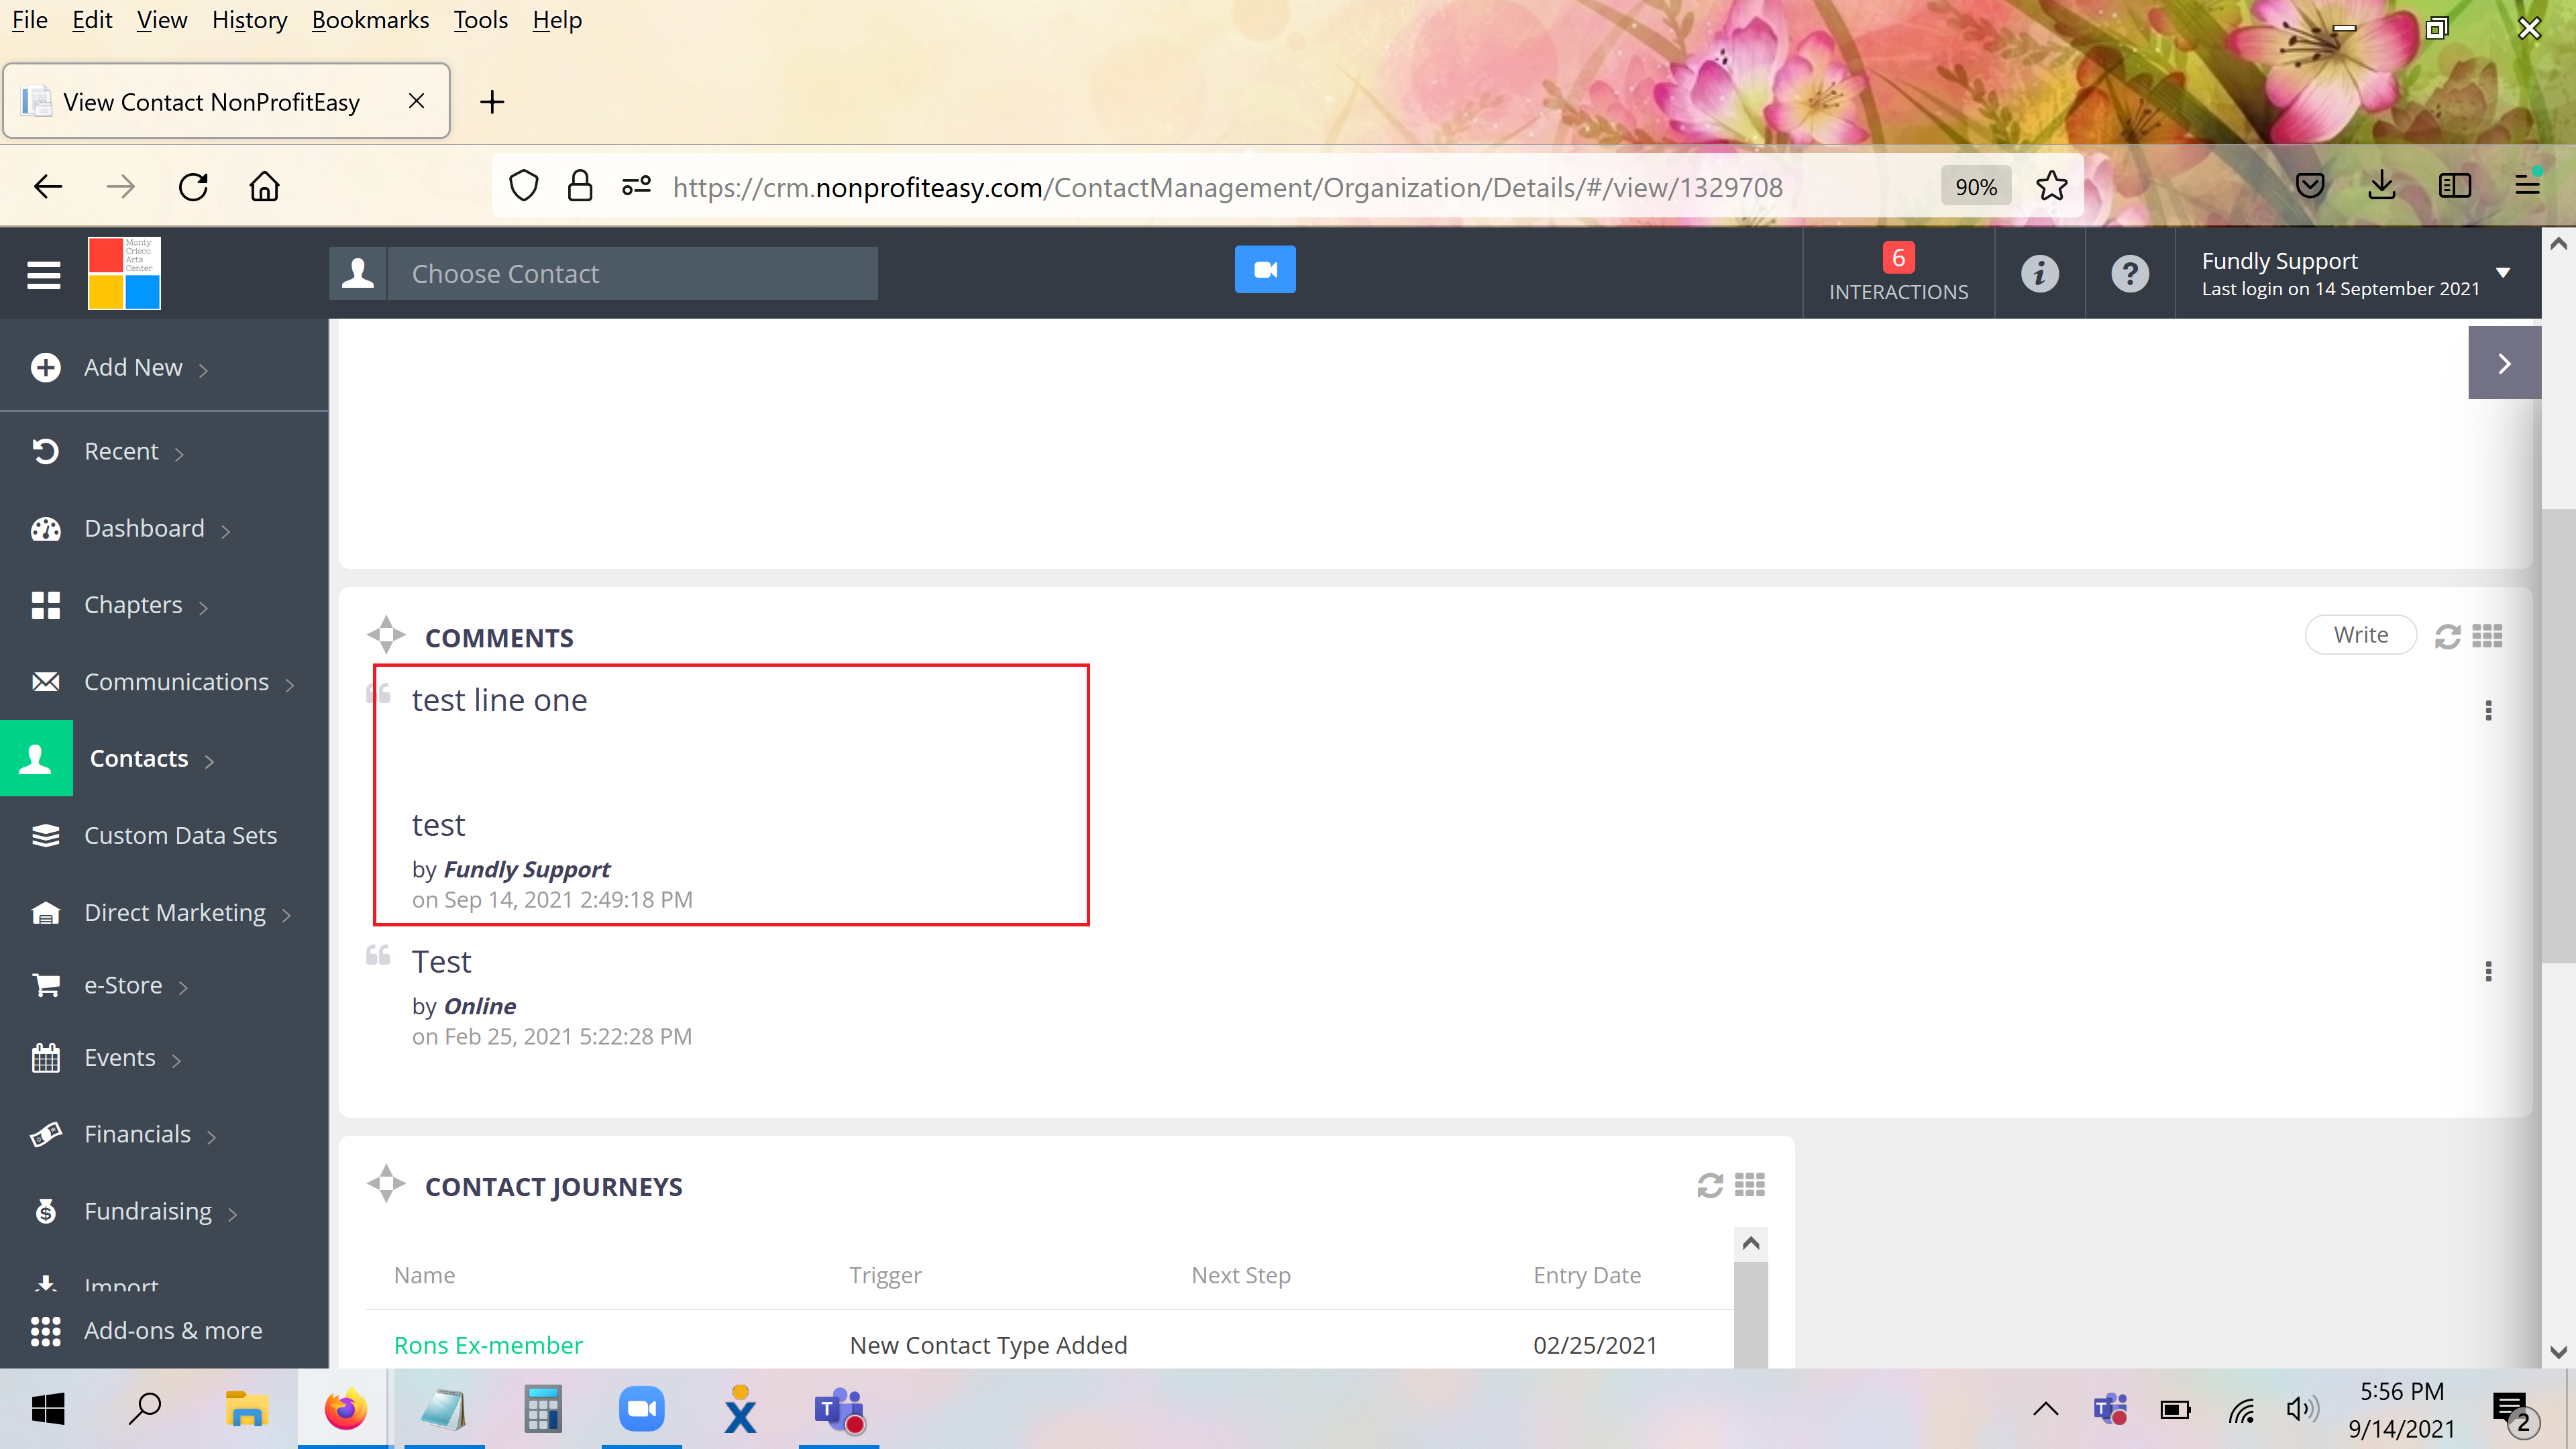
- Special Comments widgets will display any comments entered directing into the special comment field on the contact record AND any comments entered on tasks and interactions. Users can enter special comments from here or while editing a contact record. Please Note: to enter visible line breaks/paragraph returns (that will display on view contact), use the backwards slash (\) key along with the enter key as pictured below.
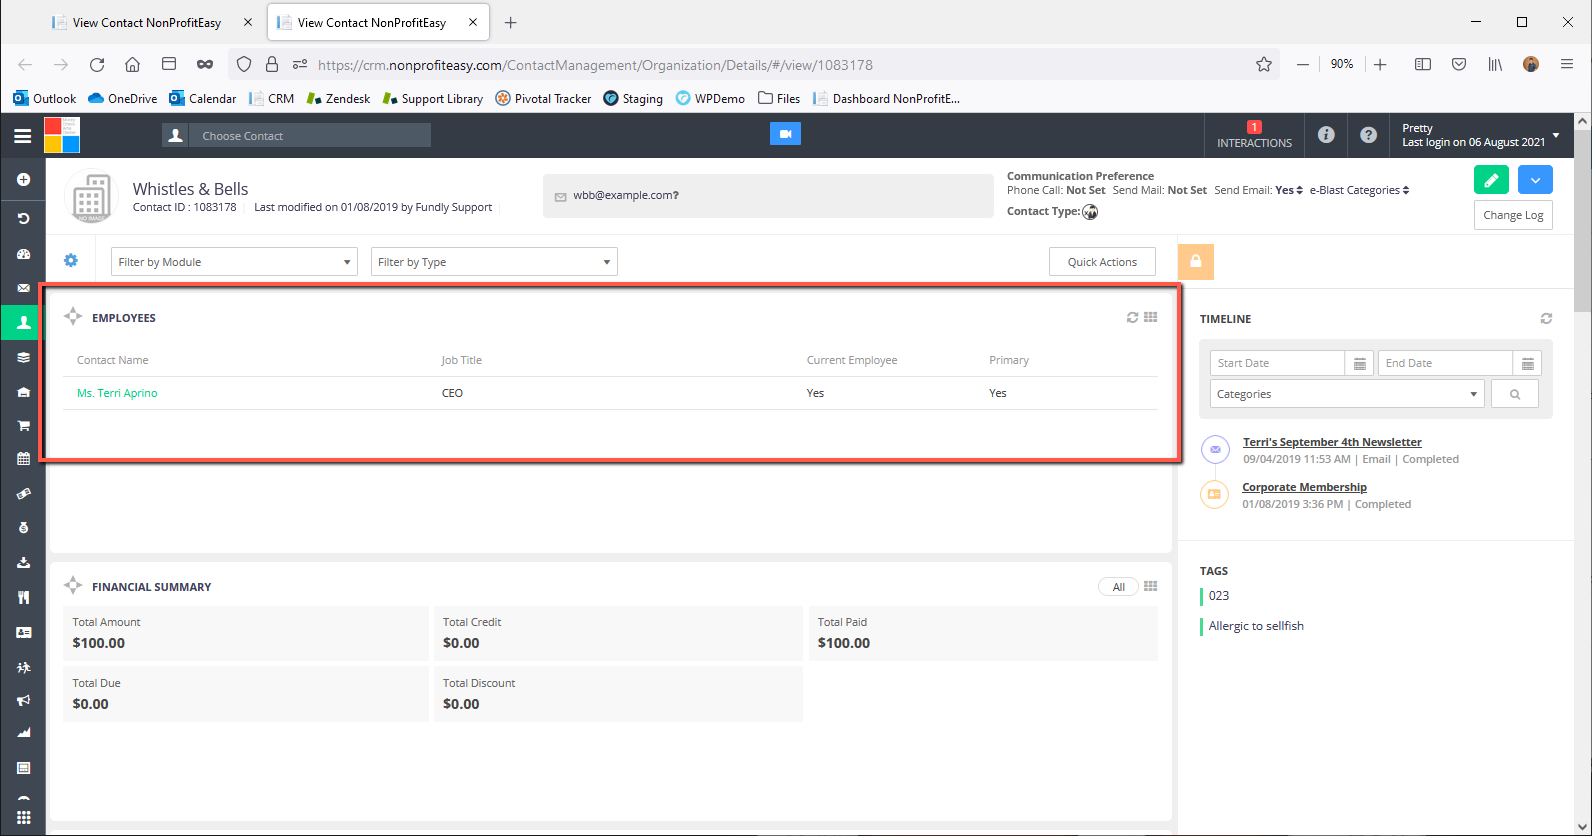
- If viewing an individual contact, there will be a widget for Work Info, which displays all work/employment history for the contact. If viewing an organizational contact, there will be a tab for Employees, which will display info on all individual contacts associated with the org as employees.
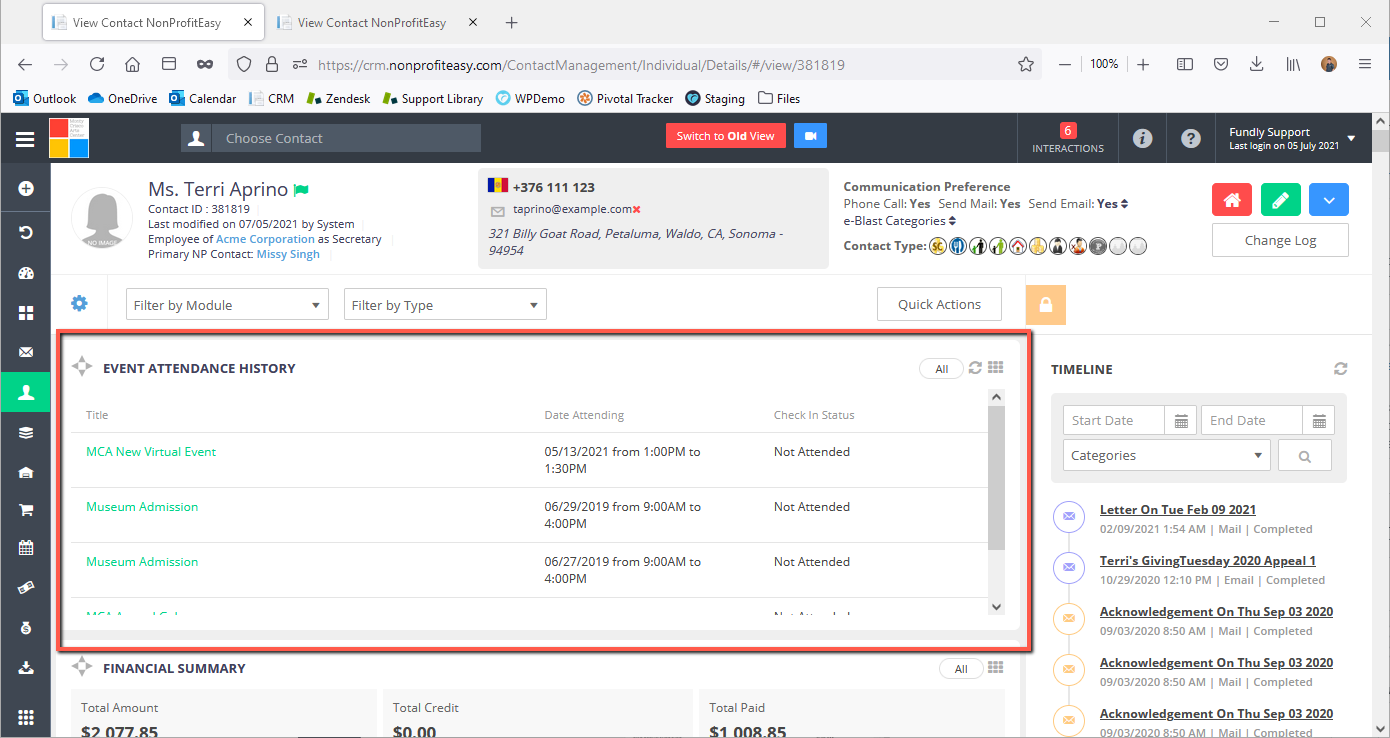
- The Event Attendance History widget will display event attendee data (attendance status). To see Event Registrant/Registration data, view the Engagement History module.
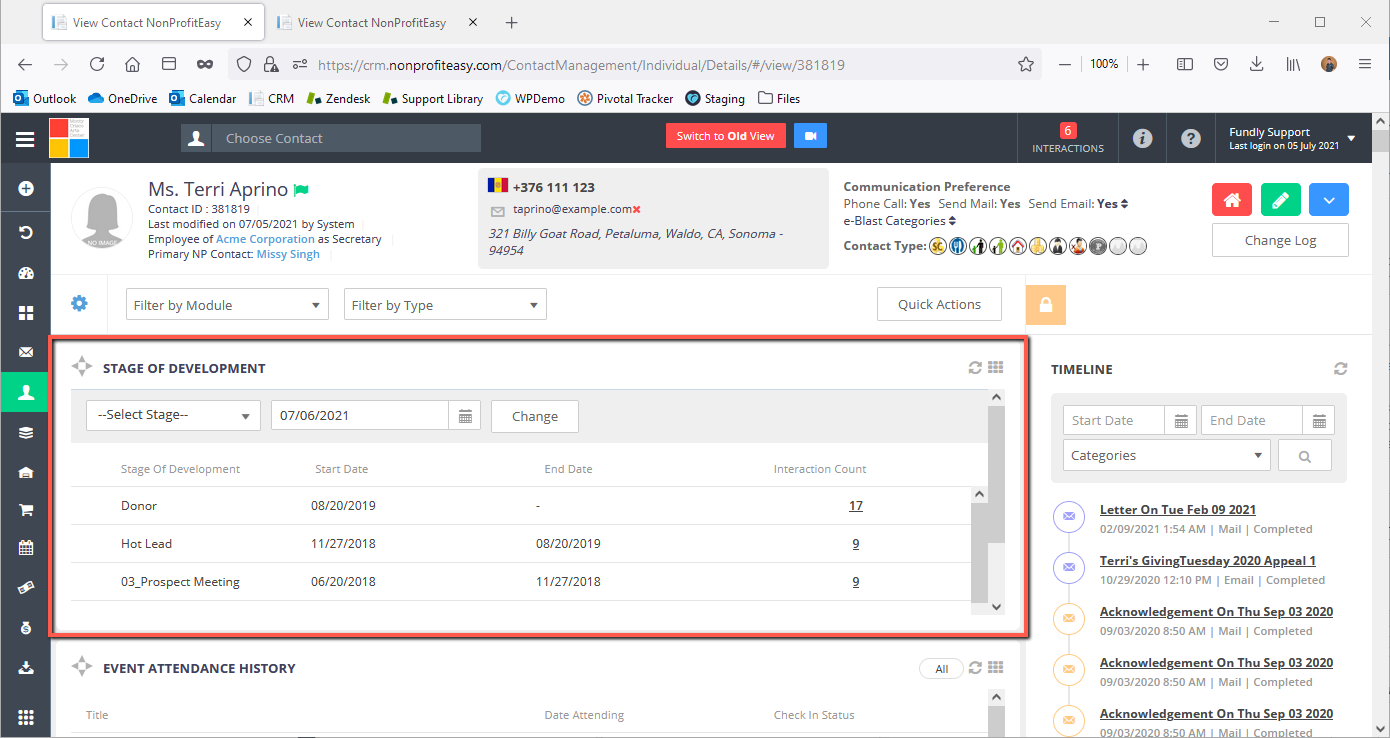
- The Stage of Development widget is for tracking the phases of pipeline development for donors, though it can be used for tracking other types of pipelines such as sales, supports, board members, mentors, etc.
- Volunteer Information synced over from the Fundly Connect volunteer management system will show in the Fundly Connect Information.

- NOTE: The above mentioned widgets are just few of the available widget that you can activate from the contact view.
Back to top
Widgets That Update Overnight
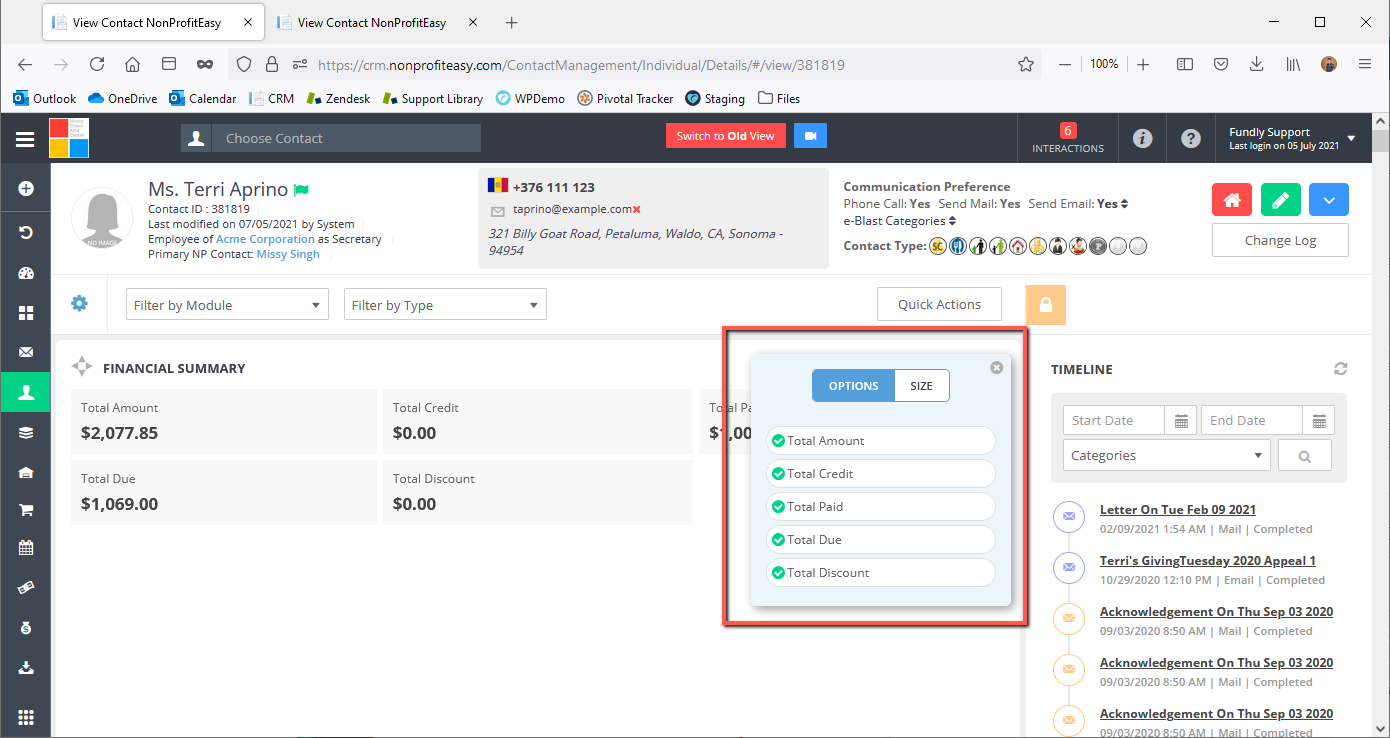
- Summary widget will give you 2 tabs when you click the 3x3 box icon, OPTIONS and SIZE. Options will let you pick the data you want to show in the widget. Please Note: all summary widgets update OVERNIGHT.
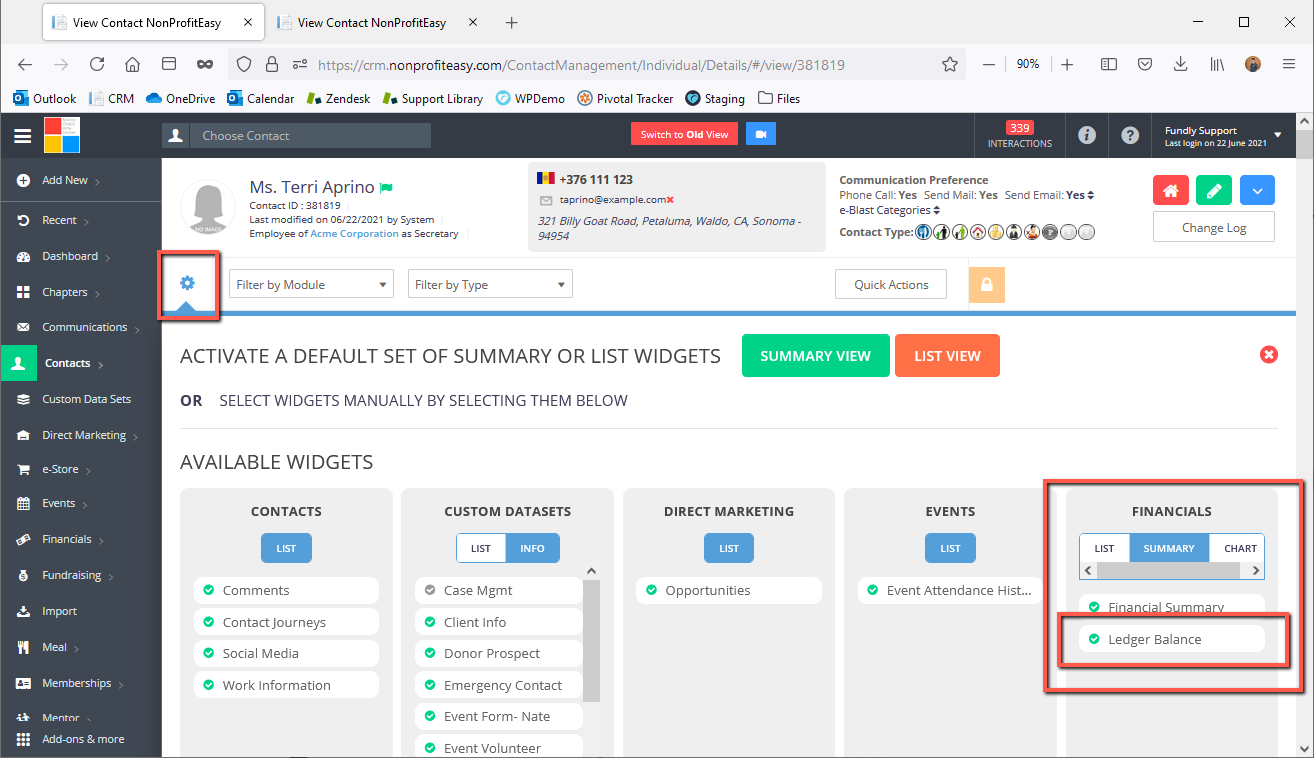
- The contact’s Ledger Balance will display in its own widget. You need to add it in the layout by activating it from the available widgets screen (gear icon) It will be red and show a negative balance if the contact owes money. It will be green and display $0 if no money is owed. It will be green a display a positive balance if the contact has a credit on their account. Please Note: the ledger balance updates OVERNIGHT.
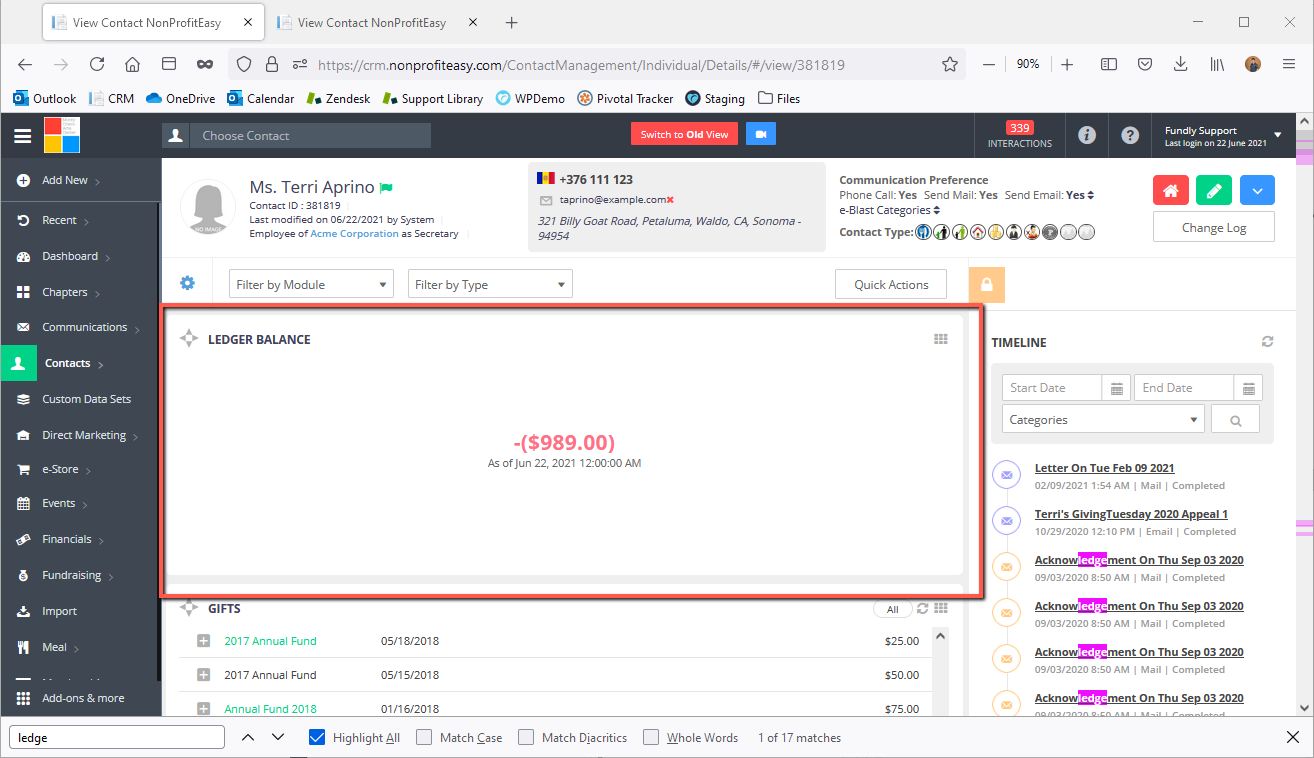
- Clicking the Ledger Balance will take you into a two-column ledger. You can edit and delete credits from here.
Customize Layout
- See also the QuickStart Video for Customizing Contact Layout.
- All items detailed above are in fixed locations that cannot be changed by the user. All modules/windows after this are set by the user. Which modules you see after this and the order in which they are arranged is up to you. You can click the gear icon/button to turn off any of the other modules that you do not wish to see. Any changes made to the Layout of one individual contact record changes the layout in all Individual Contact records – but just for YOUR login (so that each staff member may configure the layout to their own needs). Organizational Contacts and Household View also have their own set of layout configuration options.
- The gear icon contains all the available widgets that you can add to you contact view.

- You may also select from the default set of widget by selecting summary view and list view or manually selecting the widgets by clicking them from the list. After selecting the either the default view or selecting the widgets manually, click on the X icon on the upper left to close the available widgets window. You can also activate the widgets for Custom Datasets. However, activating widget on contact view is universal setting for all contacts, so once a custom dataset widget is activated on contact view, the widget will show up for all the contacts even if the contact doesn't have the CDS contact type.


- The widgets that are activated can be filtered in the contact view. You can filter it by module or by type.


- The quick actions menu lets you add gifts, merge duplicates, add interactions, and etc.


Comments
0 comments
Article is closed for comments.