Contacts: Configure Relationships
- This tutorial will cover how to configure Relationships options within the system.
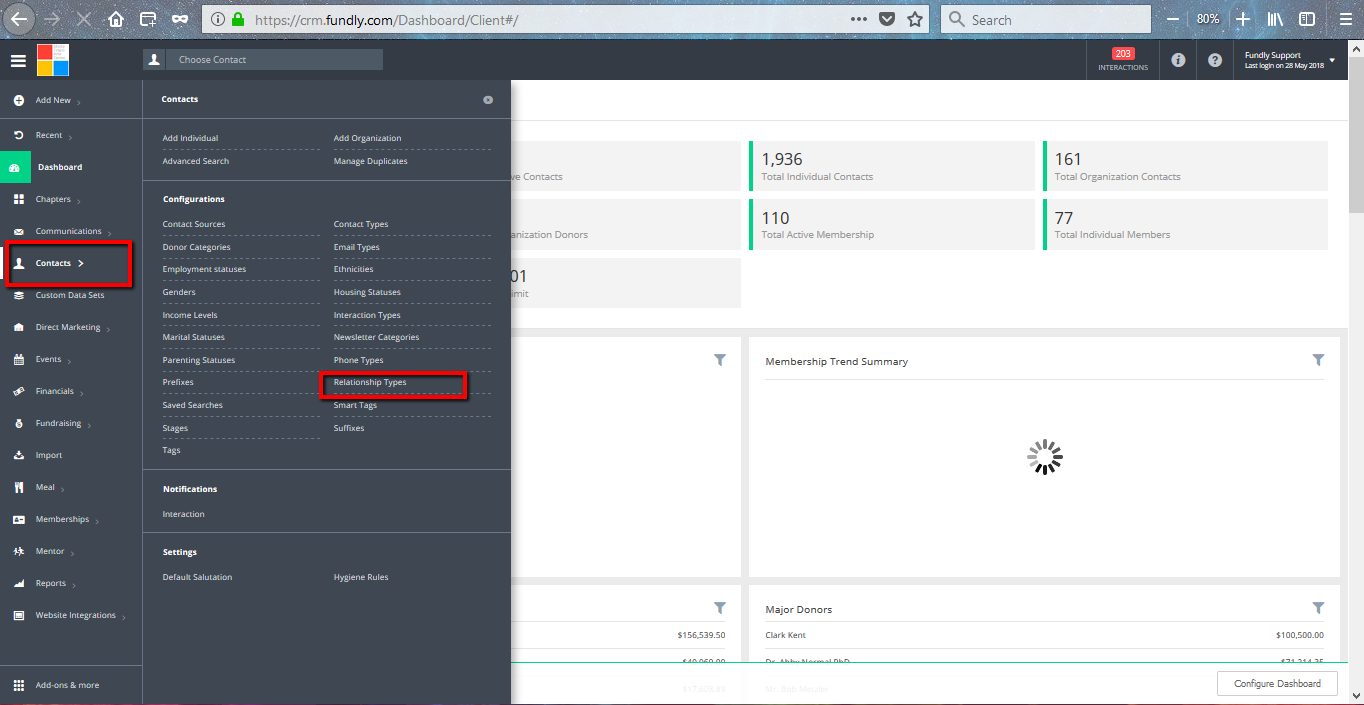
- To configure contact relationships, click on Contacts from the left hand menu to open the contacts sub menu and then click Relationship Types under the configurations heading.
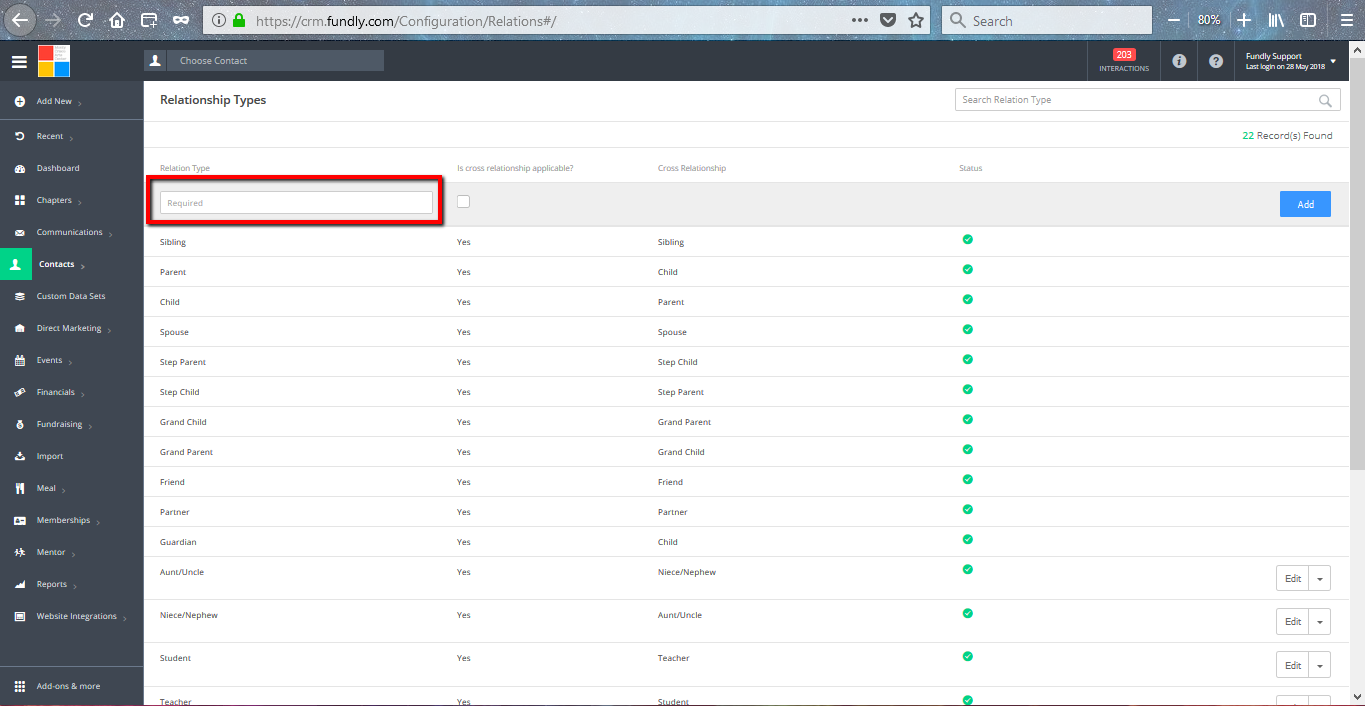
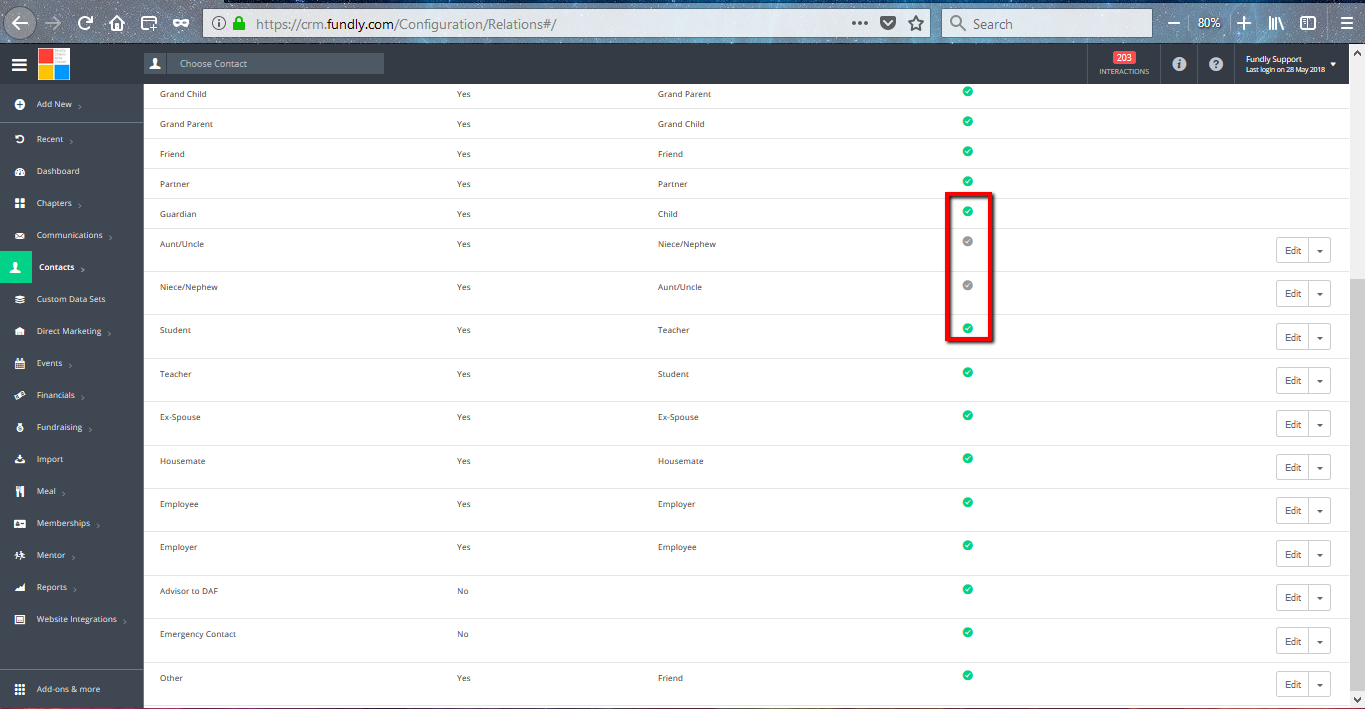
- This will present you with a list of any currently configured relationship options.
- To add a new option, in the Relation Type field enter a descriptive name for the relationship.
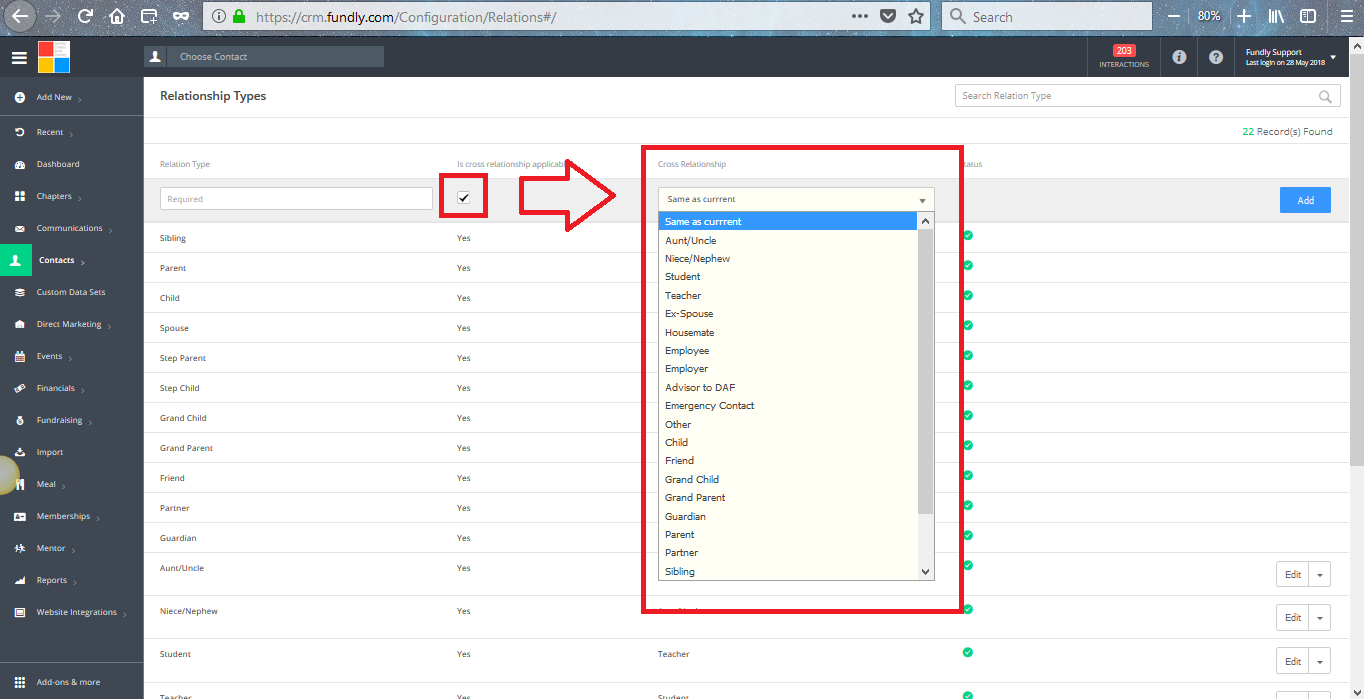
- If this relationship is an applicable cross relationship with another type indicate this with the “Is Cross Relation Applicable” checkbox.
- If you have indicated that a cross relationship is applicable, select the relationship from the Cross Relationship drop down.
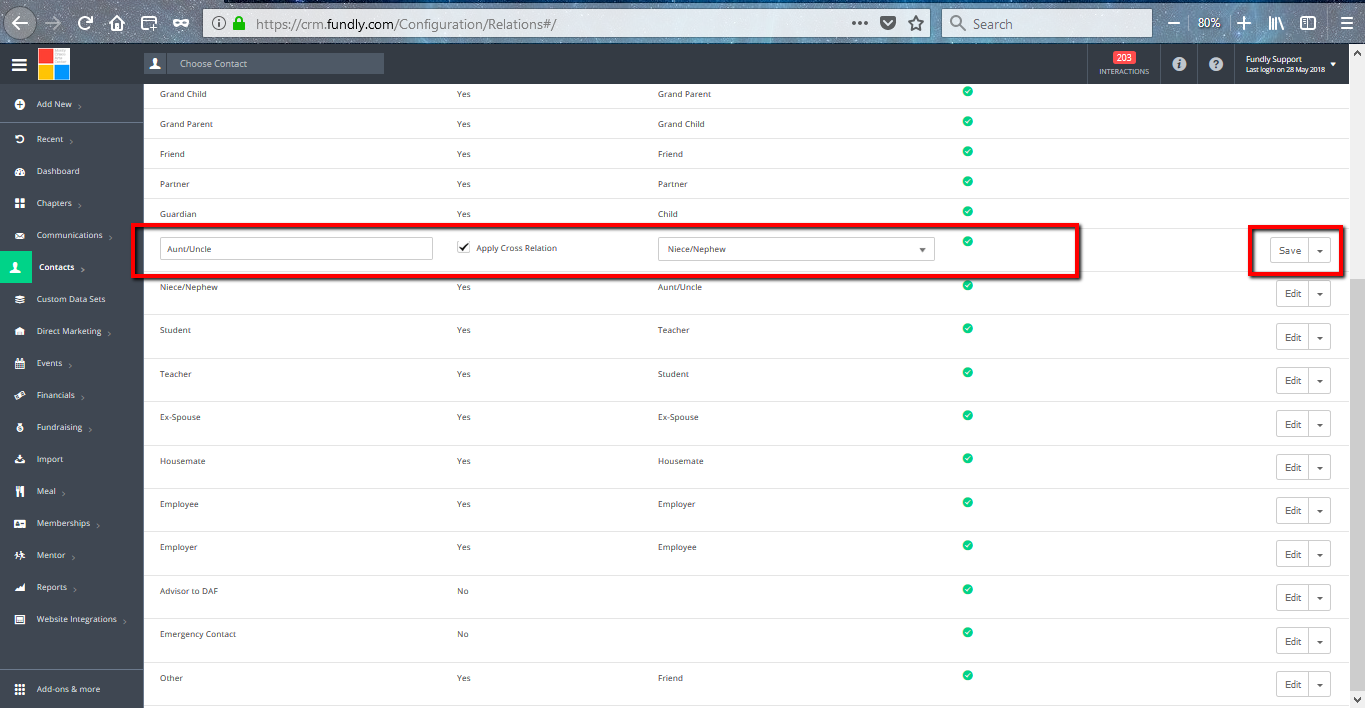
- When you have completed all information for the relationship click the Add (+) button to the right.

- To edit an existing option, find the option in the list, and in the drop down to its right select Edit.

- This will modify the fields to allow you to edit them, and when you have completed your changes, click the Save button on the right.
- To delete an option, find the option in the list, and in the drop down on the right select Delete.

- You will then be asked to confirm the change and upon doing so, the relationship will be removed from the system and all contact records.
- To deactivate a relationship option, click on the green check mark icon to the right of the description column.
- This will turn the icon grey, indicating that they option is no longer active, but not deleted.
- To reactivate a deactivated relationship options, click on the grey icon, thus turning it green and active.
- Please note that system defined relationships cannot be edited, deleted or deactivated.
Comments
0 comments
Article is closed for comments.