Mentoring Module: Add Mentors
- The mentoring module can be used for tracking mentor and mentee pairings. The module can be used to track peer-to-peer mentoring relationships or adult-to-youth mentoring relationships. You must first turn on this module (it is a paid add-on) in order to use it. See our tutorial on activating the Mentoring Module.
- To indicate that a contact has applied for and been approved as a mentor, edit the contact record, click the “+” button in the Add Contact Type area, and check the box next to Mentor.
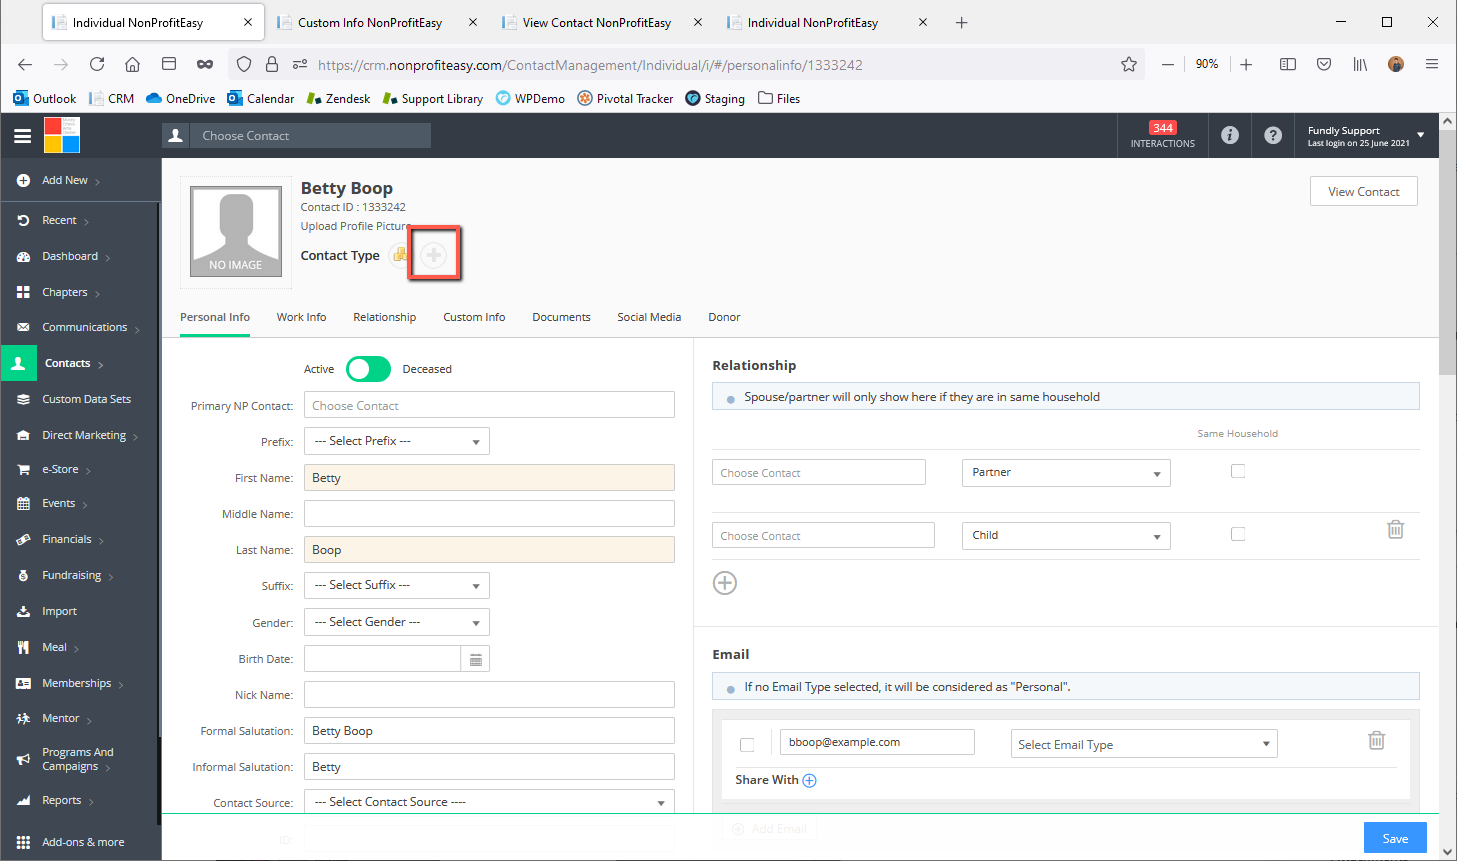

- Click Continue to save the contact type. The Mentor contact type icon will be added to the record (the Mentor and Mentee icons are the same; for Mentors, the “adult”/taller person will be green; for Mentee, the “youth”/shorter person will be green.
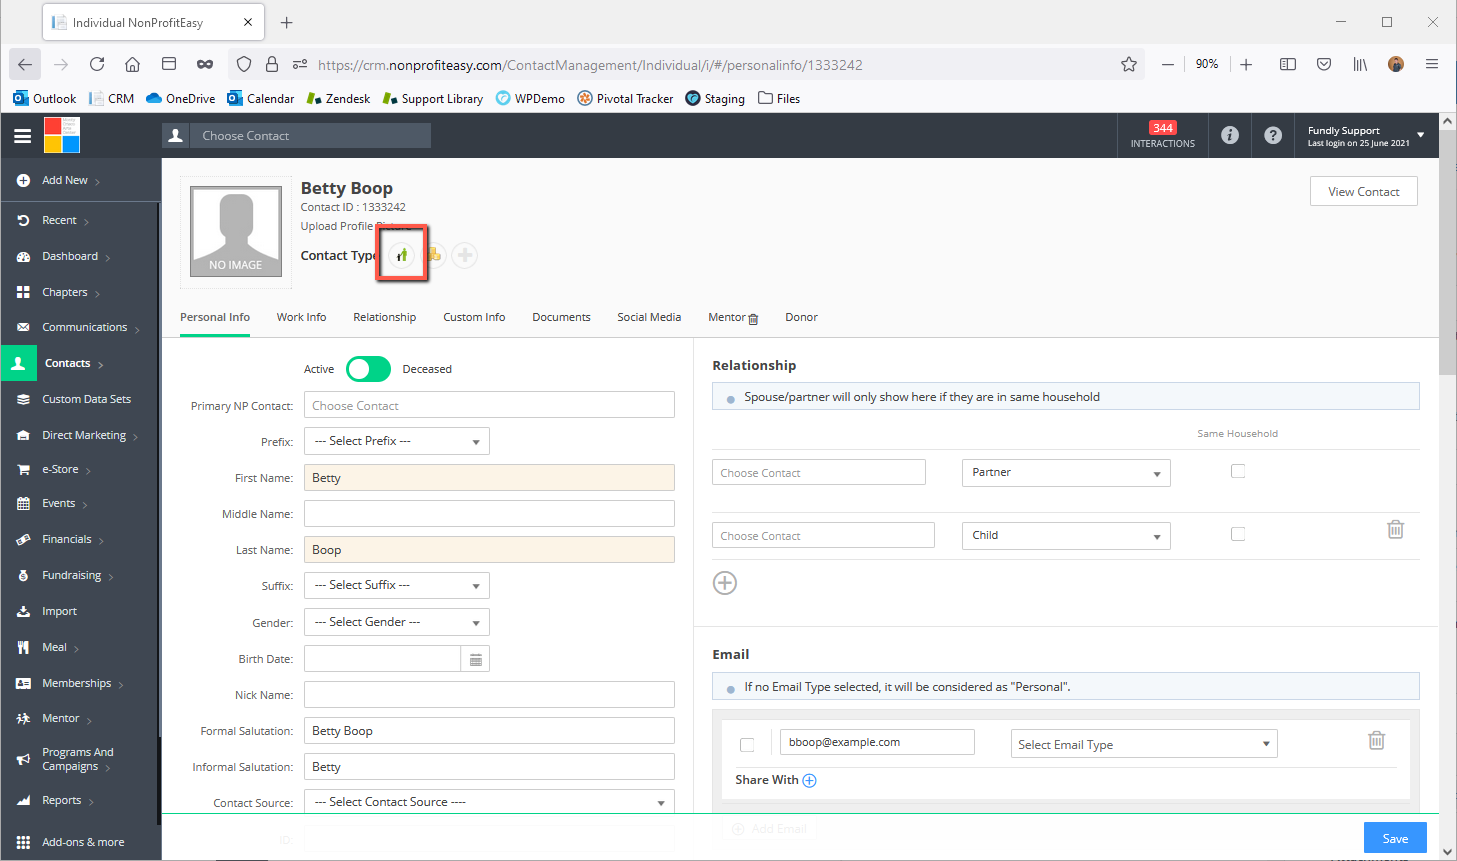
- In addition, the Mentor Custom Data Set will become available for data entry. Click on the Mentor tab and enter the Mentor Details.
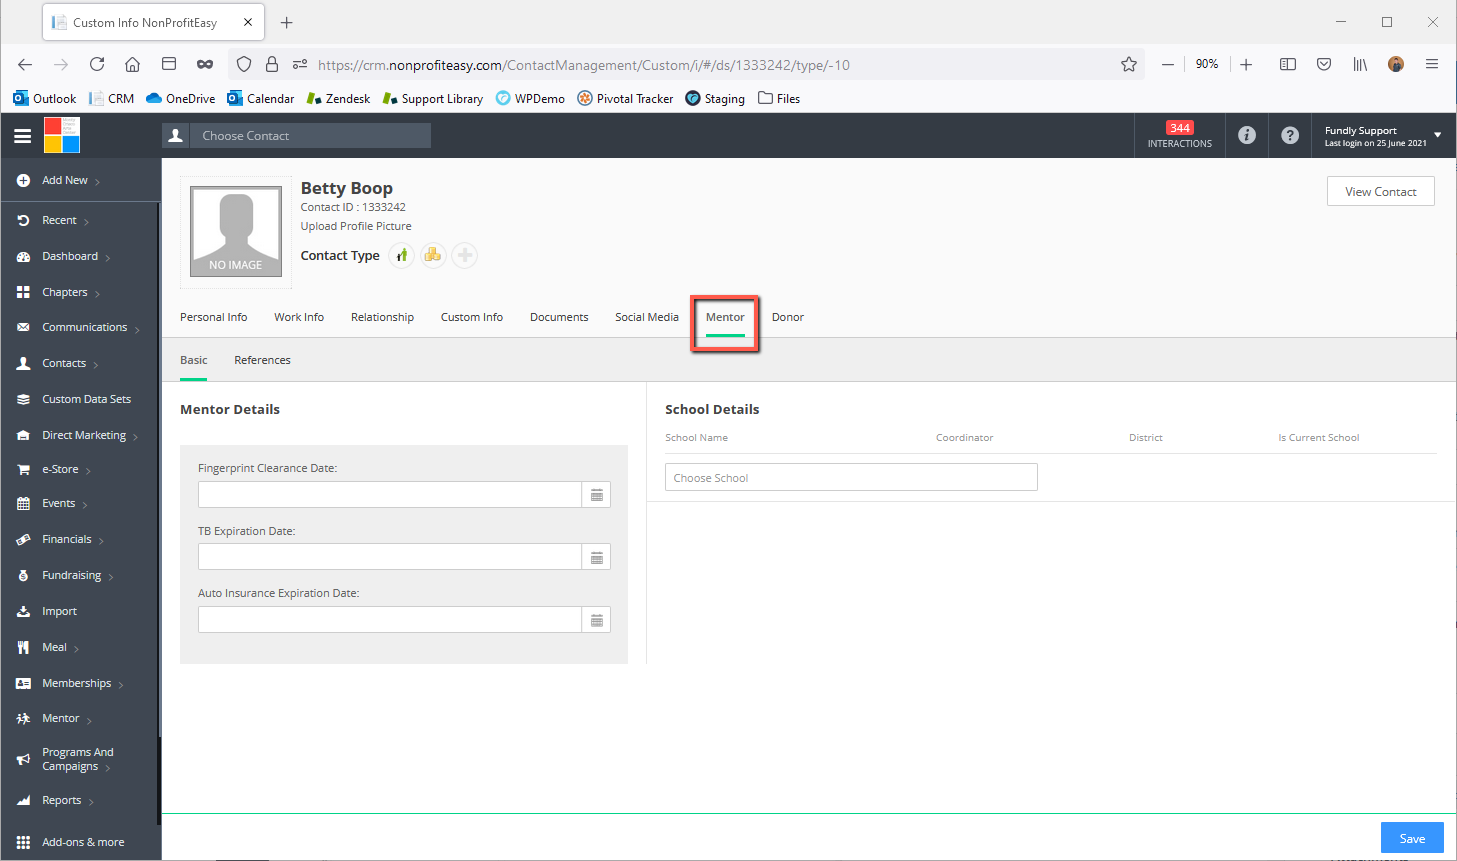
- All of the fields on the Basic and References tabs of the Mentor tab are optional.
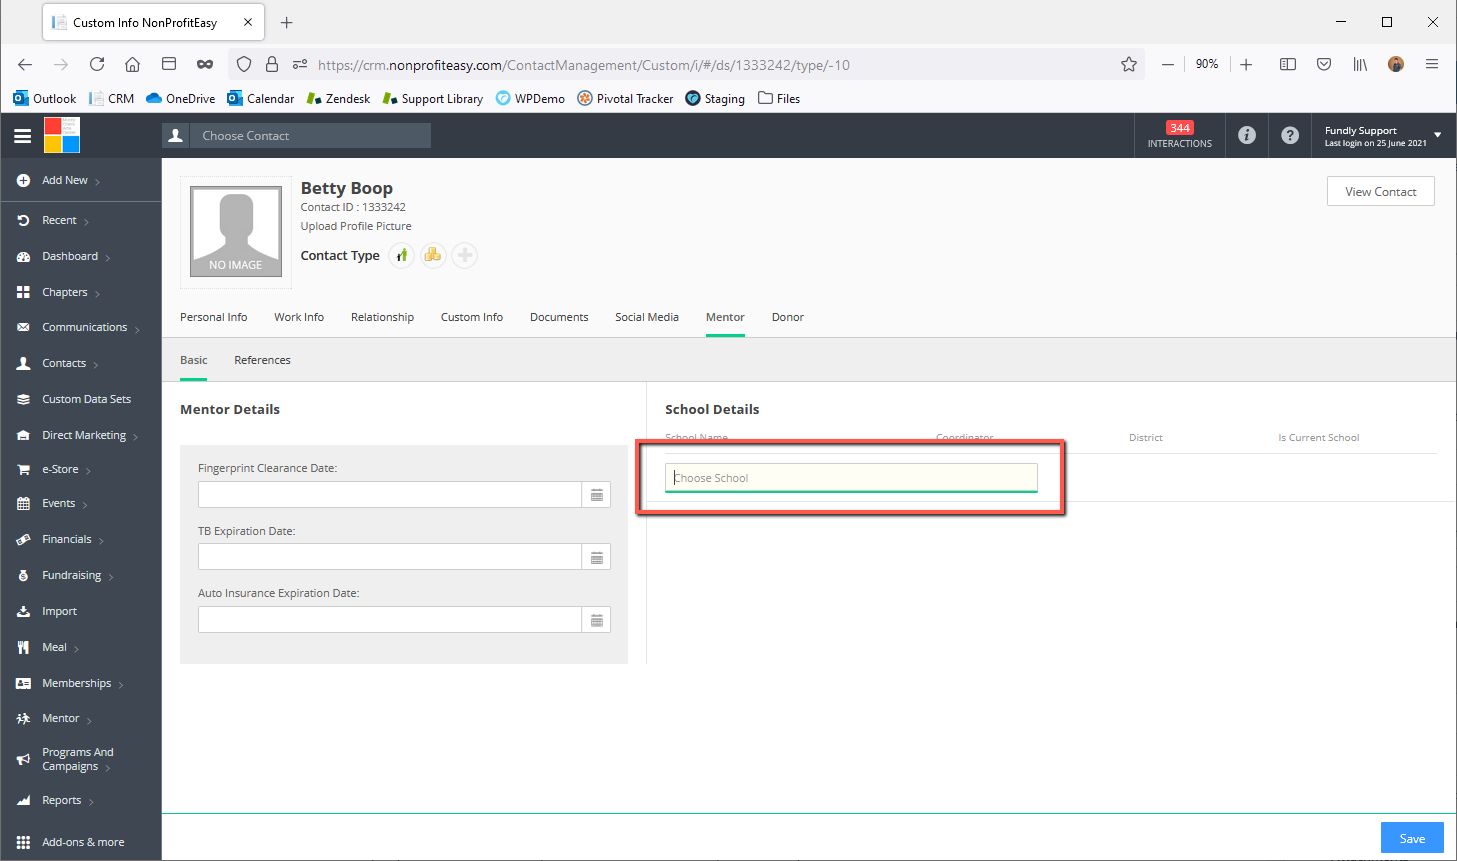
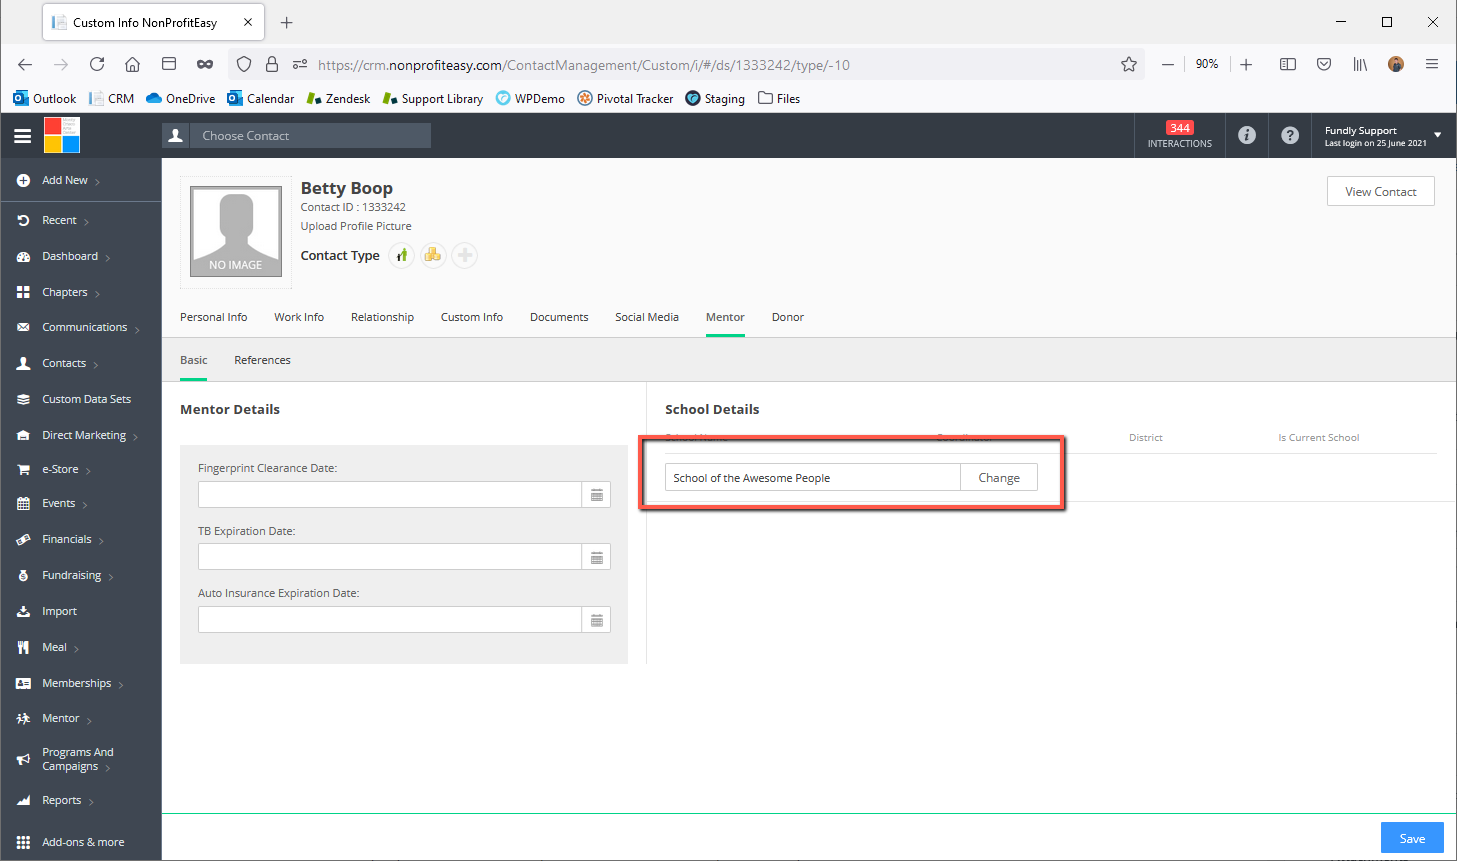
- Only contacts that have been assigned the School contact type can be selected/added to the School field. See our Tutorial on adding schools for more information.
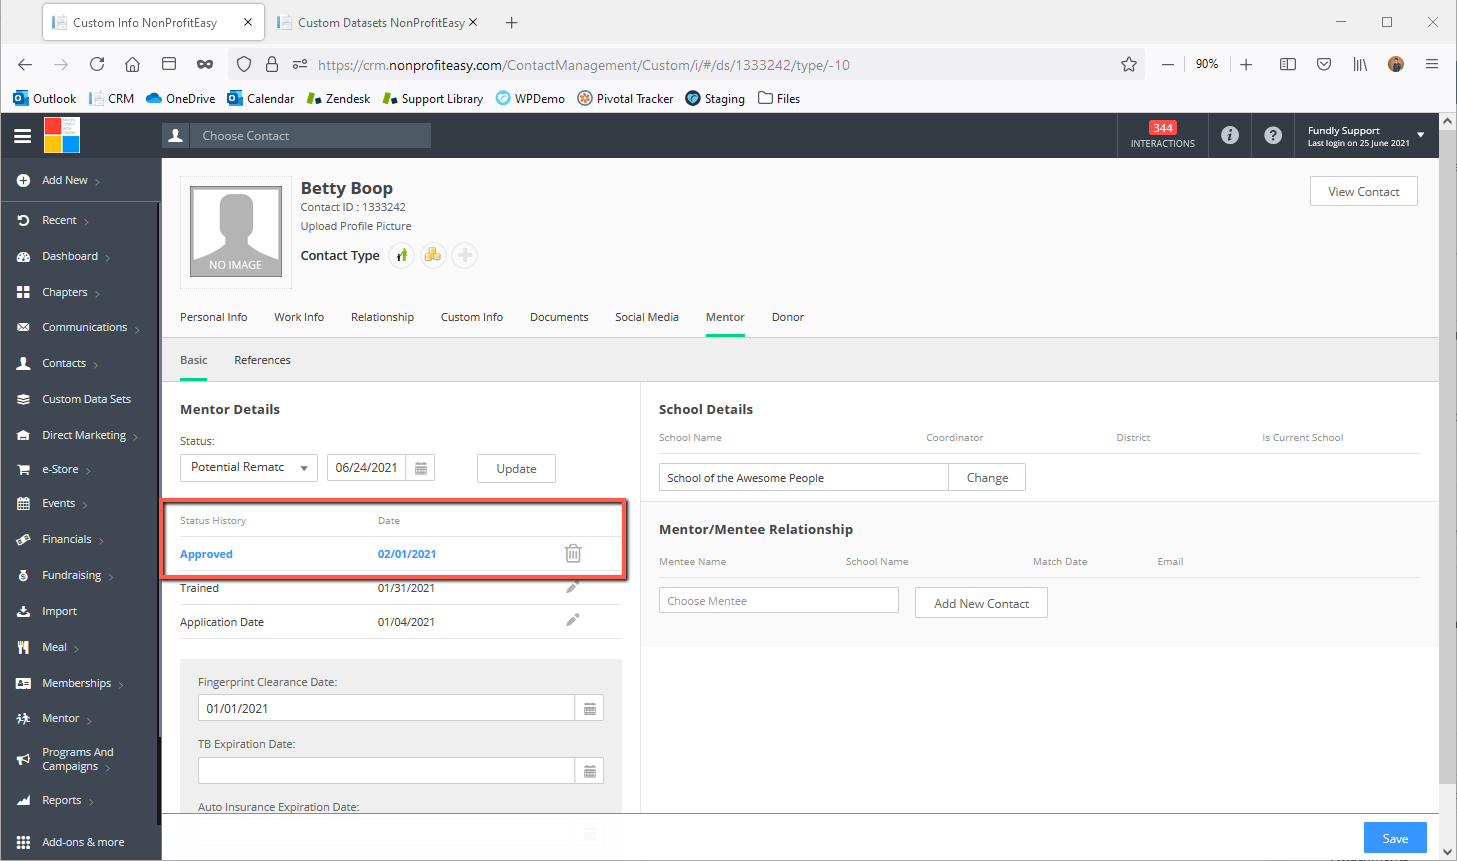
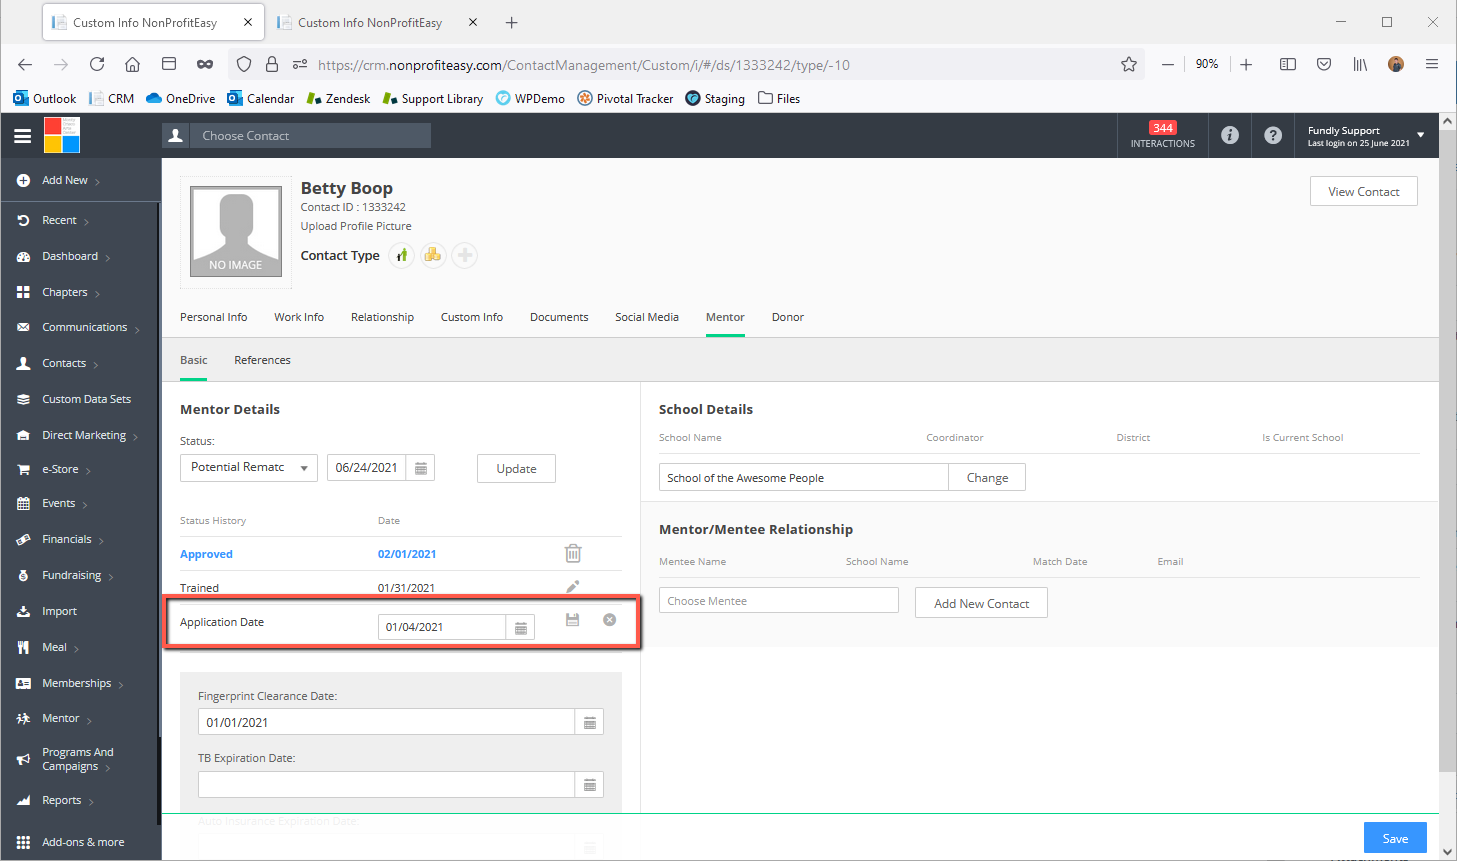
- Enter whatever data you have/wish to track on the Basic and References tabs and then click Save. The Status field will appear, and now you can track the mentor’s status.
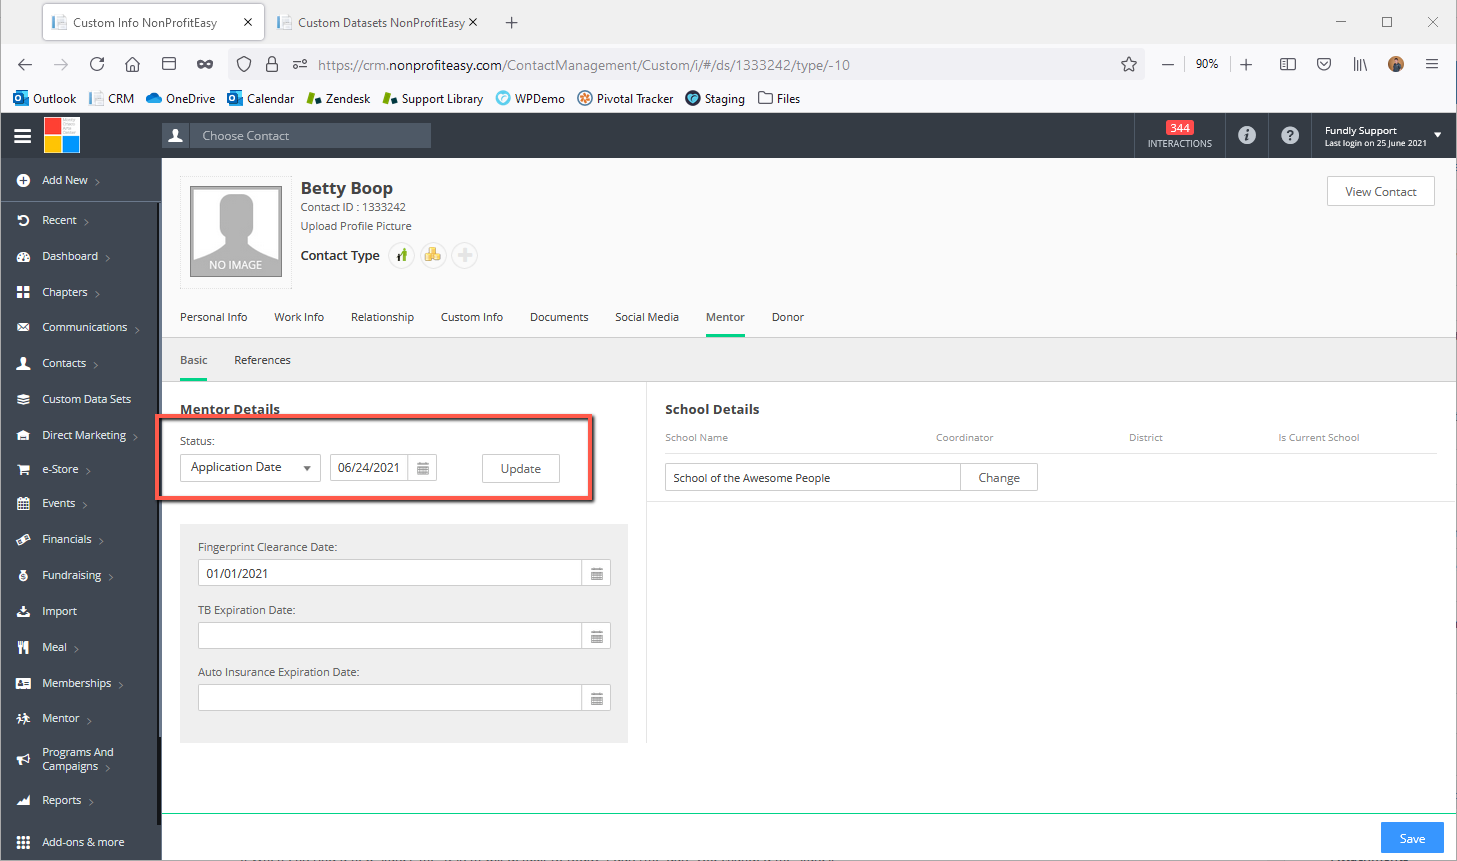
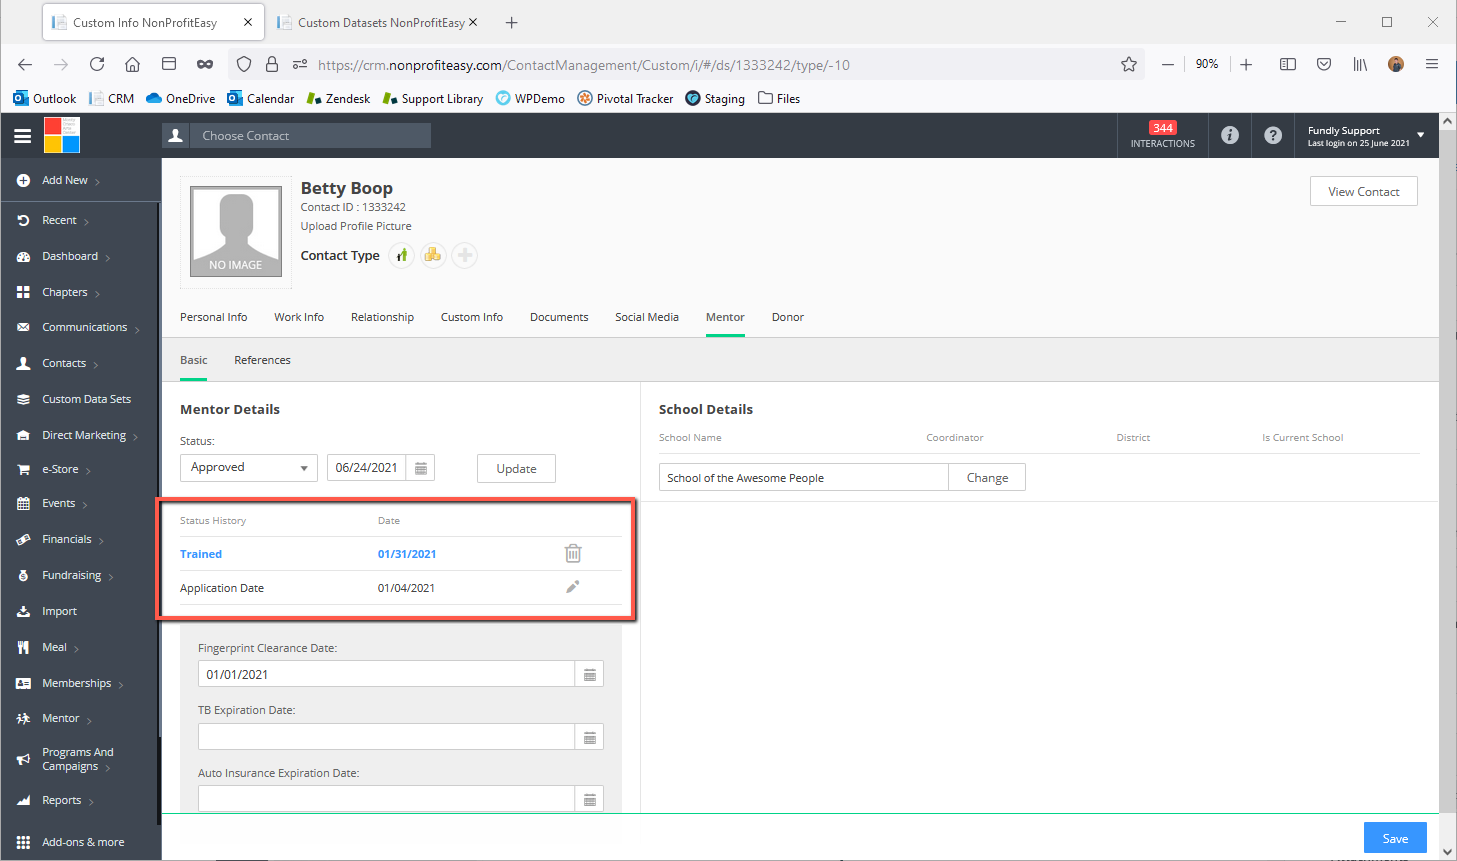
- The Status field is a progressive field that allows you to track the mentor as they move through the various stages of application and approval: Application [Submitted] Date, Training completion date, Approval date, All steps must be entered in order; the next step/stage of the process does not become available to enter until the previous stage is added. The steps do not have to be entered on the same day/at the same time.
- When entering a new status, the system will default to today's date/the date you changed the status. You cannot edit the current status's date until the next status/stage is entered (you can only delete the status, but not edit). For example, to edit the Approved status in the example below, I'd have to enter the next status available, which is "Matched".
- The first step/status is Application Date. Click the Update button to enter the date the Mentor completed the application. Please Note: The Application Date will be shown as the date when you clicked the Update button. There is no way to change this date/to back date the application date until you add the next status/stage [which is Trained].
- The next status you can enter (which doesn’t become available until you have indicated an application date/that an application has been submitted) is Trained (date the mentor completed training). Select the date and click Update to add it. You will not be able to edit/change this date until you add the next stage/status to the Mentor's record.
- The next status you can then enter is Approved. Select the date and click Update.
- After the Mentor is Approved, the Mentor/Mentee Relationship field will appear/become available and you can now match the Mentor to a Mentee.
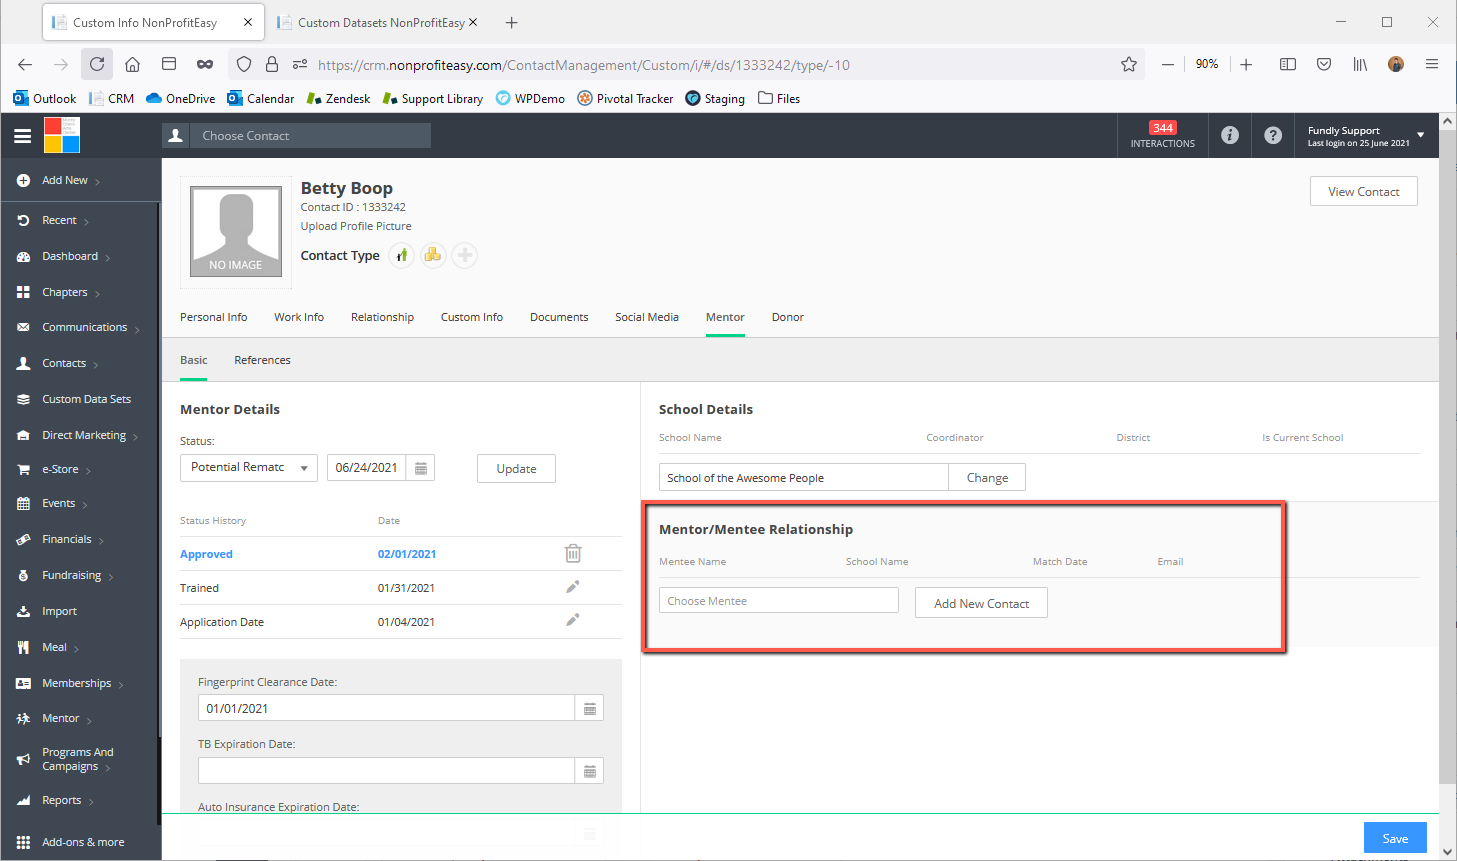
- You will only be able to select a contact that is an approved Mentee/a contact that has the Mentee contact type. See this Tutorial on adding Mentees to your CRM.
- See also this Tutorial on adding Mentor/Mentee Relationships.
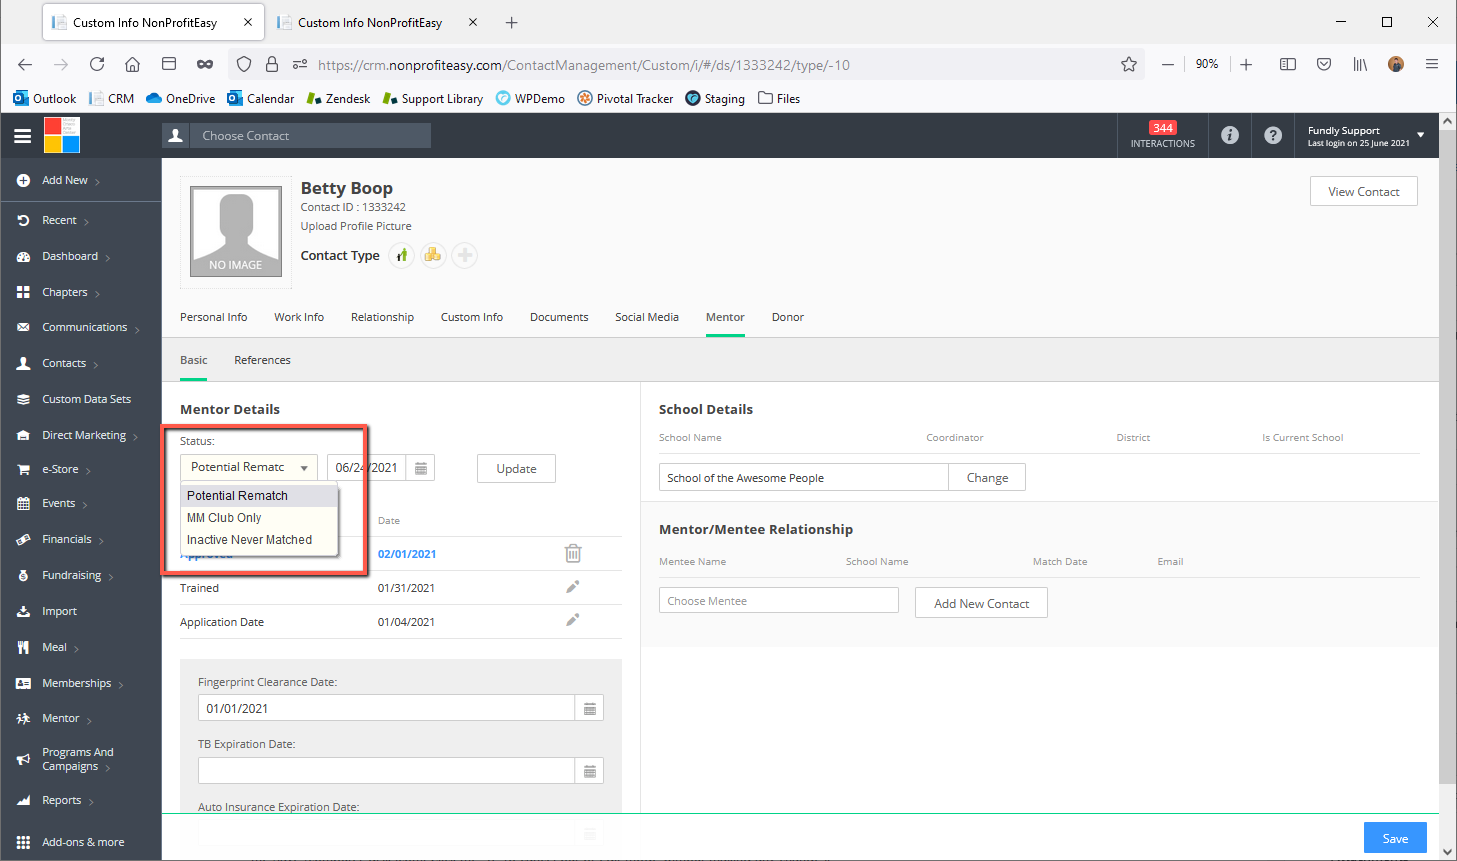
- In addition, once the Mentor is approved, several other Statuses/Stages will become available from the Status drop down, including Potential Rematch (for Mentor's who have completed a mentoring relationship and wish to be matched to another mentee) and MM Club (MM Club is a special status used by one of our clients. If most likely is not applicable to you and can be ignored).
- You can delete statuses from a Mentor's record by clicking the trash can icon to the right of the status. However, statuses MUST be deleted in order. For instance, if a mentor is approved and you wish to delete the application date, then you must delete first the approved status, then the training status, and finally the application date status.
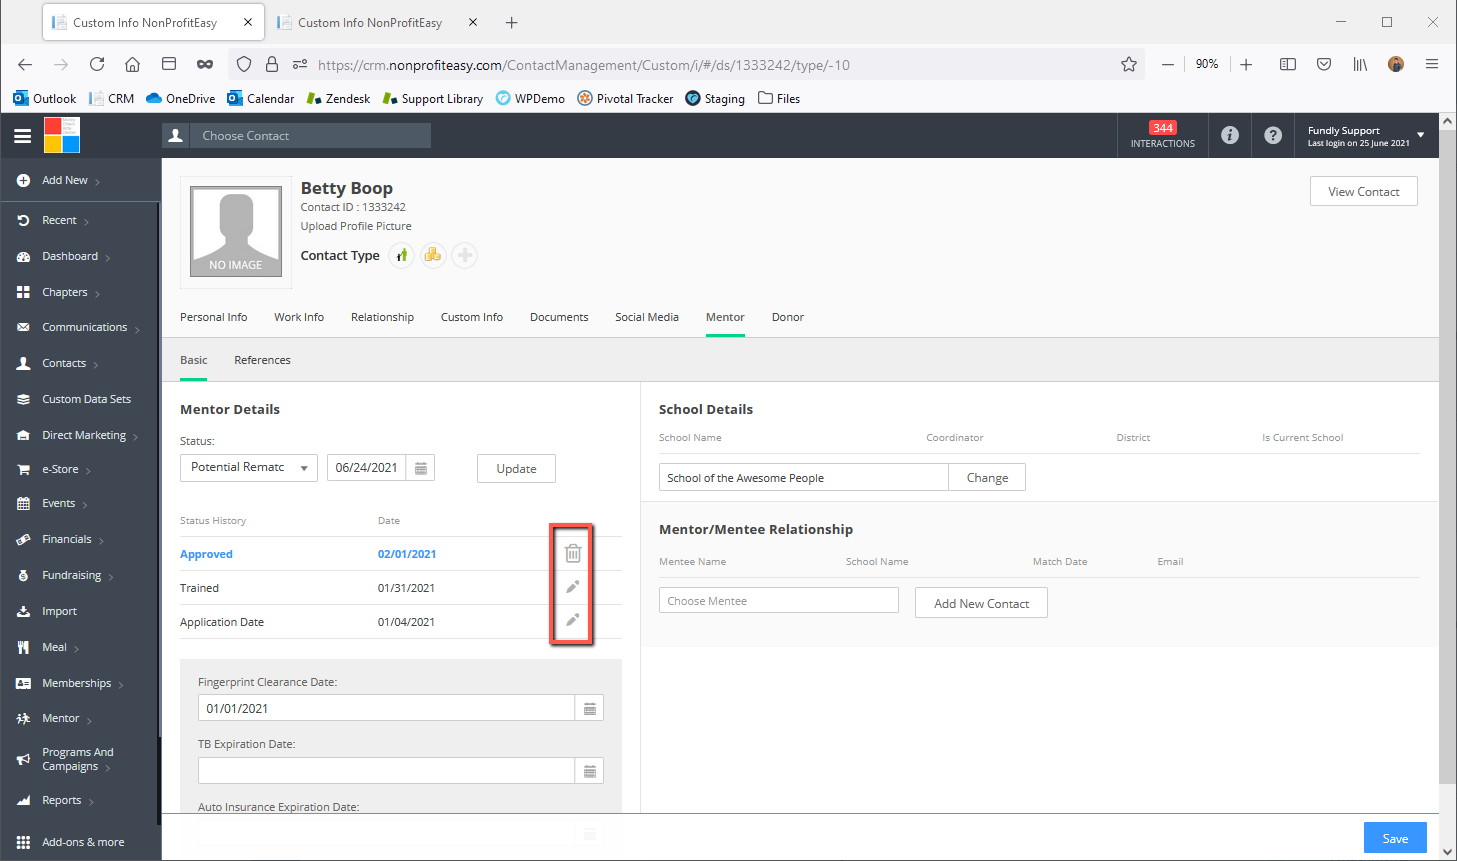
- You can edit a status date by clicking the pencil icon to the right of it. Change the date and then click the Save (computer disk icon). Click the "X" to cancel out of edit mode without making any changes.
Comments
0 comments
Article is closed for comments.