Integration With Your Website: Using Public Profiles (Plug-Ins and Pages)
- This tutorial covers how your online event registrants, members, e-store shoppers, and/or donors can create and use a public profile on your front-/public-facing website pages.
- To allow online event registration/donations/membership purchase/renewal/e-store purchases, you must first integrate your website with Fundly CRM using either Pages or our WordPress Plugin. After these steps are completed, your online users will be able to complete online transactions.
- When public profiles are enabled, users can create a log in (user name and password) to their public profile area that enables them to update/manage their contact information, household members, view their past transactions, manage the credit card on file, and quick renew memberships, cancel e-store orders, and cancel event registrations. Additionally, when checking out, if the user is logged into their public profile, all information on record including household members, mailing/billing address, and credit card number will pre-fill on the checkout page(s).
- PLEASE NOTE: having a record in your CRM does NOT automatically create a public profile. Your website visitors have to manually create a username and password/public profile for themselves.
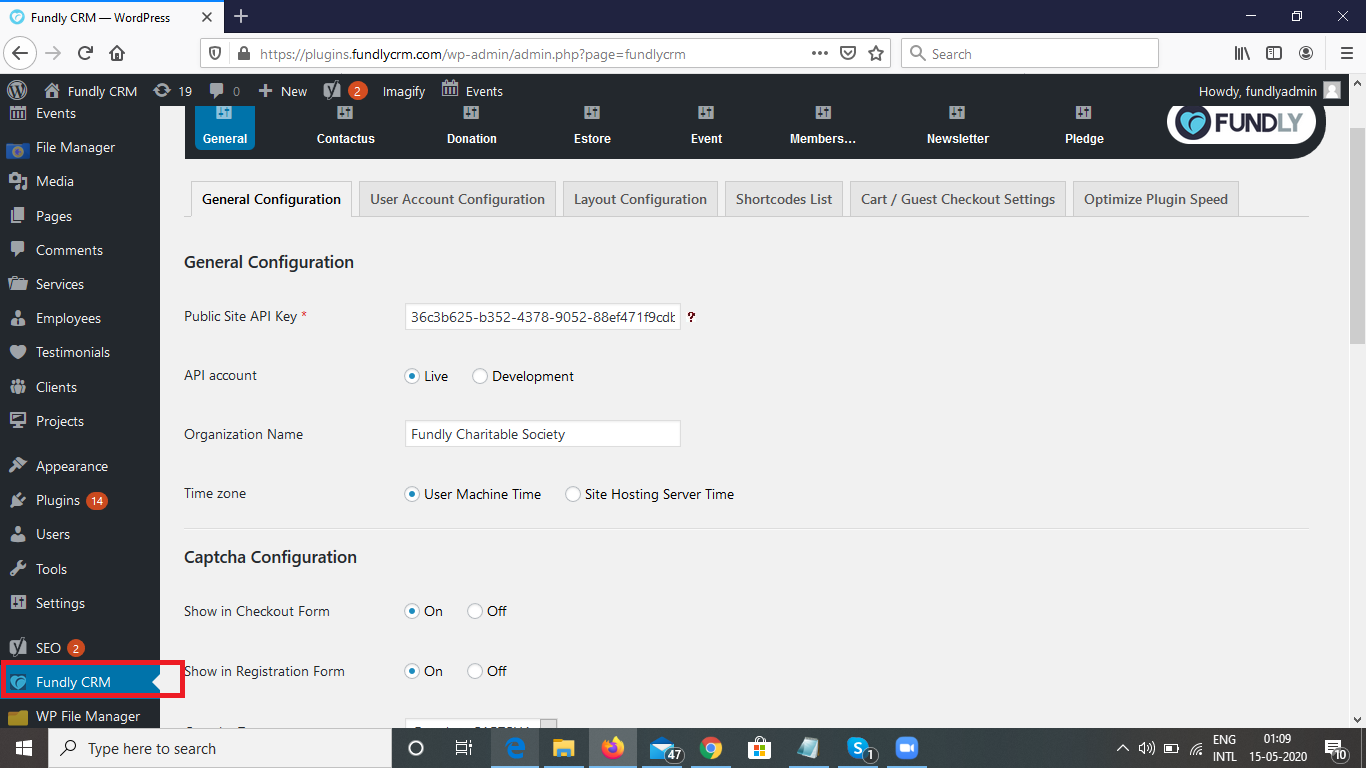
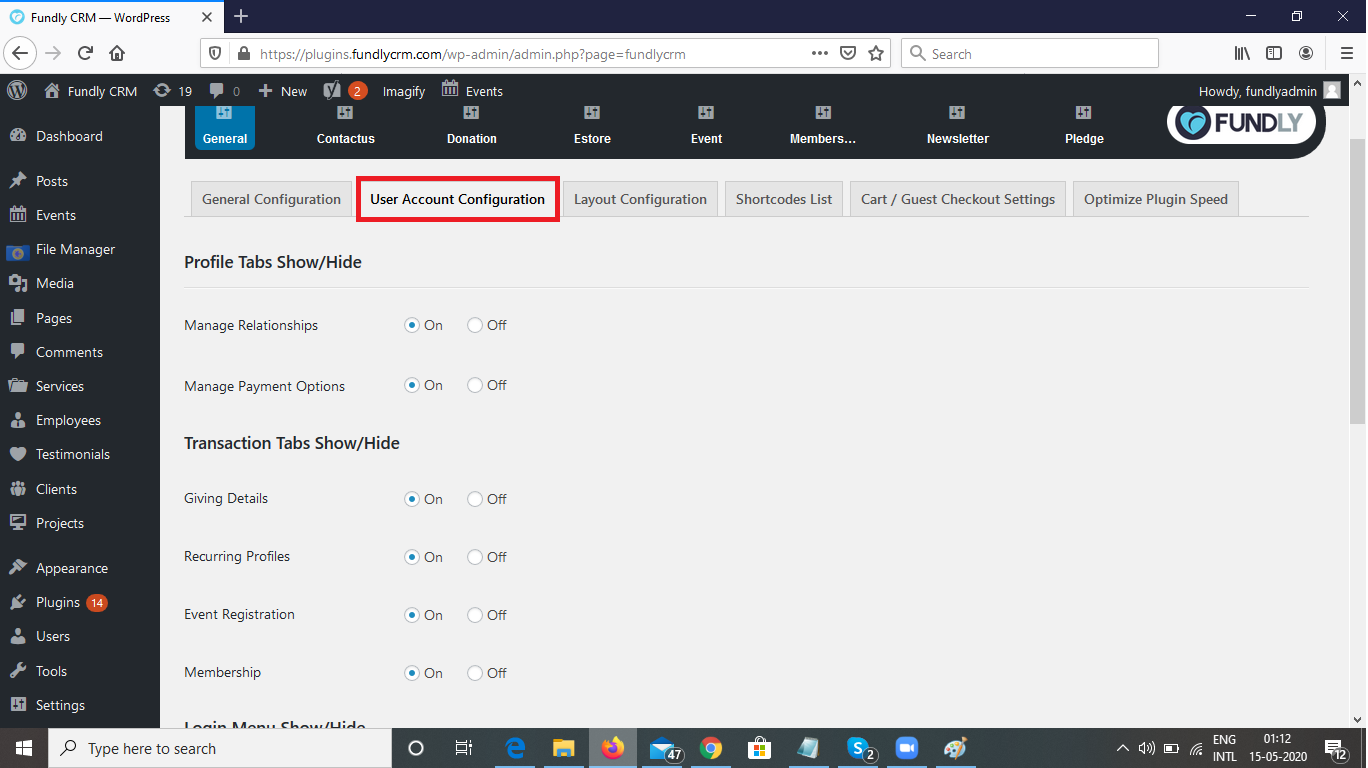
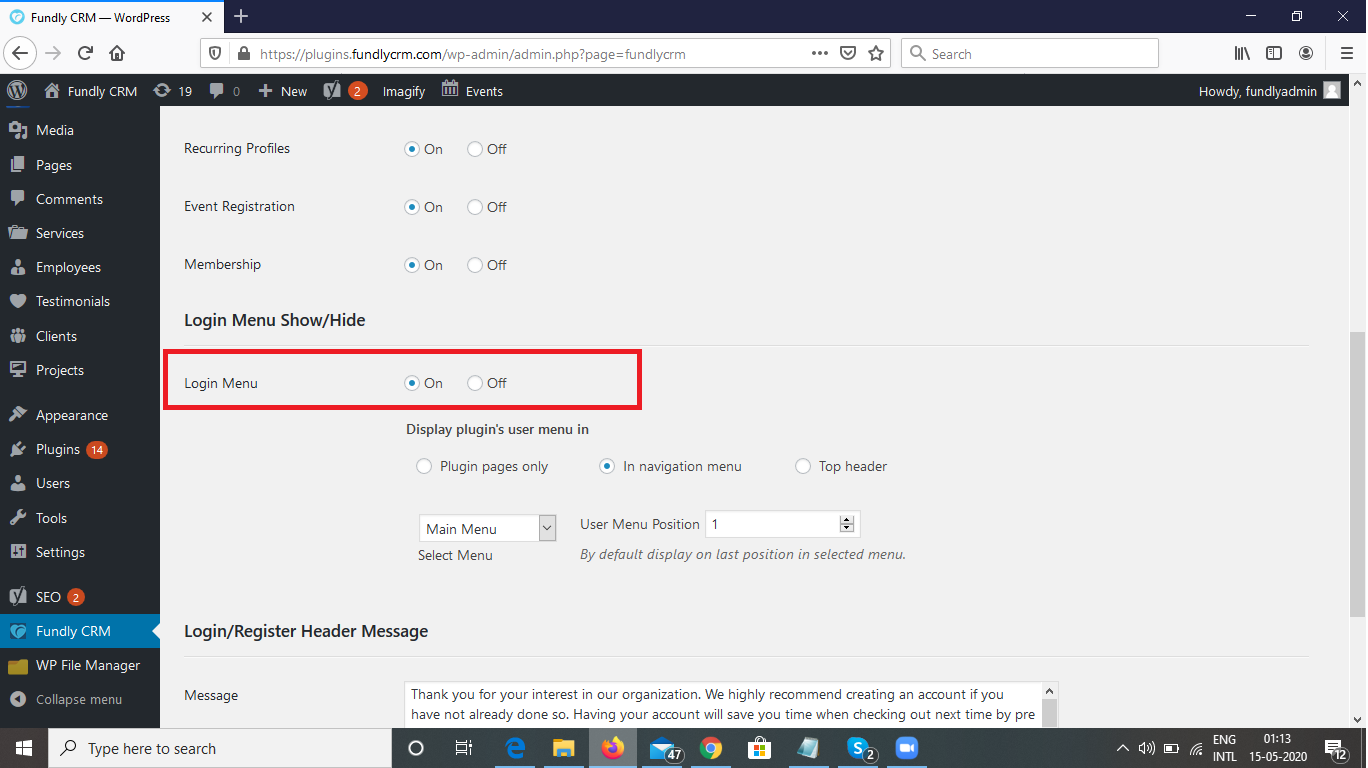
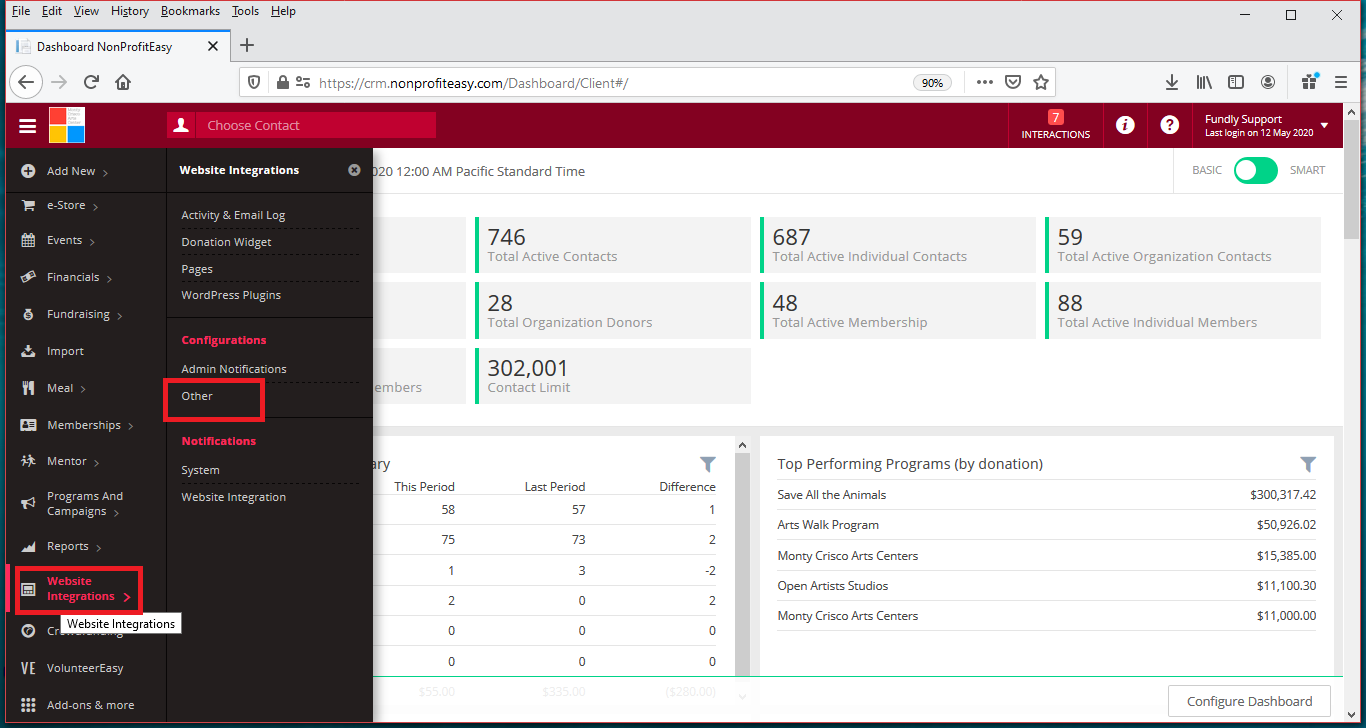
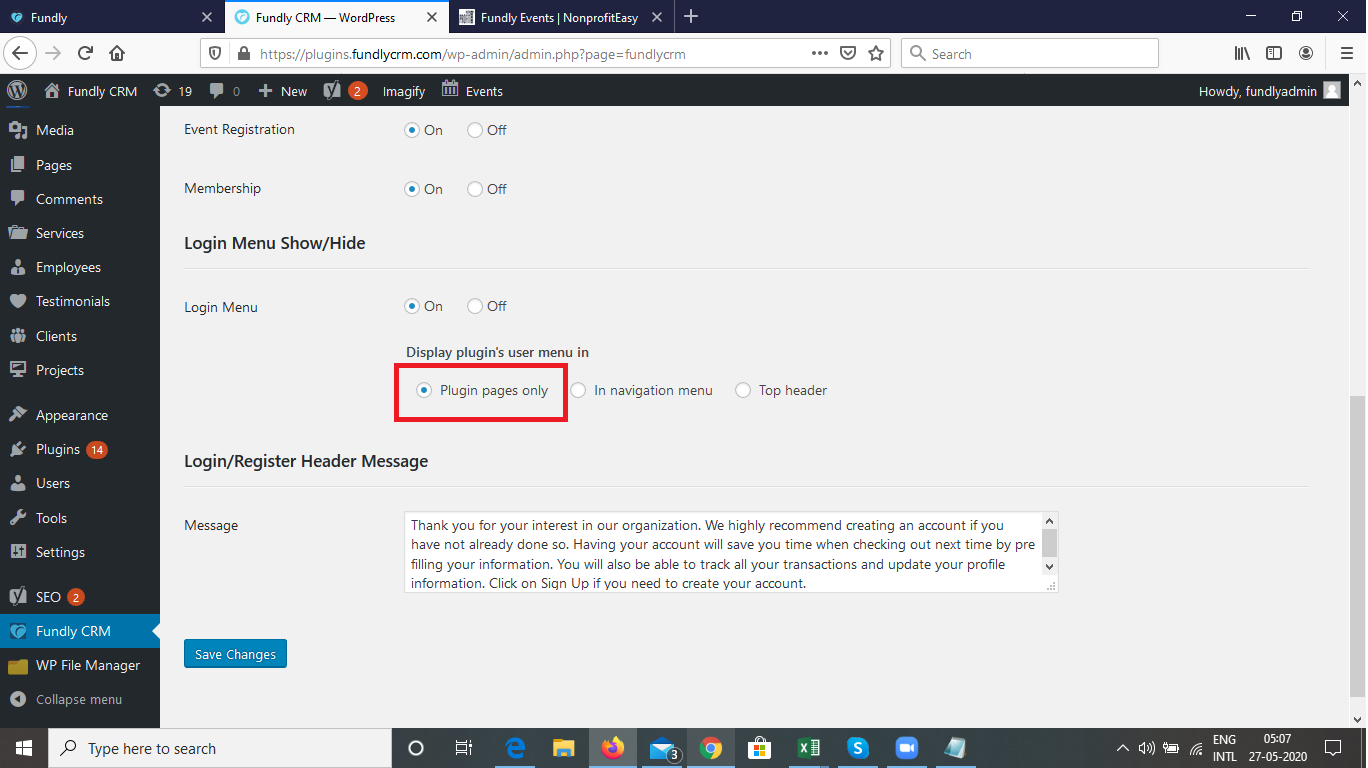
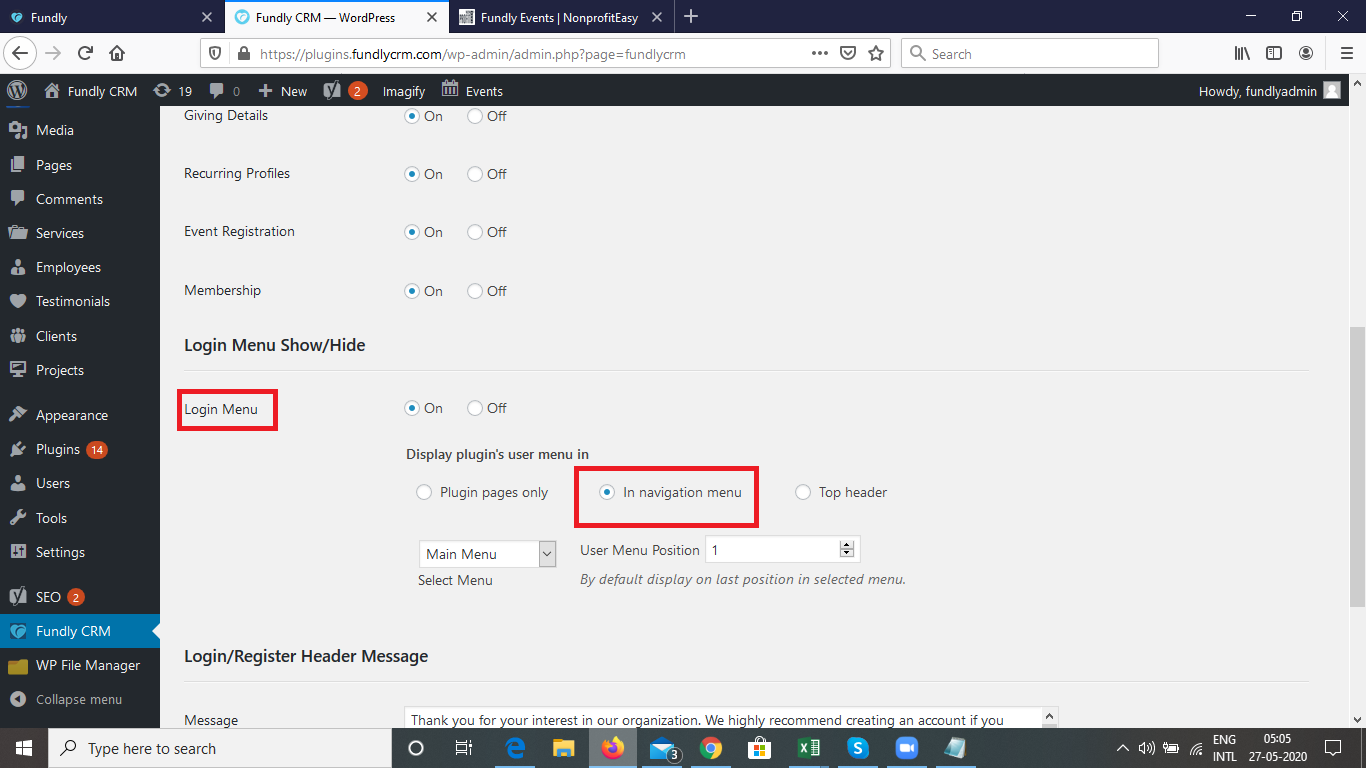
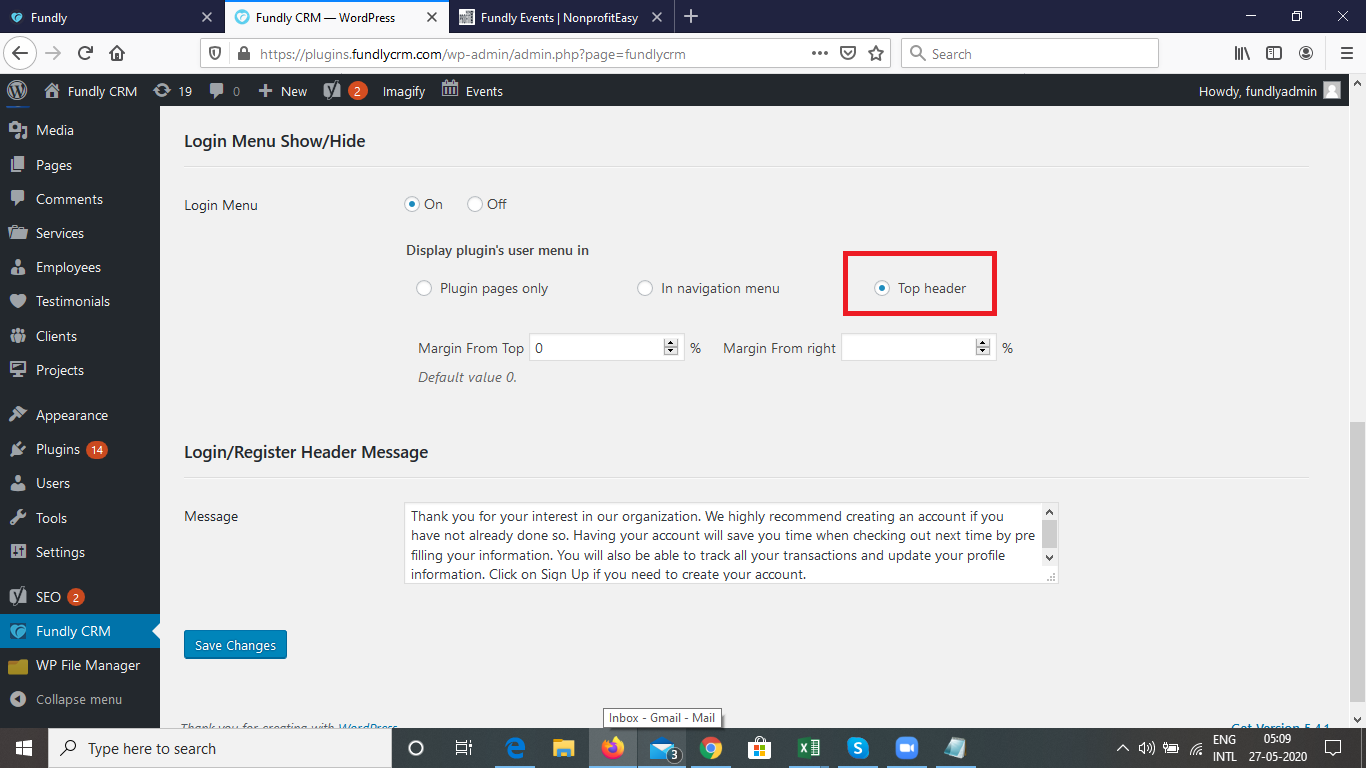
- You can turn the public profile feature on or off (for WordPress Plugins, this is done from inside your WordPress Admin site; for Pages, this is done from within our CRM at Main Menu: Website Integrations: Configurations: Other).
PLUG-INS
PAGES
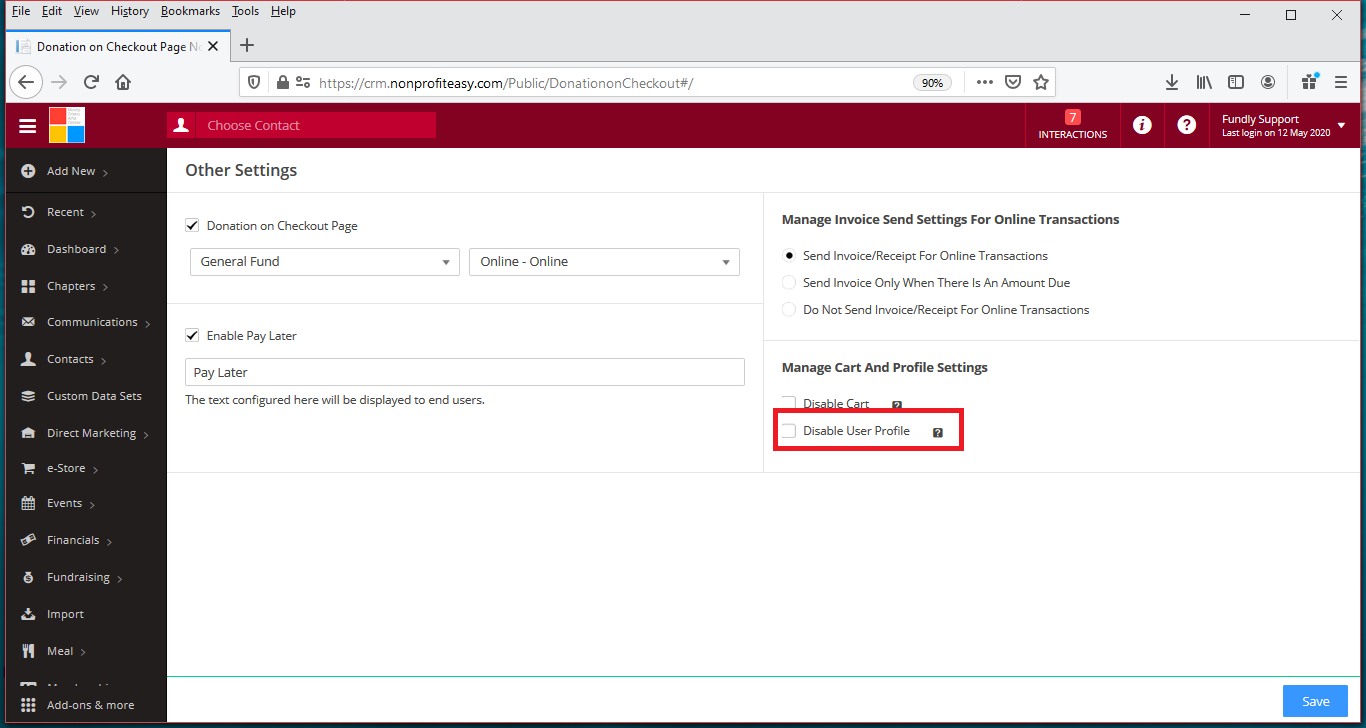
- Please note: public profiles are only for individual contacts; organizational contacts cannot create a public profile/log-in.
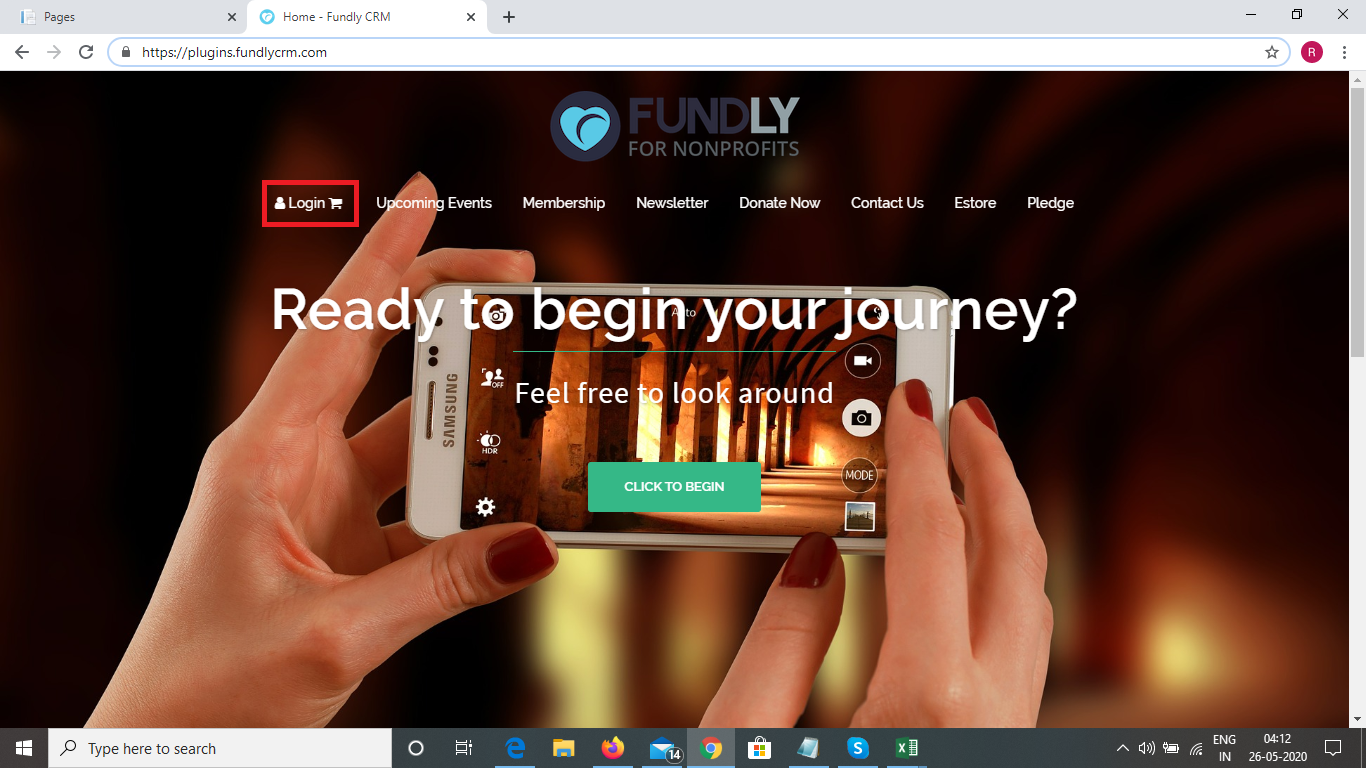
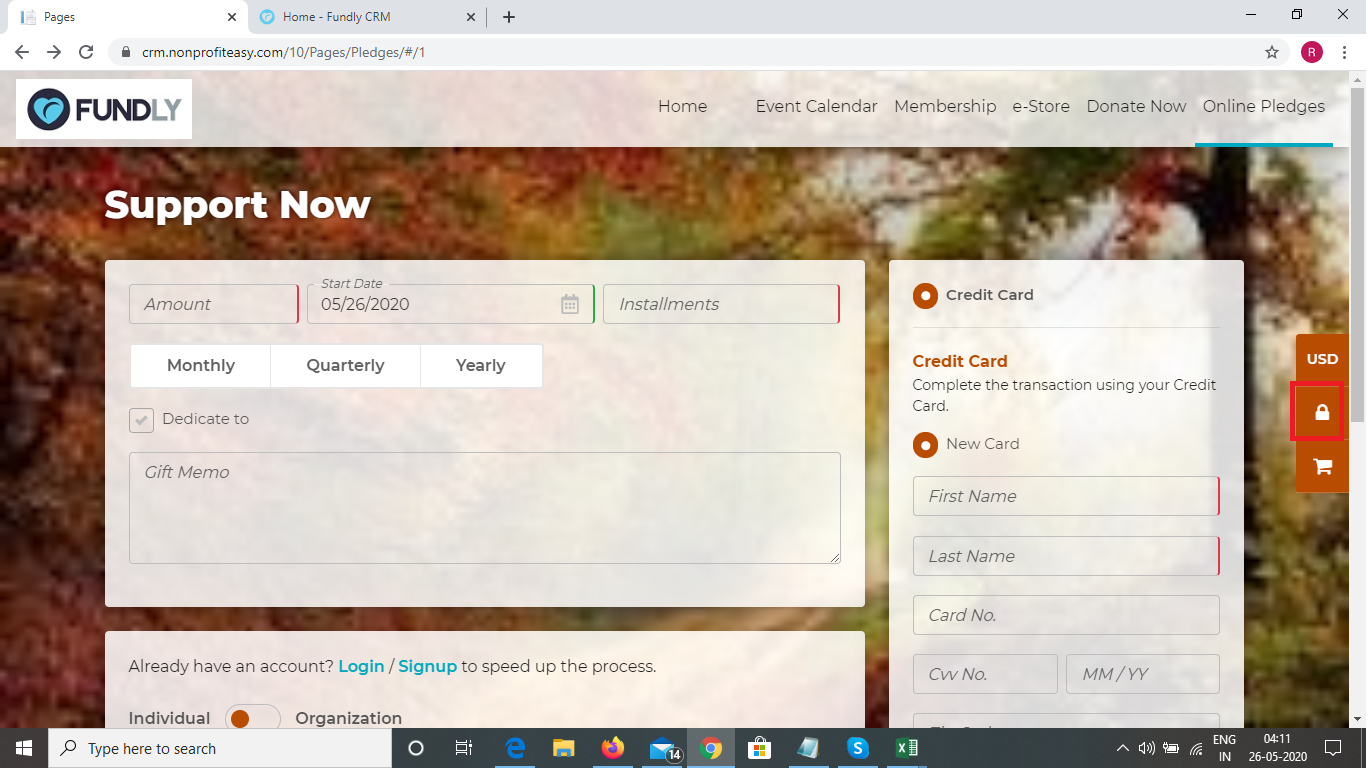
- This tutorial will cover public profiles for both Word-Press Plug-Ins and Pages. We have presented a screen shot for both Plug-Ins (top screen shot) and Pages (bottom screen shot) throughout this tutorial. However, keep in mind that the exact layout and look of your website may differ from our demo sites based on your settings - for example, with the WordPress Plugin, you can set the location of the log-in button to be in the main menu, at the top of the page, or to only appear on the NonProfitEasy integrated pages (donations, pledges, e-store, events, and membership) (in which case the log-in button appears in the middle of the page). In Pages, the public profile log-in button is a "lock' icon and always appears on the right hand side of the screen.
PLUG-INS


PAGES
- The user can sign up for a public profile and/or log into their public profile before completing any transaction OR while in the middle of any transaction. Below are some screen shots of the various screen options of how/when they can choose to log in:
PLUG-INS
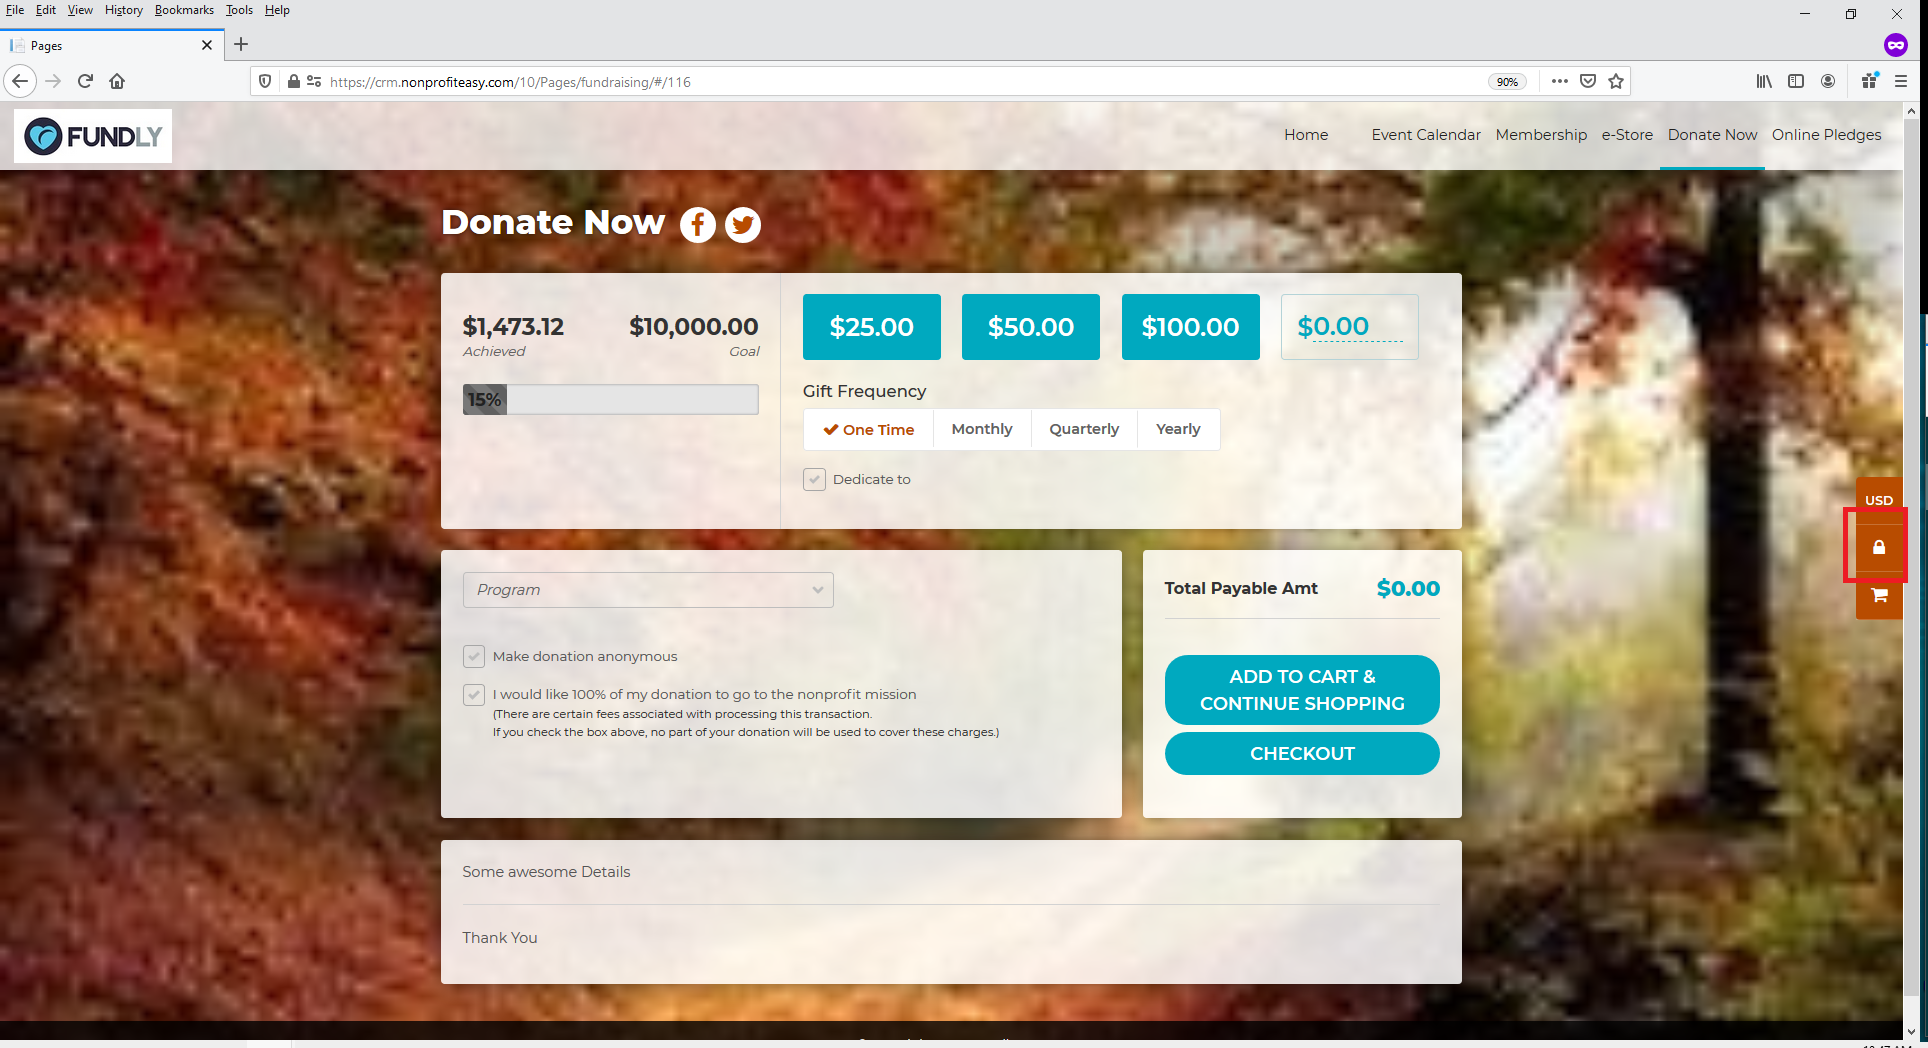
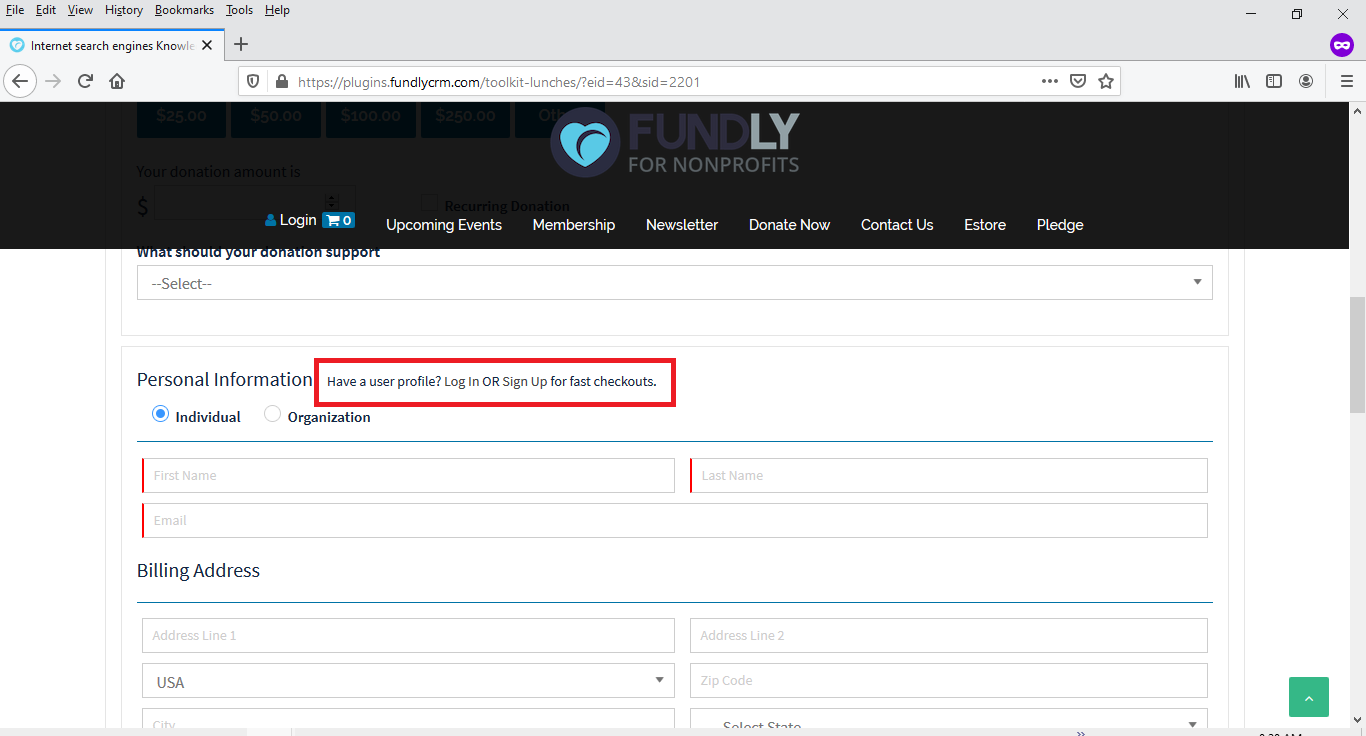
Non-Direct Check-Out Pages
Direct Check-Out Page
PAGES
Pop Up Box After Clicking Checkout When Cart is On

Direct Checkout Page (for Pledges and/or for when Cart is off)

Cart Checkout Page (when cart is on)
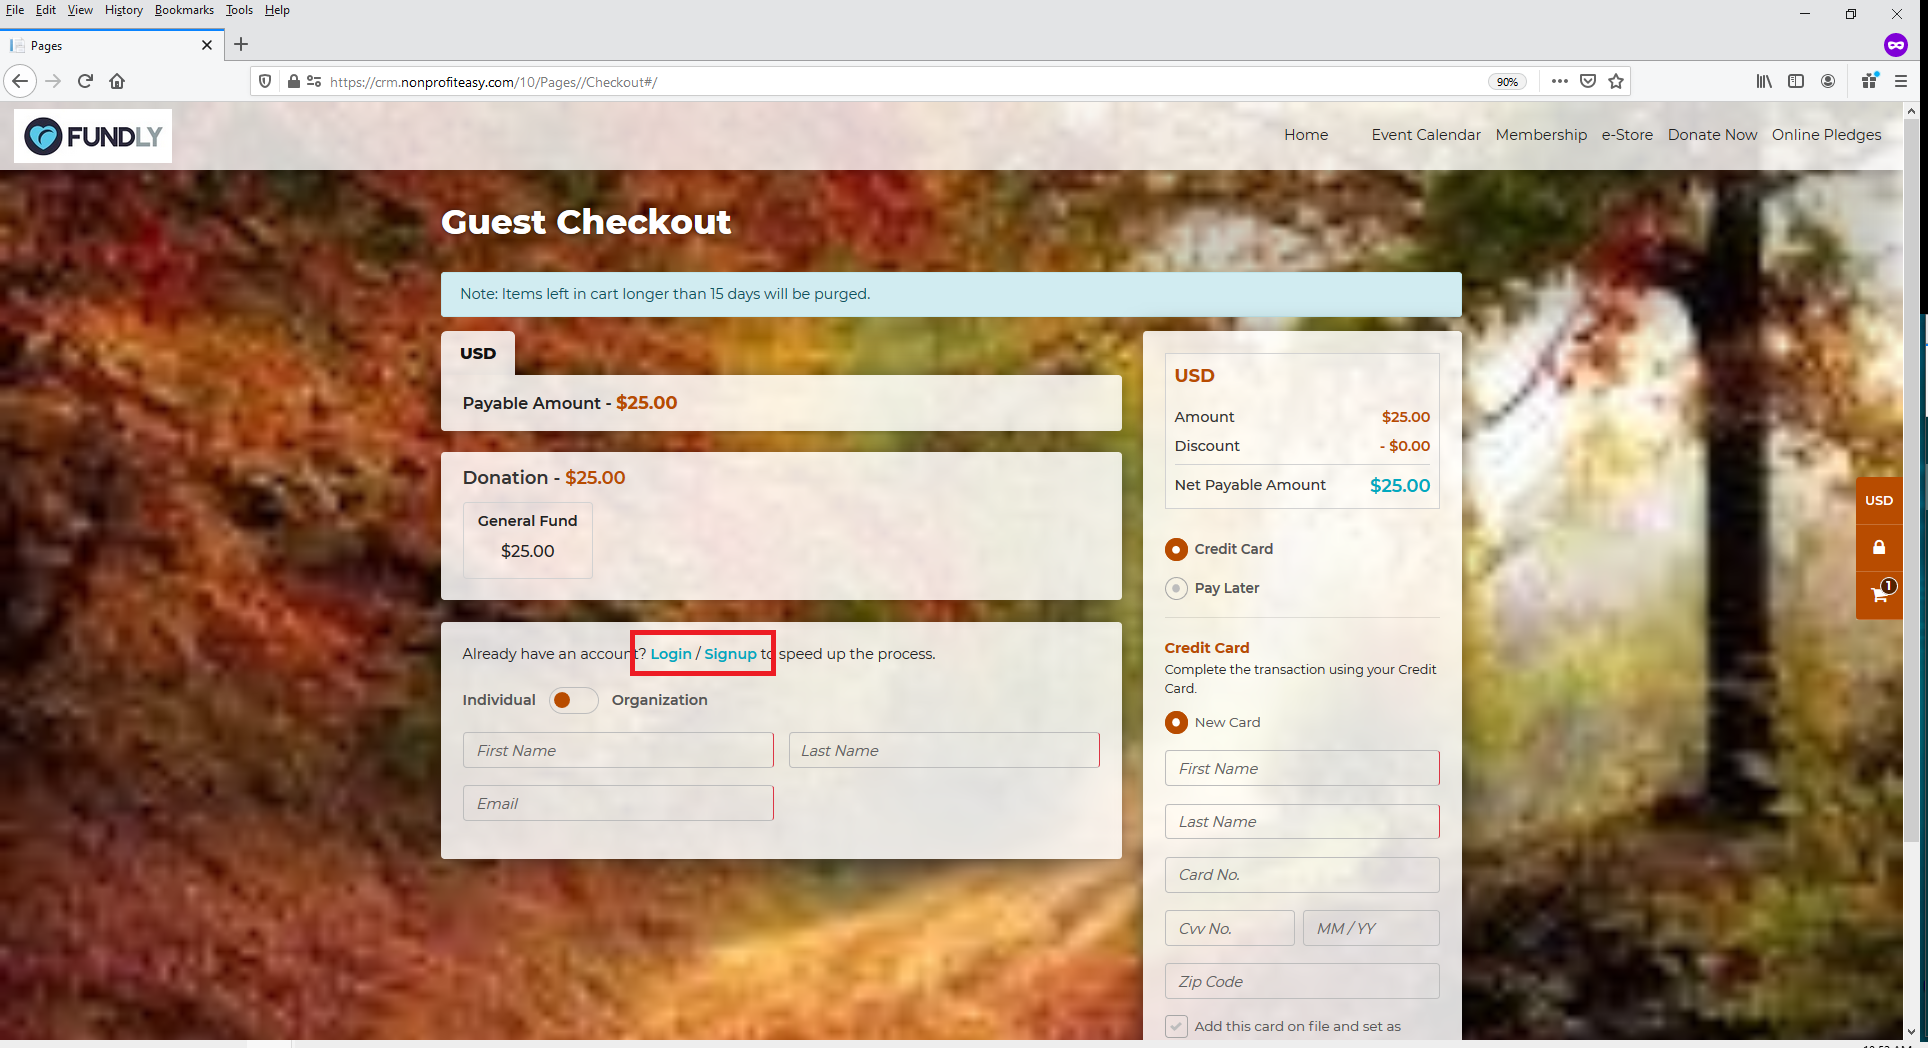
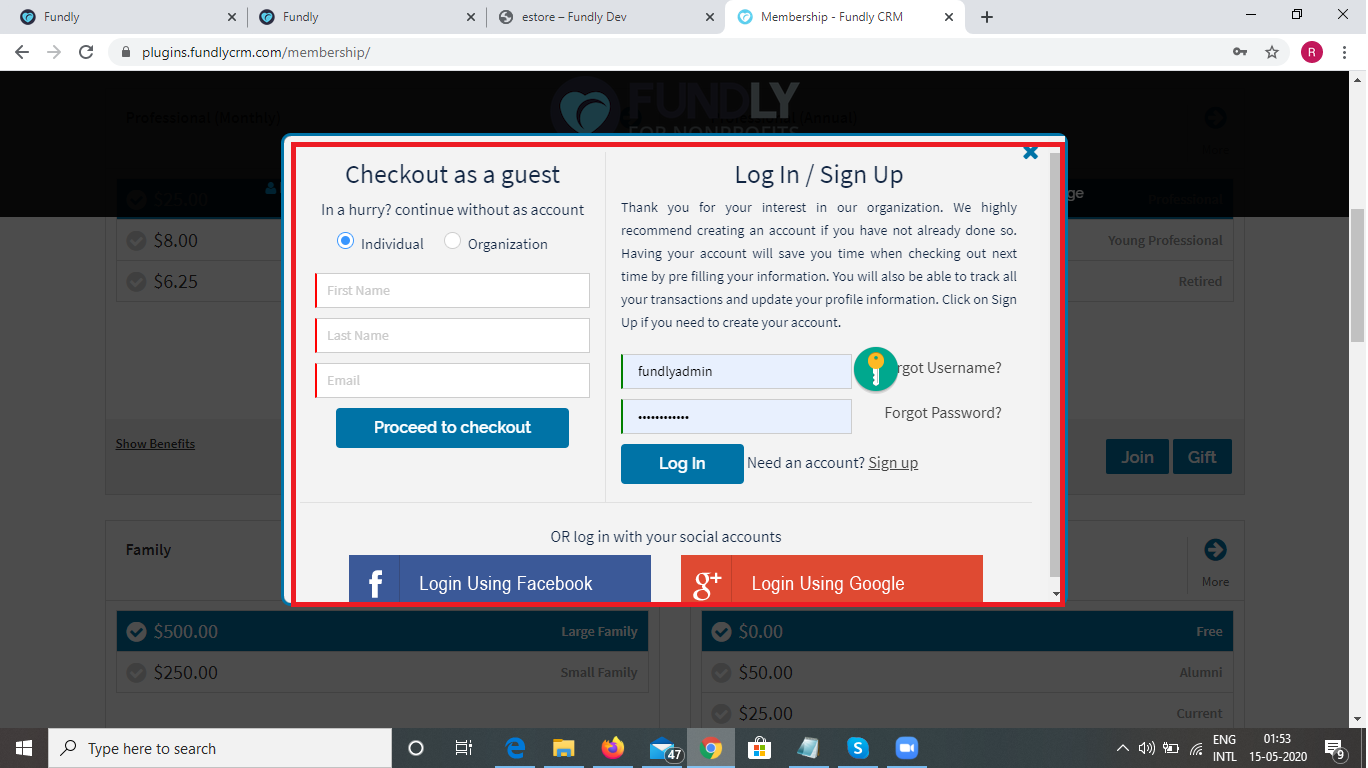
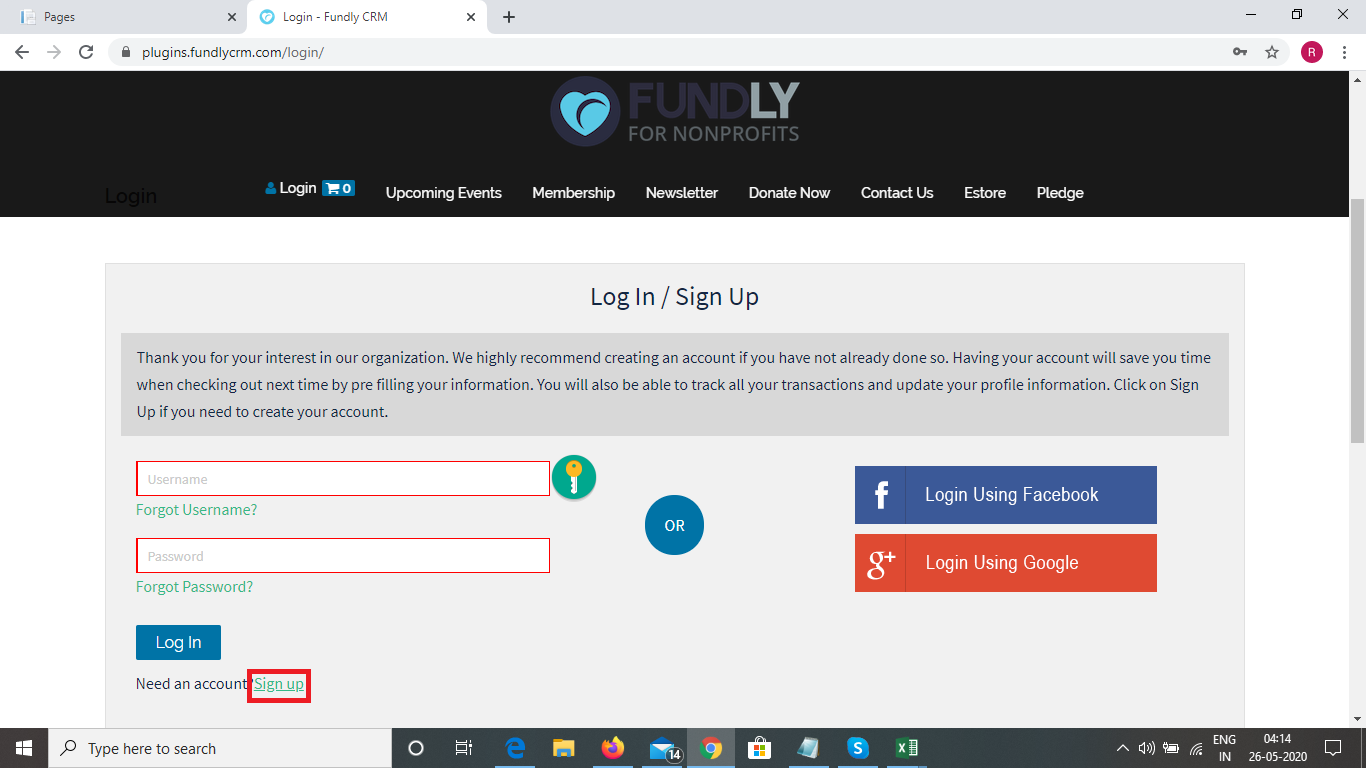
- To sign up for a public profile: the user should start by clicking the Login button (Plug-In)/Lock Icon and then "Sign Up" (Pages) from any screen prior to starting a transaction or the Login/Signup button/text link if signing up while checking out a transaction.
PLUG-INS
PAGES
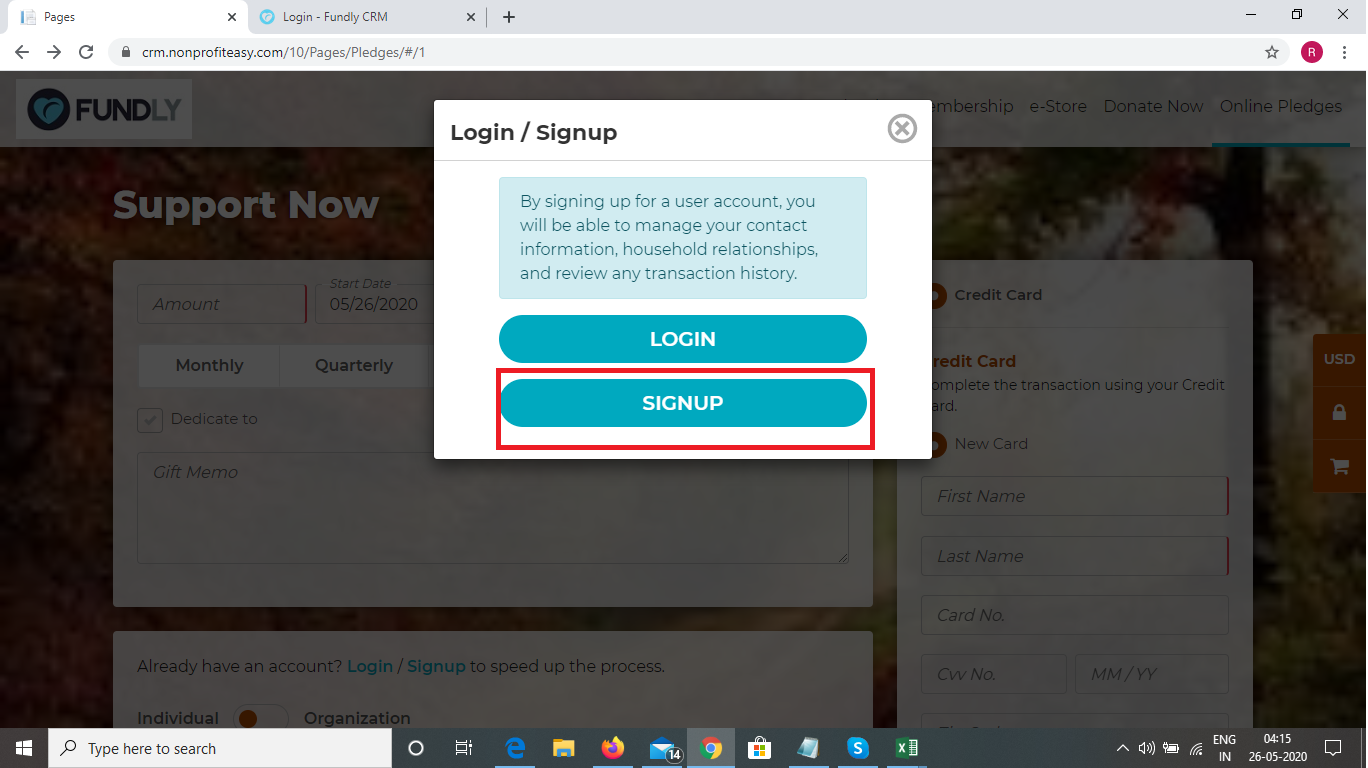
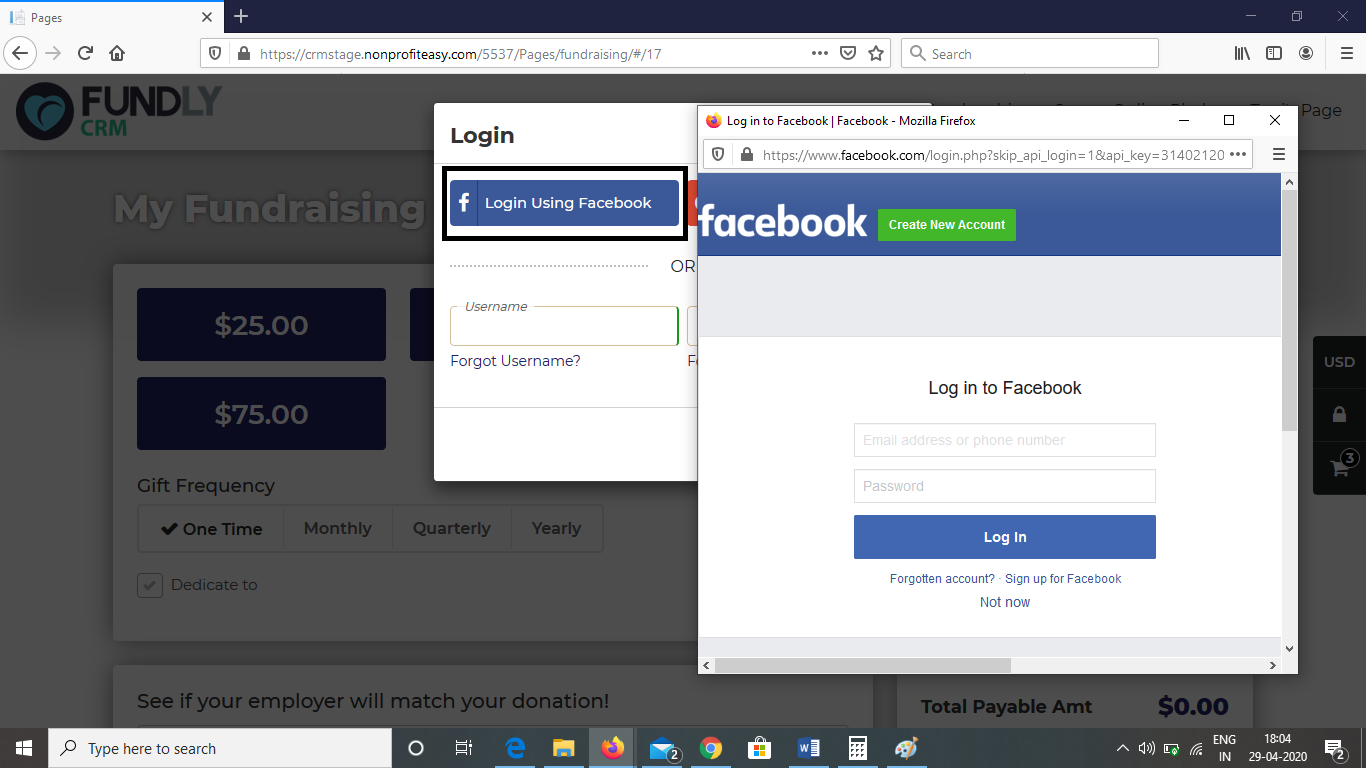
- Next, in the resulting pop up, the user will create a username and password. There are three types of usernames and passwords that the user can create:
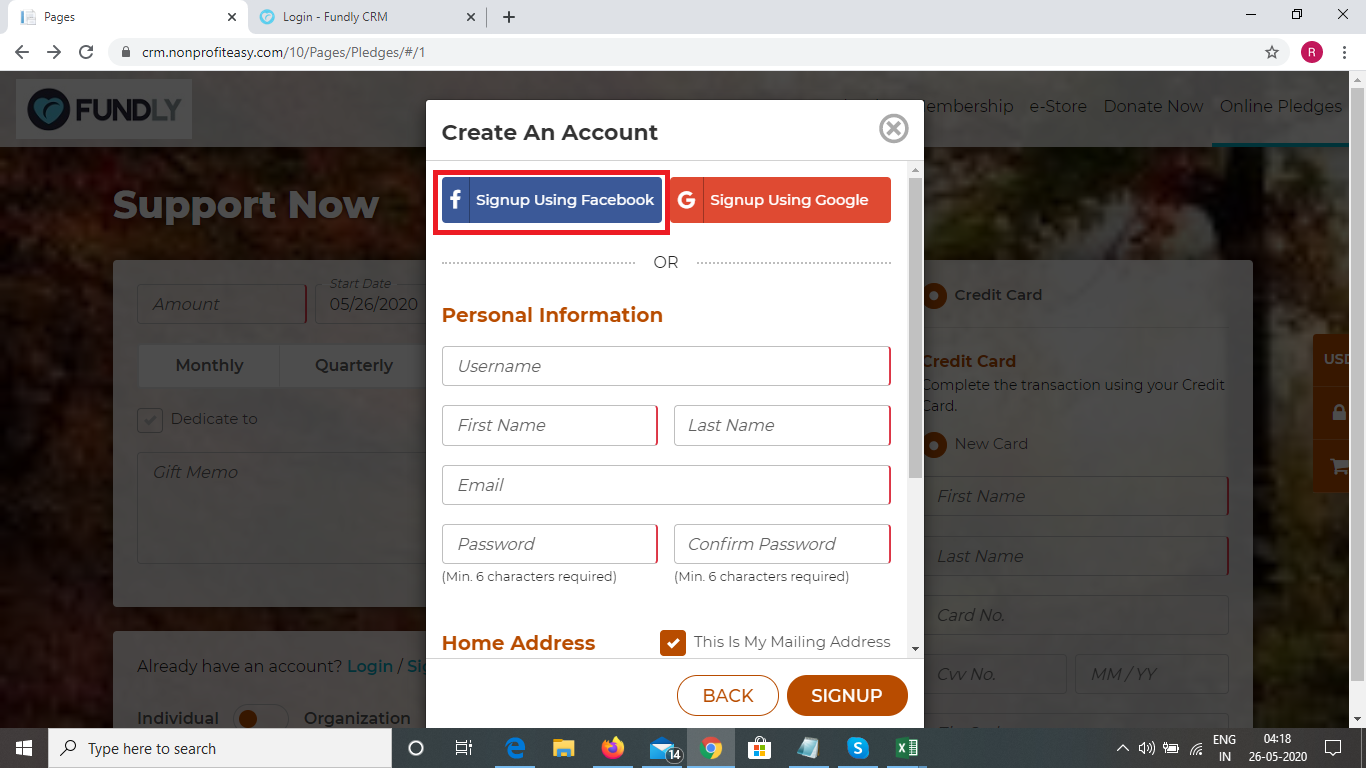
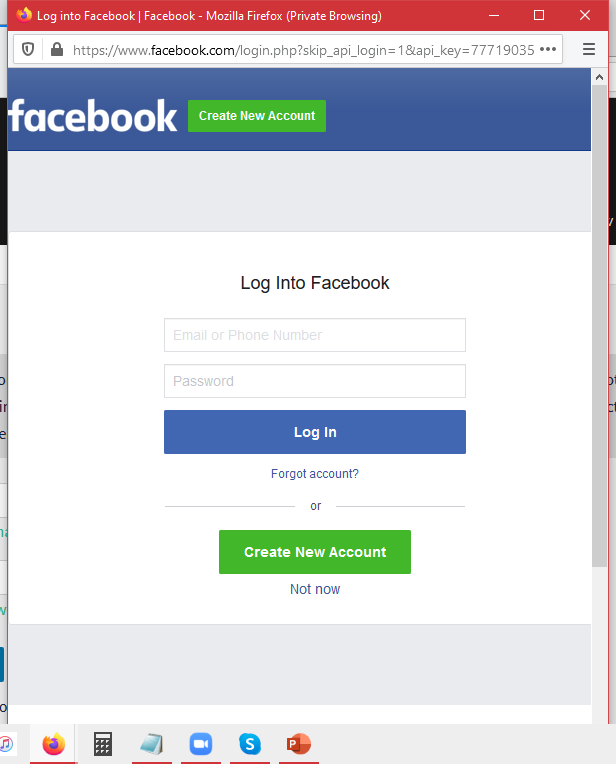
- Sign up Using Facebook/their Facebook log-in credentials by clicking on the "Login with Facebook" button (plug-ins)/Signup with Facebook" button (pages). Clicking this button will prompt the user to provide their Facebook username and password, which will then be authenticated by Facebook. If the user does not yet have a Facebook account, they can sign up/create one "on the fly" via the resulting pop up screen.
PLUG-INS
PAGES
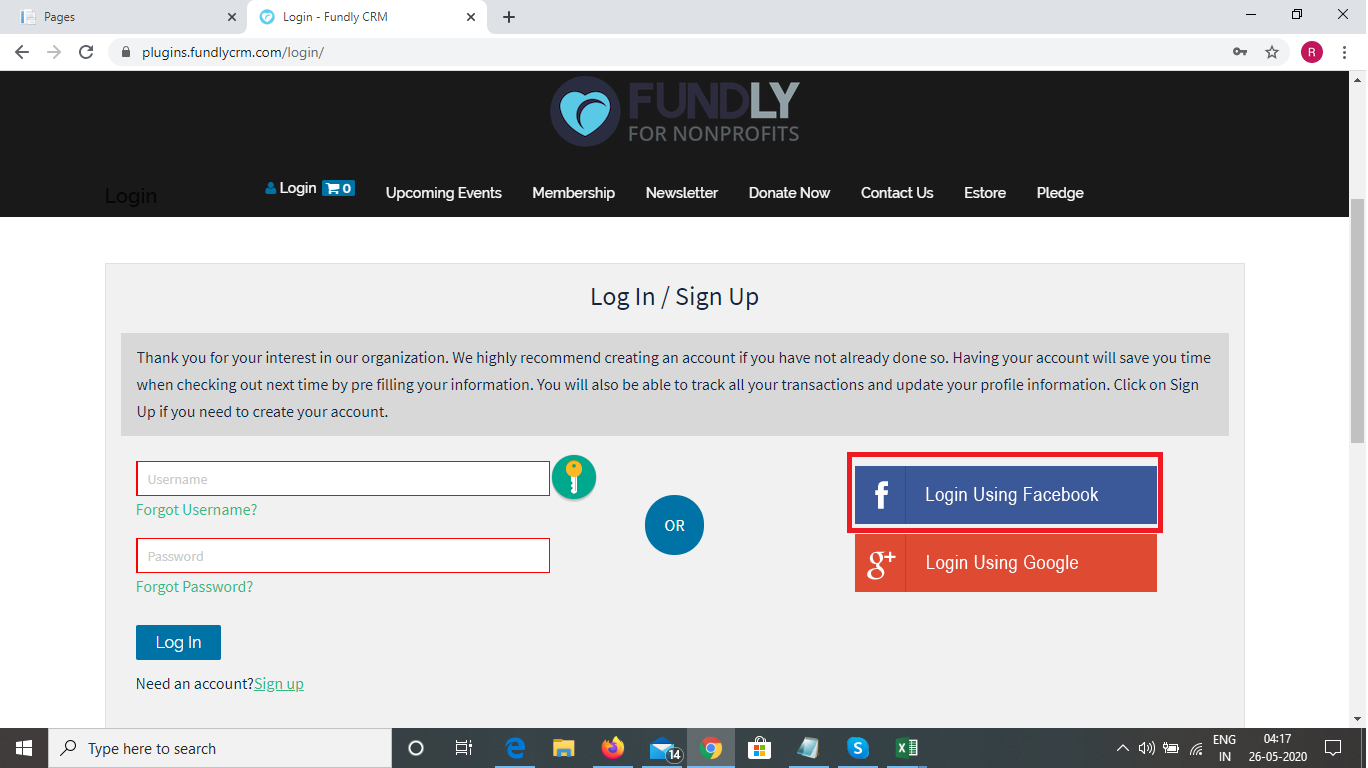
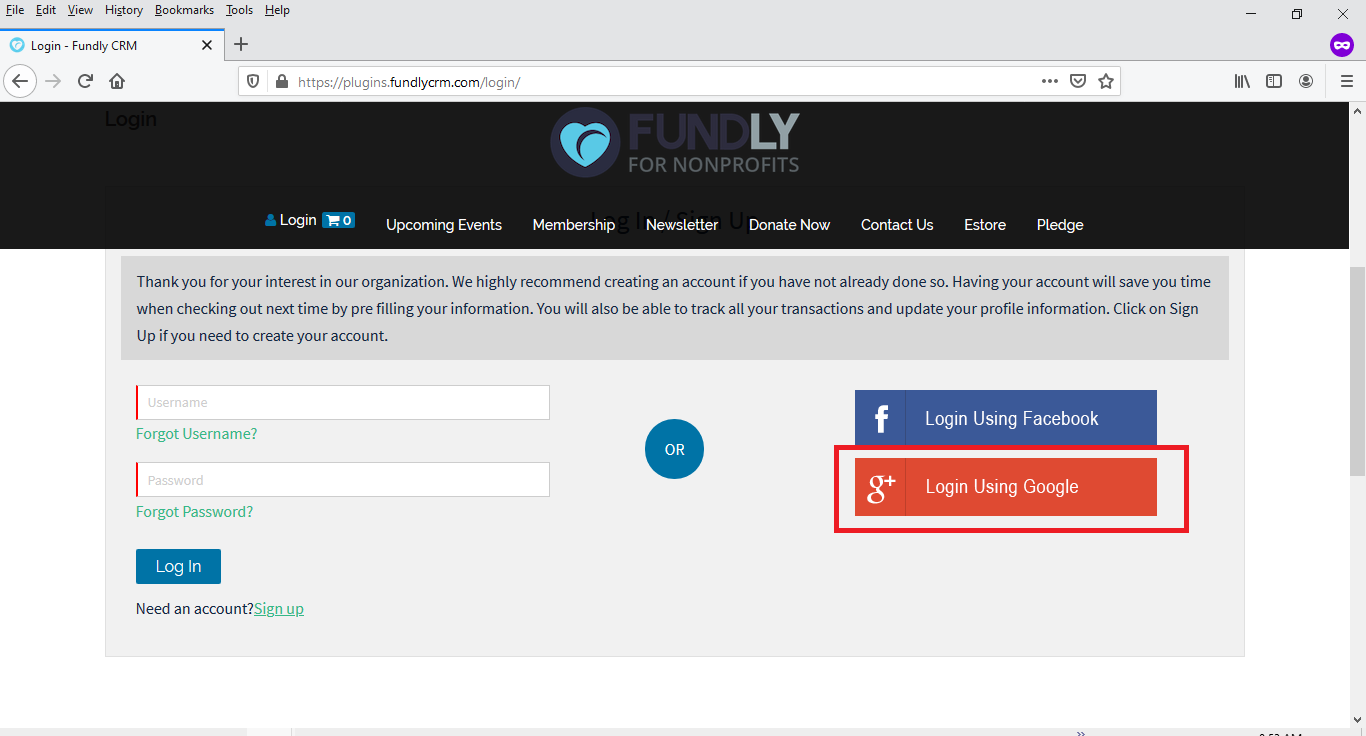
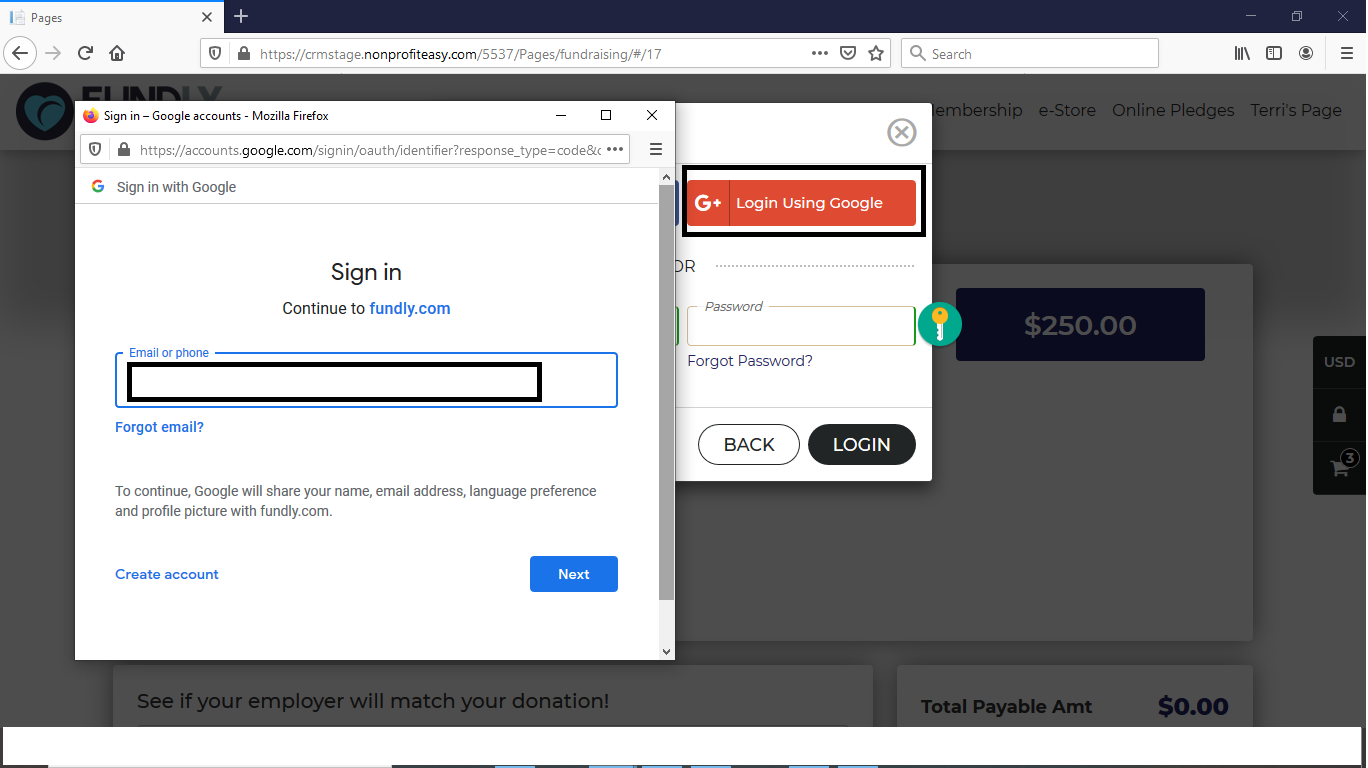
- Sign up Using Google/their Google log-in credentials by clicking on the "Login with Google" button (plug-ins)/"Signup with Google" button (pages). Clicking this button will prompt the user to provide their Google account email address or phone number and password (Google Drive, Gmail, etc. username and password), which will then be authenticated by Google. If the user does not yet have a Google account, they can sign up/create one "on the fly" via the resulting pop up screen.
PLUG-INS
PAGES


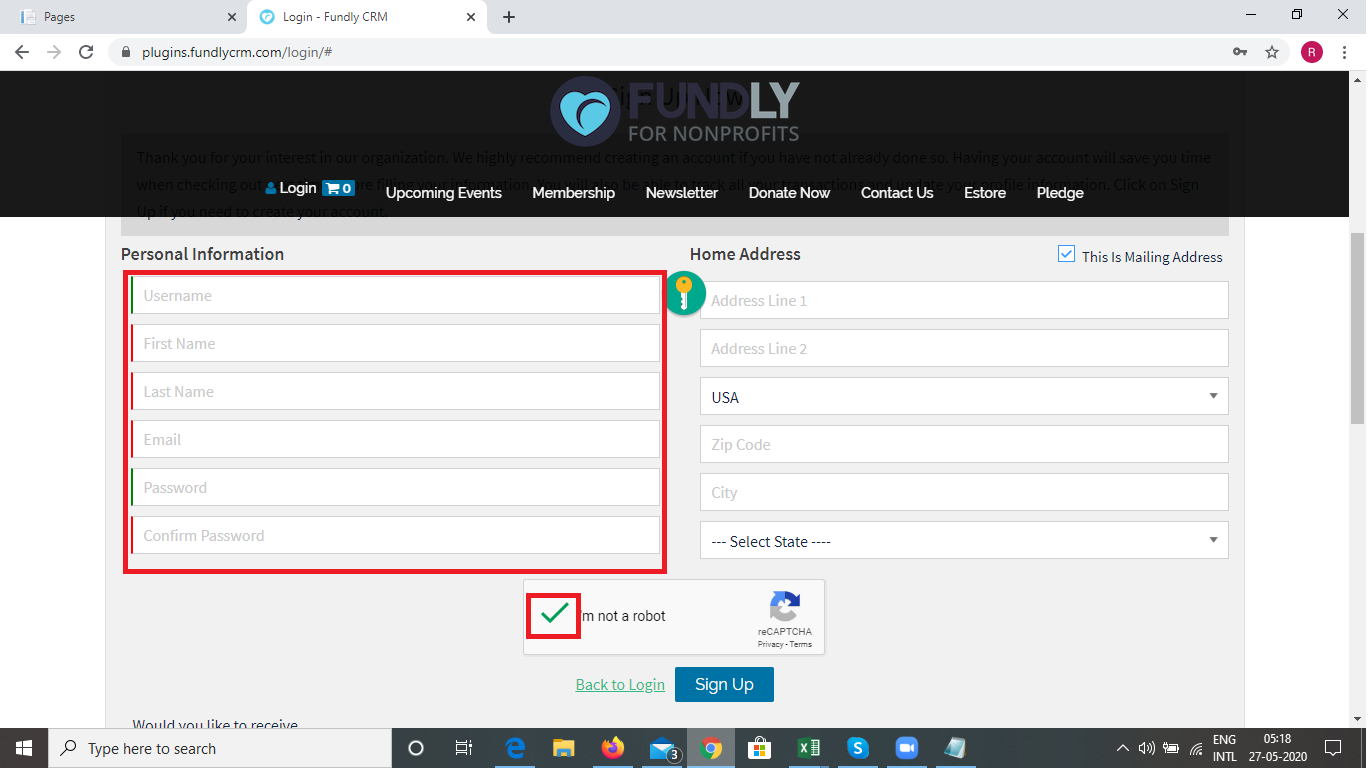
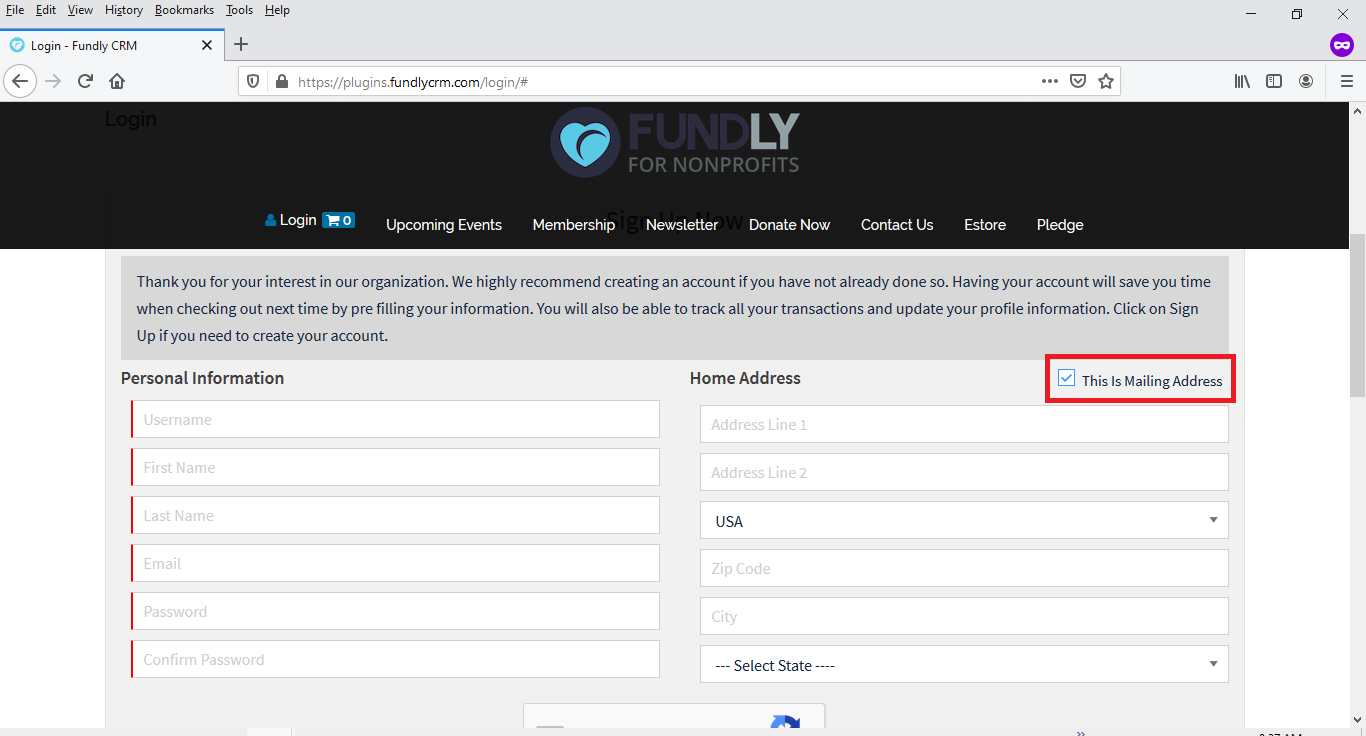
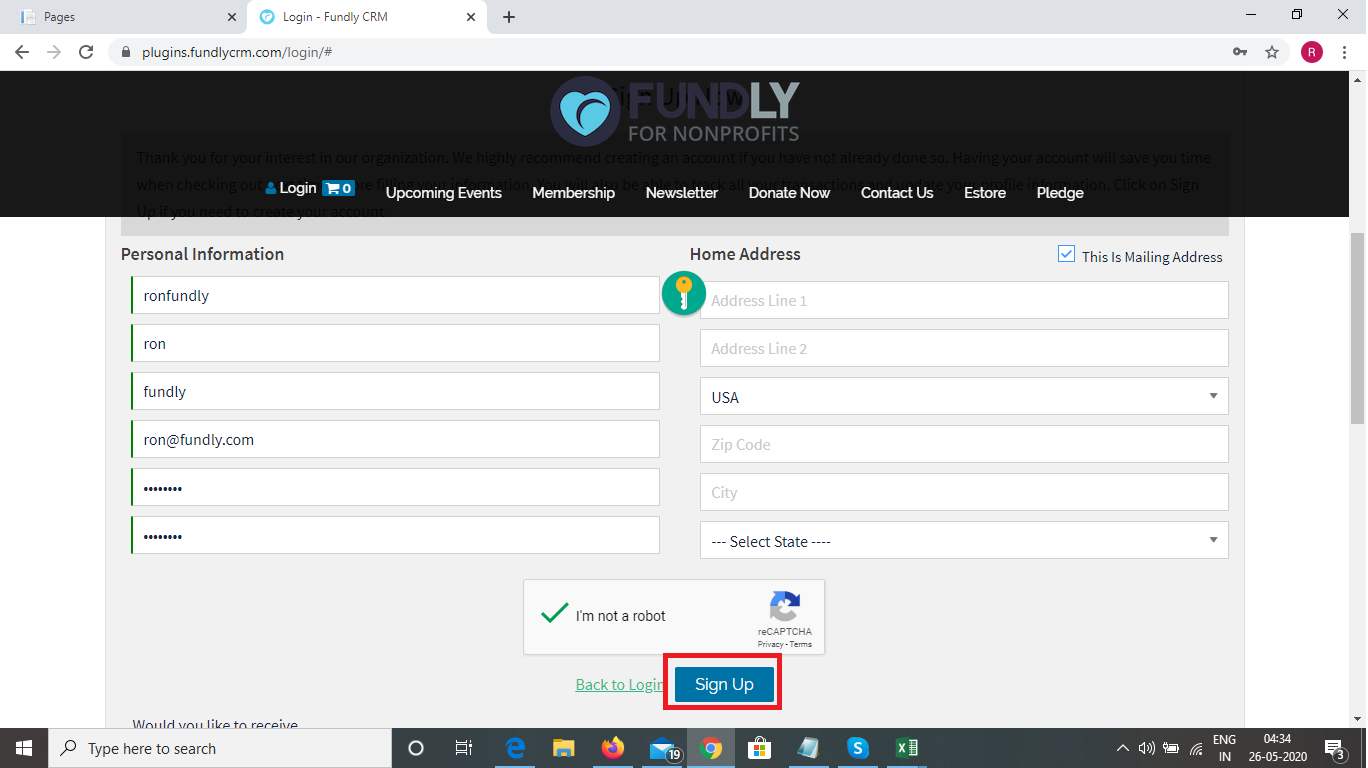
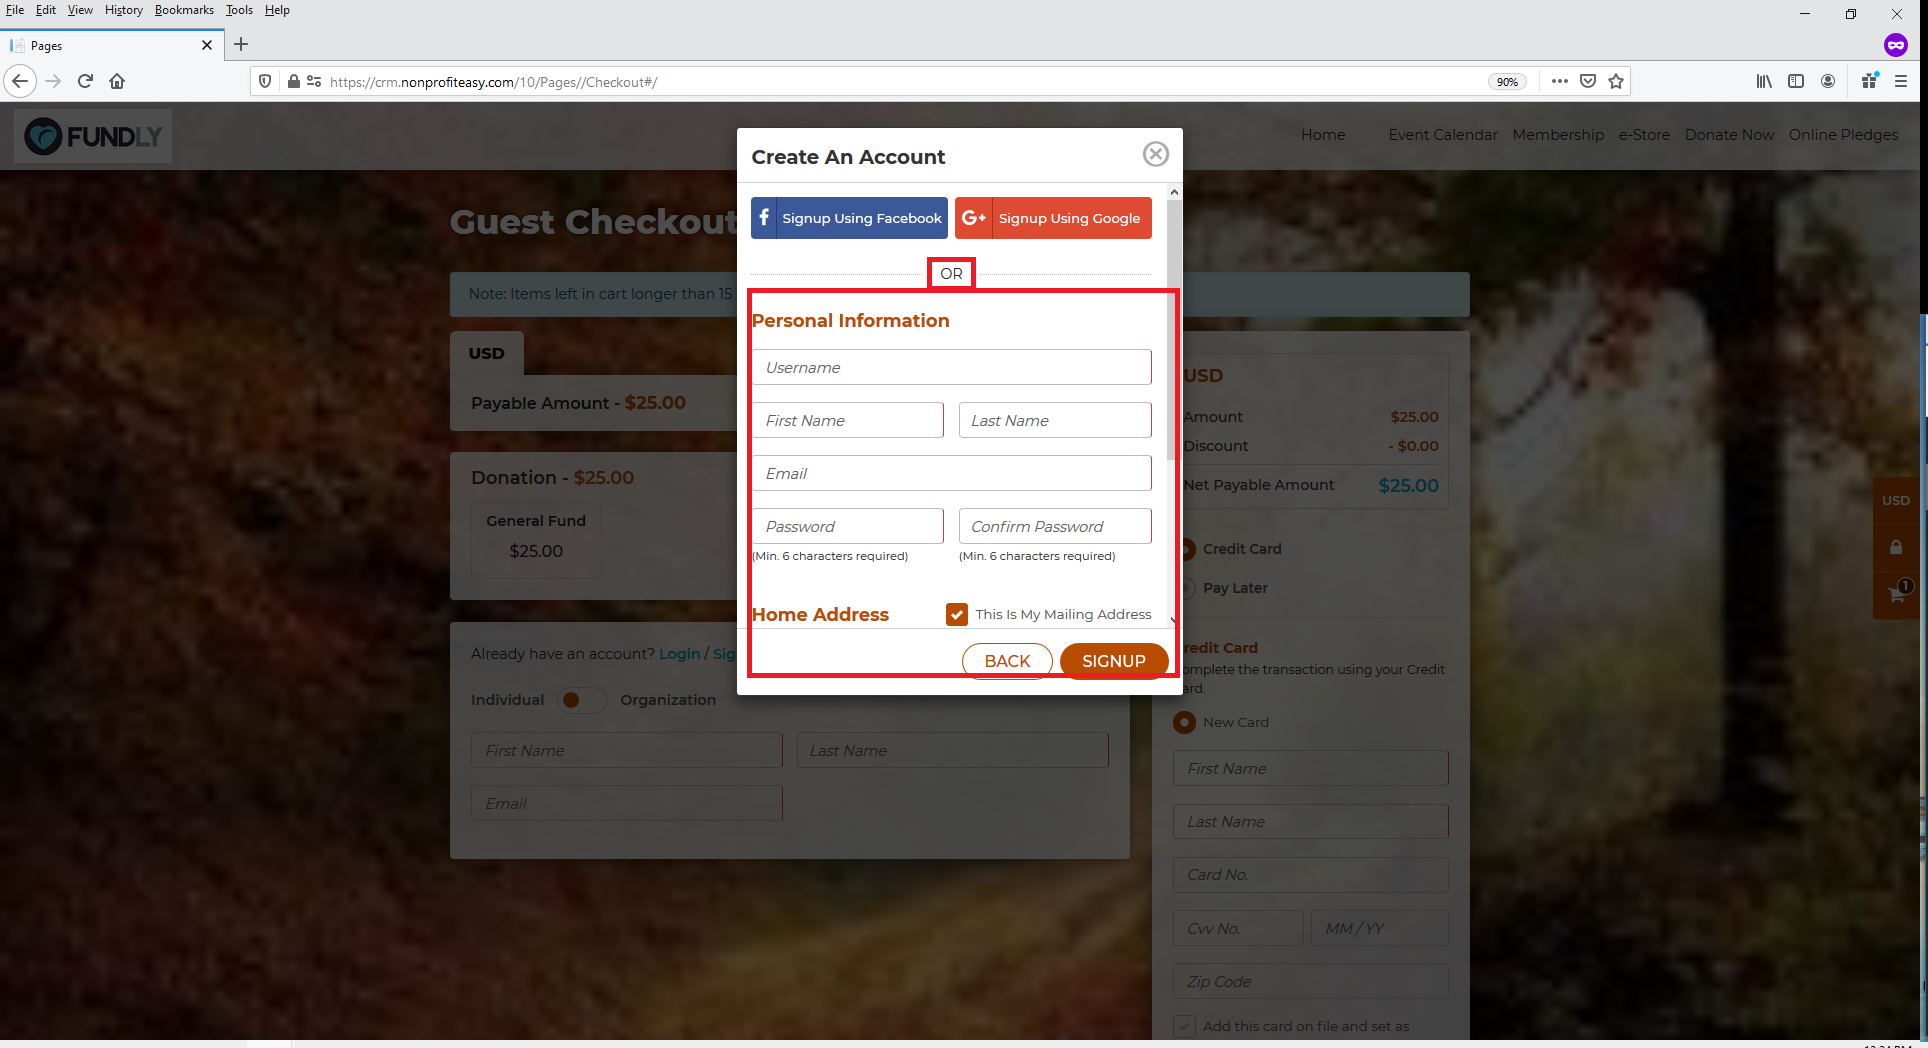
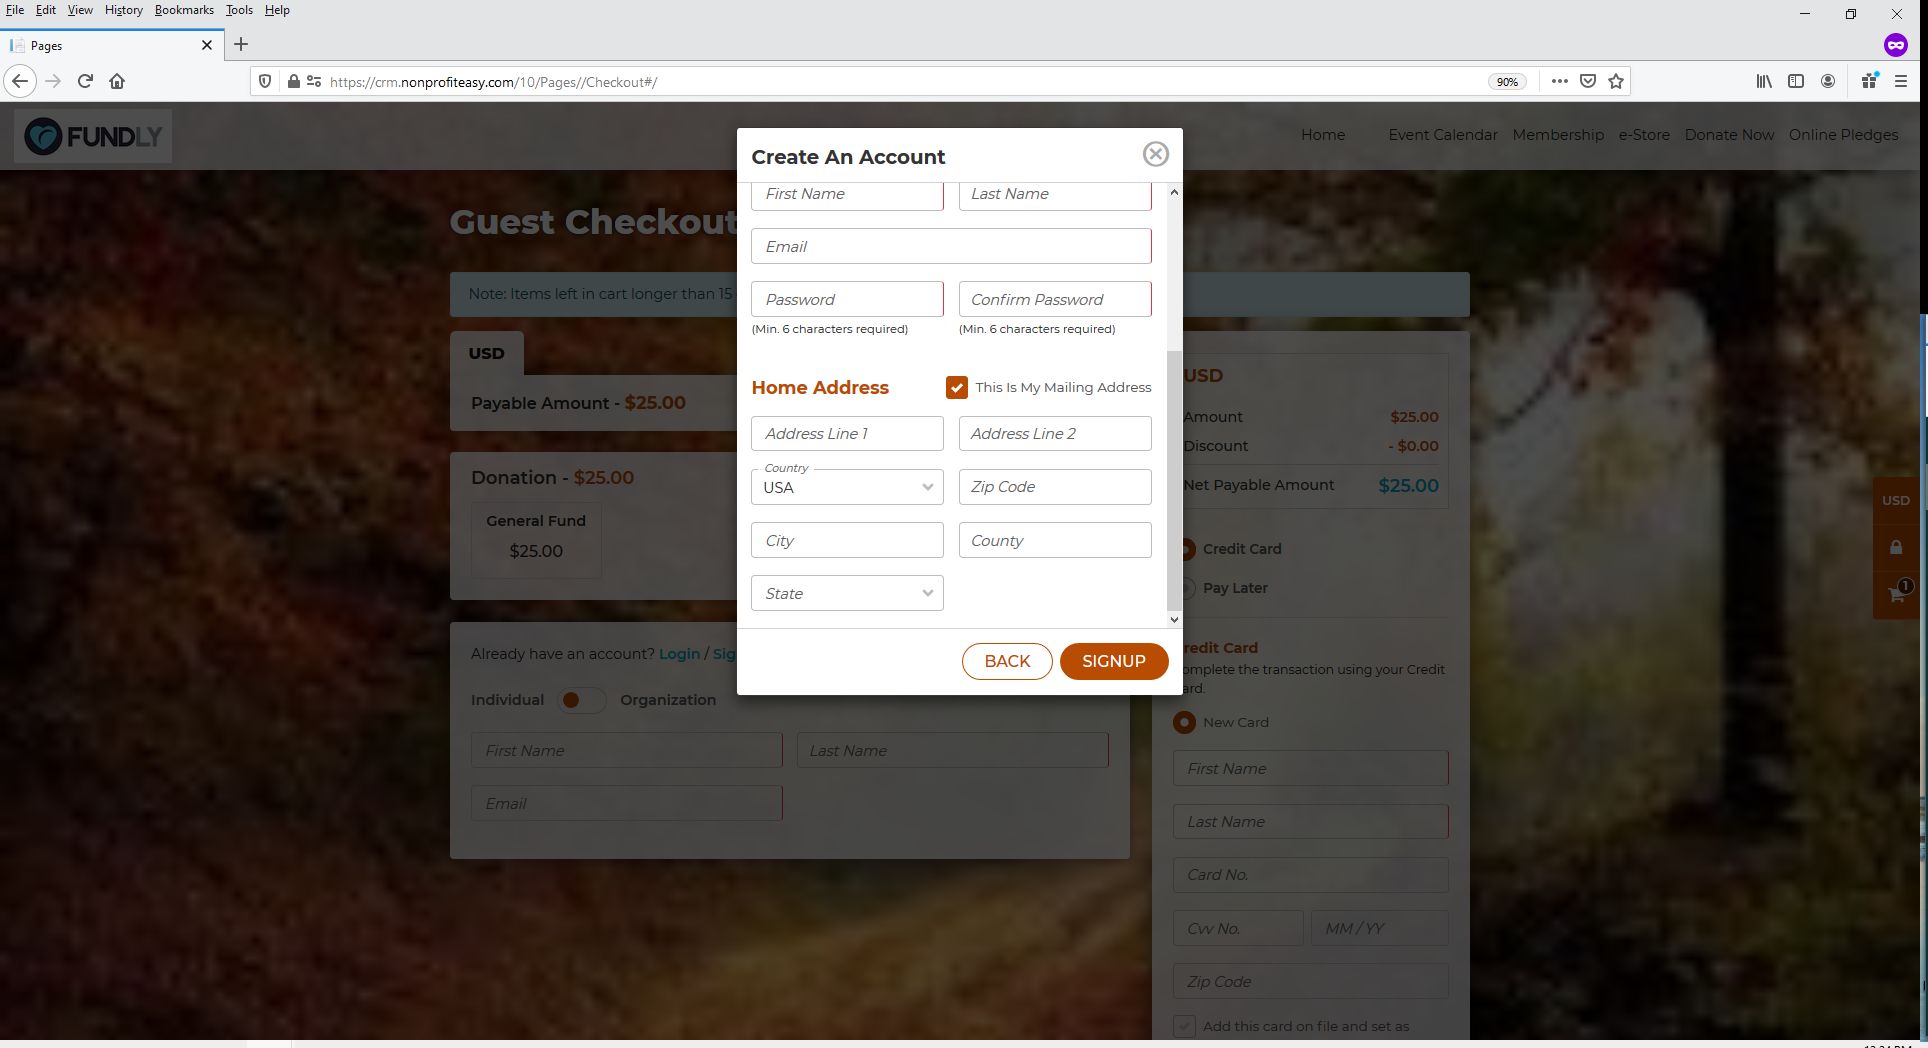
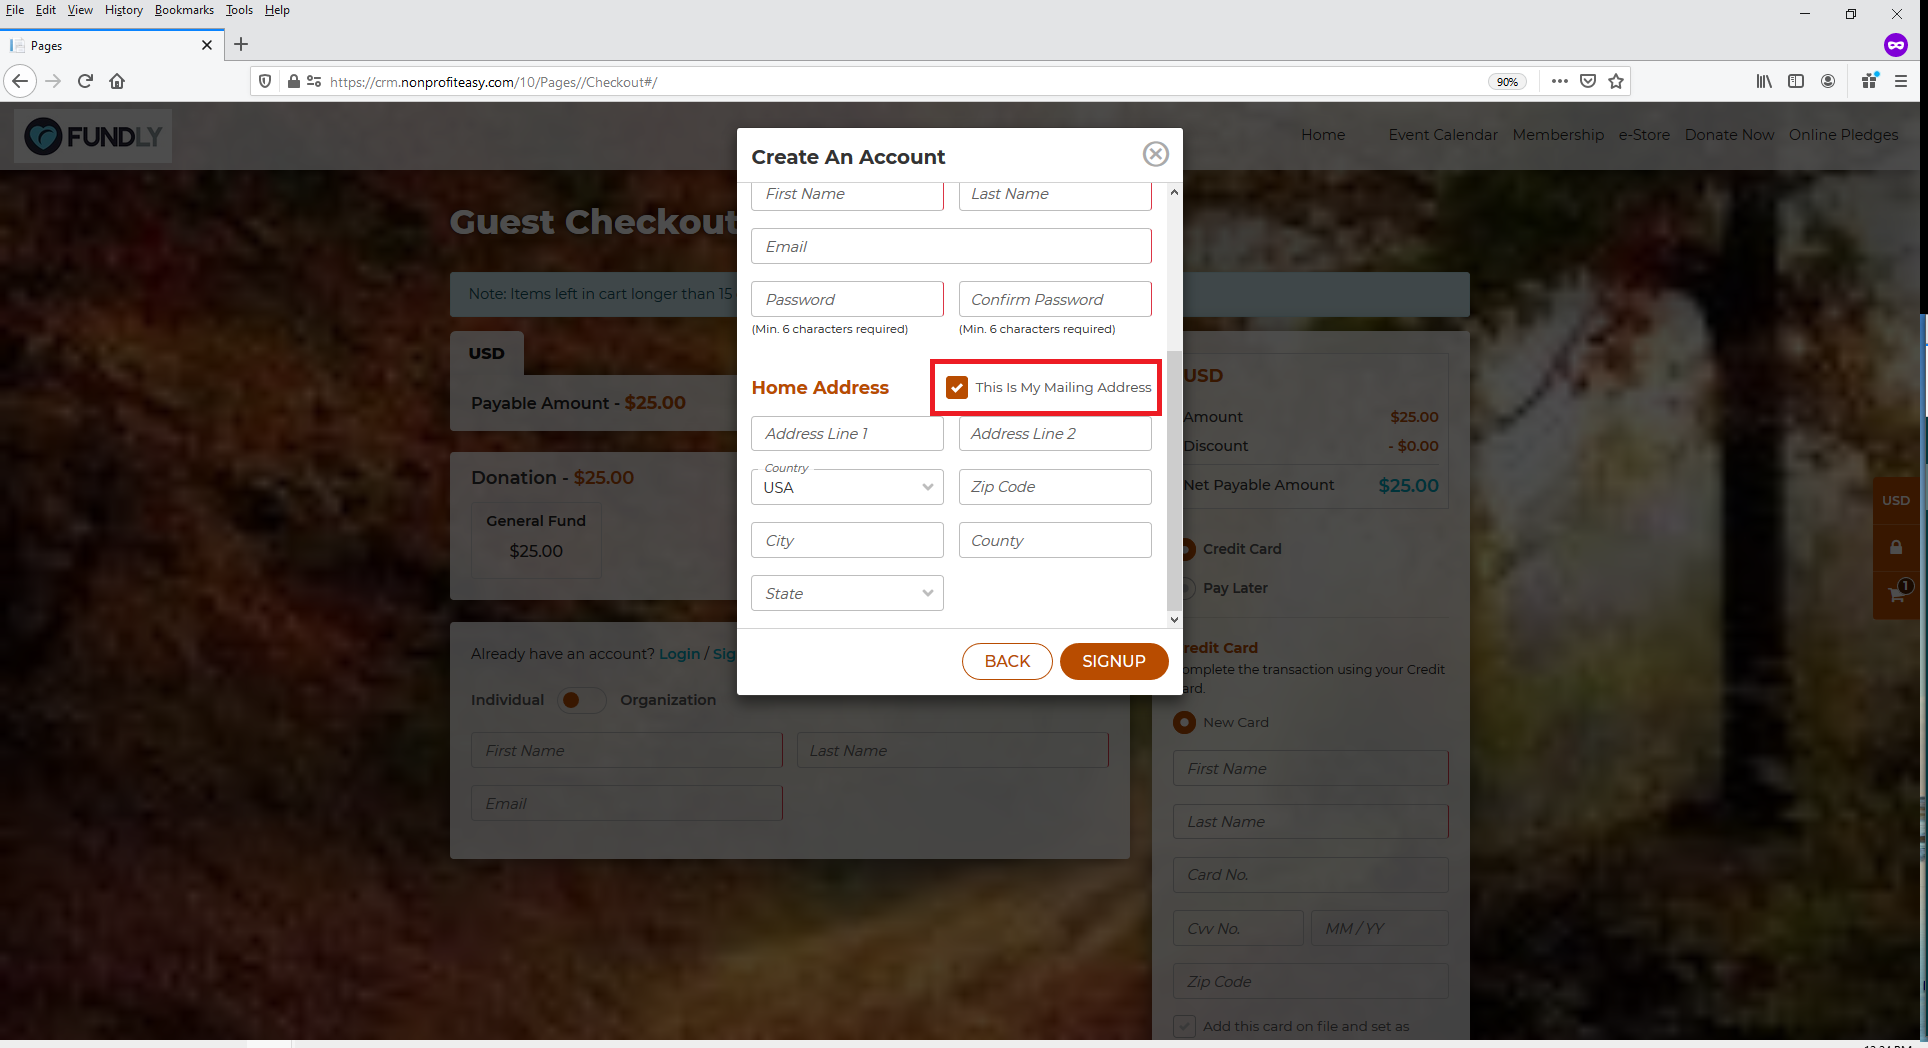
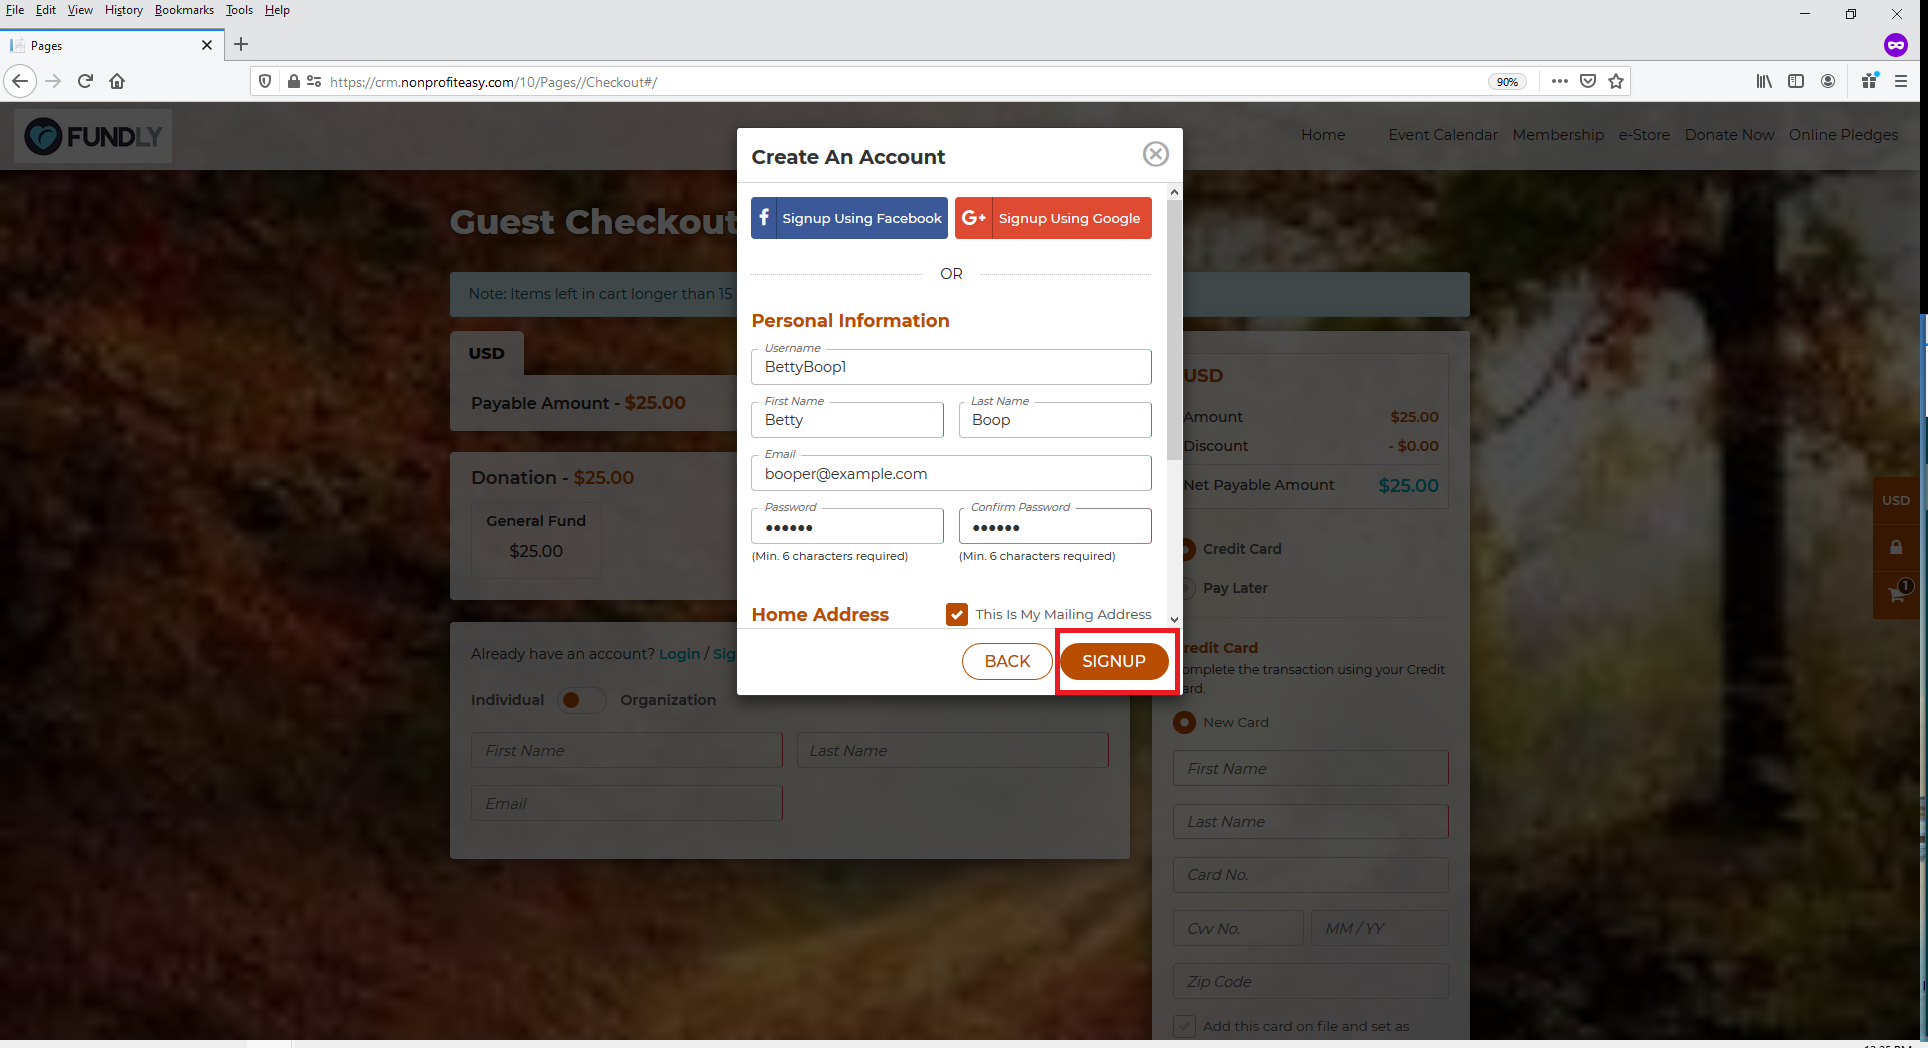
- Manually created username and password of their choosing by completing the Personal Information section. The user should create a username and fill in the required fields (First Name, Last Name, Email Address, Password, and Confirm Password (password must be a minimum of 6 characters). They can also opt to fill out their Home Address and select if the Home Address is also a Mailing Address (if they check this box, the home address will be saved in their CRM contact record in the mailing address block. If this box is not checked, then the home address will be saved in the Other Address block of their record. After completing the fields, the user should click Signup to save the information.
PLEASE NOTE: if any part of address is required as part of your duplicate prevention settings, then that field/those fields will also become required on the create public profile pop up box.
PLUG-INS
PAGES
- Sign up Using Facebook/their Facebook log-in credentials by clicking on the "Login with Facebook" button (plug-ins)/Signup with Facebook" button (pages). Clicking this button will prompt the user to provide their Facebook username and password, which will then be authenticated by Facebook. If the user does not yet have a Facebook account, they can sign up/create one "on the fly" via the resulting pop up screen.
- Next, in the resulting pop up, the user will create a username and password. There are three types of usernames and passwords that the user can create:
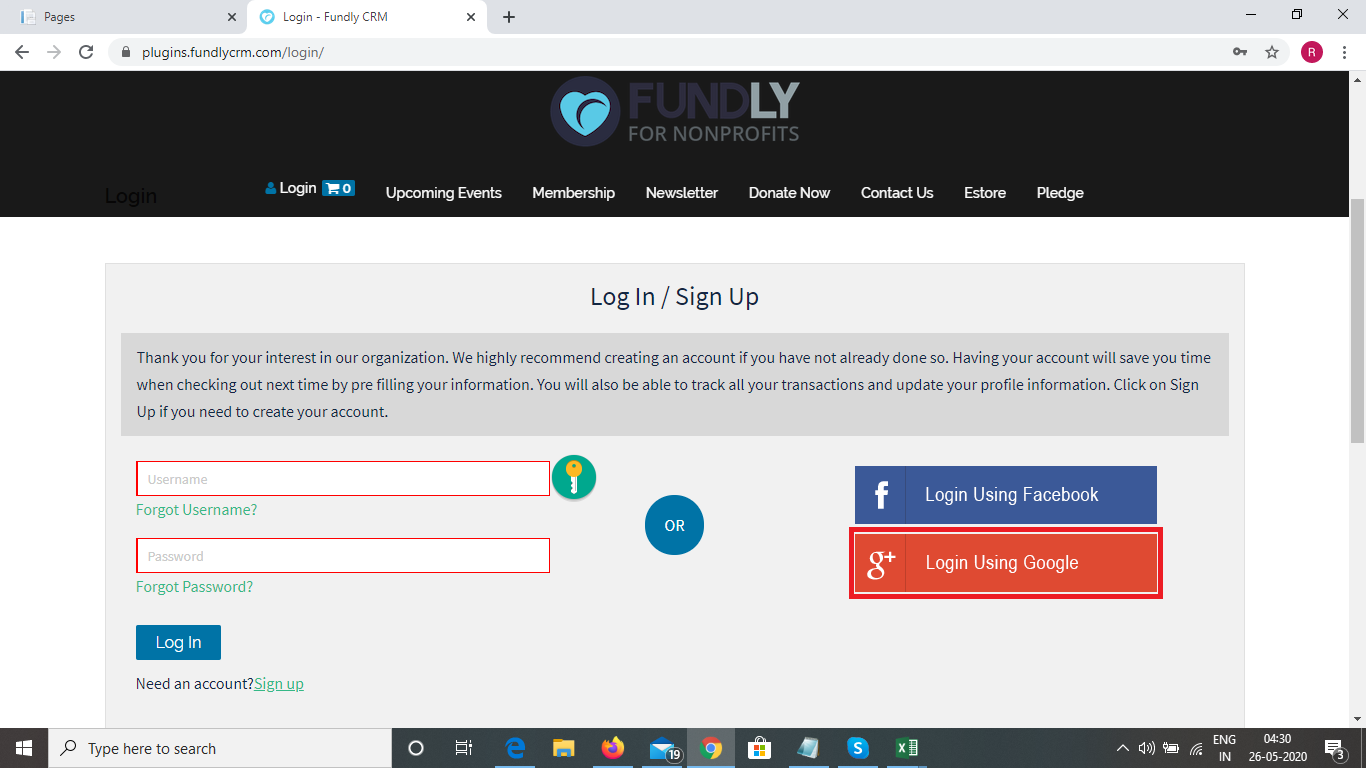
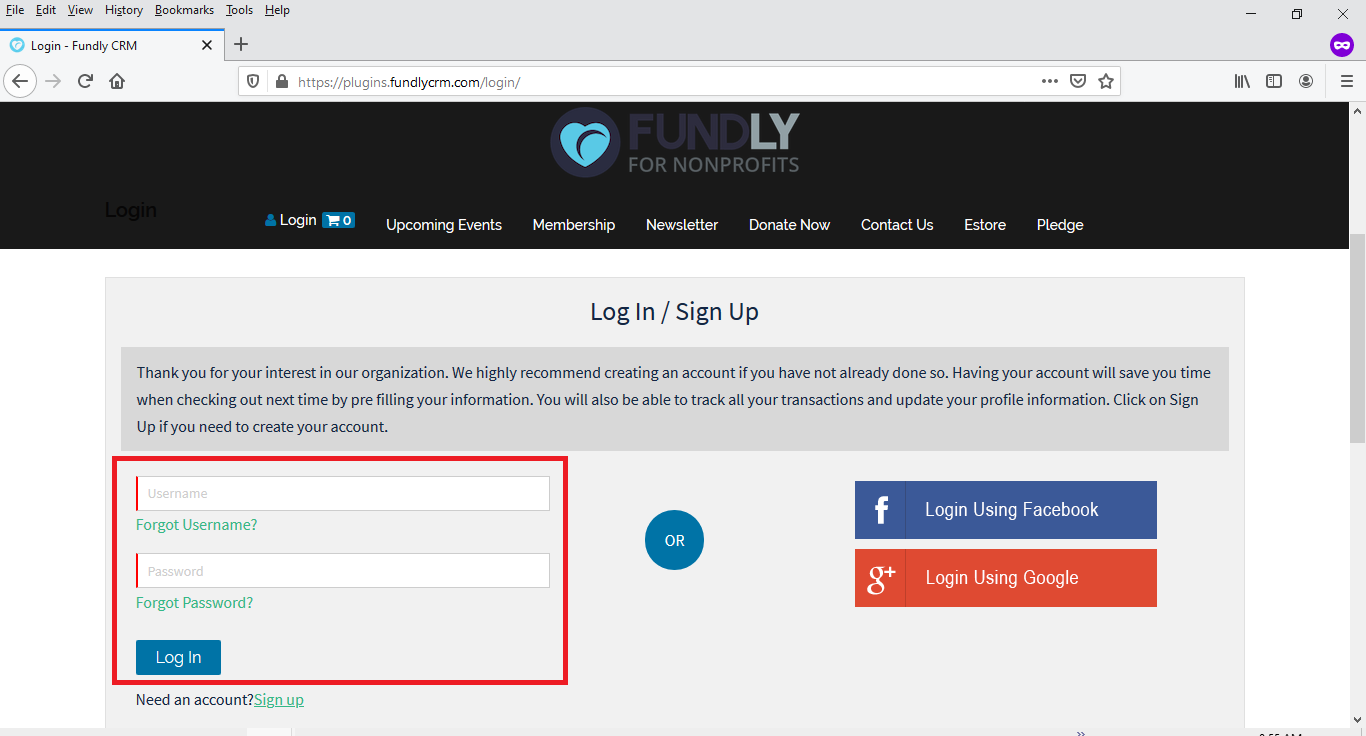
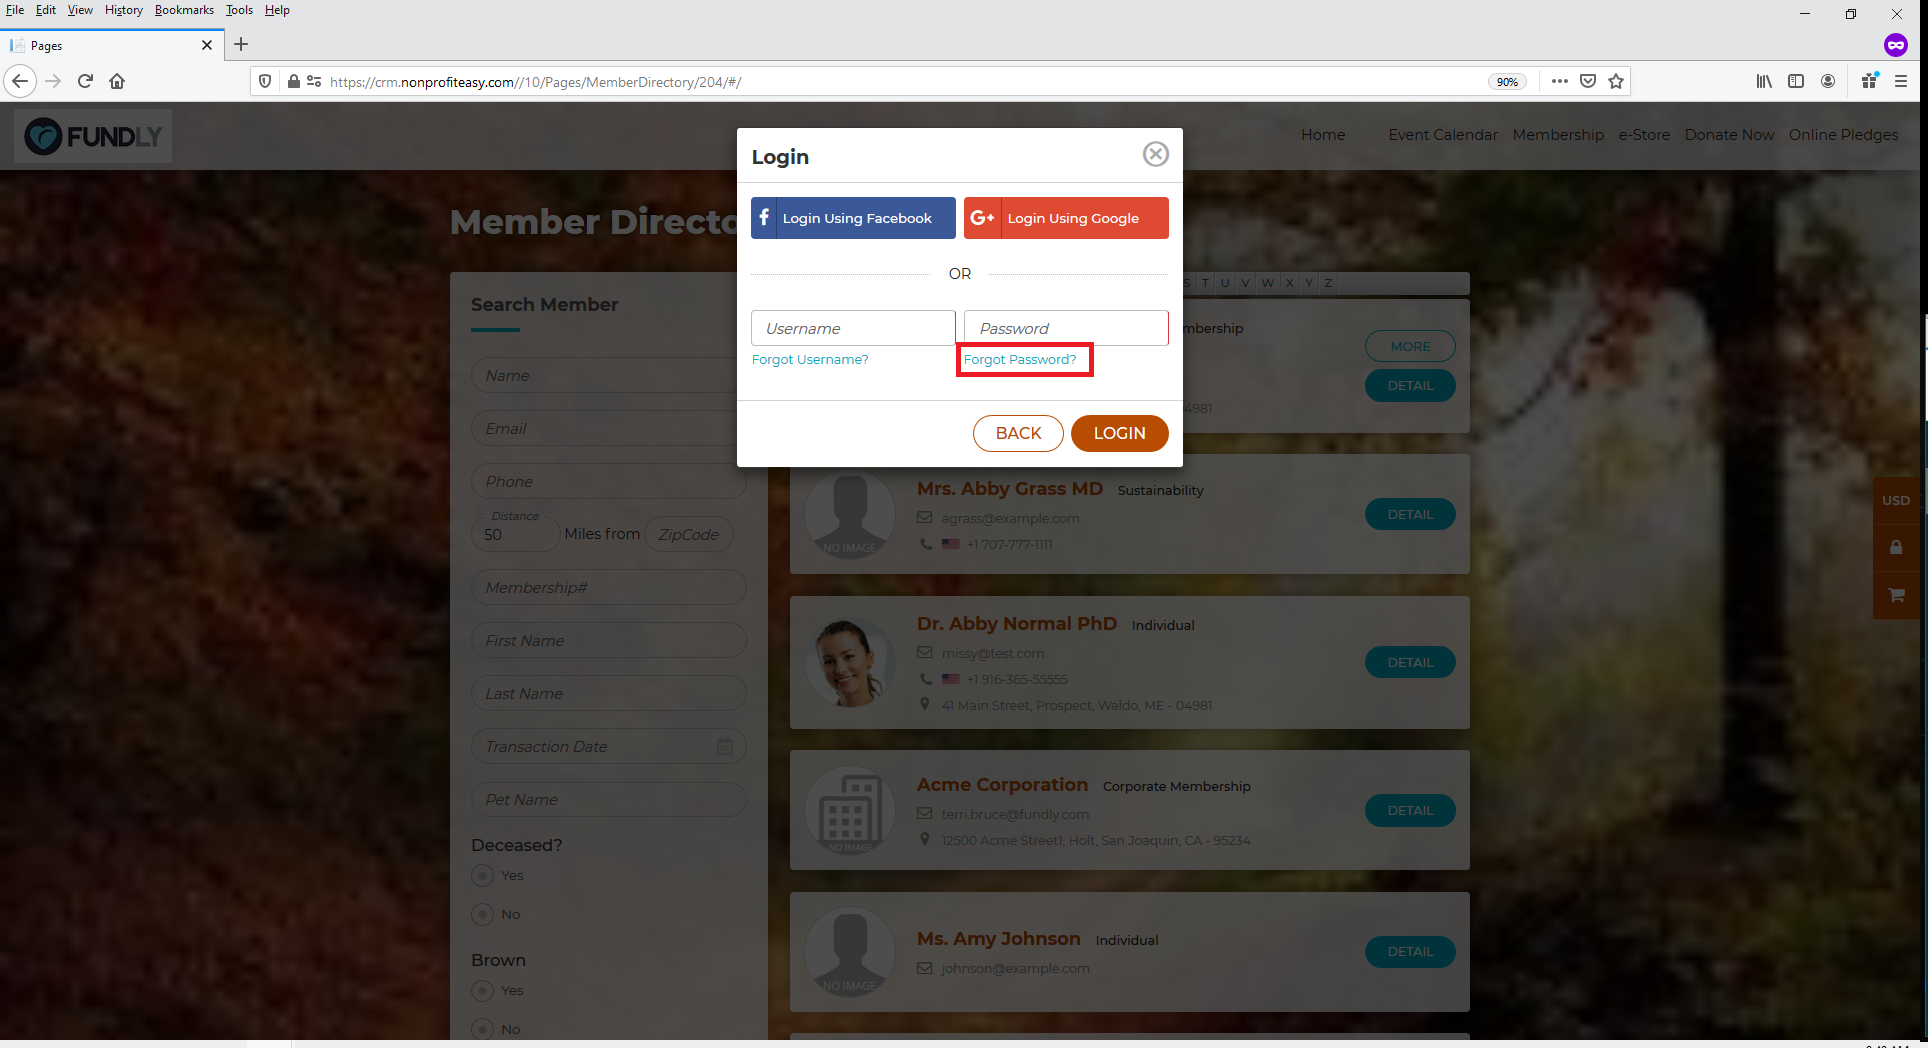
- To log in to their profile, the user should start by clicking the Login button (Plug-In)/Lock Icon and then "Log In" (Pages) from any screen prior to starting a transaction or the Login/Signup button/text link if signing up while checking out a transaction.
PLUG-INS

PAGES


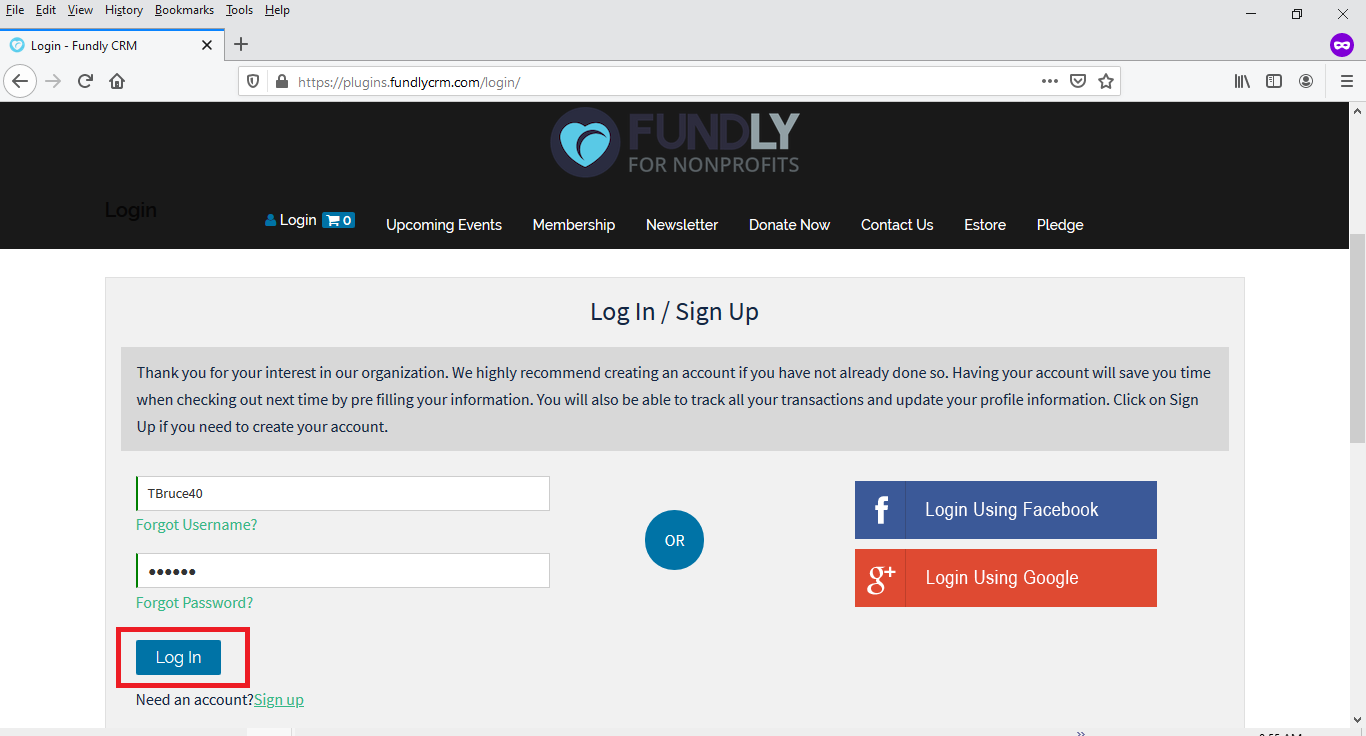
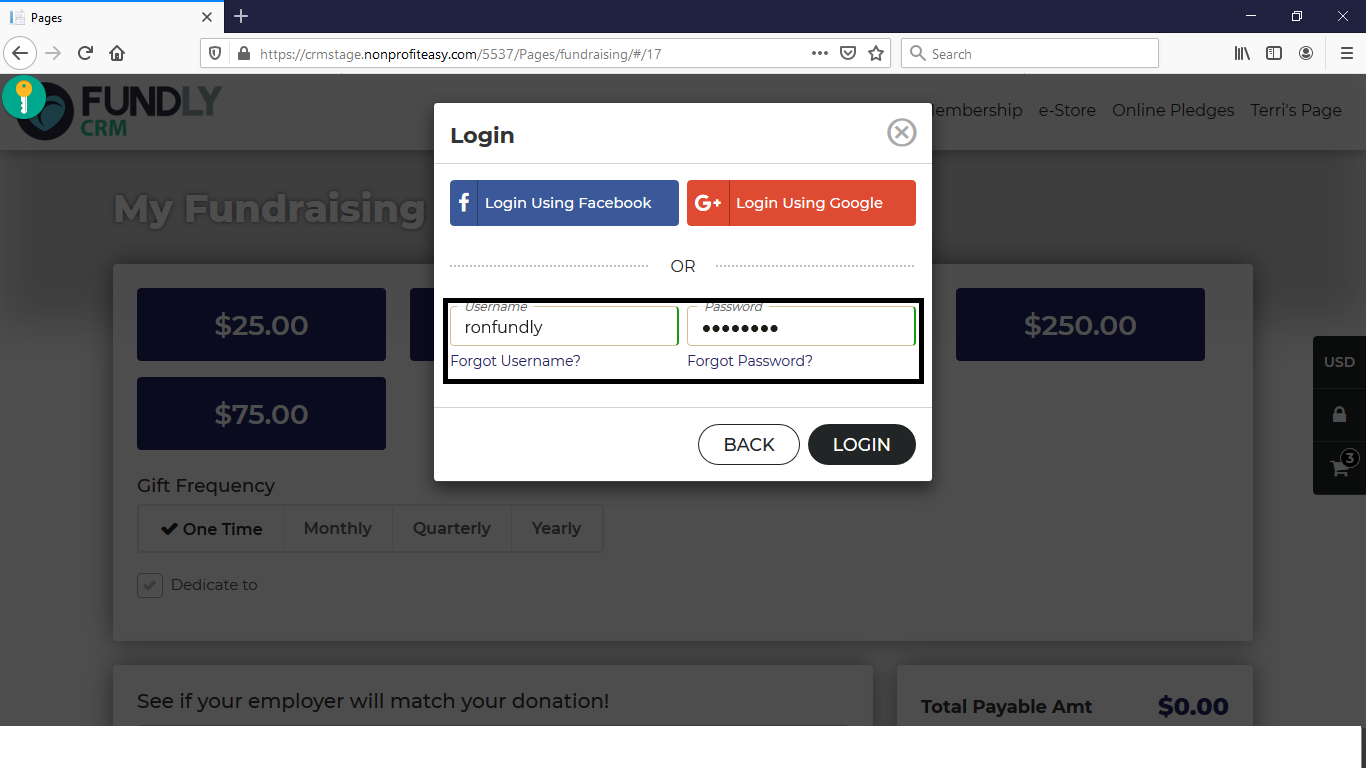
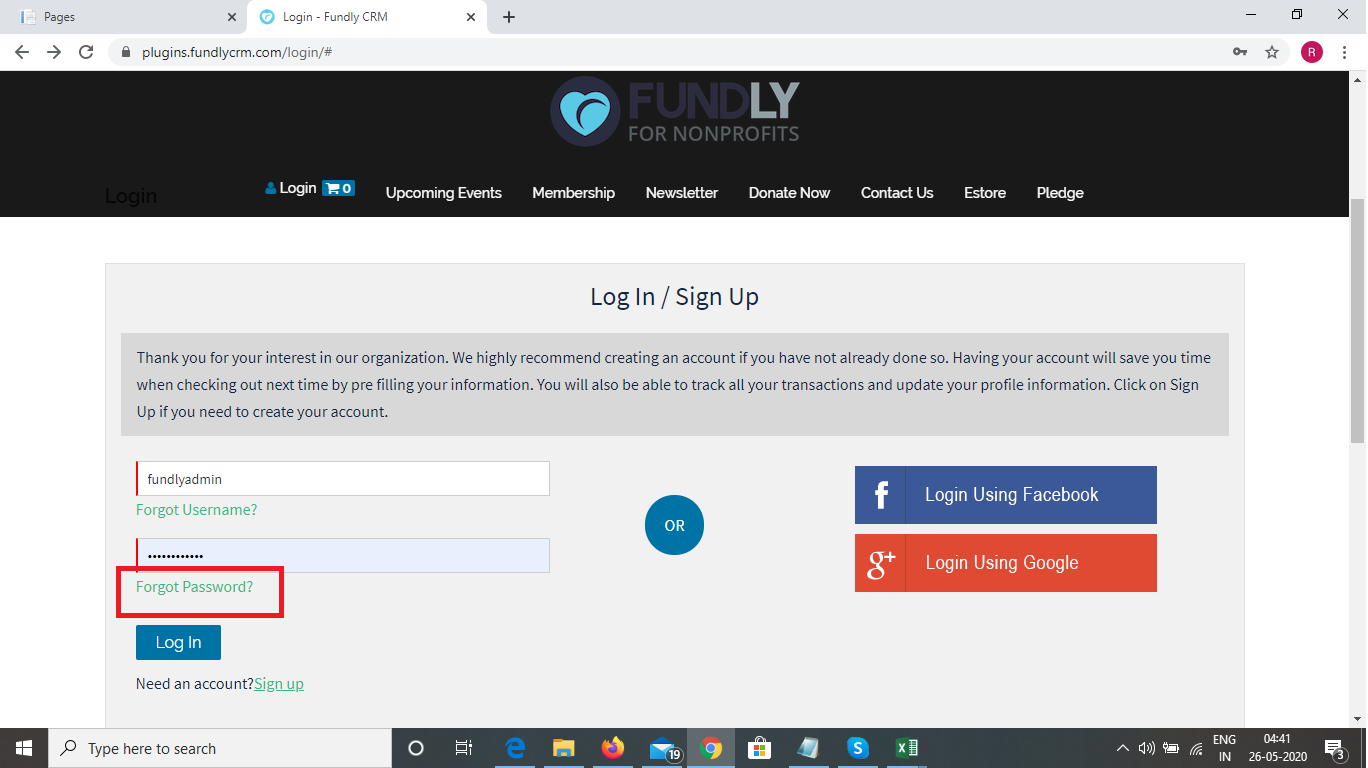
- If the user signed up for a public profile using Facebook, they should click on the "Login Using Facebook" button and then enter their Facebook username and password. If the user signed up for a public profile using Google/their Google credentials, they should click on the "Login Using Google" button and then enter their Google username and password. If the user manually created a username and password, they should enter that manually created username and password and then click Login.
PLUG-INS
PAGES

OR
PLUG-INS
PAGES

OR
PLUG-INS
PAGES
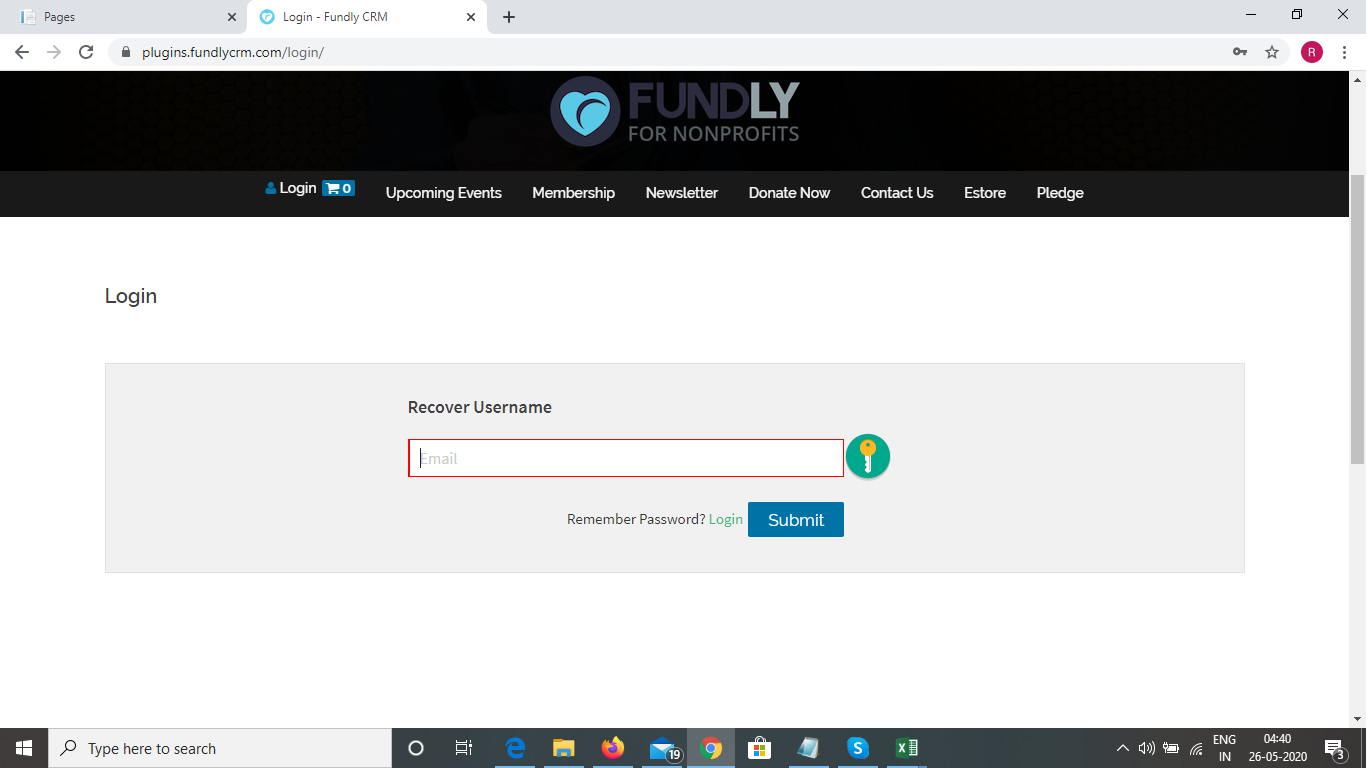
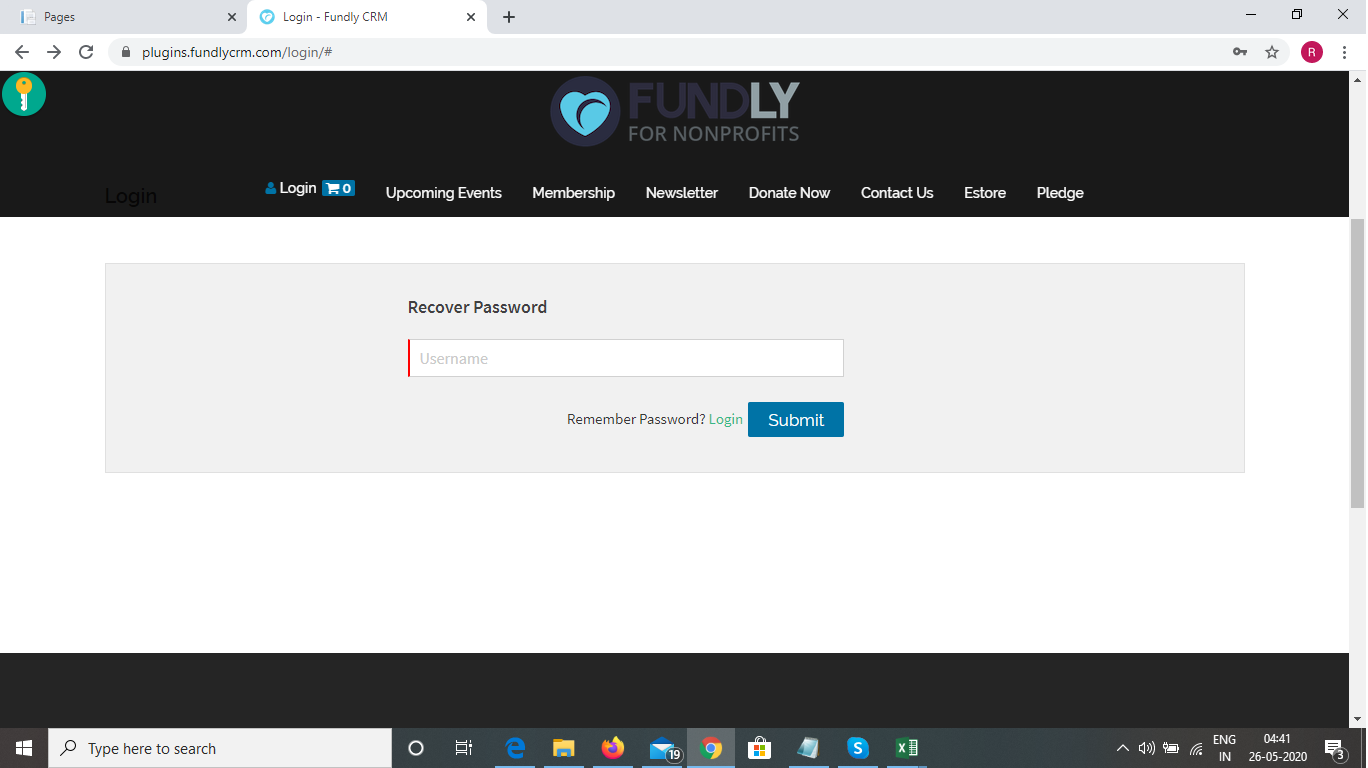
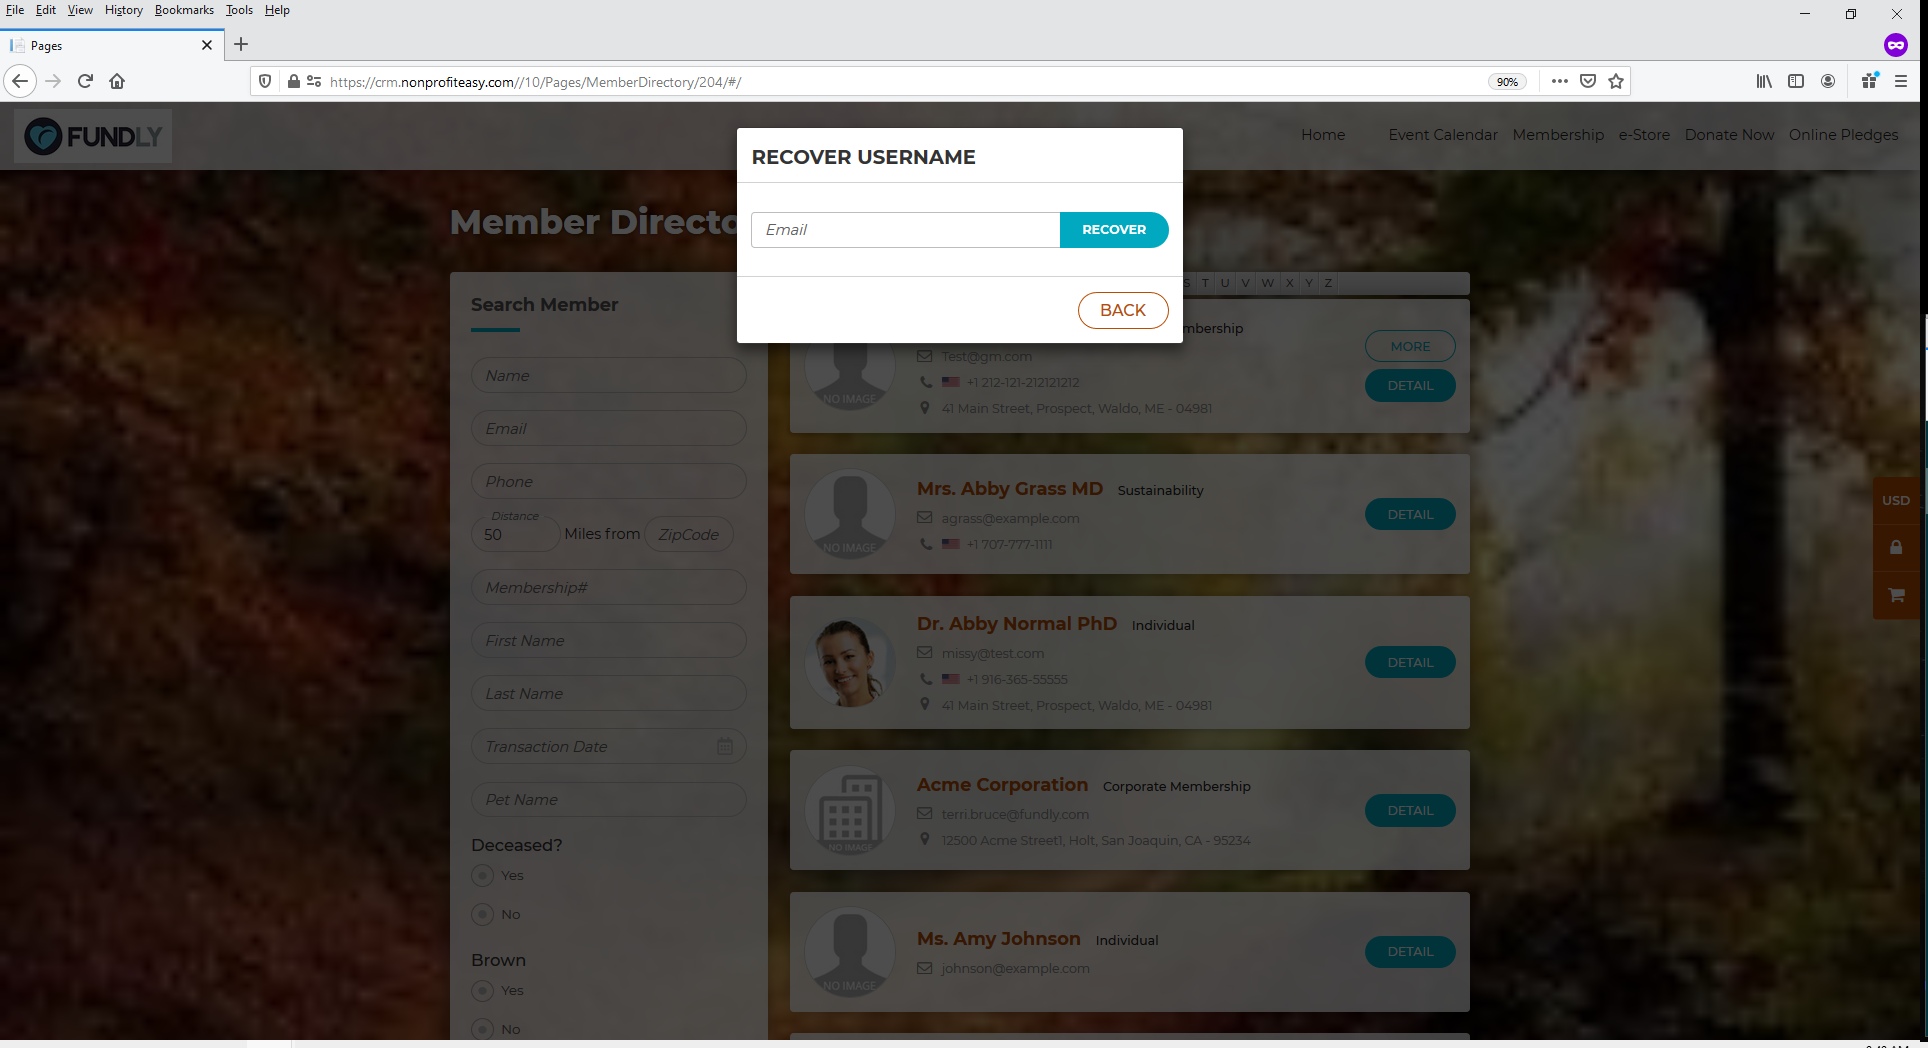
- If the user doesn't remember their username, they can click the Forgot Username link and then enter their email address on the resulting pop up. If the user doesn't remember their password, they click the Forgot Password link and then enter their username and click recover to receive a new, temporary password via email. If the user needs additional help logging in, your staff can assist them using the instructions in this tutorial.
PLUG-INS
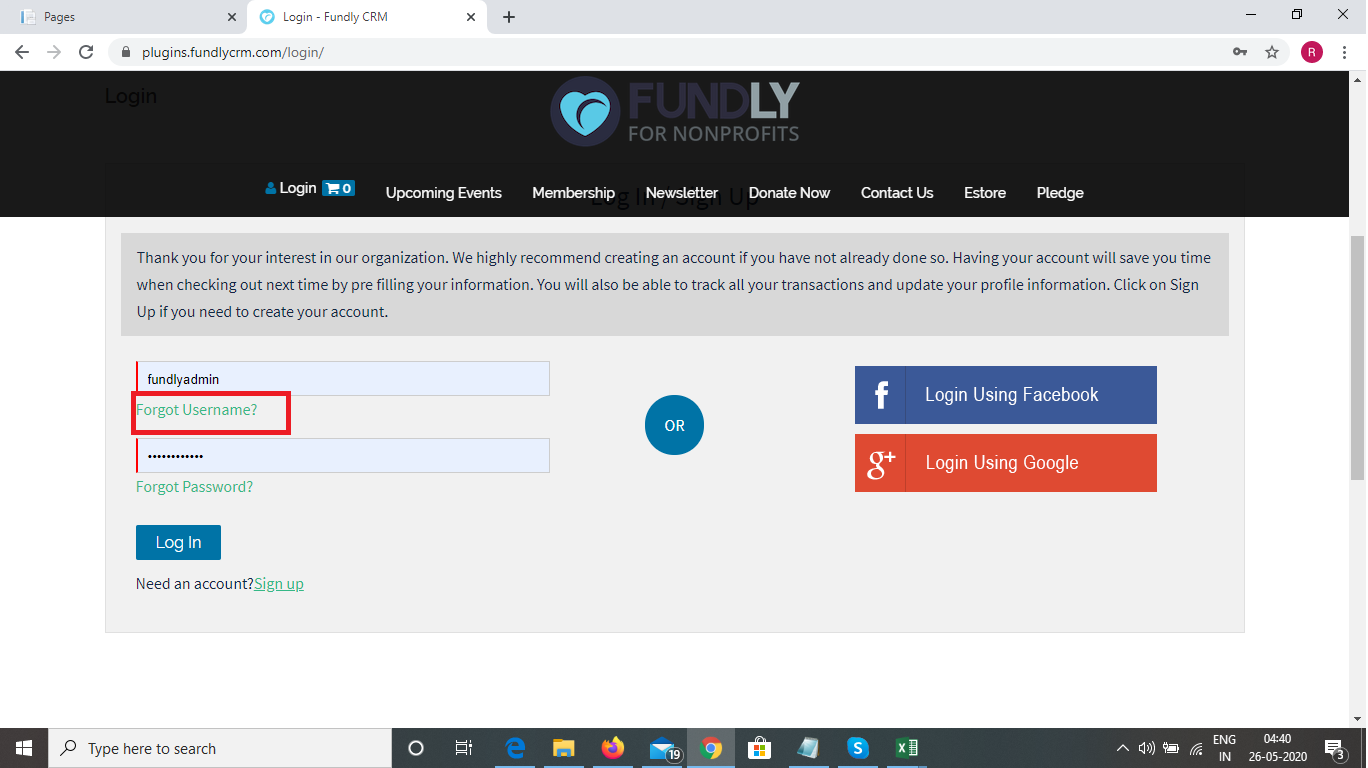
PAGES


- If the user signed up for a public profile using Facebook, they should click on the "Login Using Facebook" button and then enter their Facebook username and password. If the user signed up for a public profile using Google/their Google credentials, they should click on the "Login Using Google" button and then enter their Google username and password. If the user manually created a username and password, they should enter that manually created username and password and then click Login.
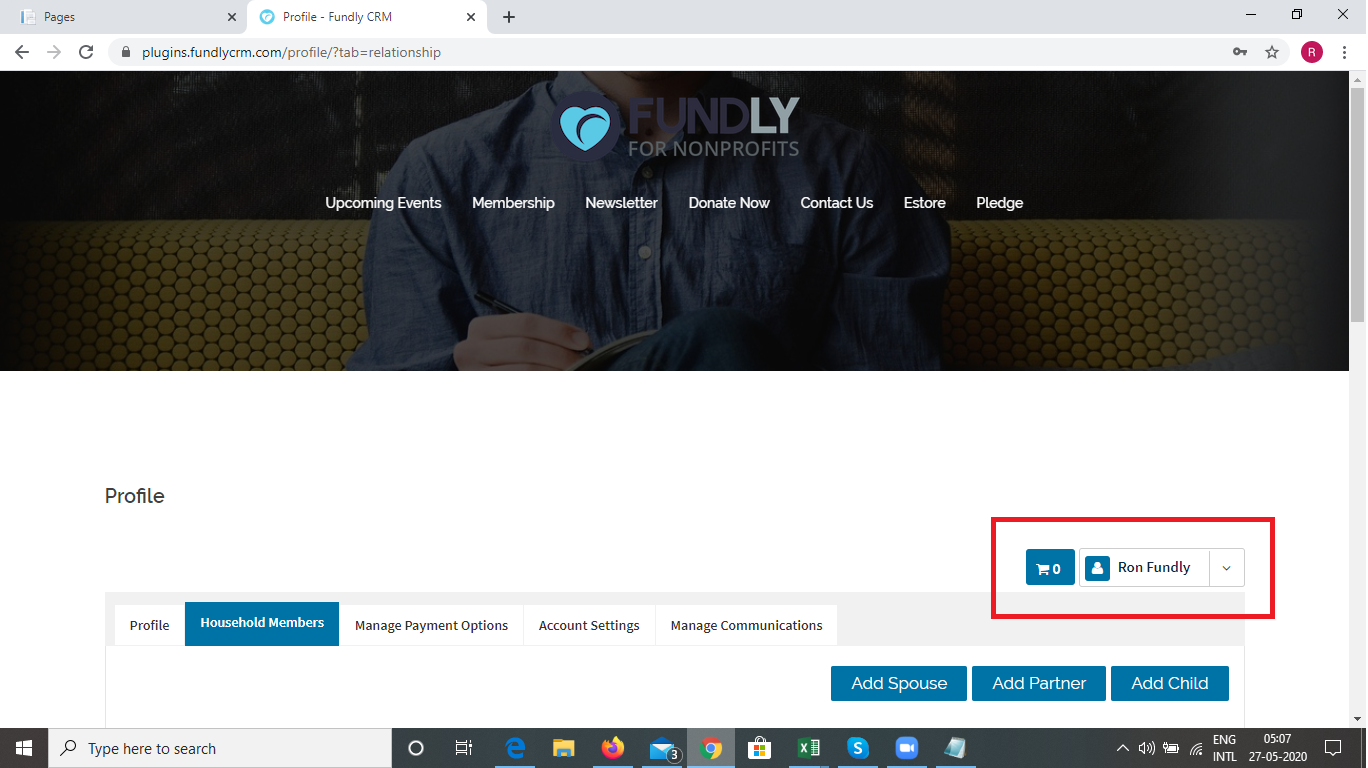
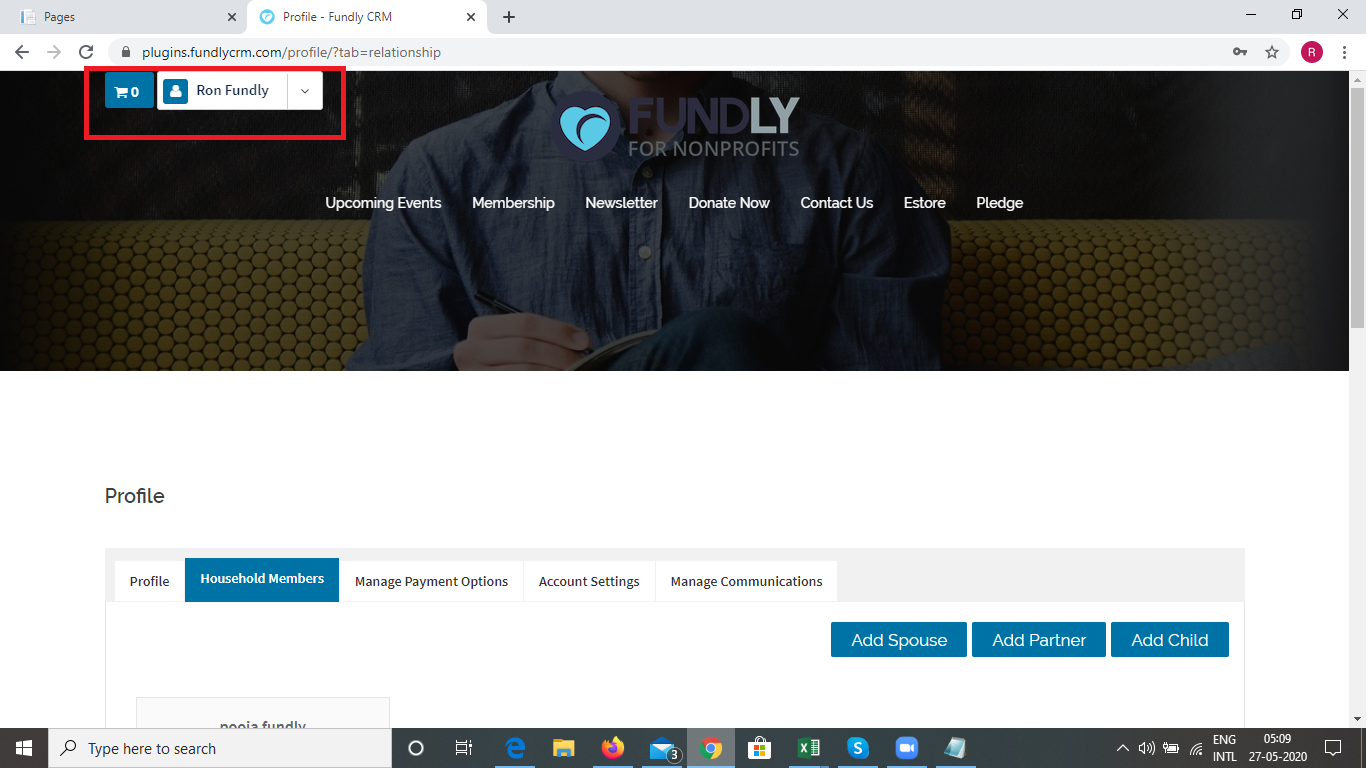
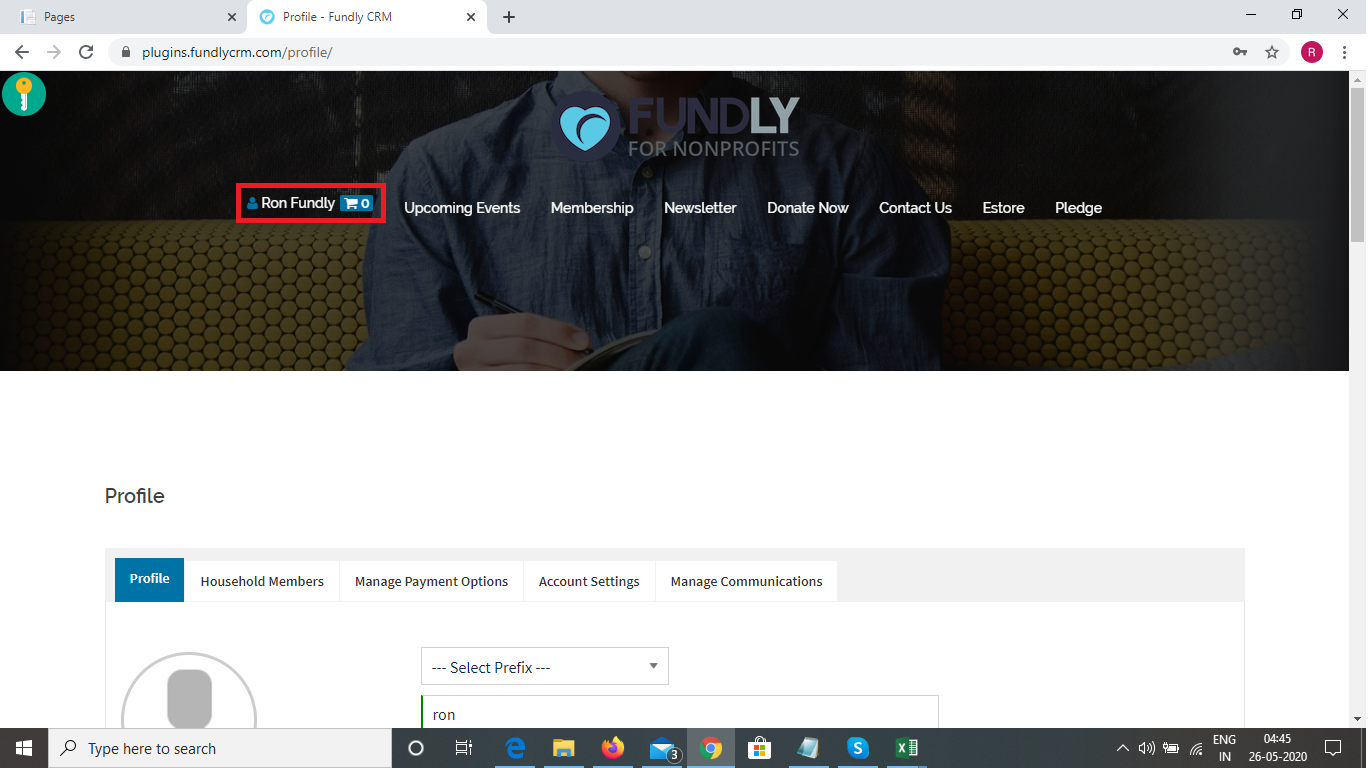
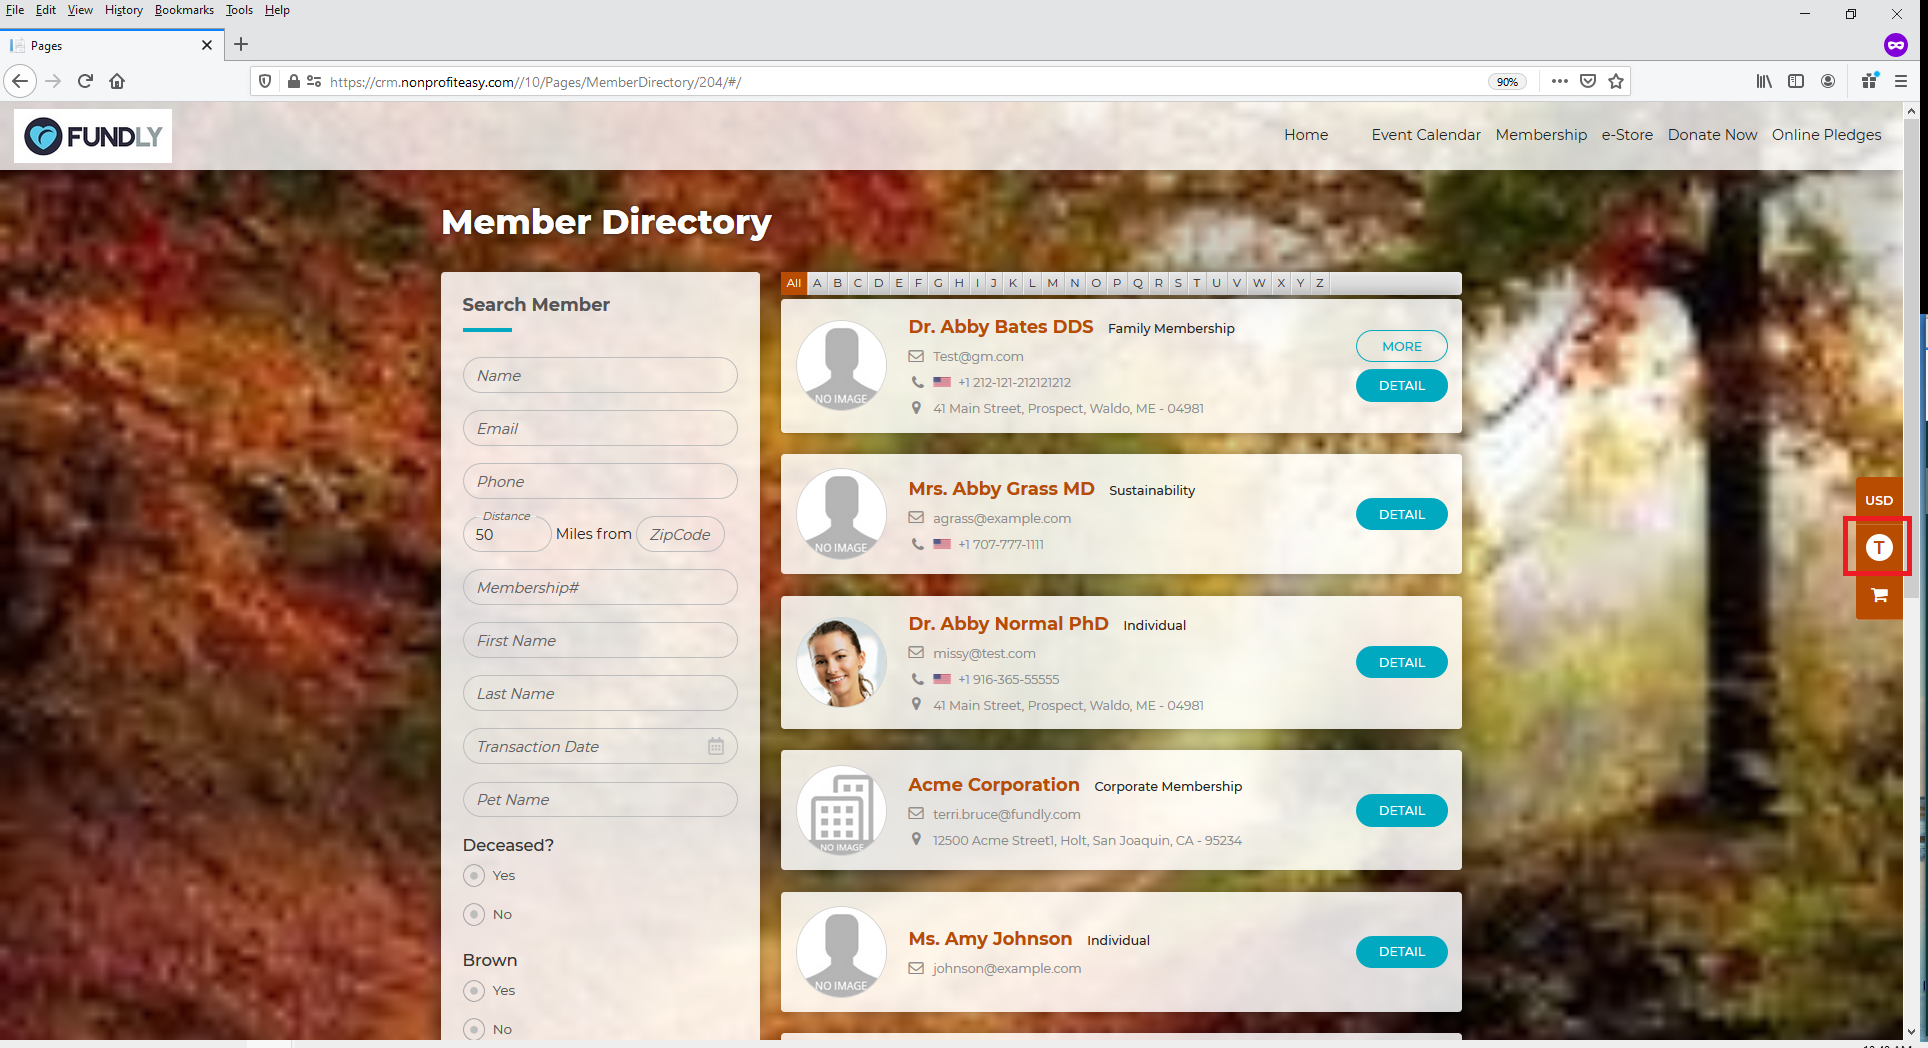
- Once the user is logged into their account, the text on the login menu will show the user's name (Plug-Ins)/the lock symbol will then turn into the first letter of the user name (Pages).
PLUG-INS
PAGES
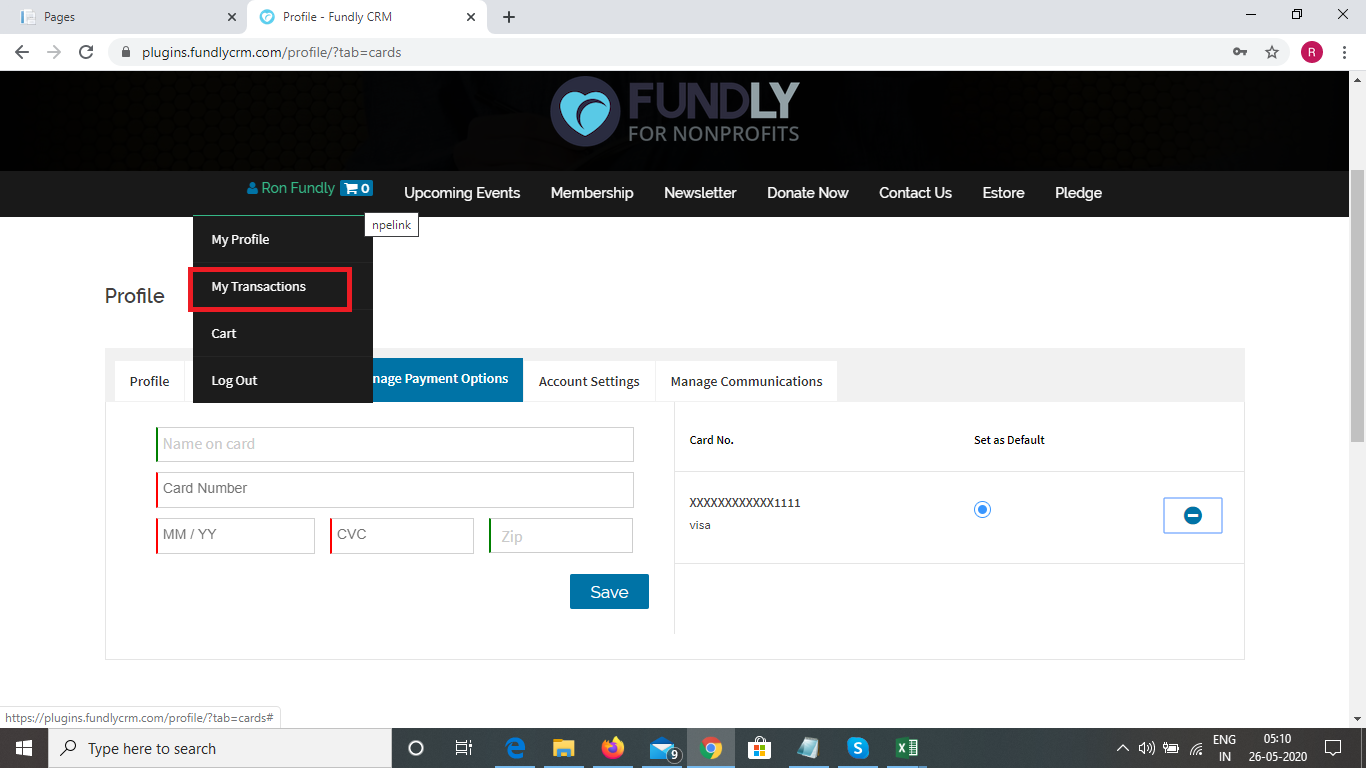
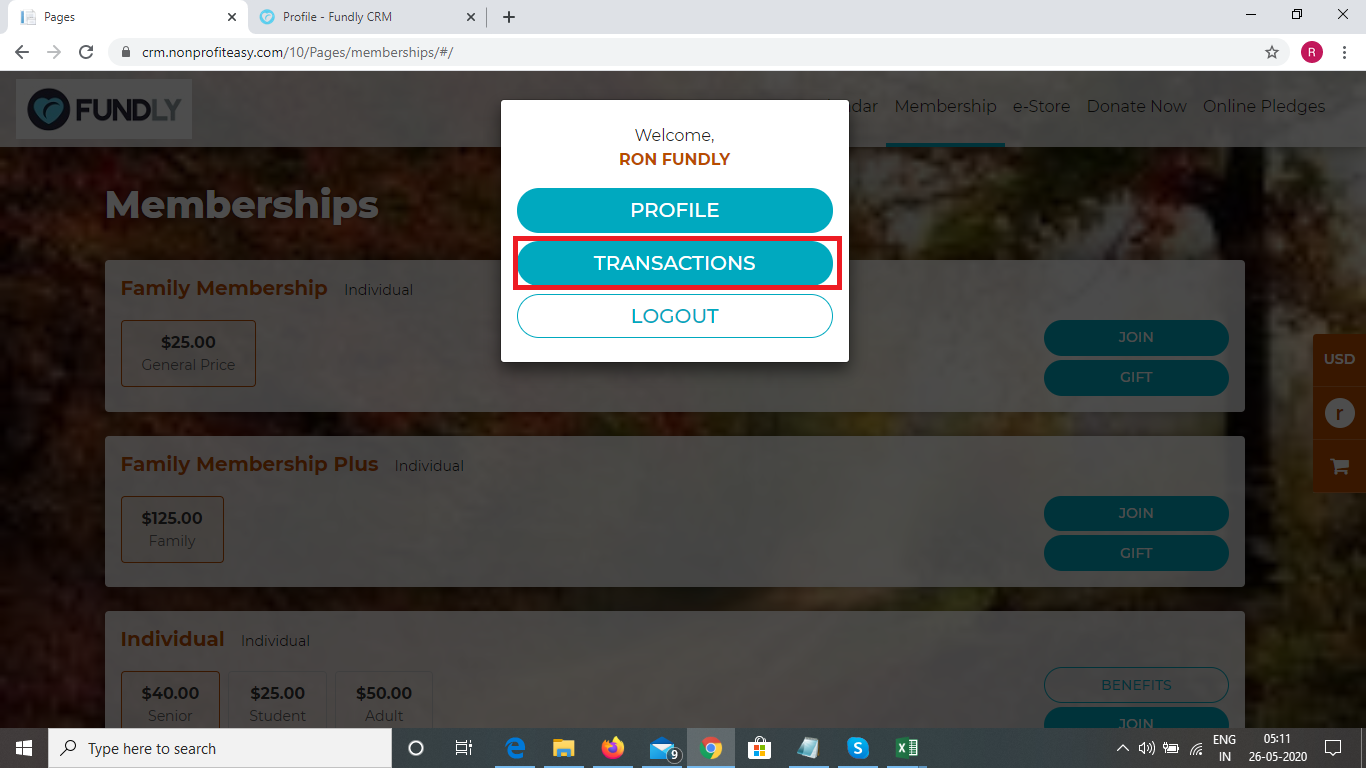
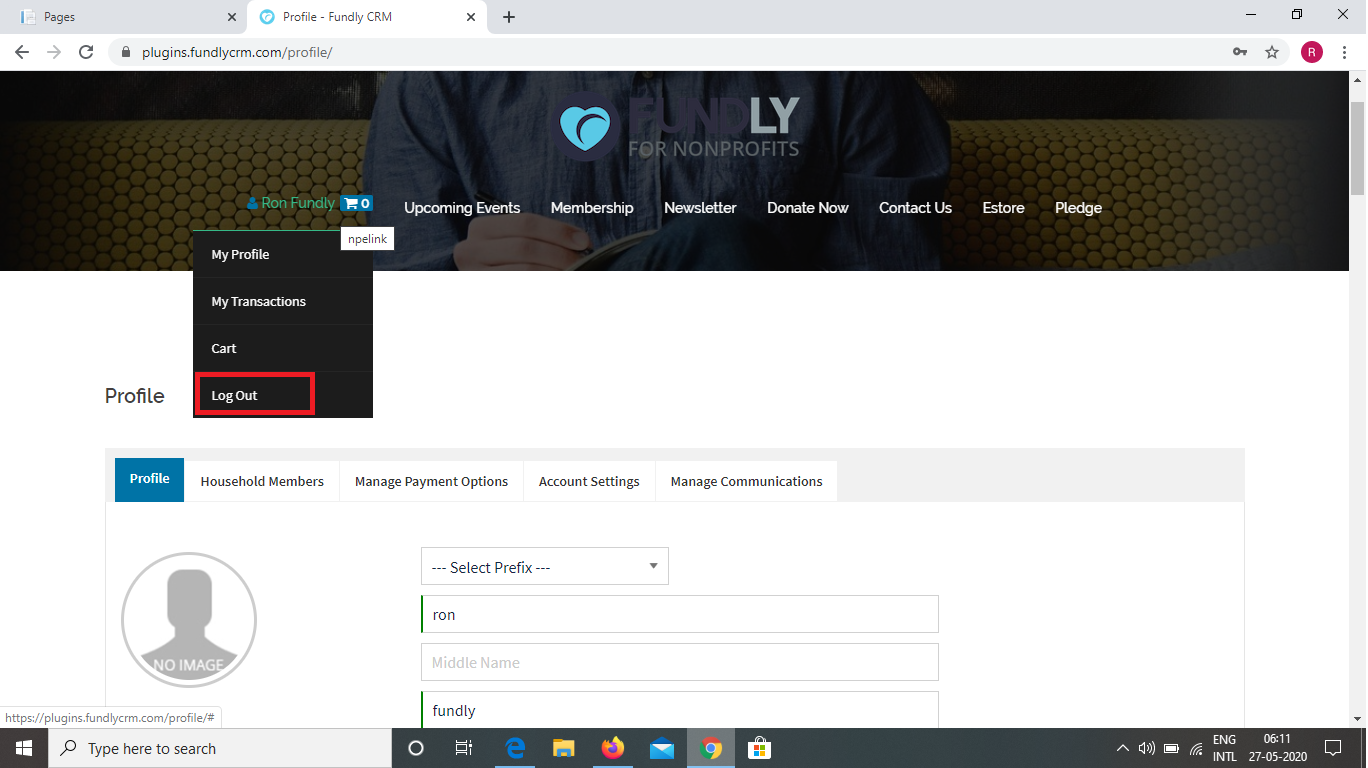
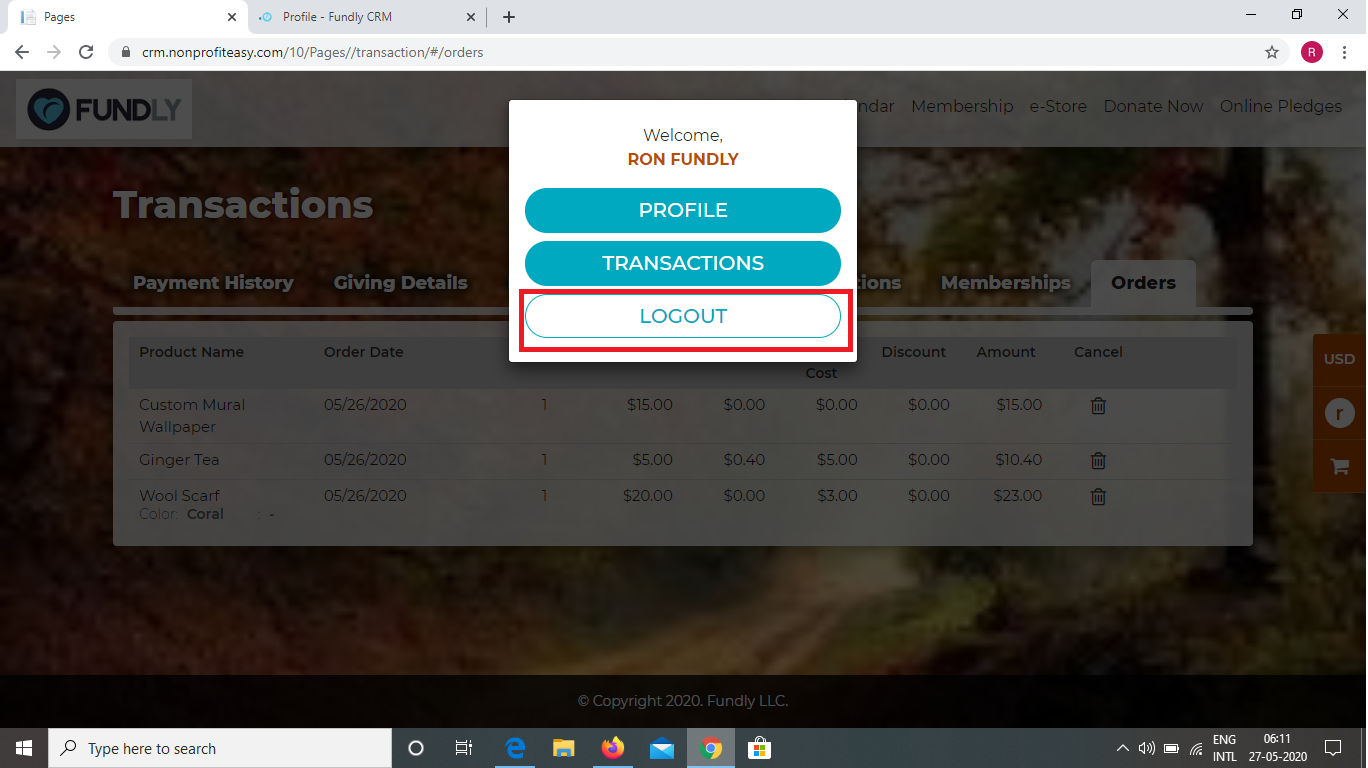
- When the user clicks on the public profile menu/icon, they will see four options (My Profile, My Transactions, Cart, and Log Out) (Plug-Ins)/three options (My Profile, My Transactions, and Log Out) (Pages).
PLUG-INS

PAGES
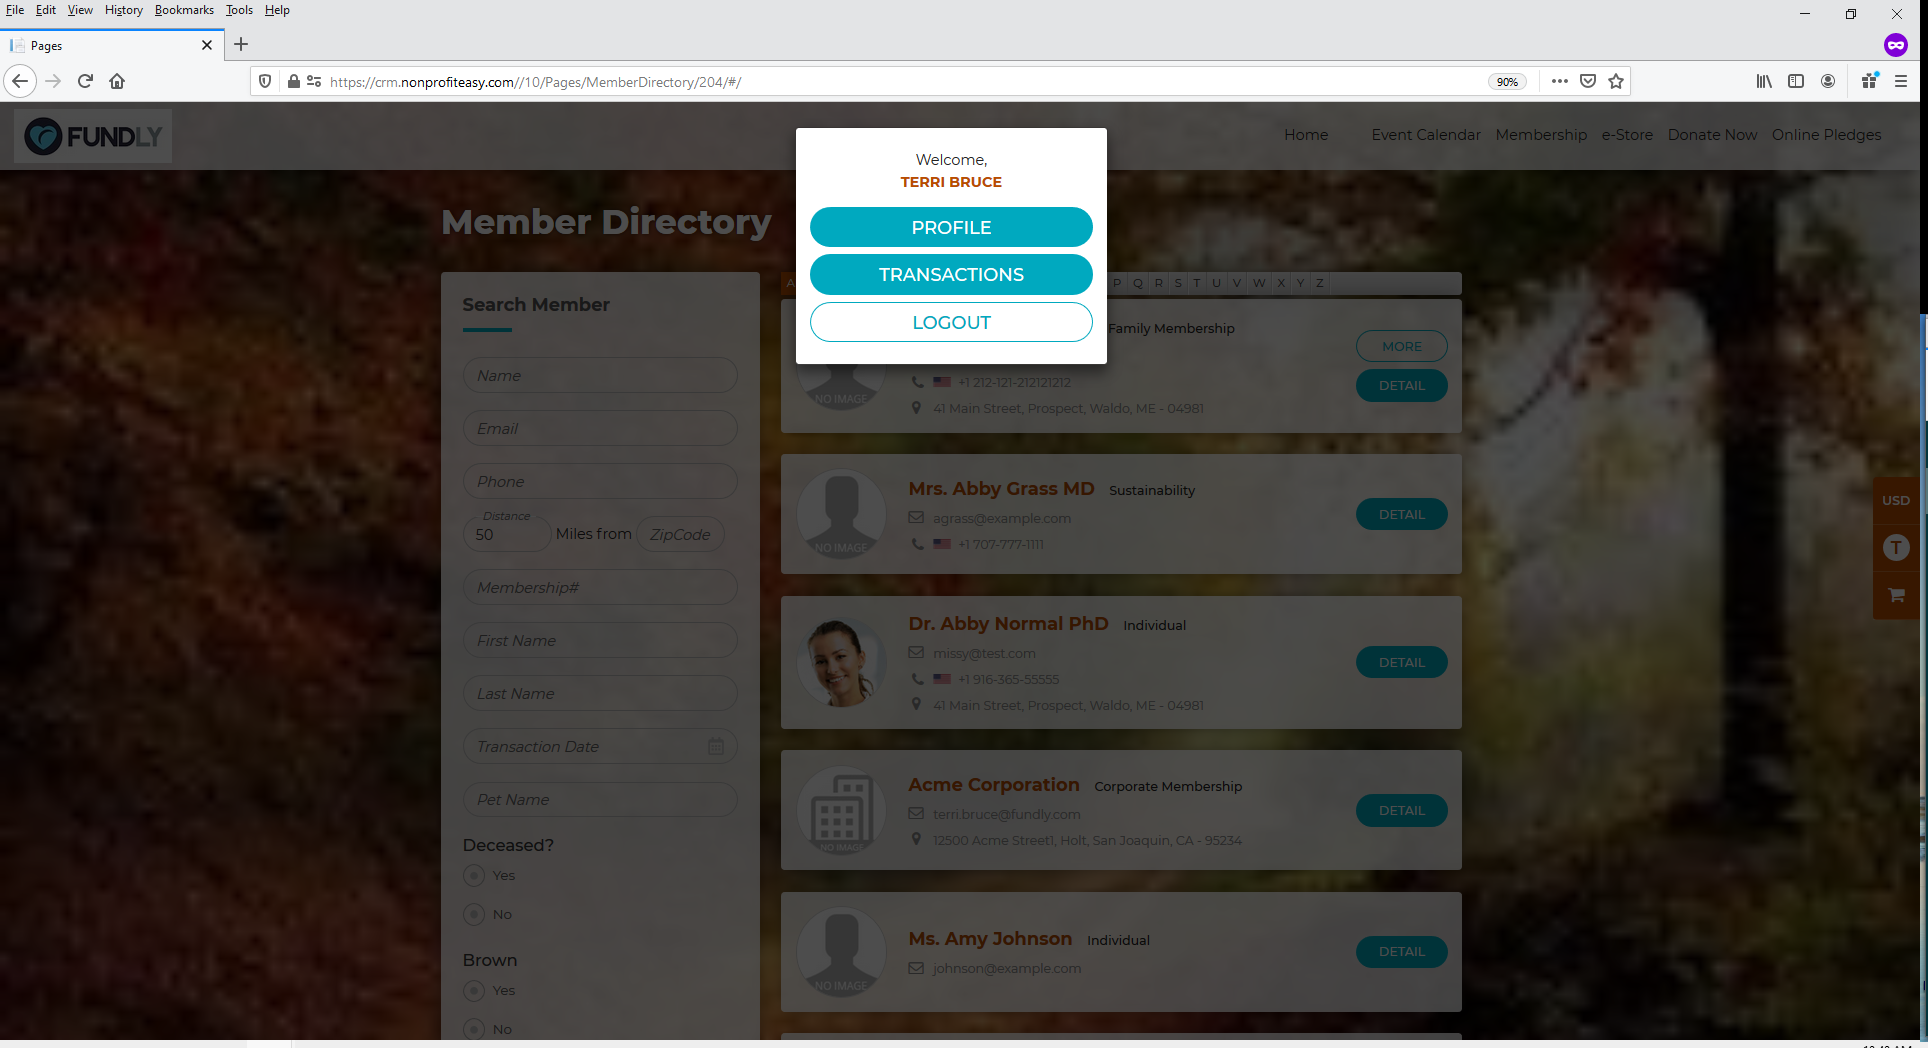
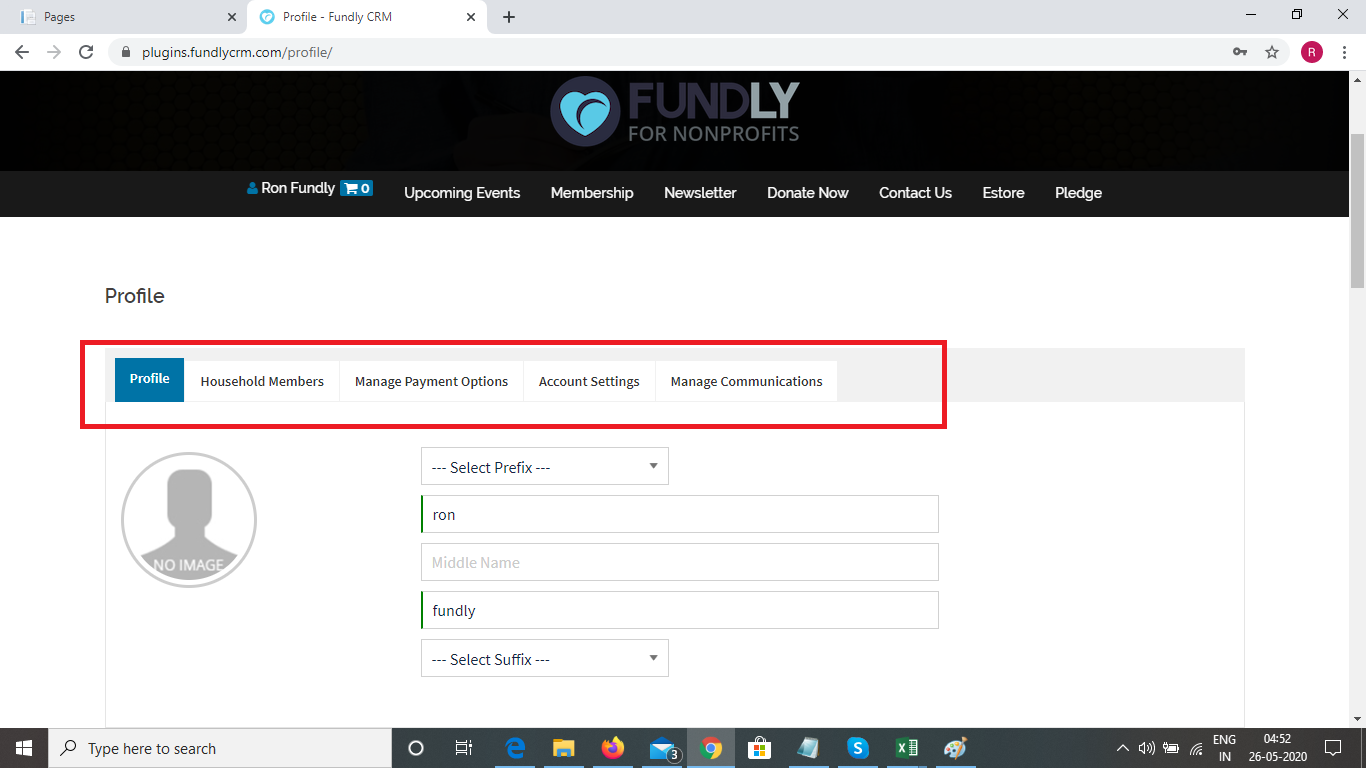
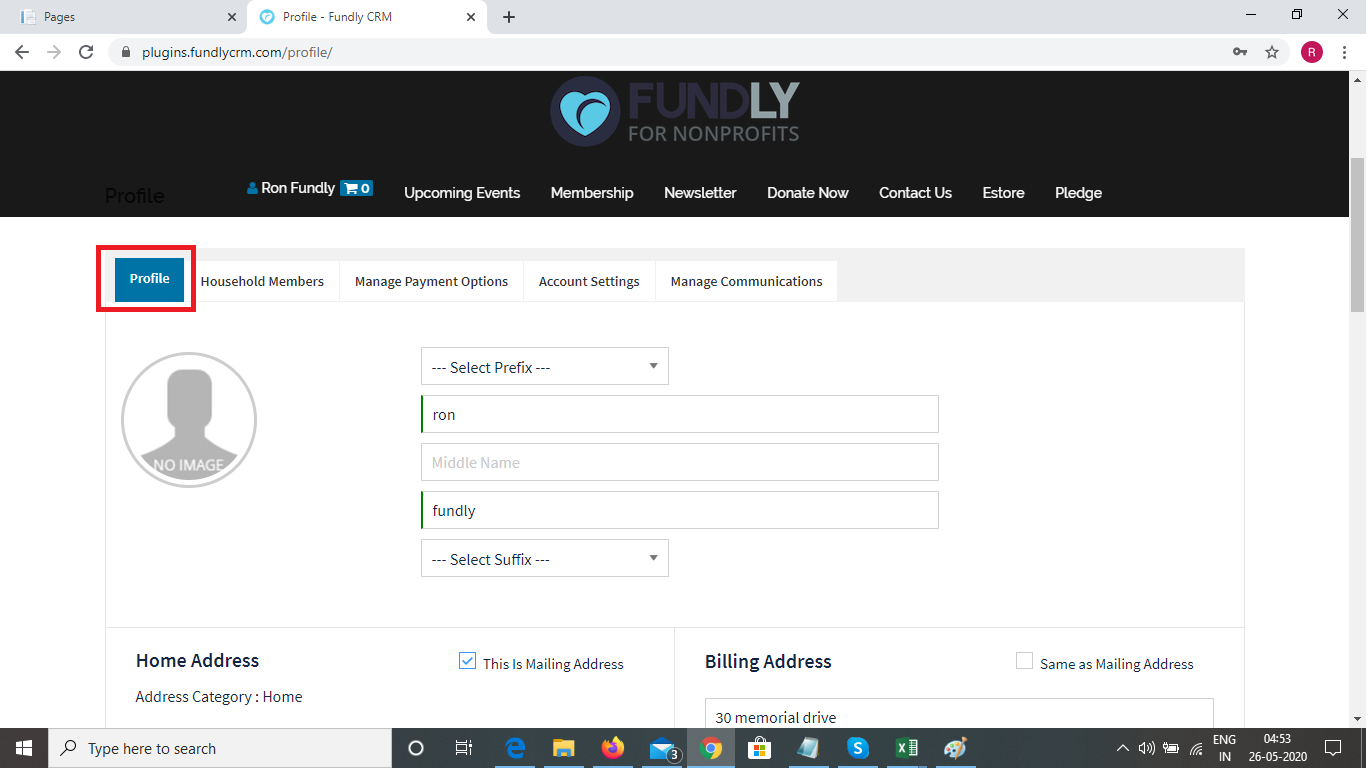
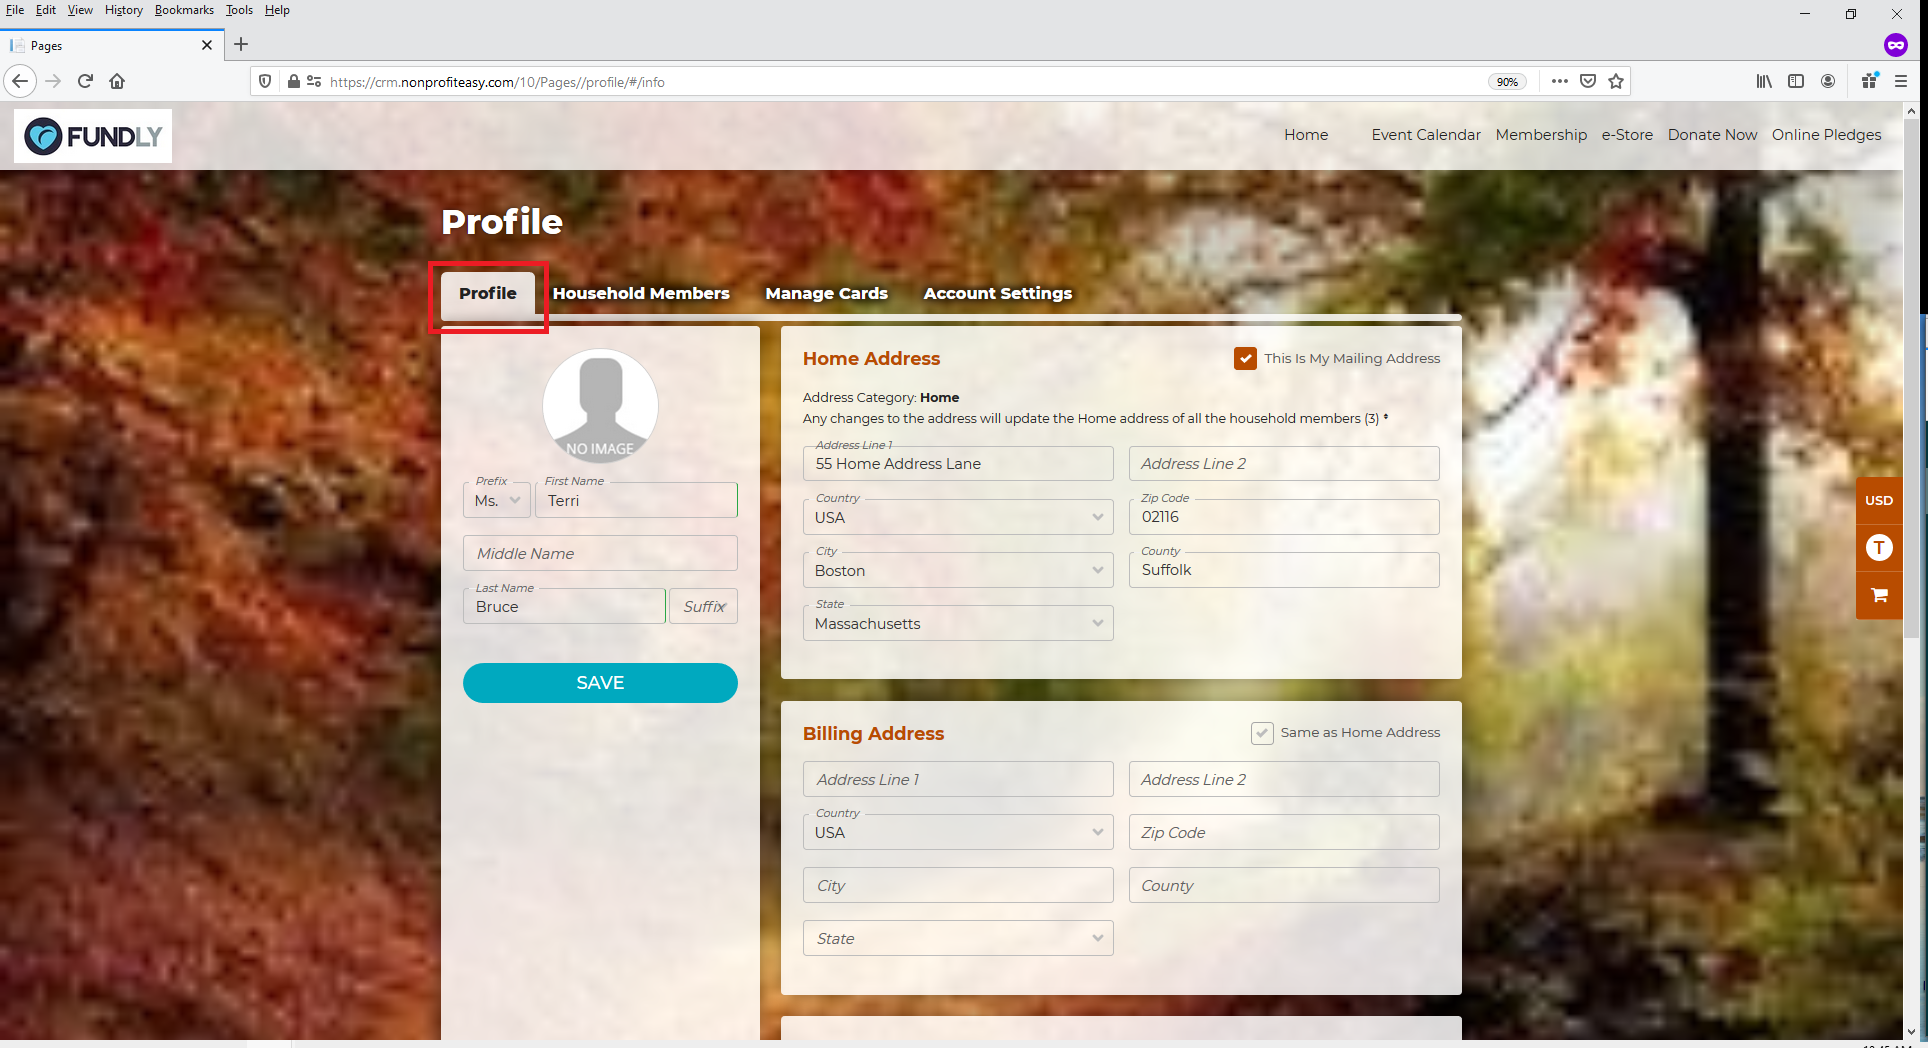
- The user can manage their public profile by clicking on the profile option. This will take the user to their public profile. Here they will see four tabs: Profile, Household Members, Manage Card, and Account Settings.
PLUG-INS
PAGES

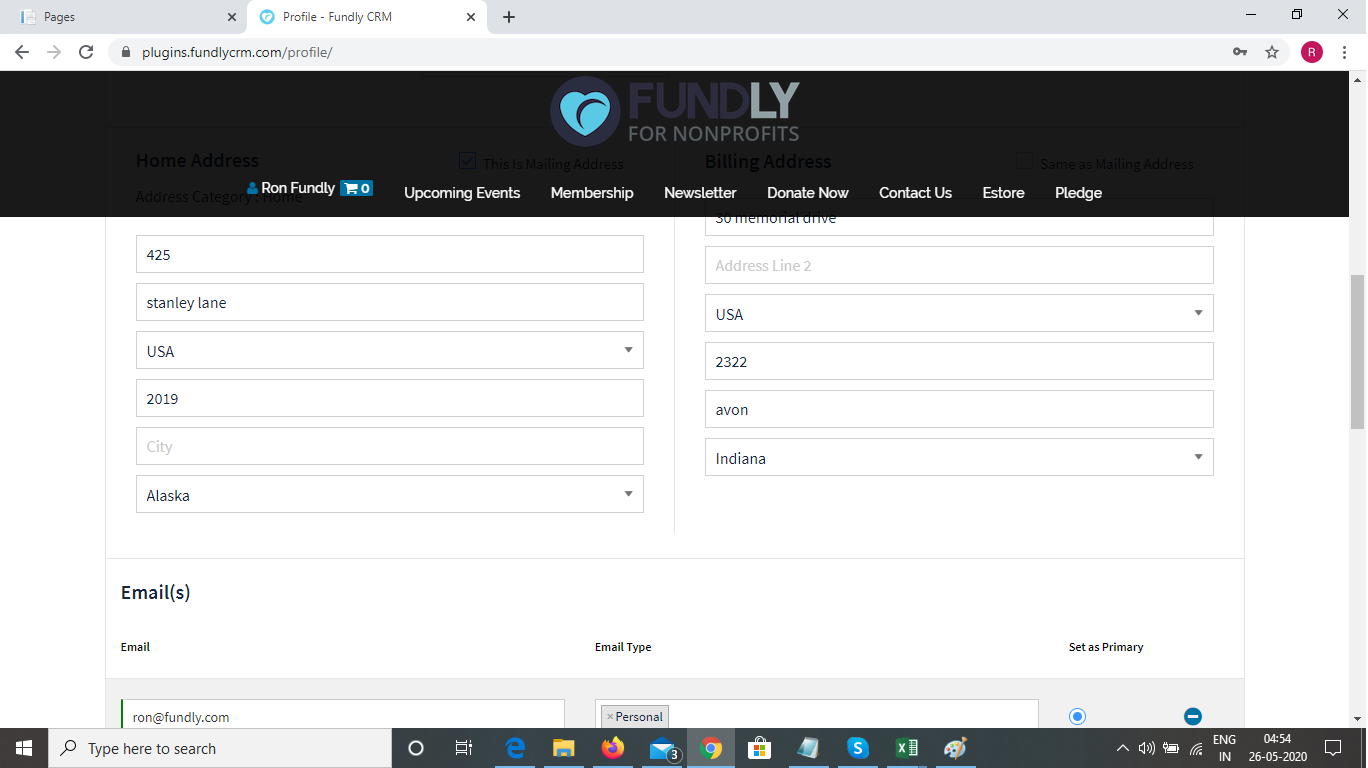
- On the Profile tab, the user can update their name, home address, billing address, email address(es), and phone number(s).
PLUG-INS
PAGES

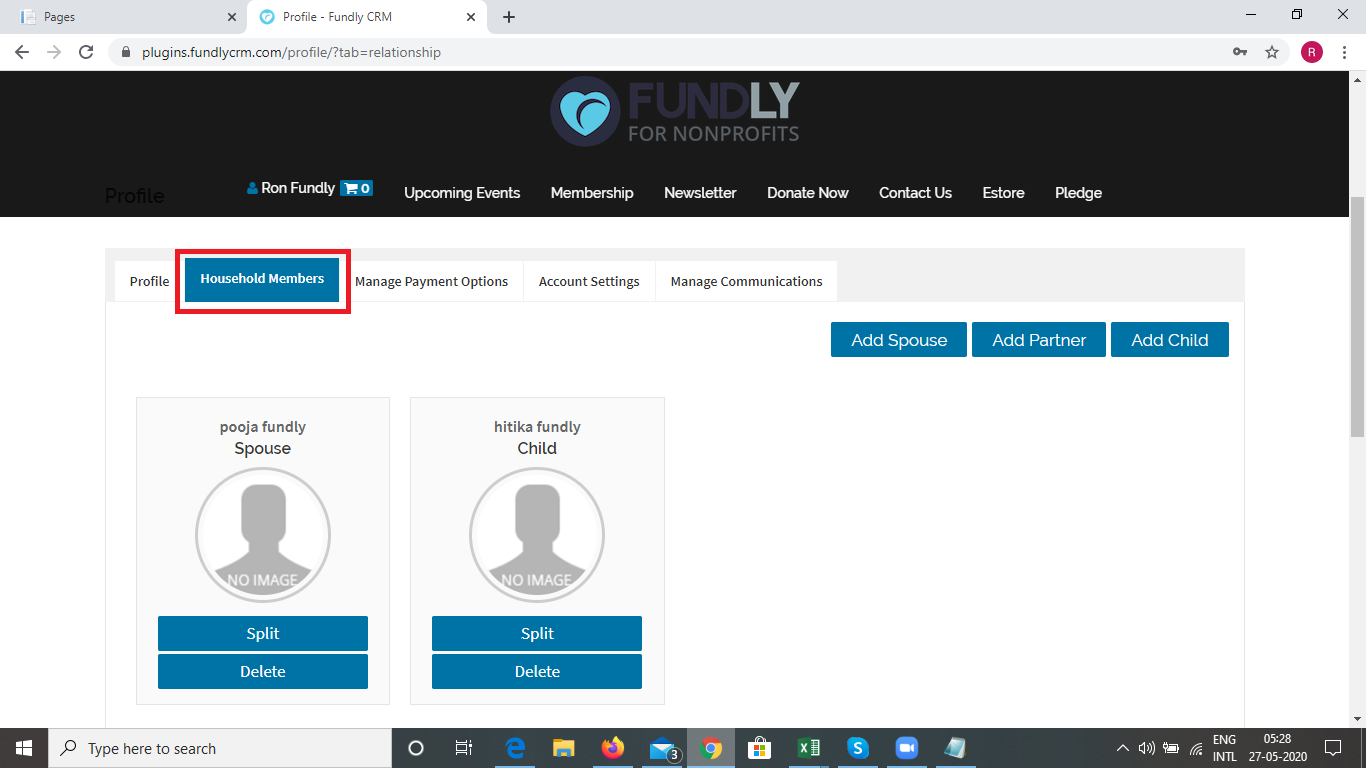
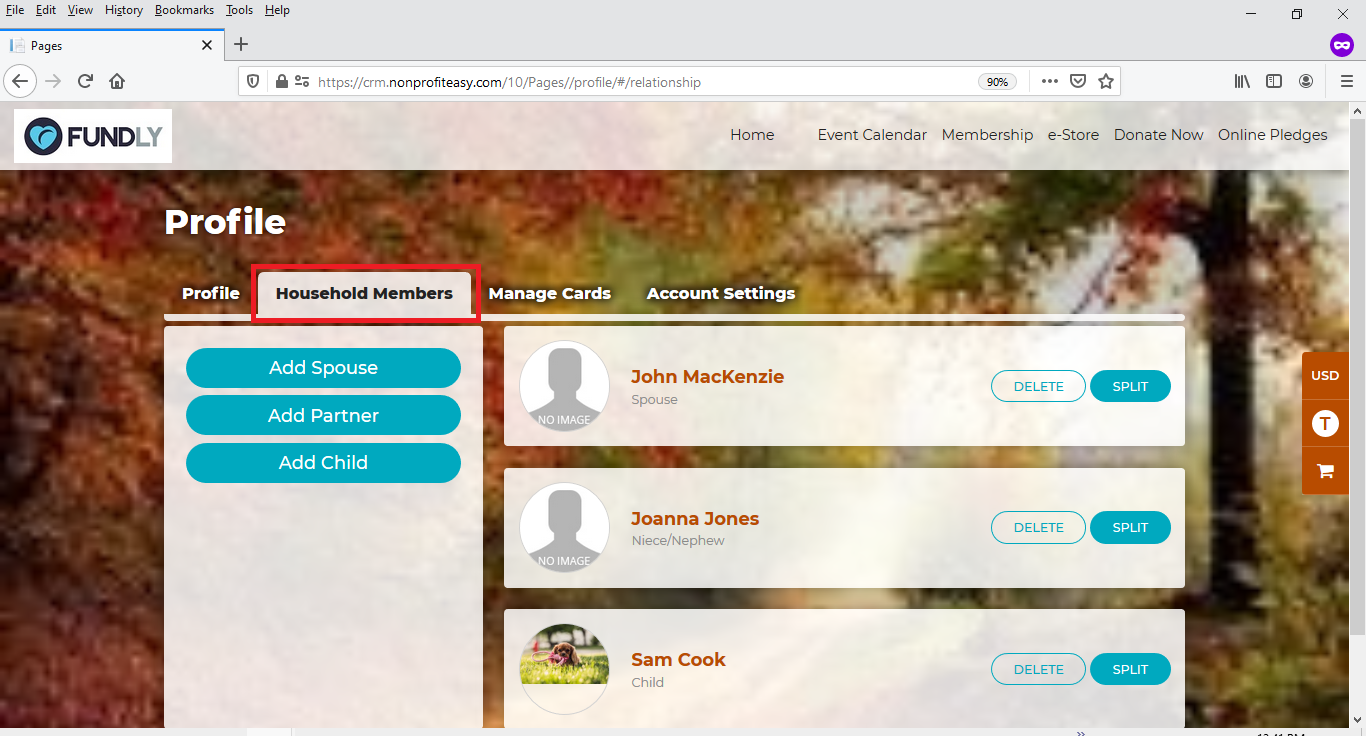
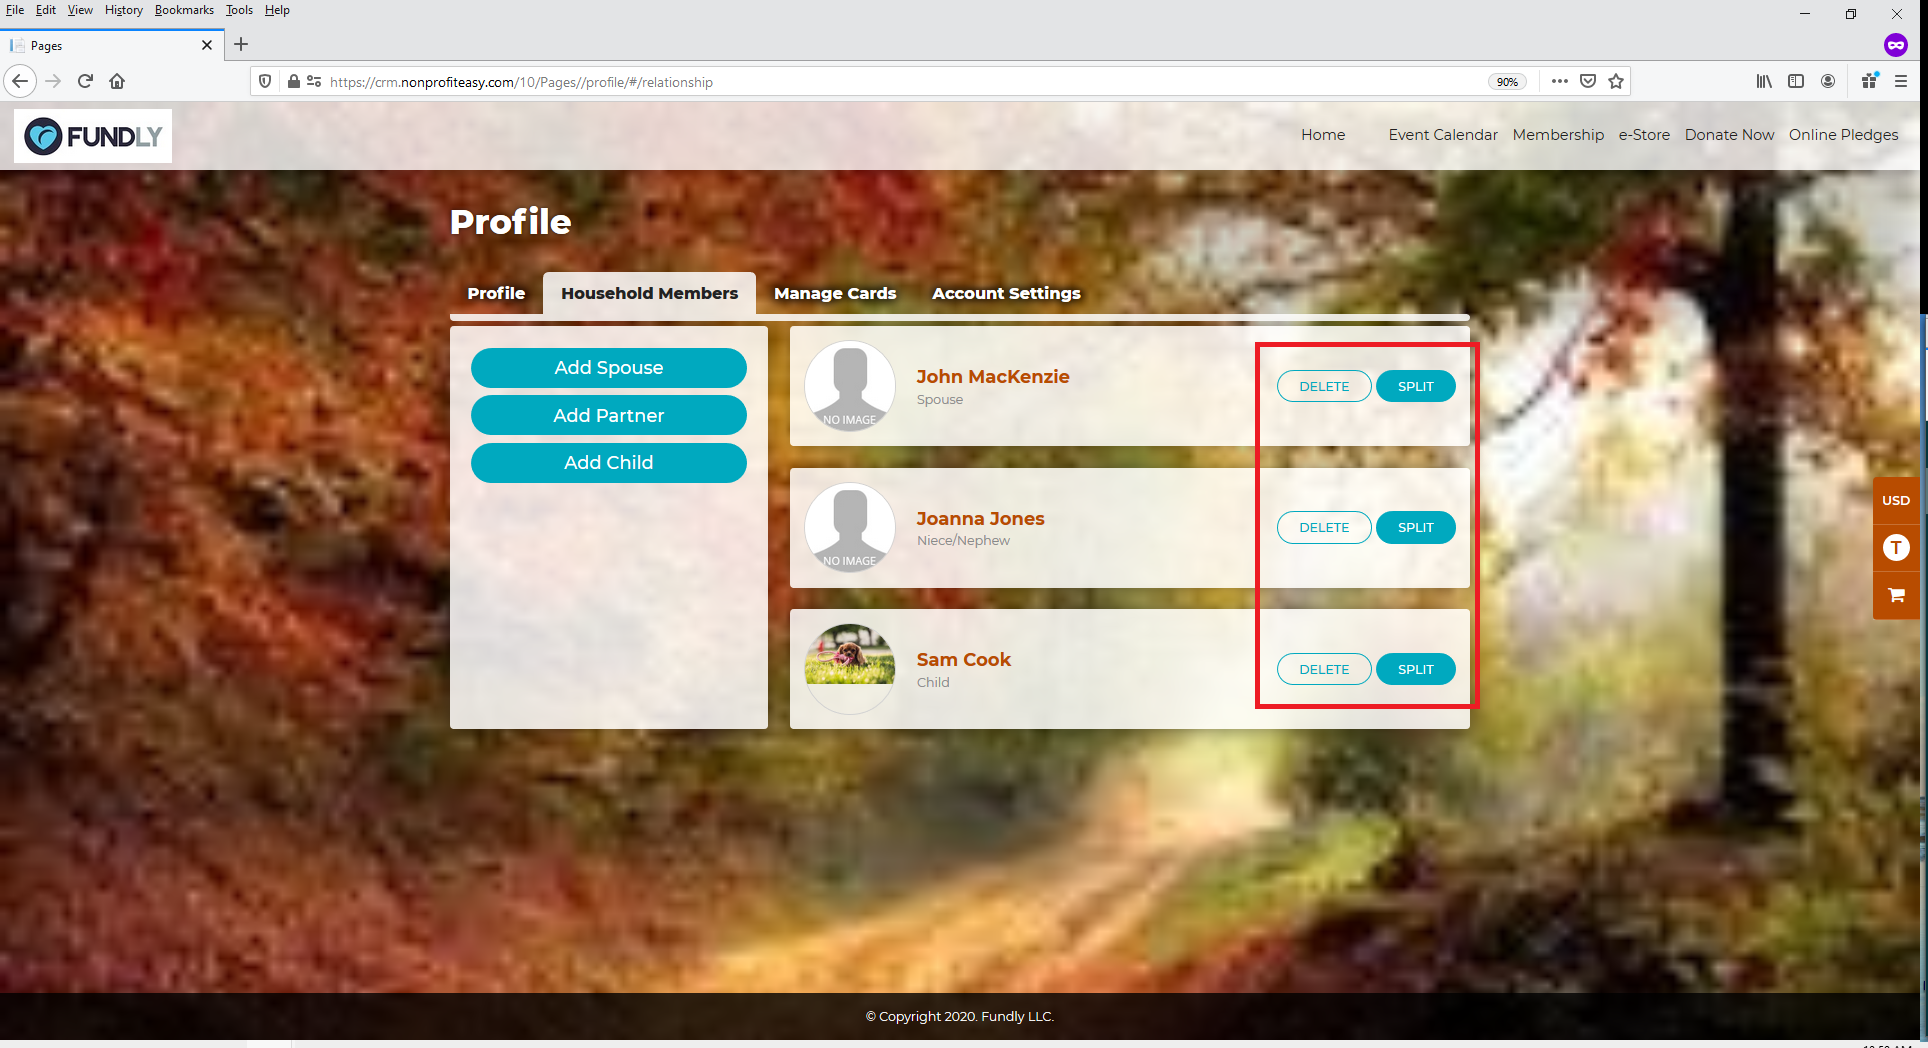
- On the Household Members tab, the user will able to add or remove spouse/partner and/or one or more children (these are the only relationships that can be managed from the public profile).
PLUG-INS
PAGES
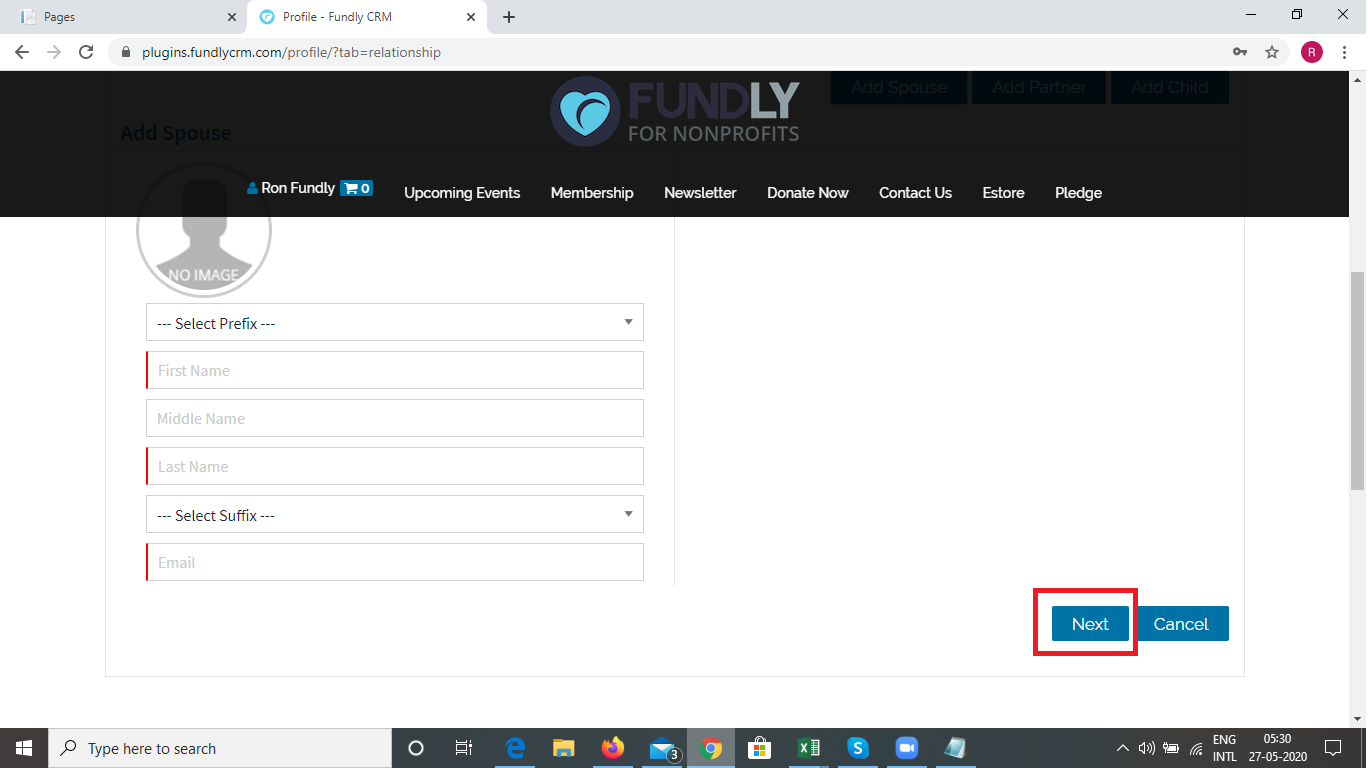
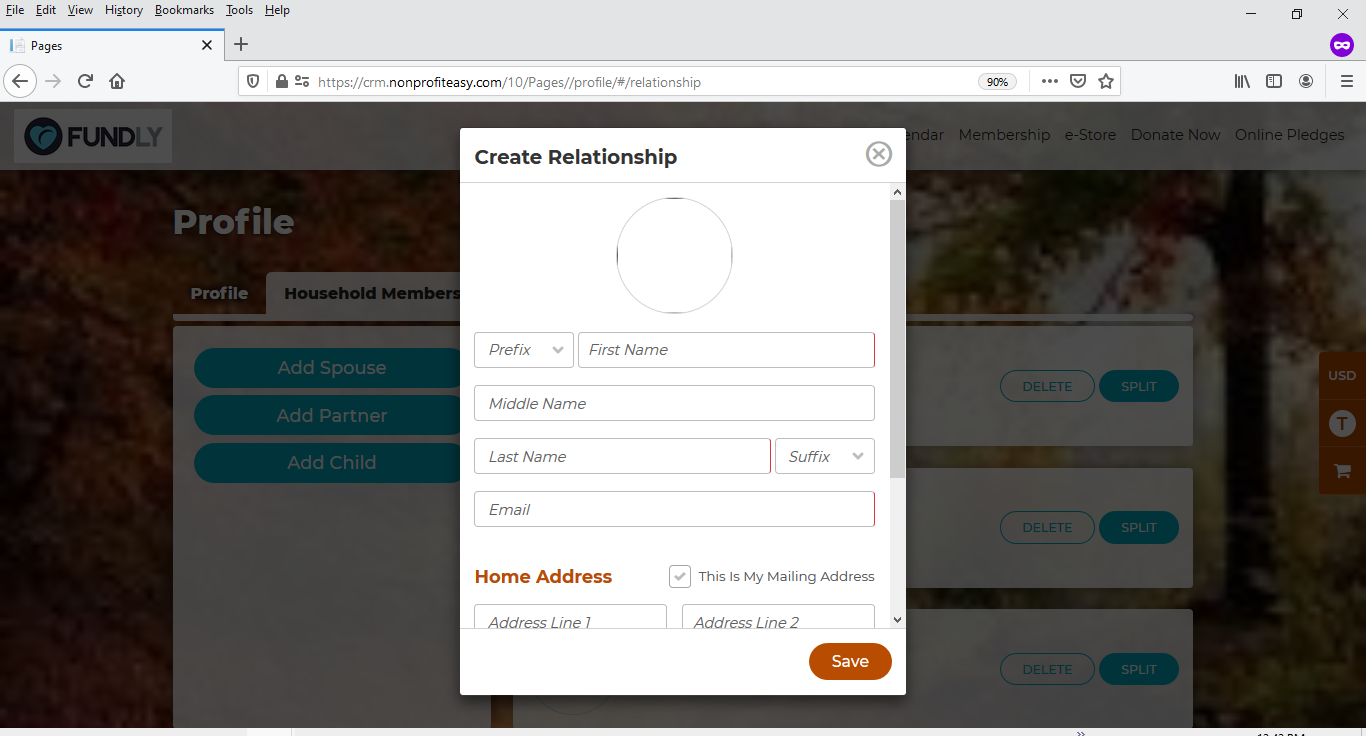
- To add a relationship, they should click on the Add Spouse, Add Partner, or Add Child button. In the resulting pop up they should add the spouse's/partner's/child's name and email address. First Name, Last Name, and Email are required; the other fields are optional. They can enter their own email address for the other person if they don't know it or don't want to provide it. They can add a profile picture for the contact by hovering over the circle at the top and clicking the camera icon.
PLUG-INS


PAGES
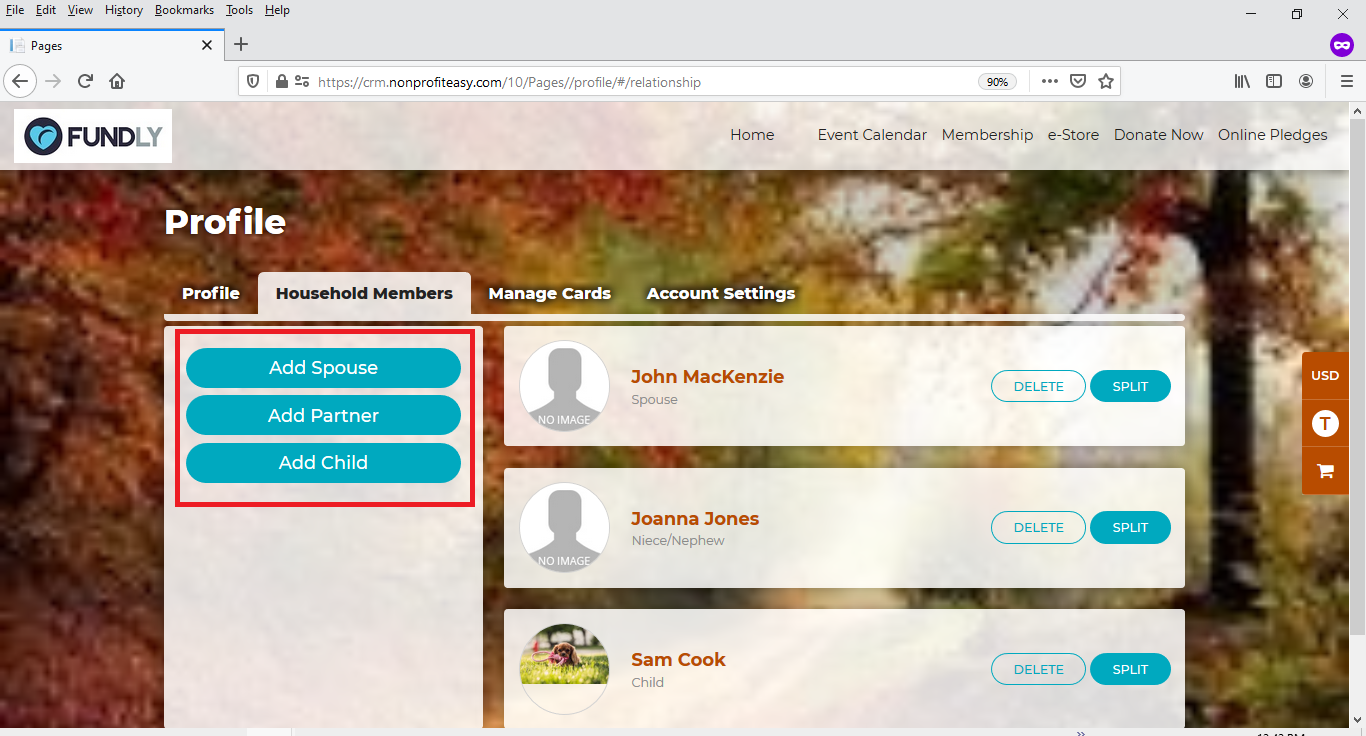
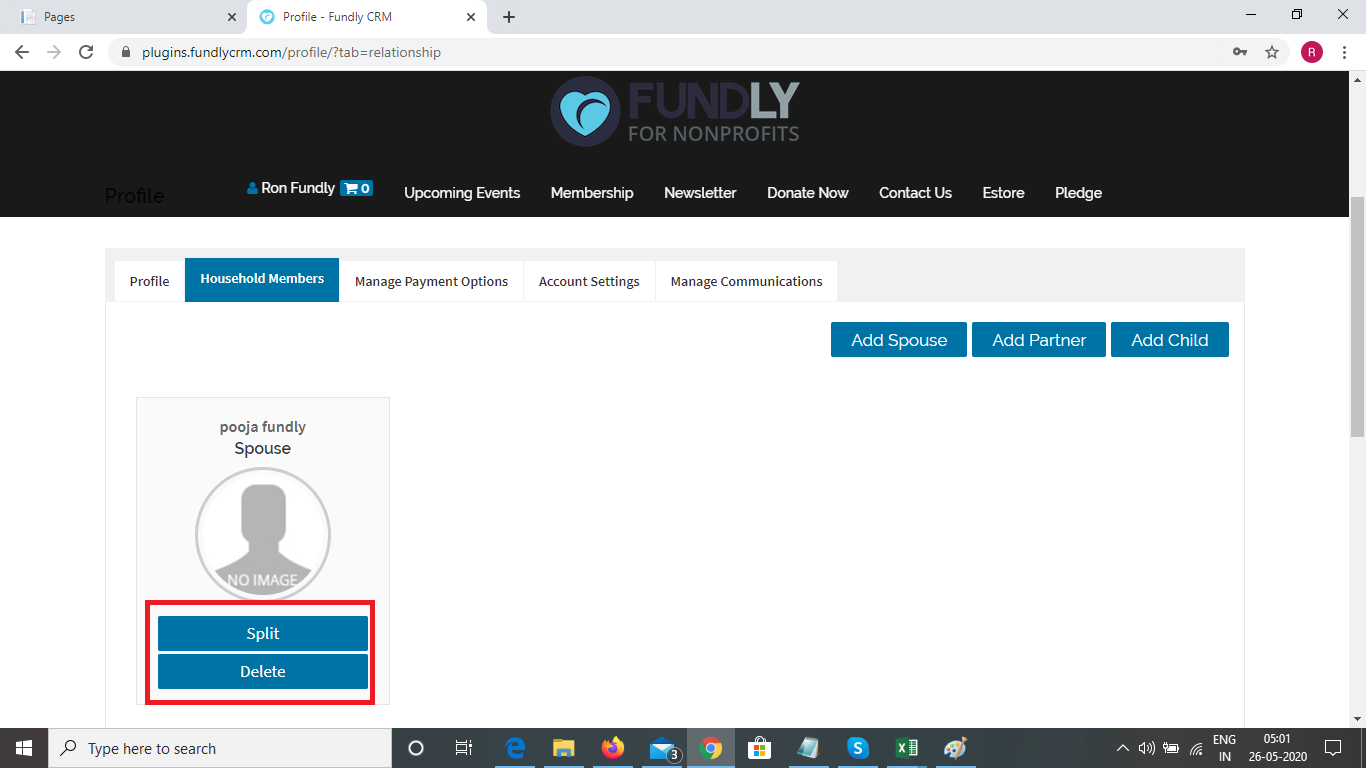
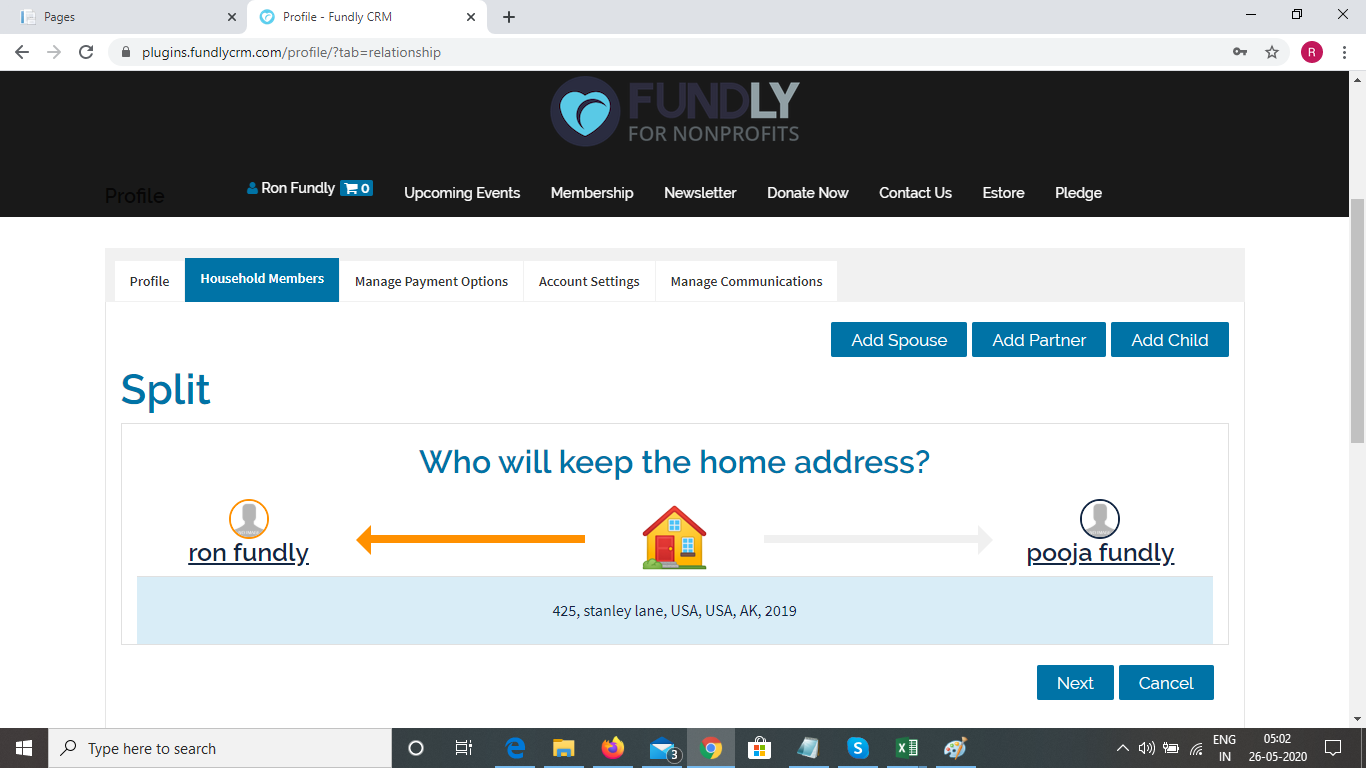
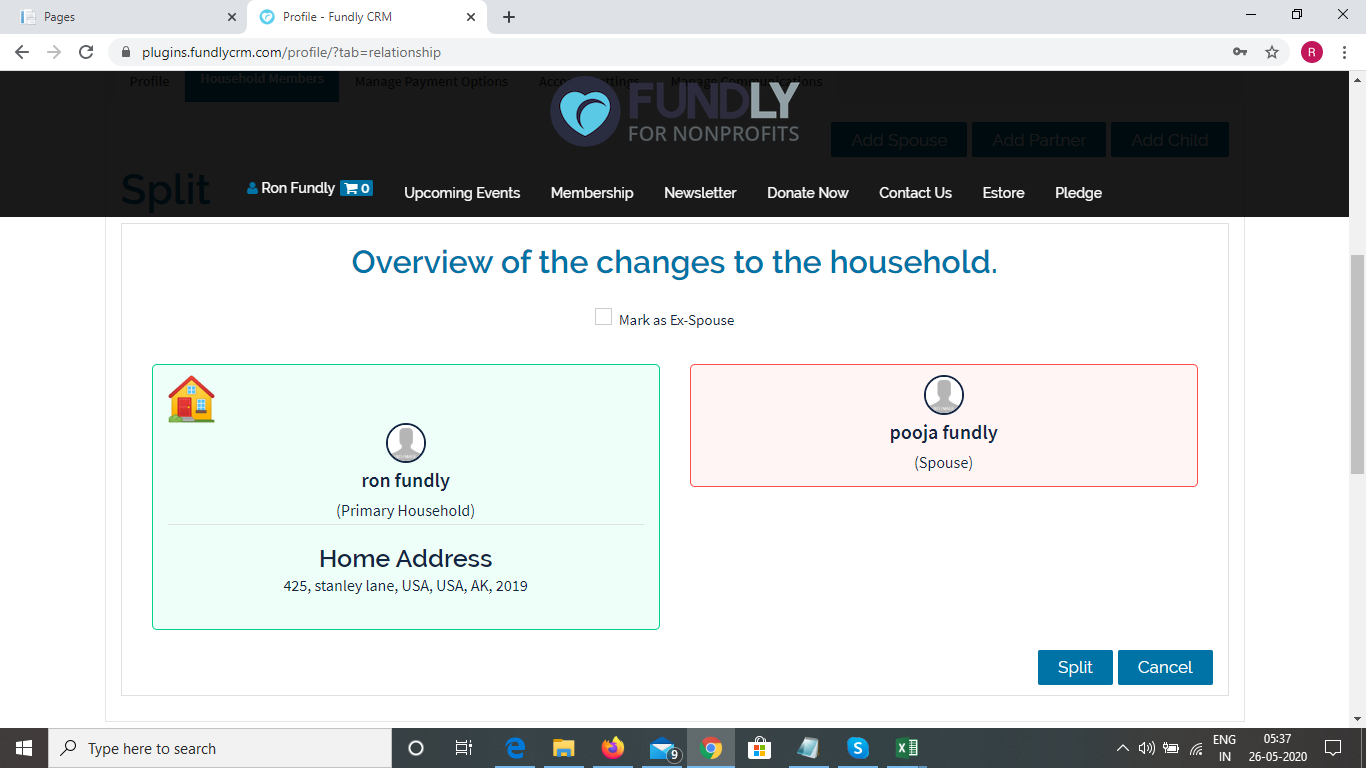
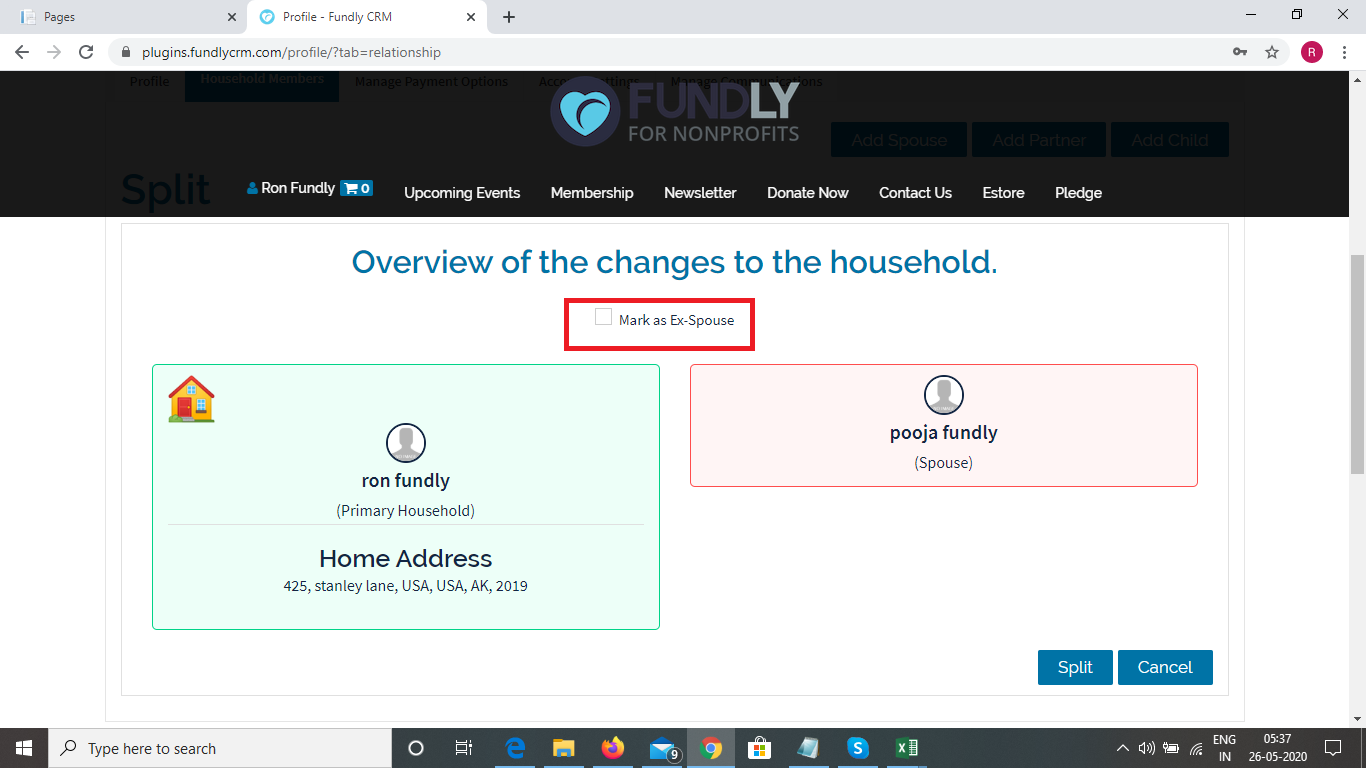
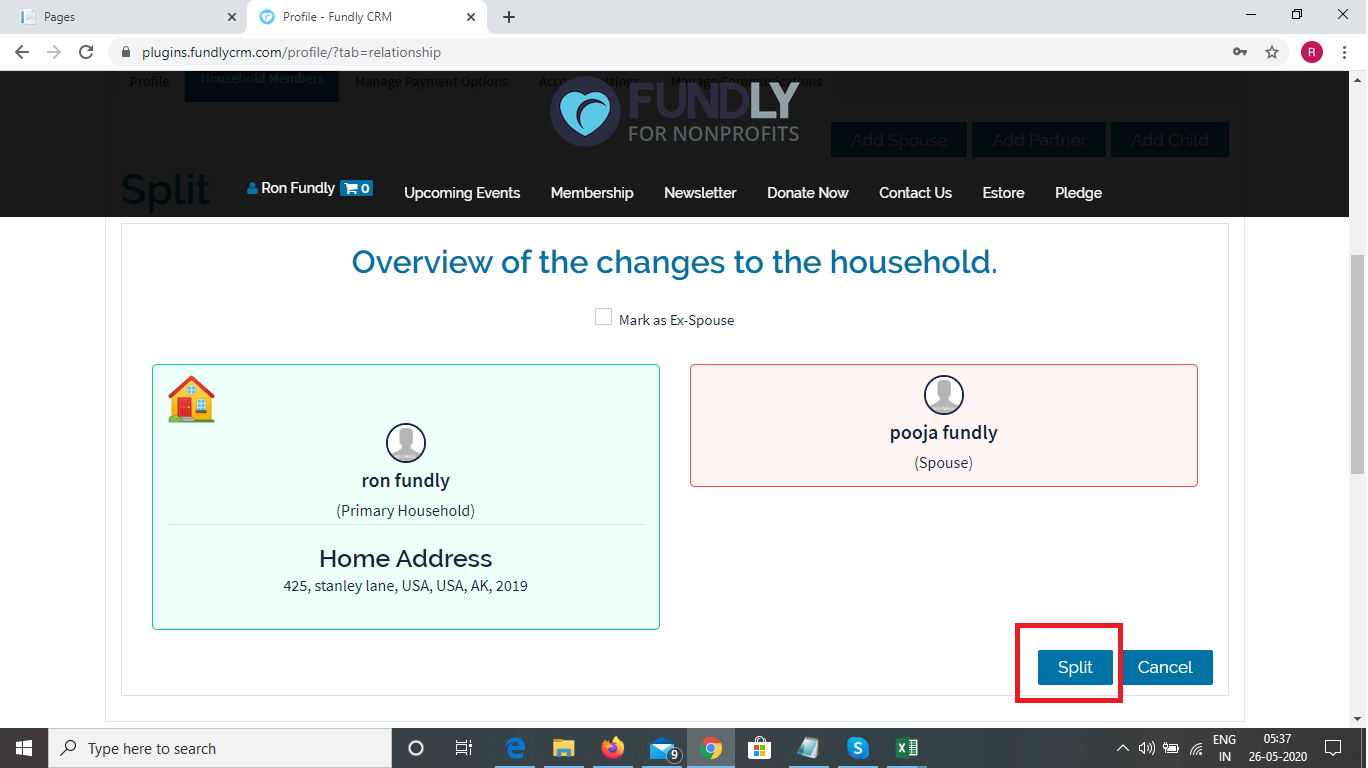
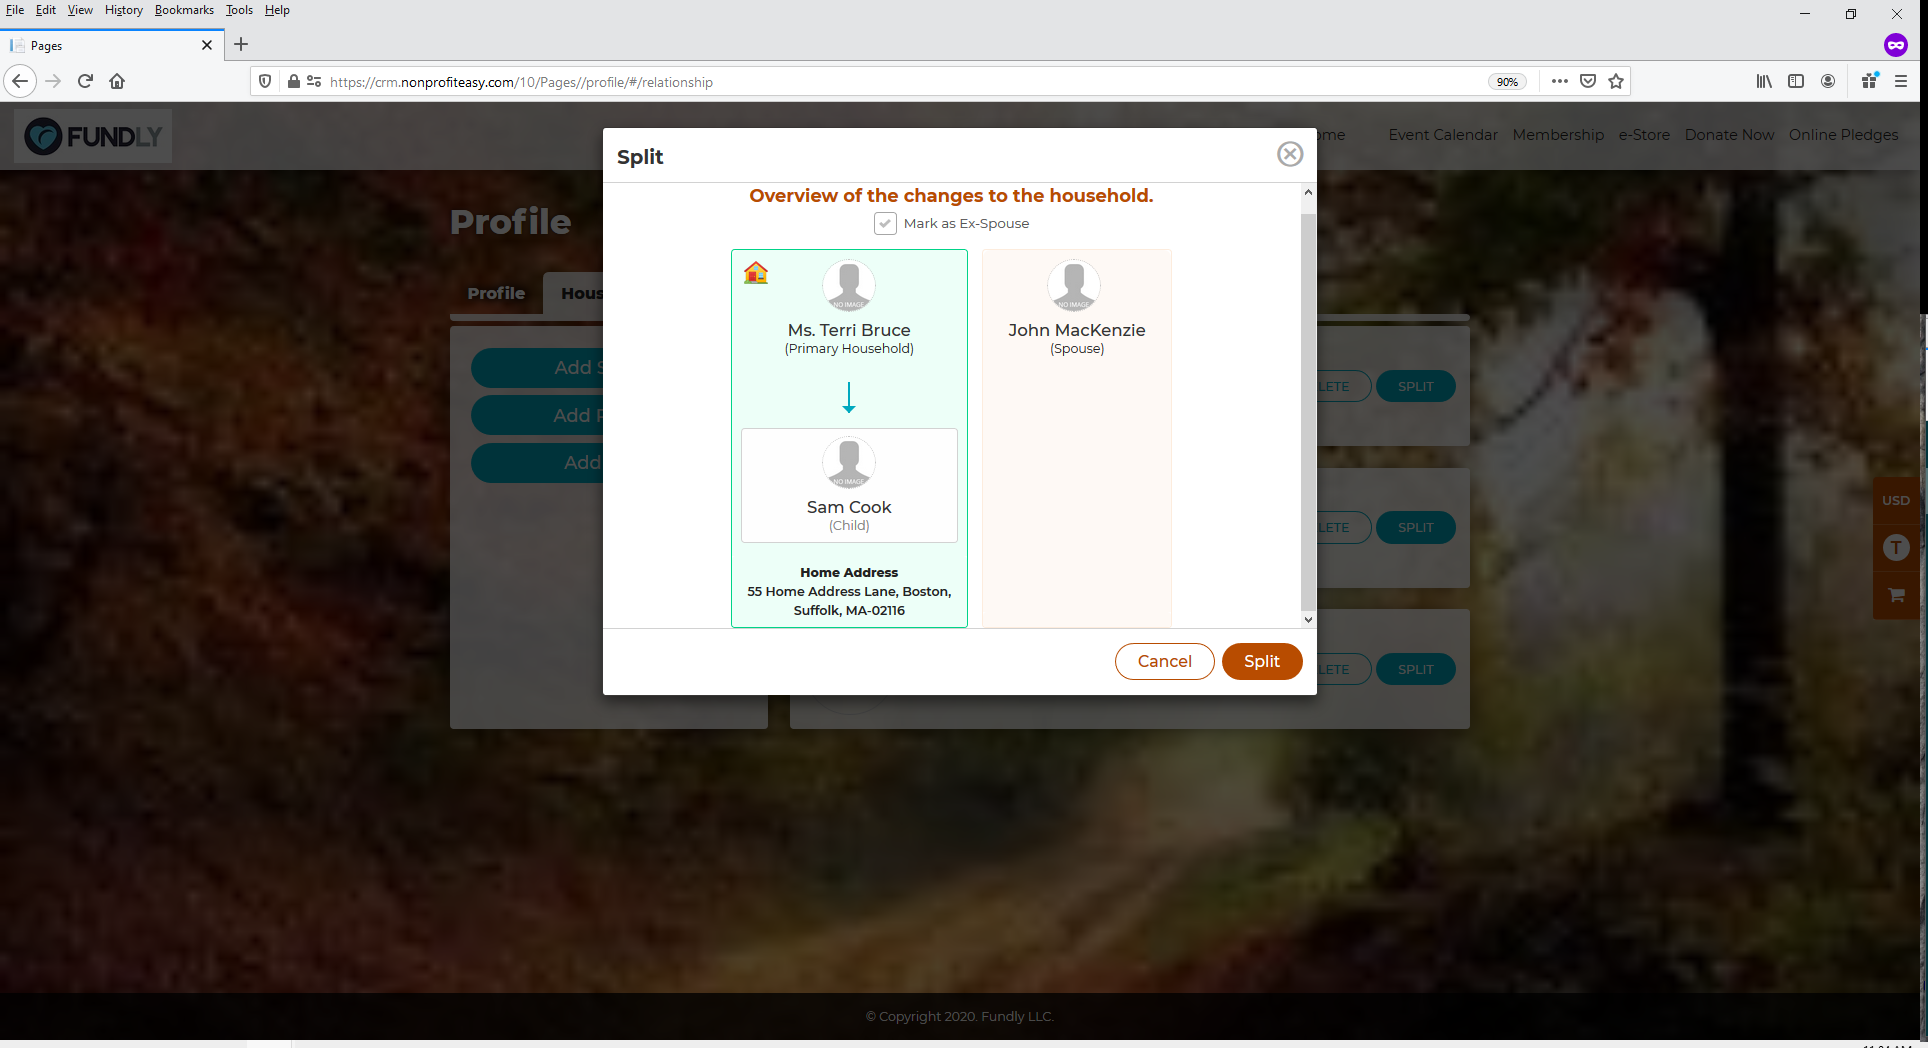
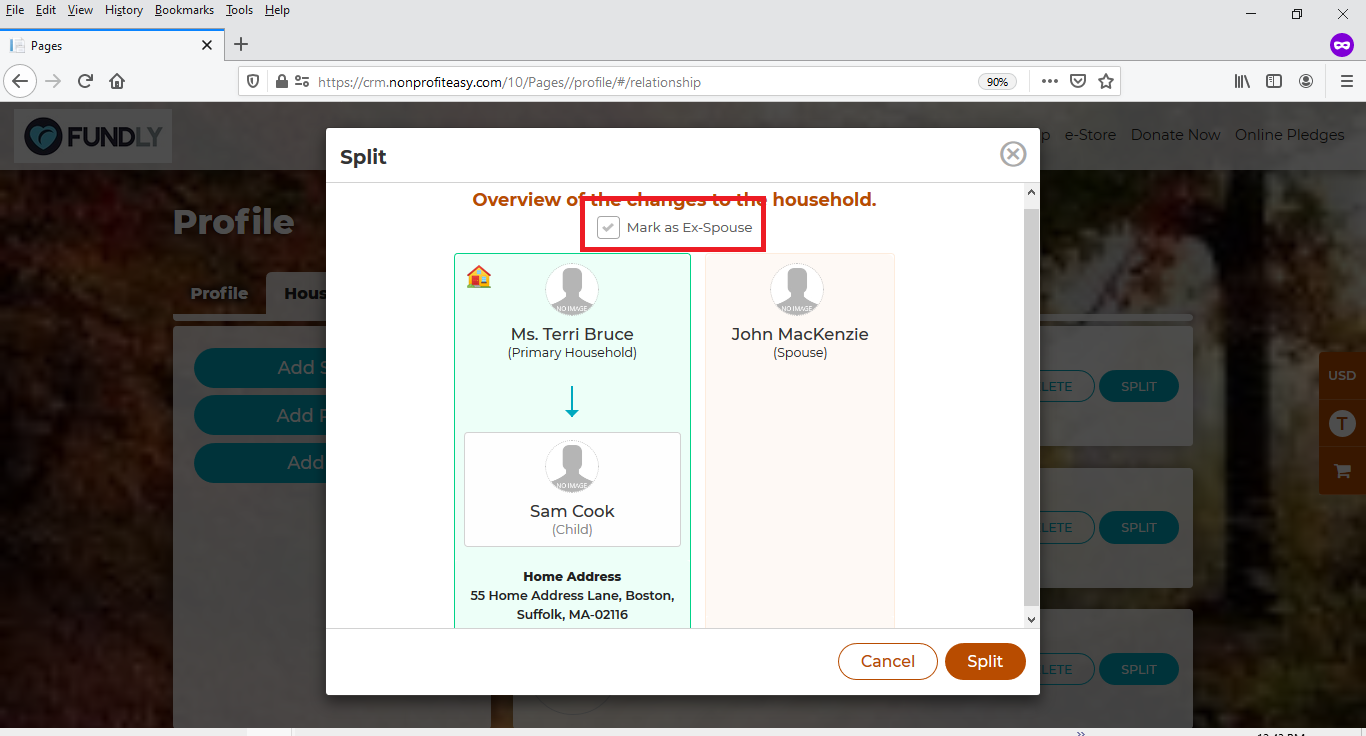
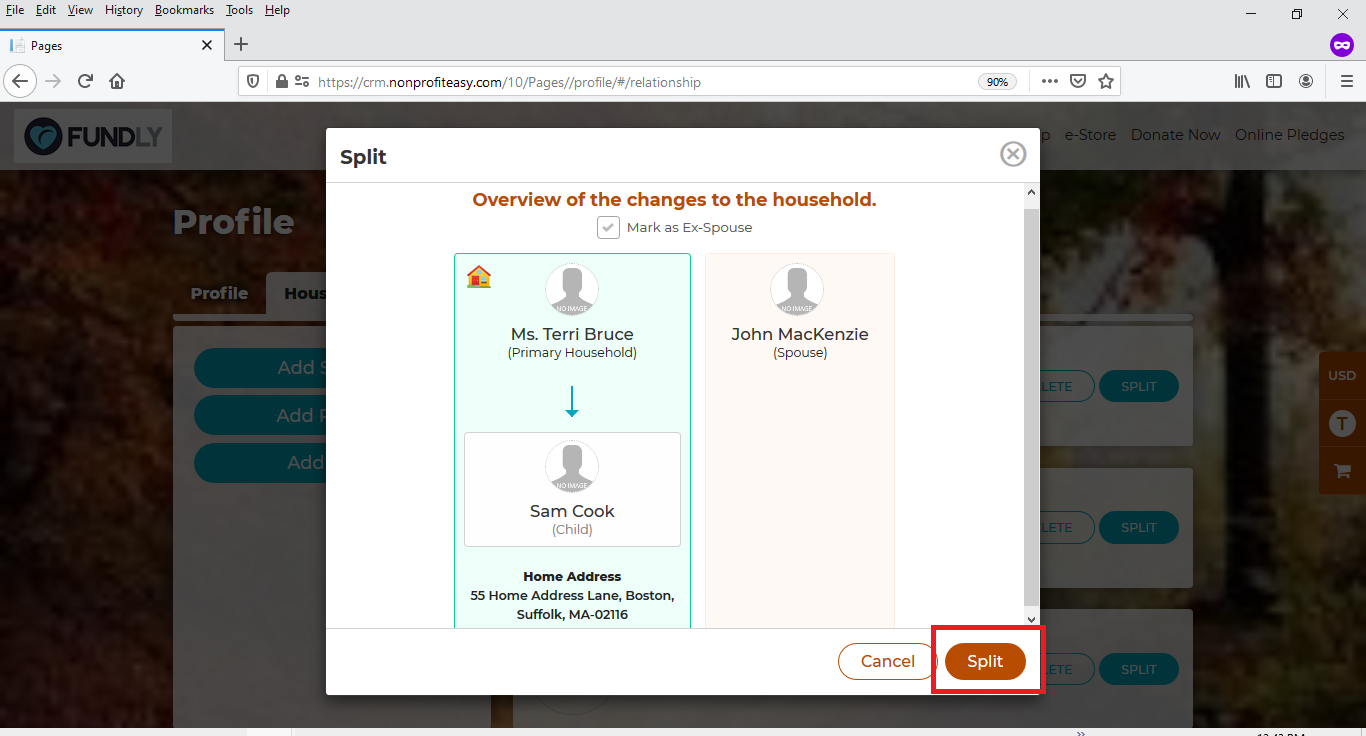
- To remove a relationship, they should click Delete next to the contact/relationship to delete the relationship completely or Split to keep the relationship (or, in case of spouse/partner to change to an ex-spouse/ex-partner) but indicate the contact does not share the same household/address as them. In either case, the "split household" dialog box will open and the user should follow the steps to split up the household.
PLUG-INS
PAGES


- To add a relationship, they should click on the Add Spouse, Add Partner, or Add Child button. In the resulting pop up they should add the spouse's/partner's/child's name and email address. First Name, Last Name, and Email are required; the other fields are optional. They can enter their own email address for the other person if they don't know it or don't want to provide it. They can add a profile picture for the contact by hovering over the circle at the top and clicking the camera icon.
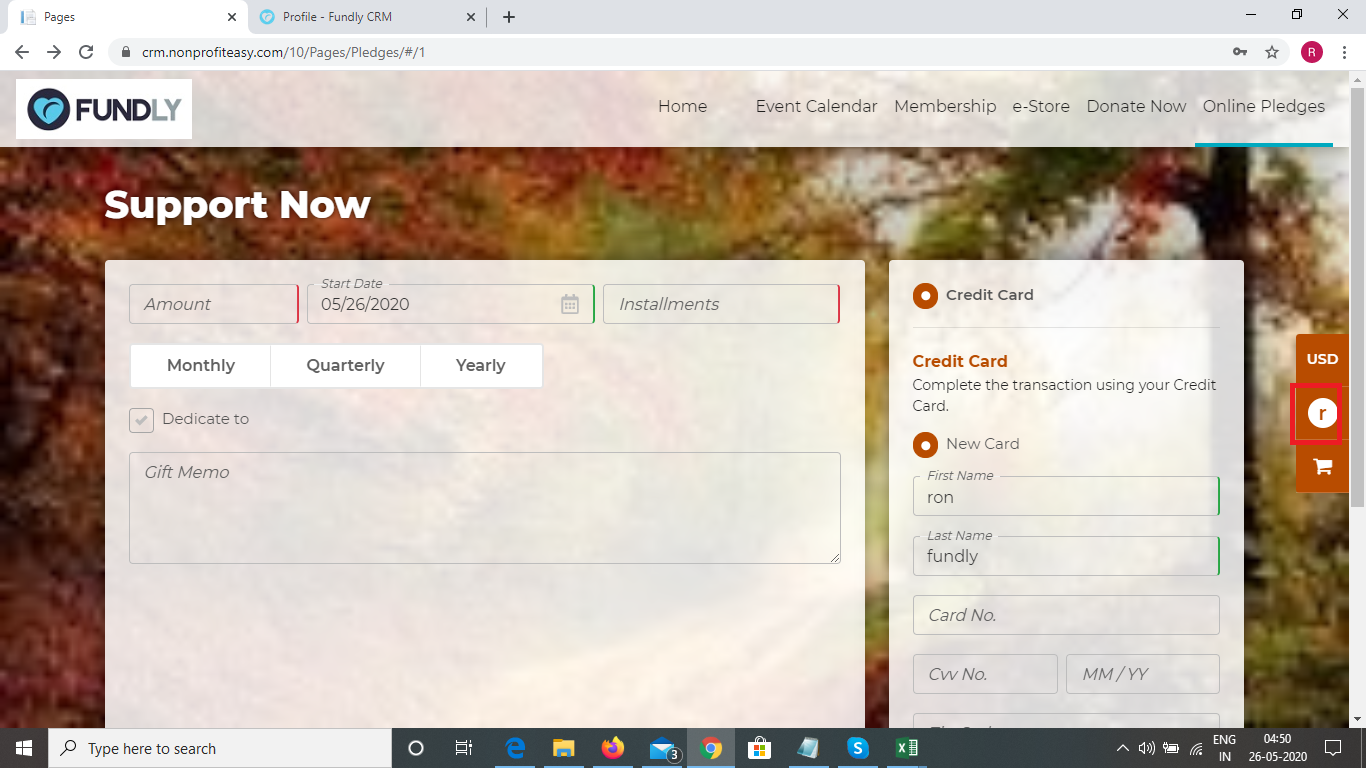
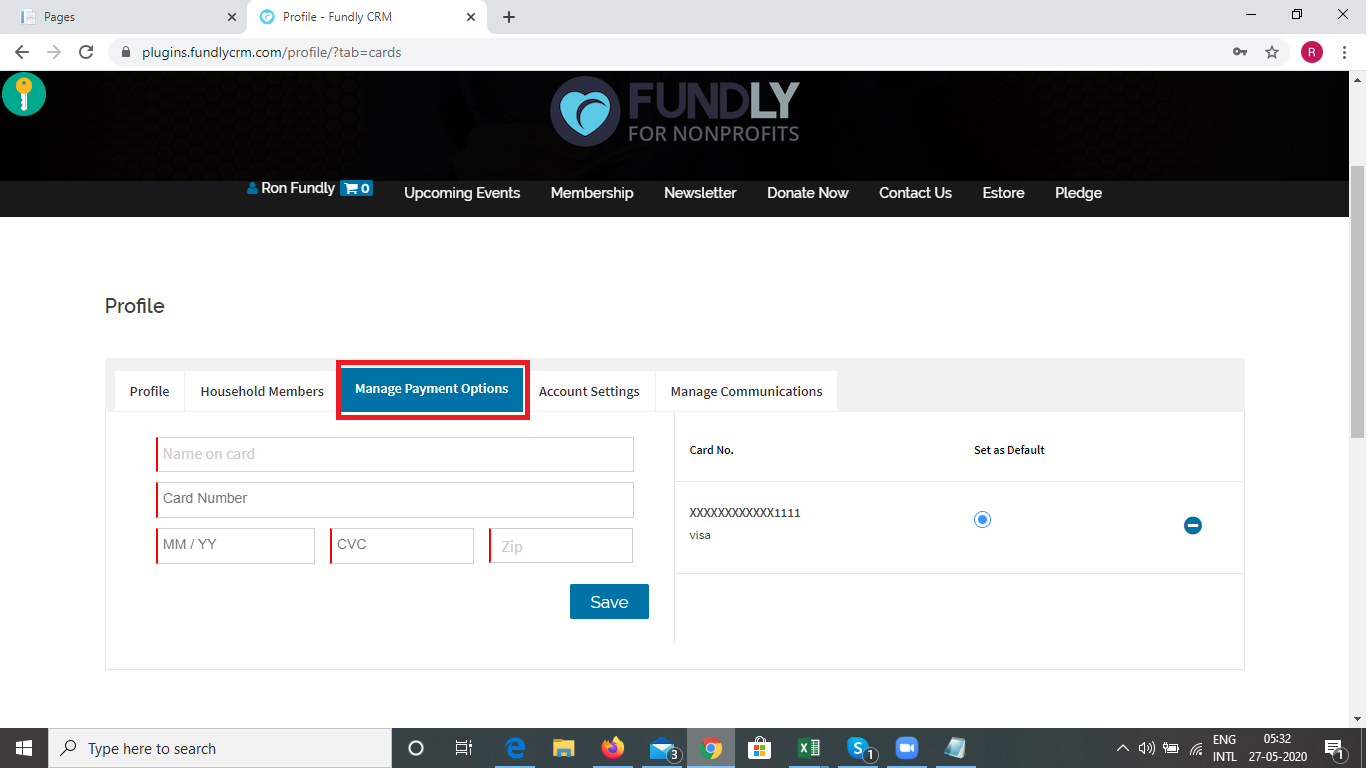
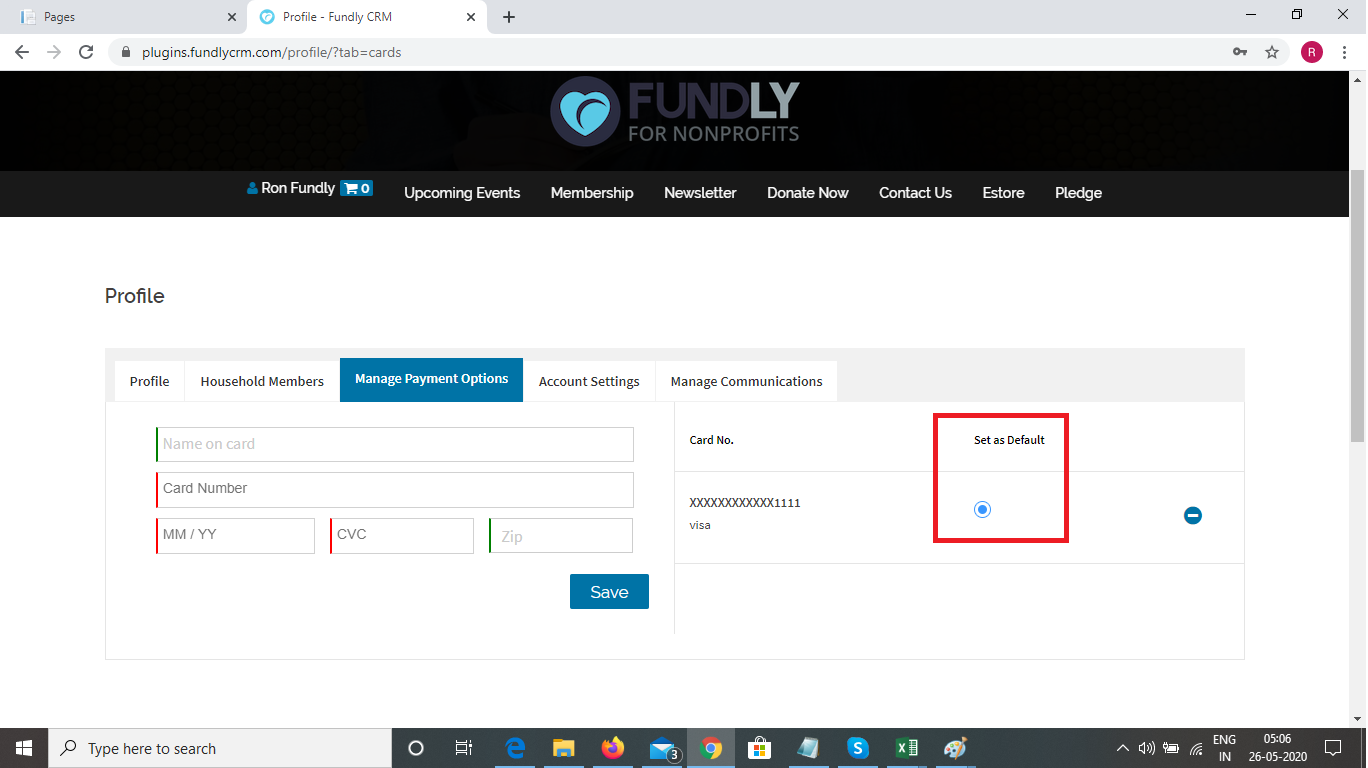
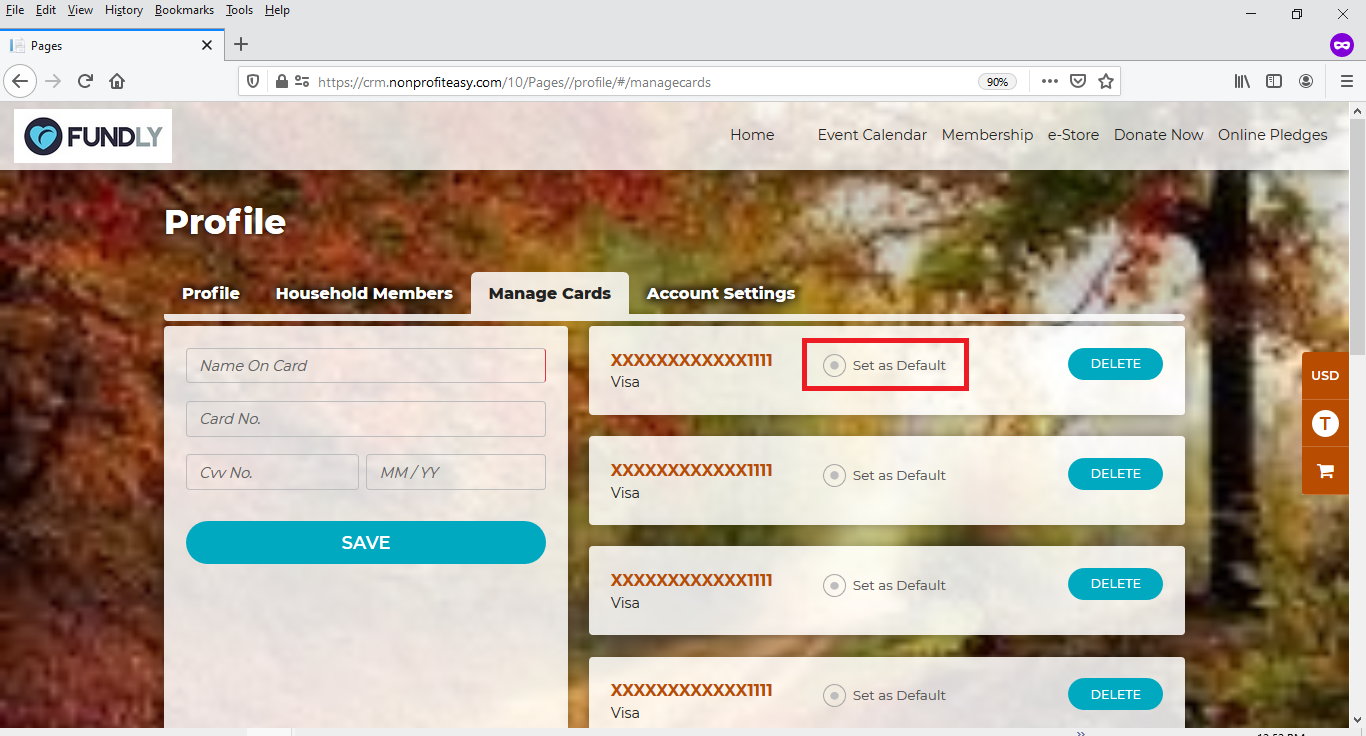
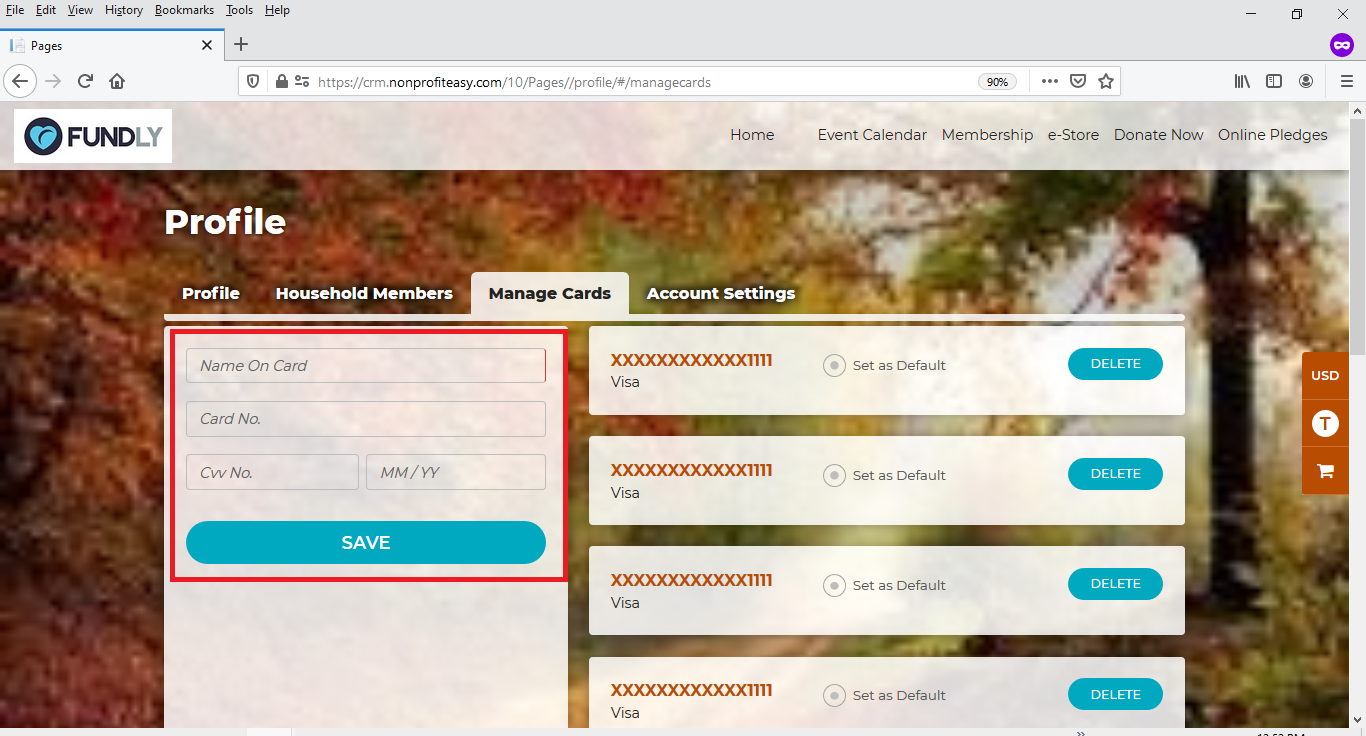
- Under Manage Payment Options (plugins) / Manage Card (pages) the user will be able to manage their saved credit card information (add, edit, delete).
PLUG-INS
PAGES

- To set any saved credit card as the default card on file (the default card will be selected by default for all new transactions but the user can manually switch to a different card when checking out), the user should click the "Save as Default" radio button next to any saved credit card.
PLUG-INS
PAGES
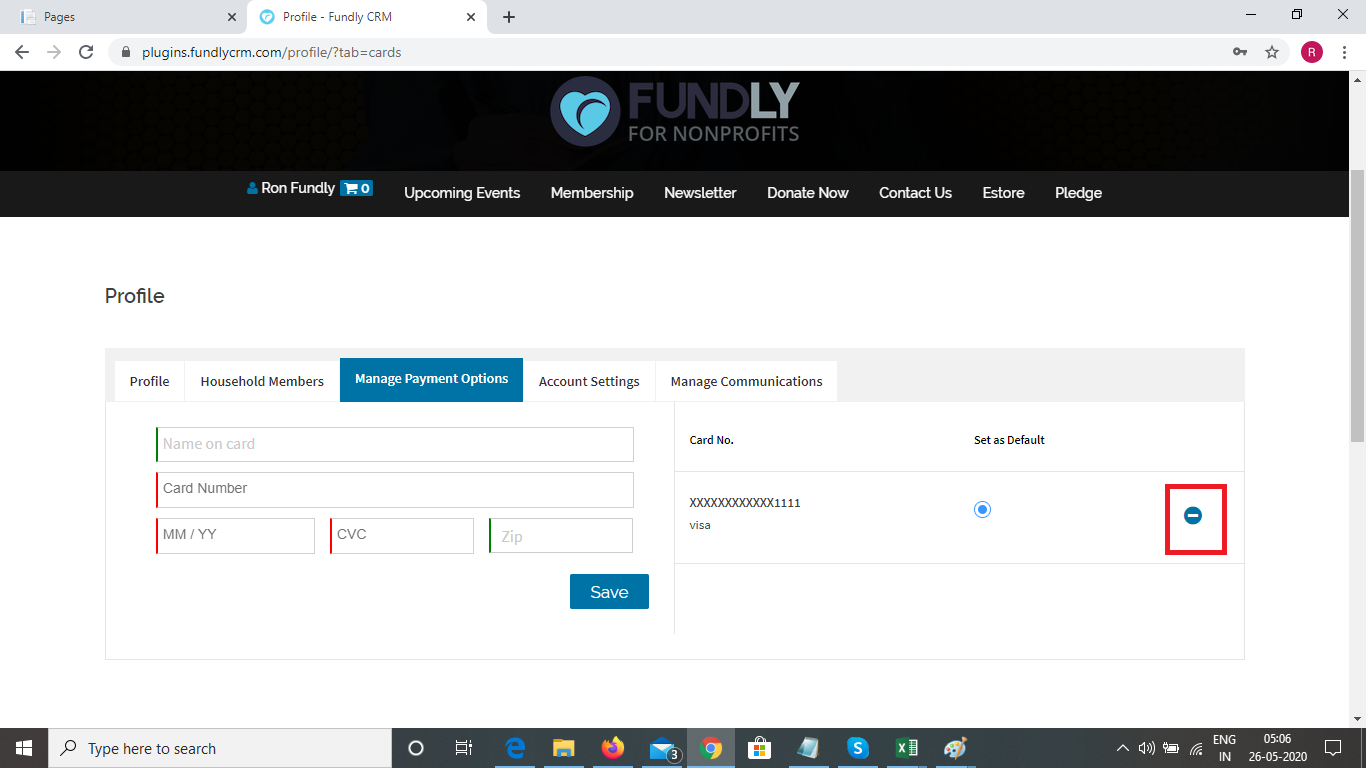
- To delete/remove any saved credit card, the user should click the Delete button next to any saved credit card.
PLUG-INS
PAGES

-
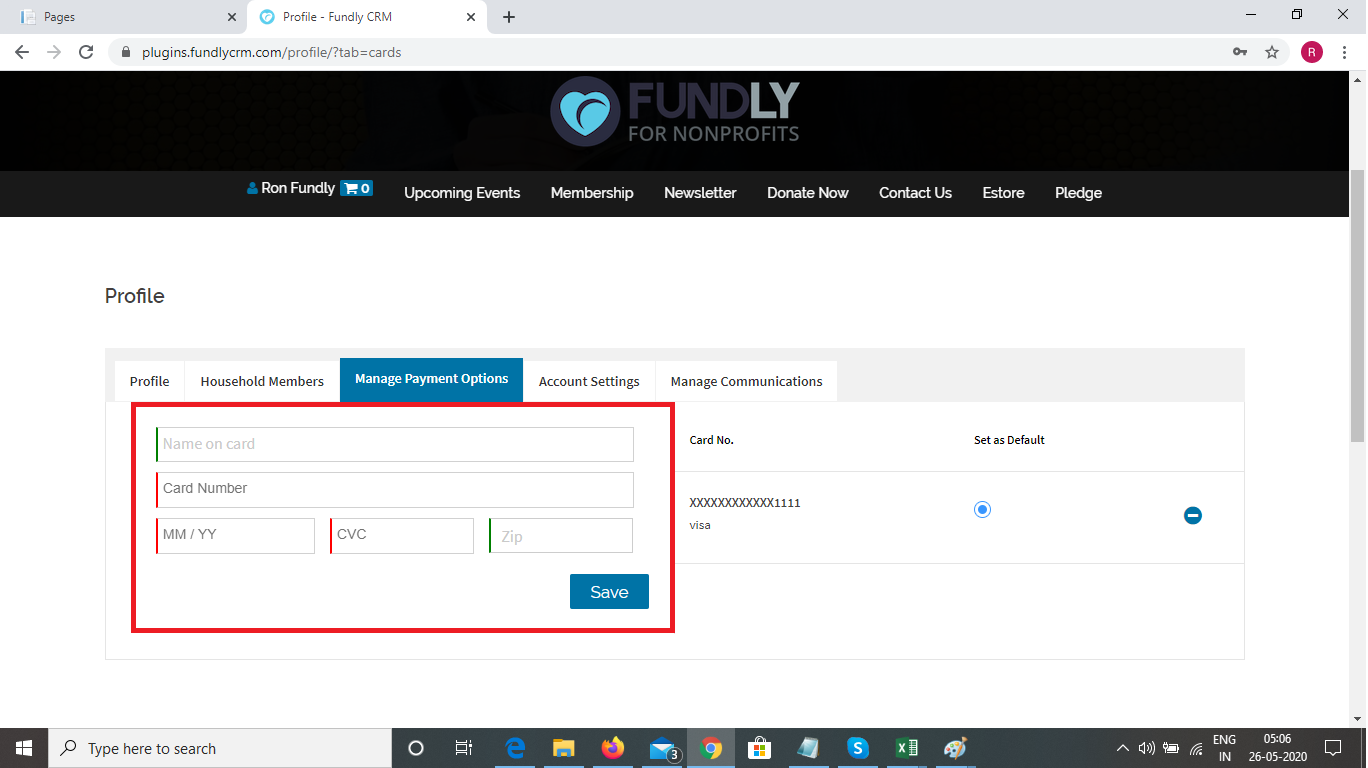
To add a new saved credit card/card on file, the user should enter the information in the left hand panel and click Save.
PLUG-INS
PAGES
- To set any saved credit card as the default card on file (the default card will be selected by default for all new transactions but the user can manually switch to a different card when checking out), the user should click the "Save as Default" radio button next to any saved credit card.
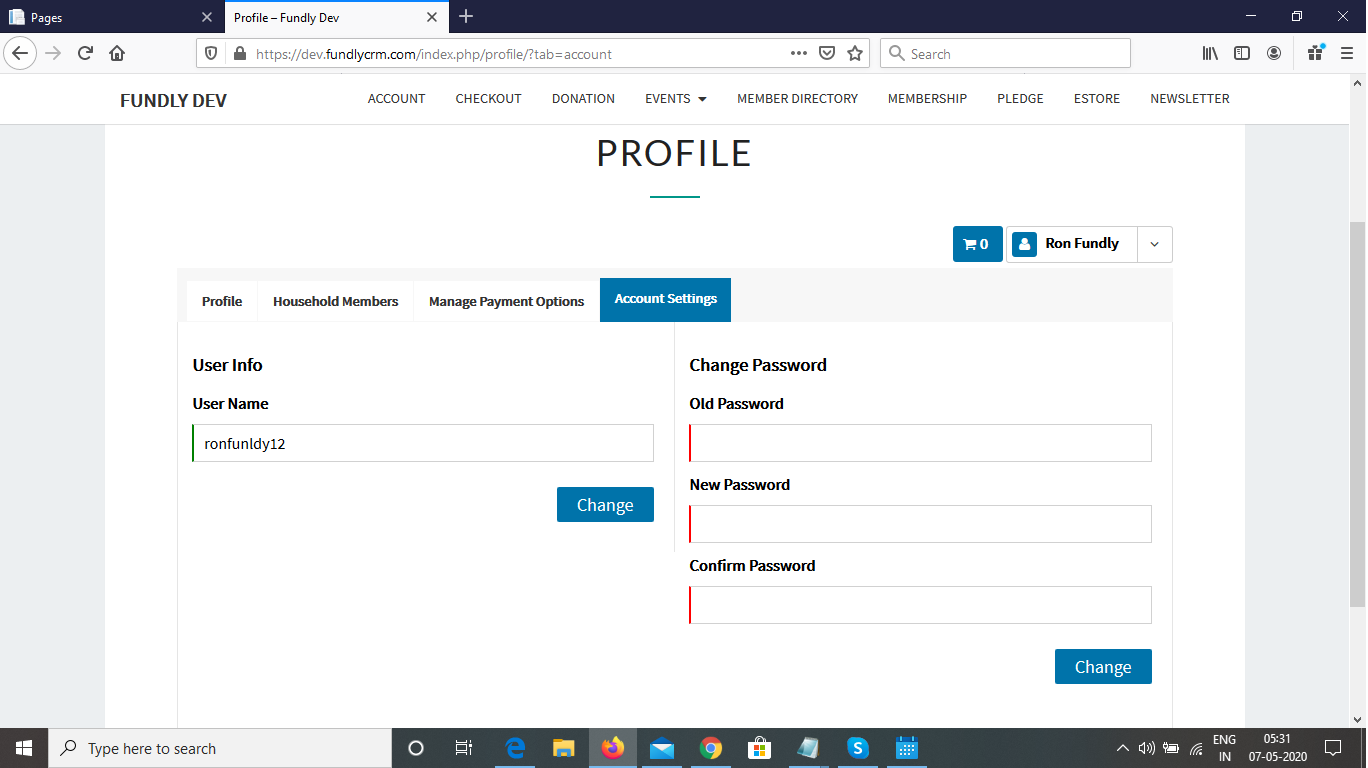
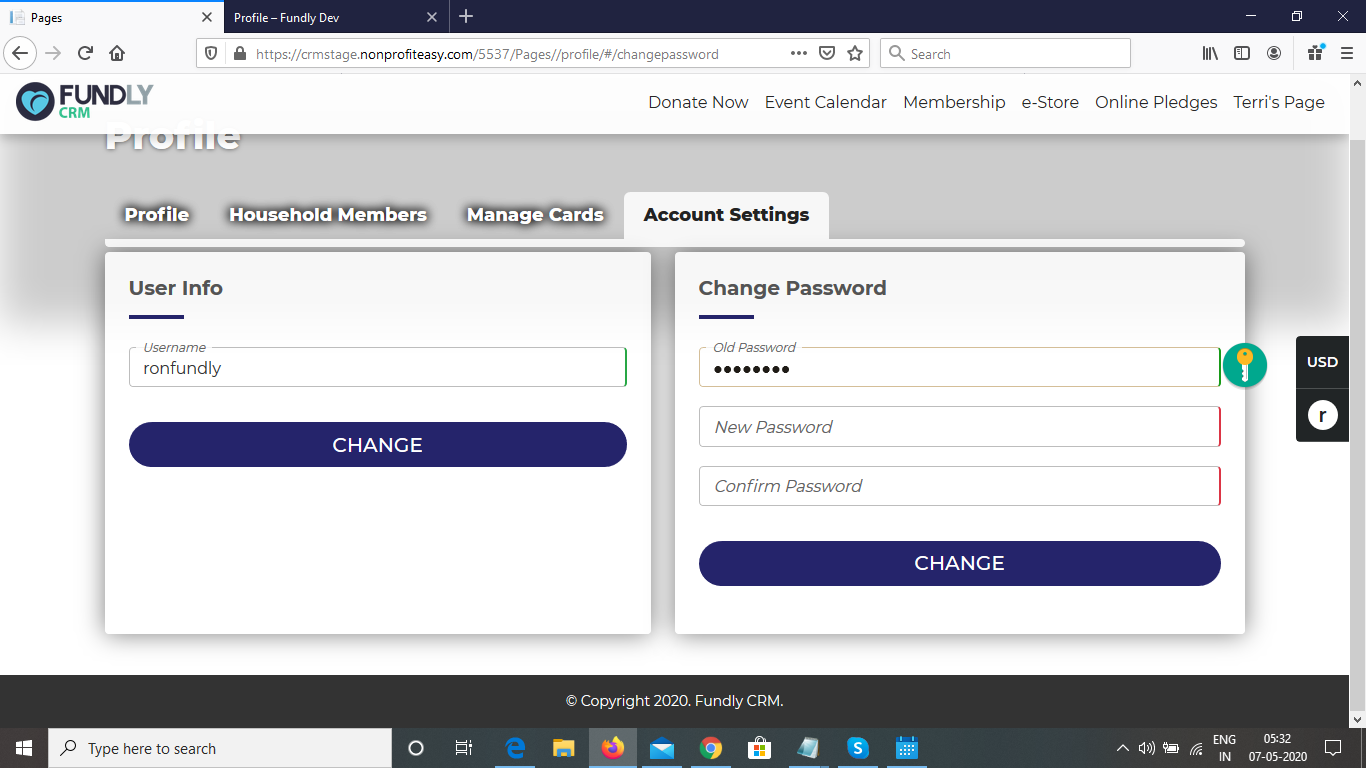
- Under Account Settings, the user will be able to see their user name and also change their password to a new one.
PLUG-INS
PAGES
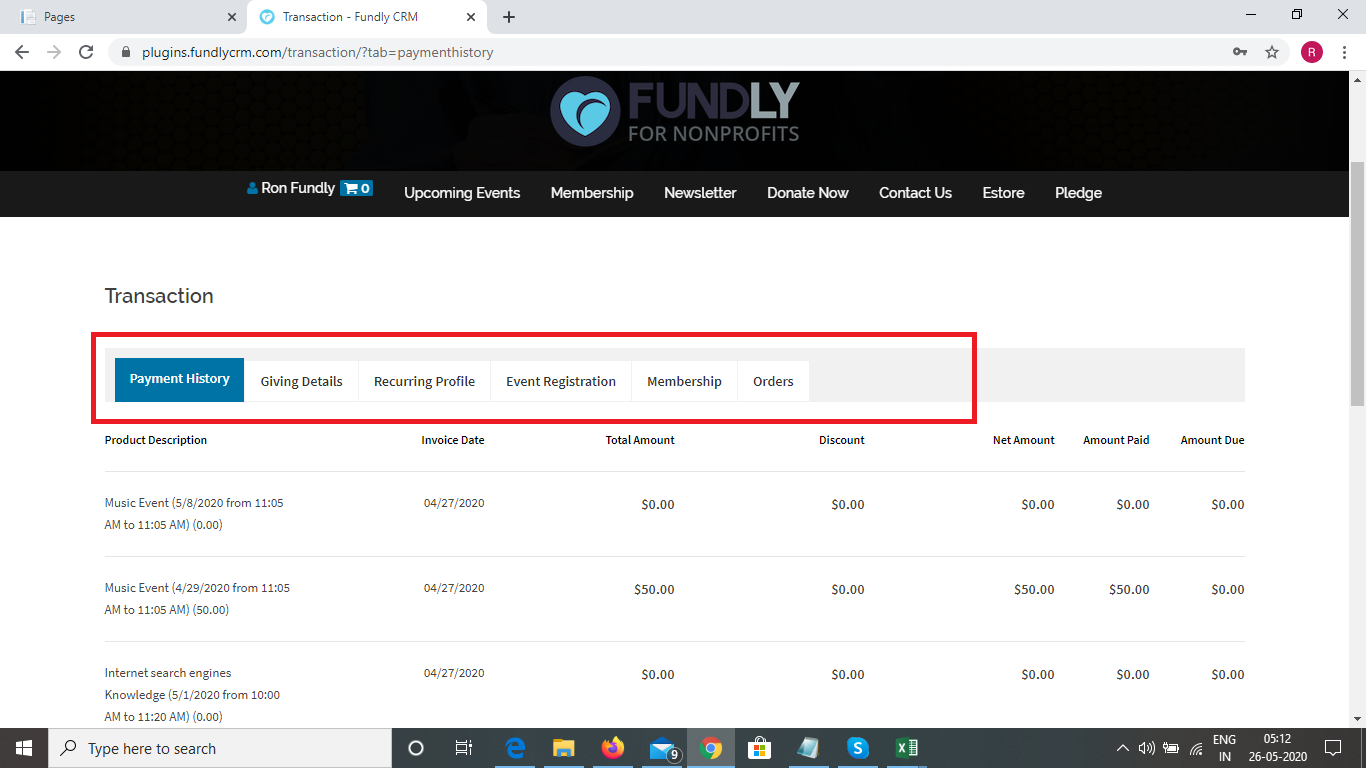
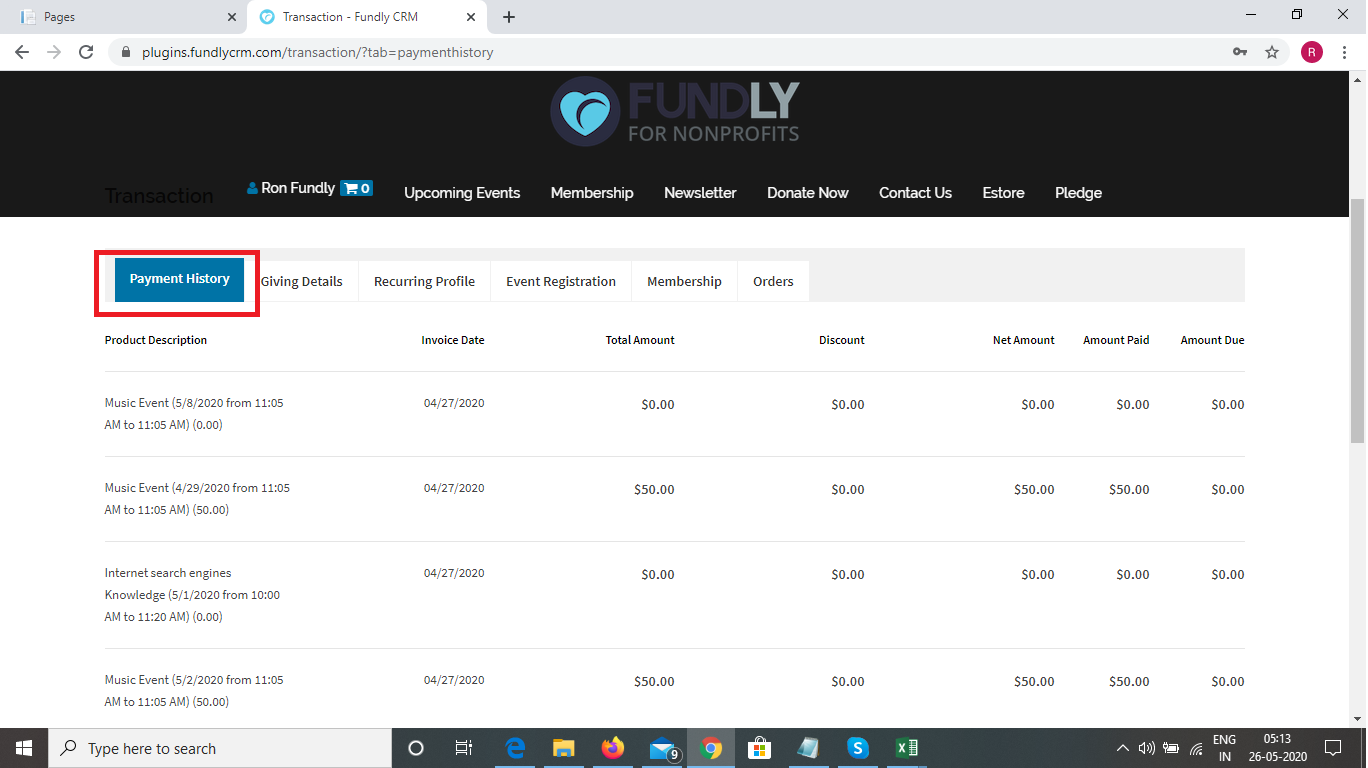
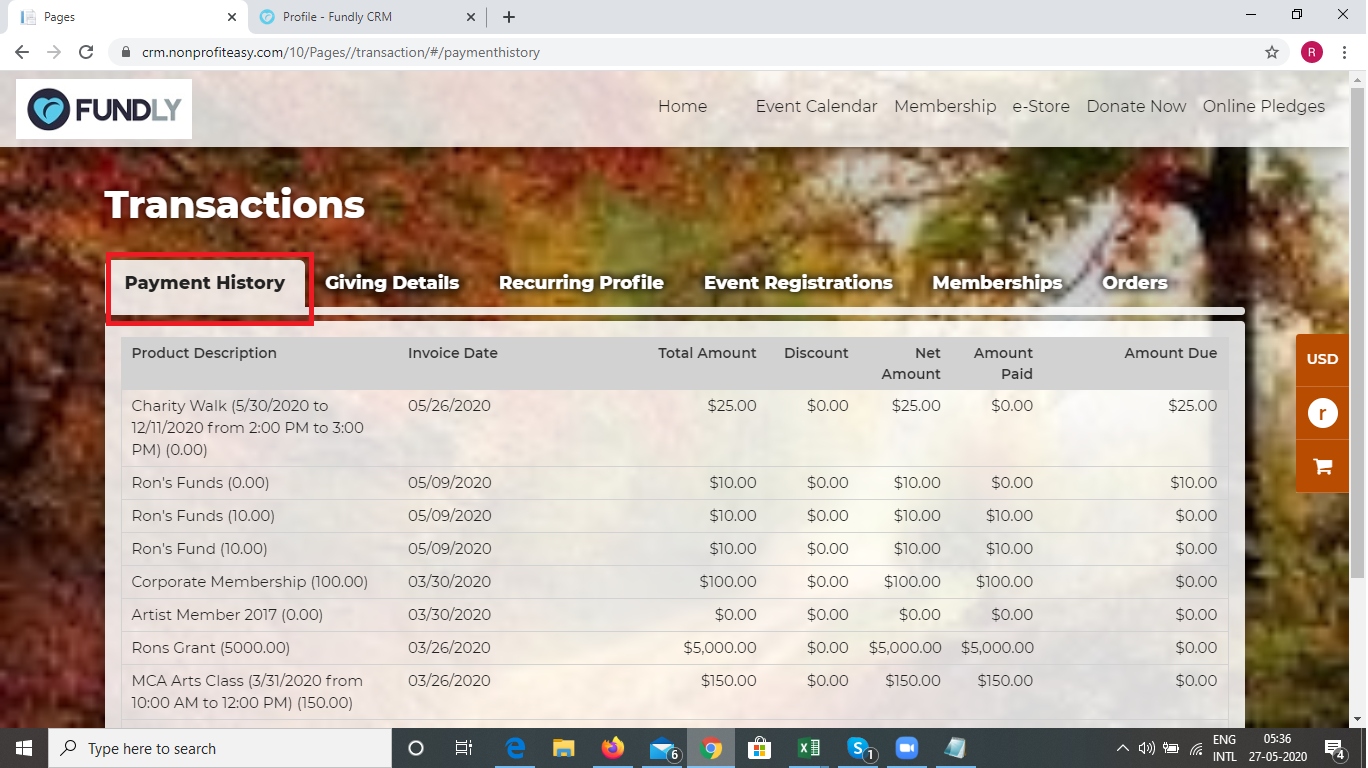
- Under My Transactions (Plug-Ins) / Transactions (Pages), the user can see all the transaction they have made including Donations, event registrations, memberships, and e-Store orders.
PLUG-INS
PAGES
- The My Transactions area is divided into sub-tabs that show just transactions in that category/of that type.
PLUG-INS
PAGES

A) Payment history - all payments made including invoice/transaction number, invoice/transaction date, transaction amount, and the description of the "product"/transaction.
PLUG-INS
PAGES
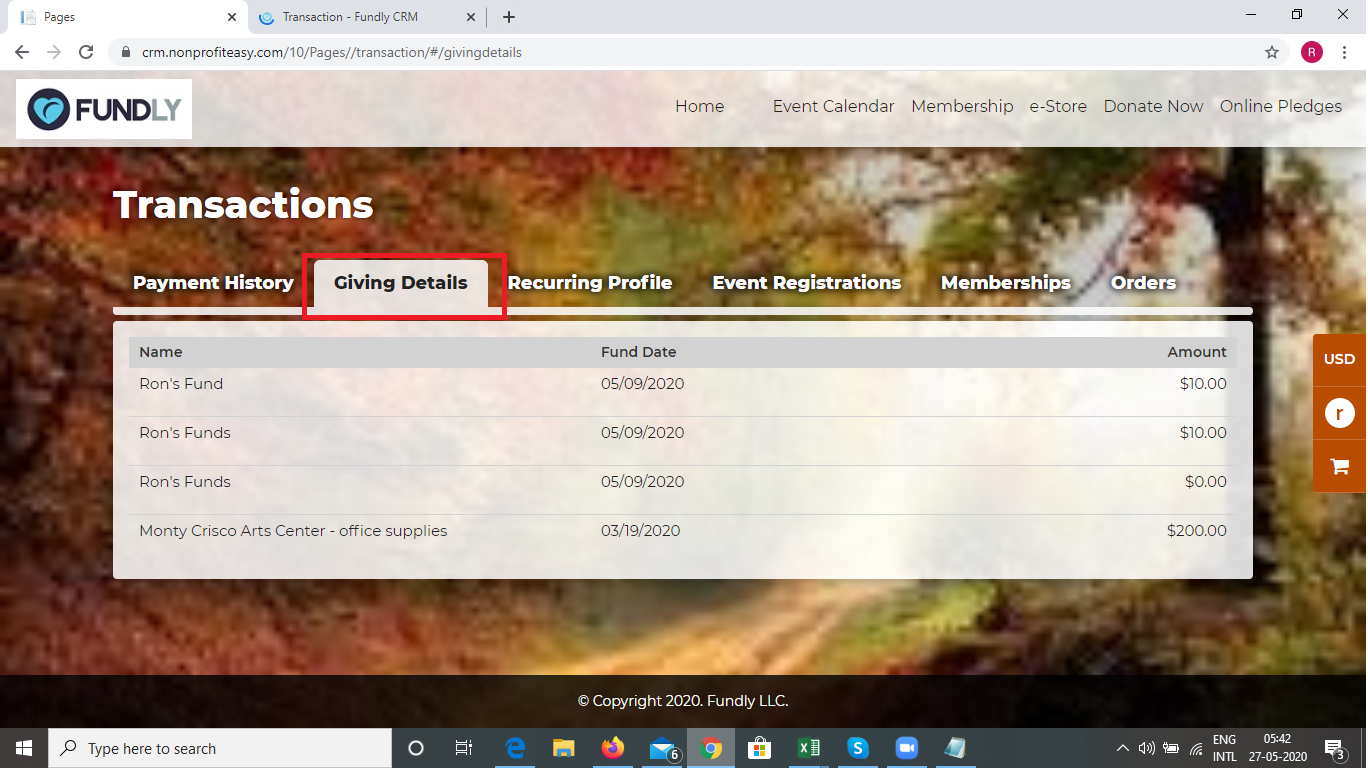
B) Giving details - all of the donations made.
PLUG-INS
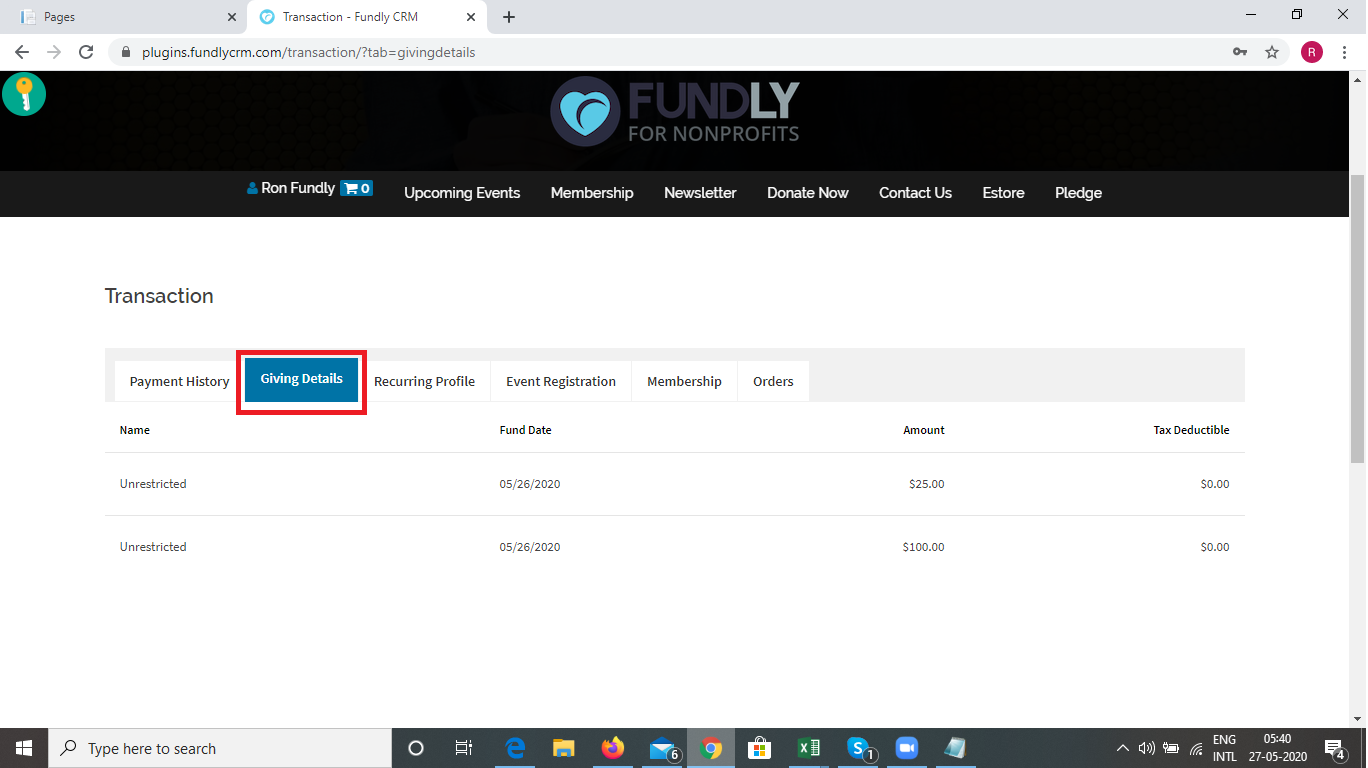
PAGES
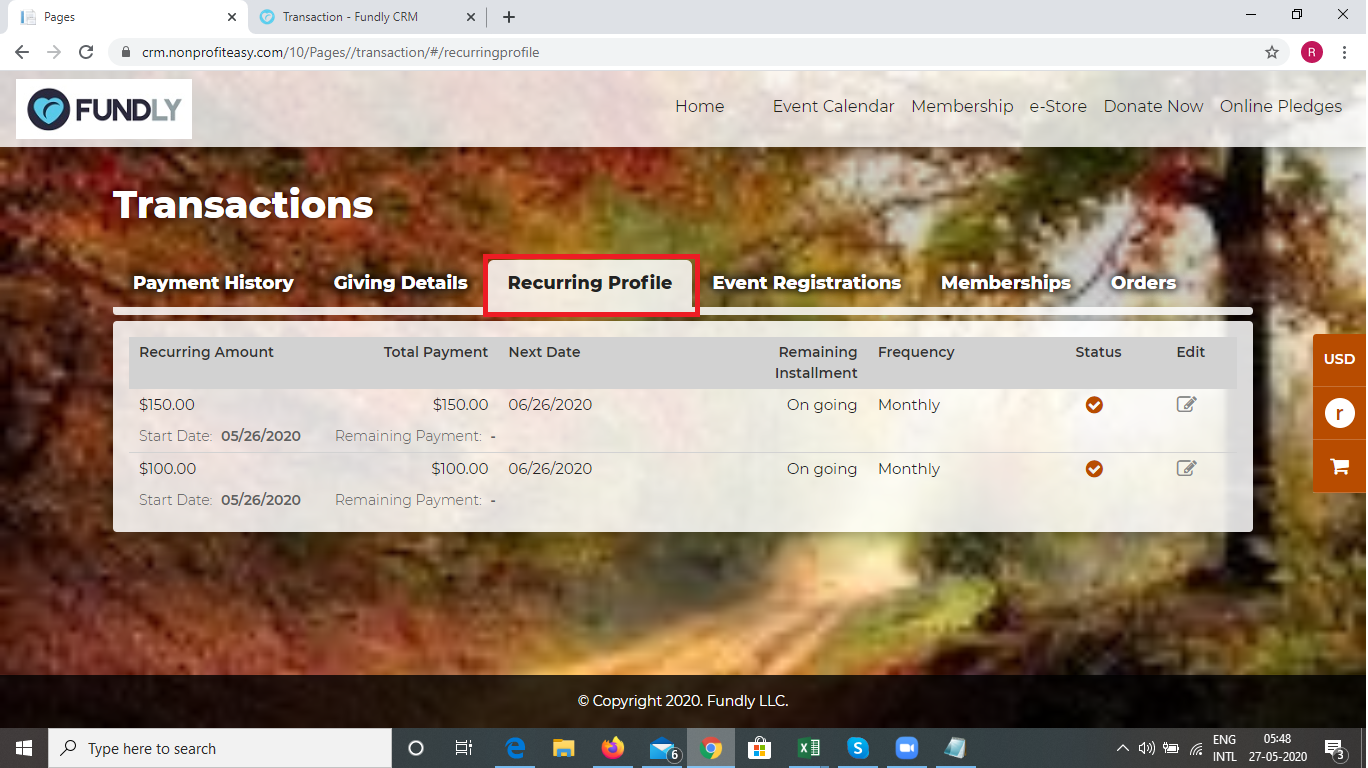
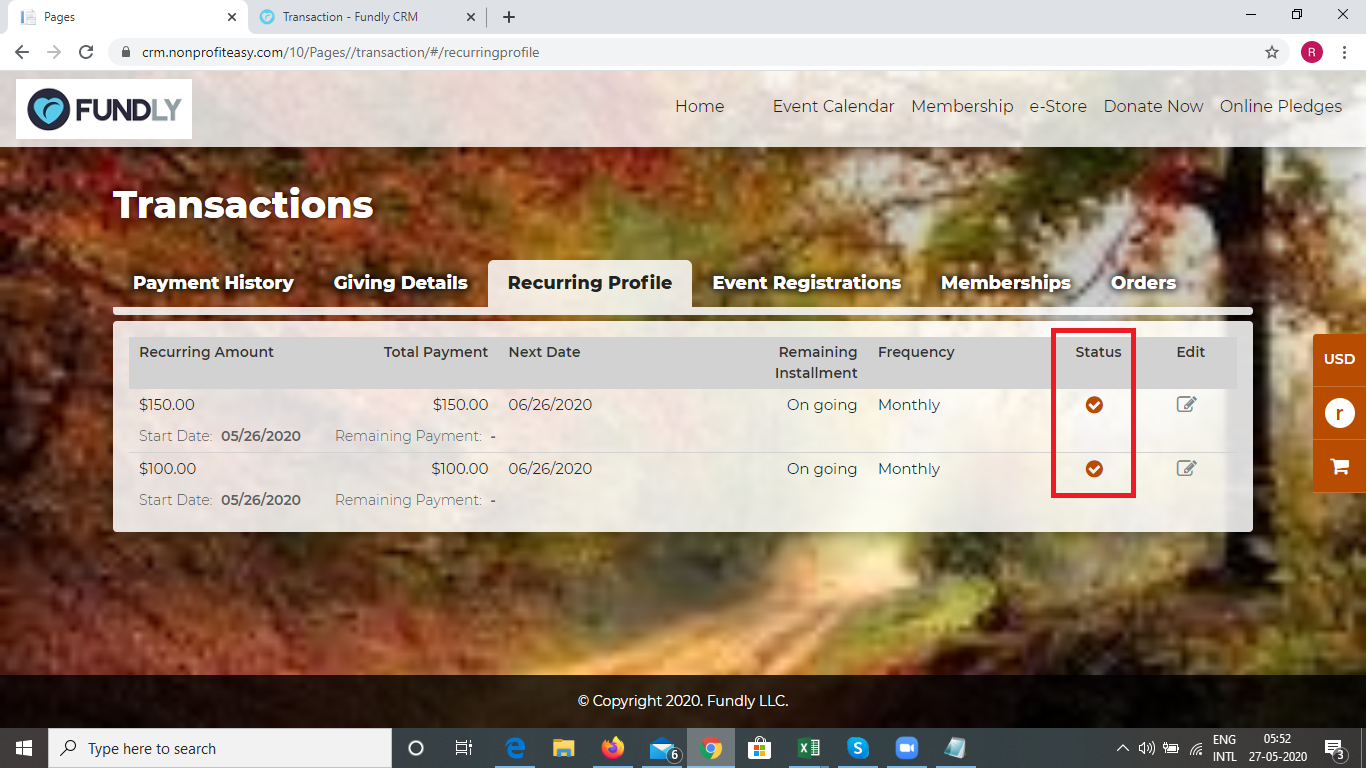
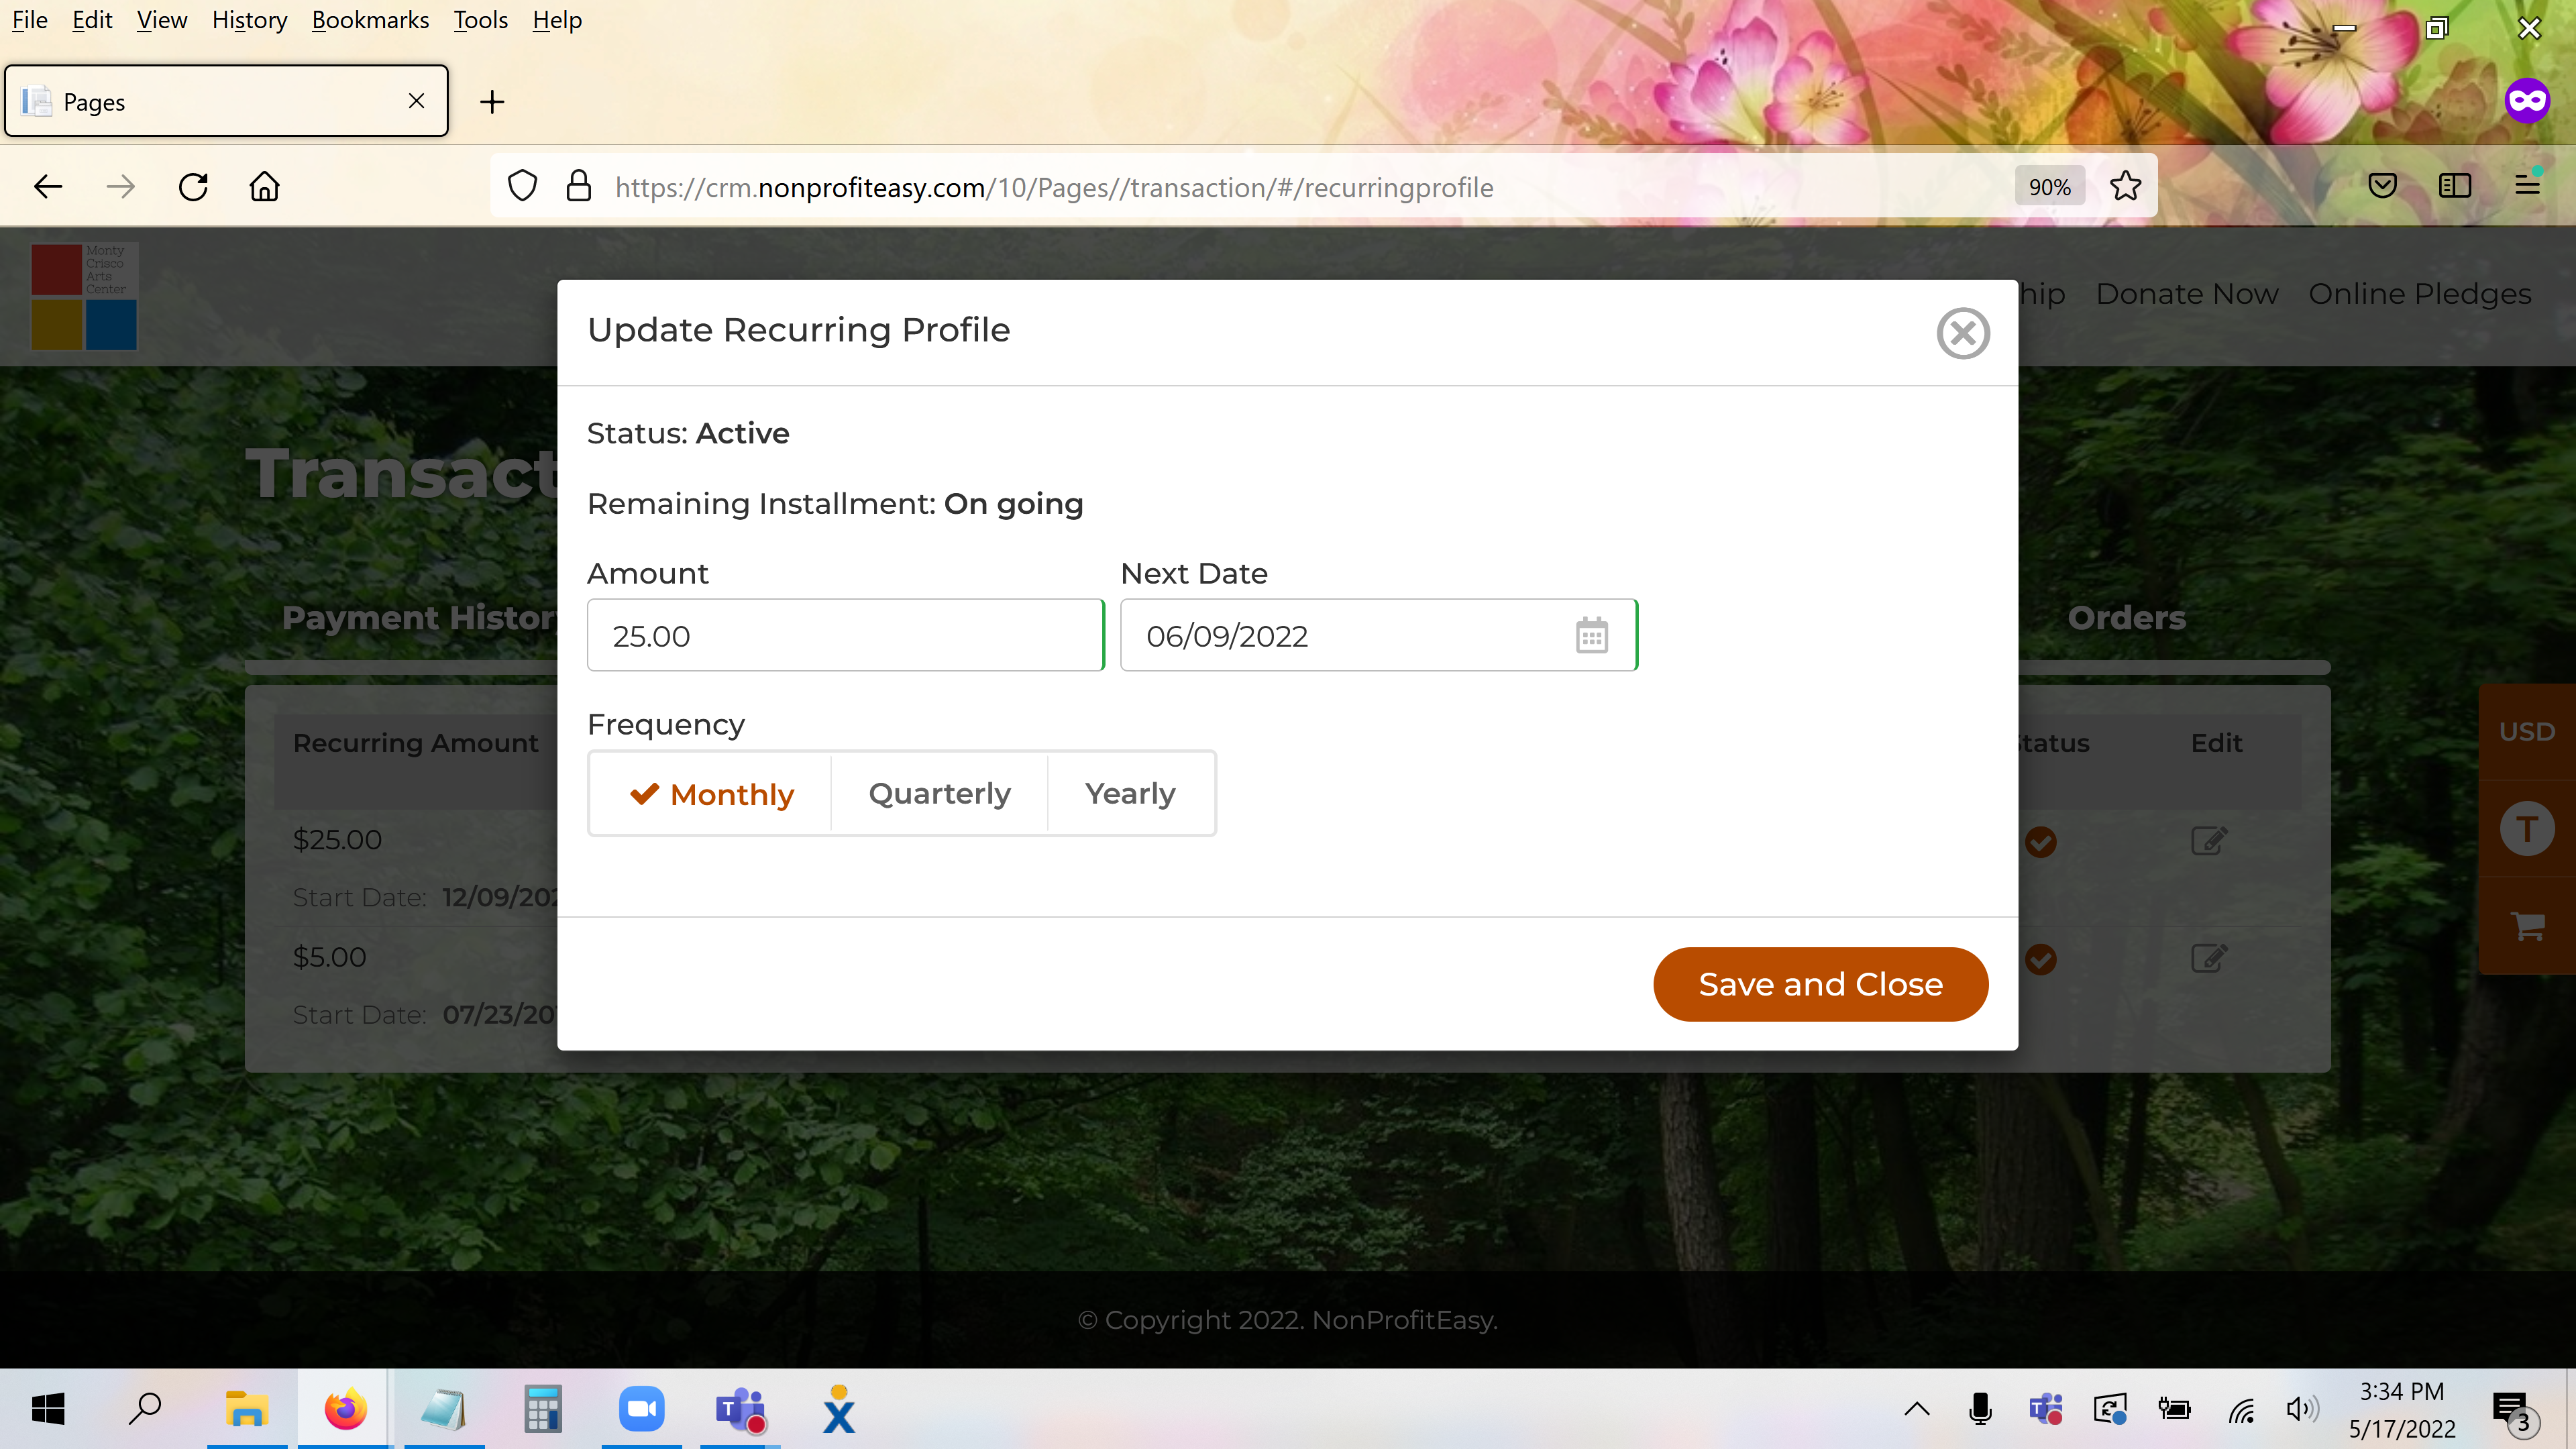
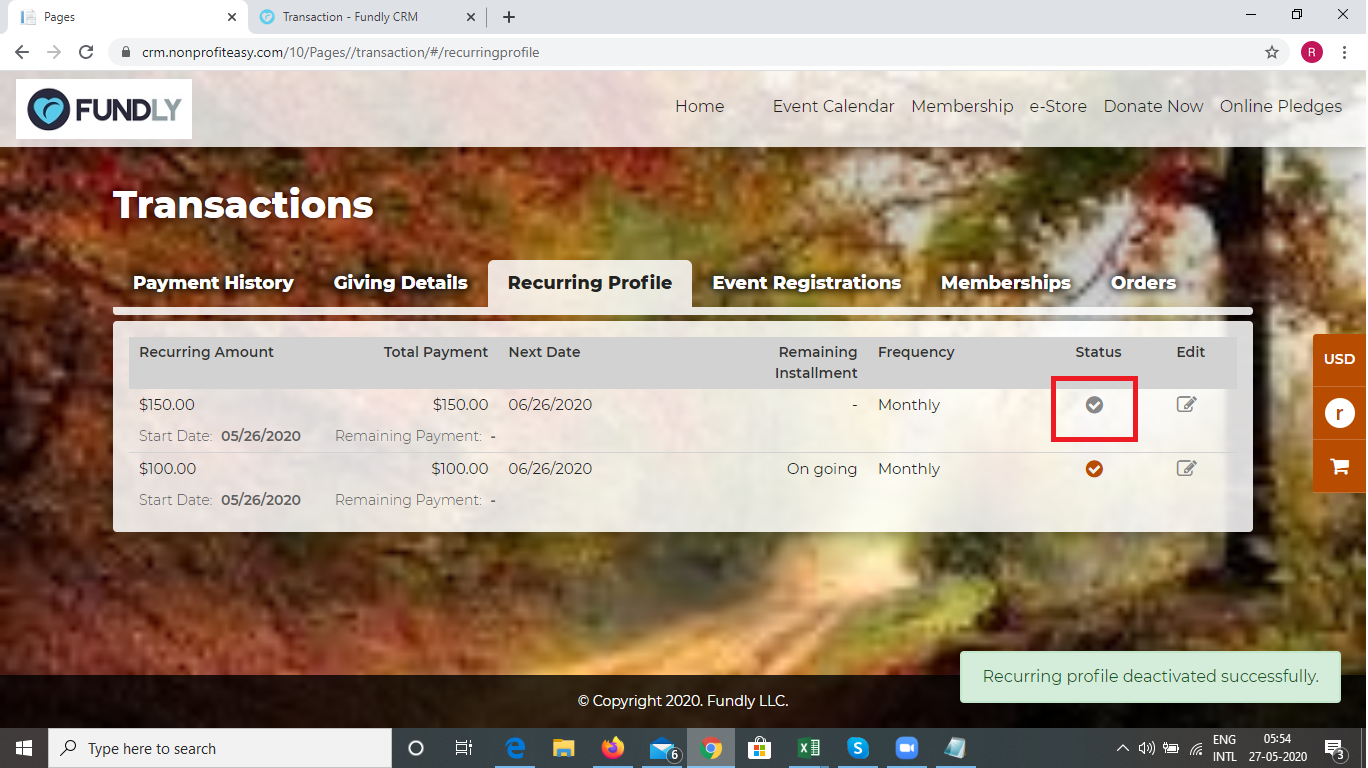
C) Recurring Profile - all of the recurring donations made including the frequency, amount, and the status. The user will be able to edit the recurring donation (change amount or frequency) and/or cancel the recurring donation by checking and unchecking the checkbox.
PLUG-INS
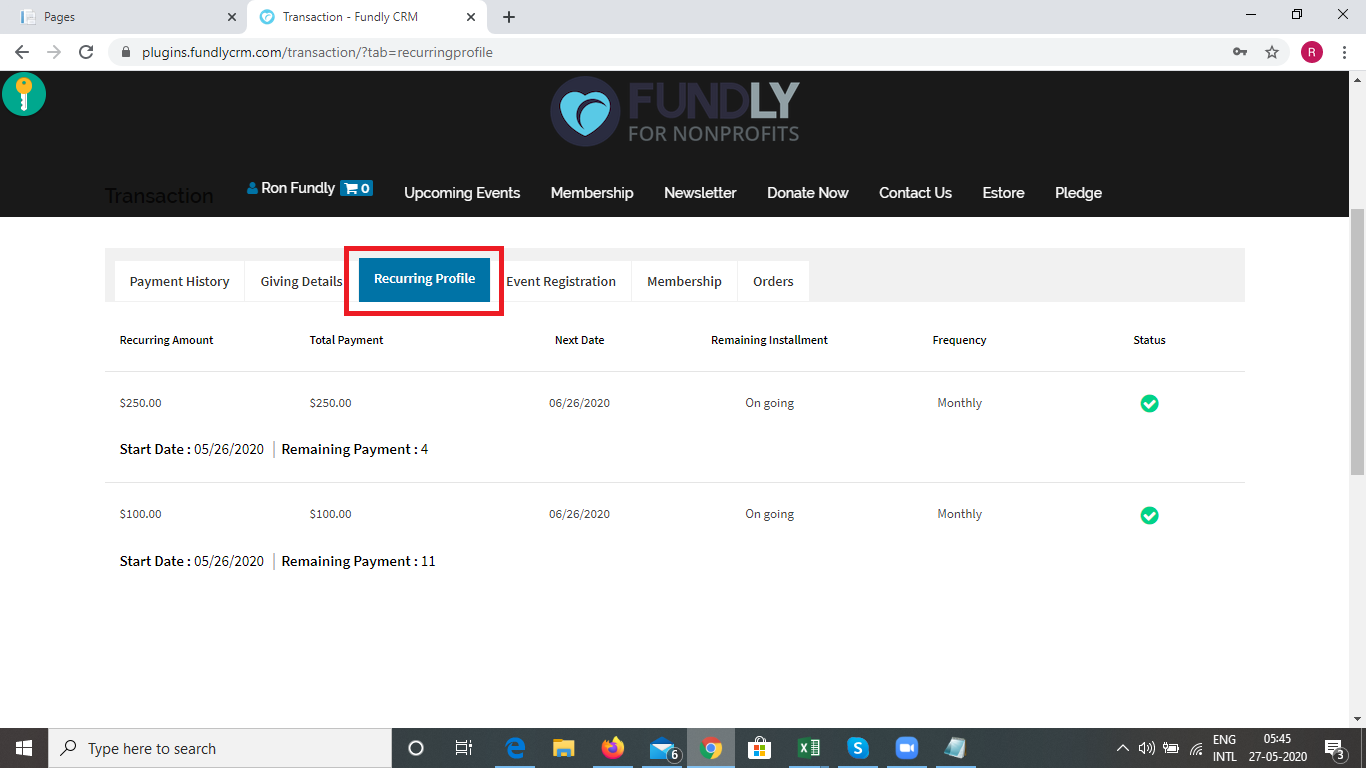

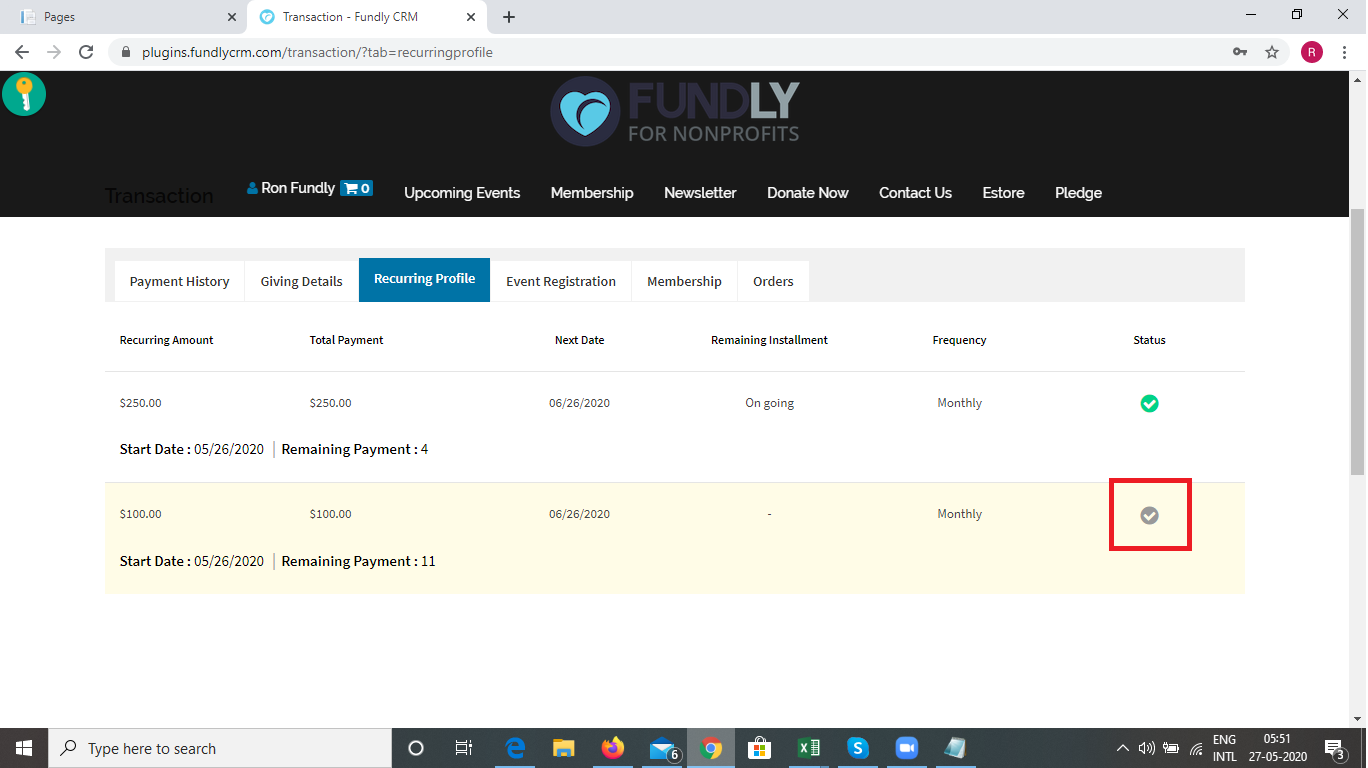
PAGES


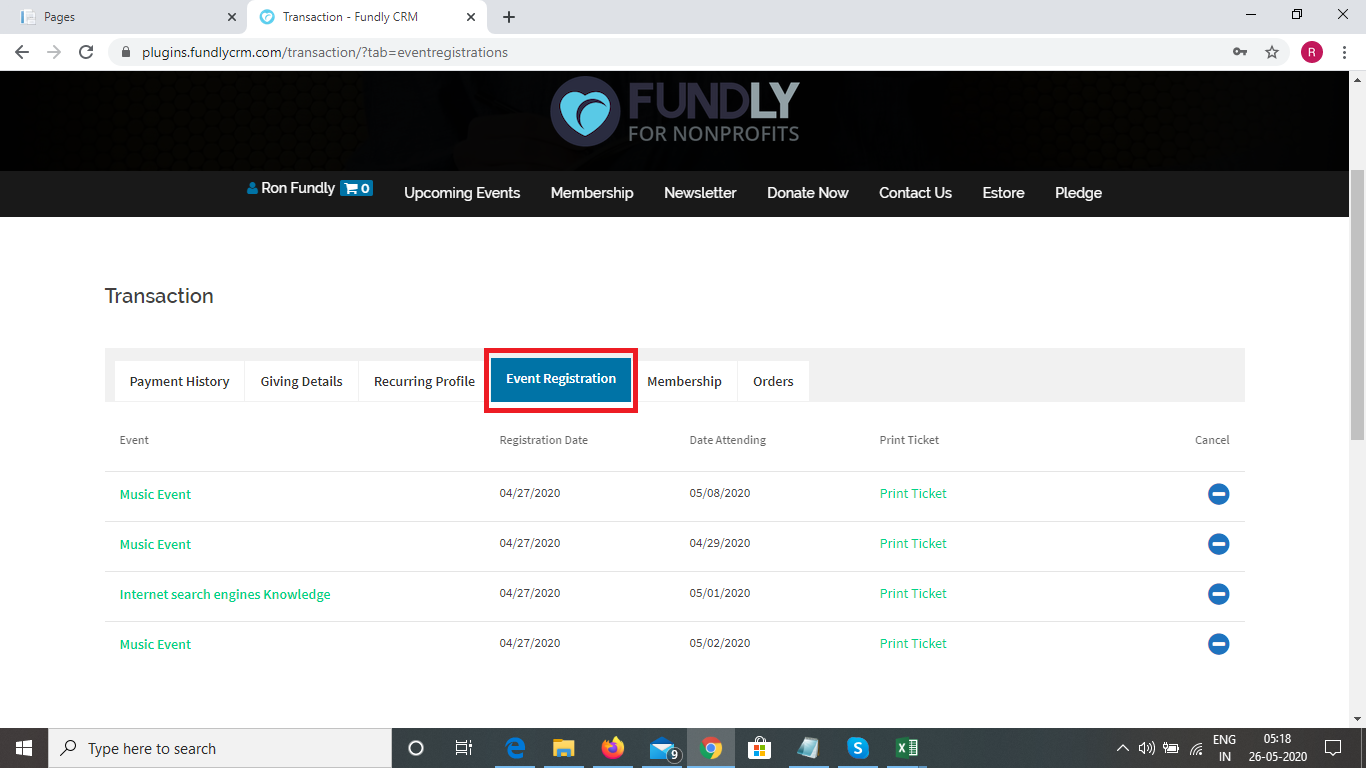
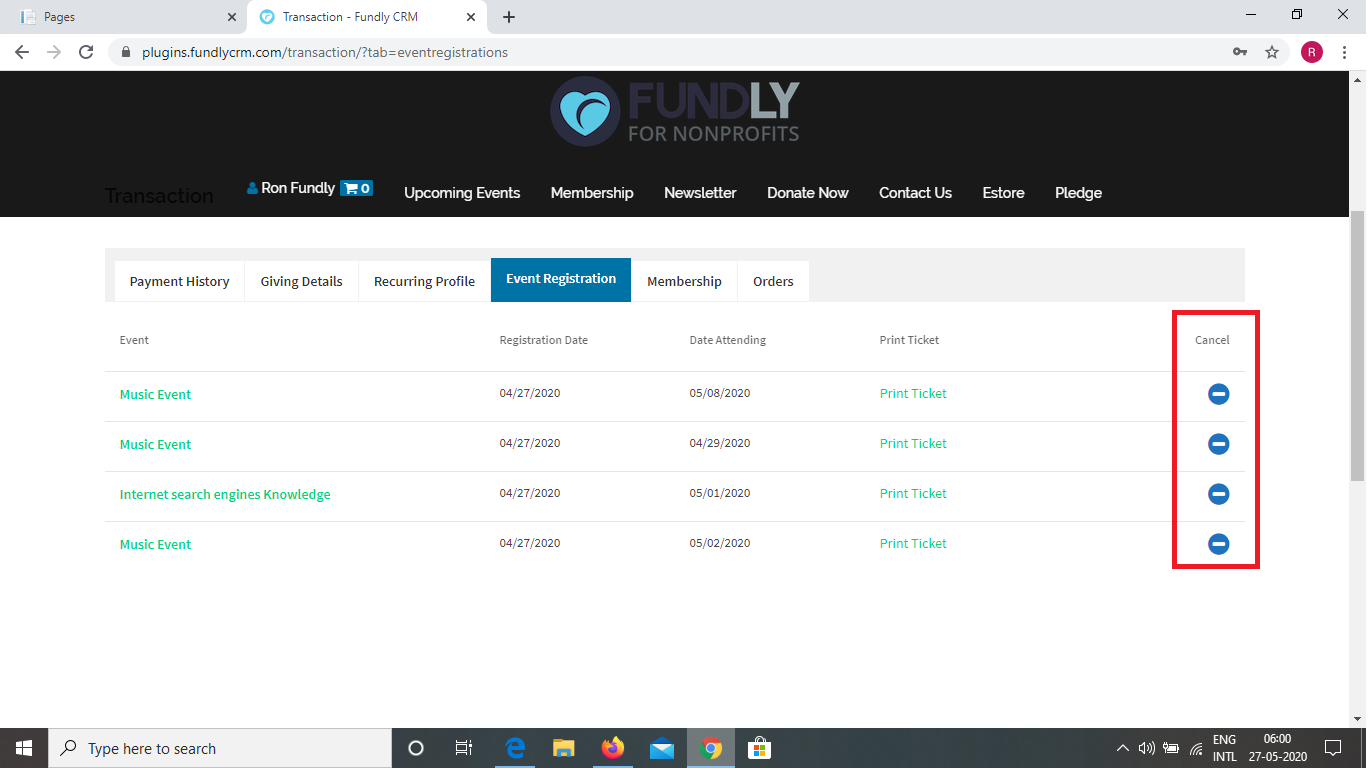
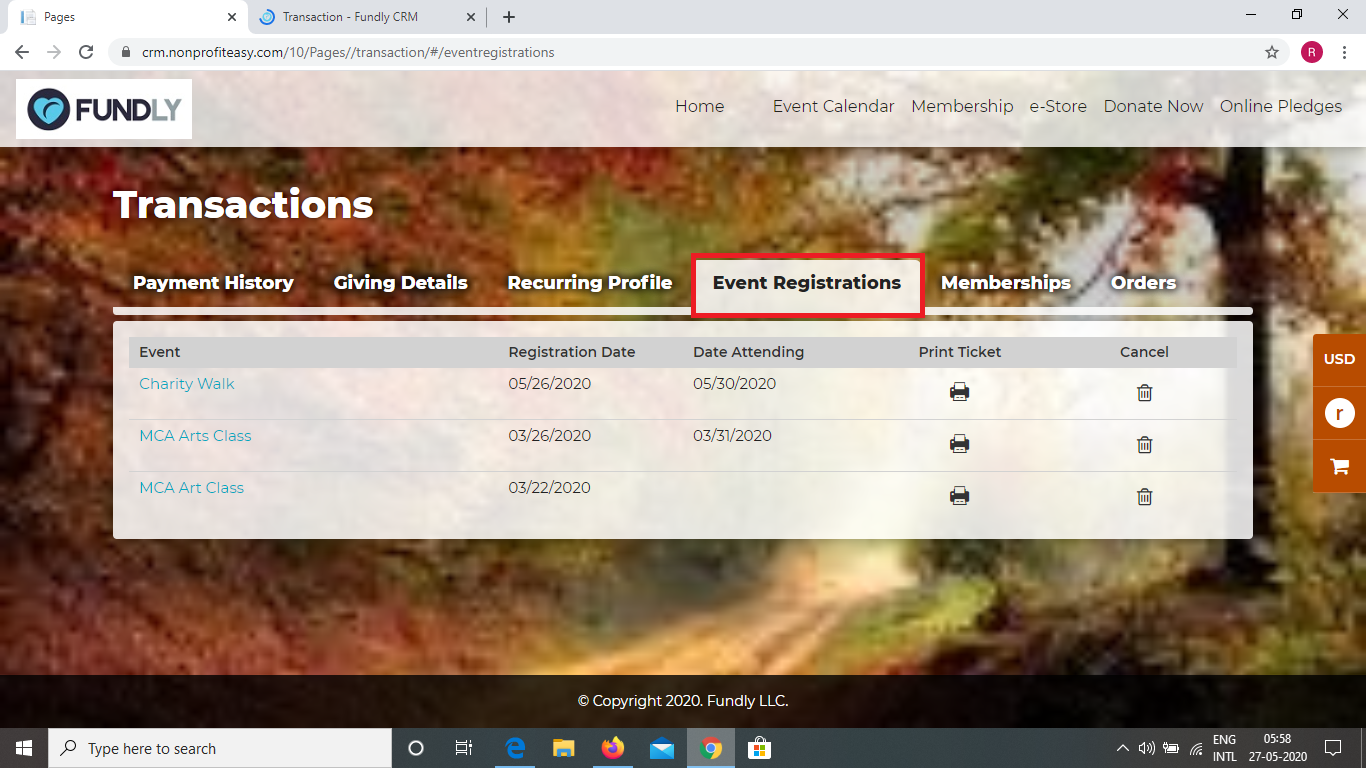
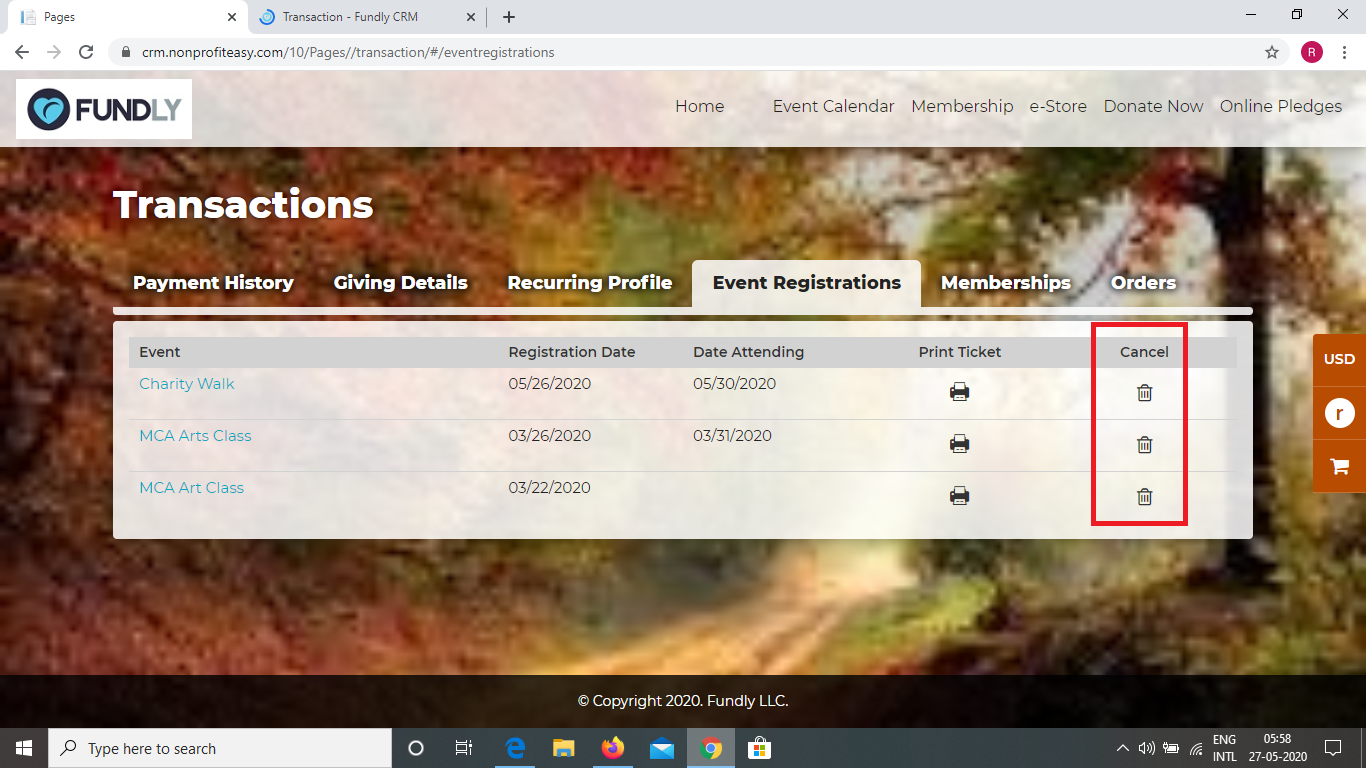
D) Event Registration - will show all event registrations (for upcoming and past events) and allow the user to print out their event tickets (if any).
PLUG-INS
PAGES
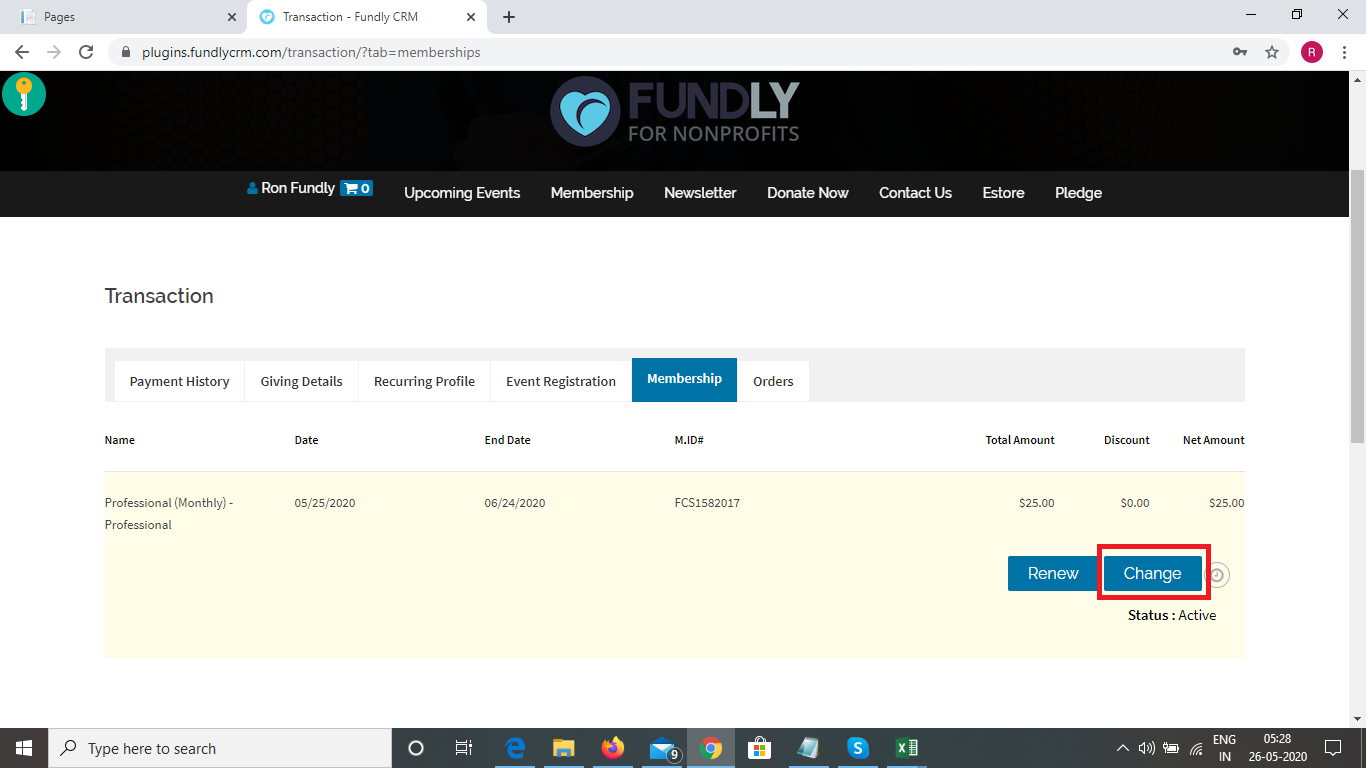
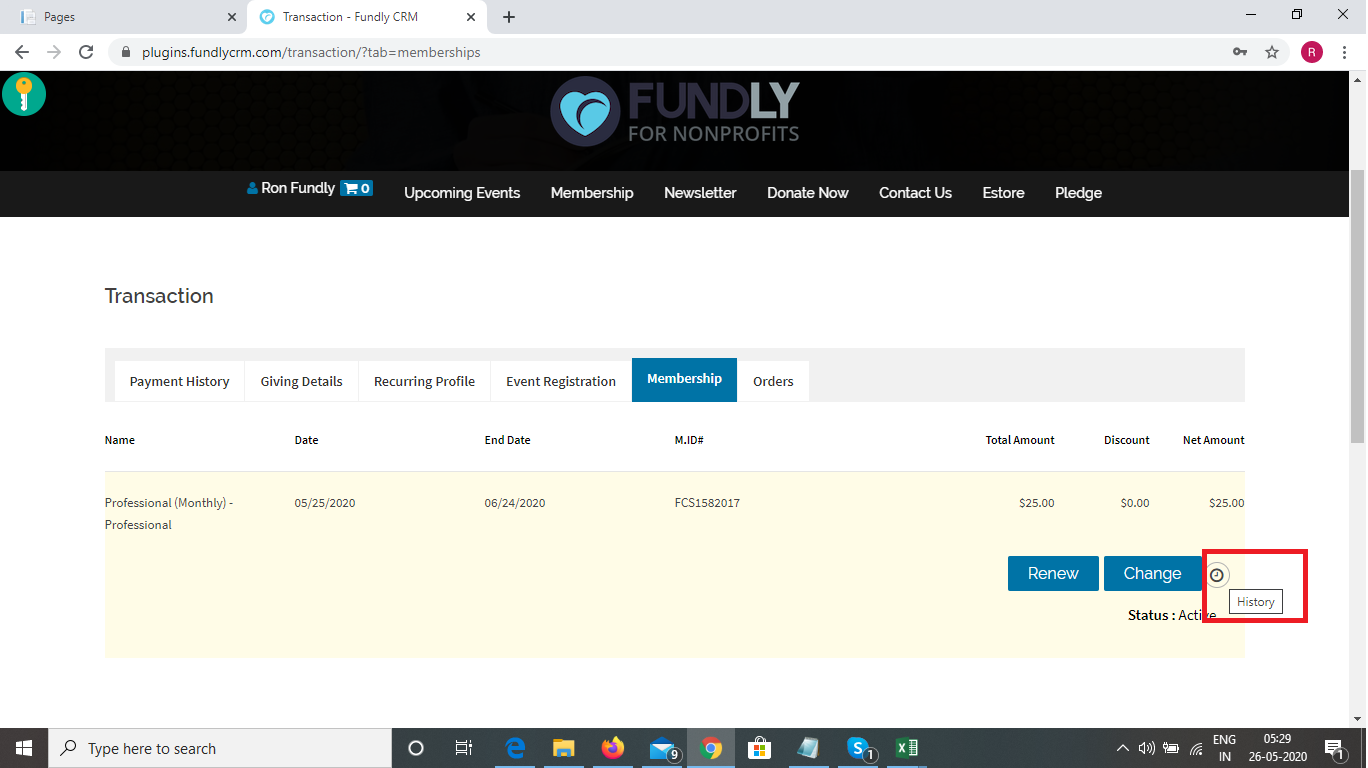
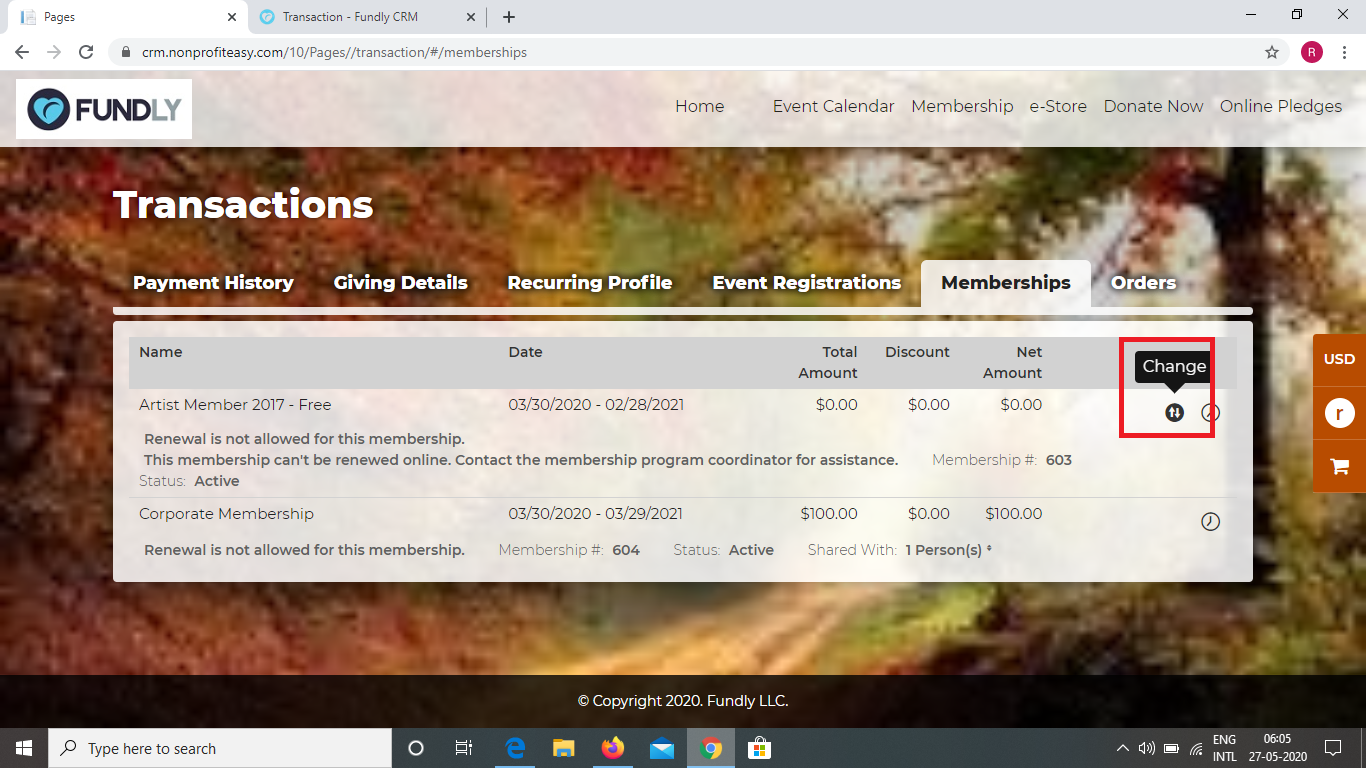
E) Membership - shows all memberships purchases for self or gifted to someone else. Membership upgrades/downgrades and renewals can be completed here as well.
PLUG-INS


PAGES


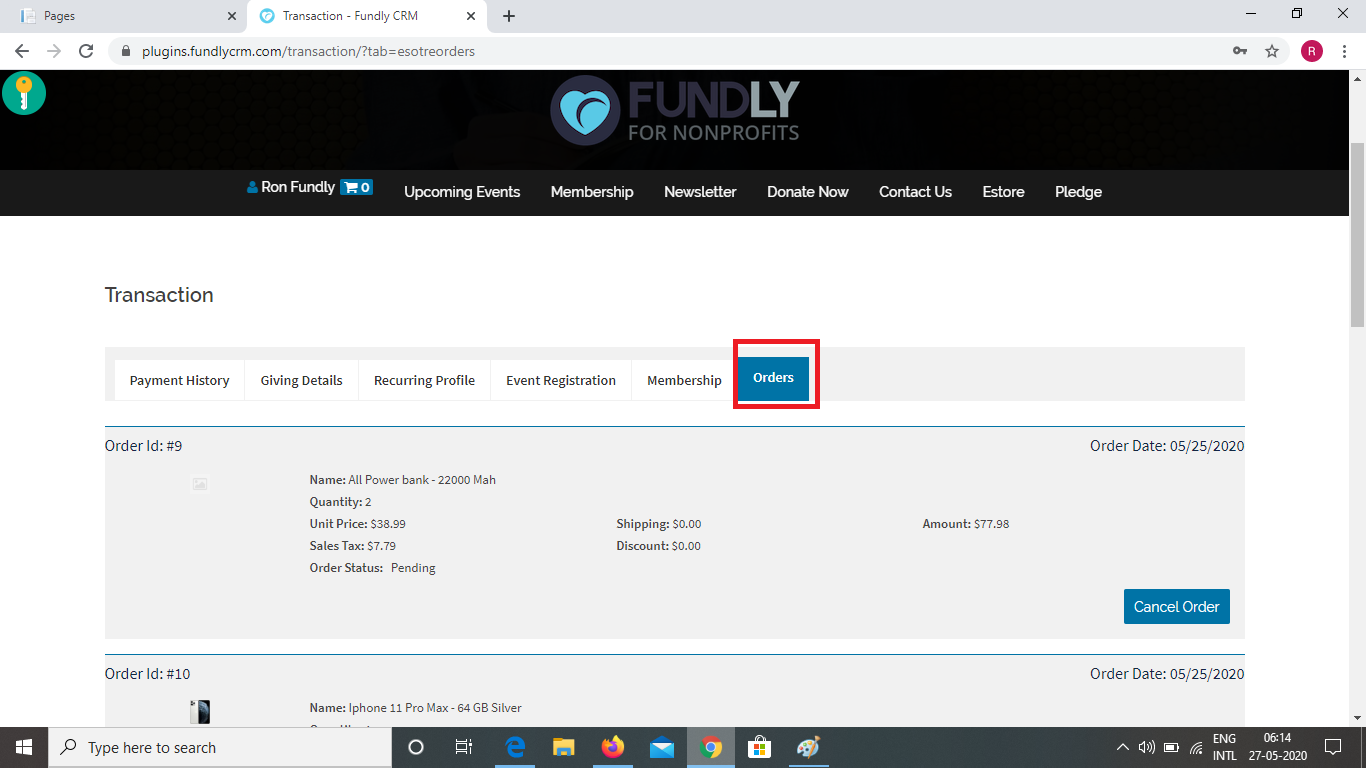
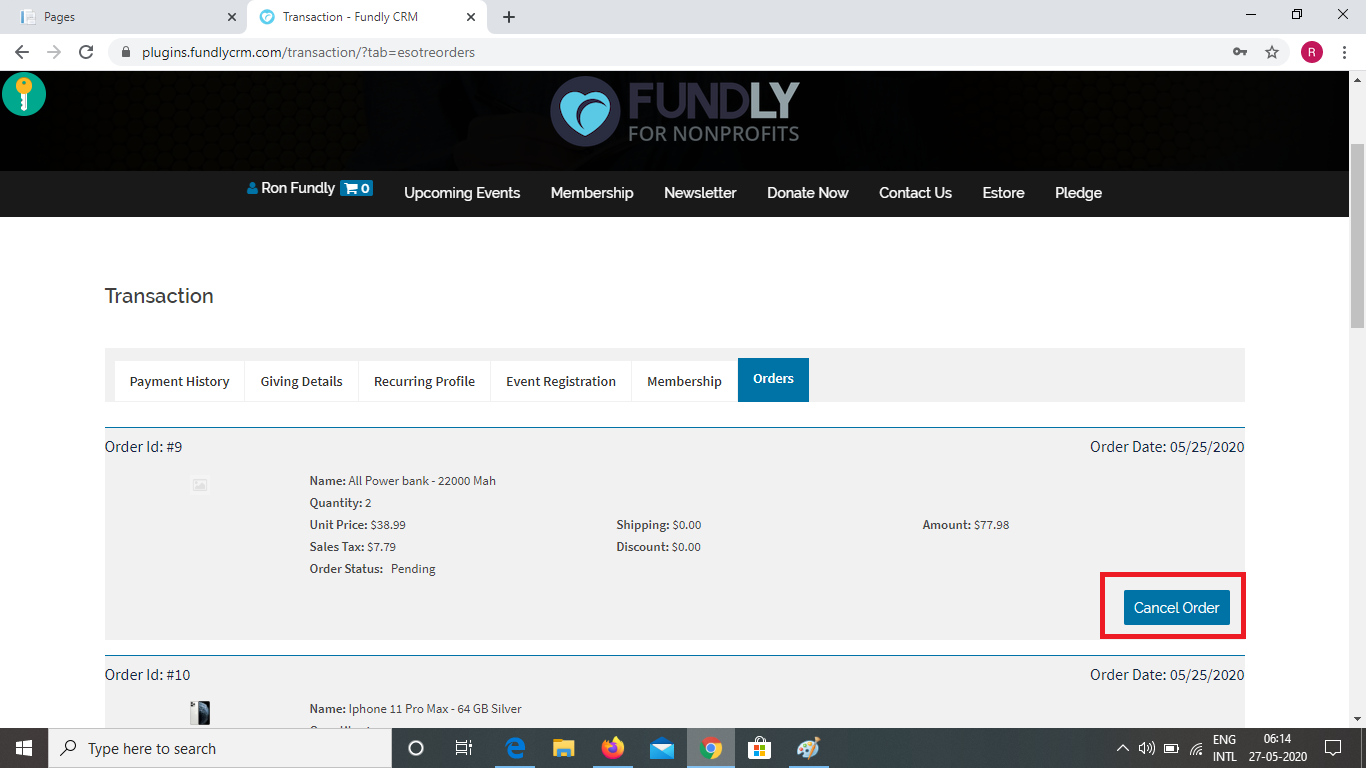
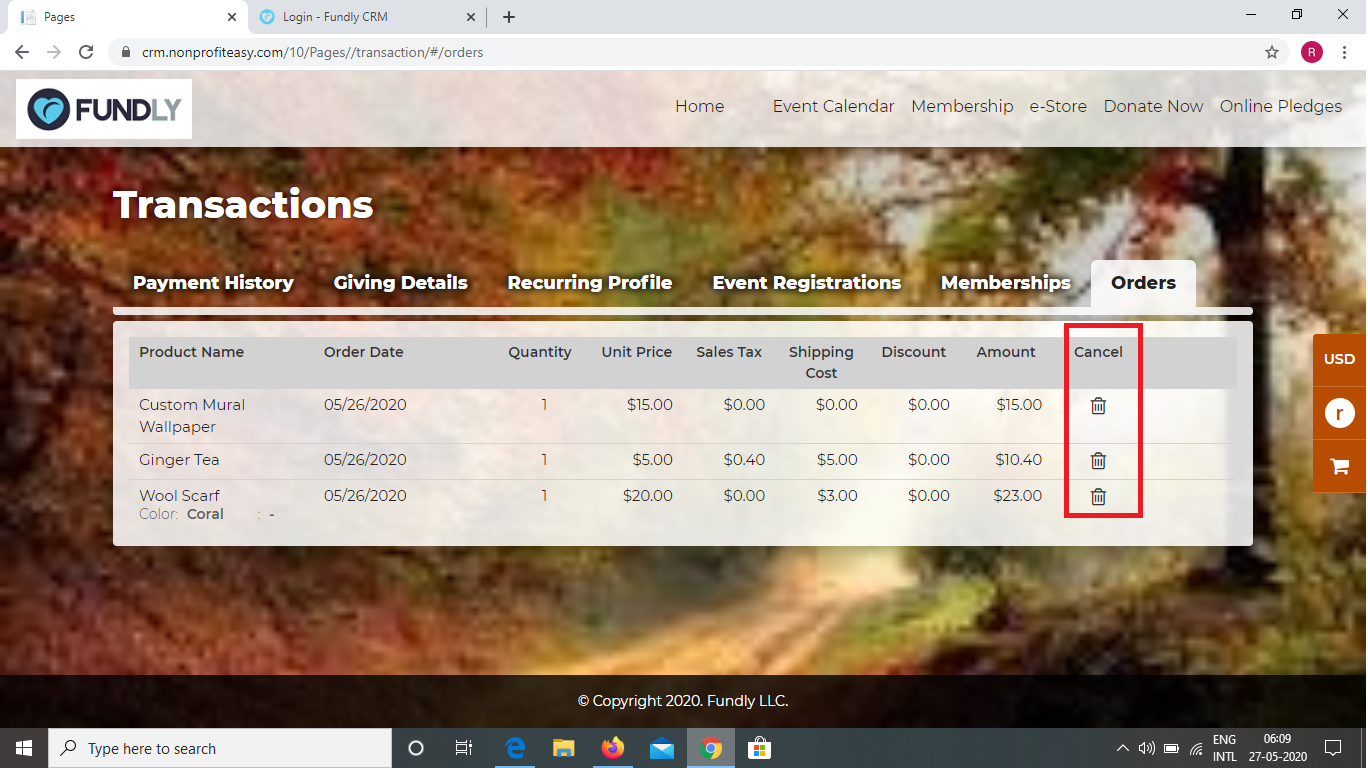
F) Orders - all e-Store orders. The user can request to cancel an e-Store order by clicking the Cancel button (plug-ins)/trashcan icon (pages).
PLUG-INS
PAGES

- The My Transactions area is divided into sub-tabs that show just transactions in that category/of that type.
- When the user clicks the Logout button, it will log them out from their account.
PLUG-INS
PAGES
Comments
0 comments
Article is closed for comments.