
Add-Ons: Widgets: Create Donation Widget
- This tutorial will cover how to configure donation widgets to be used on your website.
- Please see the tutorials on configuring Funds, Ask Arrays, and Gift Sources before proceeding with creating widgets.
- Also, be sure that you have configured your Payment Gateway Settings, so your organization is able to accept online donations through the Widget or Pages.
- To Activate the Widget:
- Select the drop-down menu next to the your username.
- Select "Account"
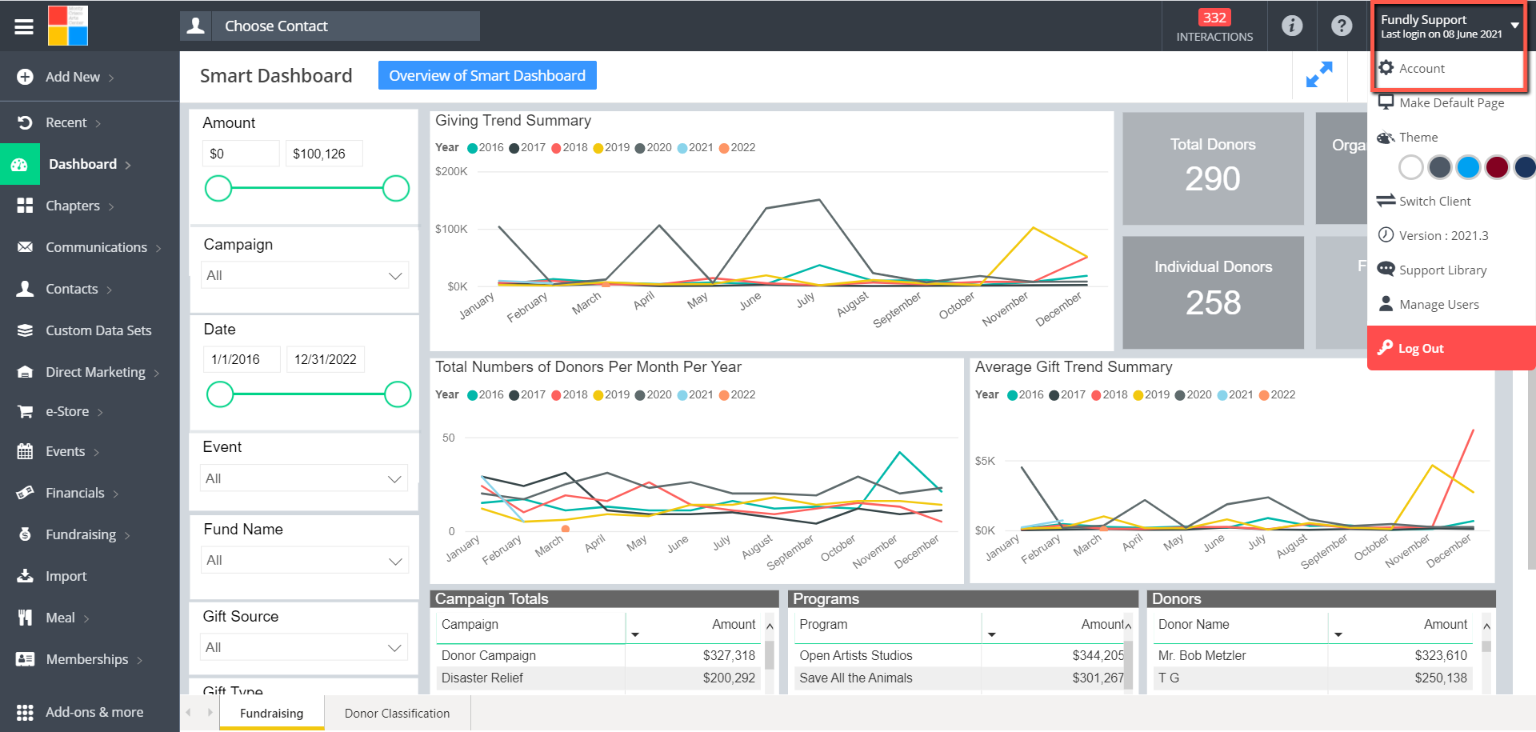
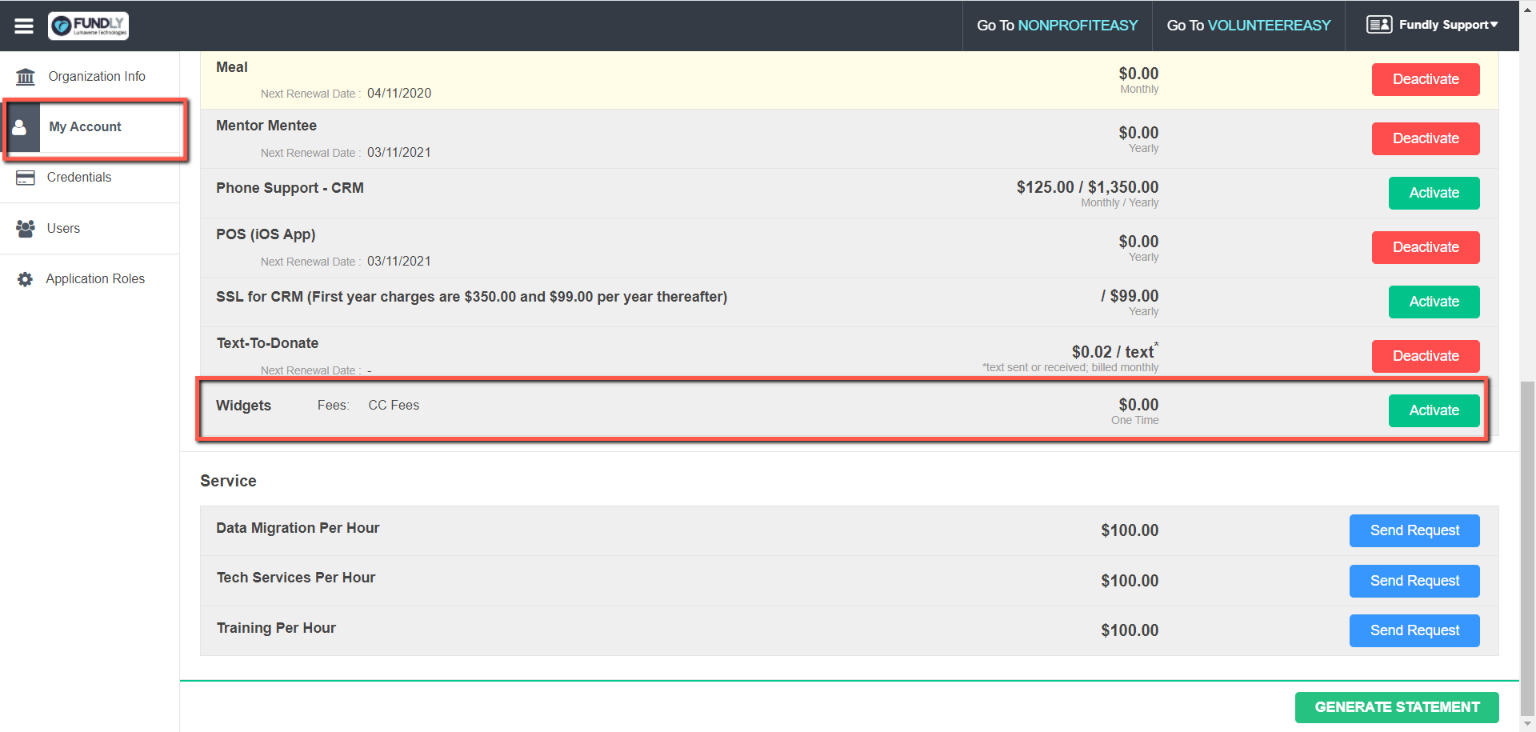
- In the left-hand menu, Select "My Account"
- Underneath Add-Ons Select "Activate" for Widgets
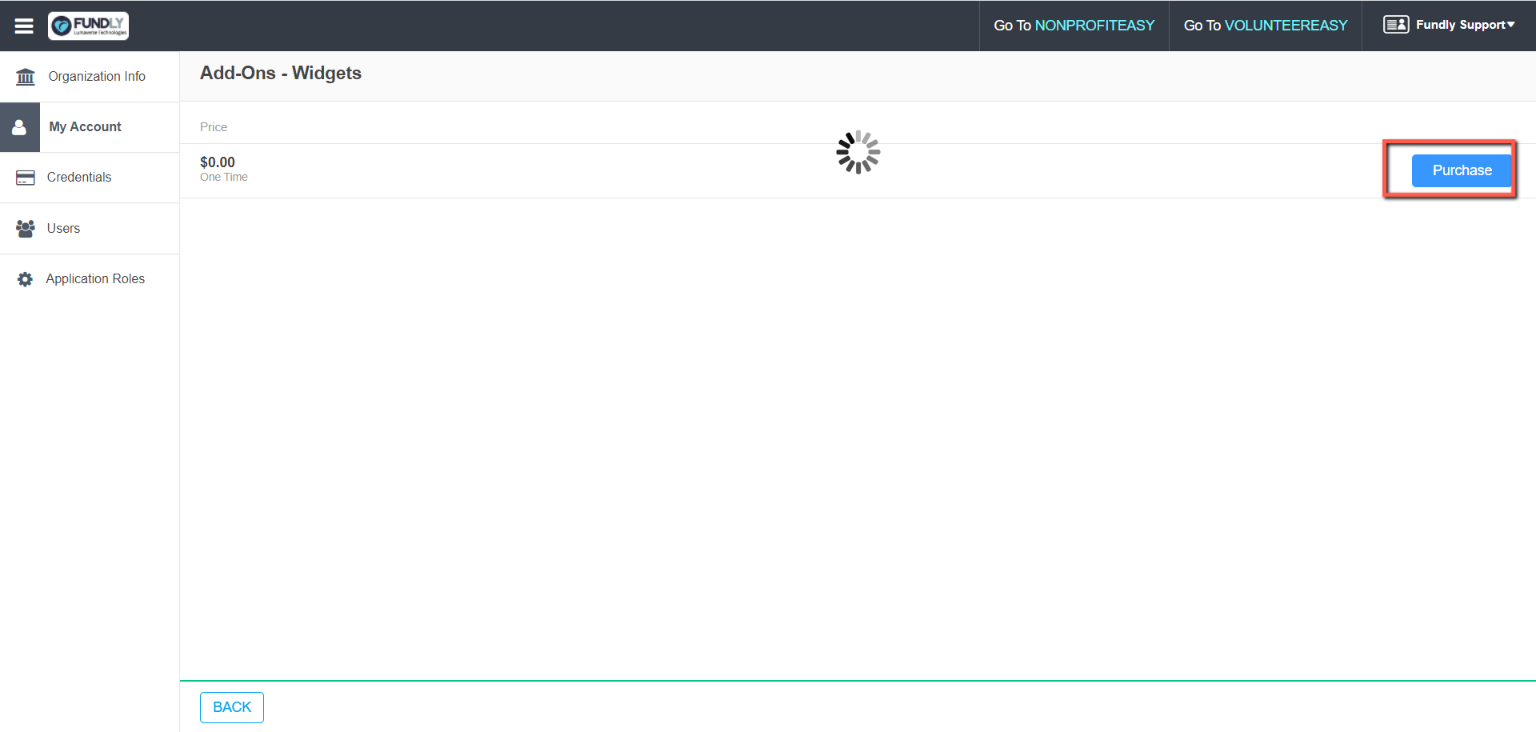
- After you have Activated the Widget, you can navigate back to the CRM Dashboard.
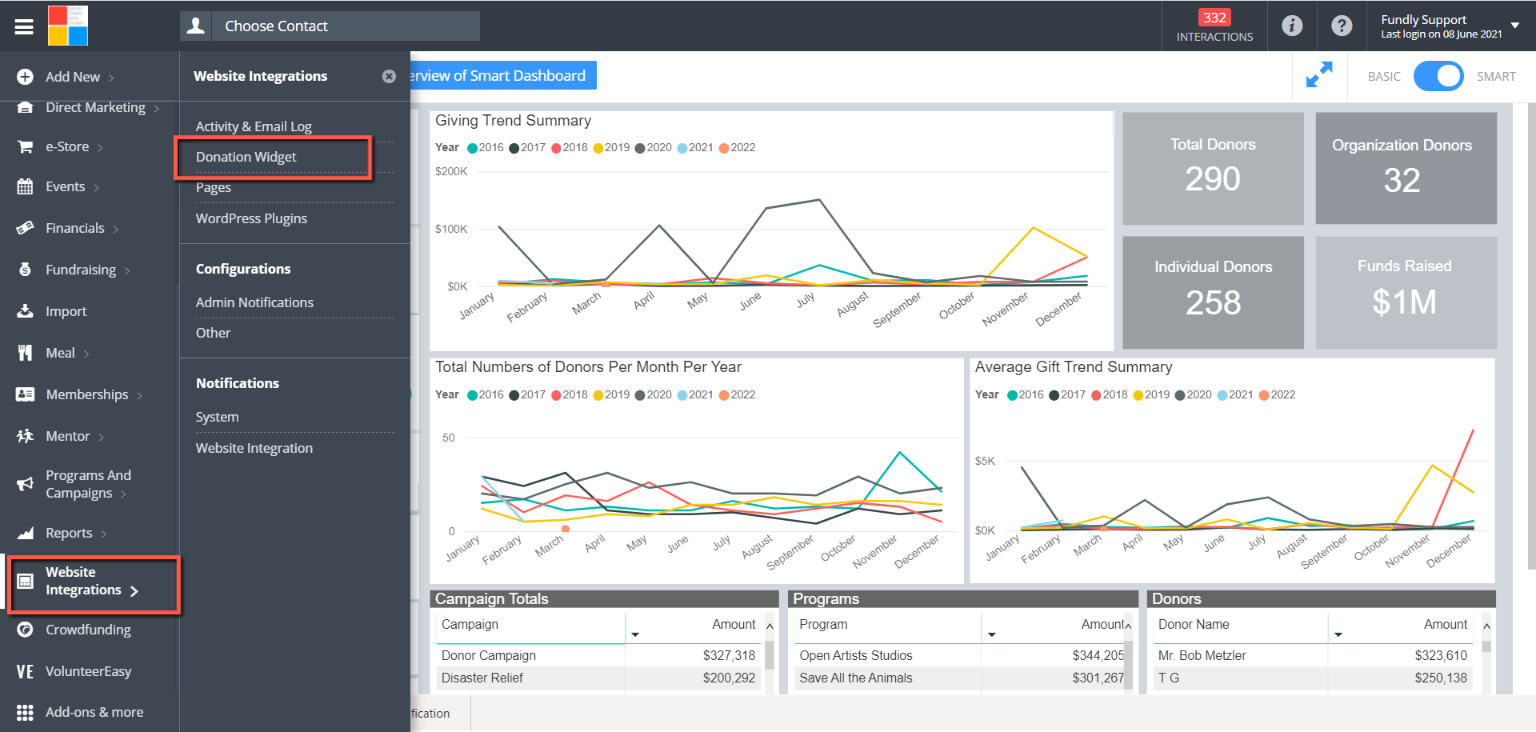
- Once you are back at your CRM dashboard, start by clicking on the Main Menu(3 bars) in the upper left-hand corner and in the Website Integration section select Donation Widget.
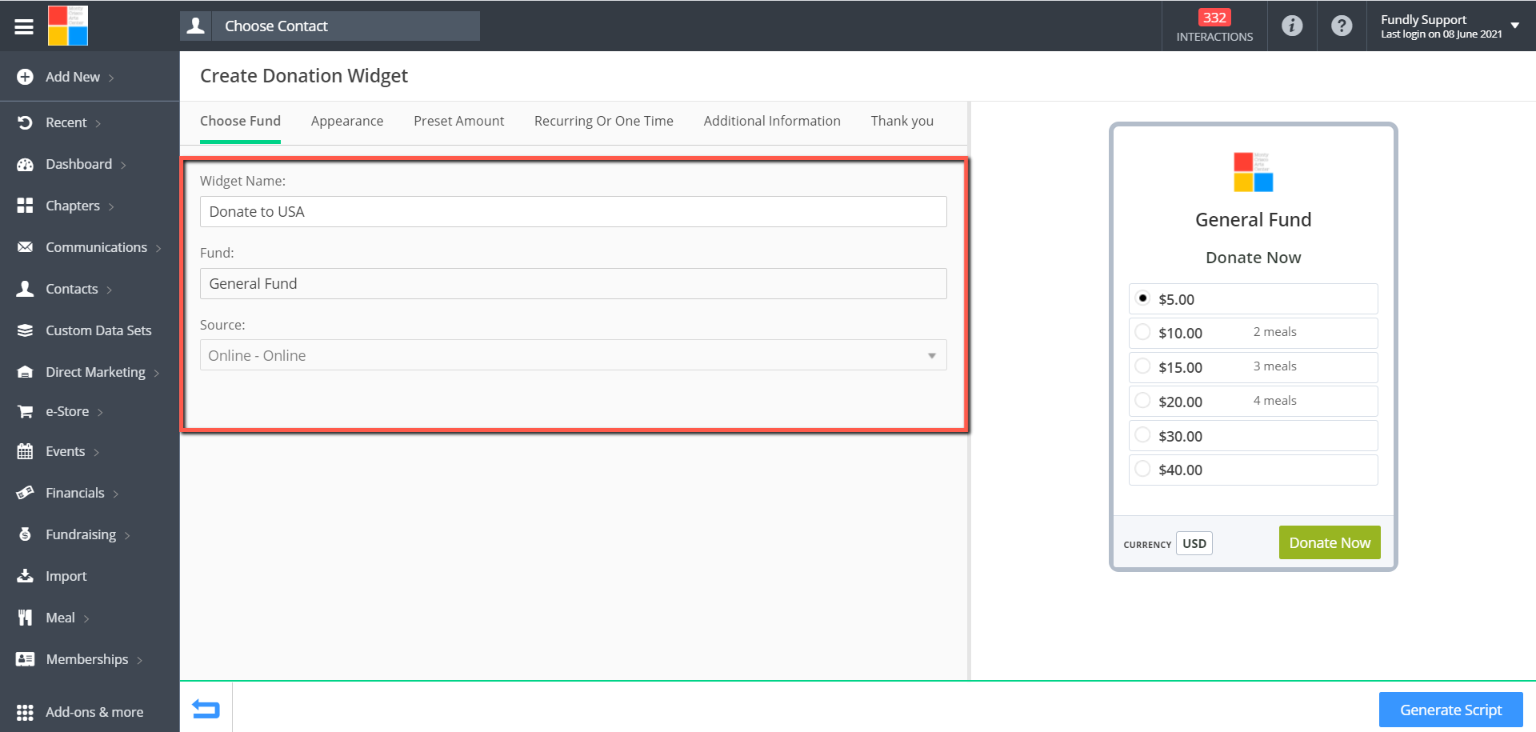
- On the Choose Fund tab, start by entering the widget name, indicating the Fund that you wish donations made through this widget to be recorded under, and the Source to which they will be assigned.
- At this point, you will see a preview of your widget in the area on the right.
- To customize the appearance of the widget to match the colours of your website, click on the Appearance tab and use the colour selectors to specify the font, button, and border colours.
- You may also set the width and height of the widget to better fit within the constraints of your website.

- By default, the widget will provide suggested amounts to donors derived from the Ask Array configured for the Fund selected.
- To modify or add to these amounts, click on the Preset Amounts tab and mark the “Add Custom Amount” check-box.
- This will open up the ability to modify the name and amount of all currently configured suggested amounts.
- Further, clicking on Add Other Amount will add an additional blank option to the list.
- To remove an option, click on the (-) button to the right of that entry.

- In the Recurring or One-Time tab, you will select whether donors contributing through this widget will be asked to make One Time or Monthly Recurring donations, or choose both.

- The additional information tab in the widget contains three fields that are related to capturing a taxpayer ID. The "Field Name' field on that tab is for users to customize the field name of the ID field as it is displayed to the user. (It is not an open text field that allows users to enter text.)
Note- If you want users to be able to earmark their donation for a particular purpose, you will need to use one of our other donation integration options - WordPress Plug-In or Pages - or set up different widgets for different purposes/earmarking (such as one widget for youth program and one for adult program or such) and direct user to the appropriate page/widget from a landing page.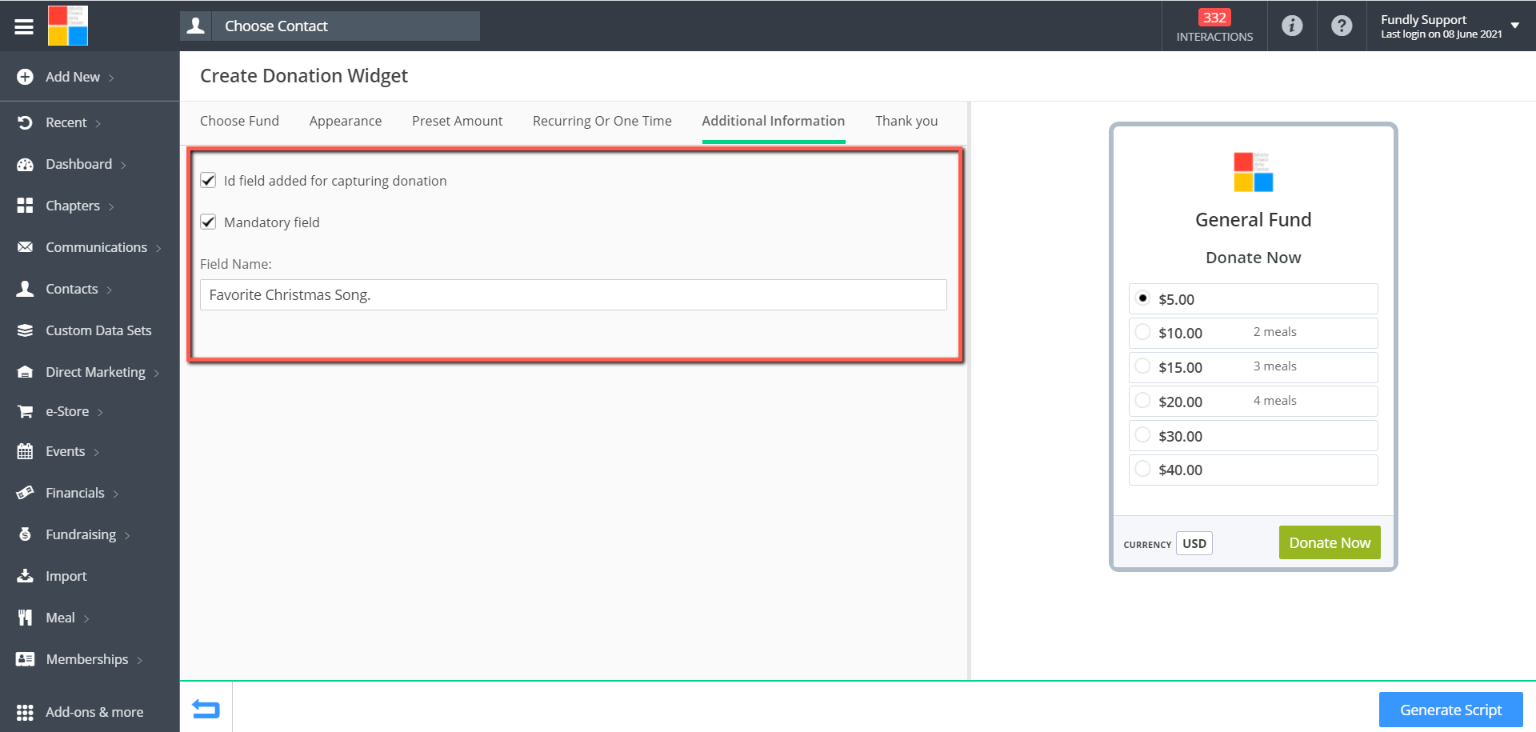
- Lastly, in the Thank You tab, you will be able to specify a thank you message presented to the donor upon completion of the donation process.

- If desired, you may check the “Thank you redirect URL” checkbox and specify a URL on your website to use as a thank you page.

- When you have finished configuring the widget and are happy with the preview presented on the right, click on the Generate Script button in the lower right of the screen.

- This will open a popup with the HTML to be placed, as indicated, in your website to display the widget.

- You may have as many different widgets on your site as desired, connected to any number of funds.
Comments
0 comments
Article is closed for comments.