WordPress Plug-Ins Configurations and Settings Part 2e: Contact Us Plugin
- The Contact Us plug-in allows users to configure one or more custom "contact us" form(s) on their website. The general intent of this plug-in is to create a "contact us" form that allows website visitors to contact you/send you a message. However, this plug-in can be used to create custom forms.
- The Contact Us Wordpress Plugin is an additional, one-time fee (see this tutorial for pricing). In comparison, our Pages function (no additional cost) has no equivalent feature/has no "contact us" functionality. See this tutorial/chart for a comparison of Pages versus WordPress Plugins.
- To configure the Contact Us WordPress Plugin, log into your Wordpress admin panel. Find the CRM plugin in the left hand menu and click it.

- This will take you to the CRM Plugin admin panel. Which tabs you have here will depend on which plugins you have purchased.
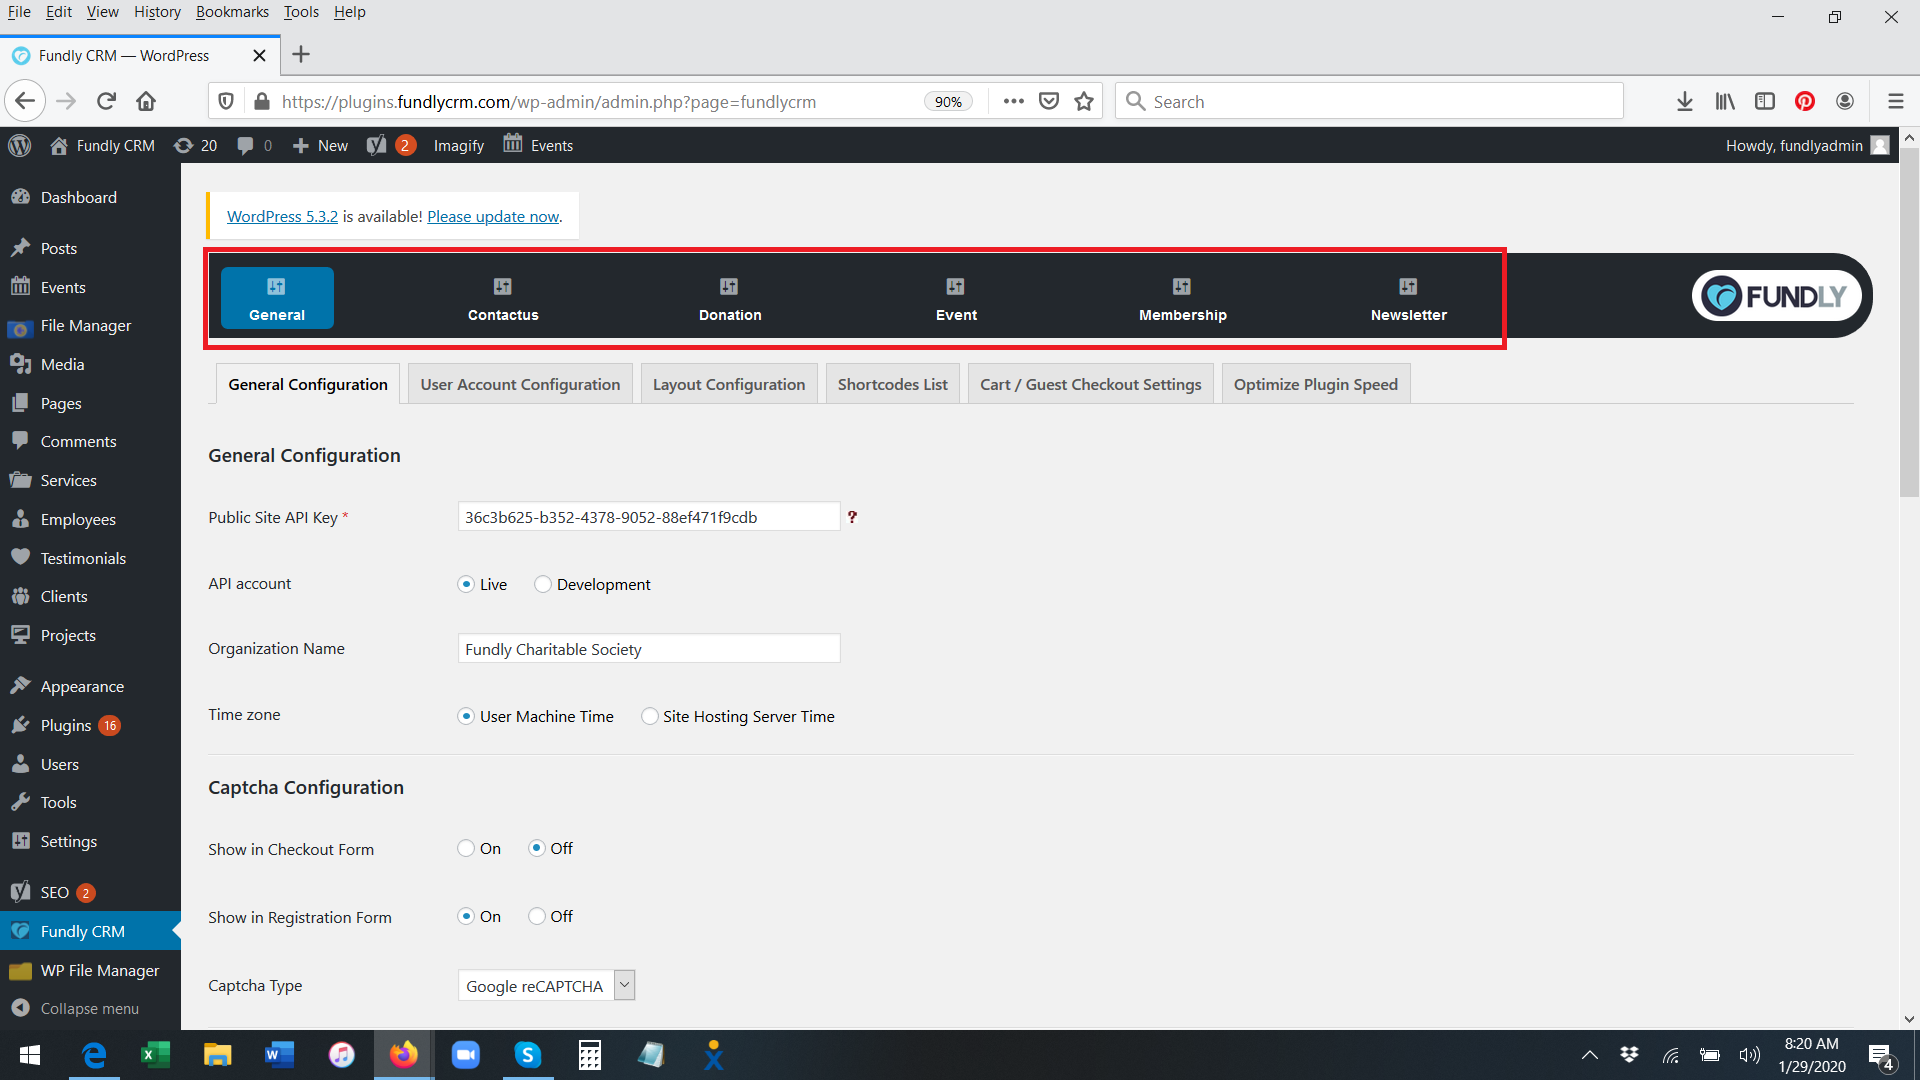
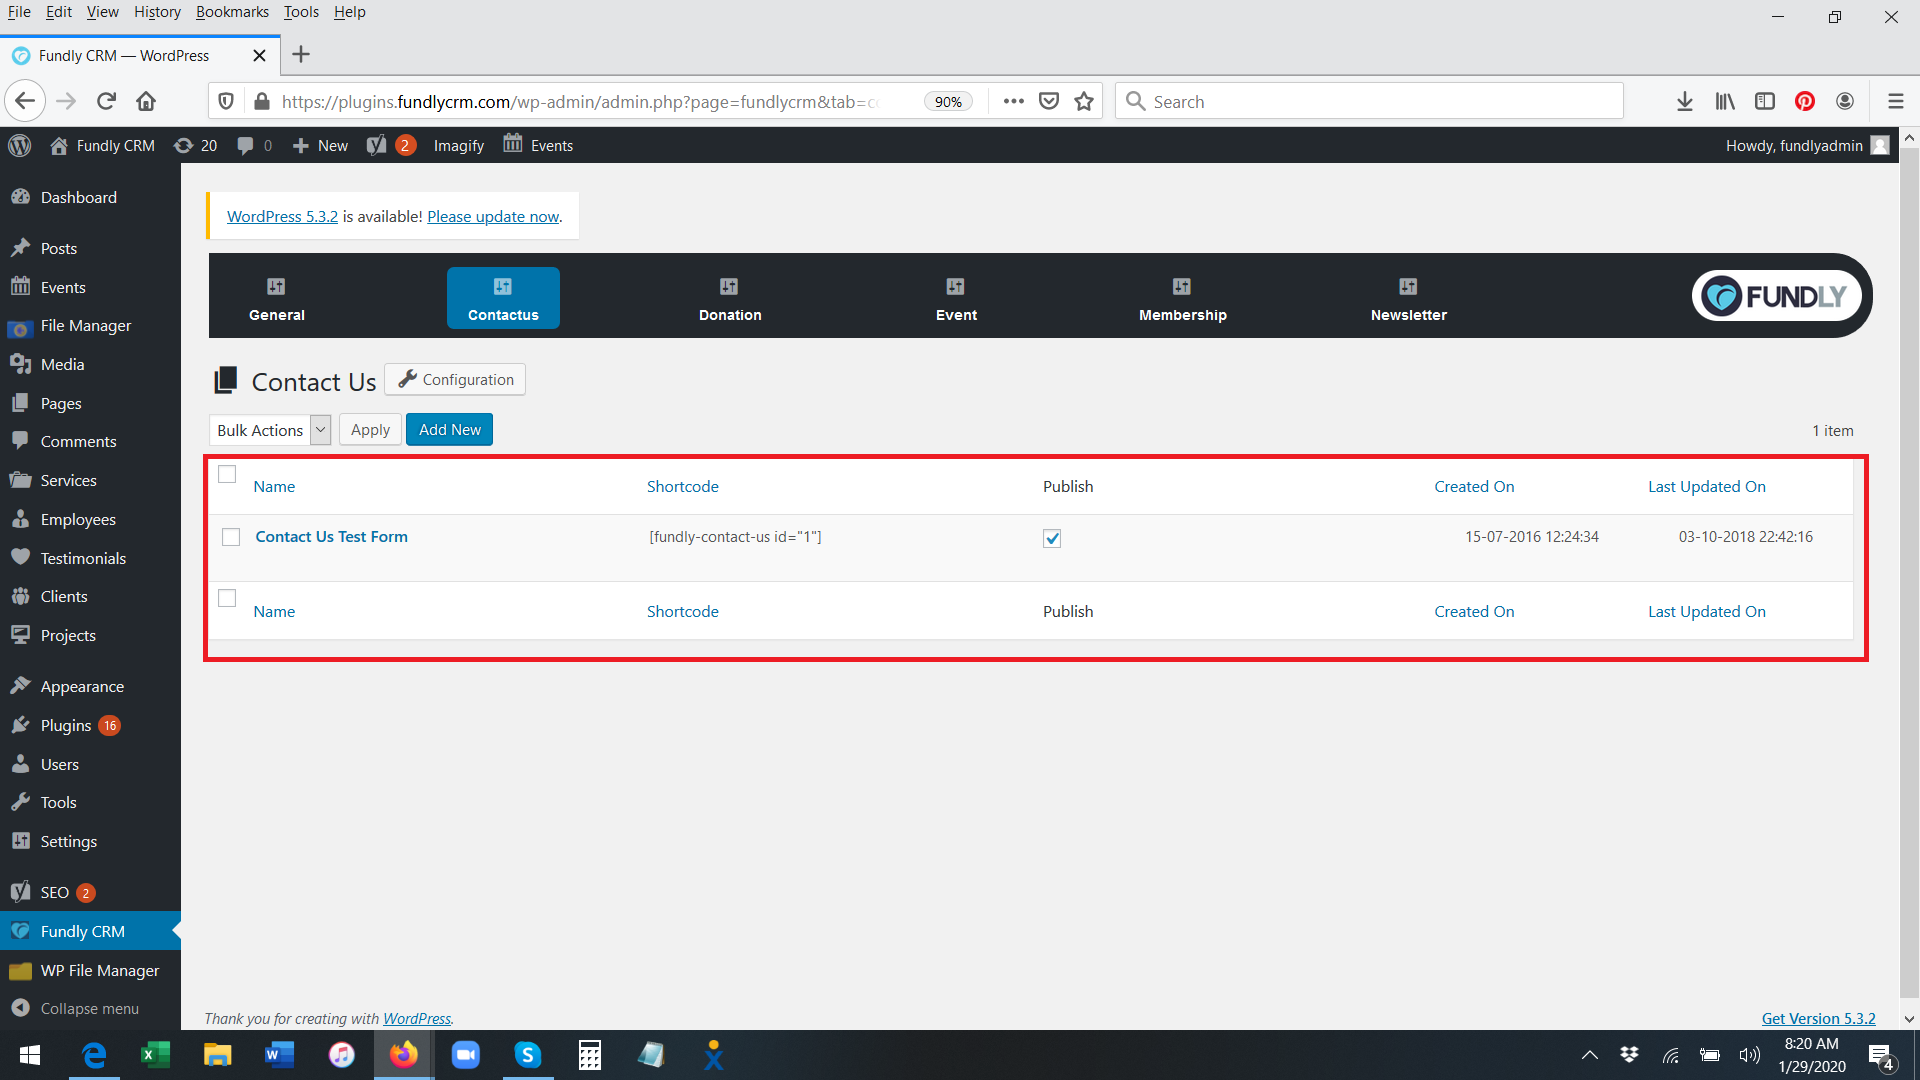
- To configure the Contact Us plugin, click on the Contact Us tab (be sure to also configure your General tab - see this tutorial for more information on the settings found on the general tab).

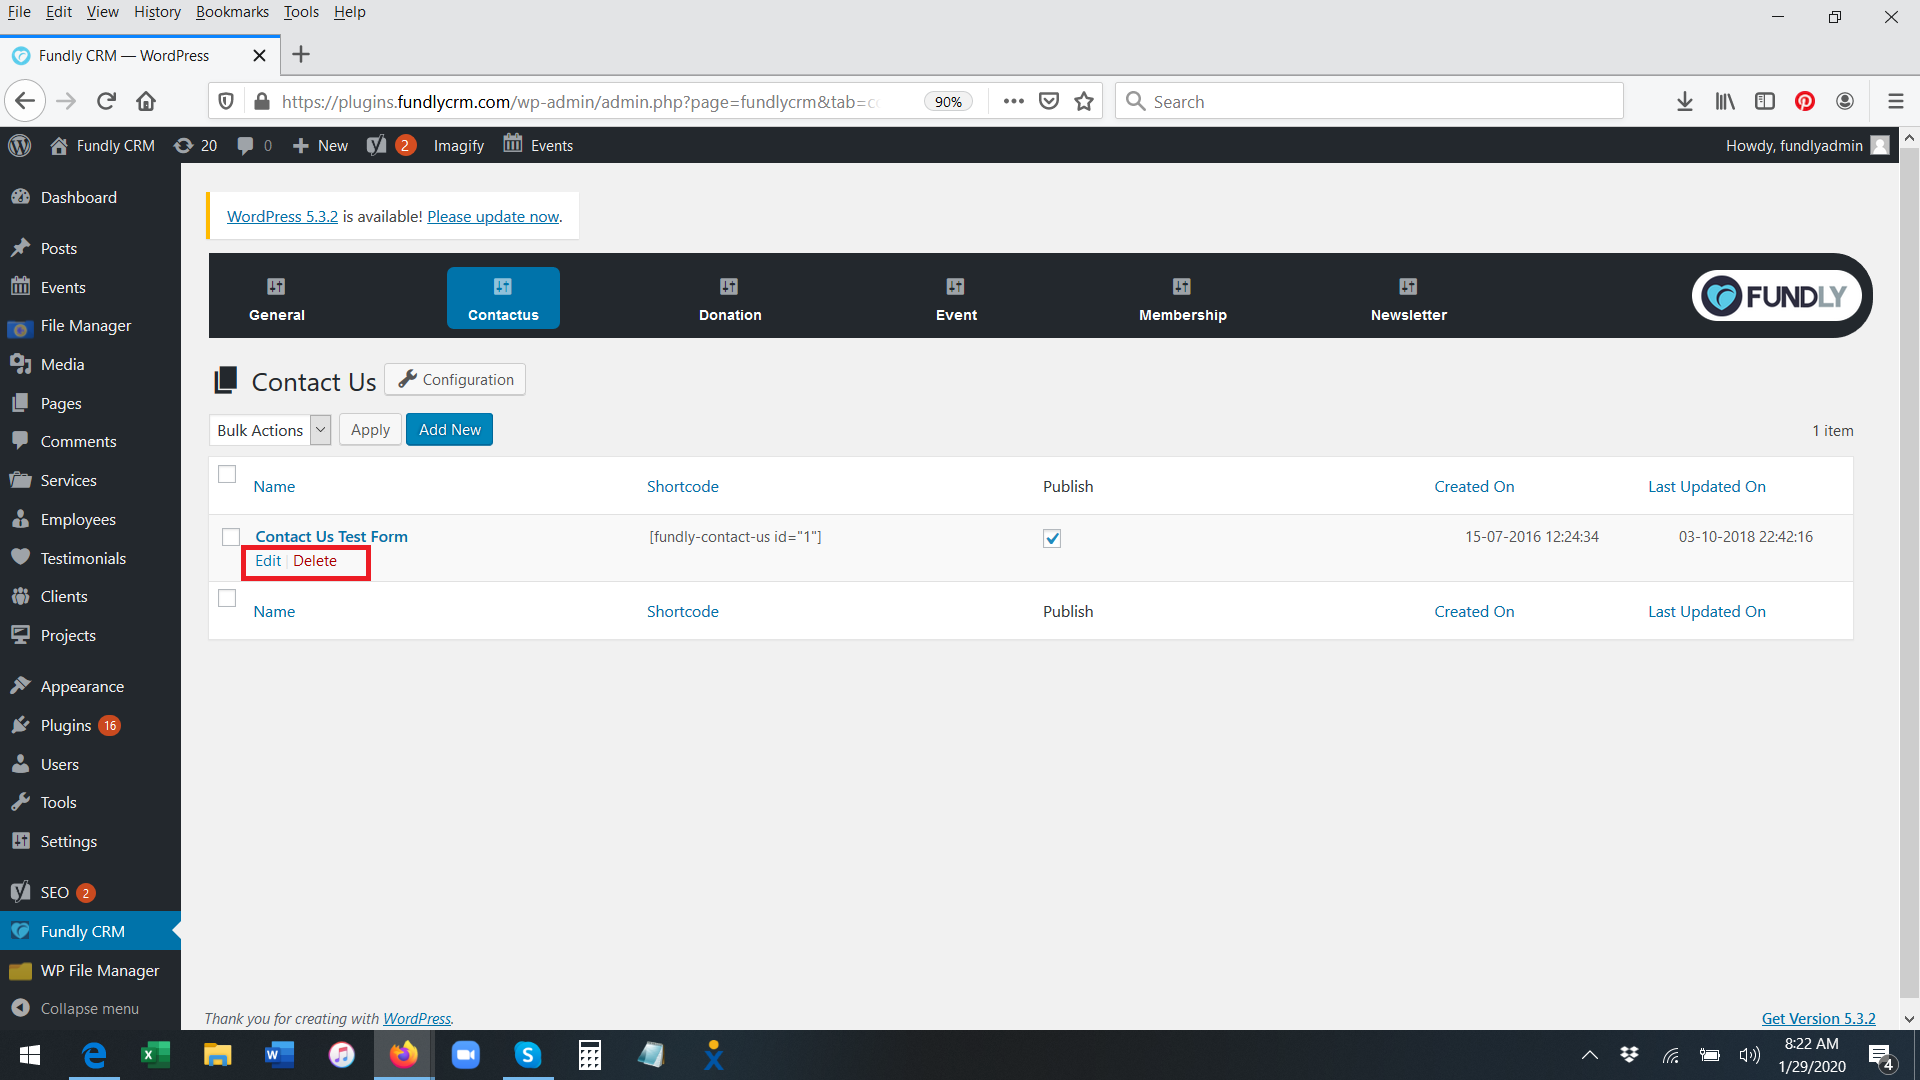
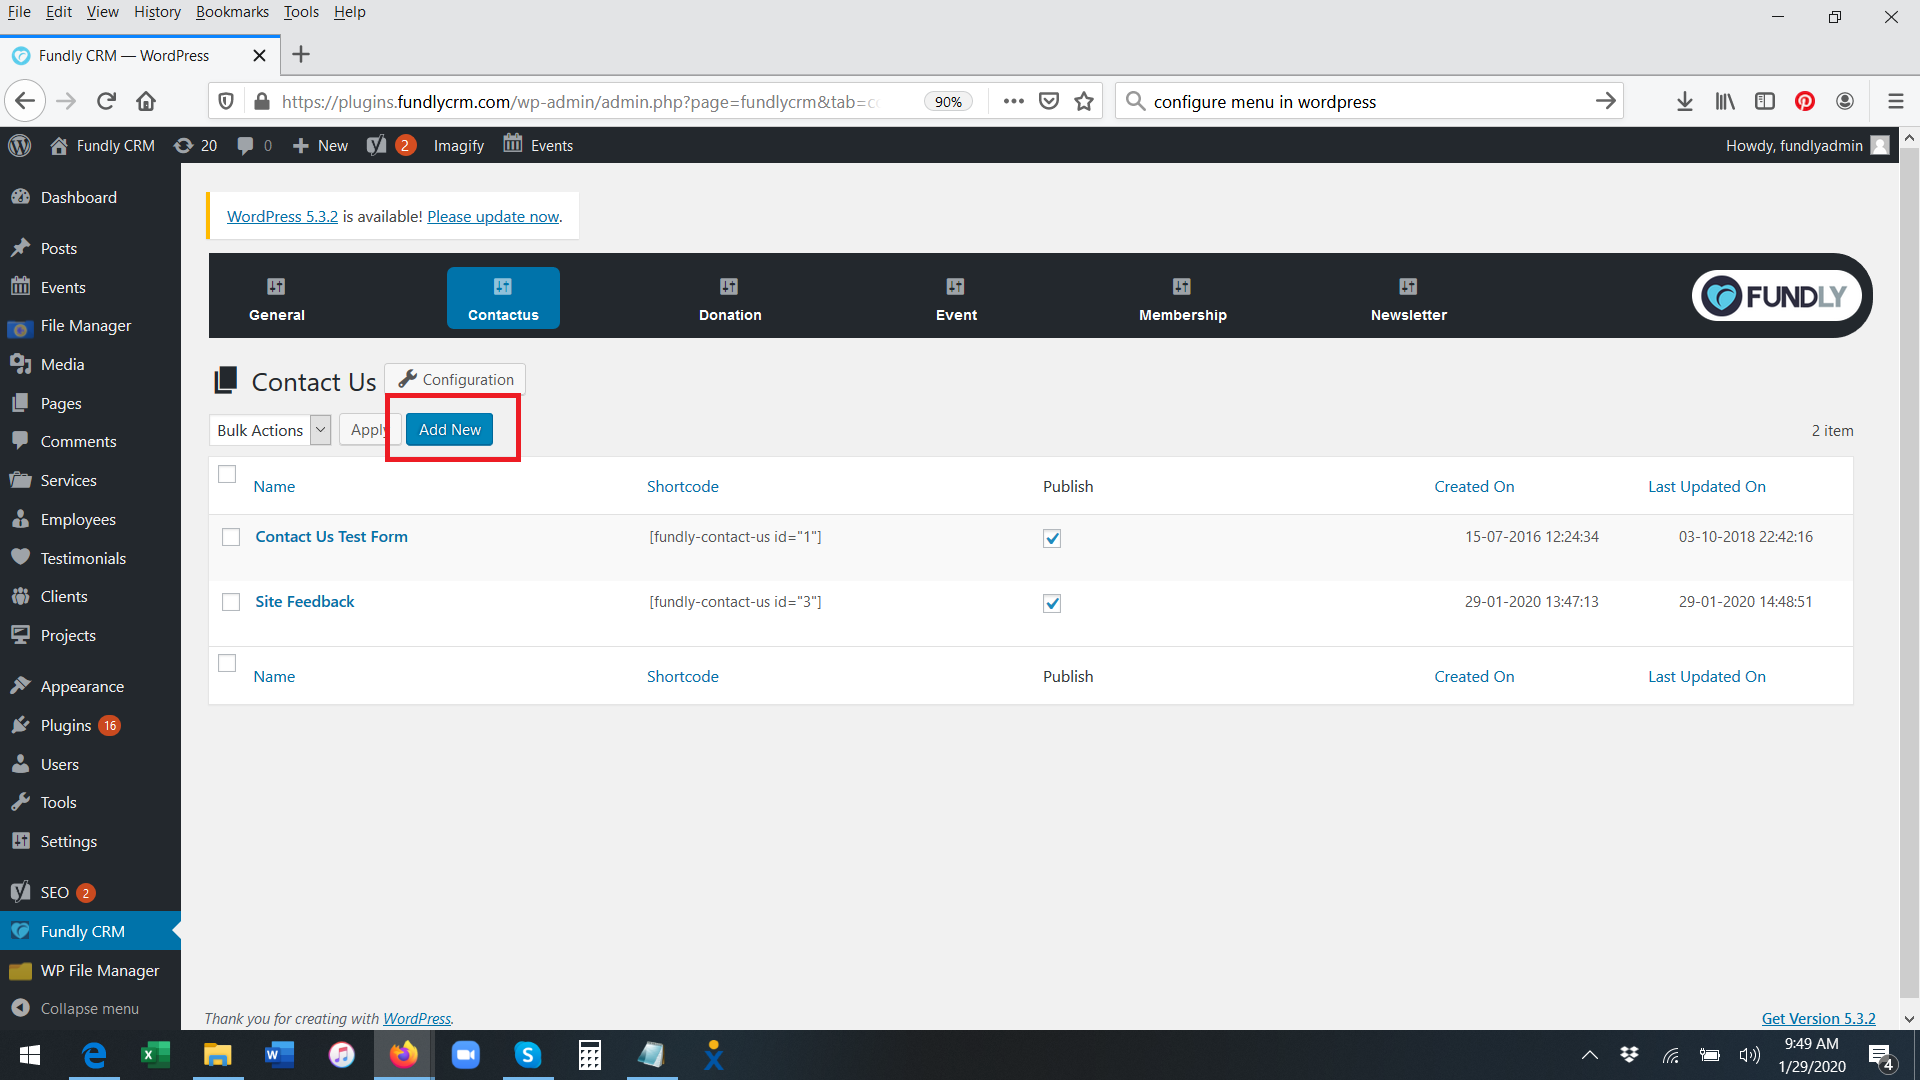
- On the Contact Us screen you will see a list of your configured custom forms, if any.
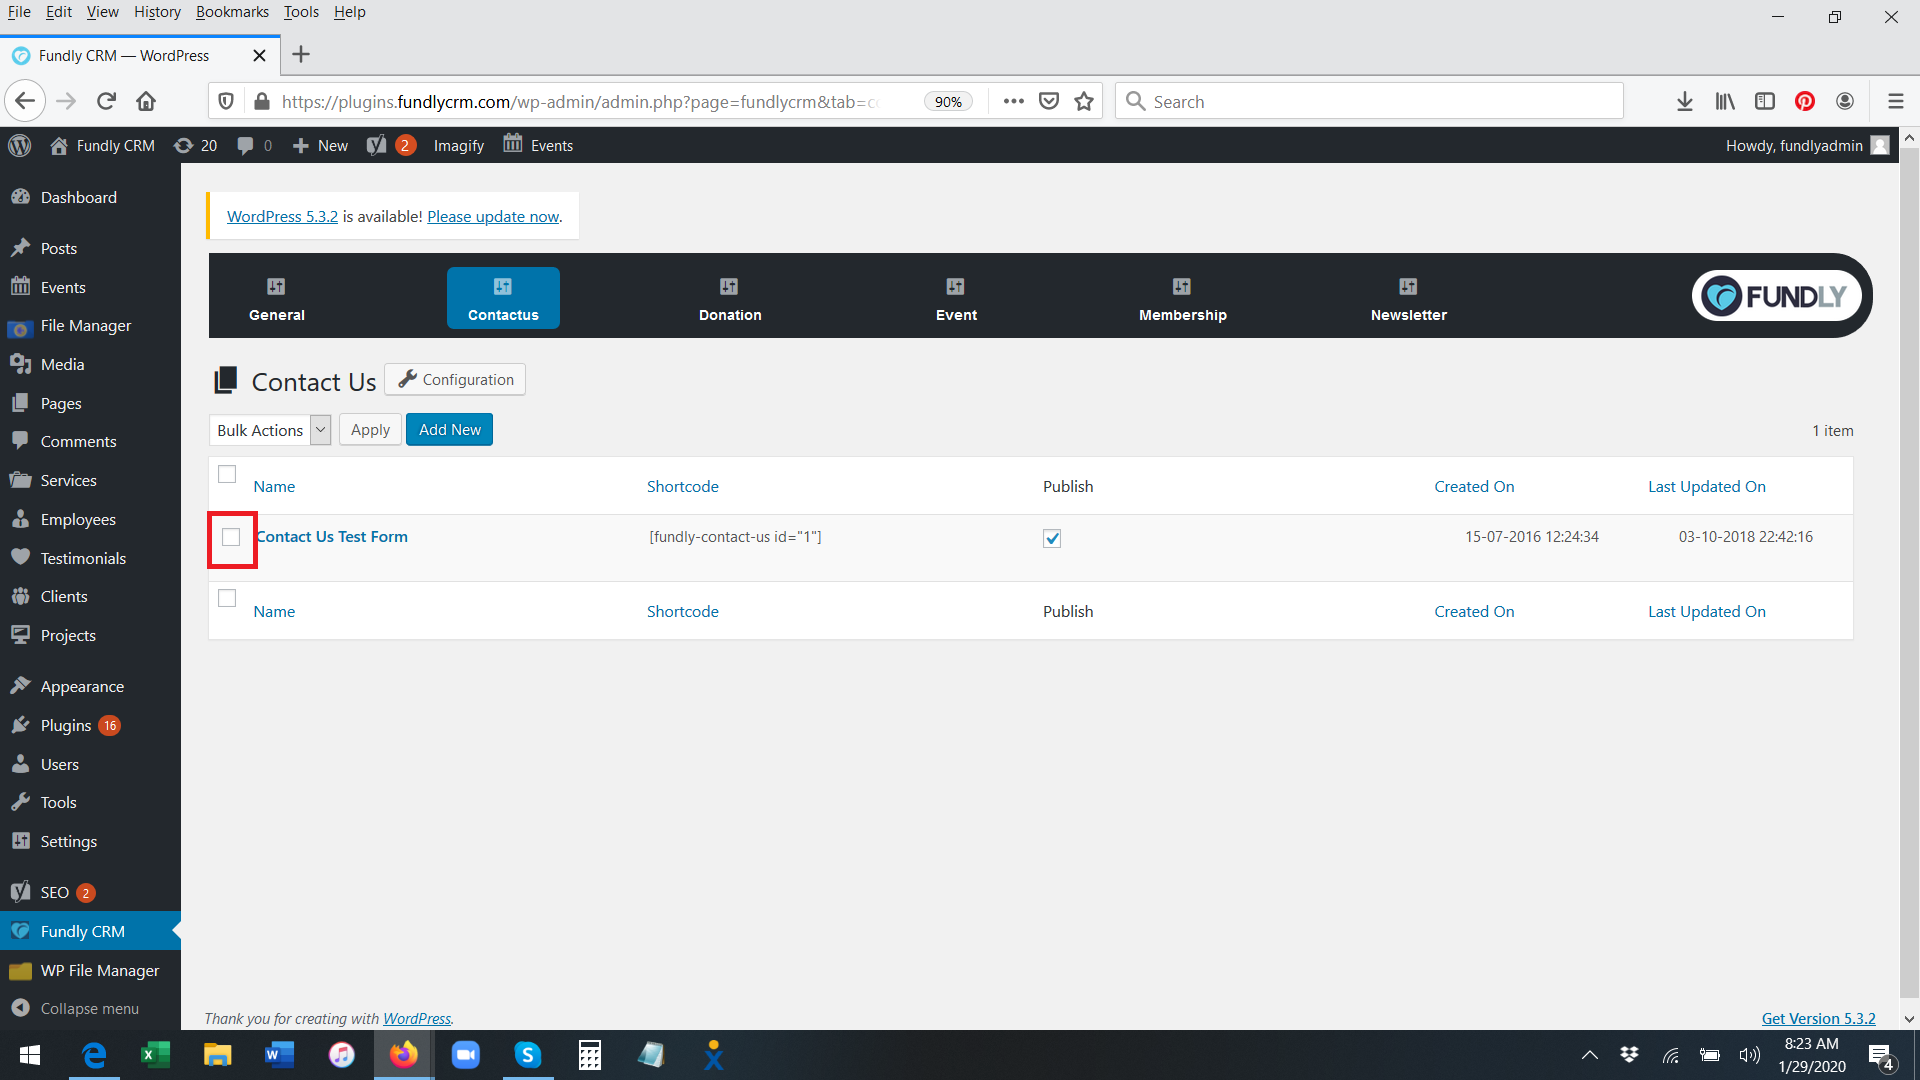
- Hovering over any form name will reveal options to Edit or Delete that form. You can also delete multiple pages at the same time by checking the white box to the left of any page and then selecting Delete from the Bulk Actions drop down menu and then click the Apply button.
OR

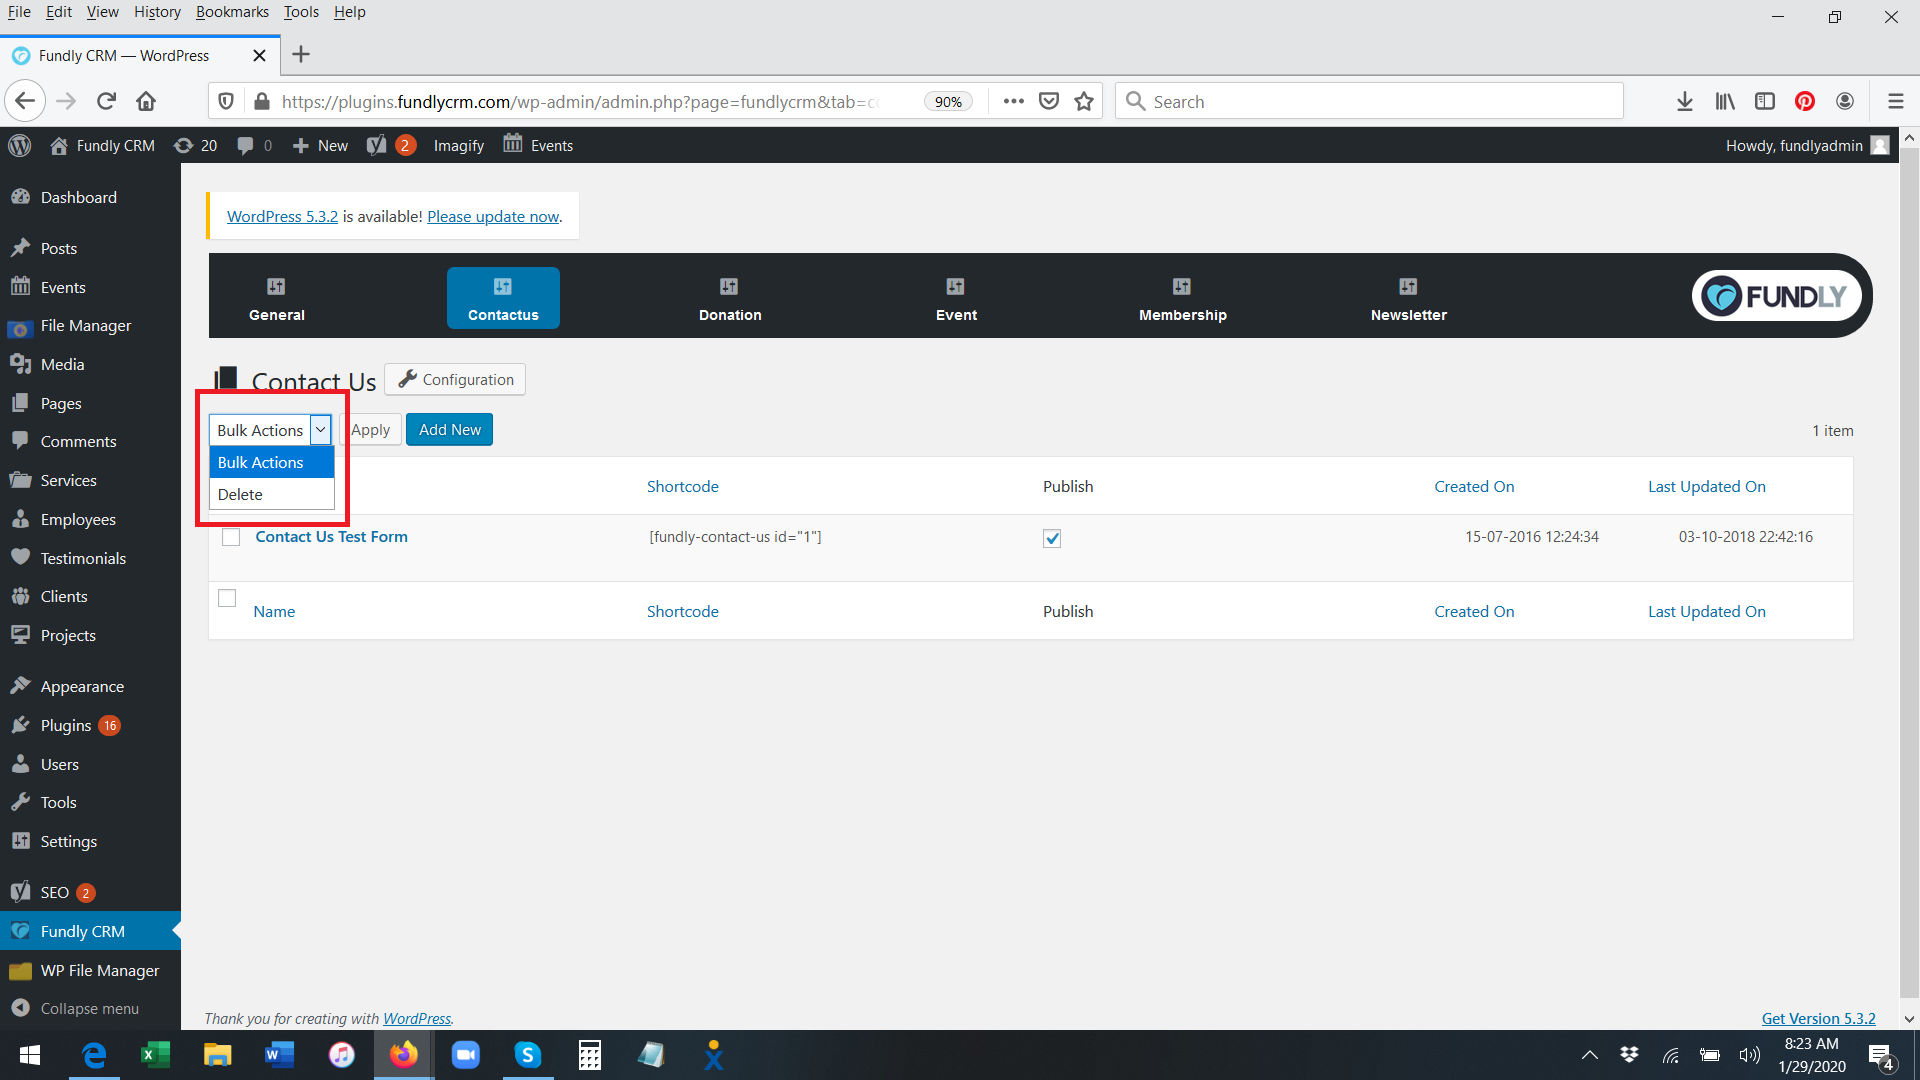

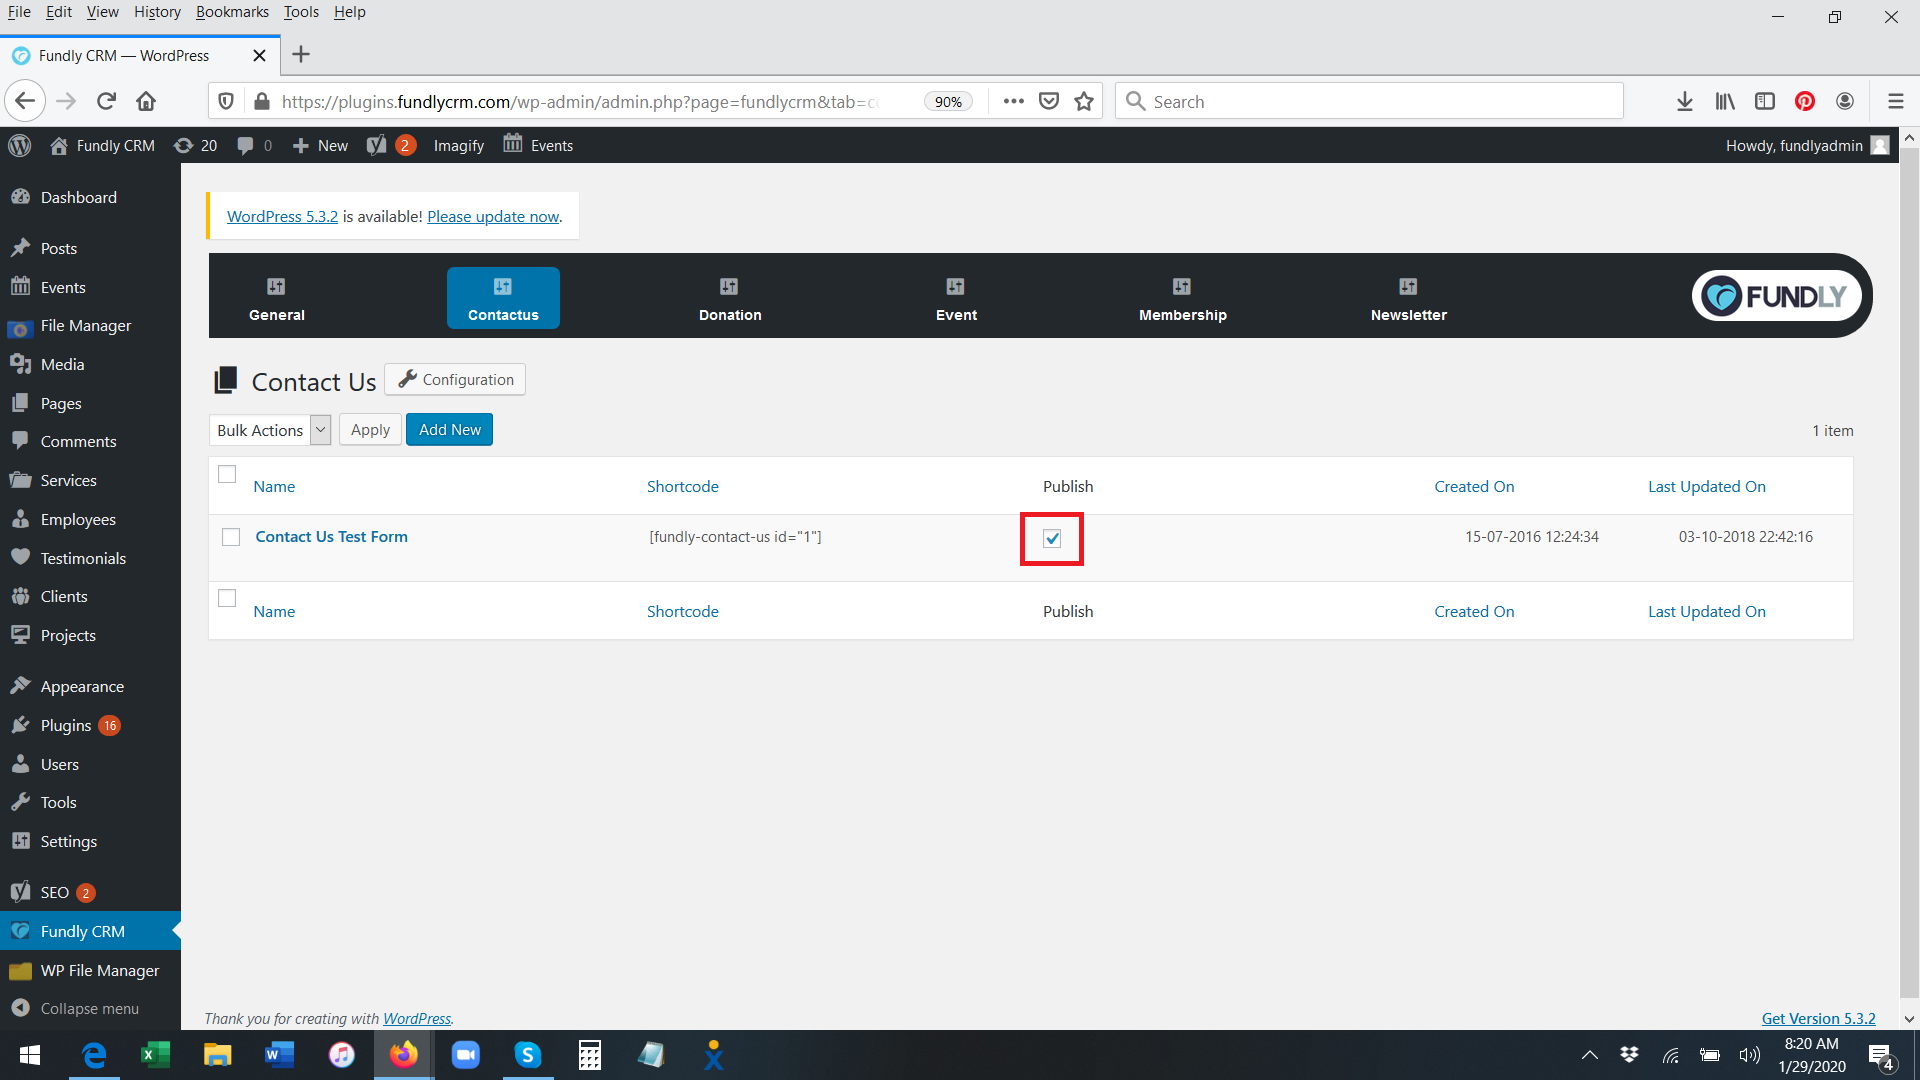
- Checking or Unchecking the Publish checkbox will allow you to publish/make like or unpublish/remove from the public side any form.
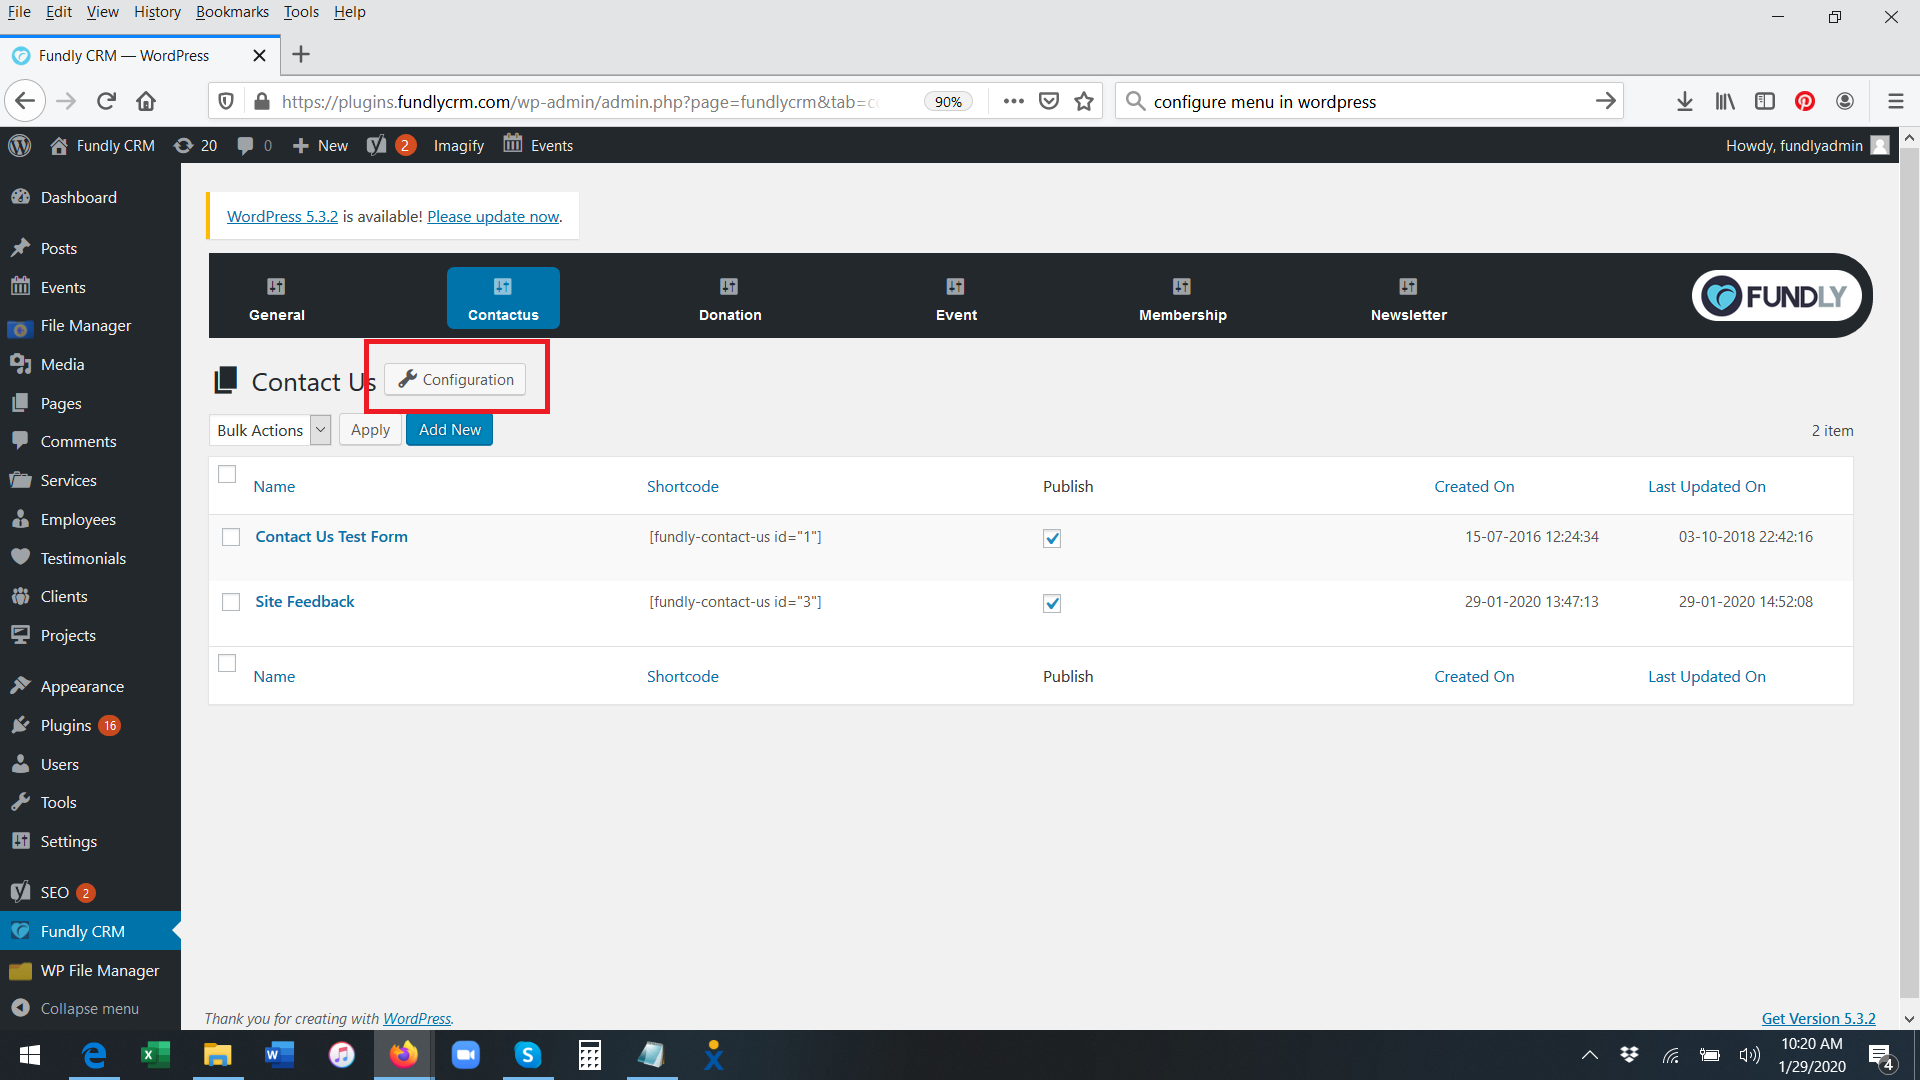
- The Configuration Button will allow you to configure the plug-ins meta settings.
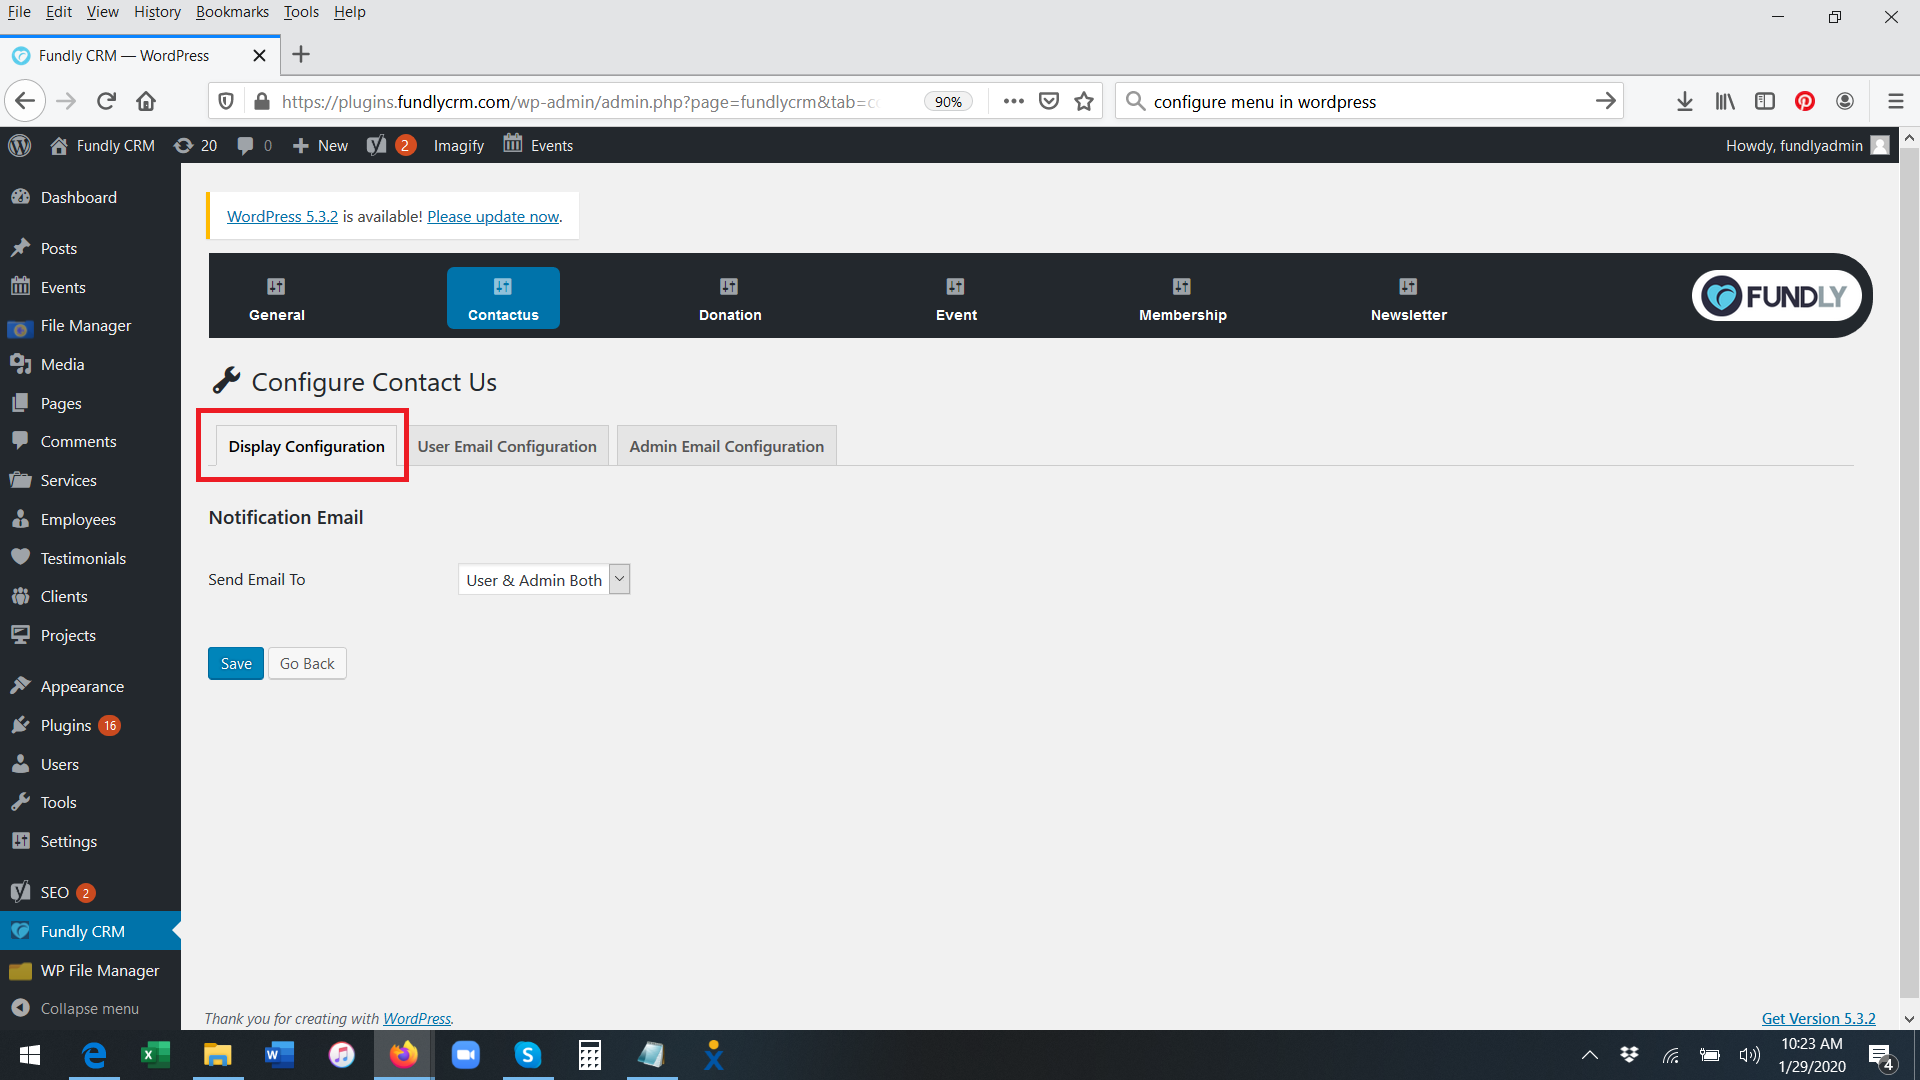
- Here, you will find three tabs: Display Configuration, User Email Configuration, and Admin Email Configuration.
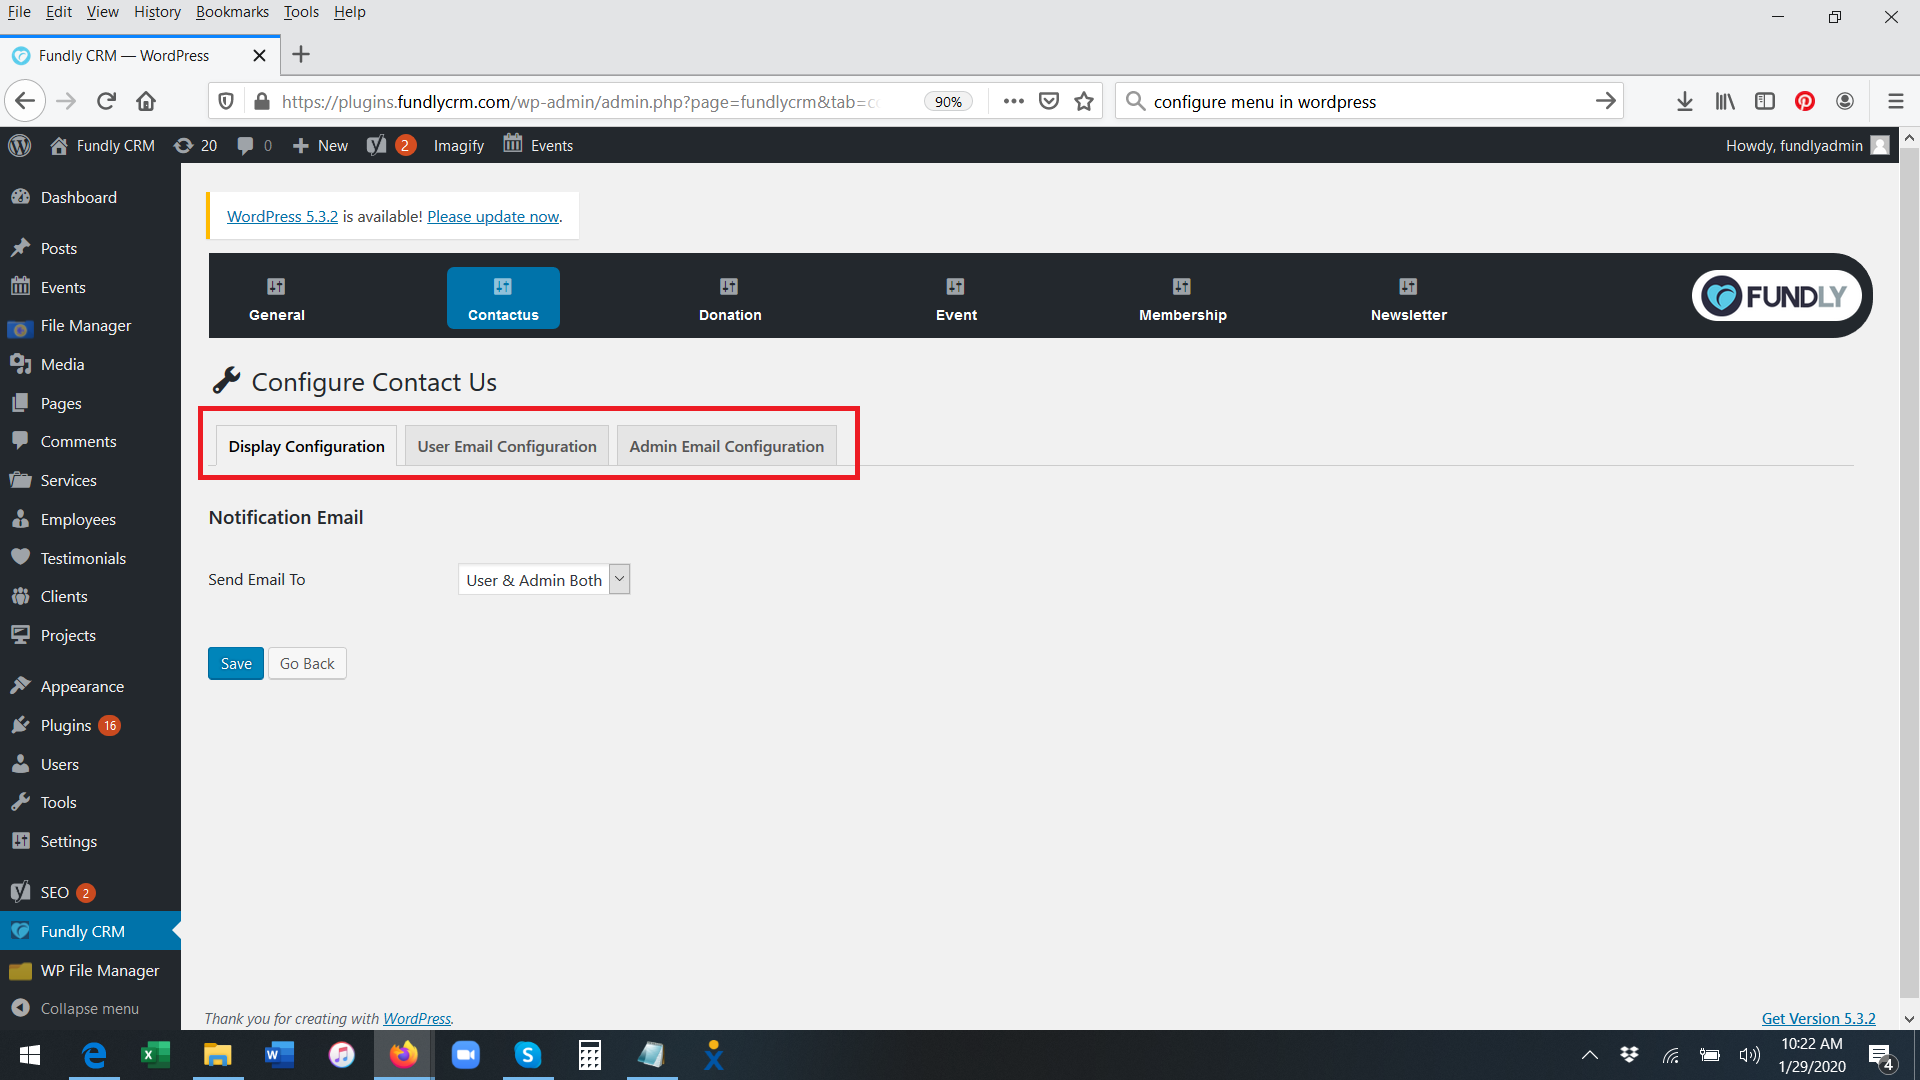
- On the Display Configuration tab, you can choose who should receive an email every time someone fills out the form - your system's admin, the user/respondent, or both. This is a global setting for all of your Contact Us forms; you cannot set different recipients for different forms.

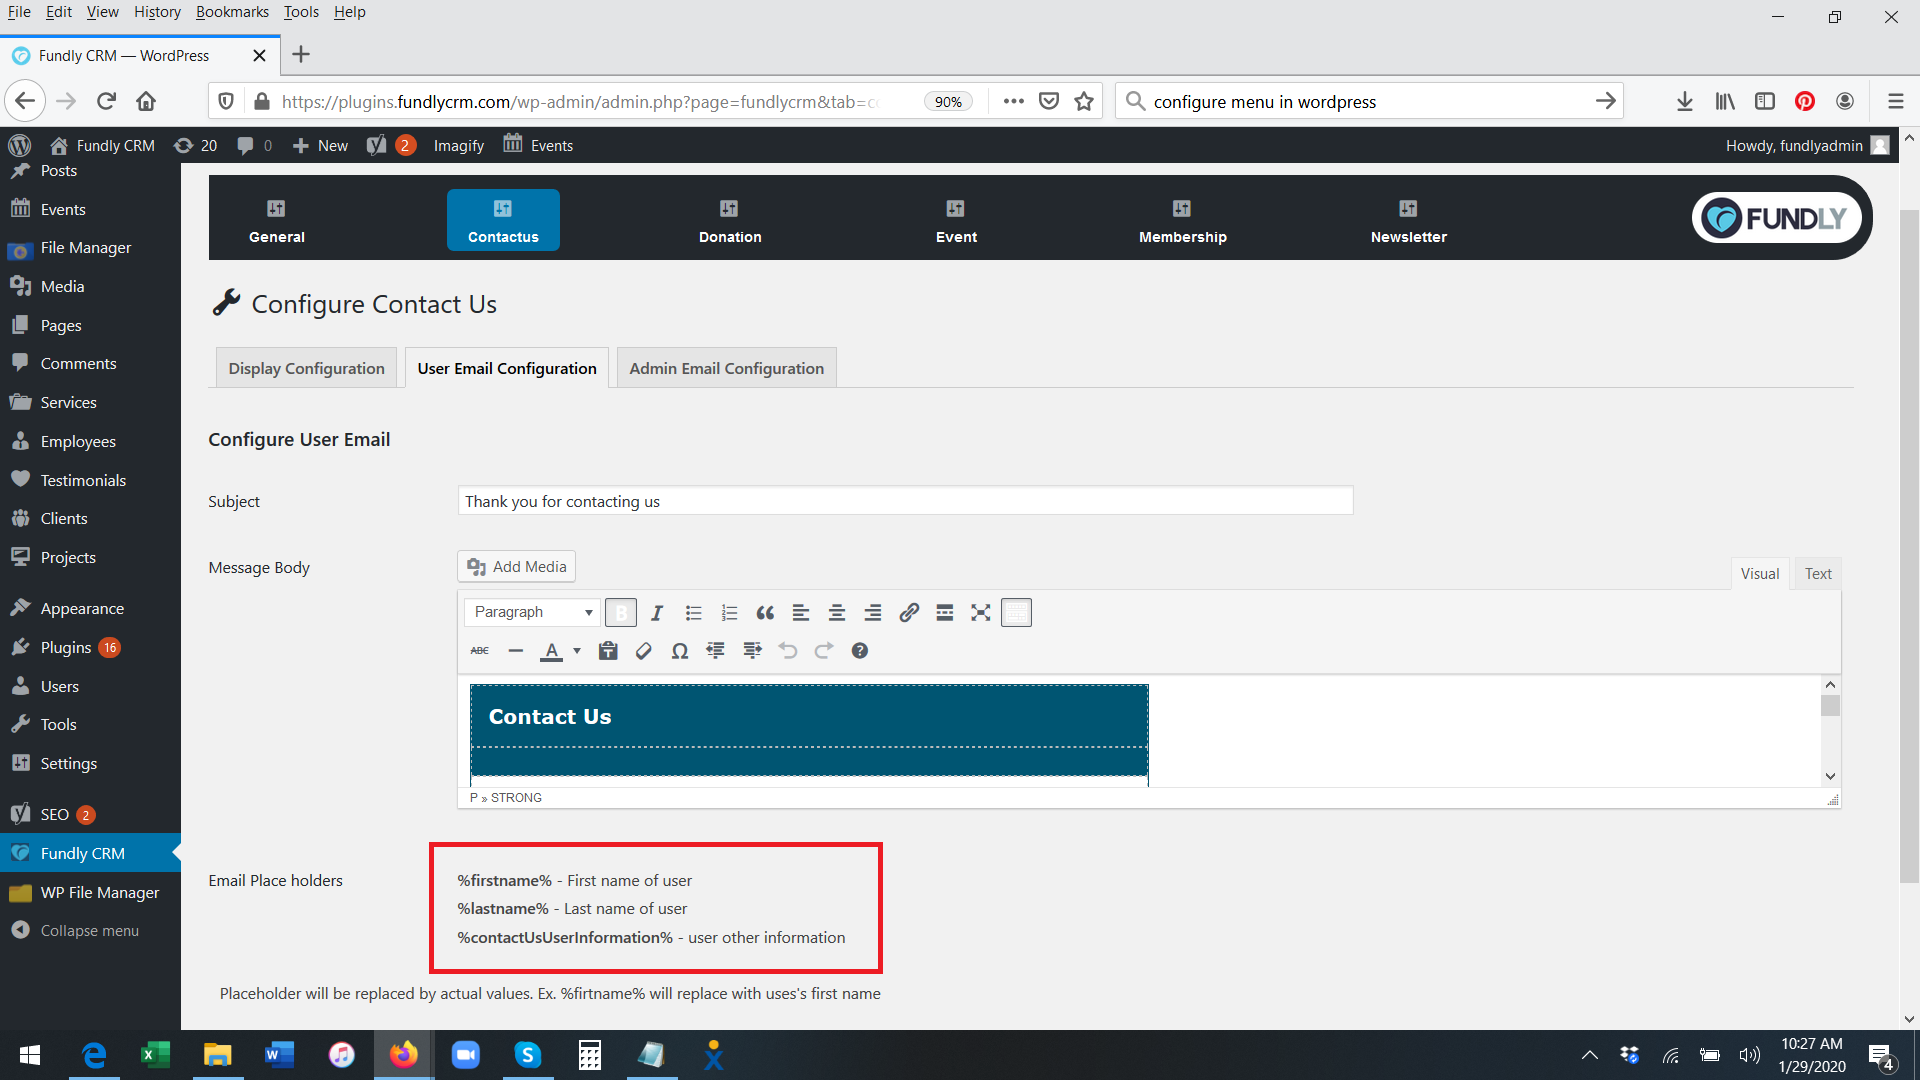
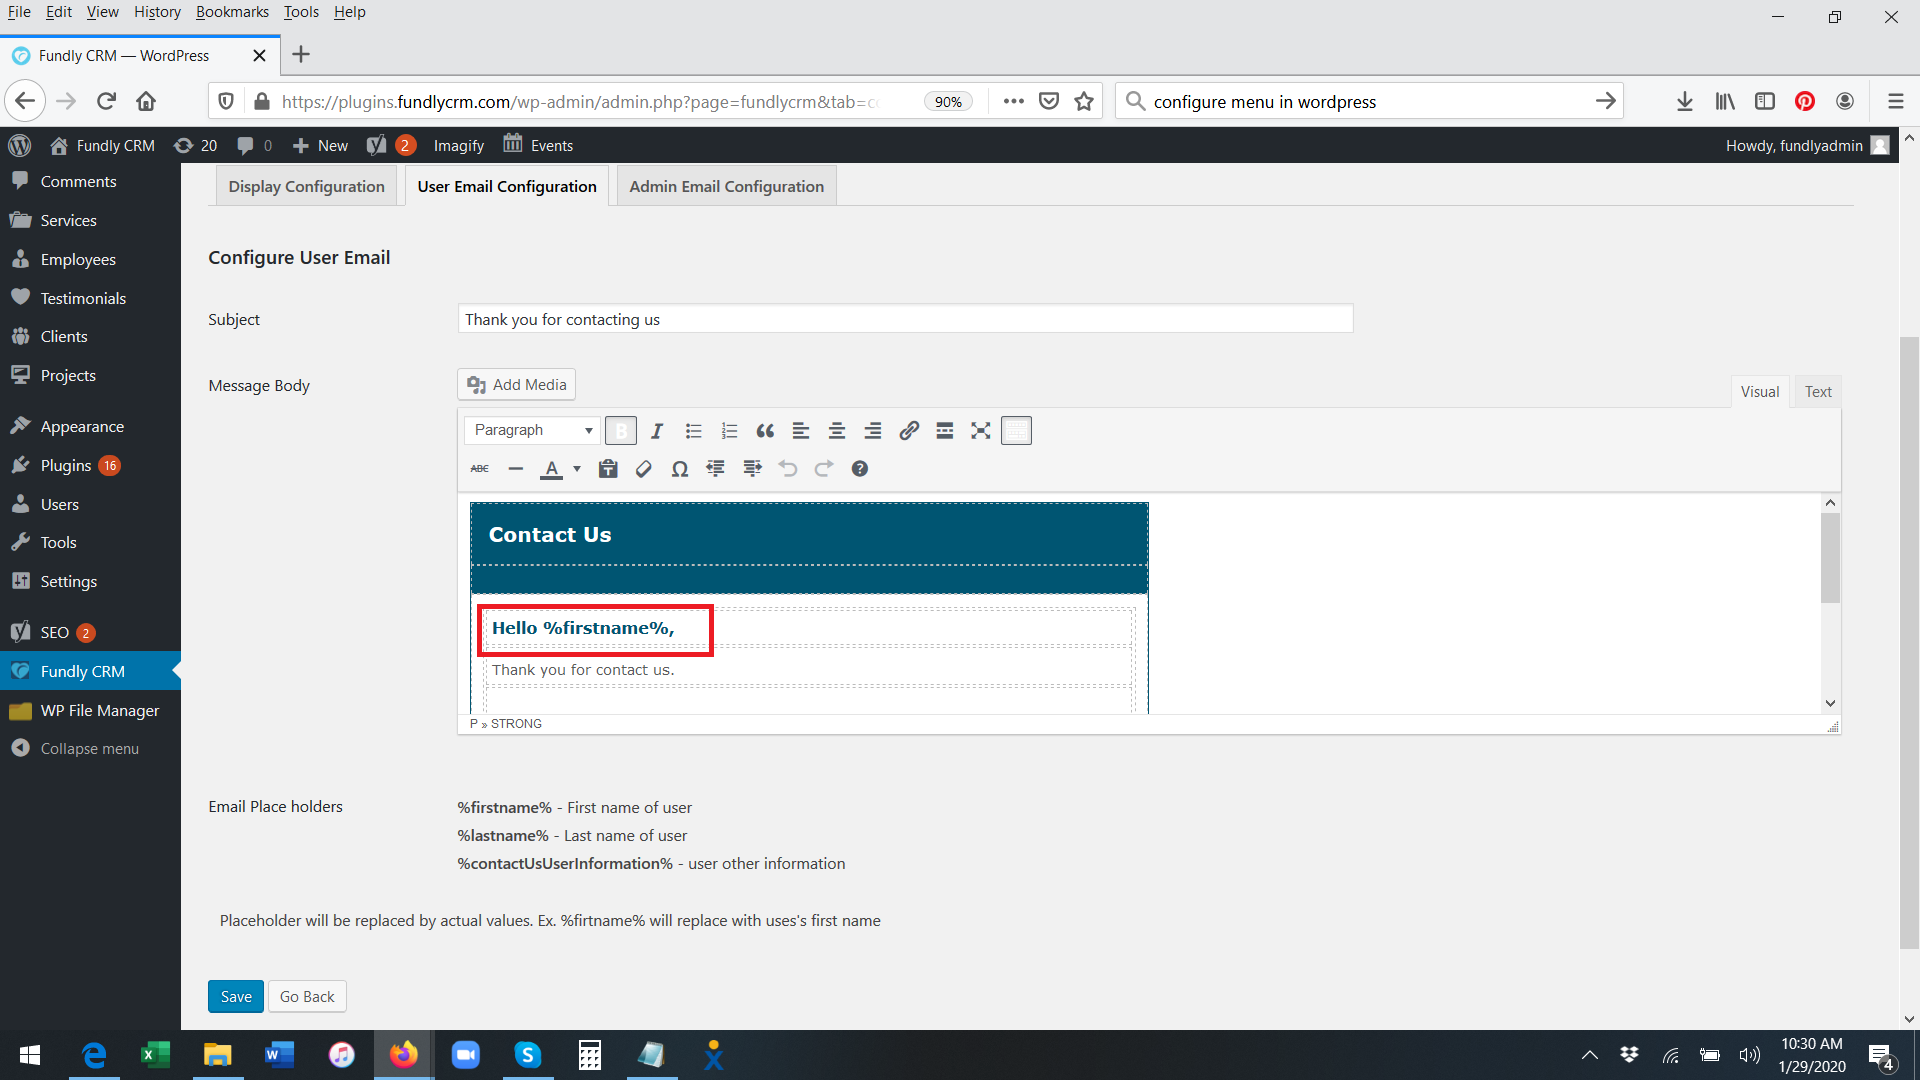
- On the User Email Configuration tab, you can configure the email that the respondent/user will receive (if you set the respondent to receive an email on the Display Configuration tab; if you do not elect to have the user receive an email when the form is submitted, you can skip this tab). This is a global setting for all of your Contact Us forms; you cannot set different messages for different forms.
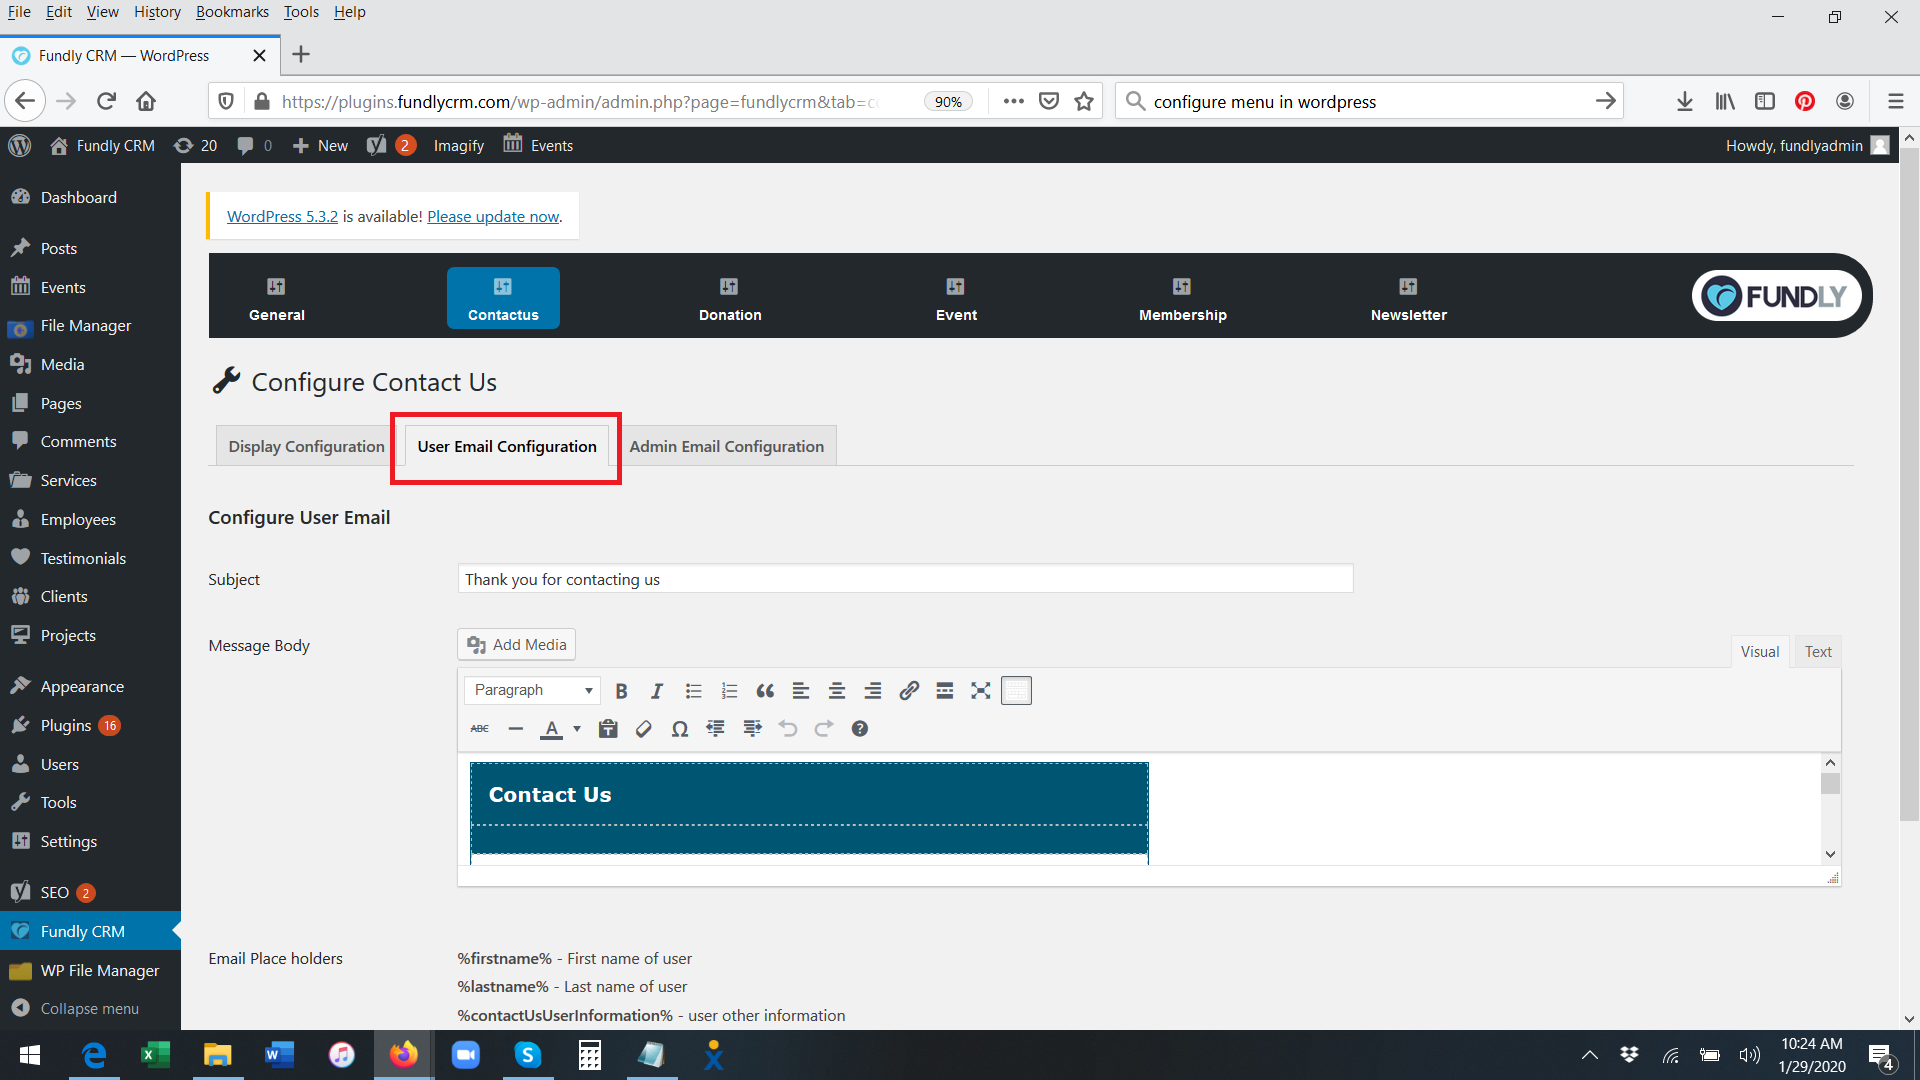
- Subject allows you to configure the subject line of the email the respondent will receive.

- The Message Body area allows you to configure the body of the email the respondent will receive.

- You can click the Add Media button to add pictures or video to the email body.

- You can configure the body text, wording, and style using the toolbar provided. You can also toggle between the Visual and Text (HTML) editor by clicking the tabs in the upper right.
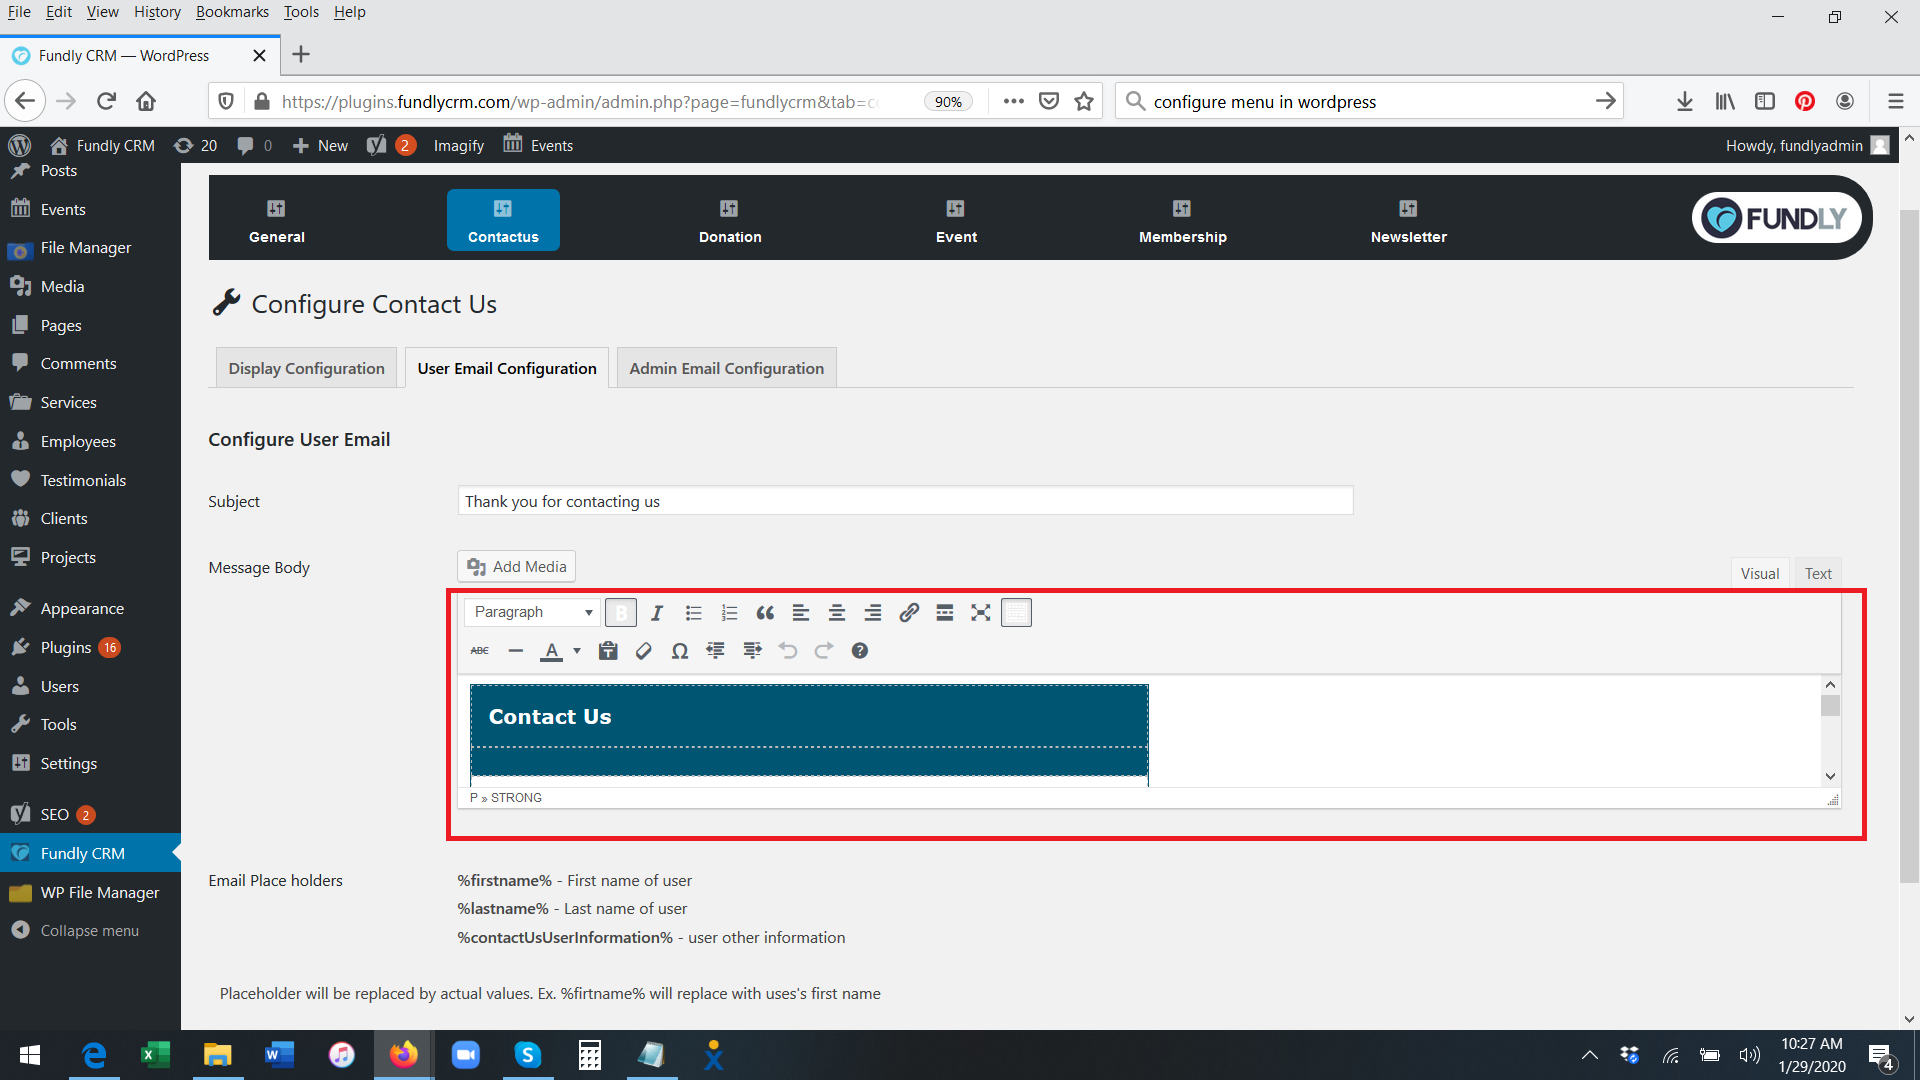

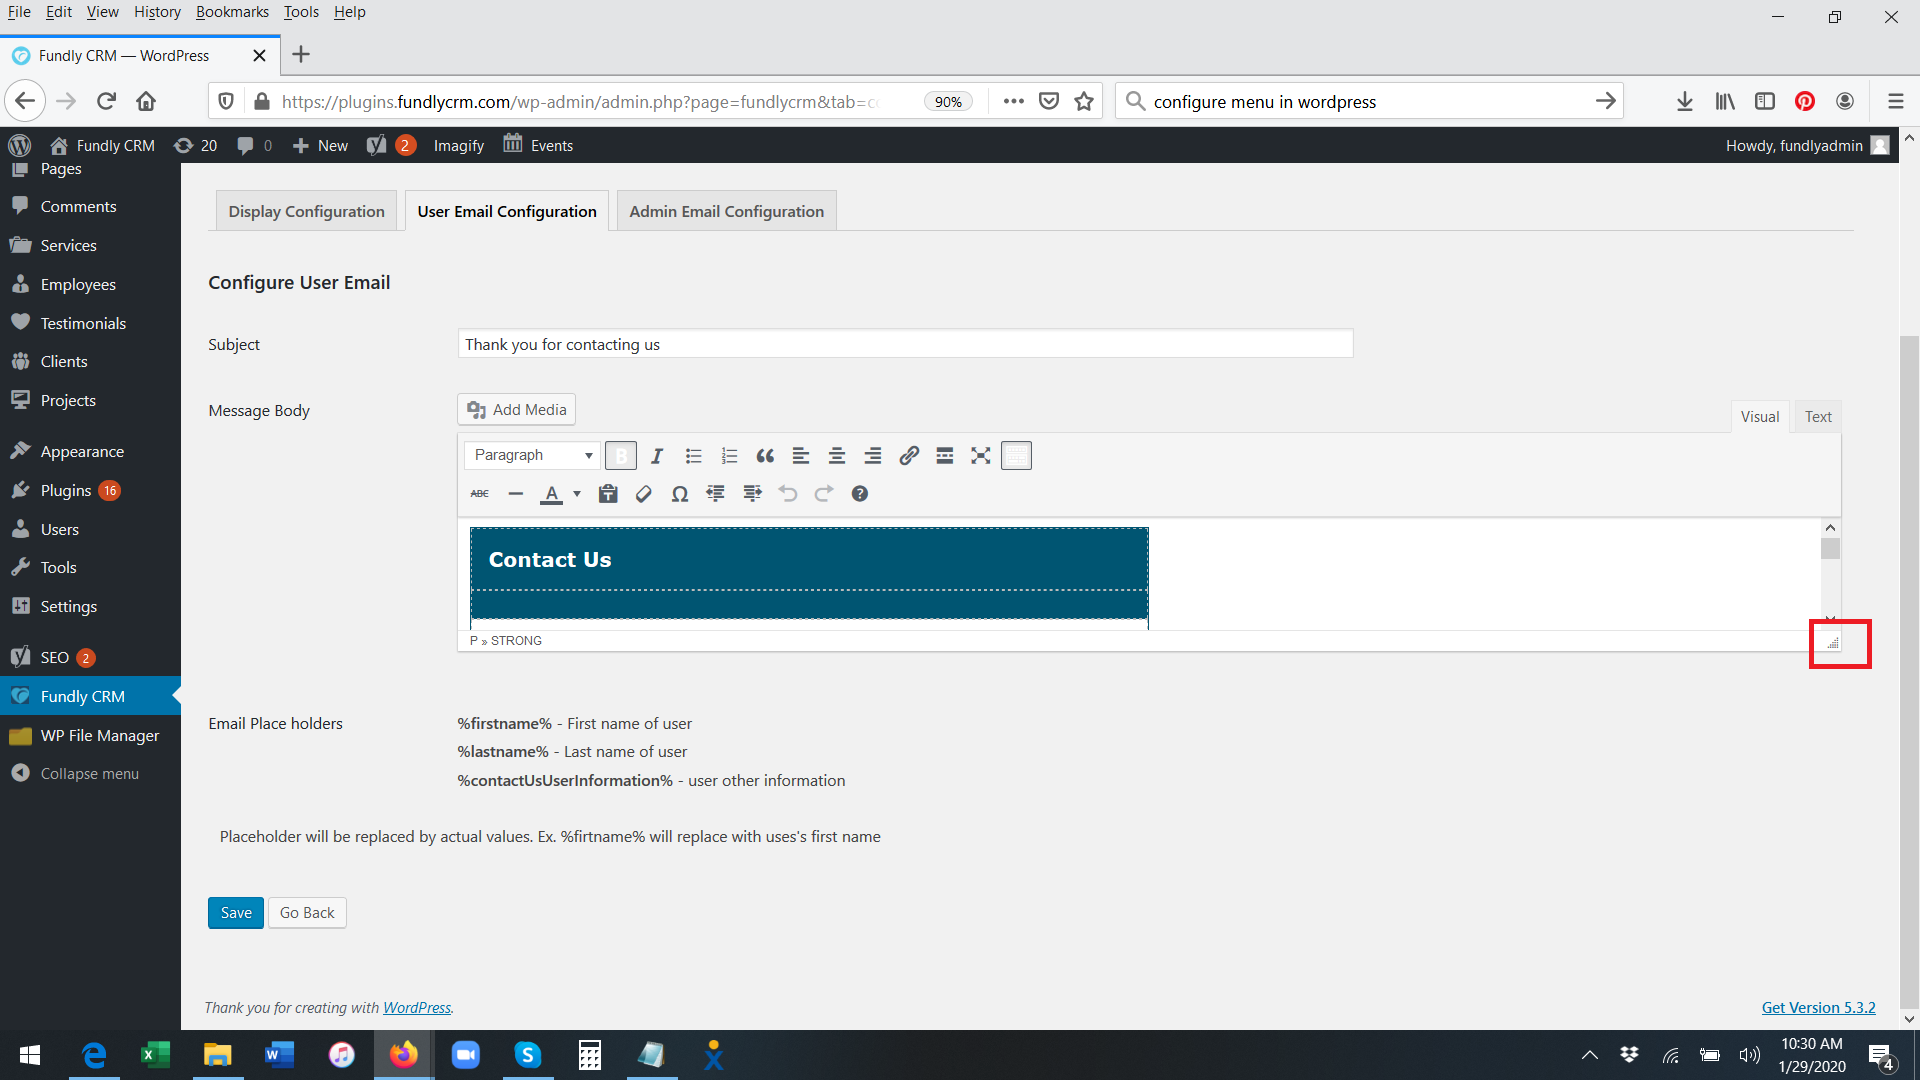
- You can make the body text editing area bigger by hovering over the triangle in the lower right corner and dragging it down.
- You can put placeholders into the body of the email as well. The %cotactUsUserOtherInformation% placeholder will populate the respondent's answers to your form's questions into the body of the email (in this way, the respondent can be sent a copy of what they submitted).
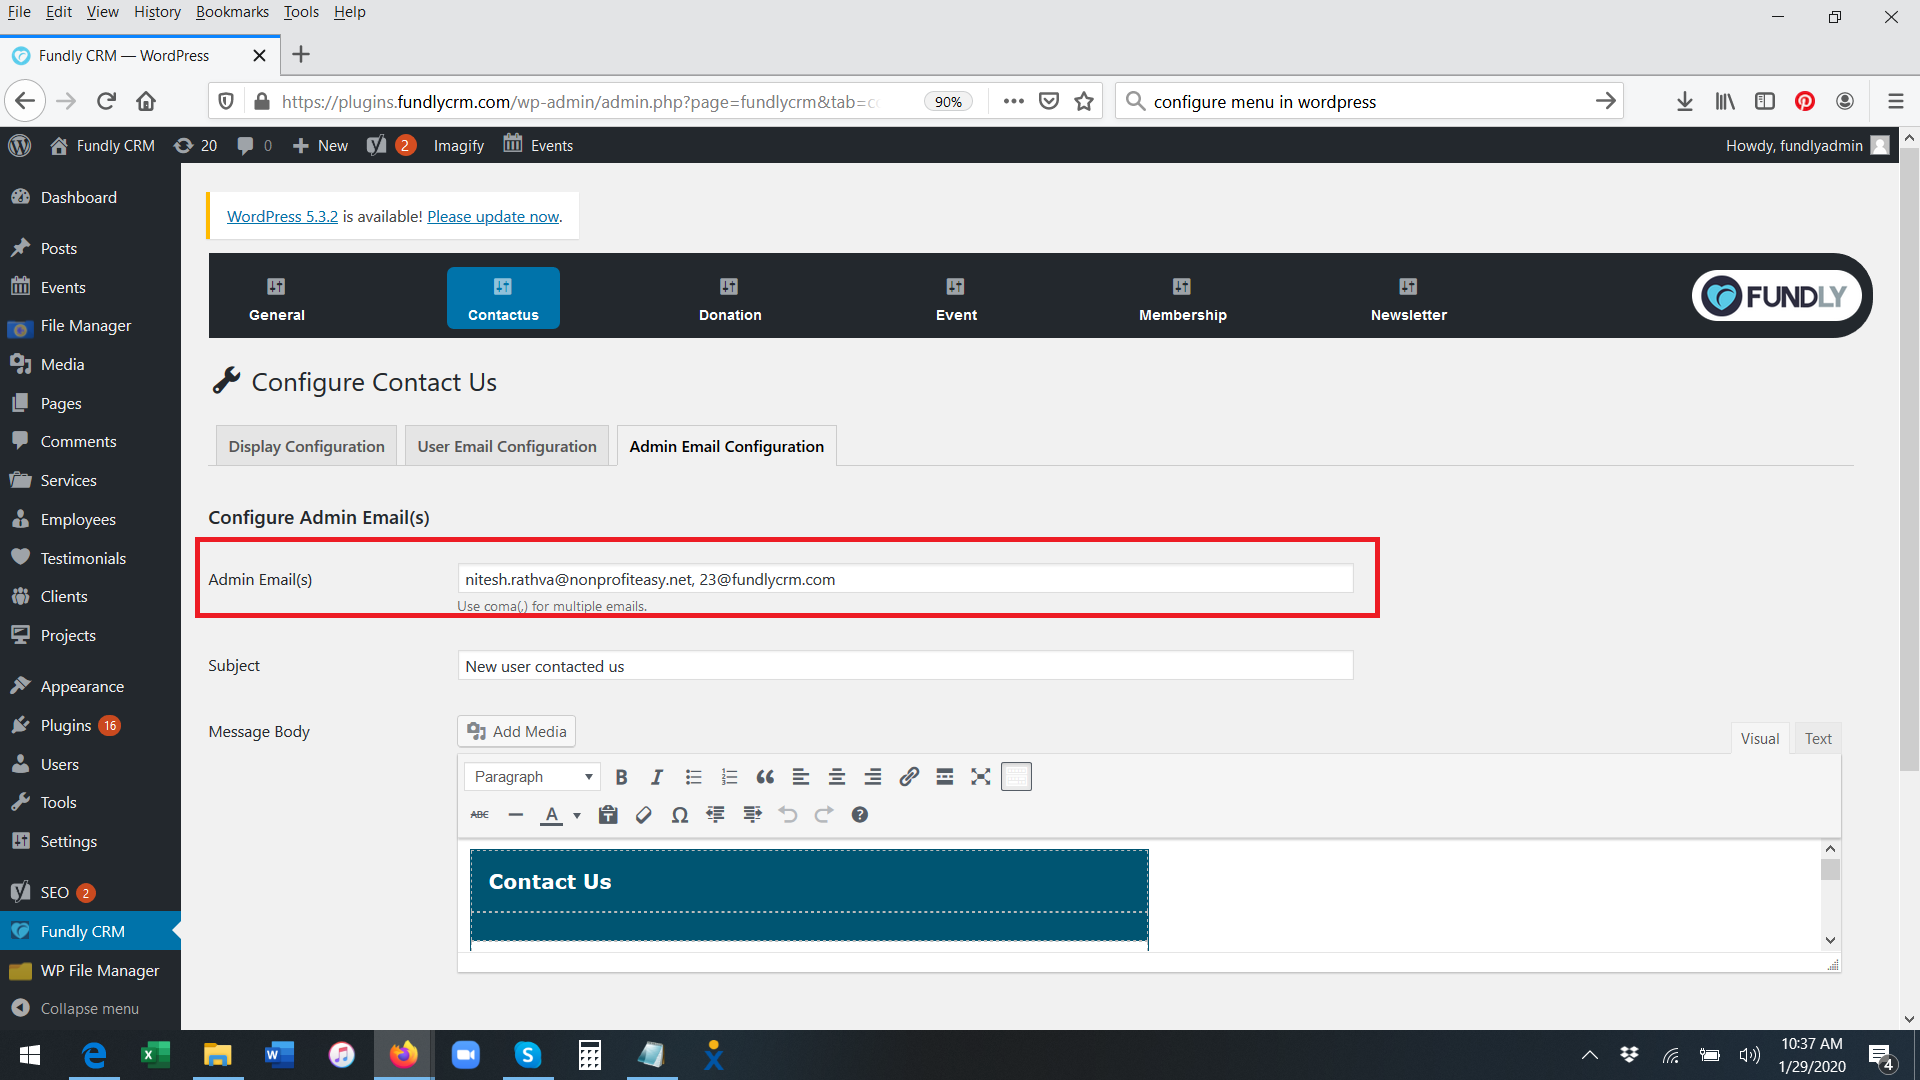
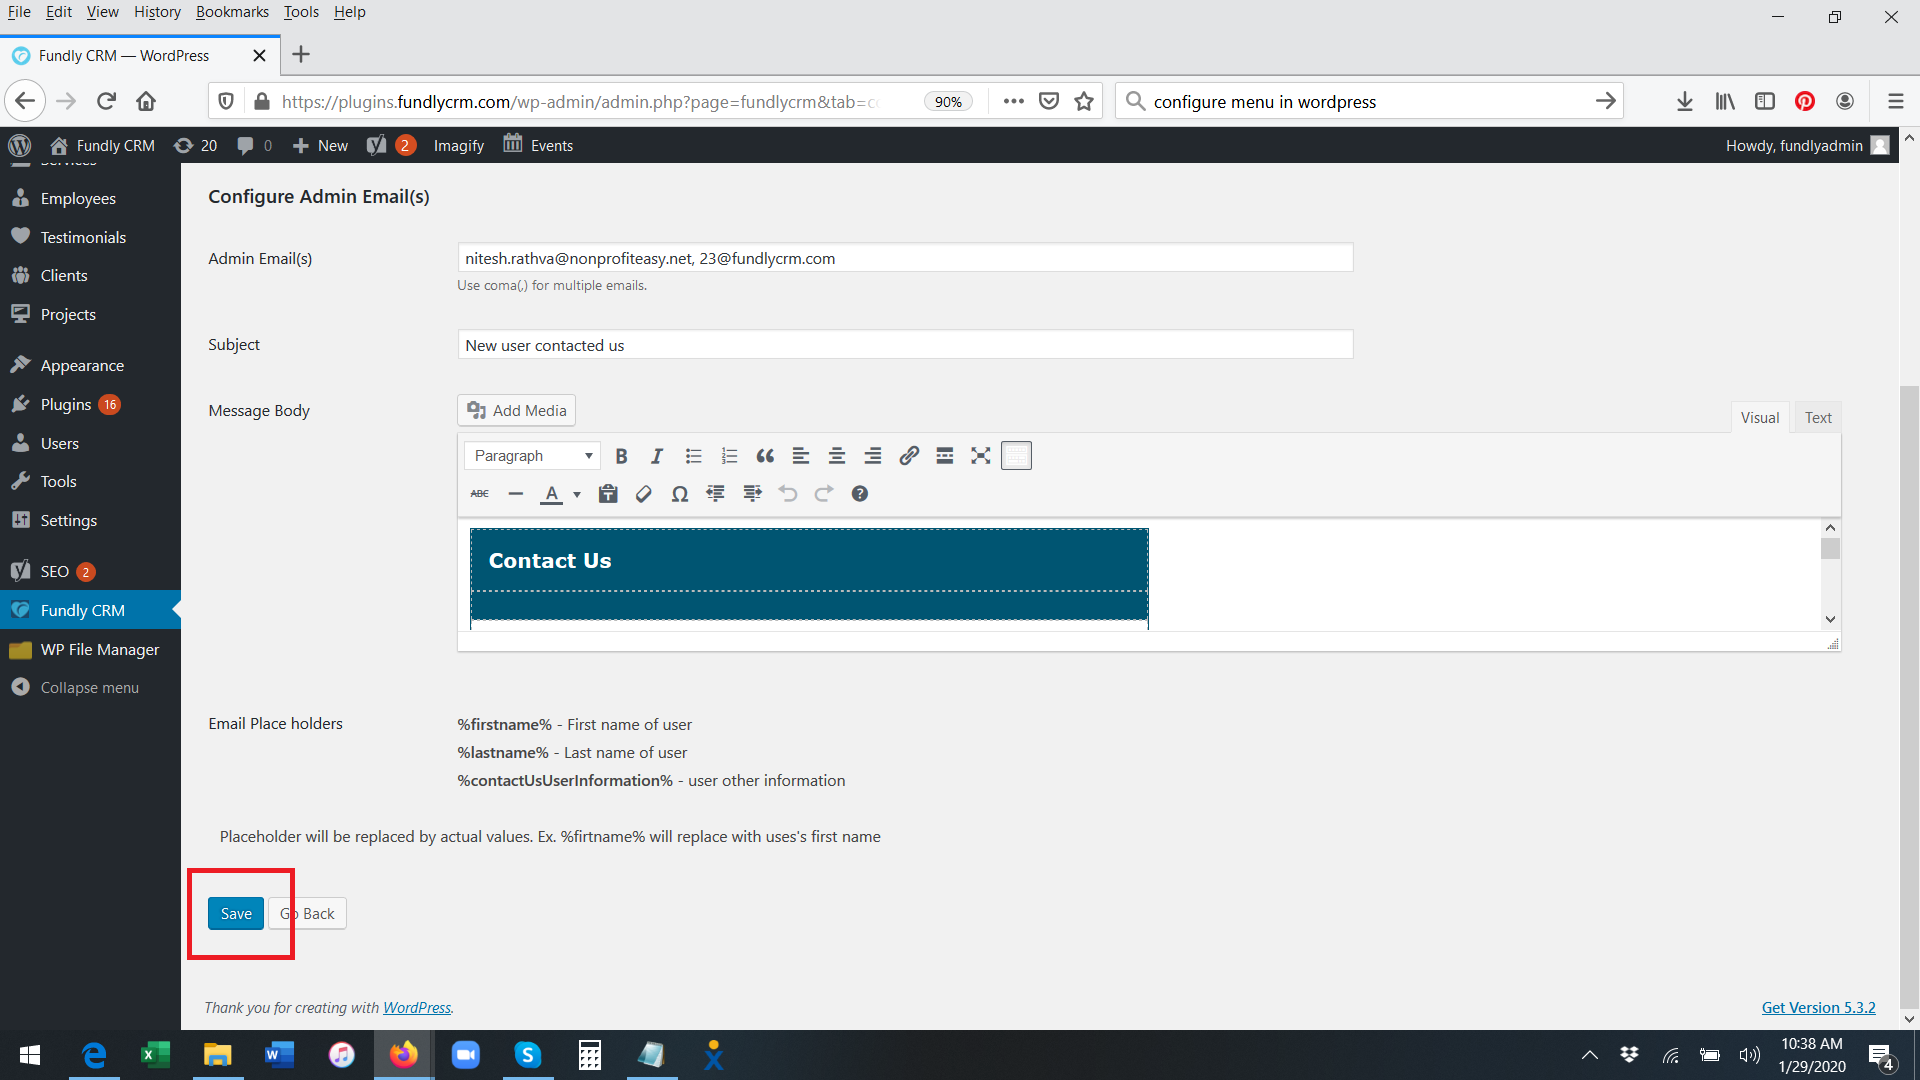
- The Admin Email Configuration tab will allow you to configure the email that your system admin will receive every time someone fills out the form (if you set them to receive an email on the Display Configuration tab). This is a global setting for all of your Contact Us forms; you cannot set different messages or different recipients for different forms.
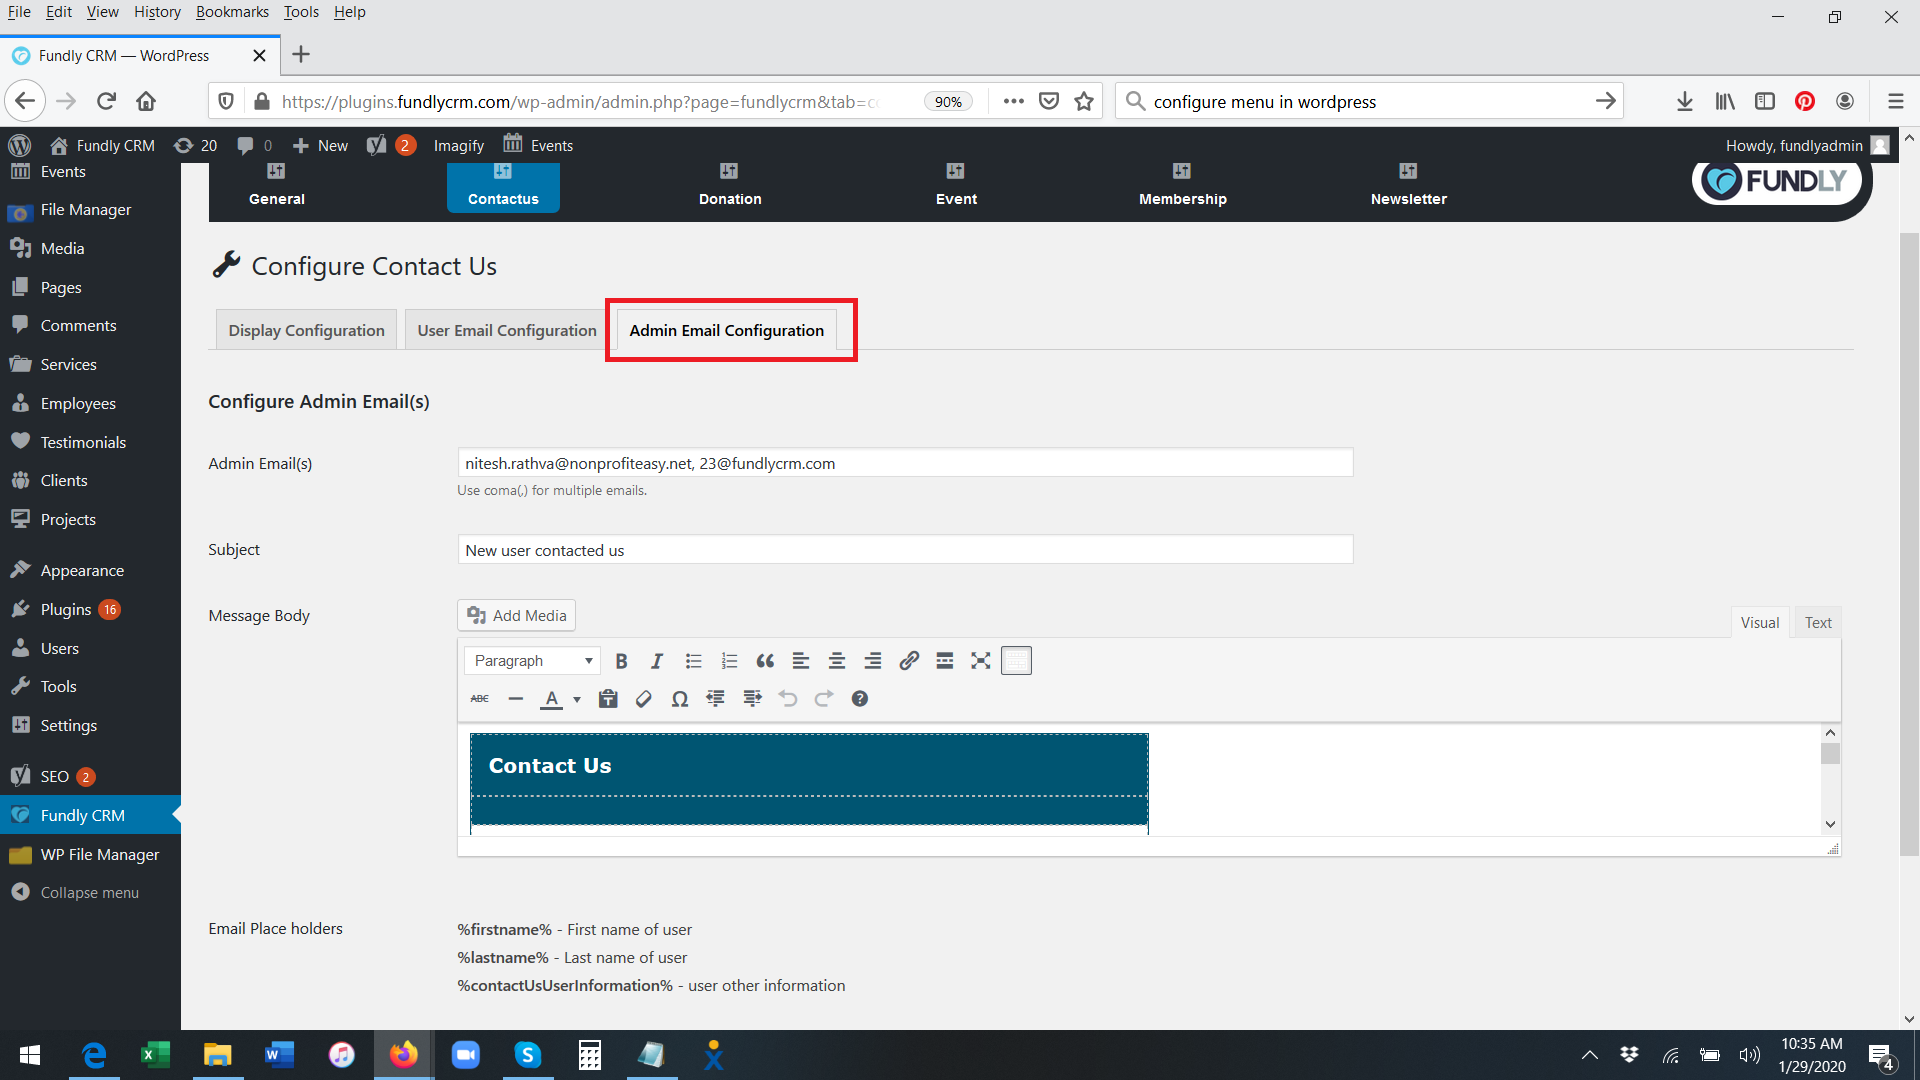
- All fields here are configured in the same way as the User Email Configuration steps listed above, with the addition that in the Admin Email(s) field, add the email address(es) (separated by commas if adding multiple addresses) of the staff member(s) who will receive an email every time someone fills out your Contact Us form(s). This is a global setting for all of your Contact Us forms; you cannot set different recipients for different forms.
- When you are done making changes to your meta Configurations, click the blue Save button in the lower right.
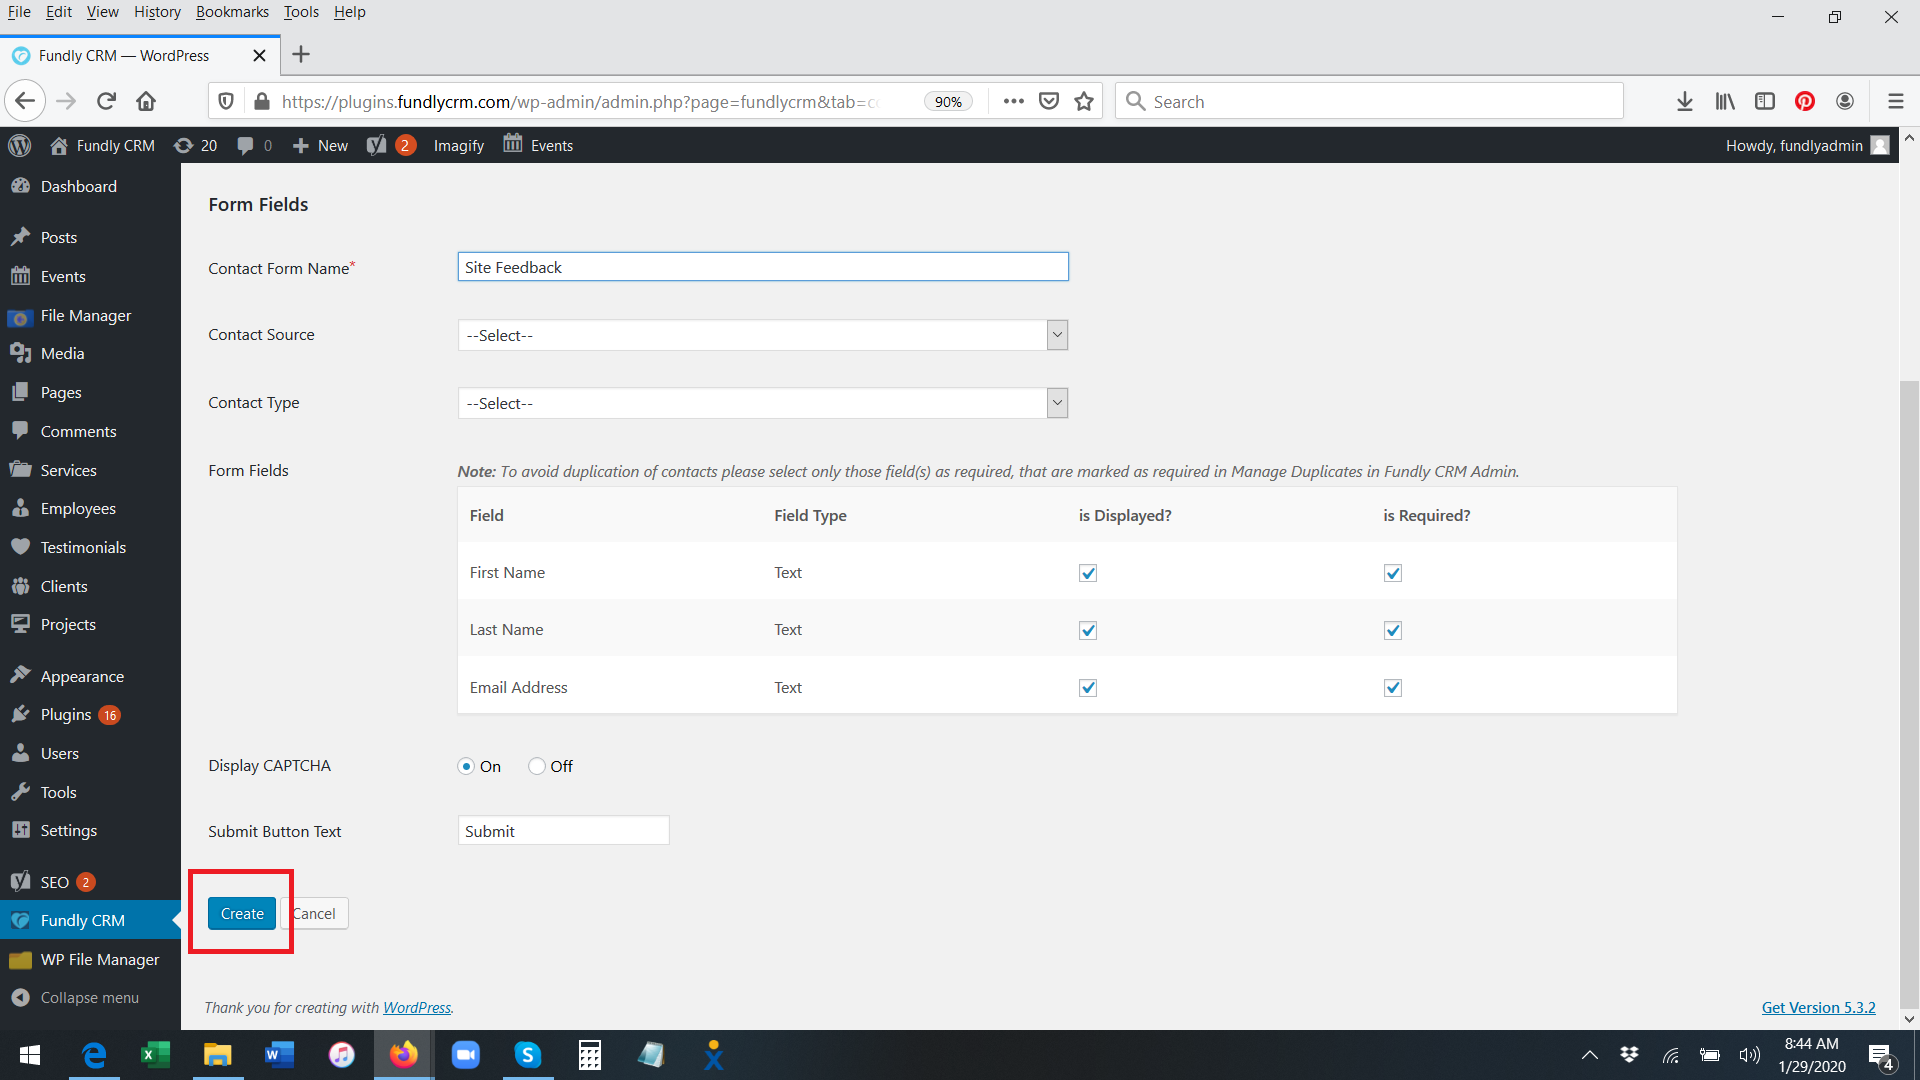
- To Add a new Contact Us form/page to your website, on the main Contact Us tab index screen, click the blue Add New button.
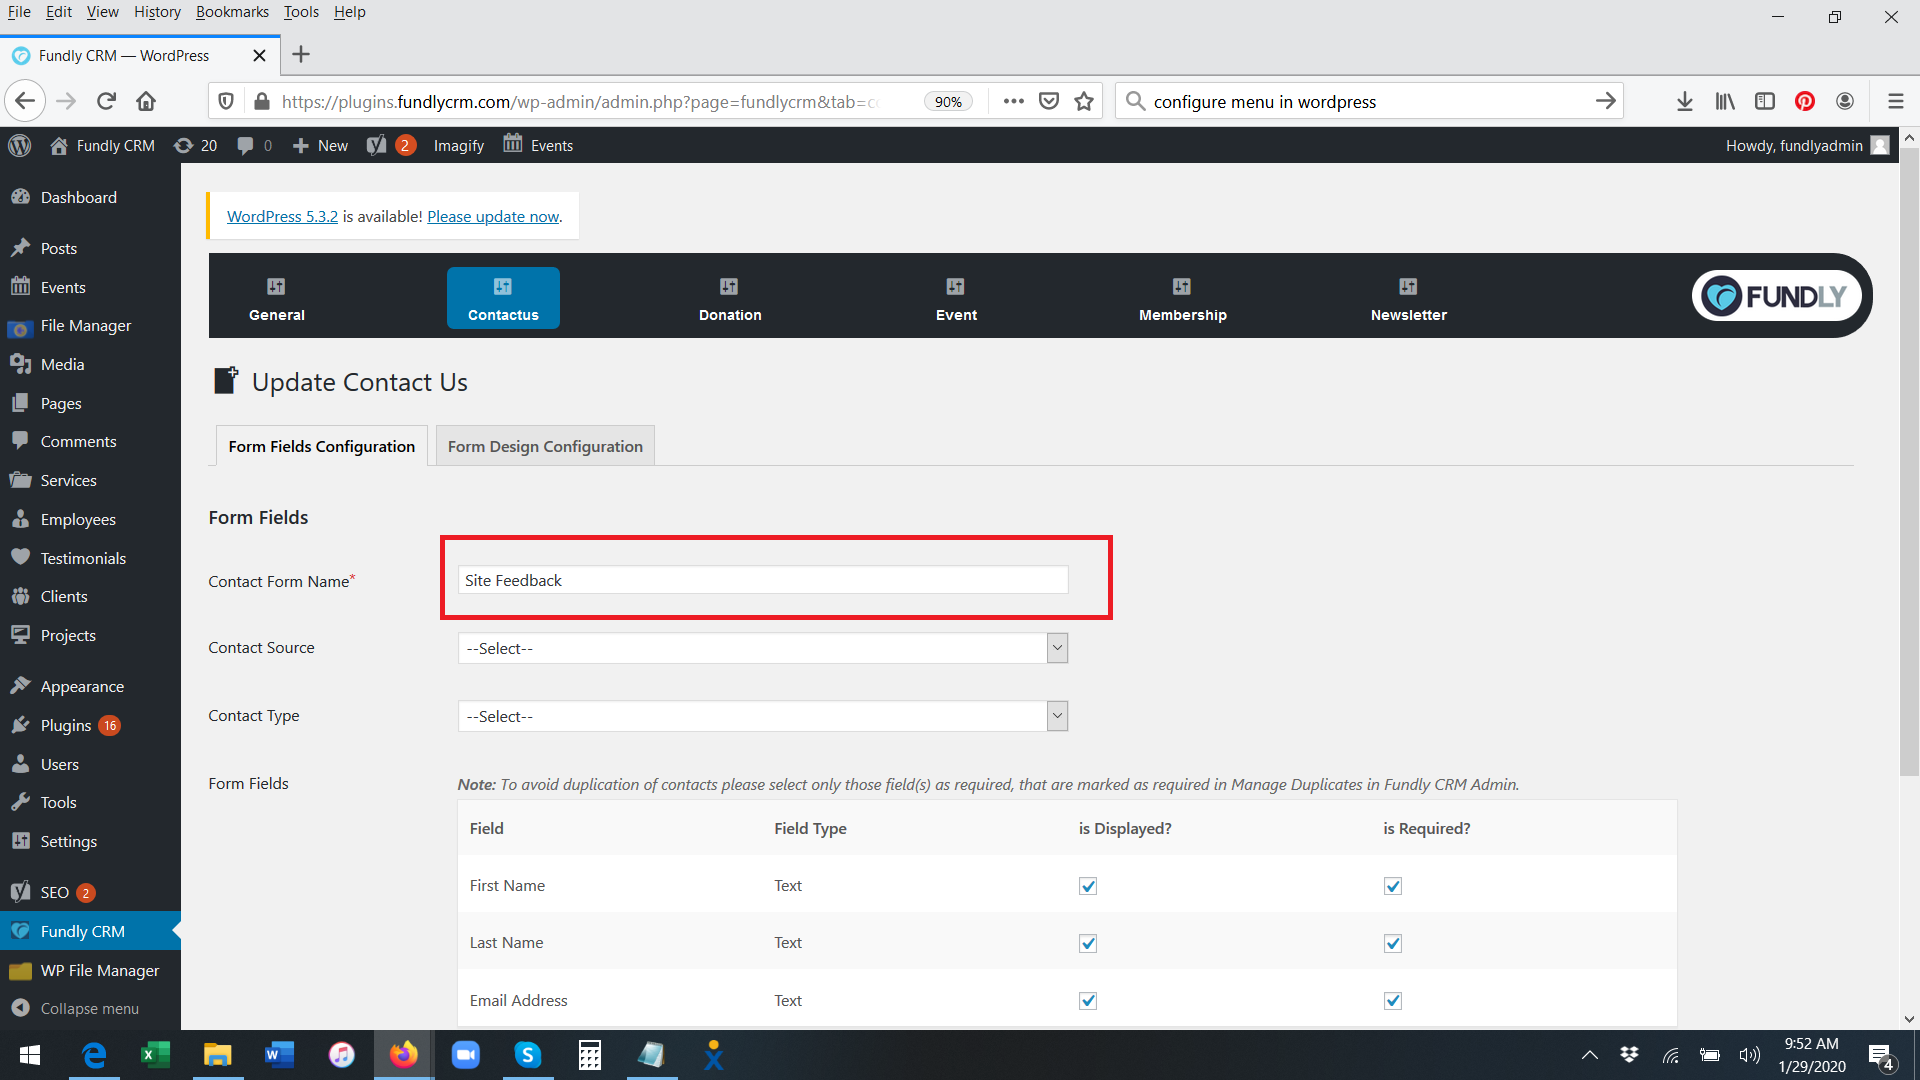
- The Add/Edit Contact Us Page has two tabs: Form Fields Configurations and Form Design Configuration.
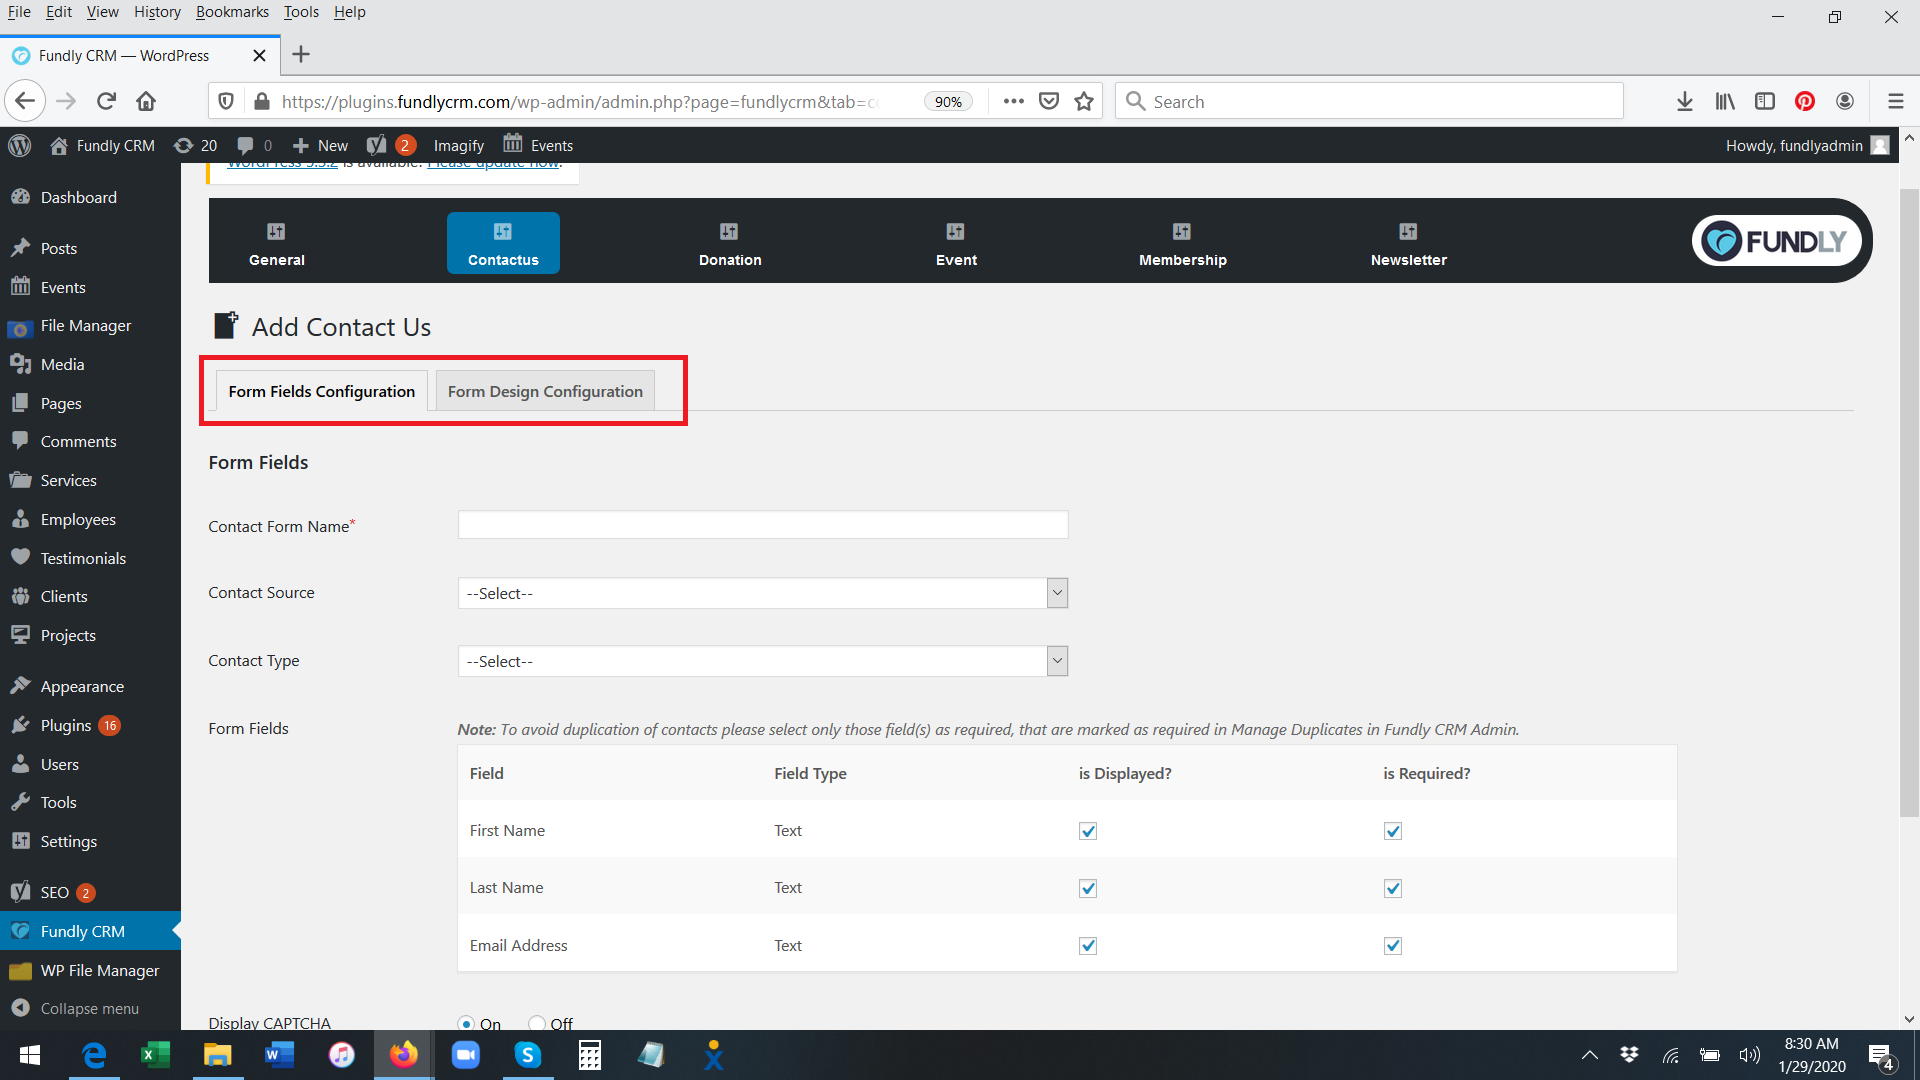
- The Form Fields Configuration tab allows you to configure which fields appear on your Contact Us form.

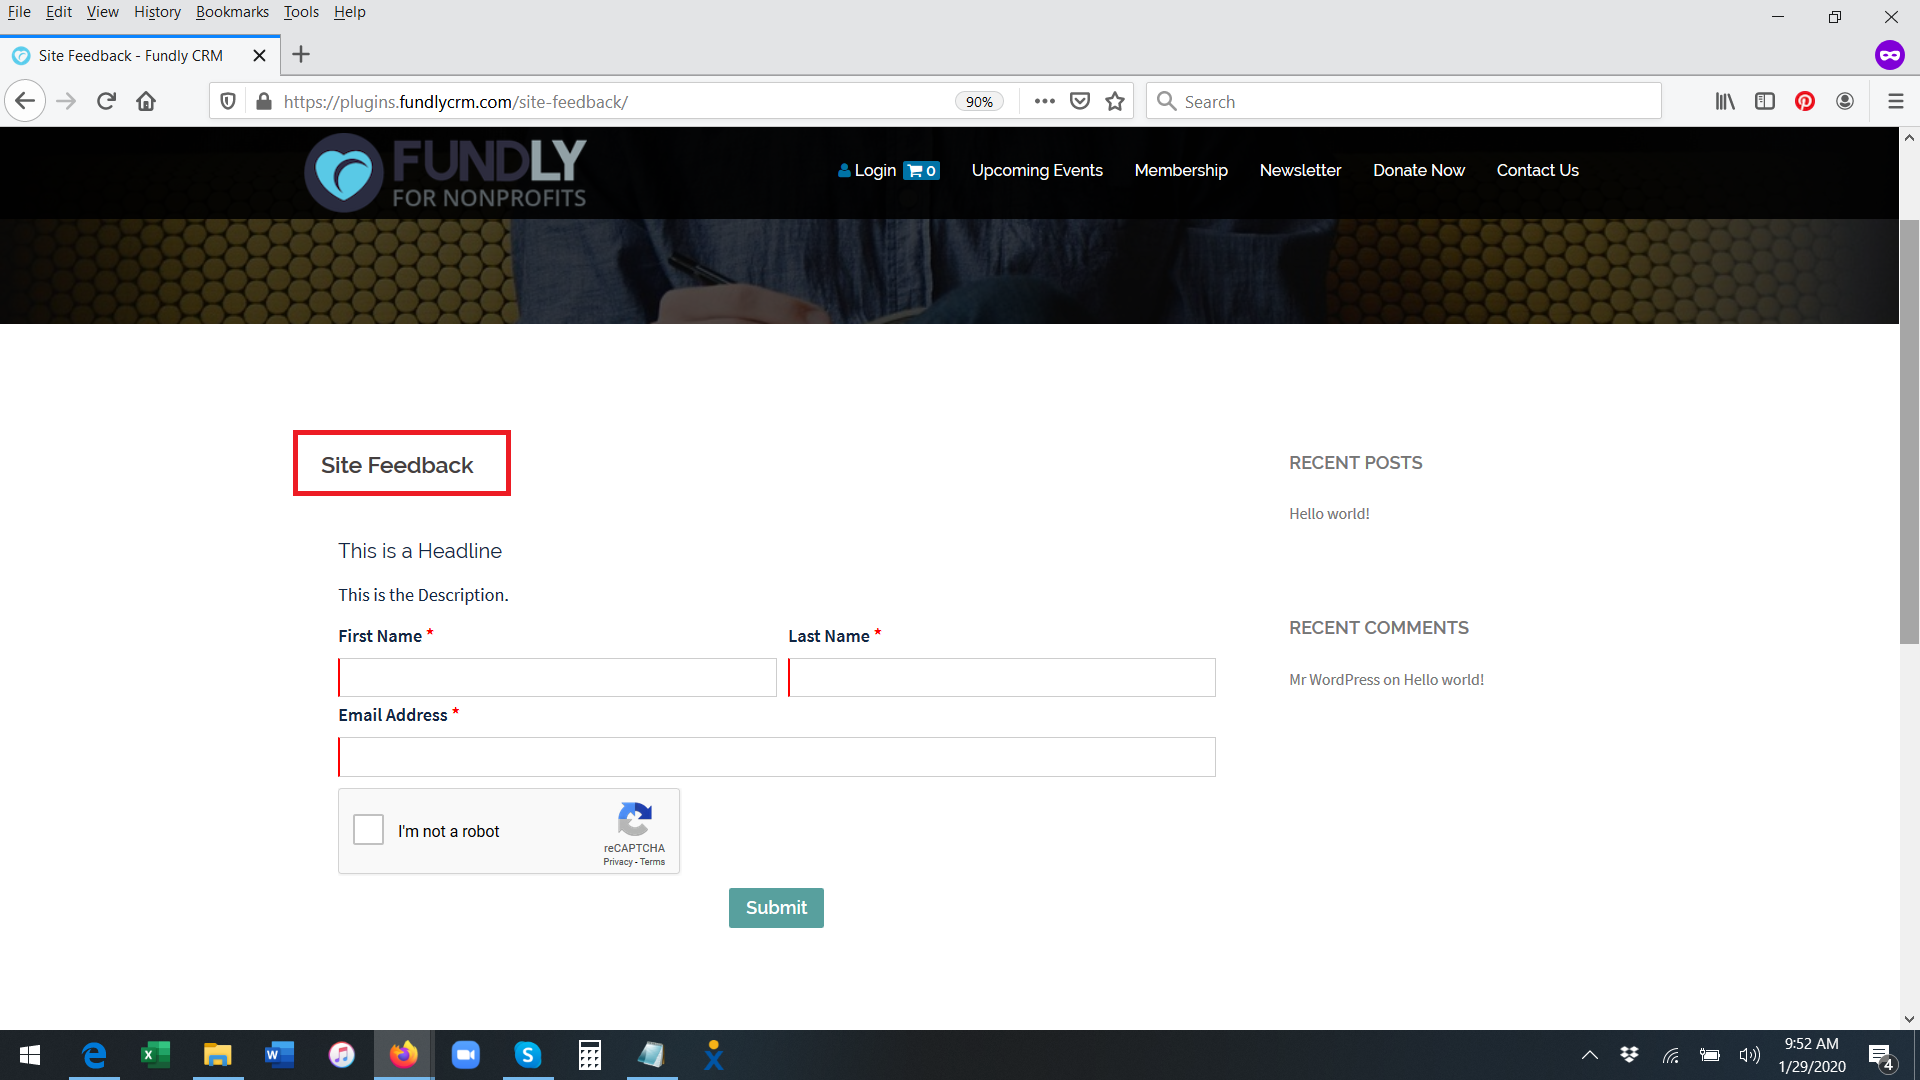
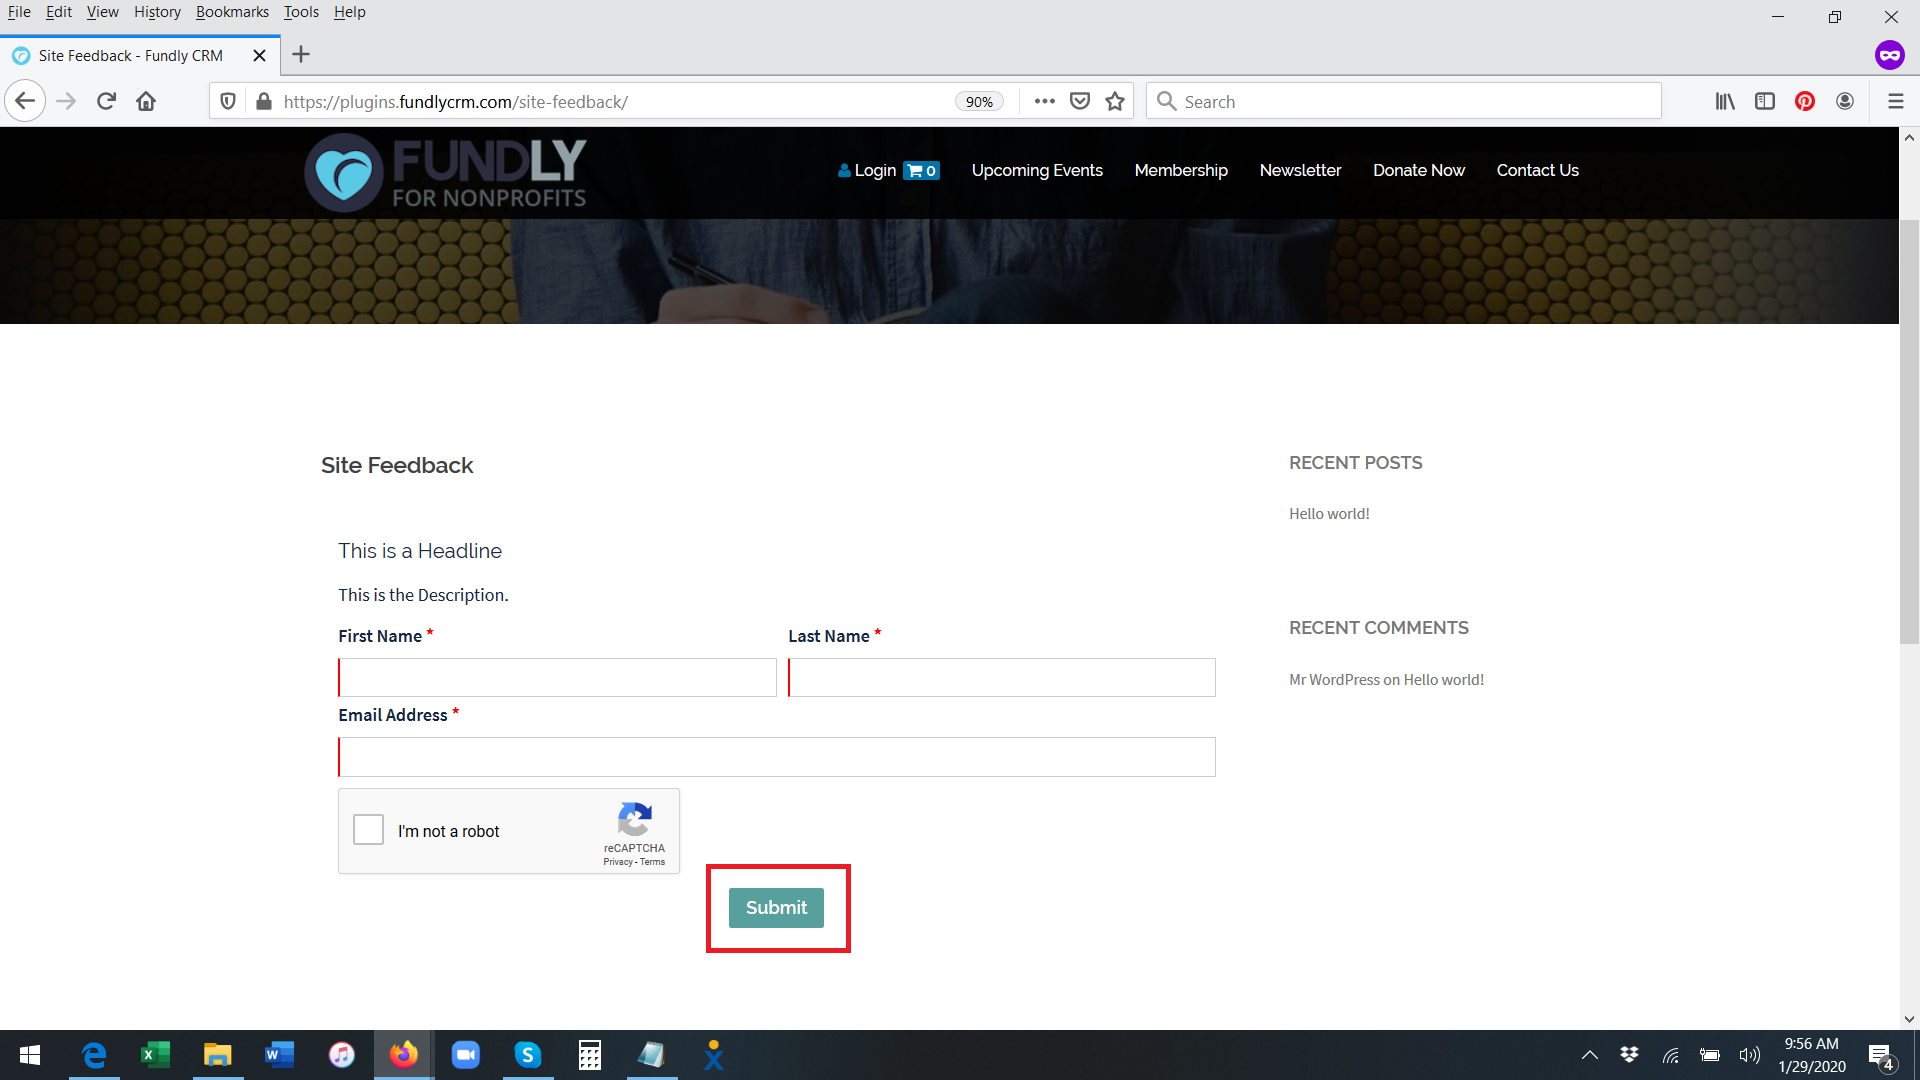
- Start by giving your form a name. This Contact Form Name will appear at the top of the form area on the public facing page.
- The Contact Source field is the Contact Source that will be shown on records created from your Contact Us form.
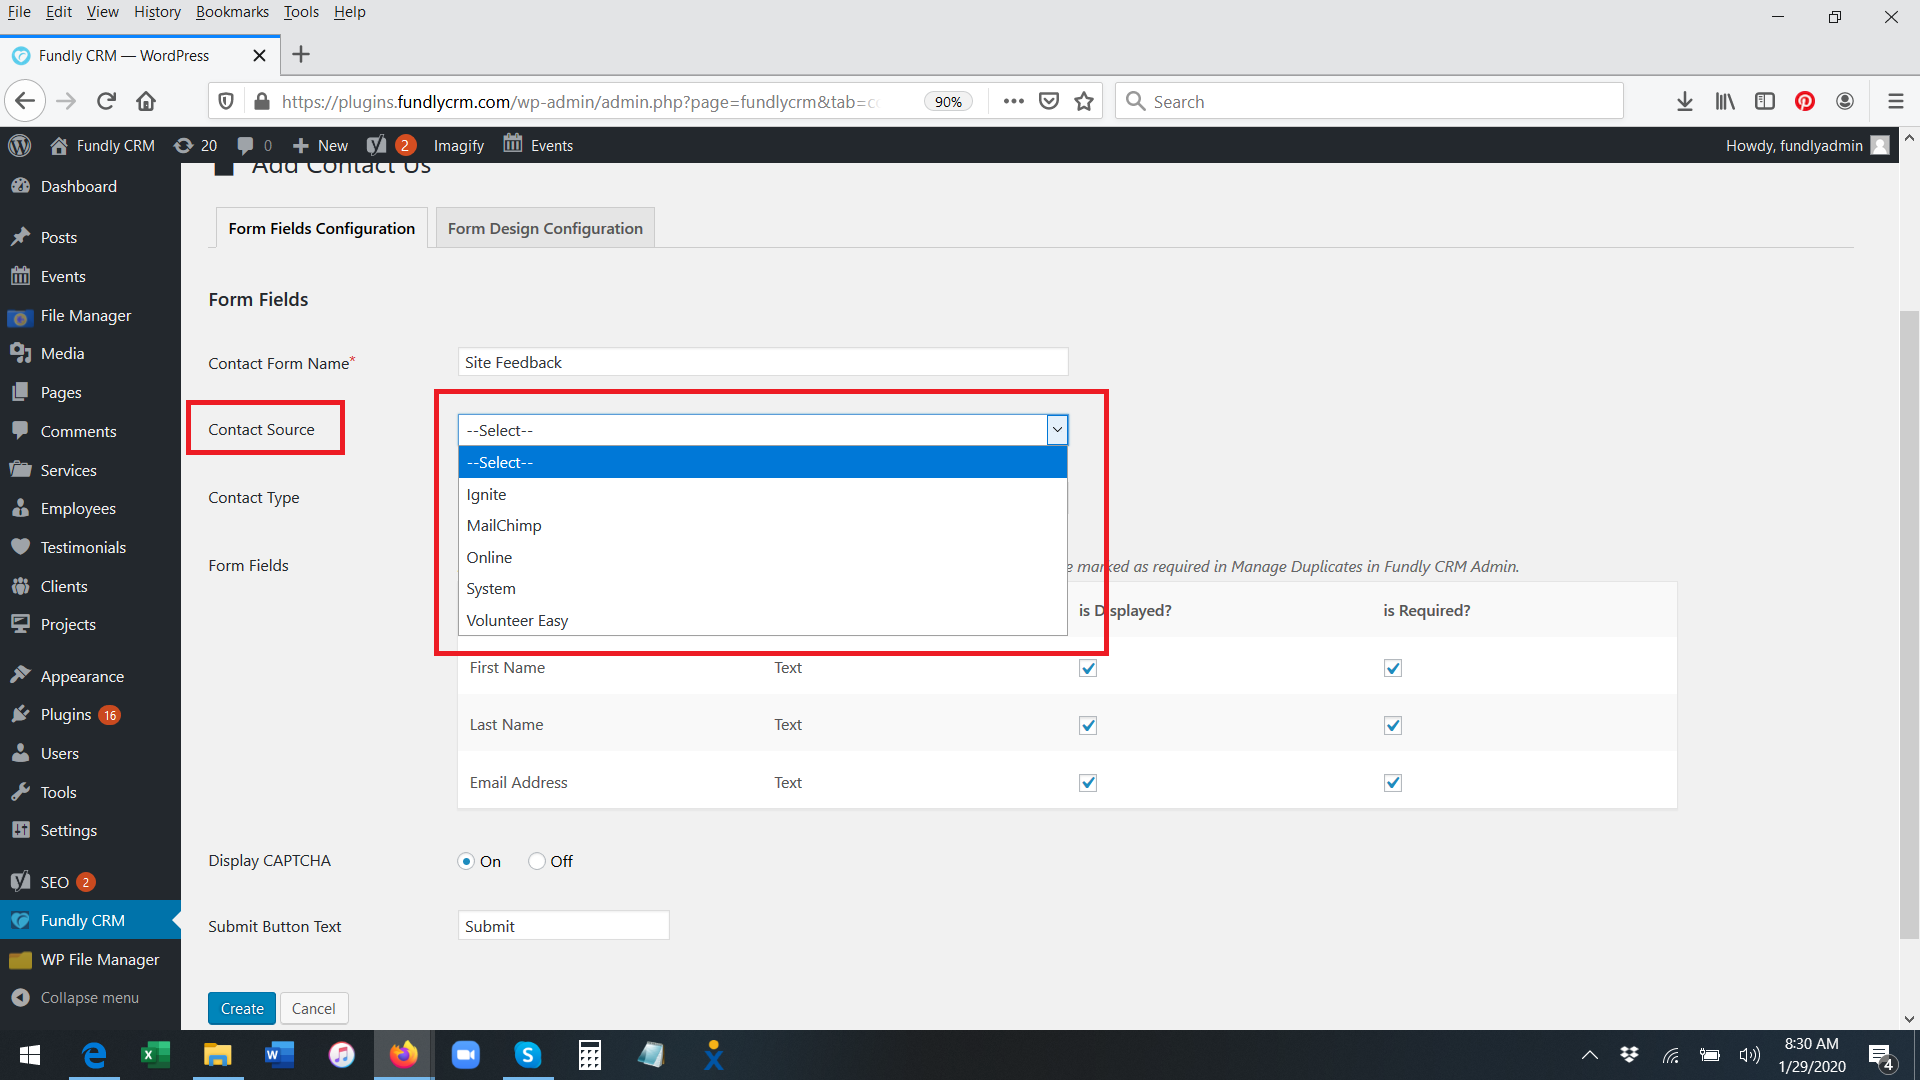
- Contact Type field allows you to add custom fields to your Contact Us form. Please Note: this is a required field. You MUST select a contact type for your form to work (at the very least, your custom data set needs to have a memo/message field for your online users/visitors to send you a message.
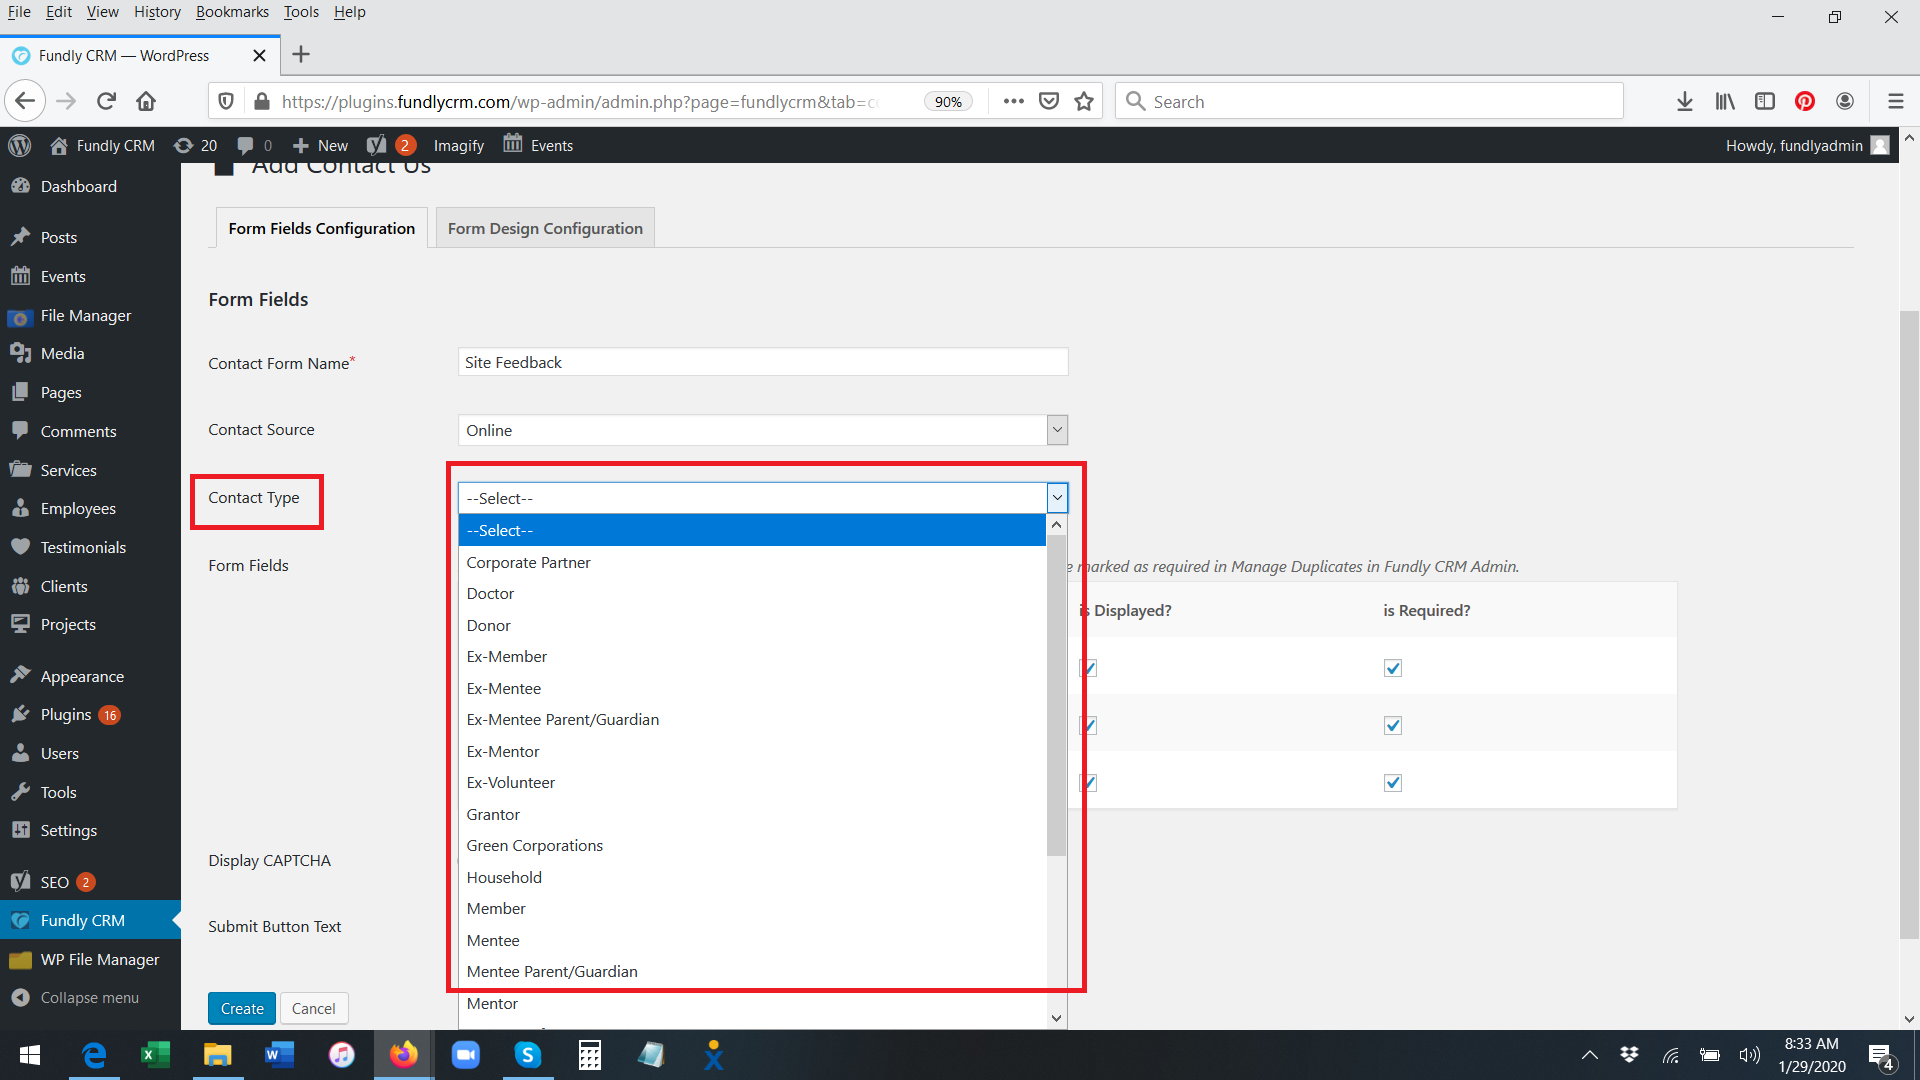
- To use this field, first you must create one or more custom data sets inside your CRM system (Main Menu: Custom Data Sets) with the fields you want to add to your form. Then, assign that custom data set a contact type. You can use an existing custom data set or create a new one, use an existing contact type or create a new one.
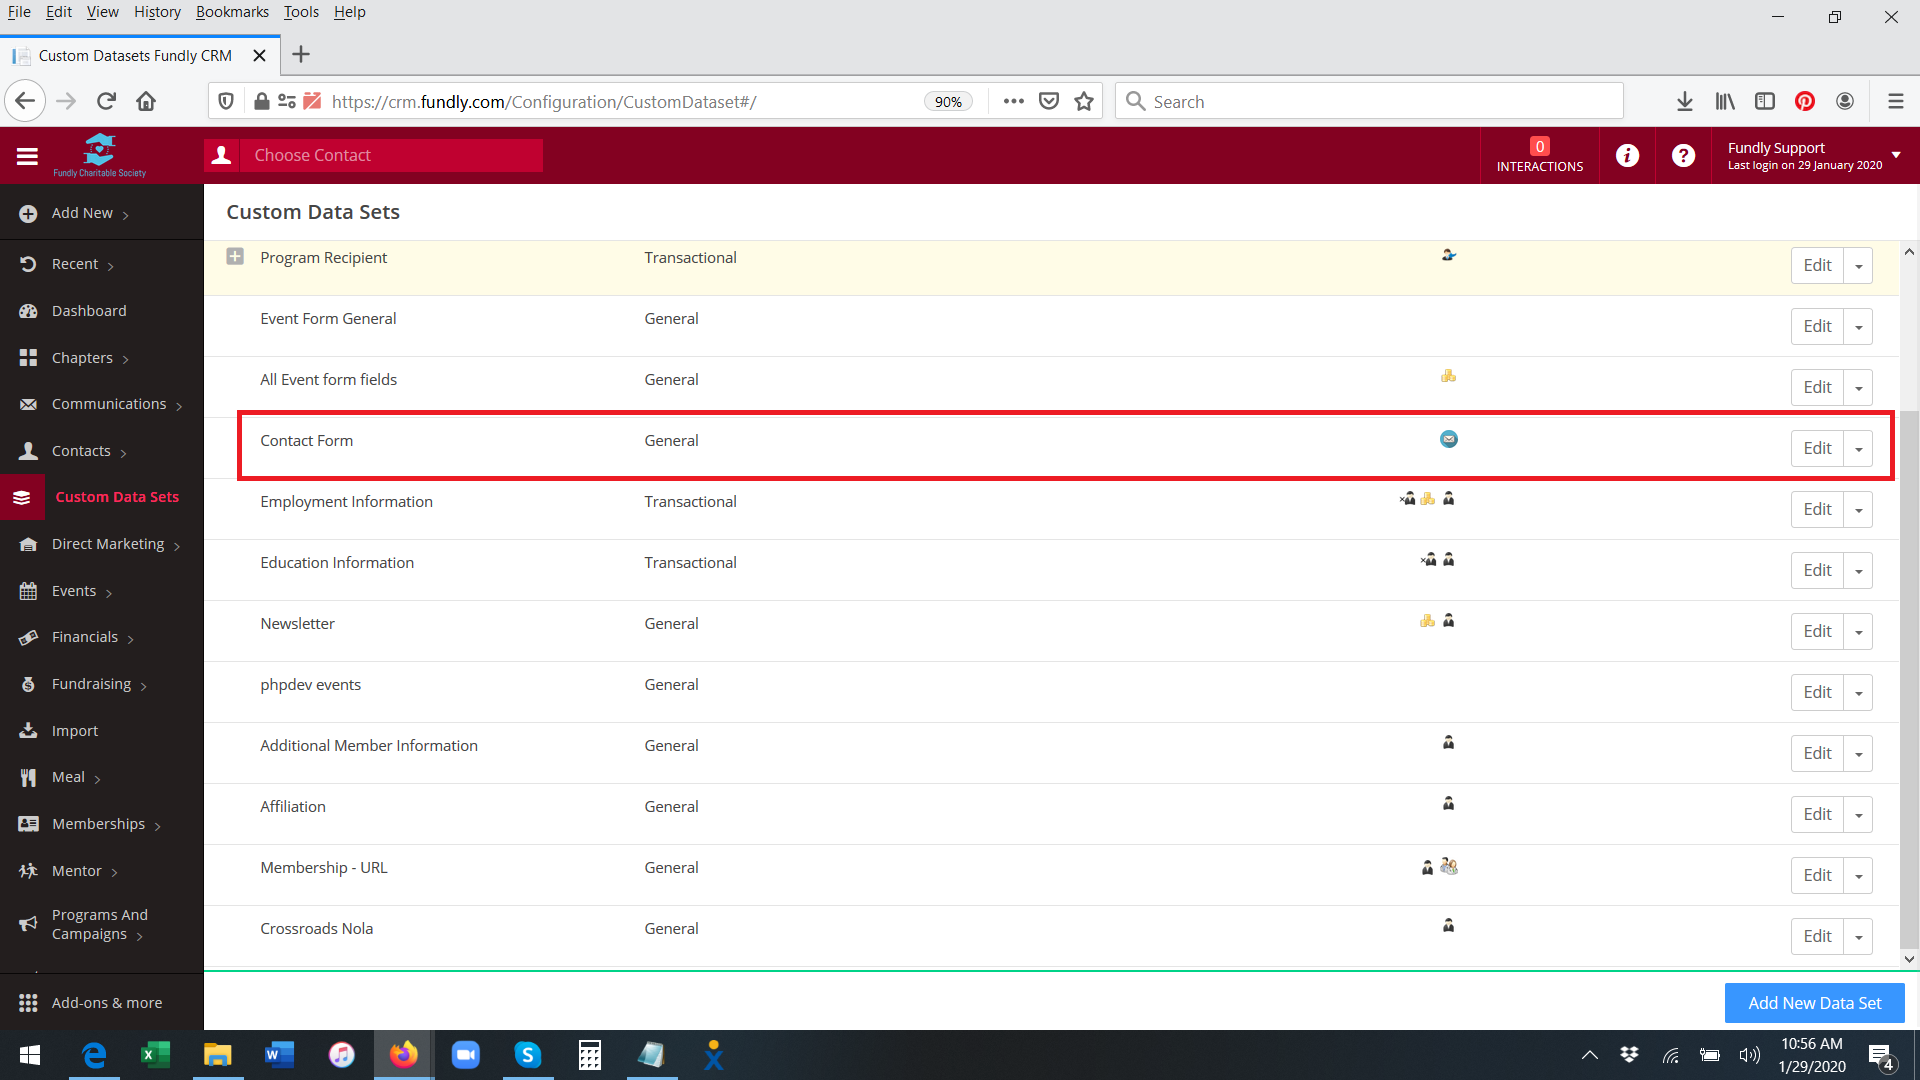
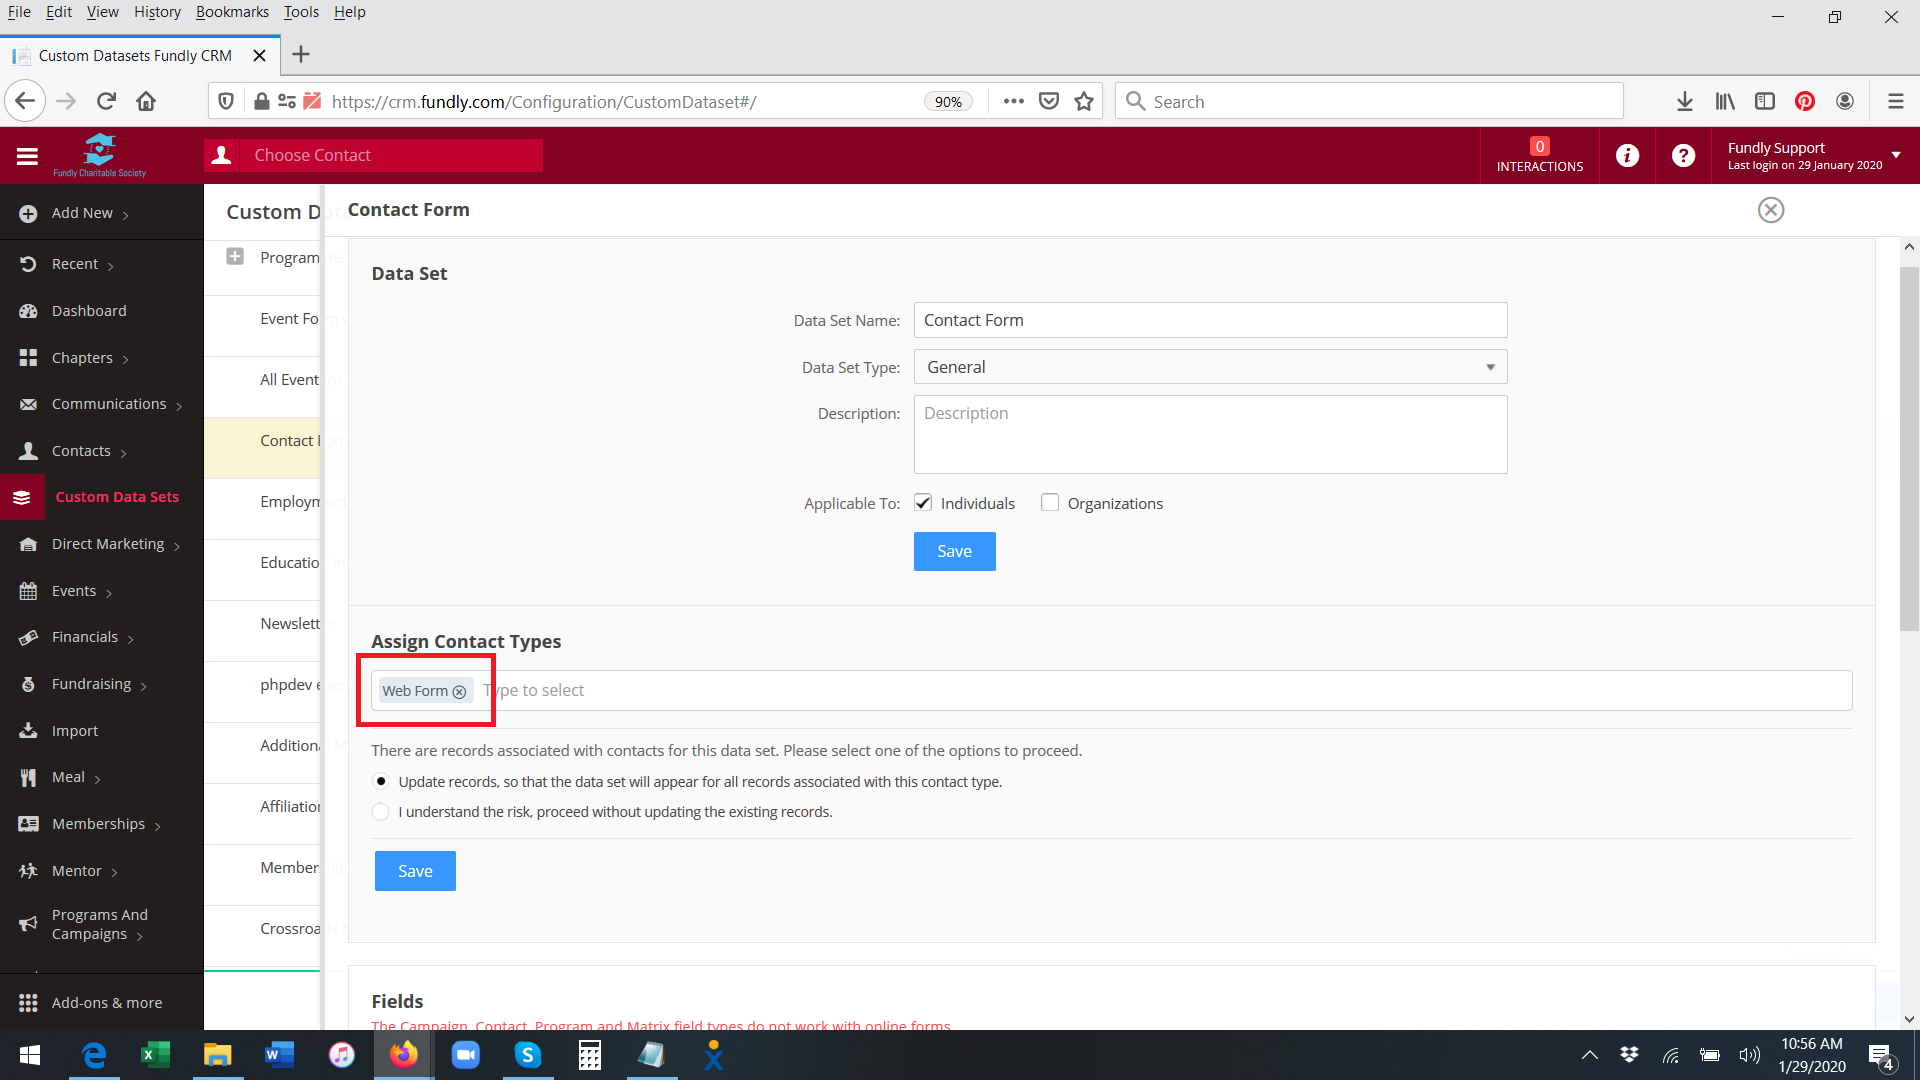
- Then, inside your WordPress Contact Us plug-in page/form configurations, in the Contact Type field, select the contact type assigned to the custom data set that has the field you want to add to the form from the drop down menu. Once you select the contact type tied to the CDS fields, the CDS fields will appear in the list of form fields.
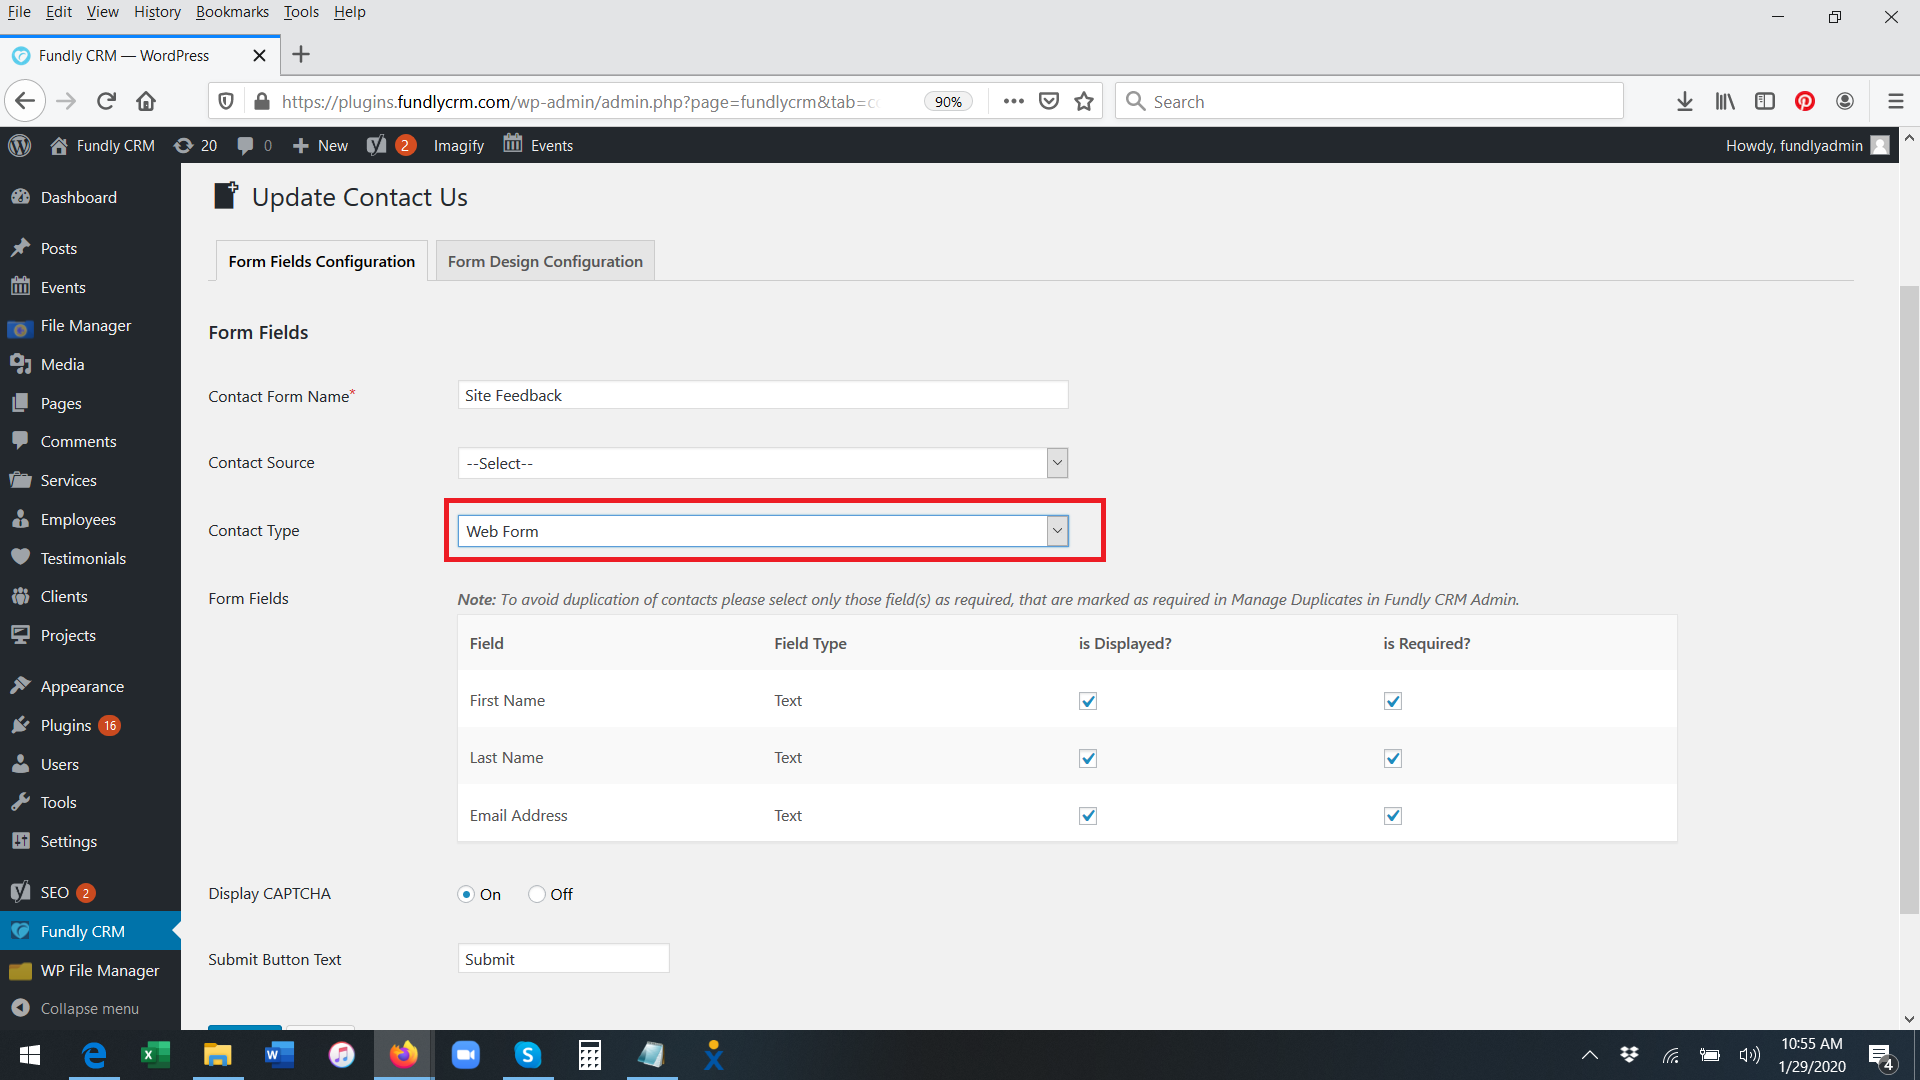

- Next, select which fields you wish to display on the form by checking the box in the Is Displayed column and, of those that are displayed, which are required by checking the box in the Is Required column. Please Note: if you are using email in duplicate prevention (CRM Main Menu: Contacts: Manage Duplicates: Prevent), then be sure to display and require the email address field on your contact us form, otherwise if anyone doesn't add their email it will create a duplicate in your system, even if that contact is already in your CRM database. Additionally, First Name and Last Name should also be required as those are mandatory parts of duplicate prevention.

- Choose whether or not to enable CAPTCHA - it is STRONGLY recommended that you enable this, otherwise spammers are likely to create hundreds or even thousands of junk records in your CRM account.

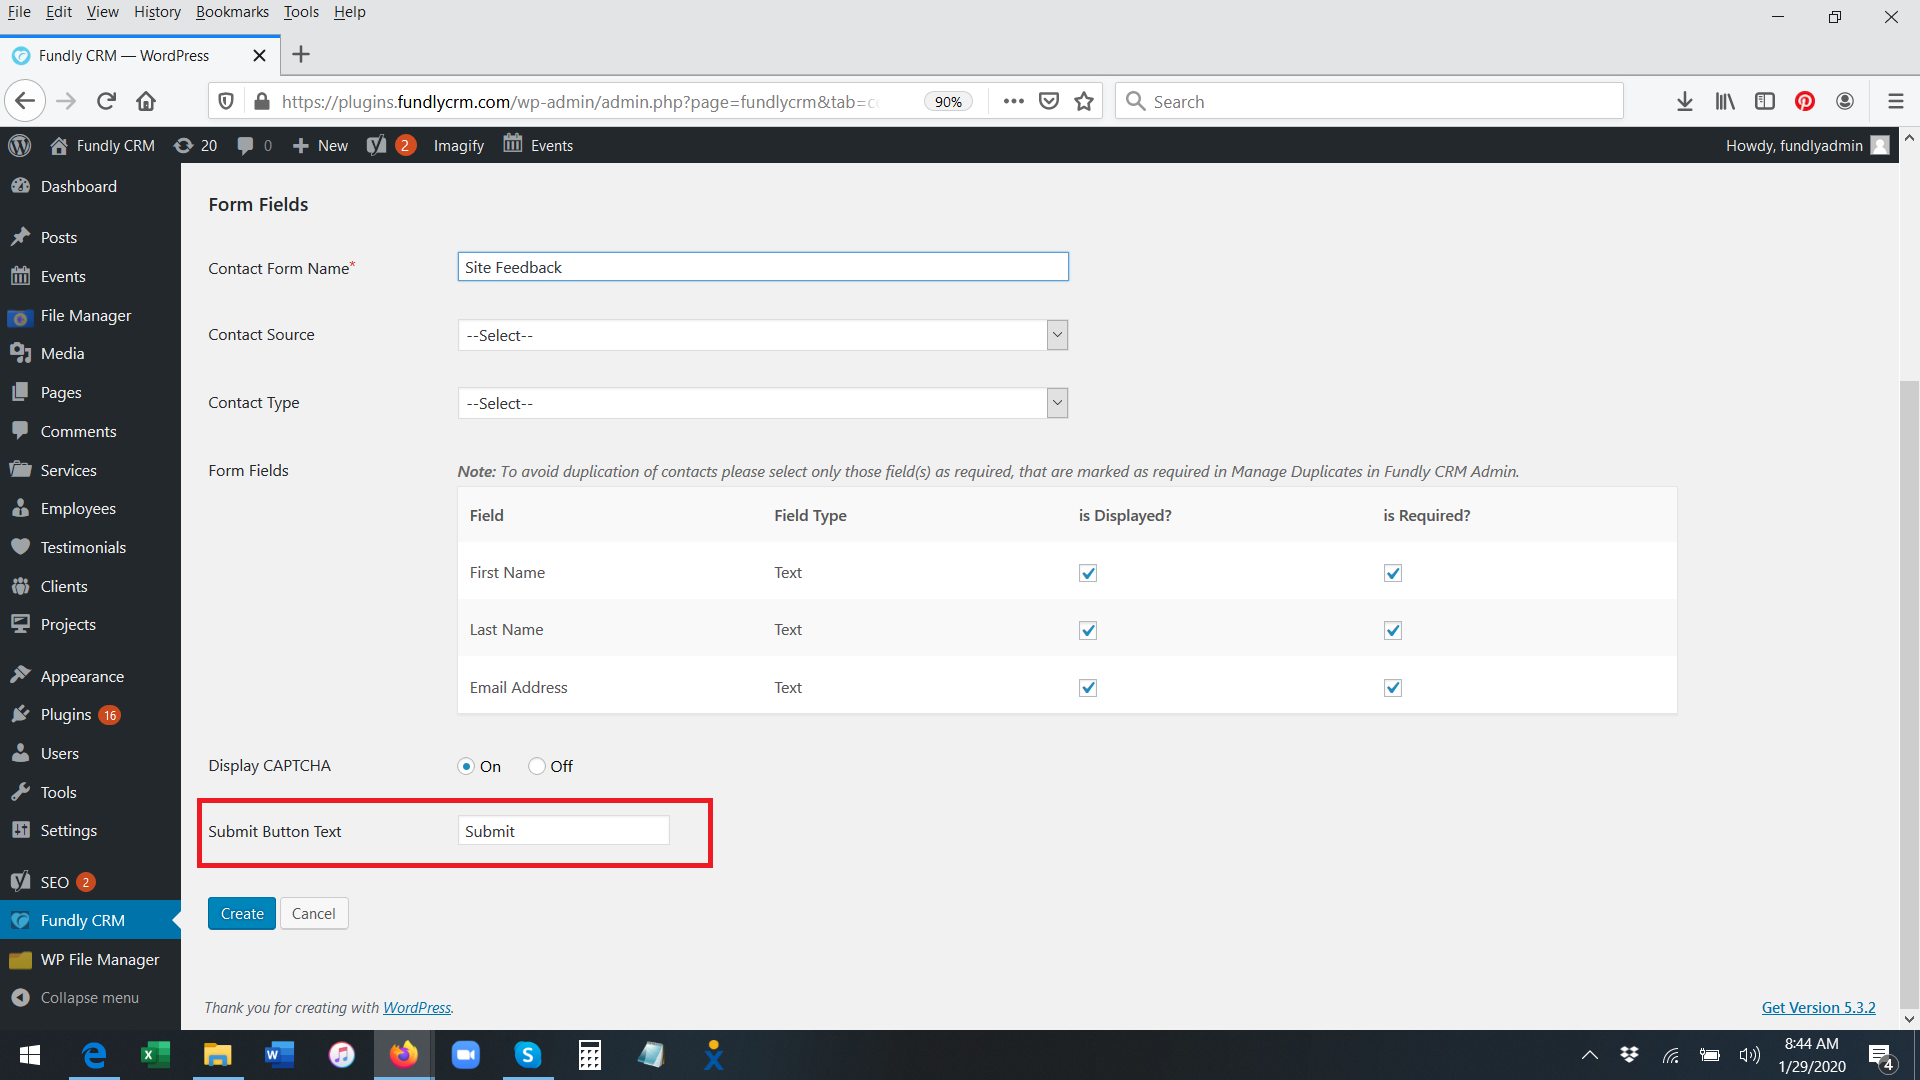
- Lastly, if desired, customize the text that will appear on the button the user clicks to submit their form/answers to you.
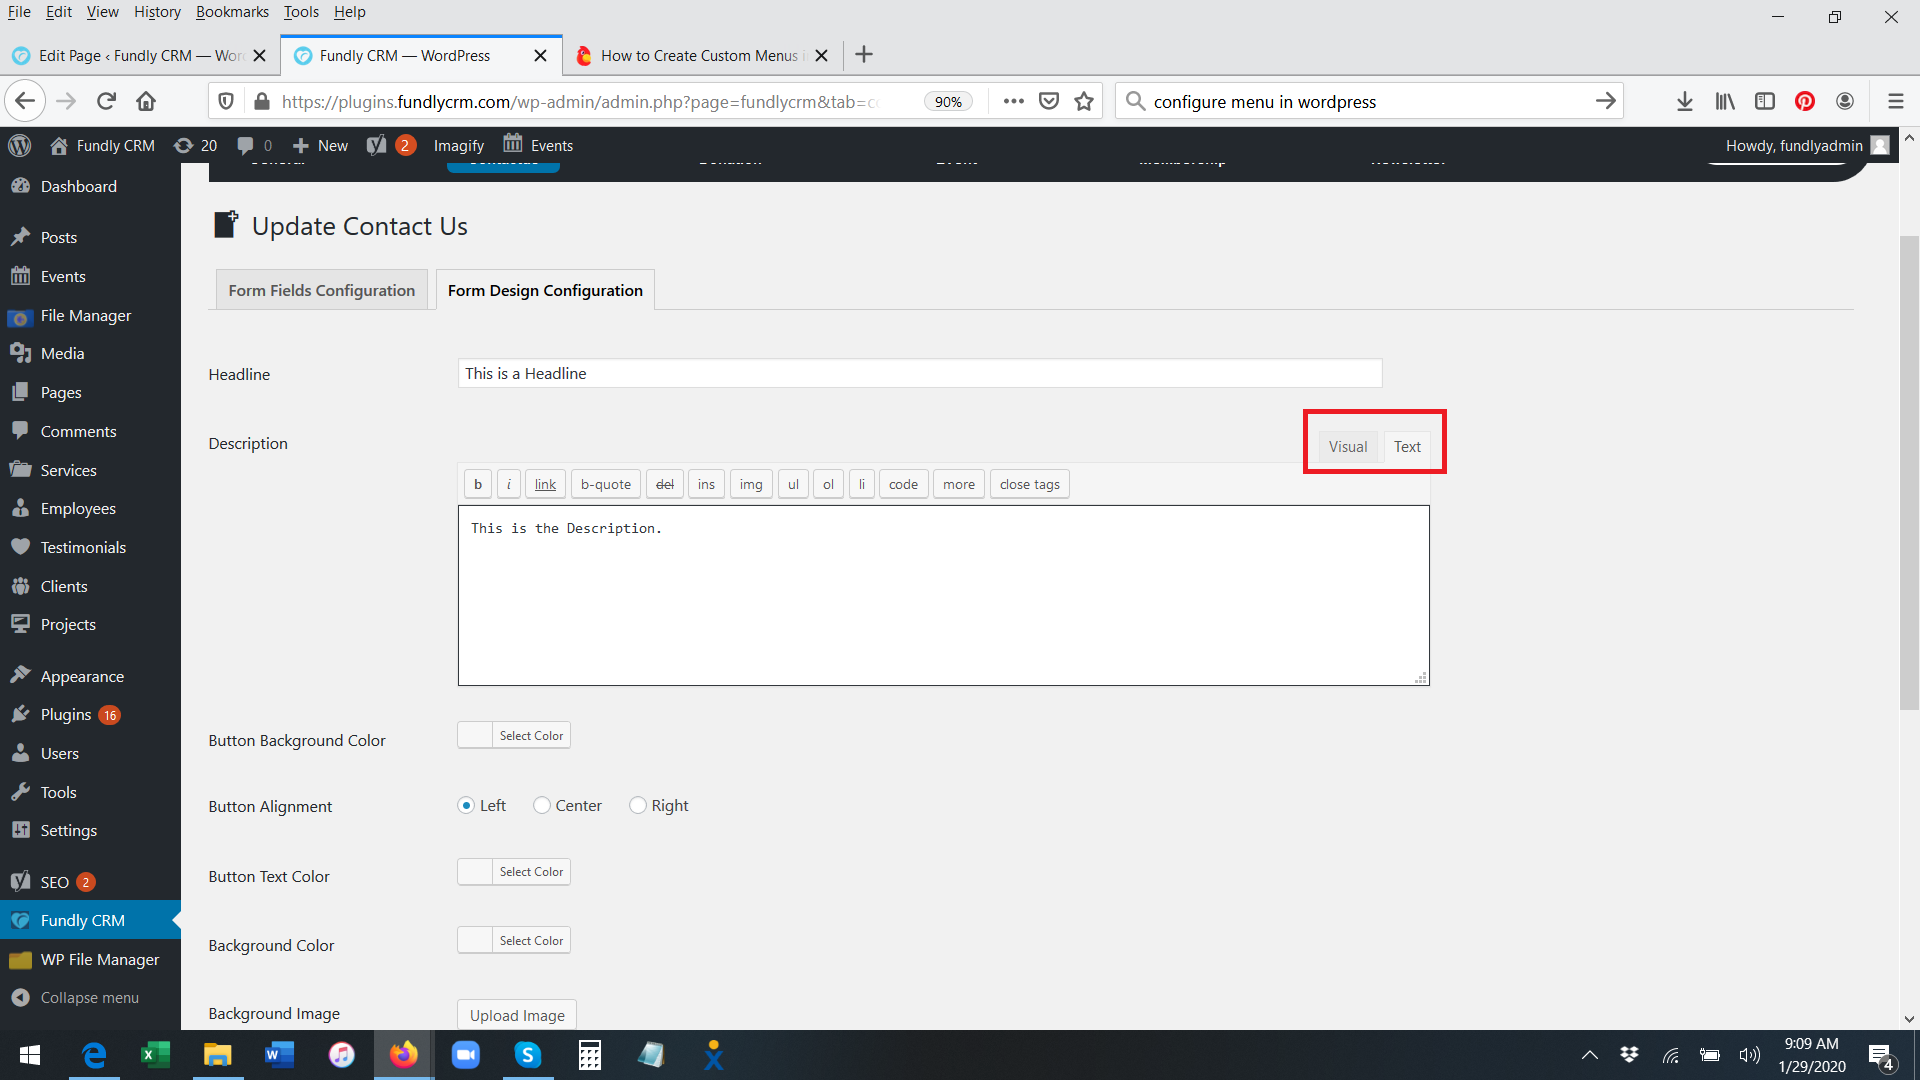
- On the Form Design Configuration tab, you can format the
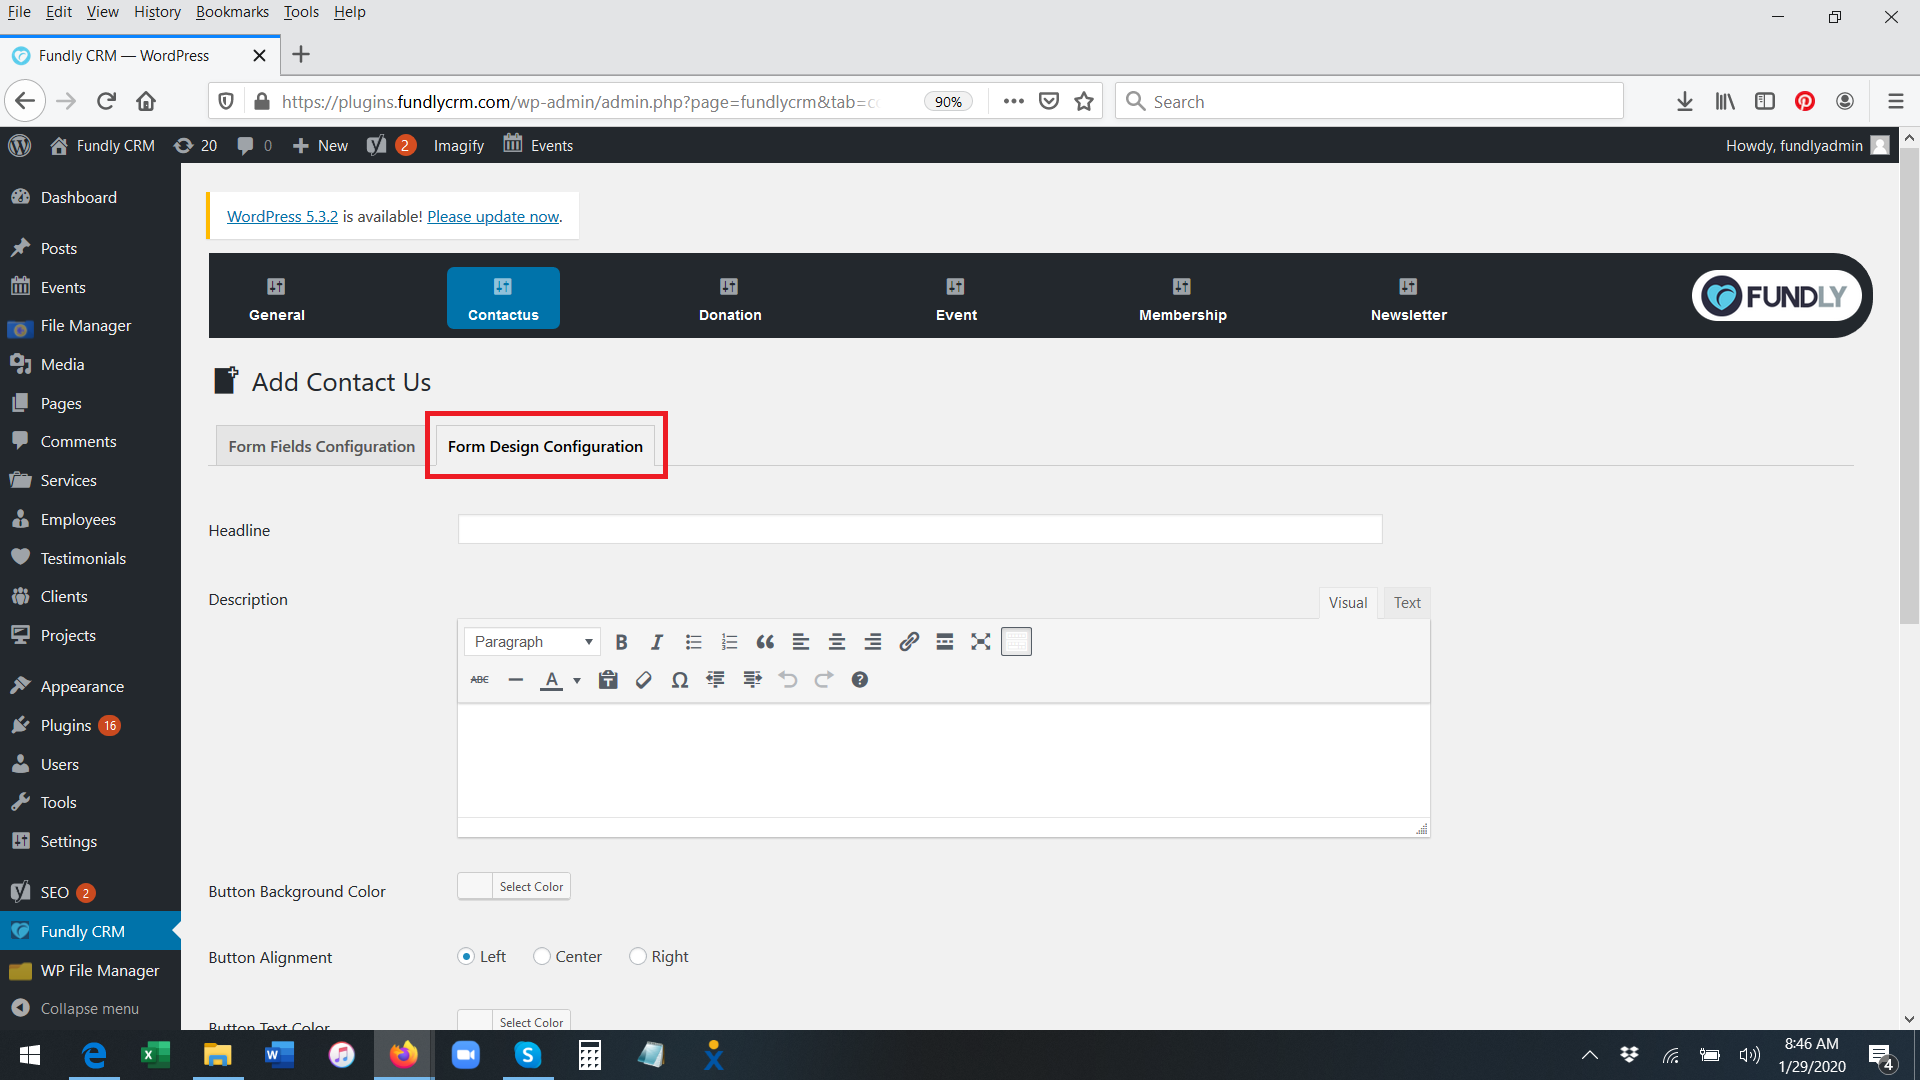
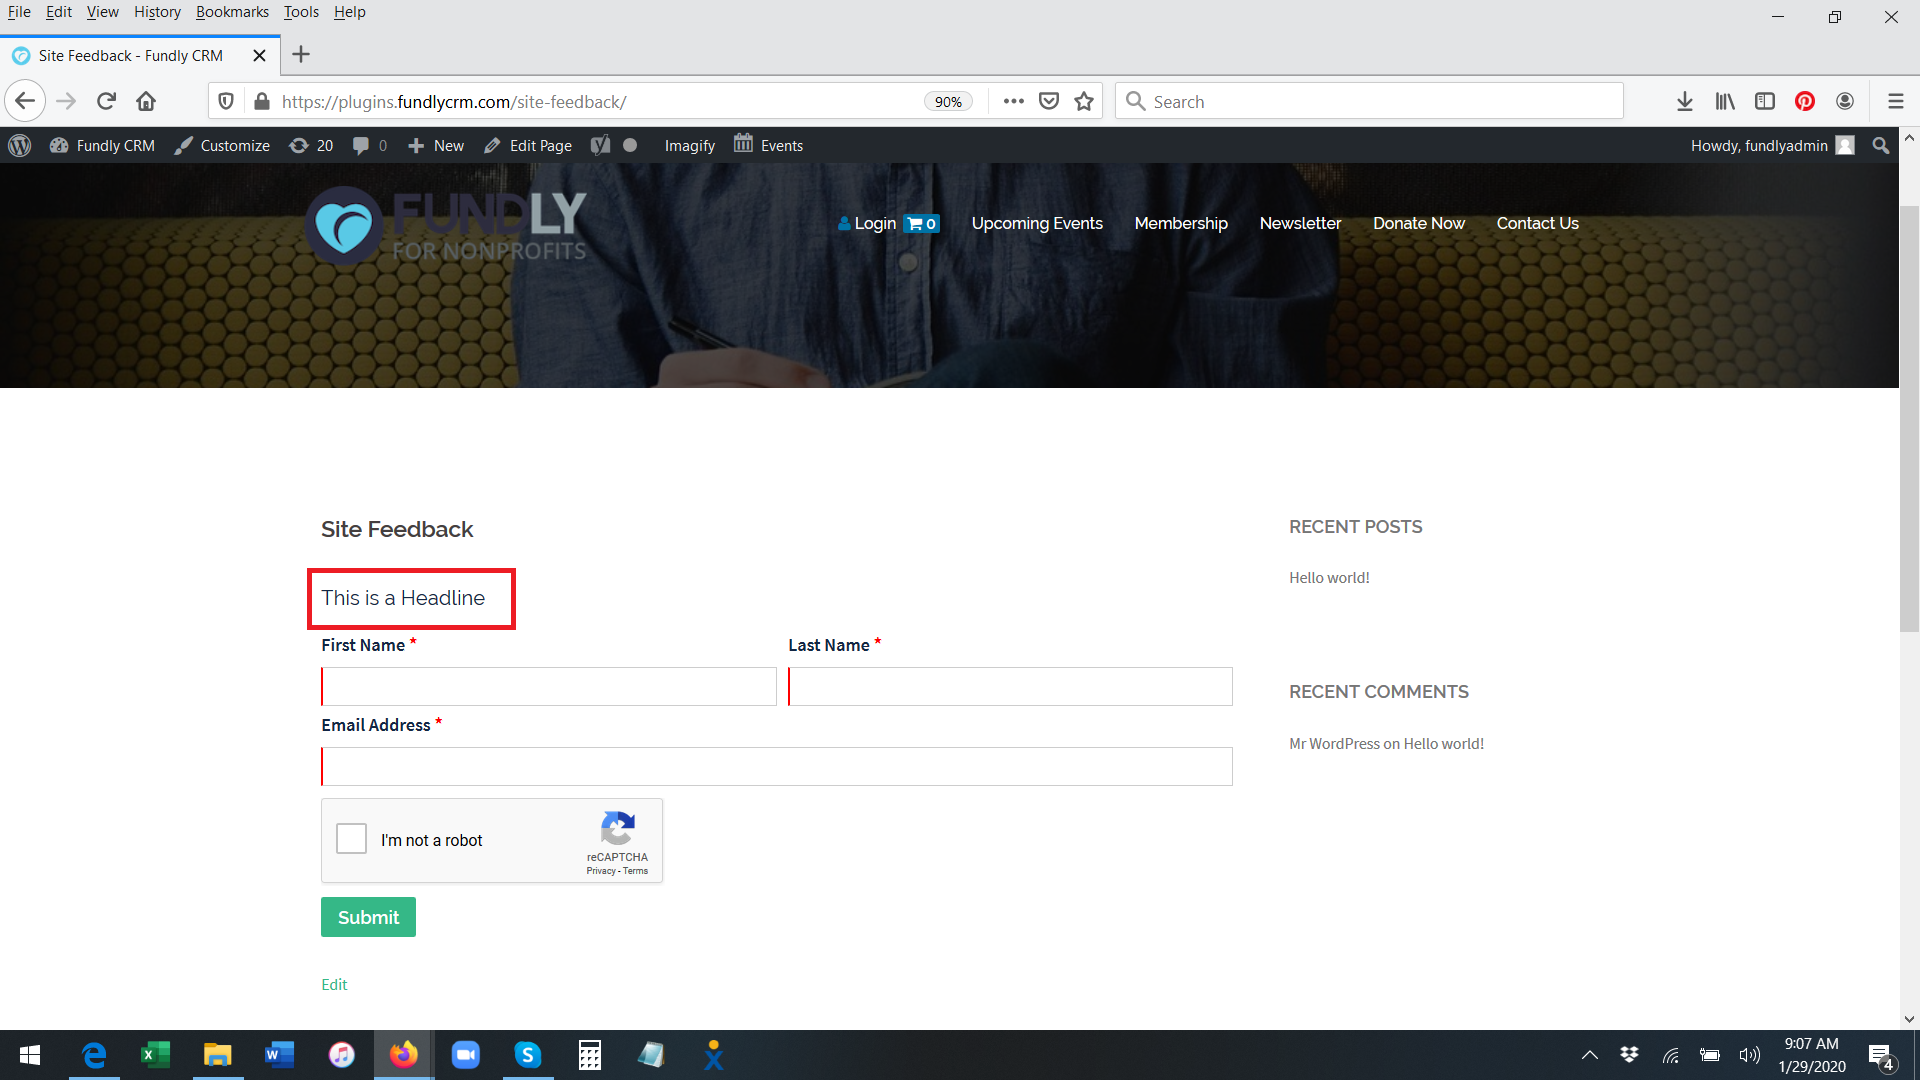
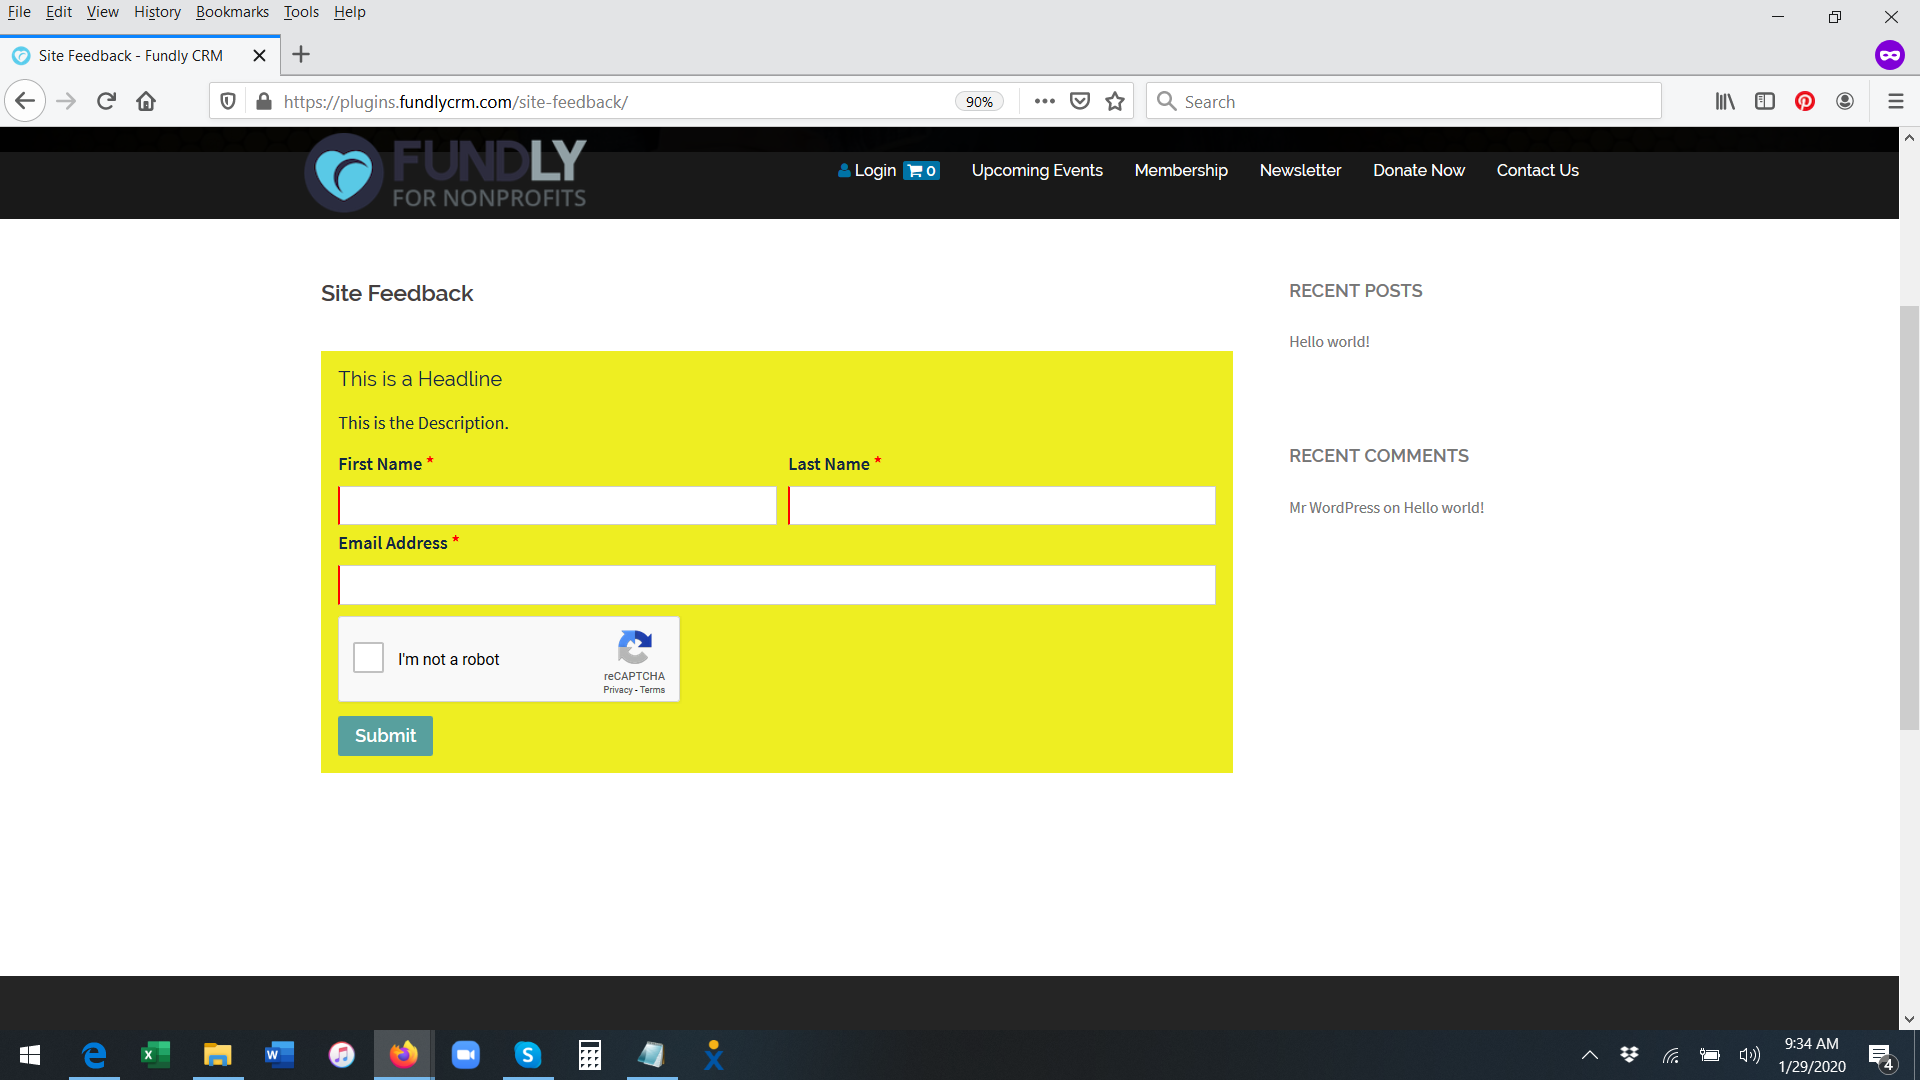
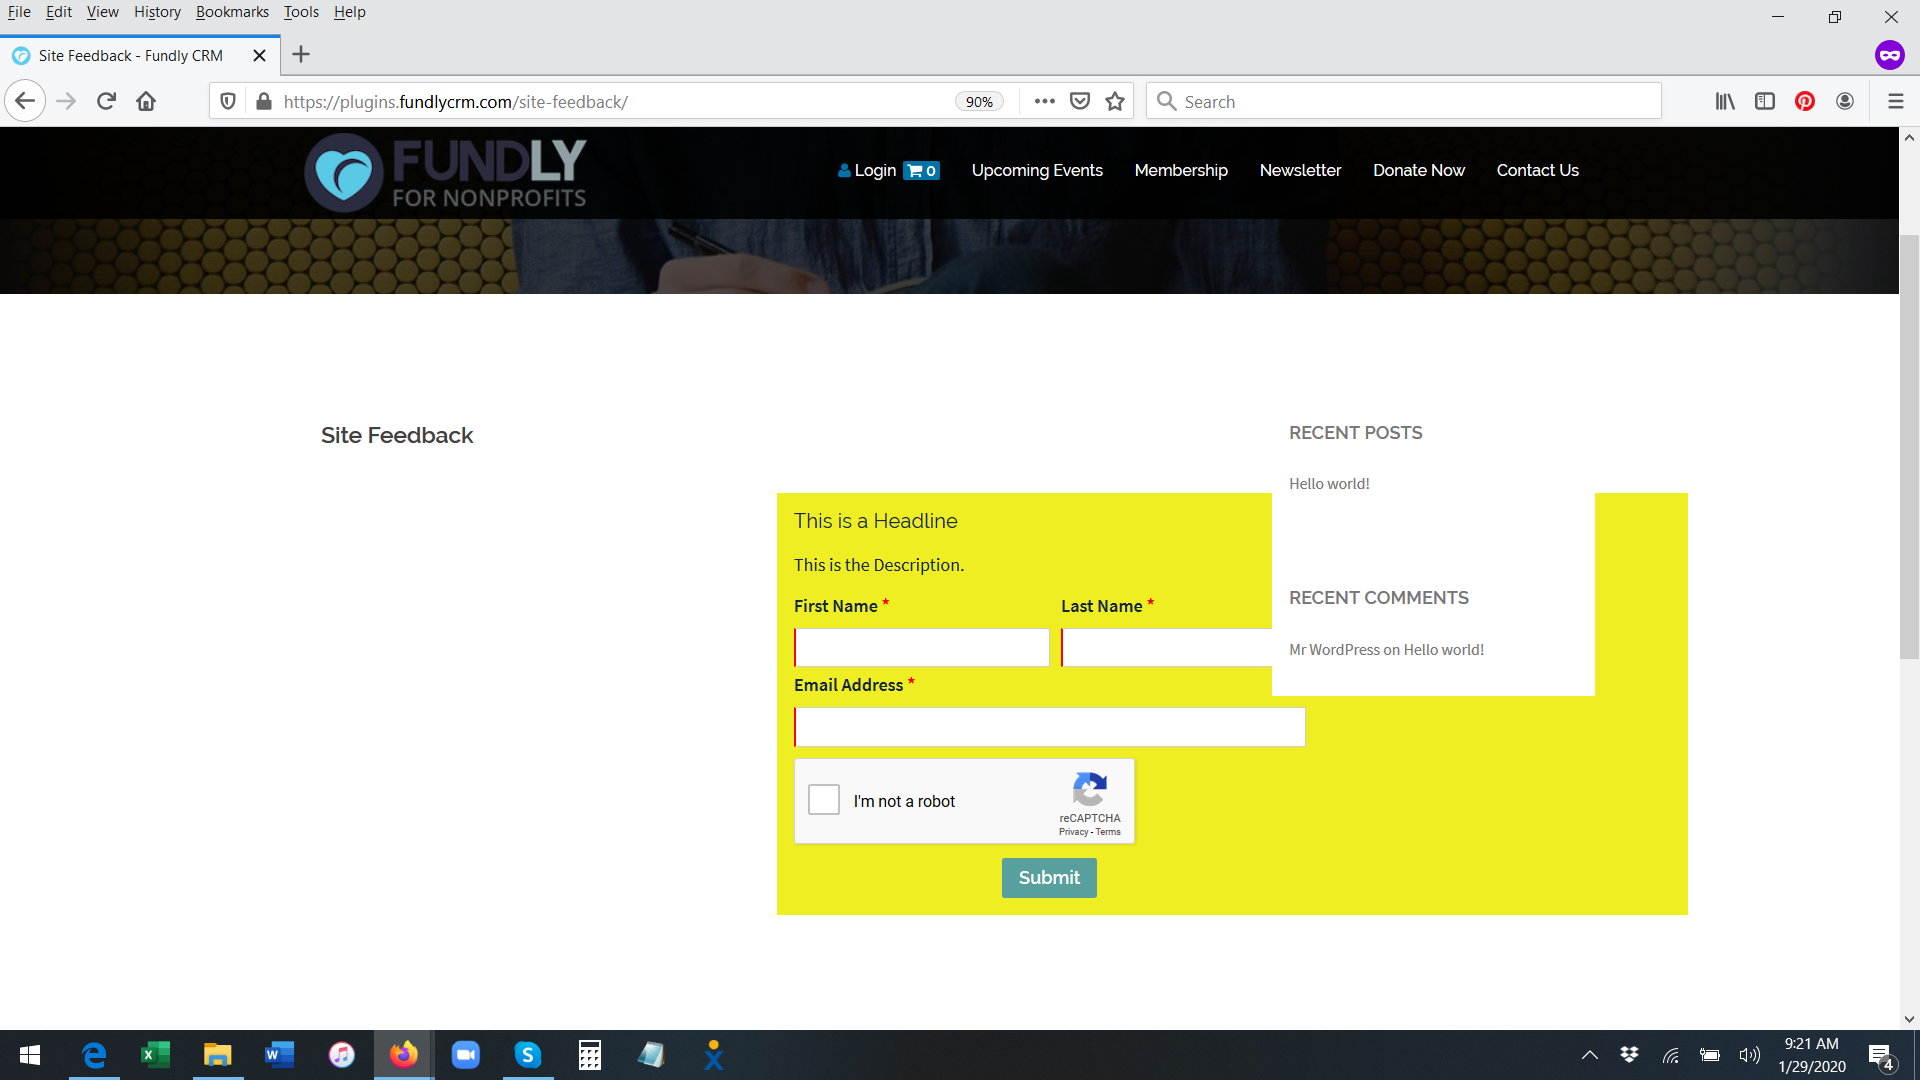
- The Headline field is the sub-header text that will appear below your Page's name and above your form on the public facing page.

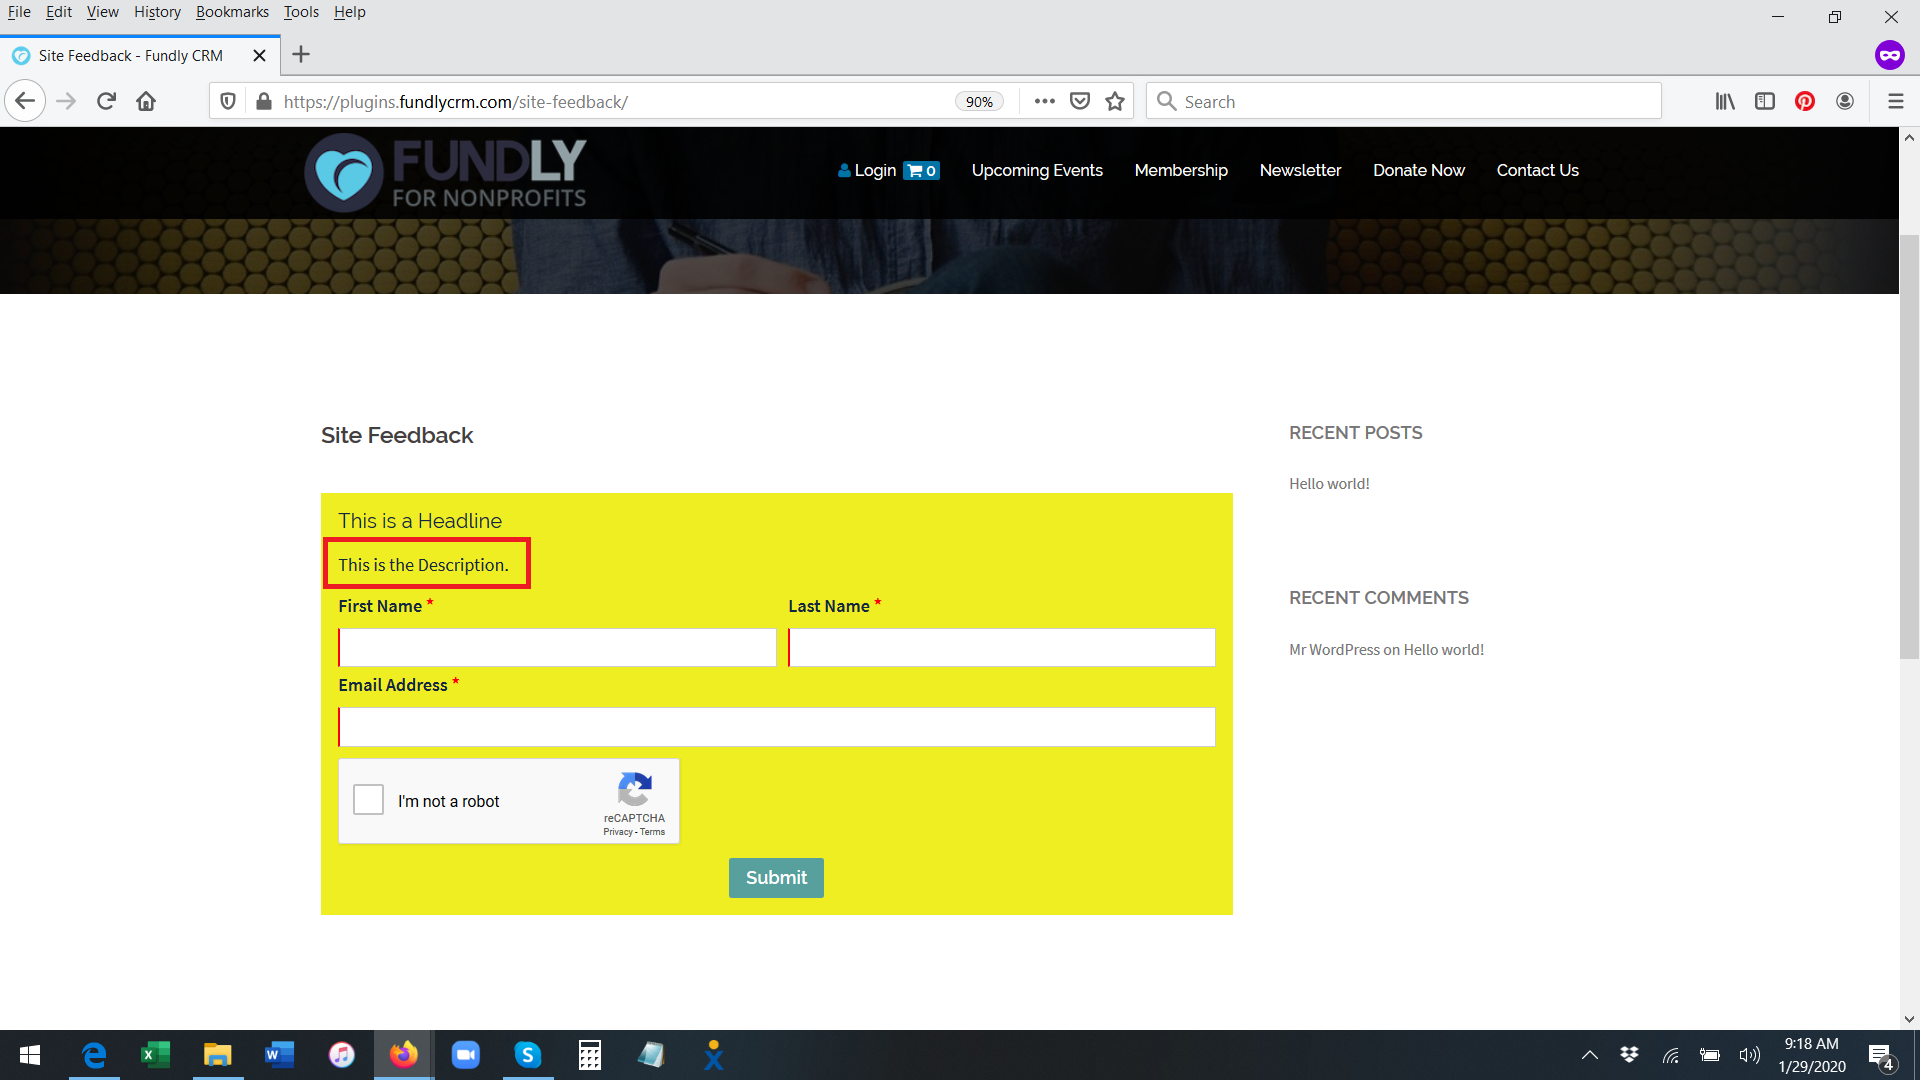
- The Description field is custom text/message that appears below the Headline and above the form fields. Use this space to provide any context or instructions to those viewing your form's page.
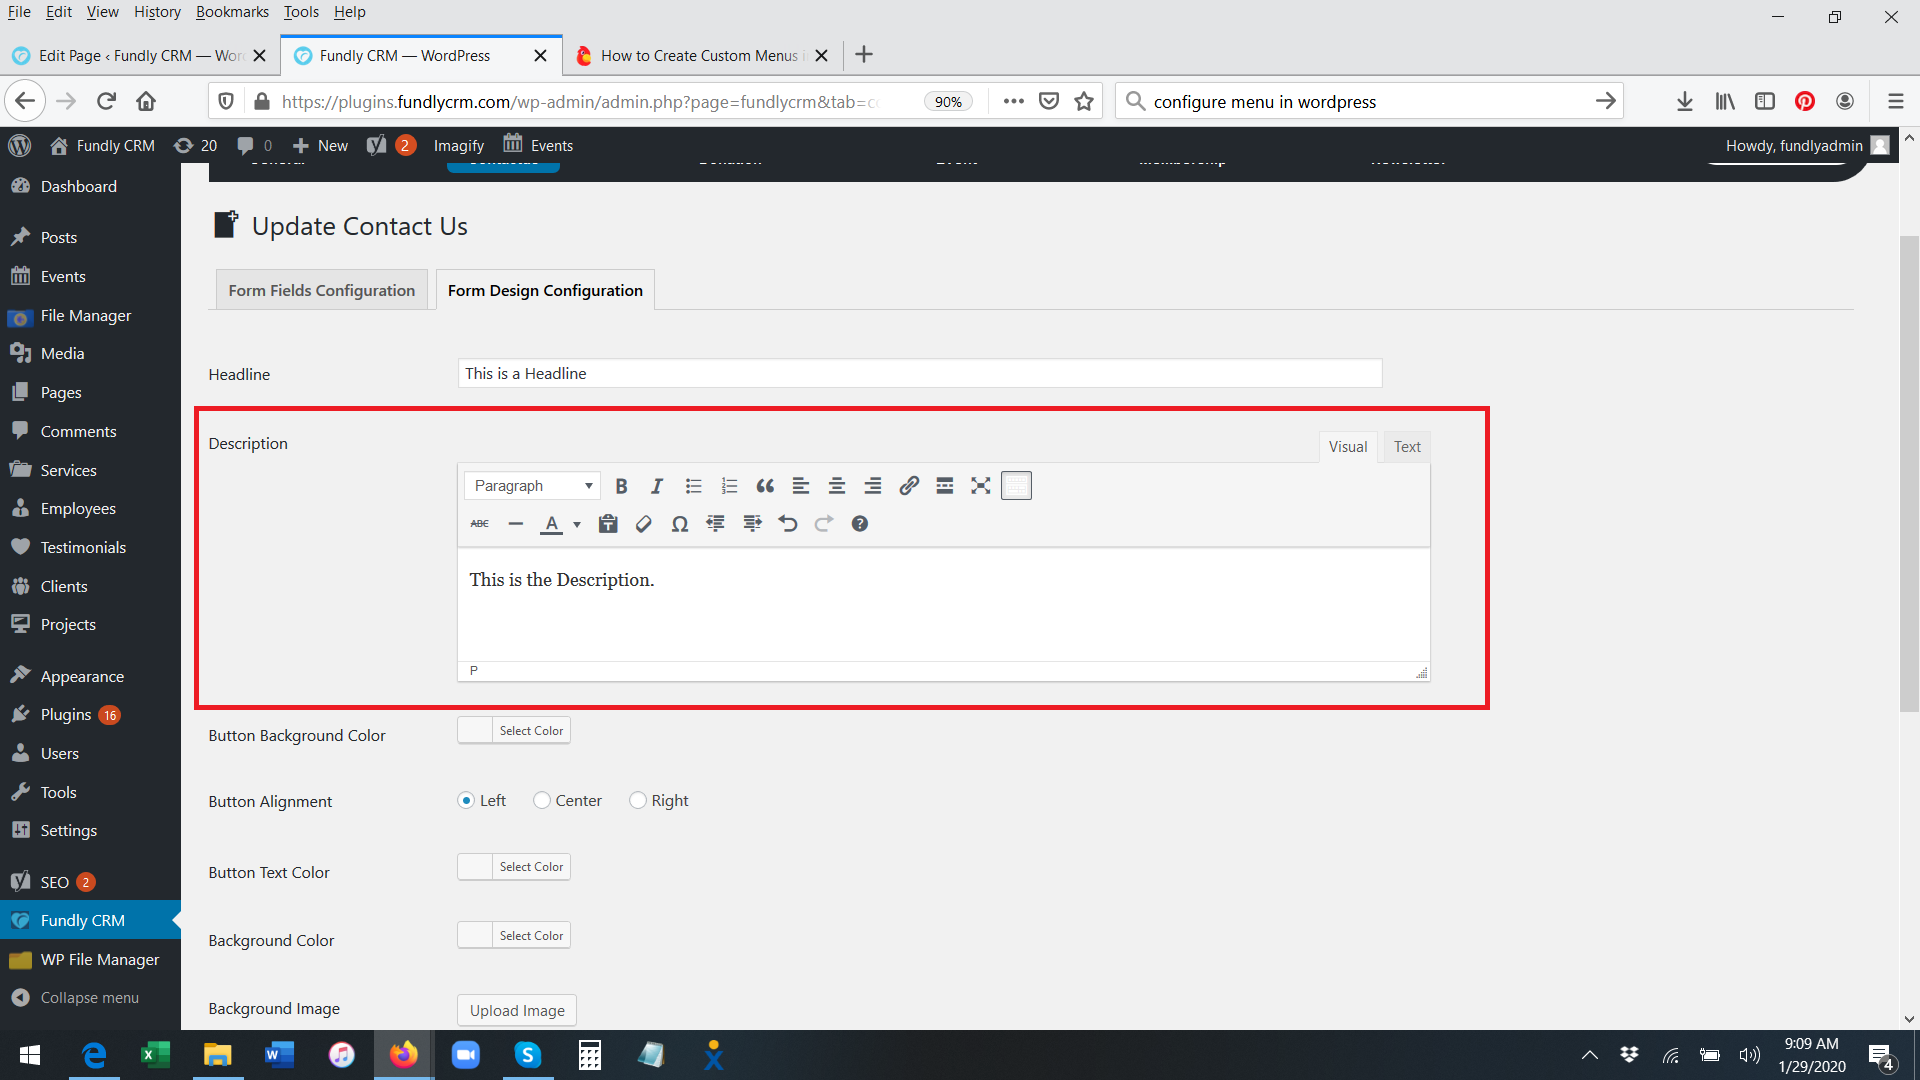
- You can toggle between the Visual and Text (HTML) editors/mode by clicking the tabs on the upper right of the Description box.
- The Button Background Color field lets you pick the color of the Submit button. Here, we have made ours teal.
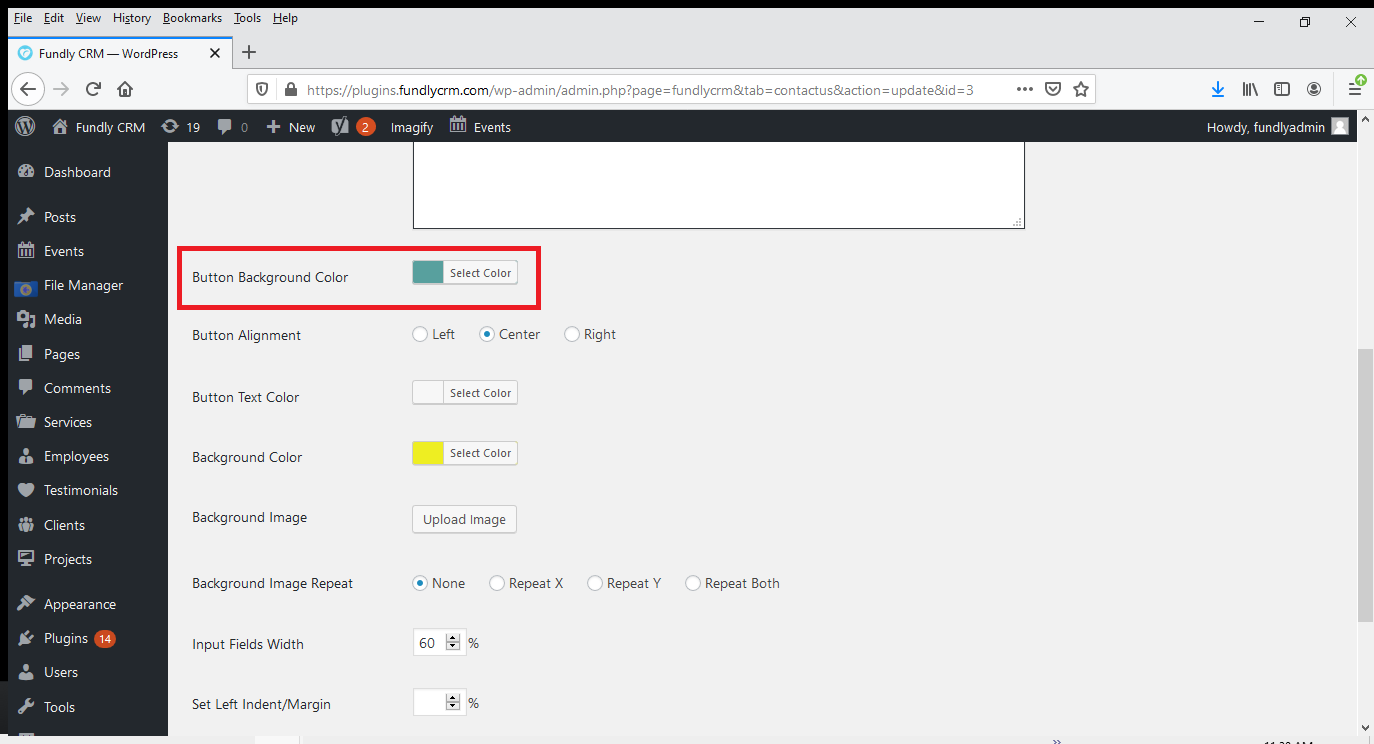
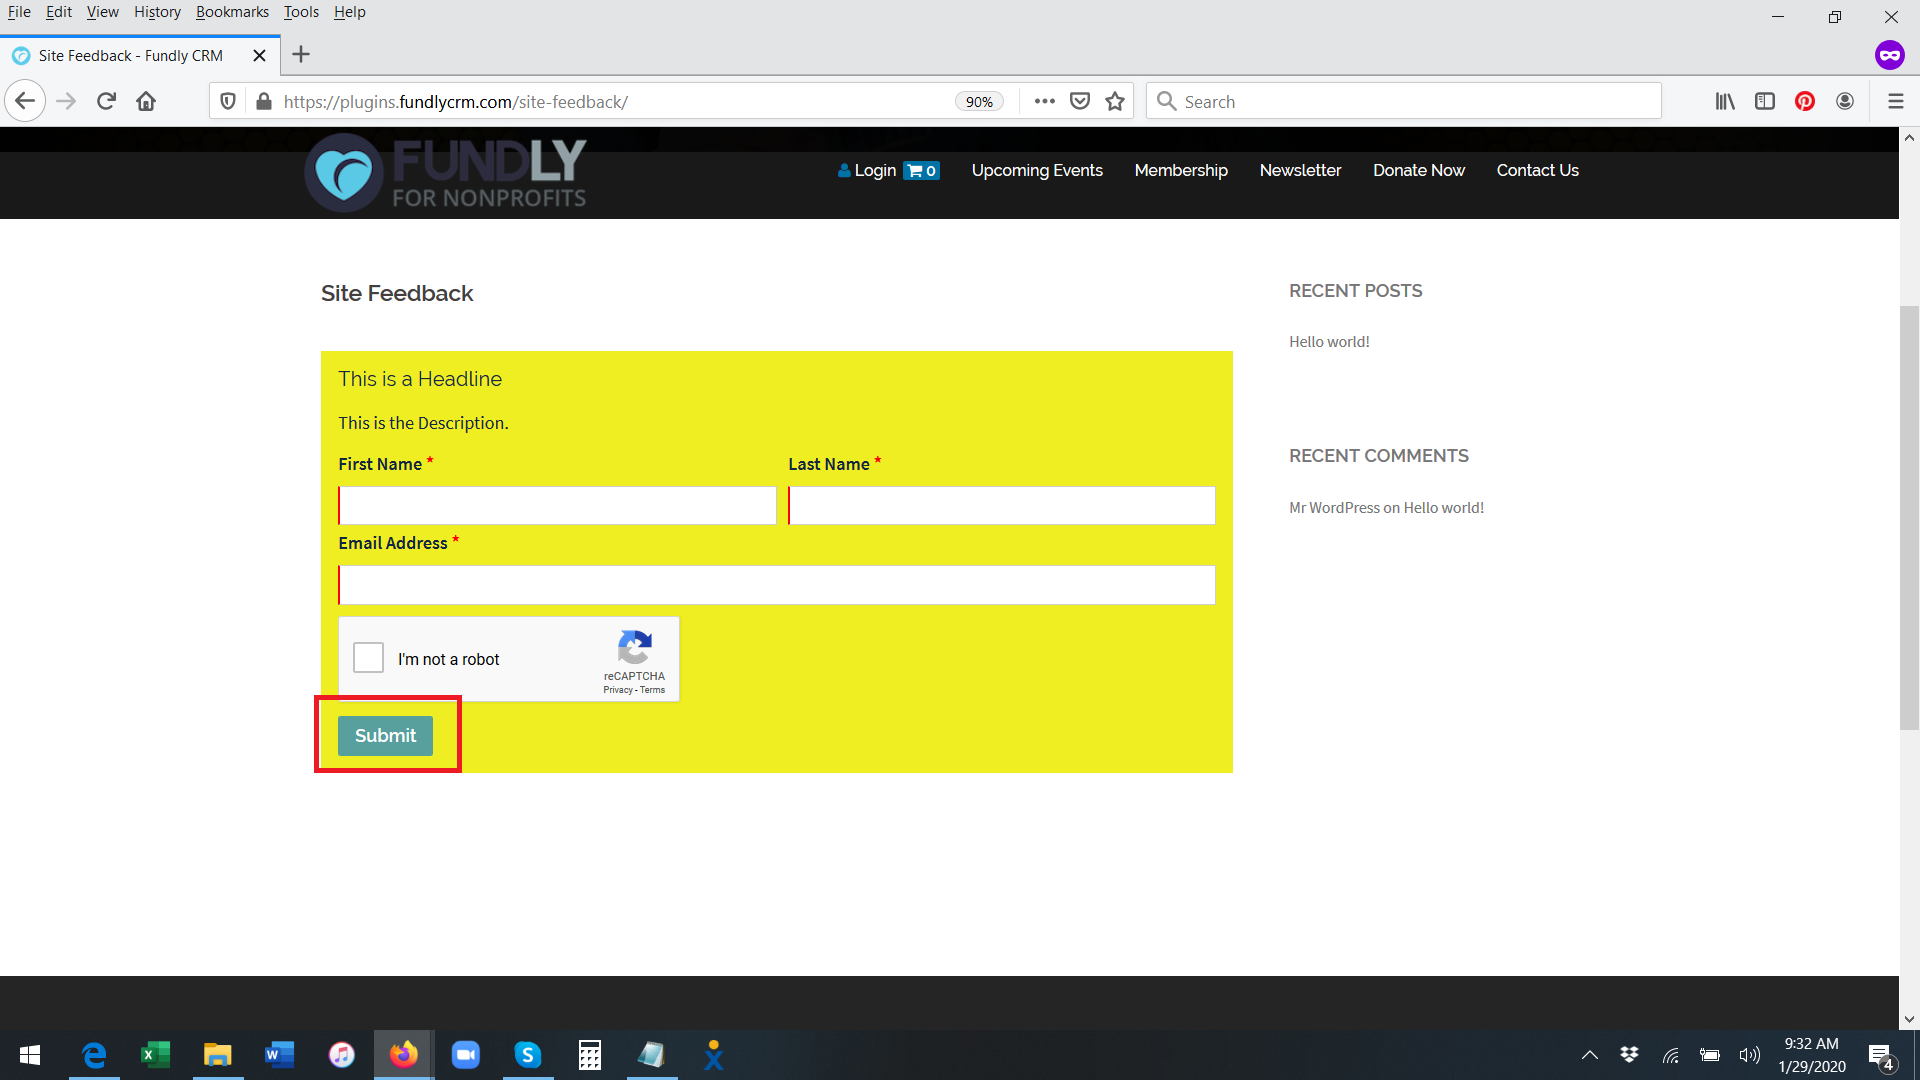
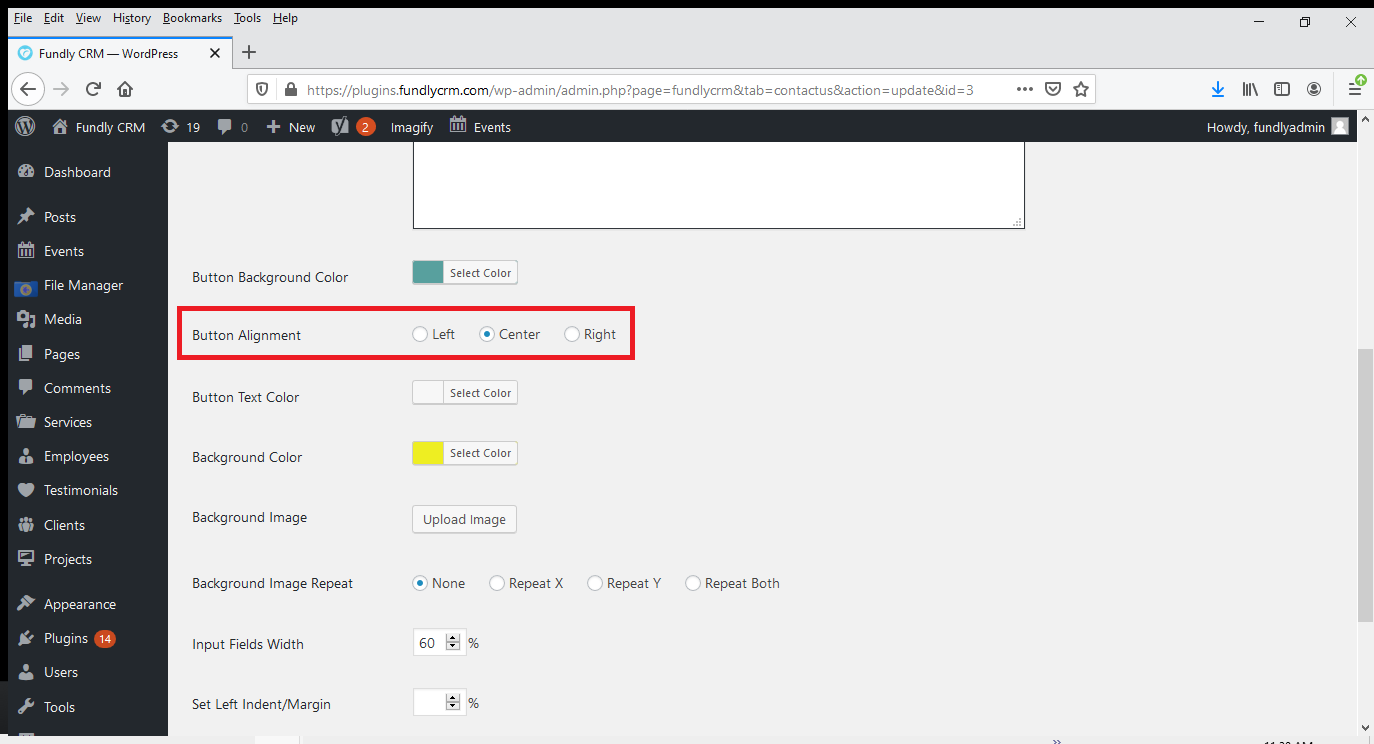
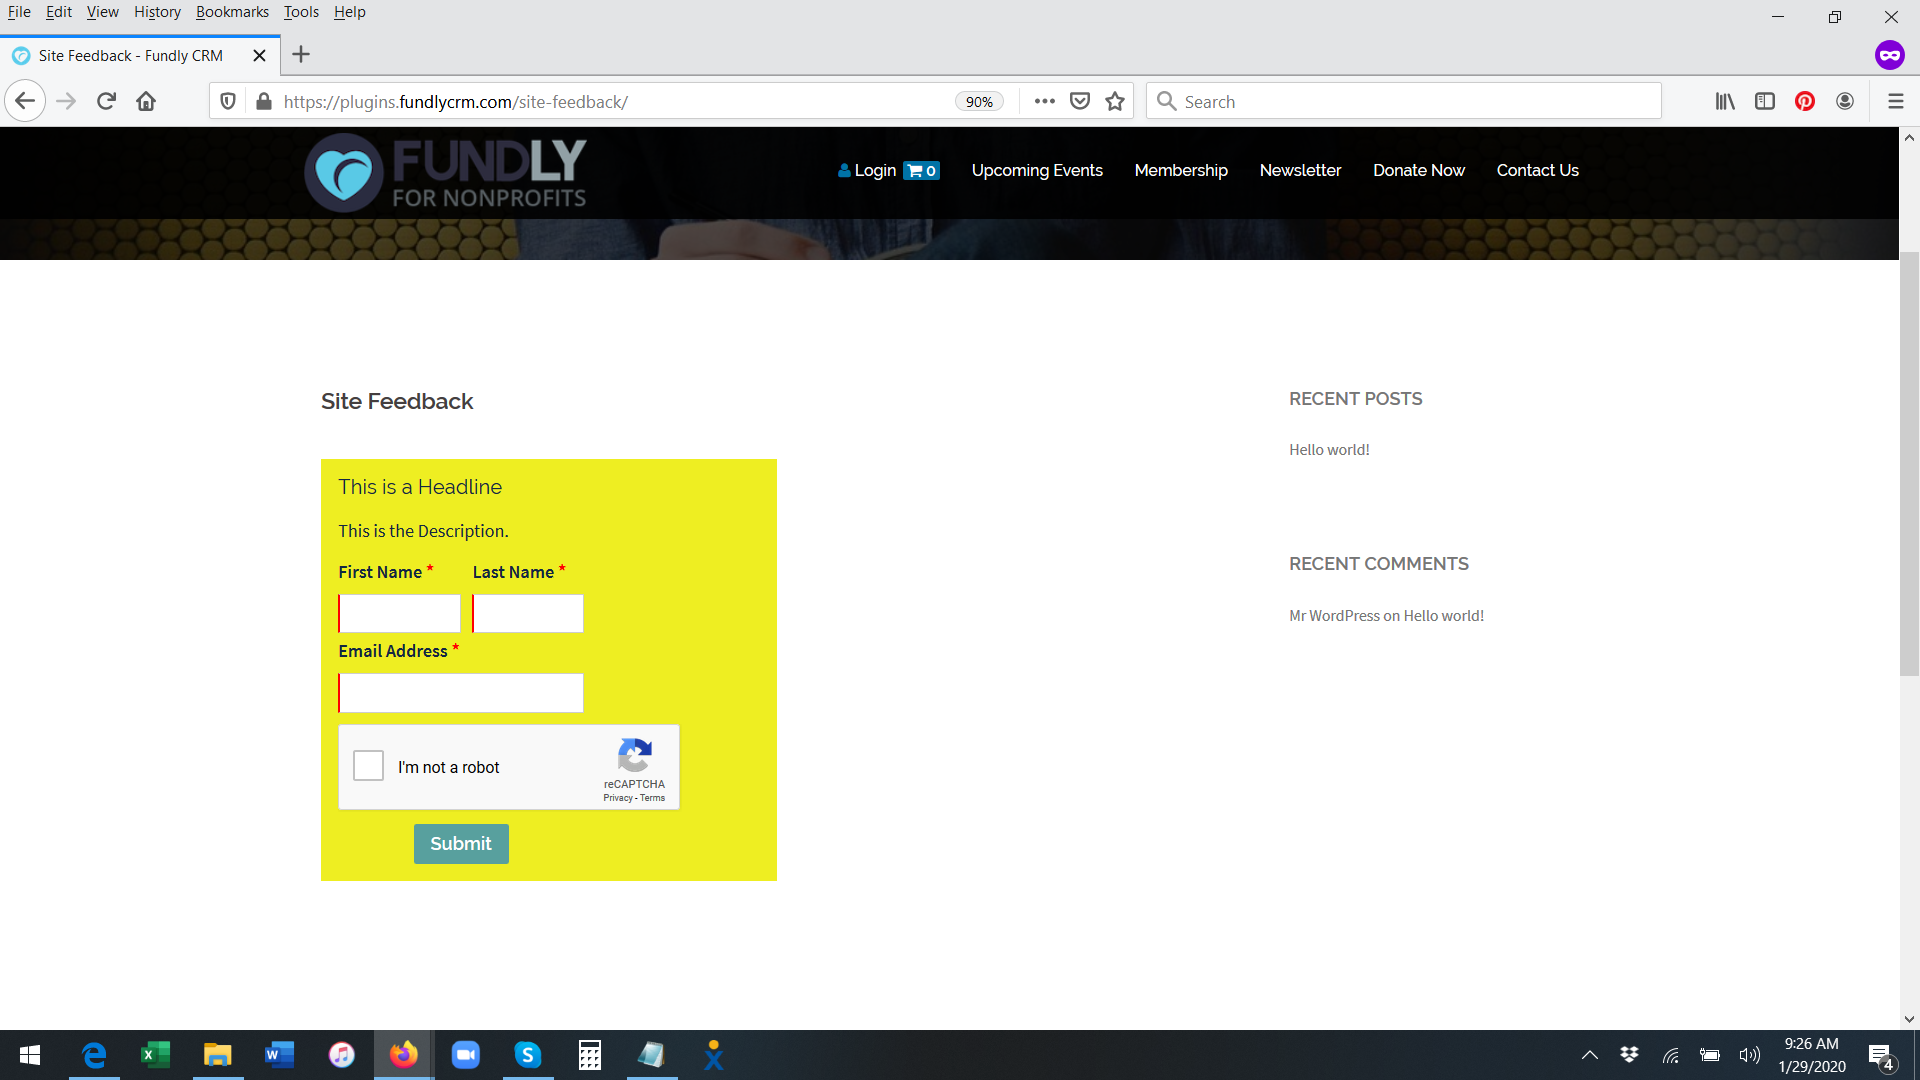
- Button Alignment lets you select whether to align the button to the left, center, or right of the INPUT FIELDS - that is, the button centering will be relative to the size/area of your INPUT FIELDS, not the entire form. In the screen shots below, we have centered the button. Notice in the first, the button appears centered in the form area. This is because the fields are set to be 100% of the form area. In the second the form fields are set to be only 50% of the form area. Notice how the button is centered under the fields, but not centered relative to the entire form area.

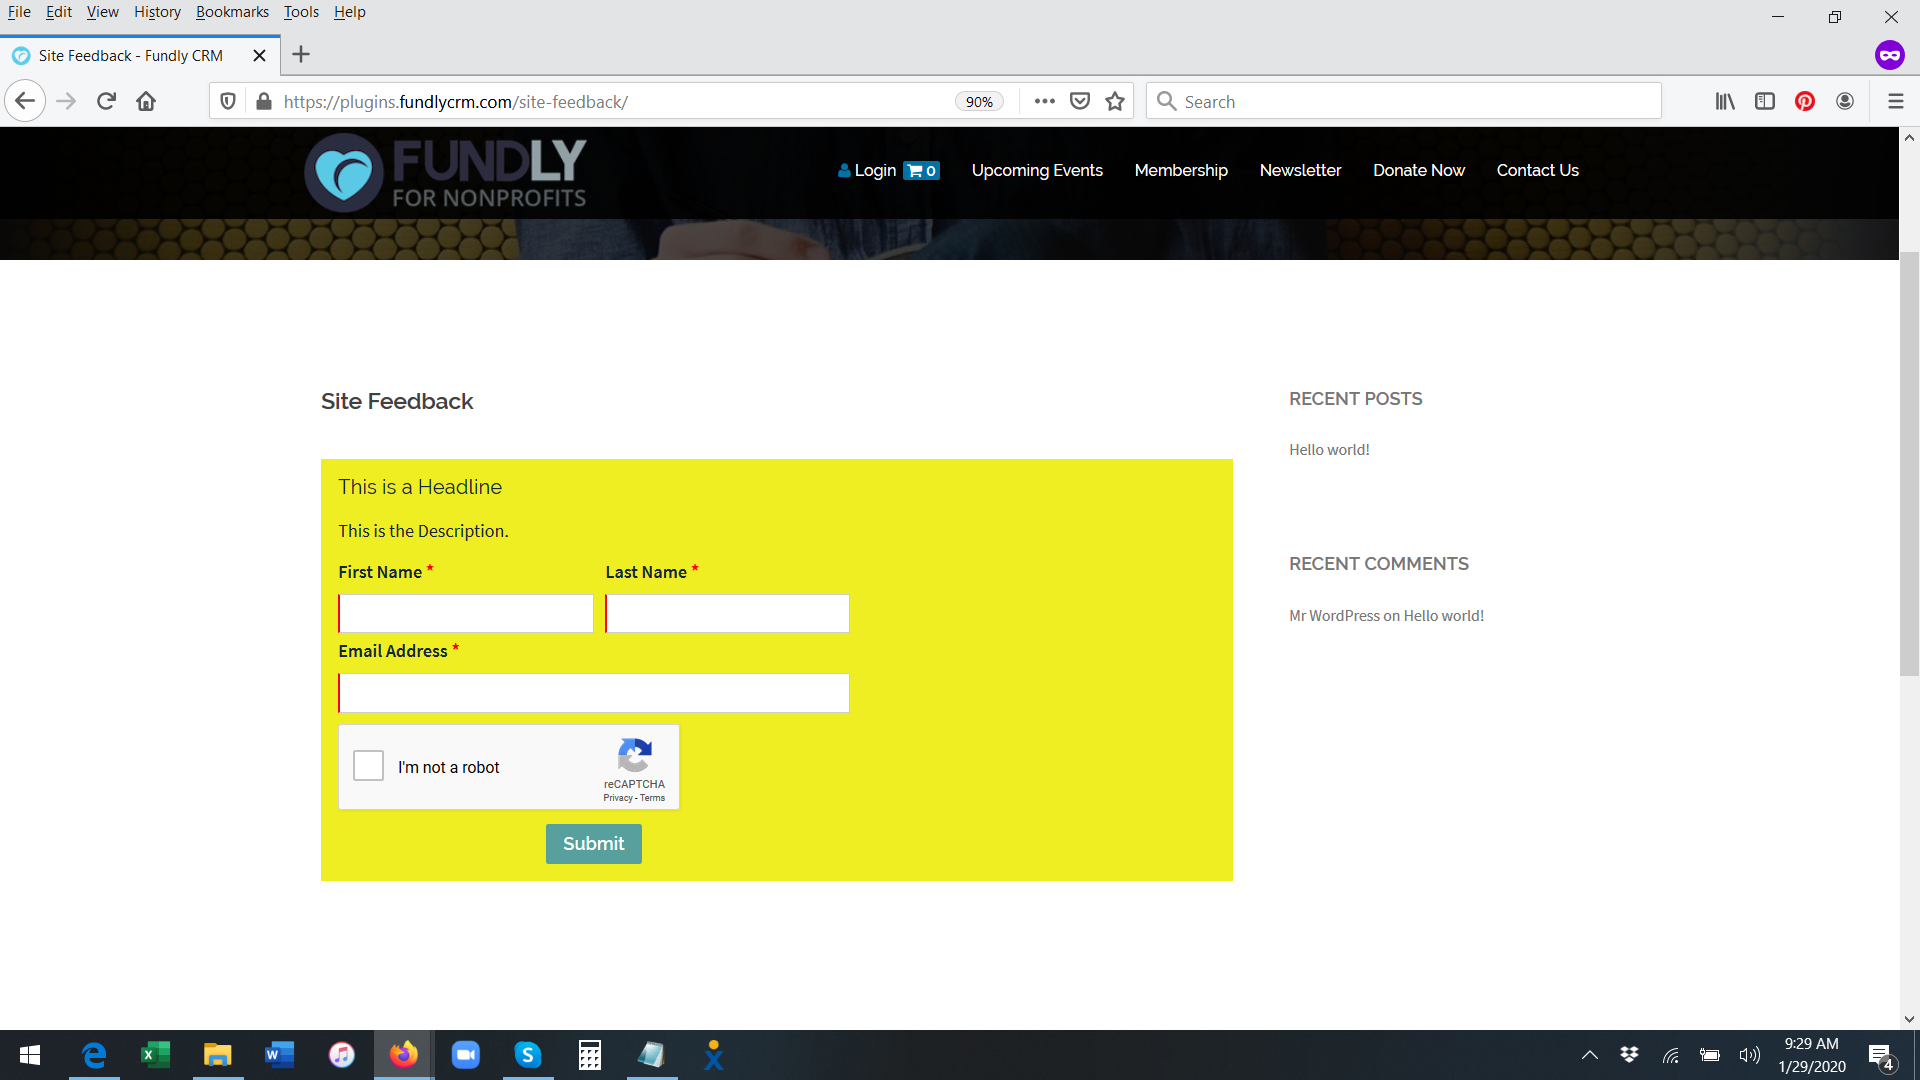
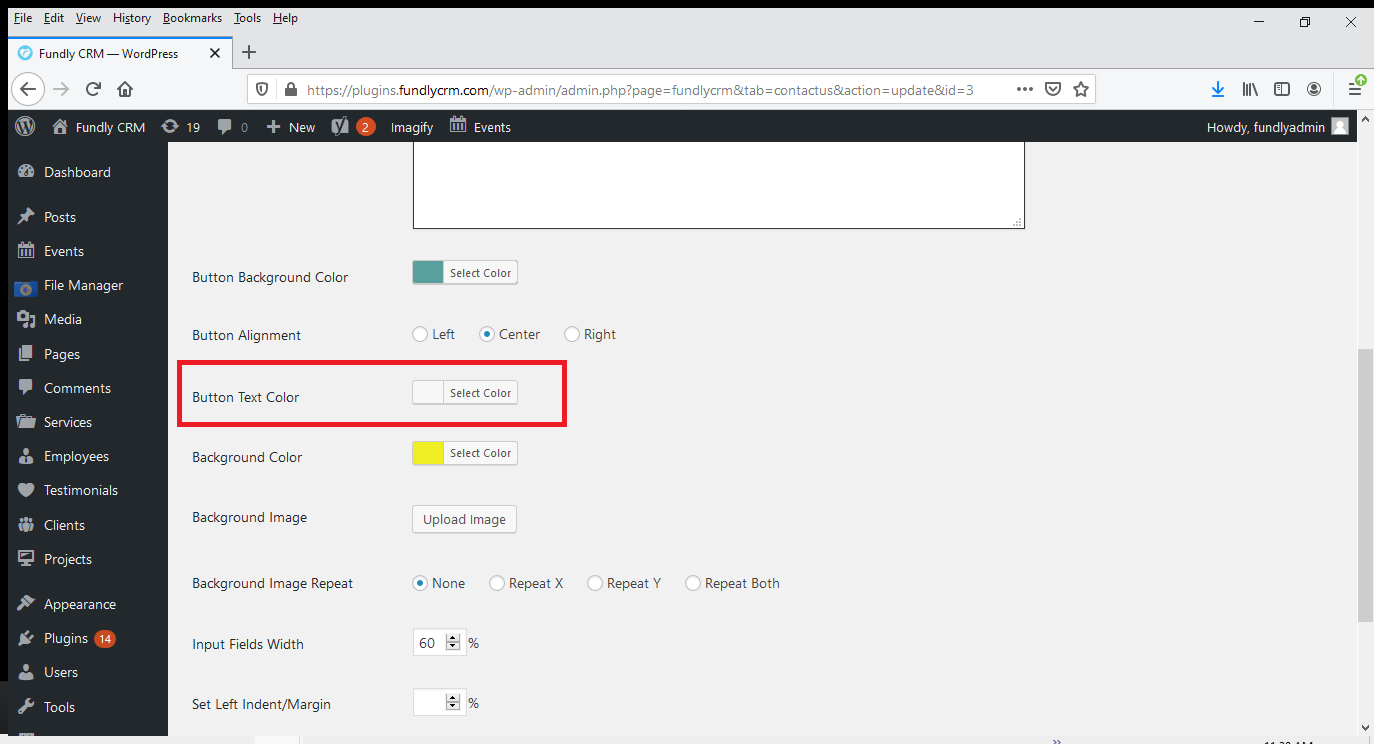
- Button Text Color lets you select the color of the text on your Submit button.
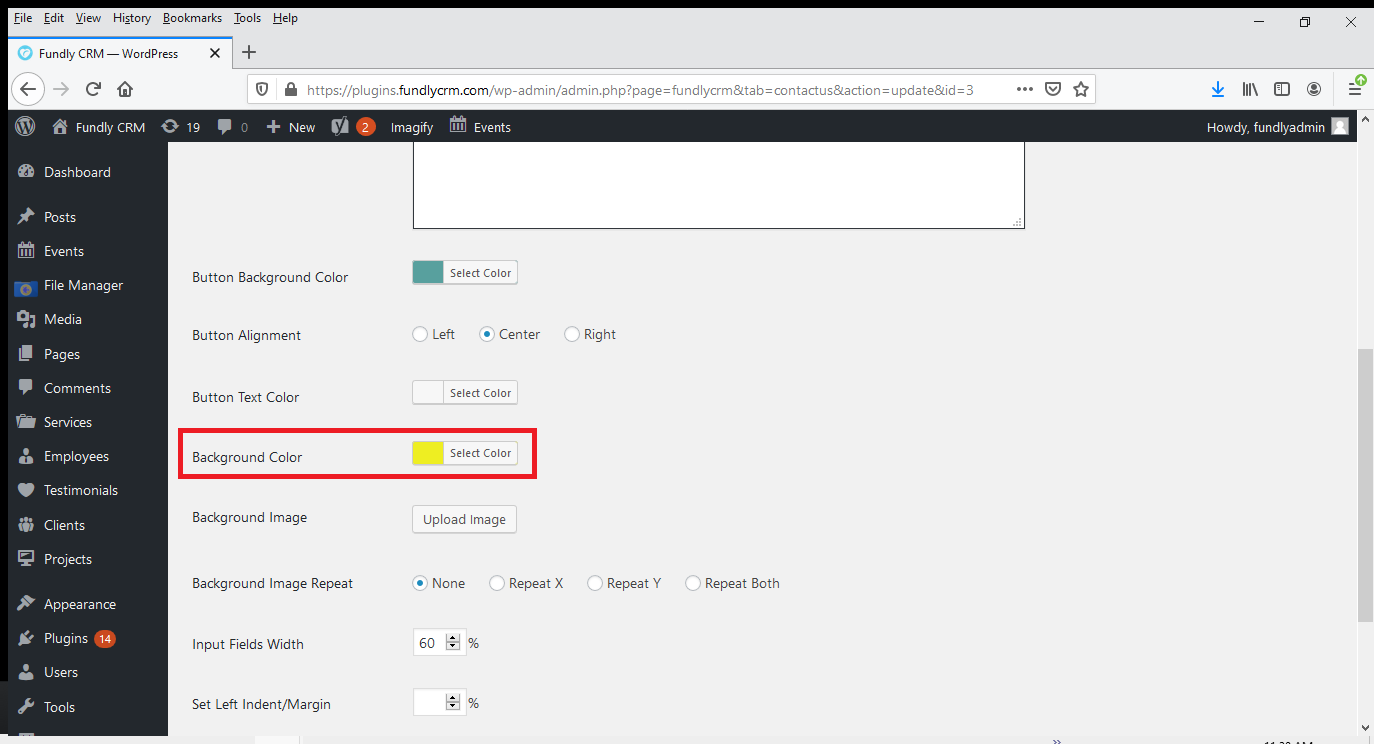
- The Background Color field lets you select the background color of your Submit form area. We have set ours to yellow here.
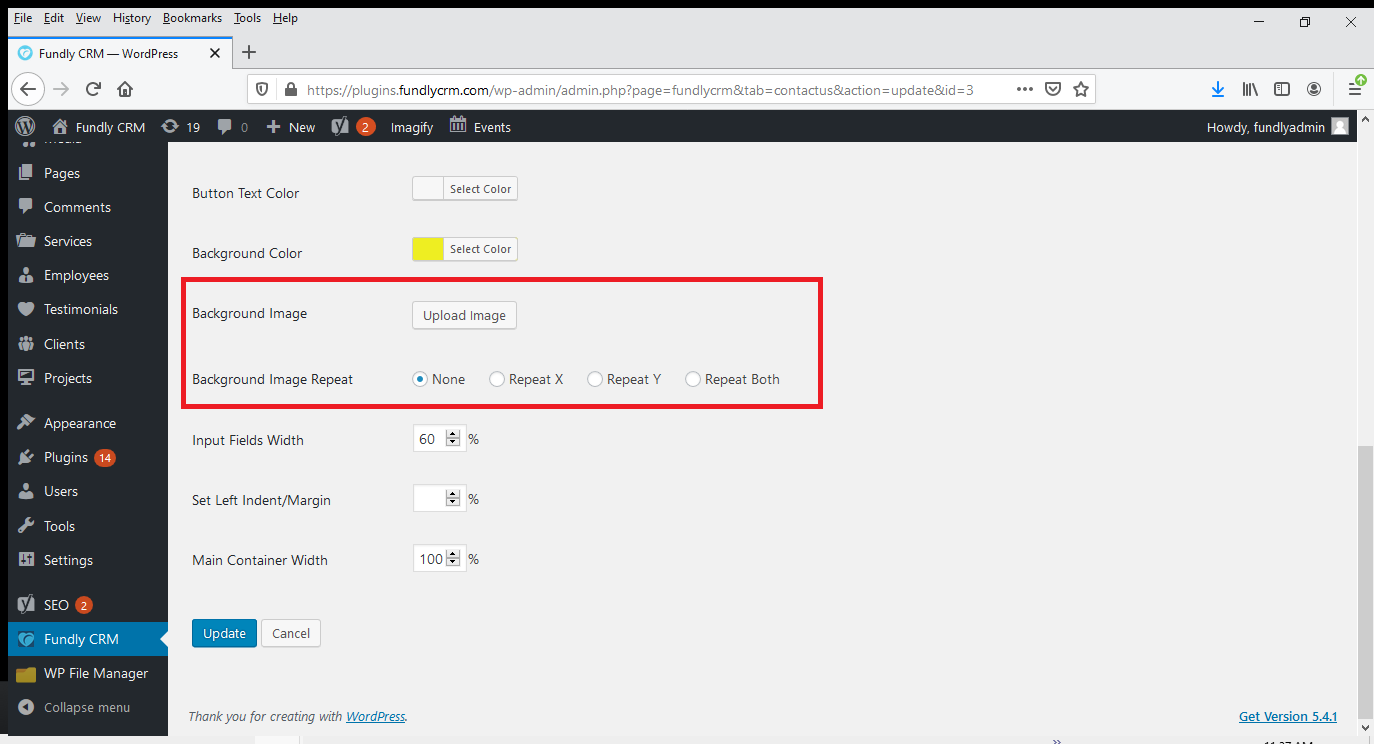
- Background Image lets you set the background of the form area as an image and Background Image Repeat lets you repeat that image over and over as the background. Repeat X means repeat the image horizontally; Repeat Y means repeat the image vertically. Repeat Both will repeat the image both horizontally and vertically.
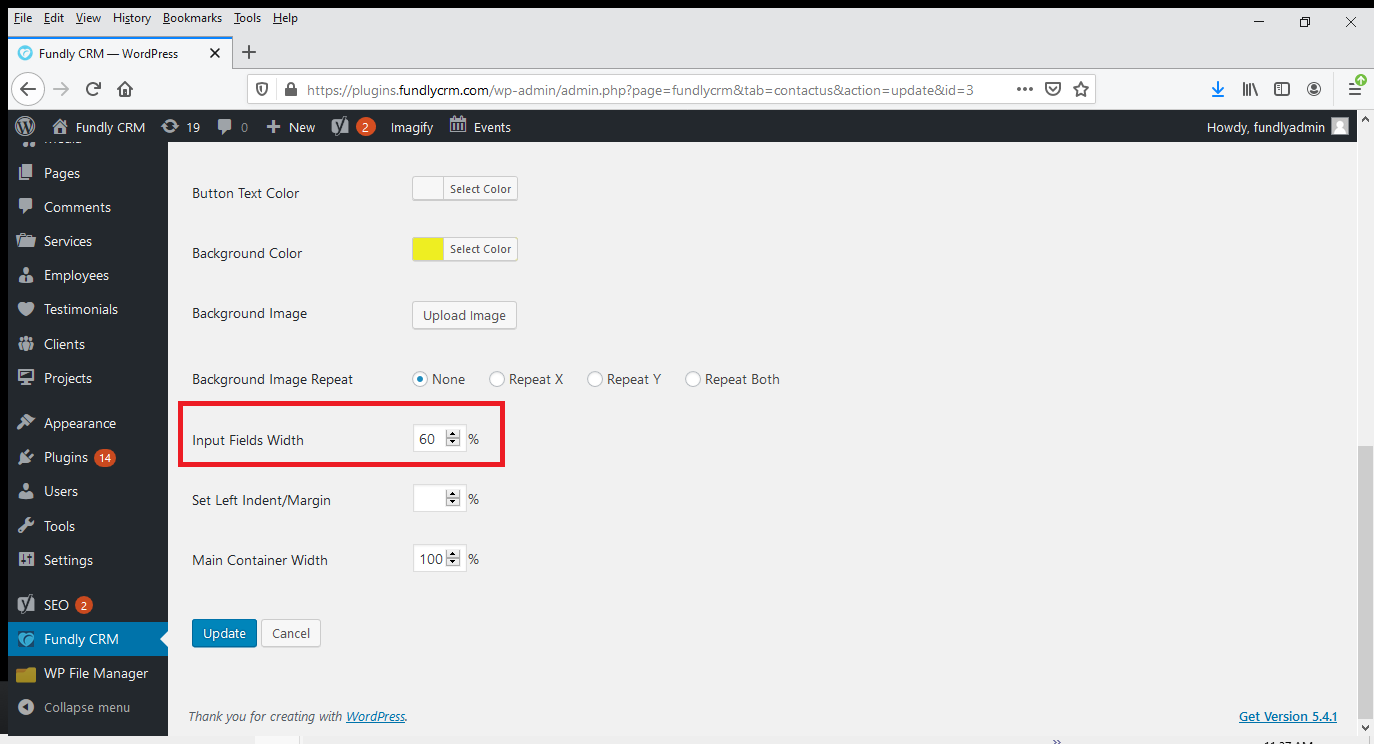
- Input Field Width lets you set the size, in percent of the form area, of the fields on your Contact Us Form (the smallest value that can be input here is 60%). There is no ability to set the width of each individual field (that is, to have different fields be different widths). The setting here will set all fields to the same width. If you leave this field blank it will default to 100%. In the 2nd screen shot below, we have set the field width to 50% so that it only takes up half of the form area (the area in yellow).

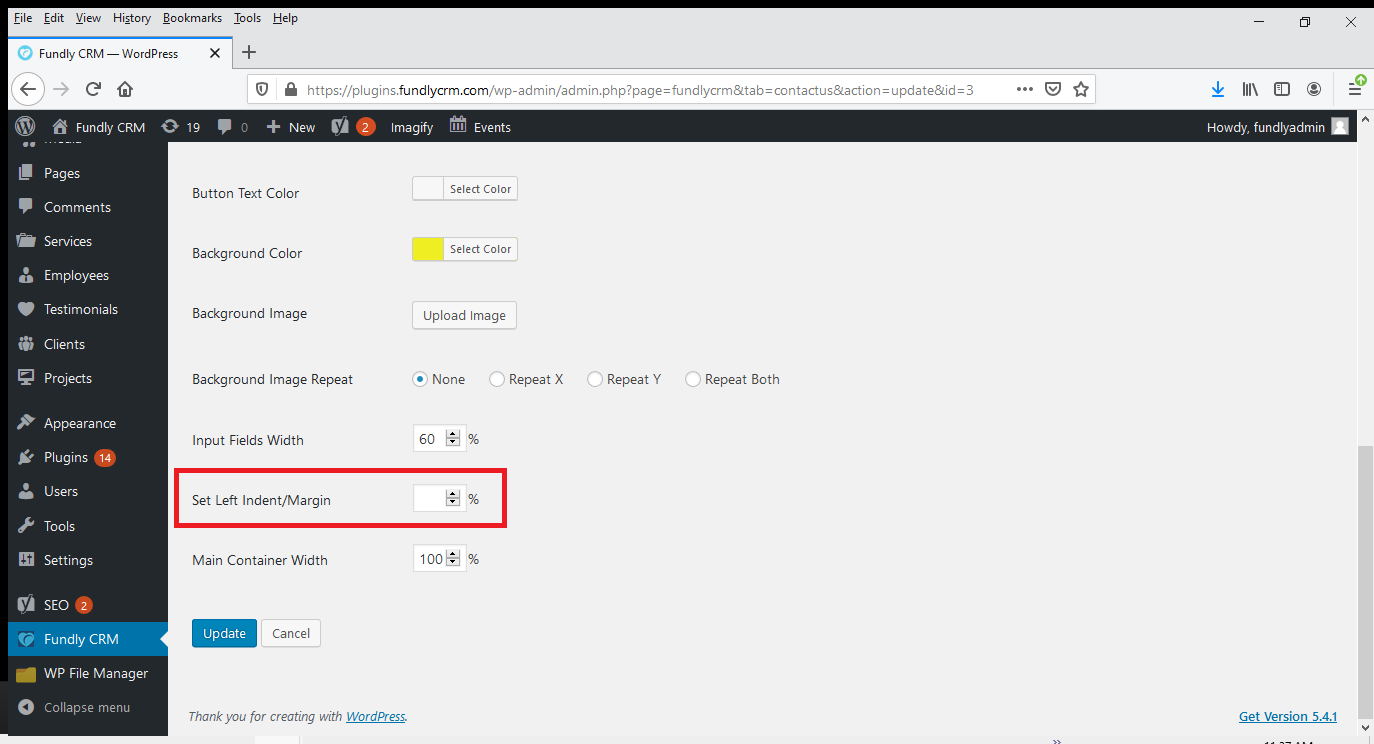
- Set Left Indent Margin sets how much you want the entire form area offset/indented from the left edge of the page. Here we have set the Left Indent to 50%, which pushes the form to the right (the left margin of the page is now 50% of the entire page); you'll notice that this then makes the form run into our sidebar on the right hand side of the page and causes issue with layout (the sidebar runs over the top of the form).
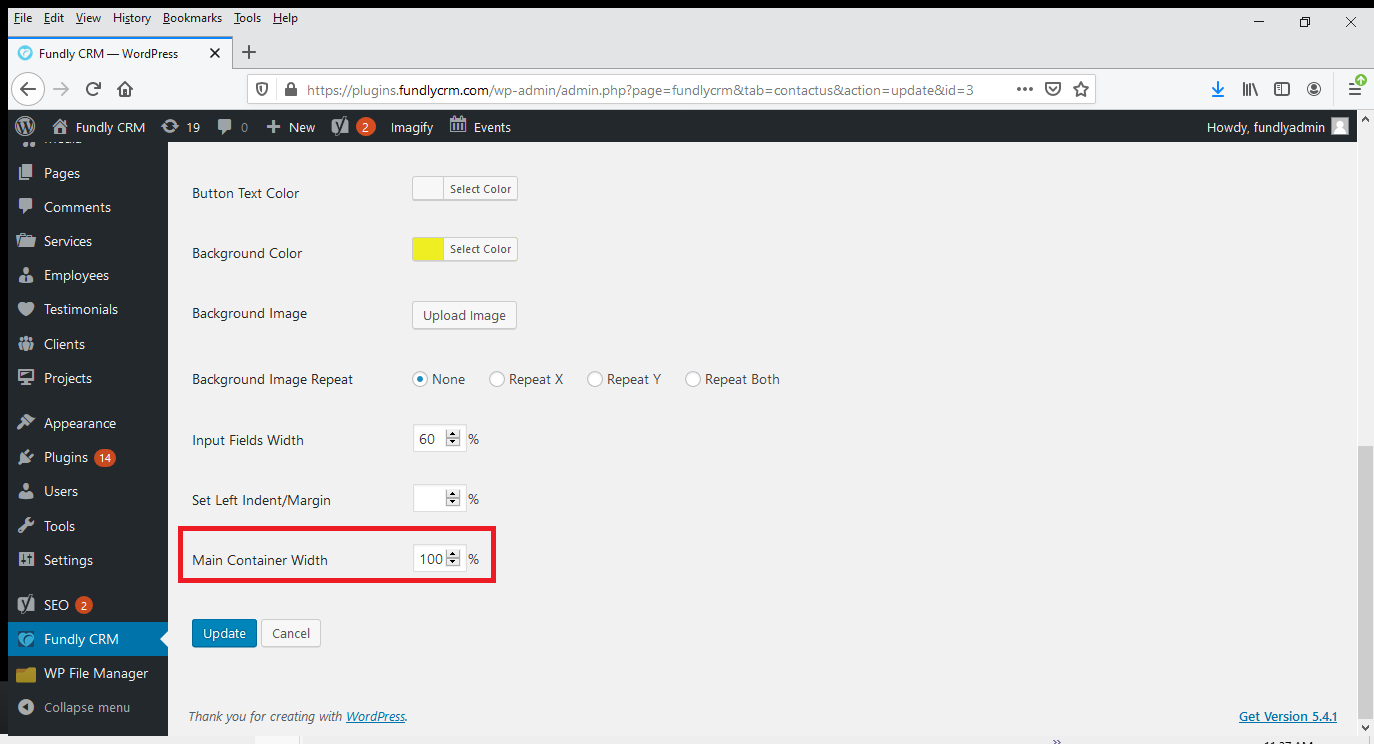
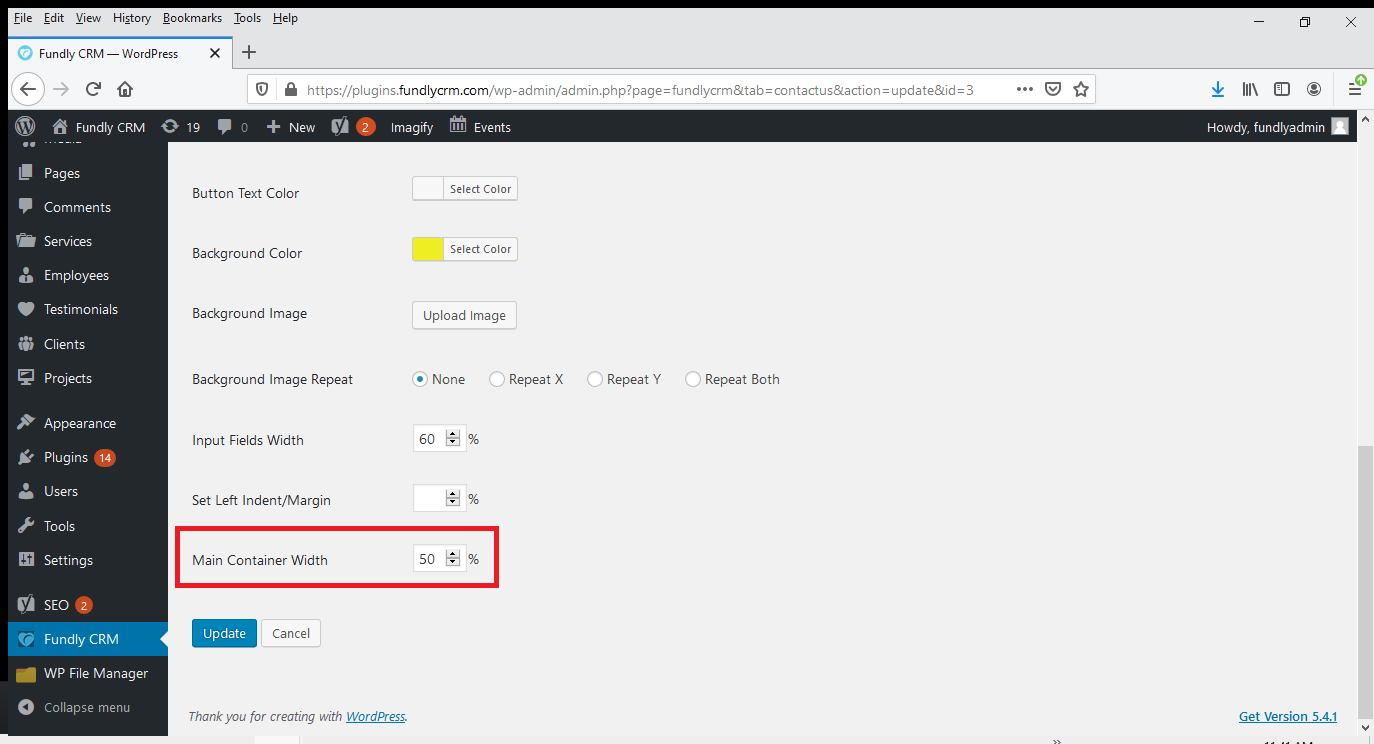
- Main Container Width sets the overall width (in % of the entire page) of the form area. Here we have set the Main Container Width to 100% and then to 50% to show the difference in how much space relative to the page the form area (in yellow) takes up. If left blank, it will default to 100% of the page.
- When done making changes, click the Create button (if you are editing a previously created form the button text will read Update) to save your changes.
OR

Comments
0 comments
Article is closed for comments.