Wordpress Plugins Configurations and Settings Part 2d - Membership Plugin
- The Membership Plugin allows you to integrate your CRM with your WordPress Website in order to accept online membership sign up, online membership renewals, and to firewall website pages behind a "members' only" portal/log in.
- The Wordpress plugin is an additional, one-time fee (see this tutorial for pricing). Alternatively, you can use our Pages function (no additional cost). See this tutorial/chart for a comparison of Pages versus WordPress Plugin for memberships.
- To configure the Membership WordPress Plugin, log into your wordpress admin panel. Find the CRM plugin in the left hand menu and click it.
- This will take you to the CRM Plugin admin panel. Which tabs you have here will depend on which plugins you have purchased.
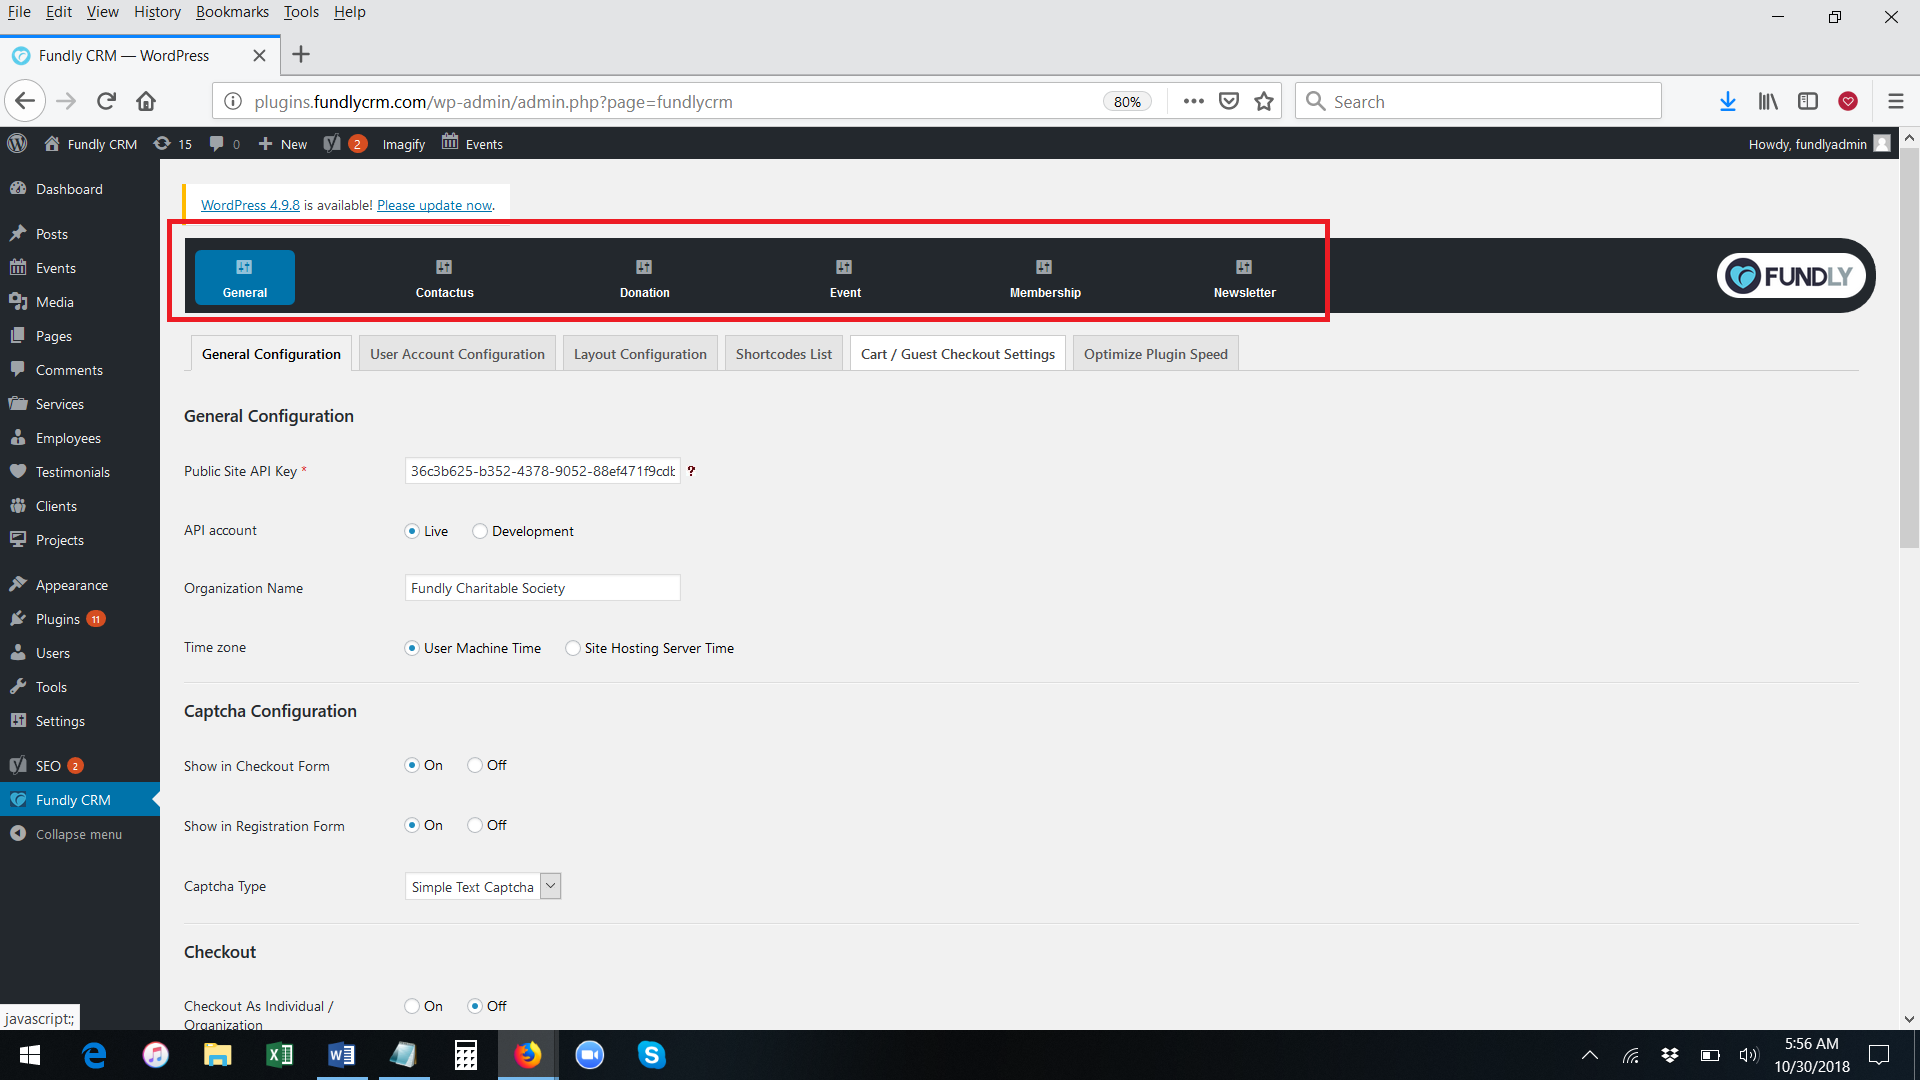
- To configure the membership plugin, click on the Membership tab (be sure to also configure your General tab - see this tutorial for more information on the settings found on the general tab).
- The Membership plugin has four sub-tabs: Settings, Short Codes, Sort Membership Levels, and Member Directory Settings.

- The Settings sub-tab is where you configure the meta settings related to memberships.
- The Short Codes sub-tab is view only page that displays short codes related to your membership pages that you can use in your WP site.
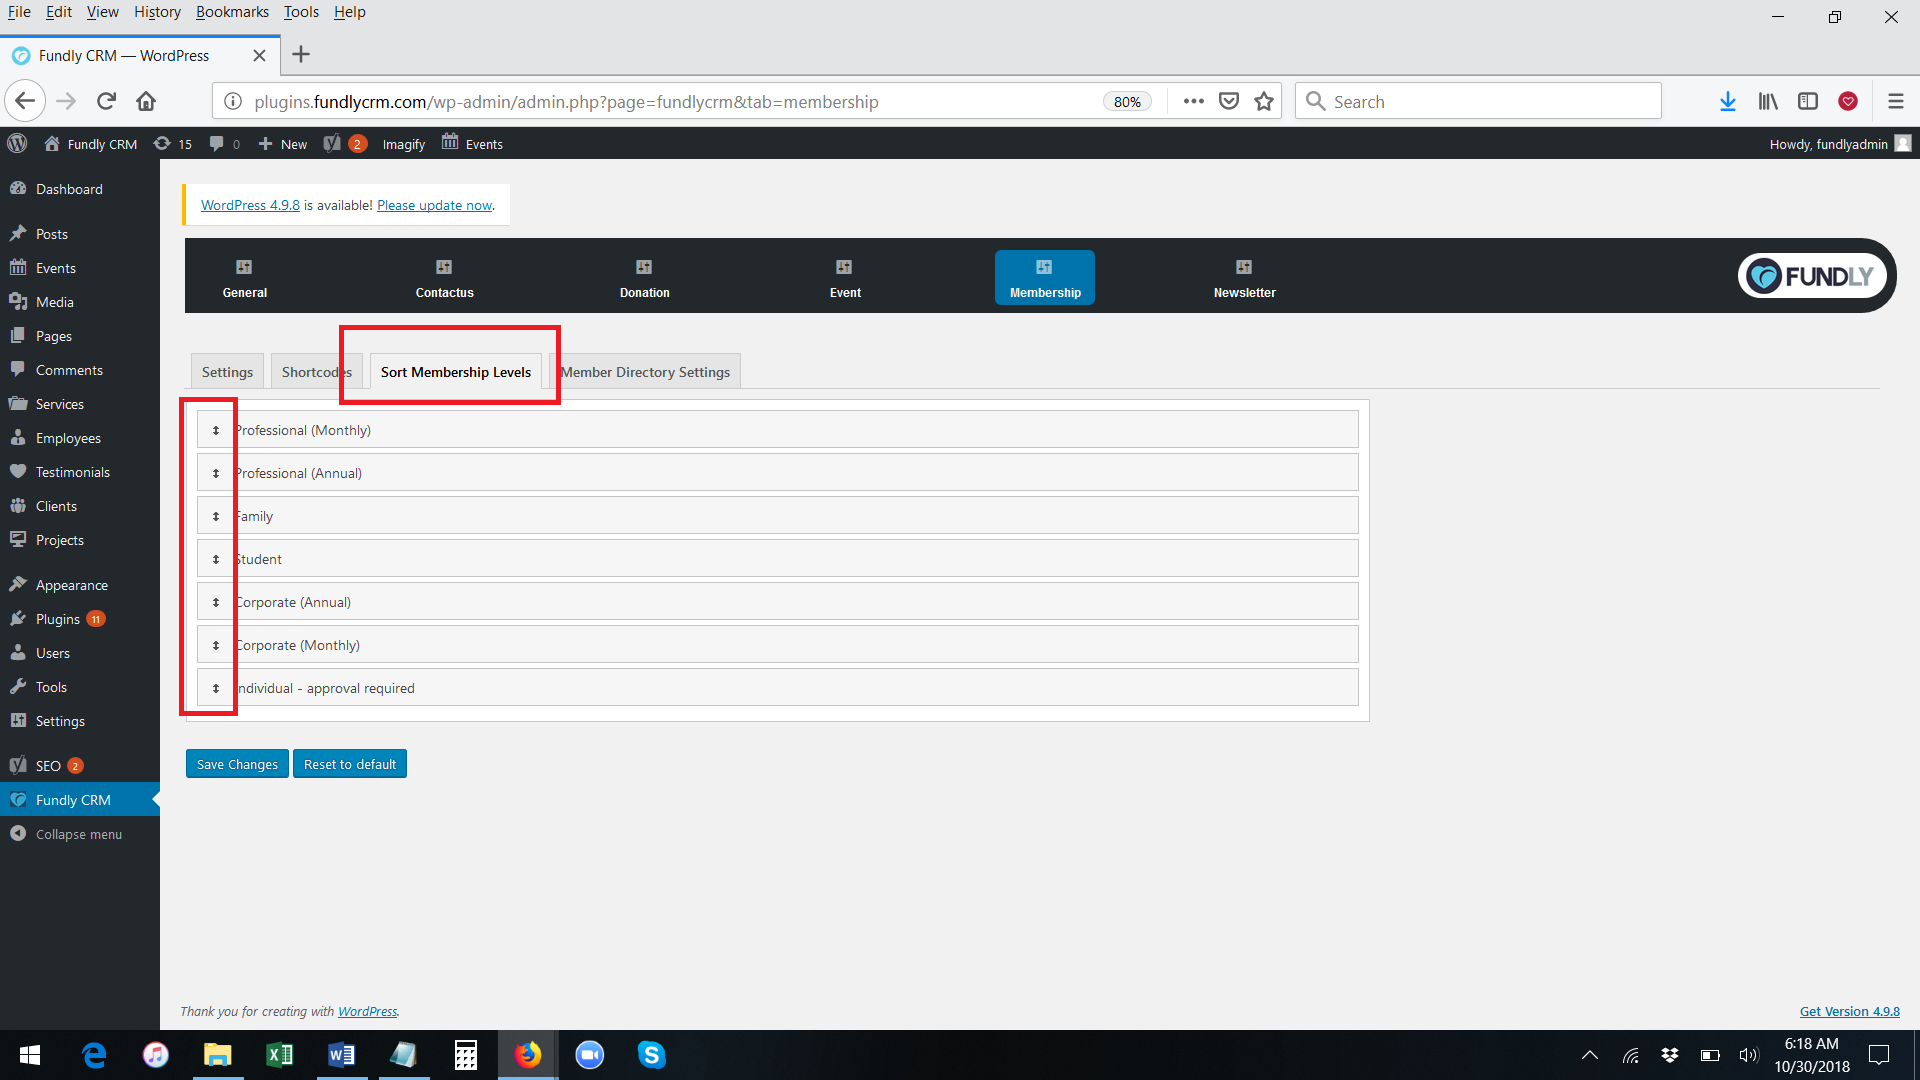
- The Sort Membership Levels sub-tab allows you to choose what order membership levels display on your buy/renew membership page.
- The Member Directory sub-tab controls the settings related to displaying the Member Directory on your website.
- On the Settings sub-tab:
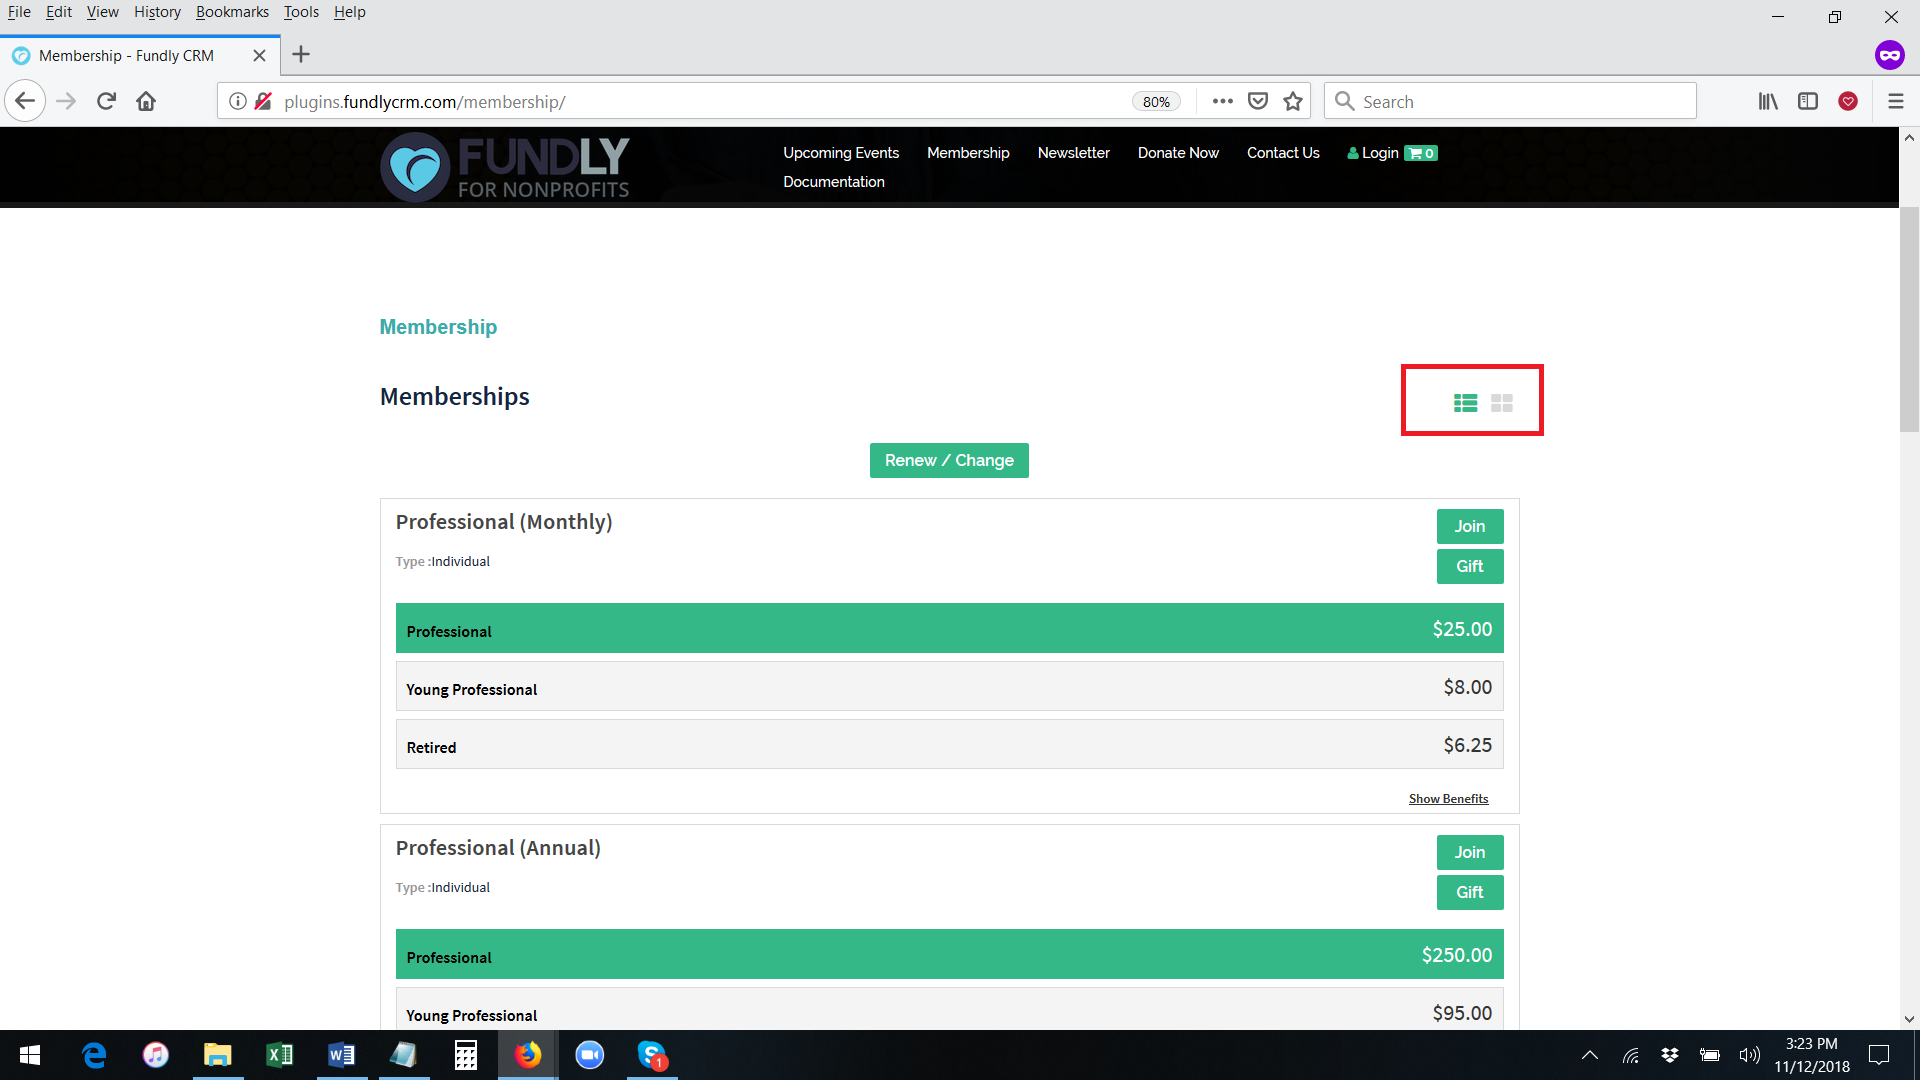
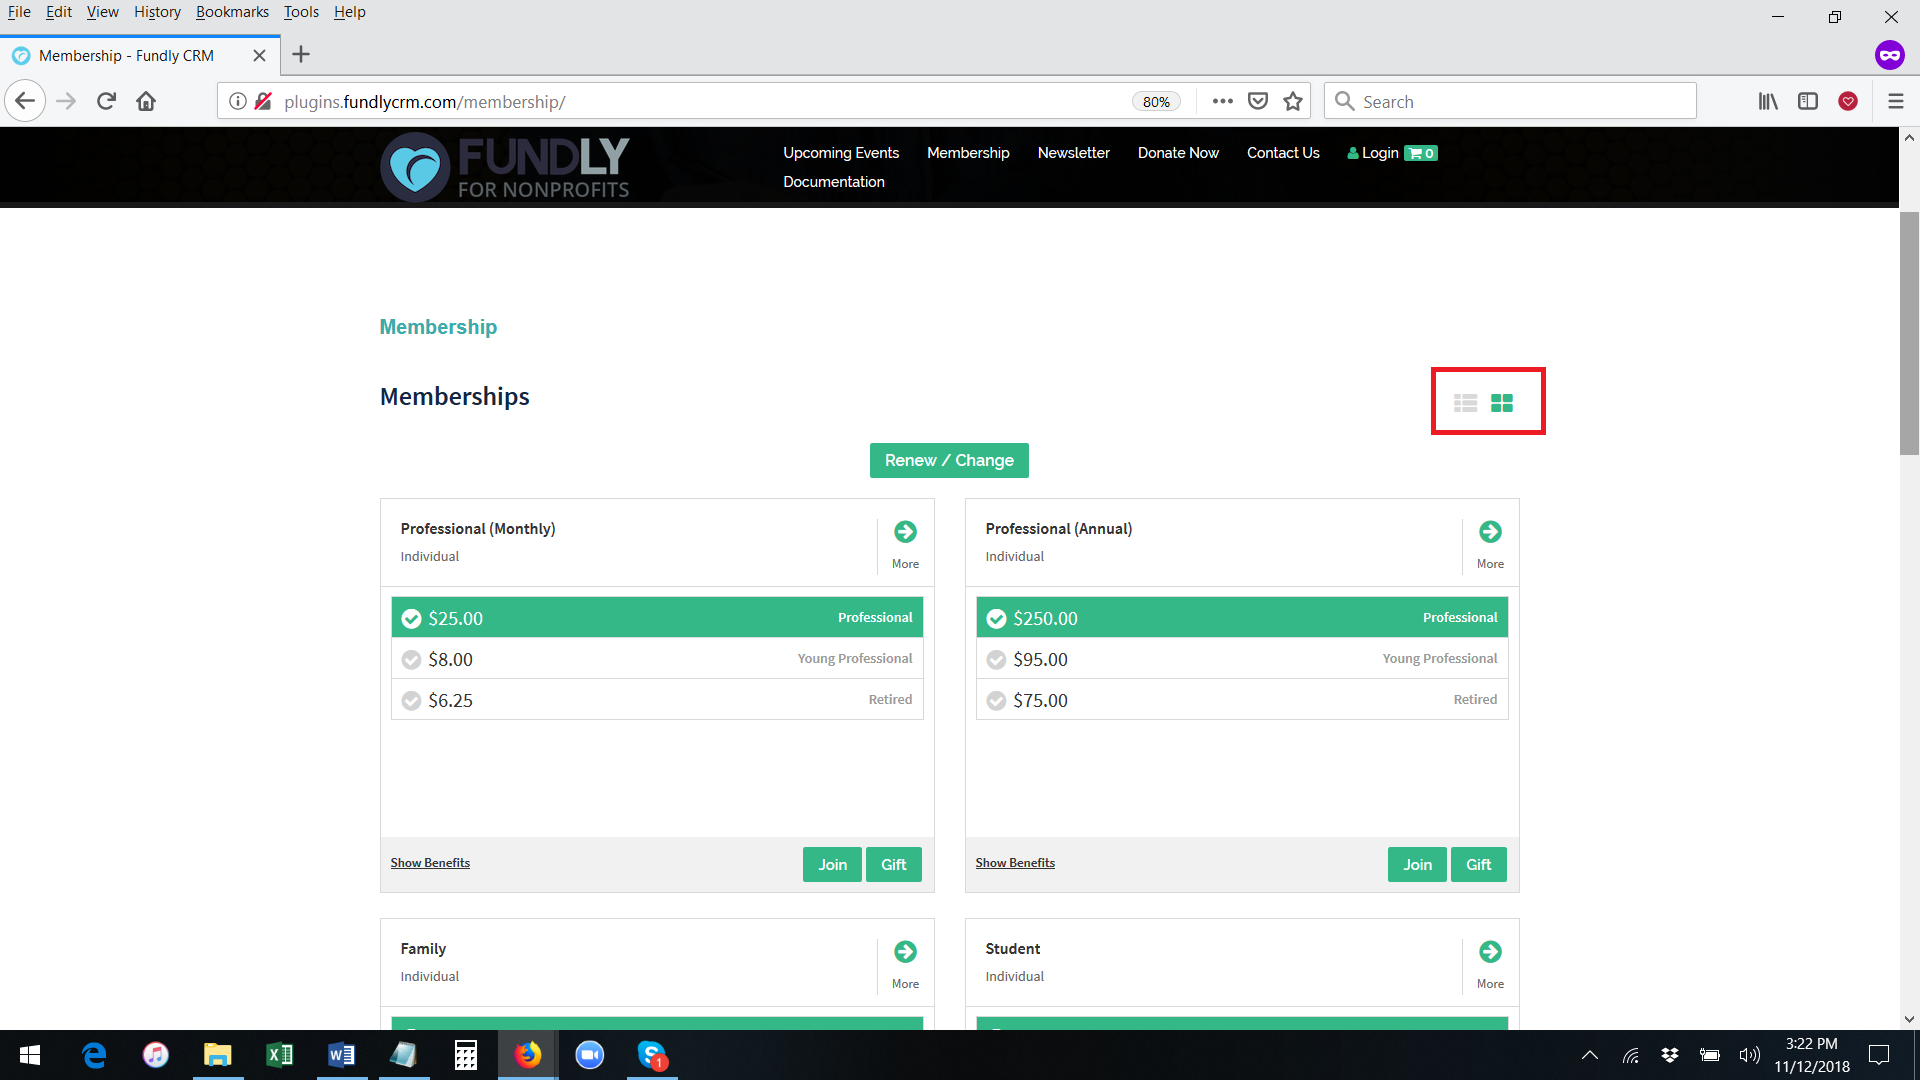
- The Membership List Type setting controls the default display style of the Buy/Renew membership page. In the first screen shot of the front facing buy/renew membership page, the default is set to List. In the second, it is set to Grid. The user can toggle between grid and list view by clicking the circled toggle setting/button in the upper right of the screen.
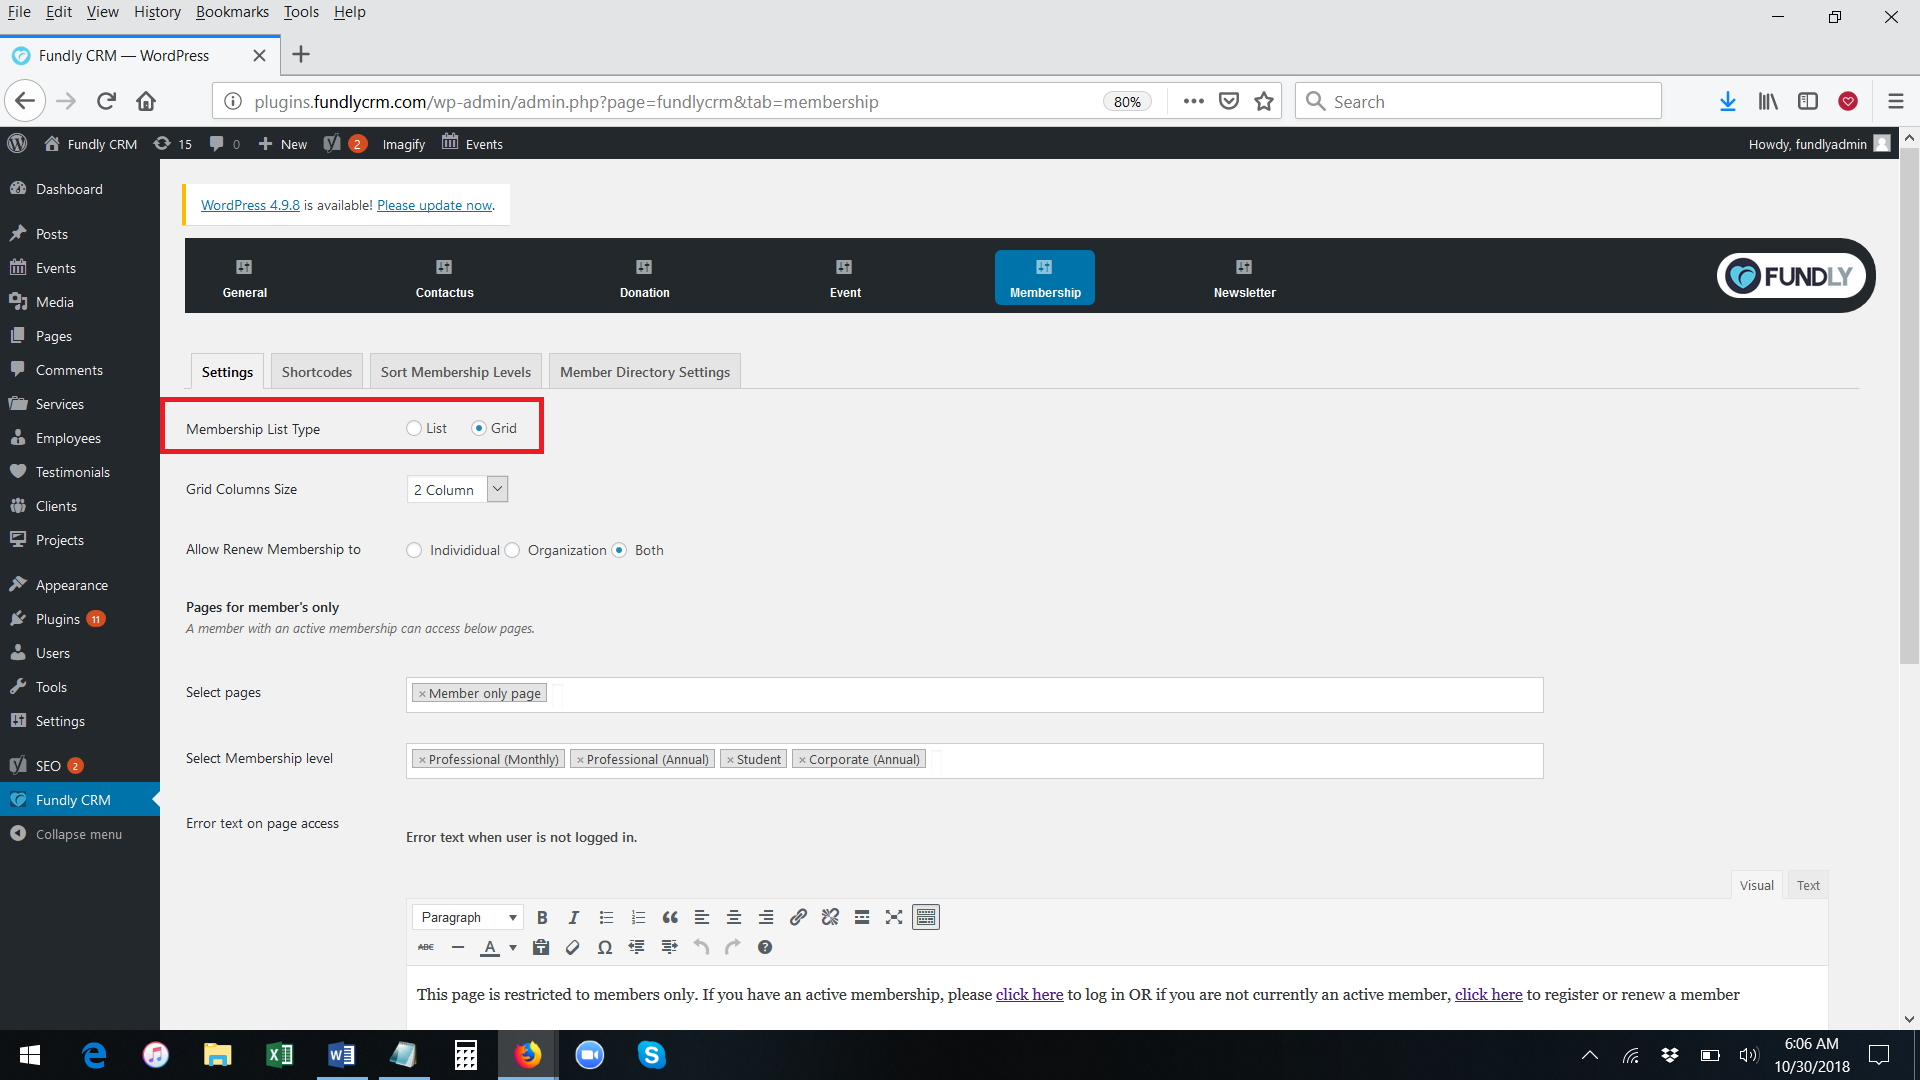
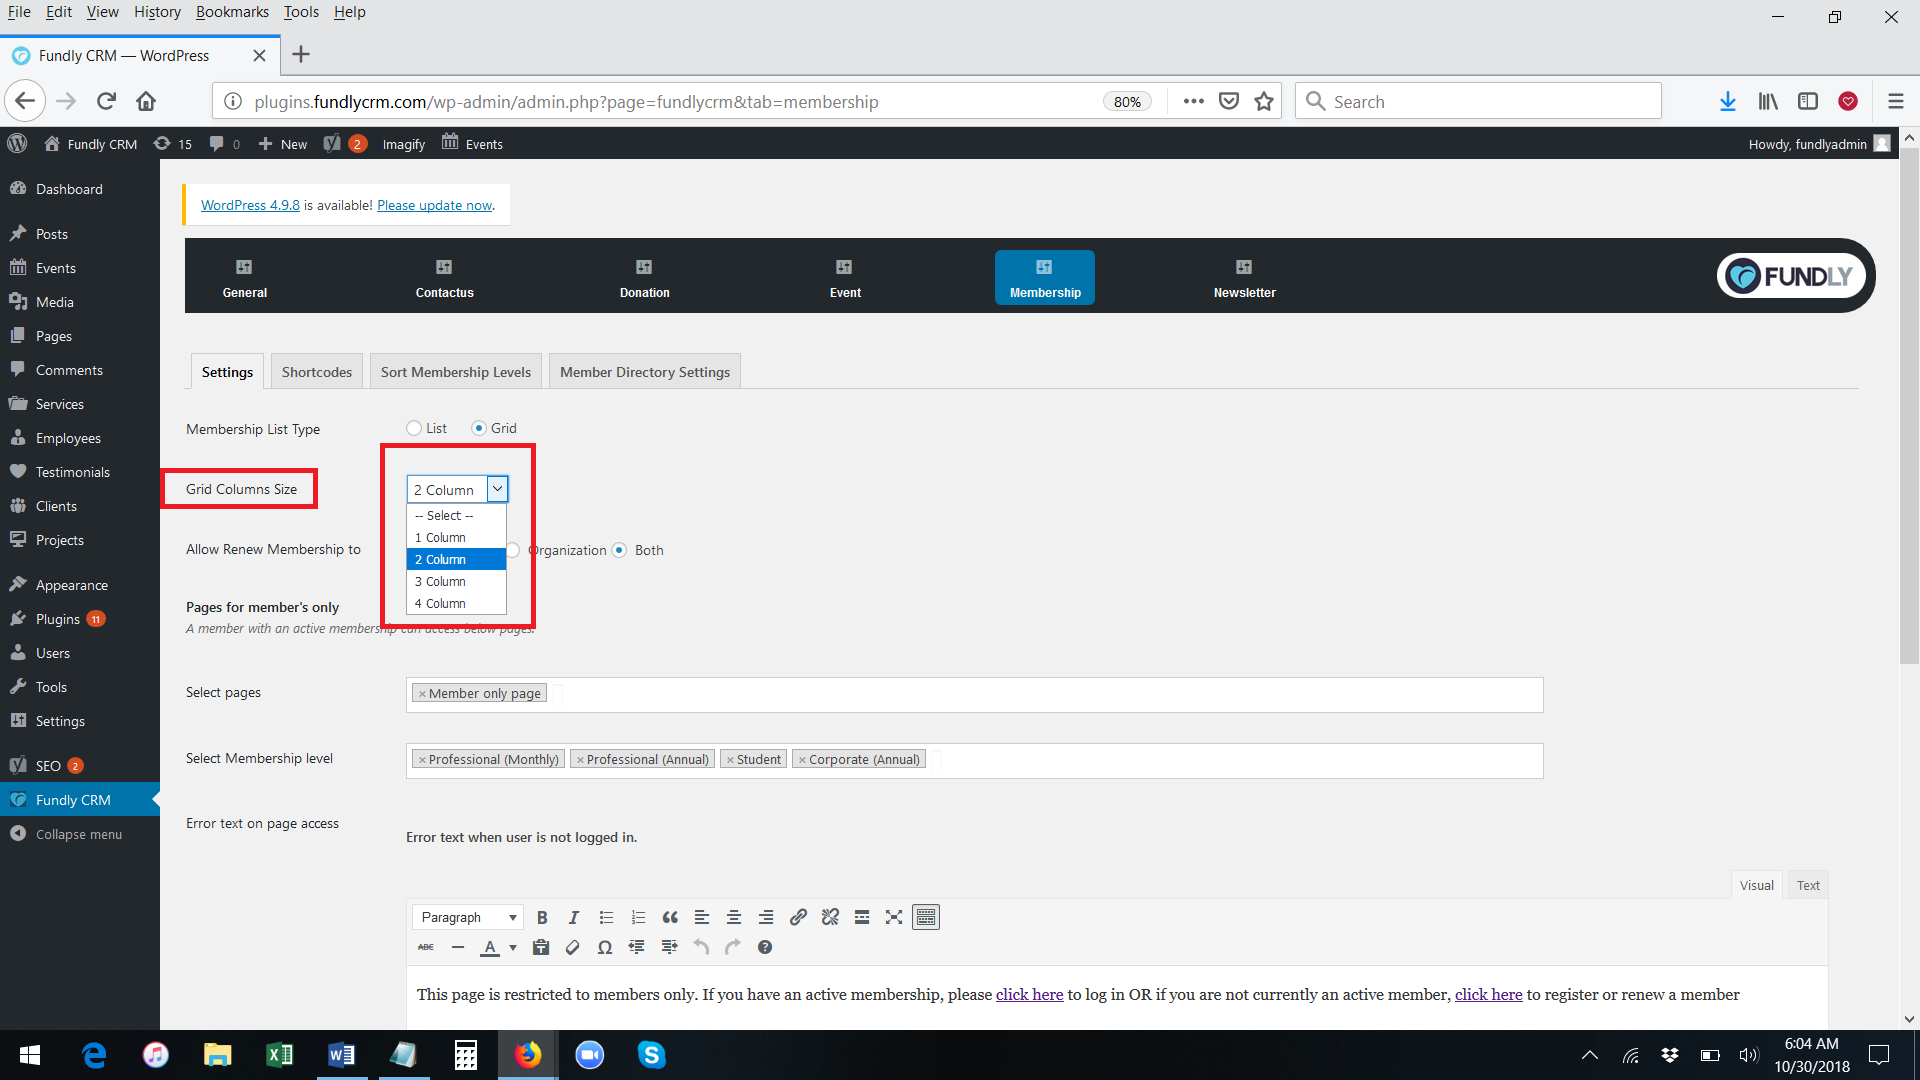
- If you select "Grid" in the Membership List settings, you can set how many columns the grid displays in the next column.
- The Allow Renew Membership To field controls whether individual and/or organizational memberships can be renewed online/via your website.

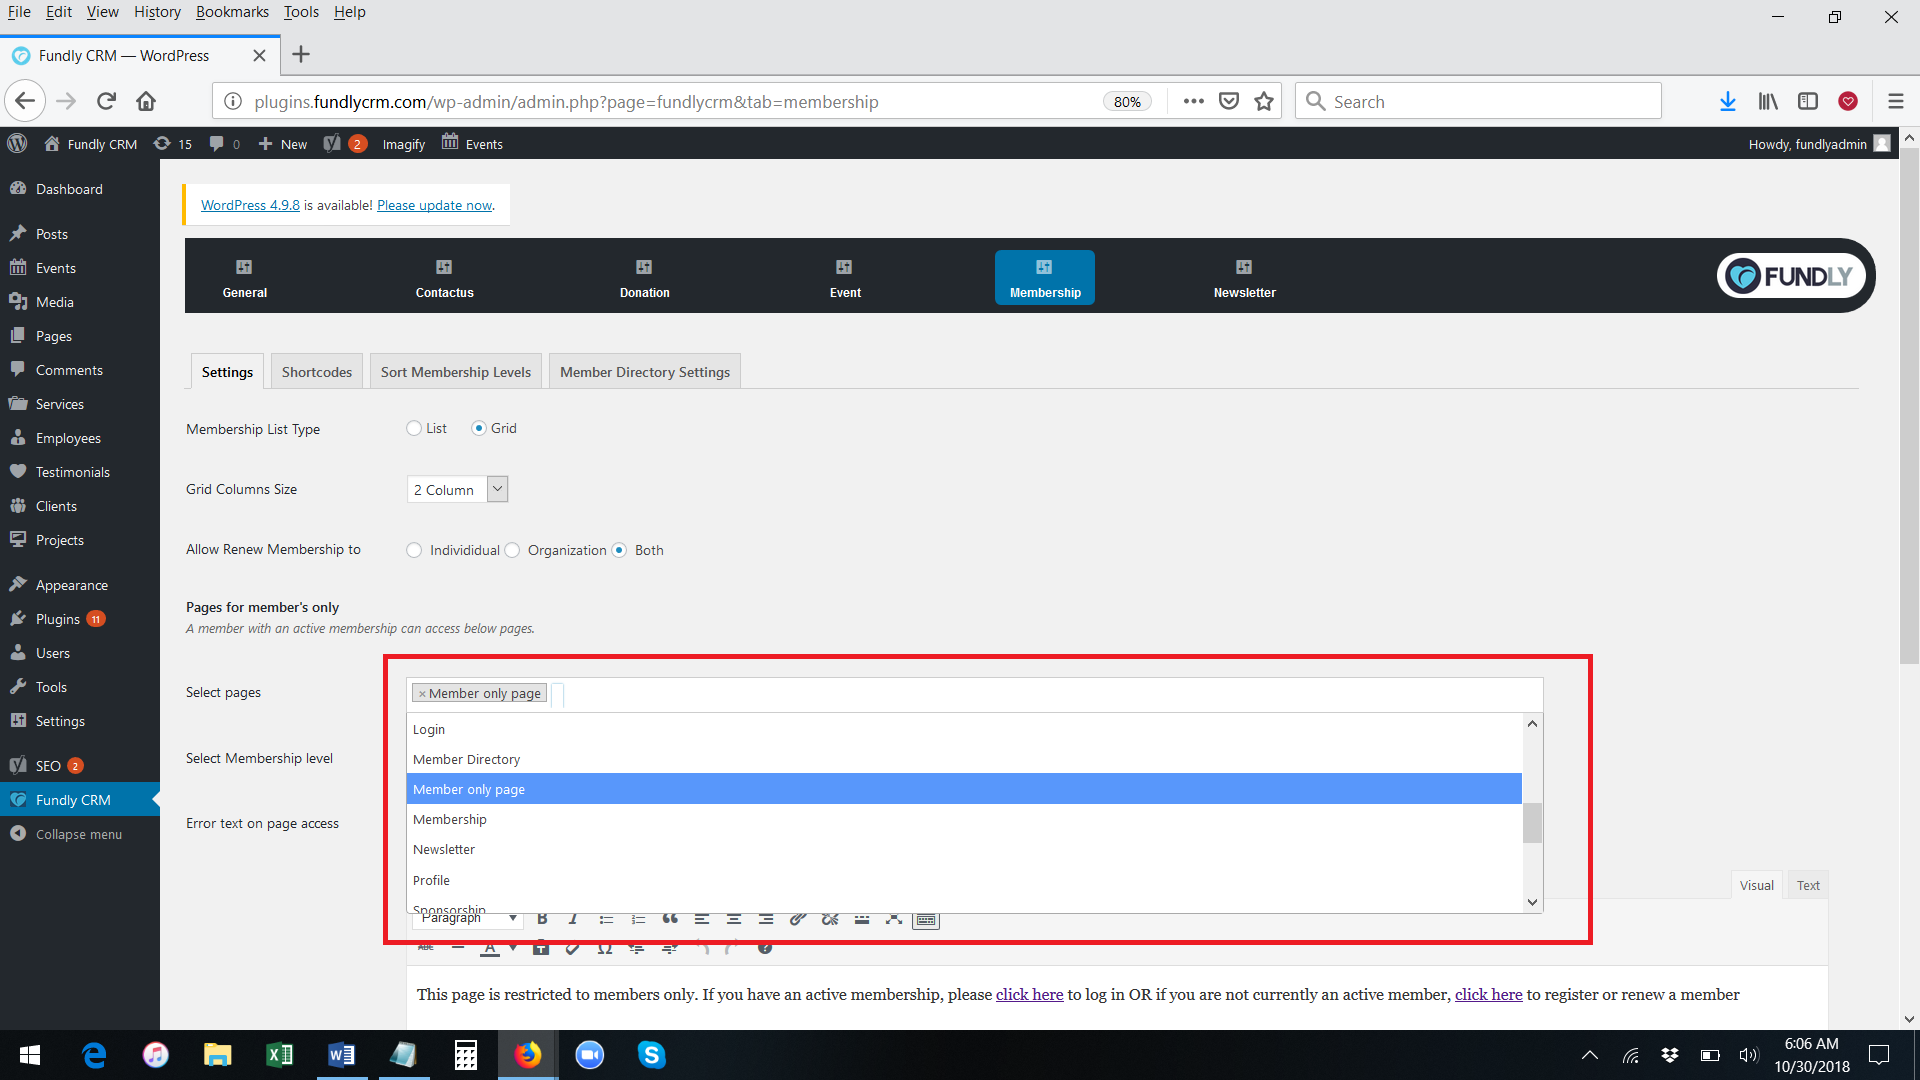
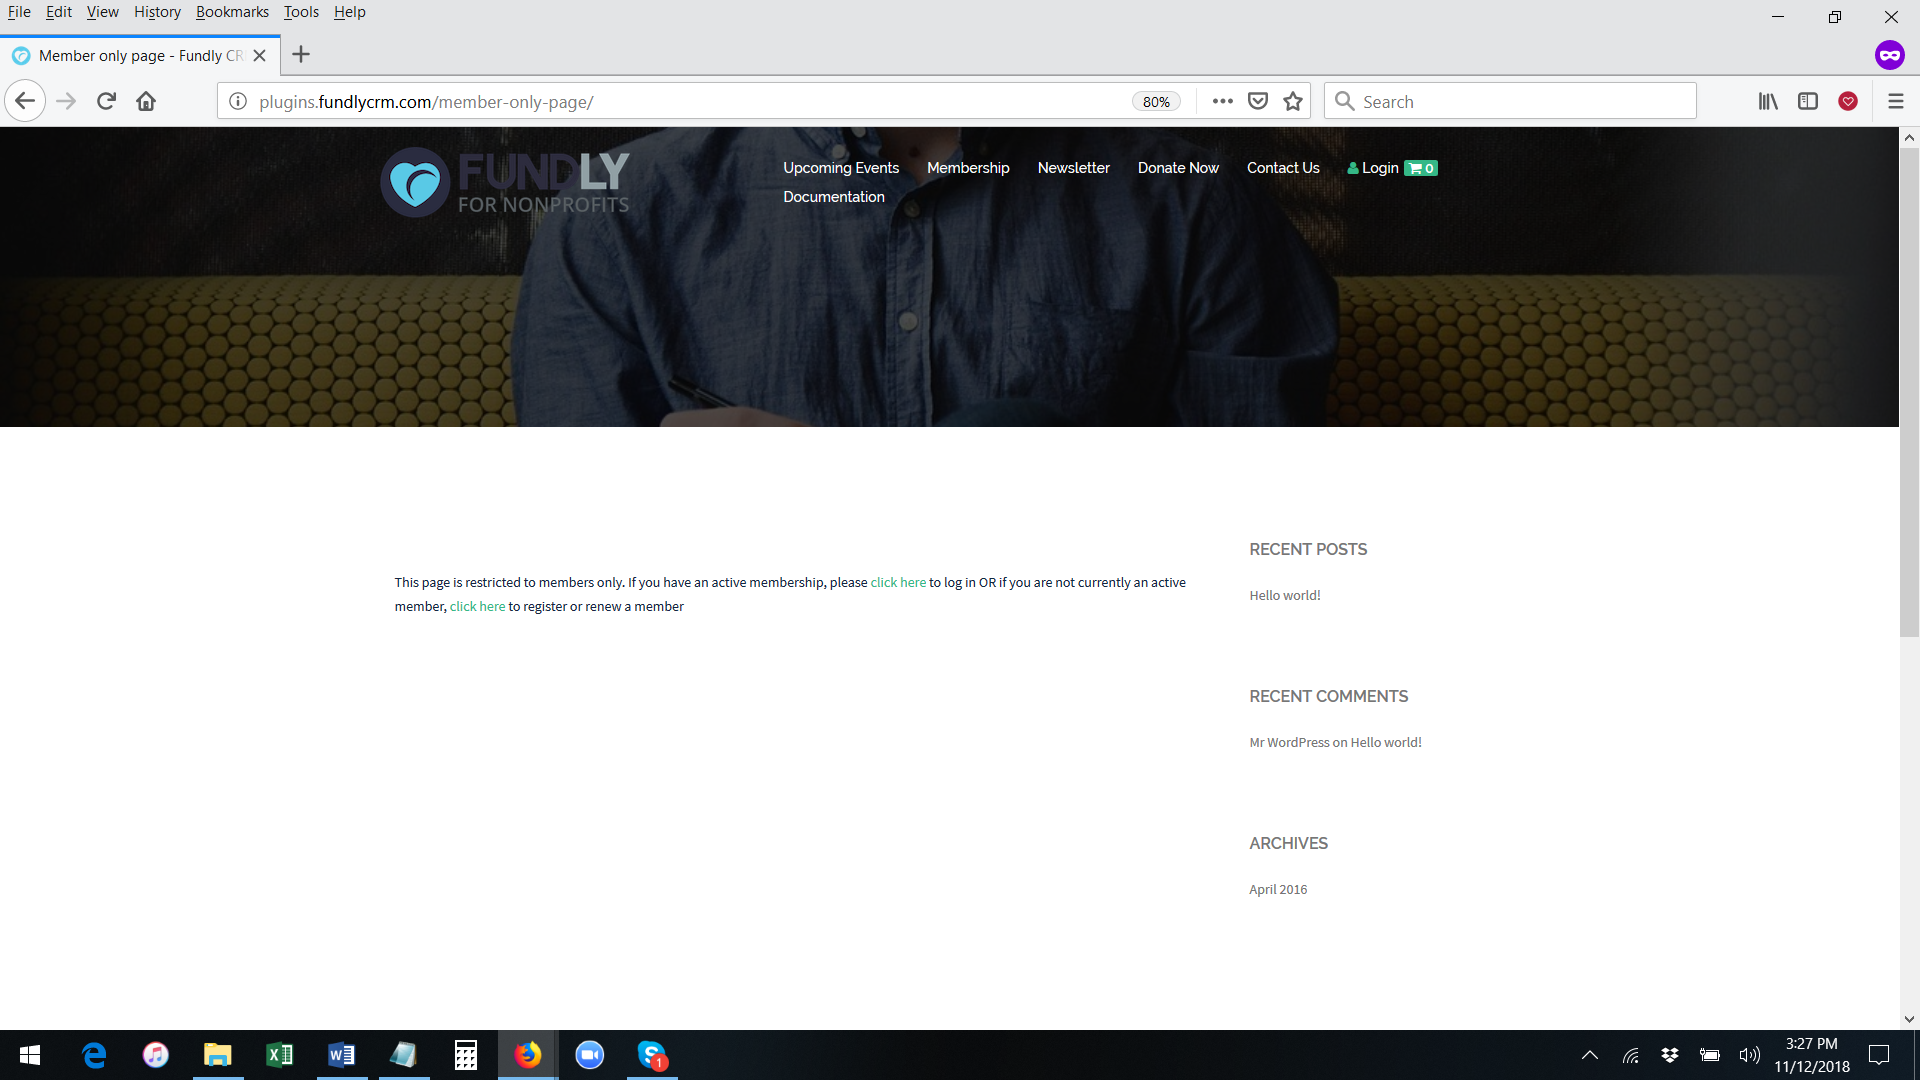
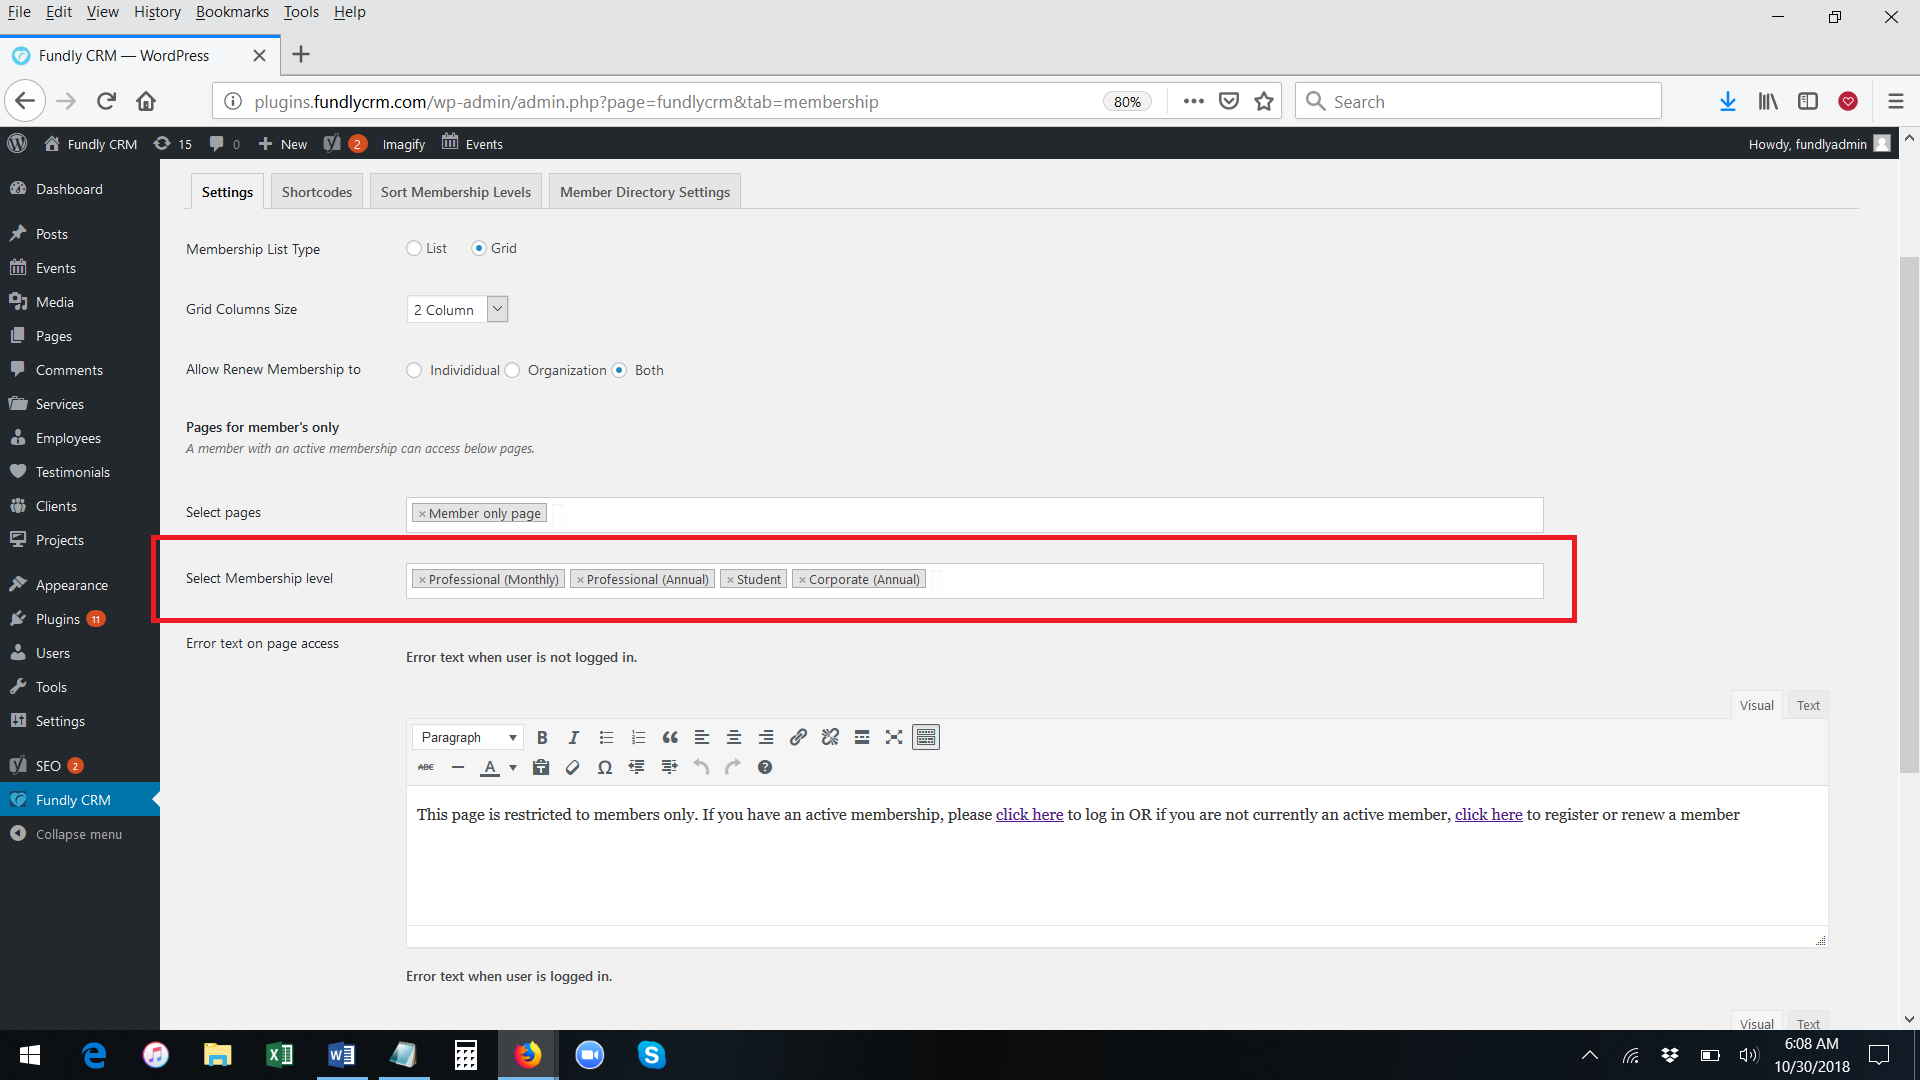
- The Pages for Members Only setting allows you to firewall certain pages of your website behind the public profile log-in. That is, if you want to firewall certain parts of your website so that only those with an active membership can view those pages (and will have to log in first in order to access those pages), then indicate those pages here. Click in the field and then select from the list of pages configured on your website (you can pick more than one page/as many pages as you like).
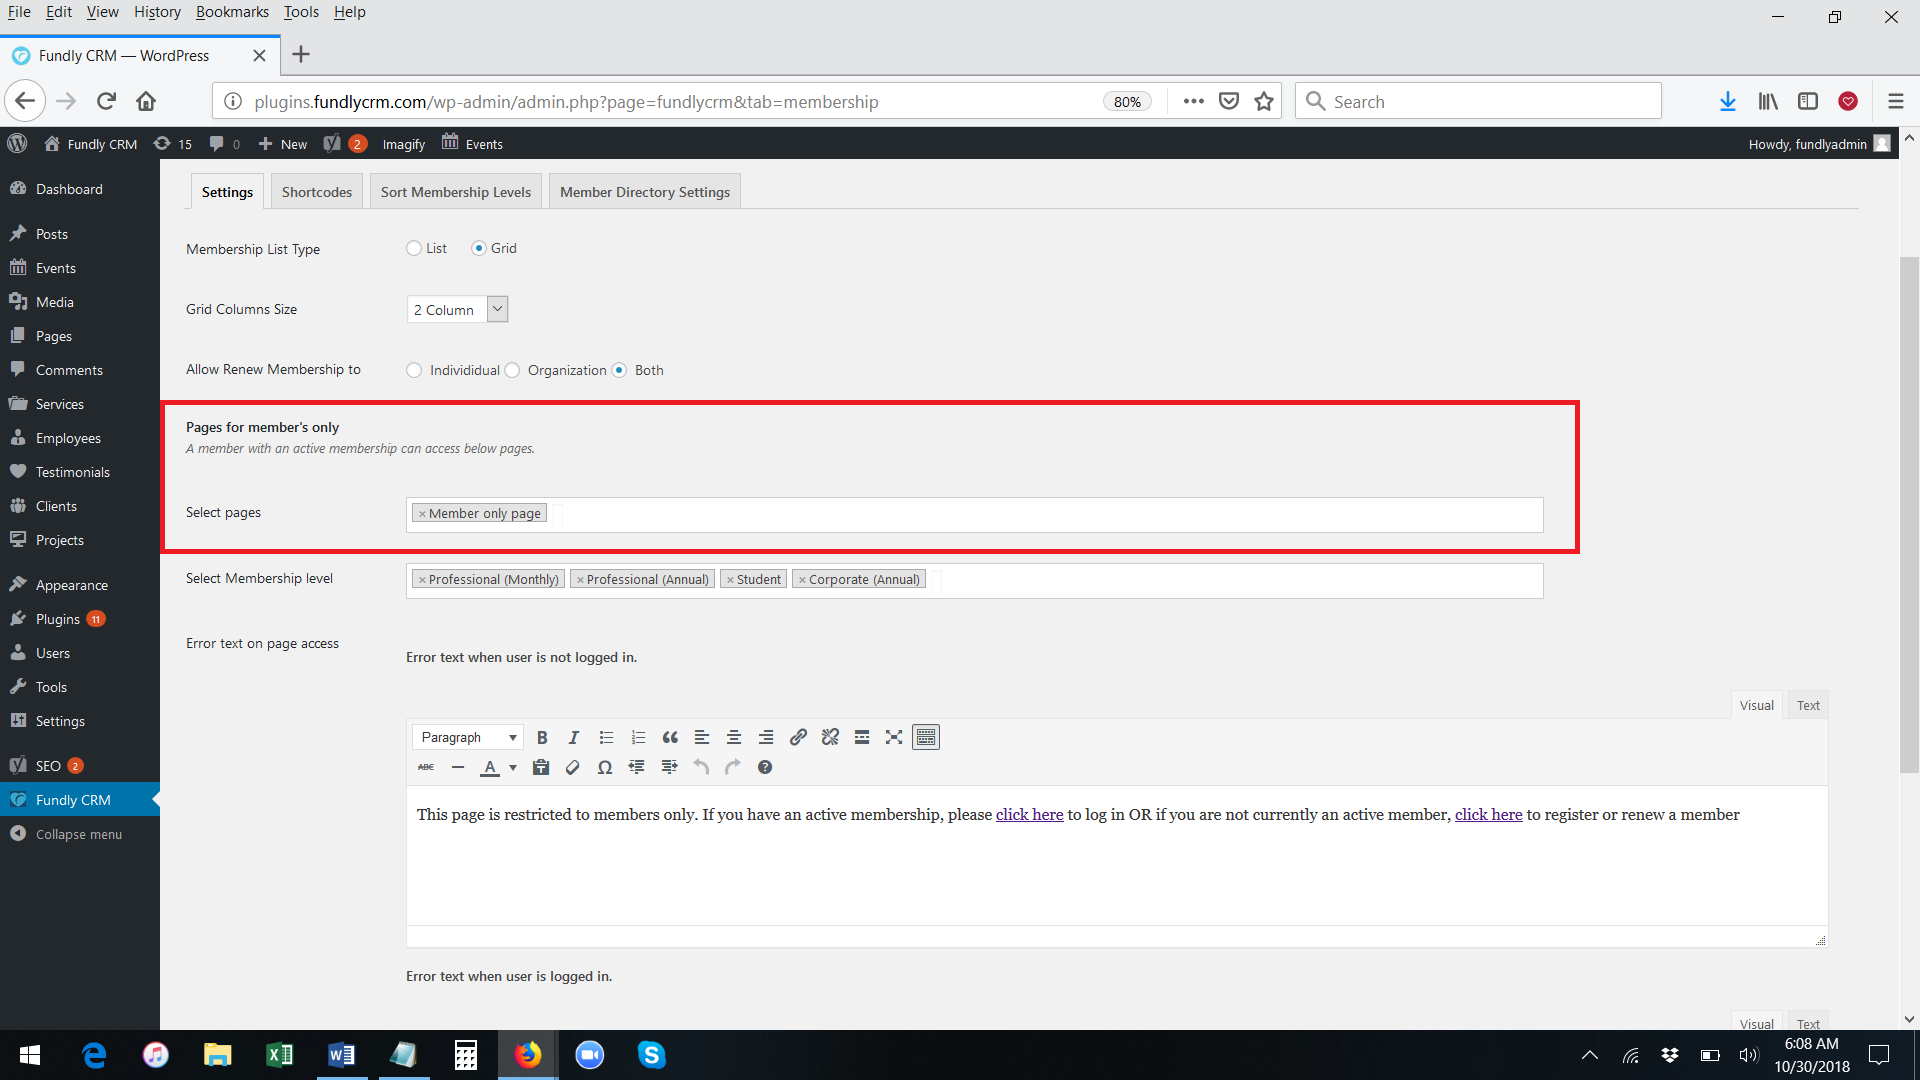
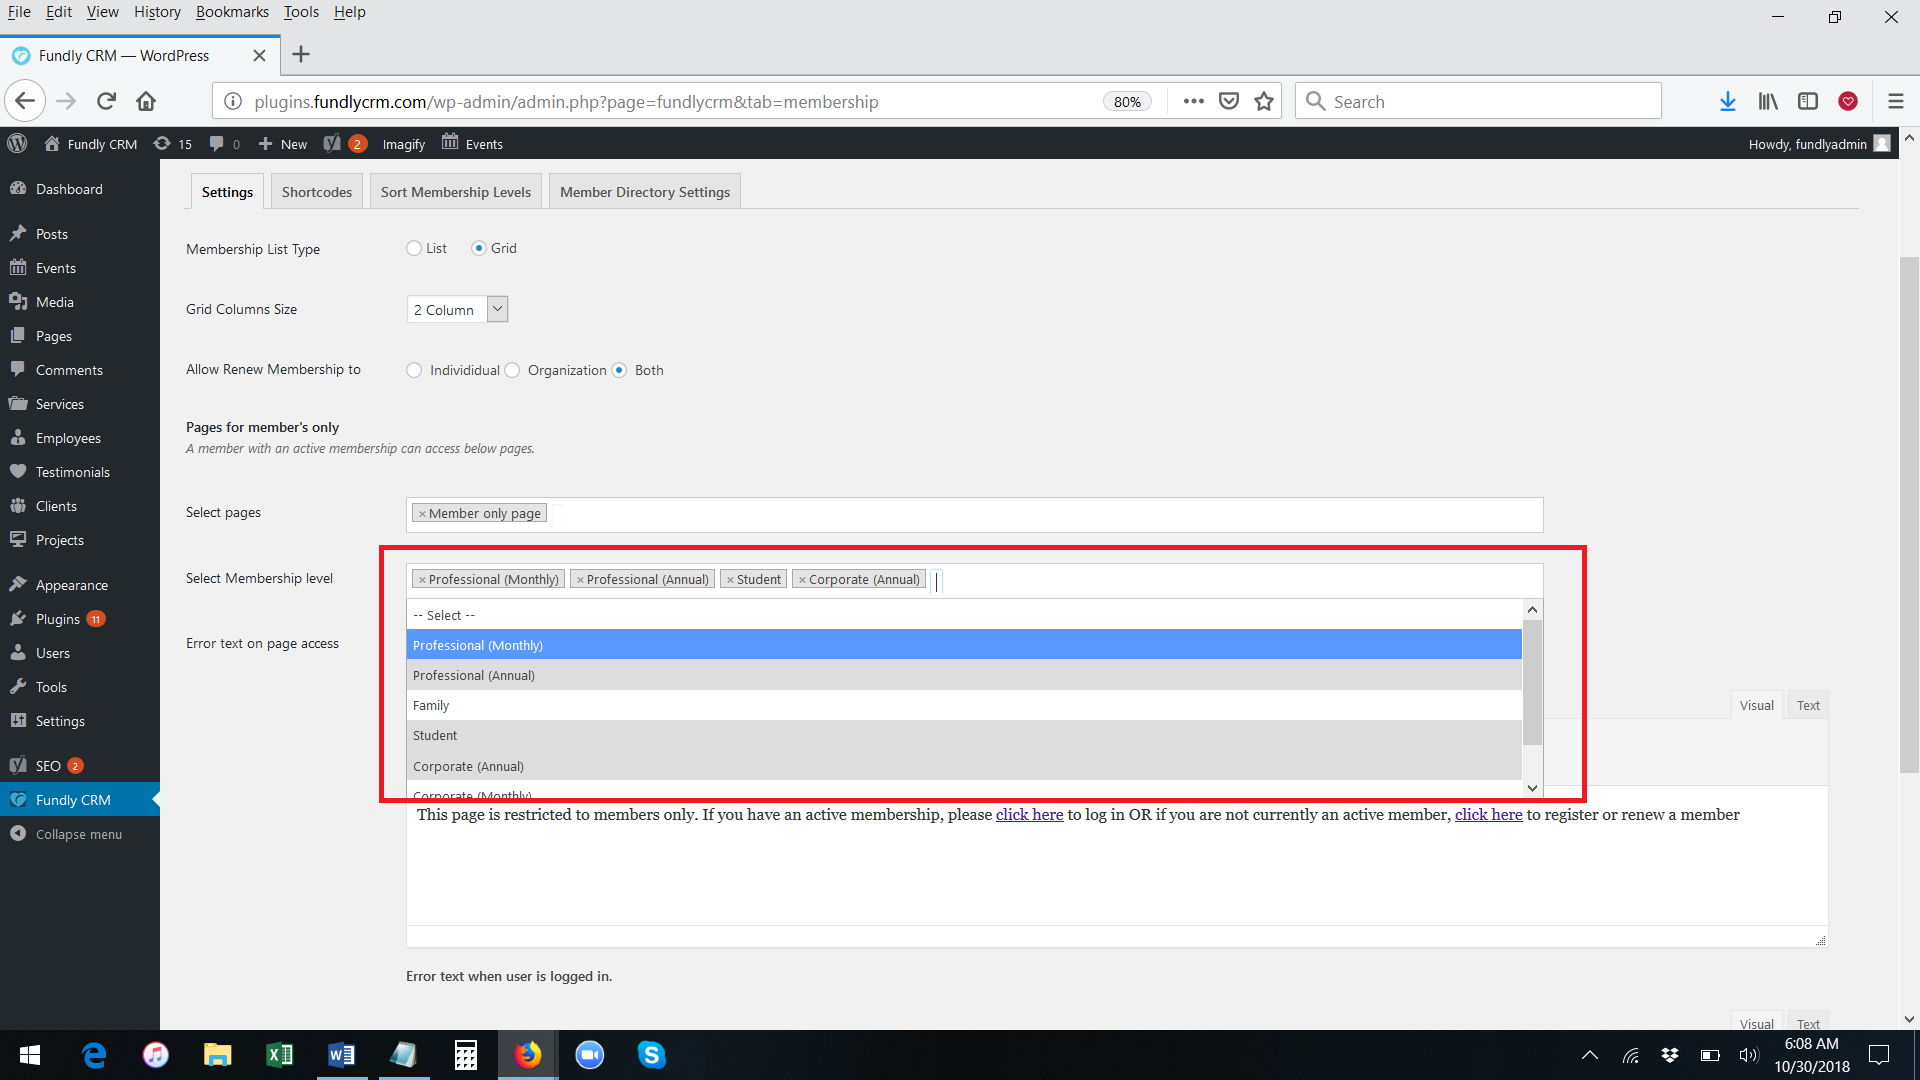
- In the Select Membership Level field, if you have opted to firewall any of your website pages behind the member log in, select which membership levels have access to the pages. That is, perhaps your have four membership levels but only two of them will have access to the member only pages. Click in the field and then select from the list of membership levels configured in your CRM.
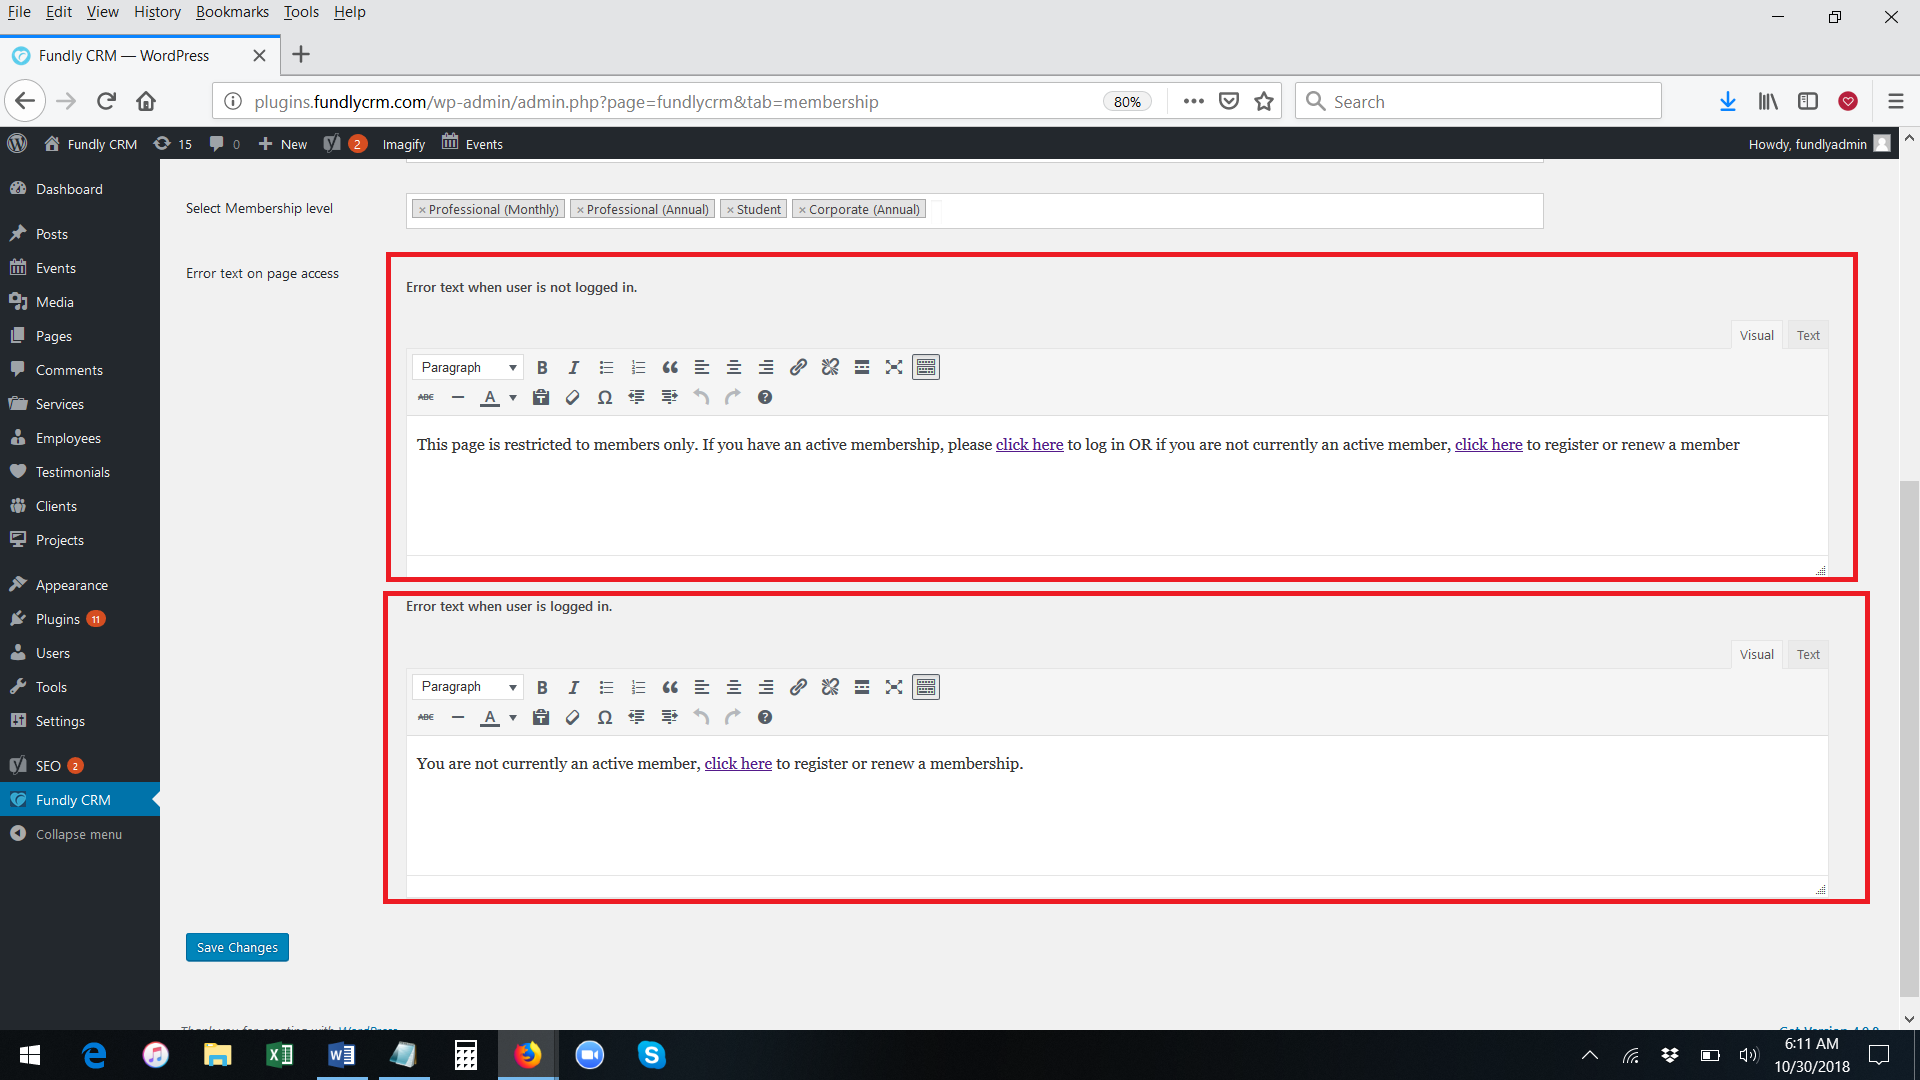
- The Error Text on Page Access section allows you to customize the error message users will receive when they attempt to access a members' only web page (a page firewalled behind the member log in) that they are not permitted to access. This error message text should notify the user that they need to log in and/or that they need to have a membership/membership of a certain level to access the pages. There are two error messages that ca be configured: a) the error message that users who are not logged in will receive when they attempt to access a members' only page and b) the error message users will receive when they are logged in but don't have the correct/necessary membership level to access a members' only page.
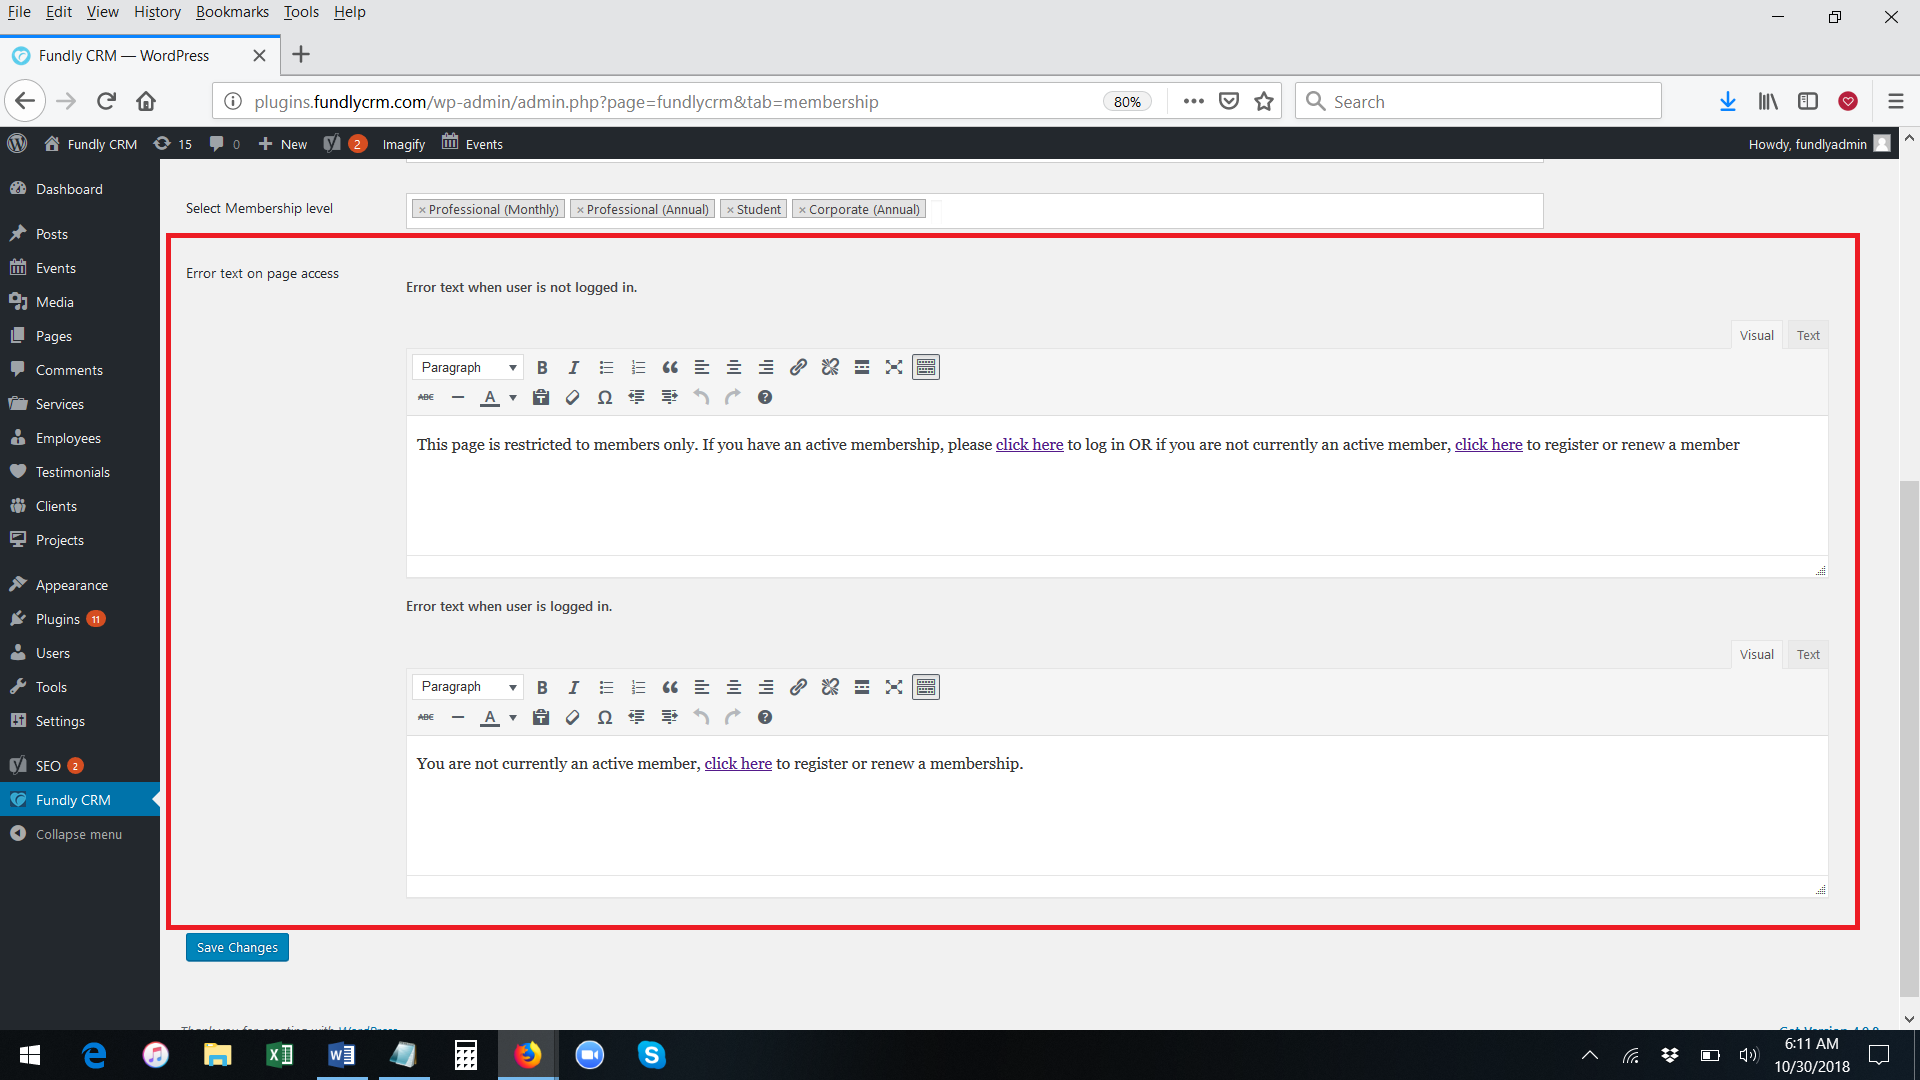
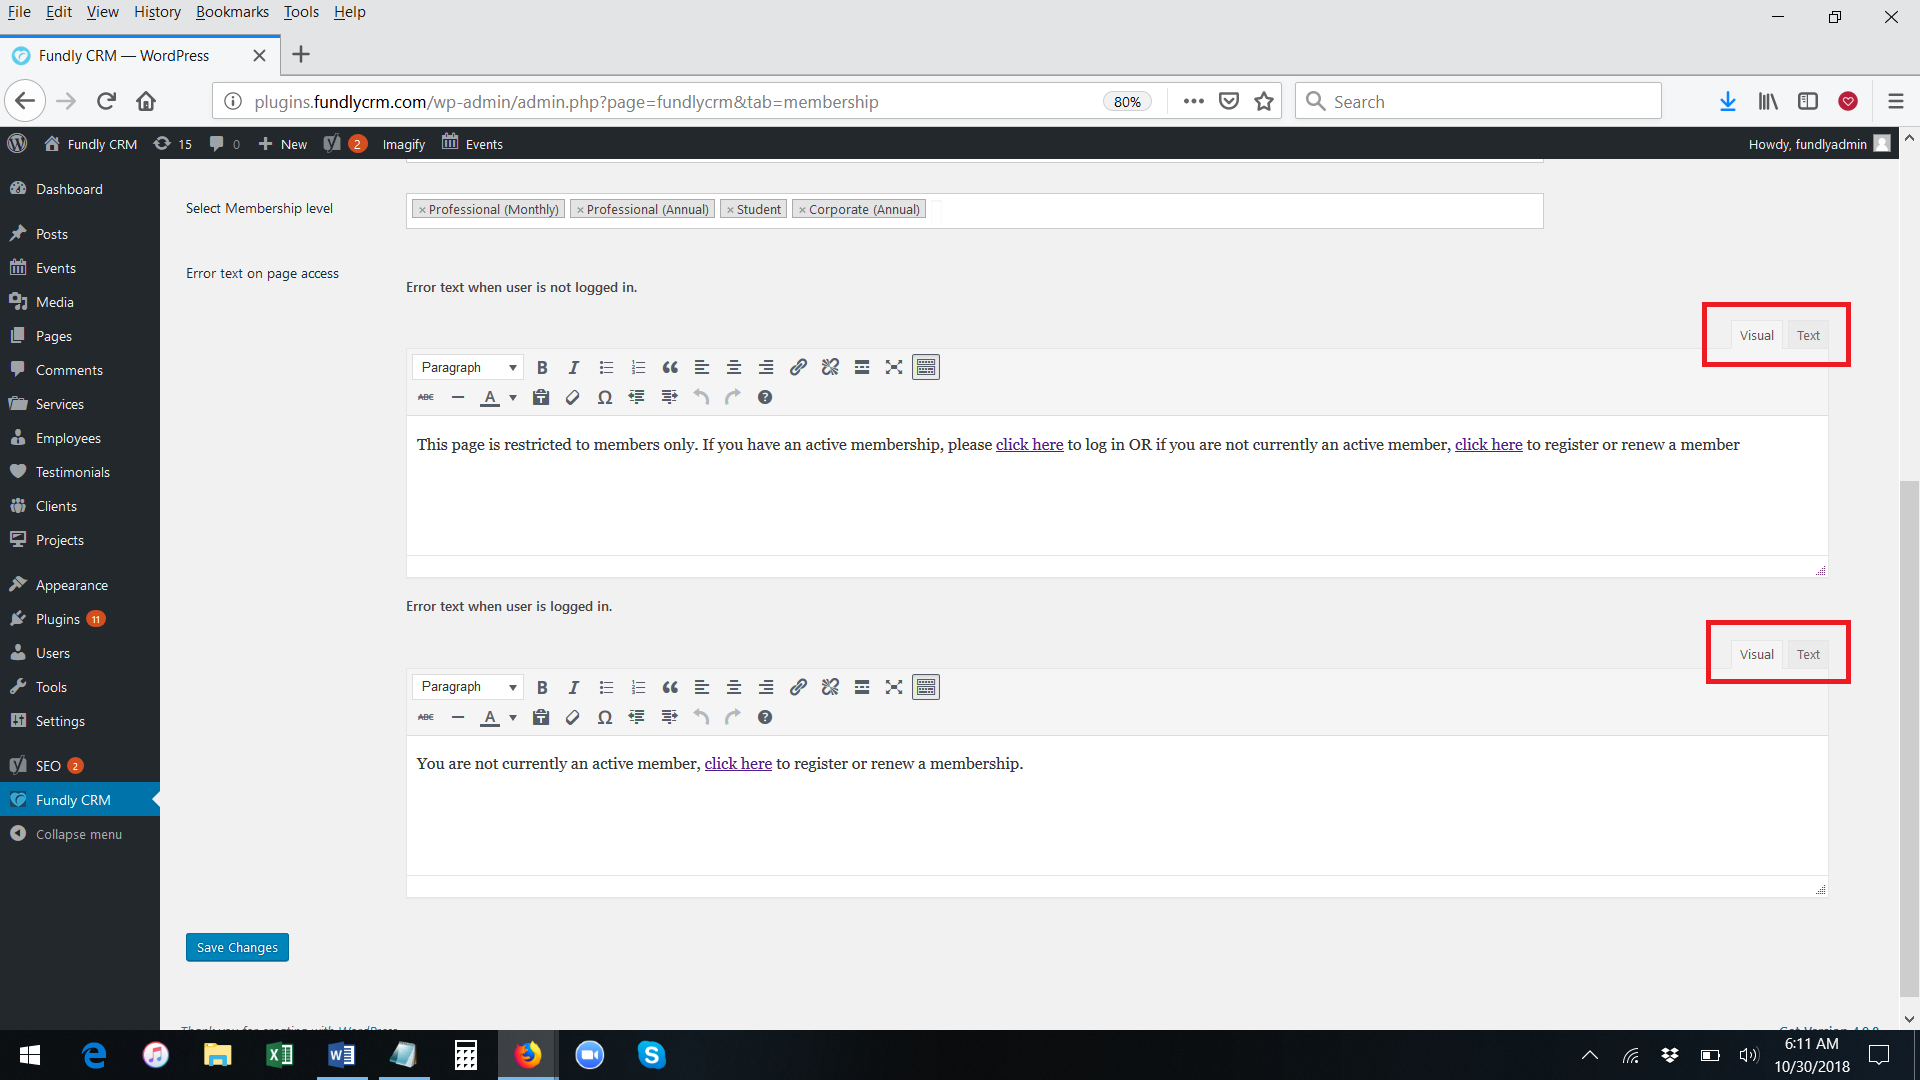
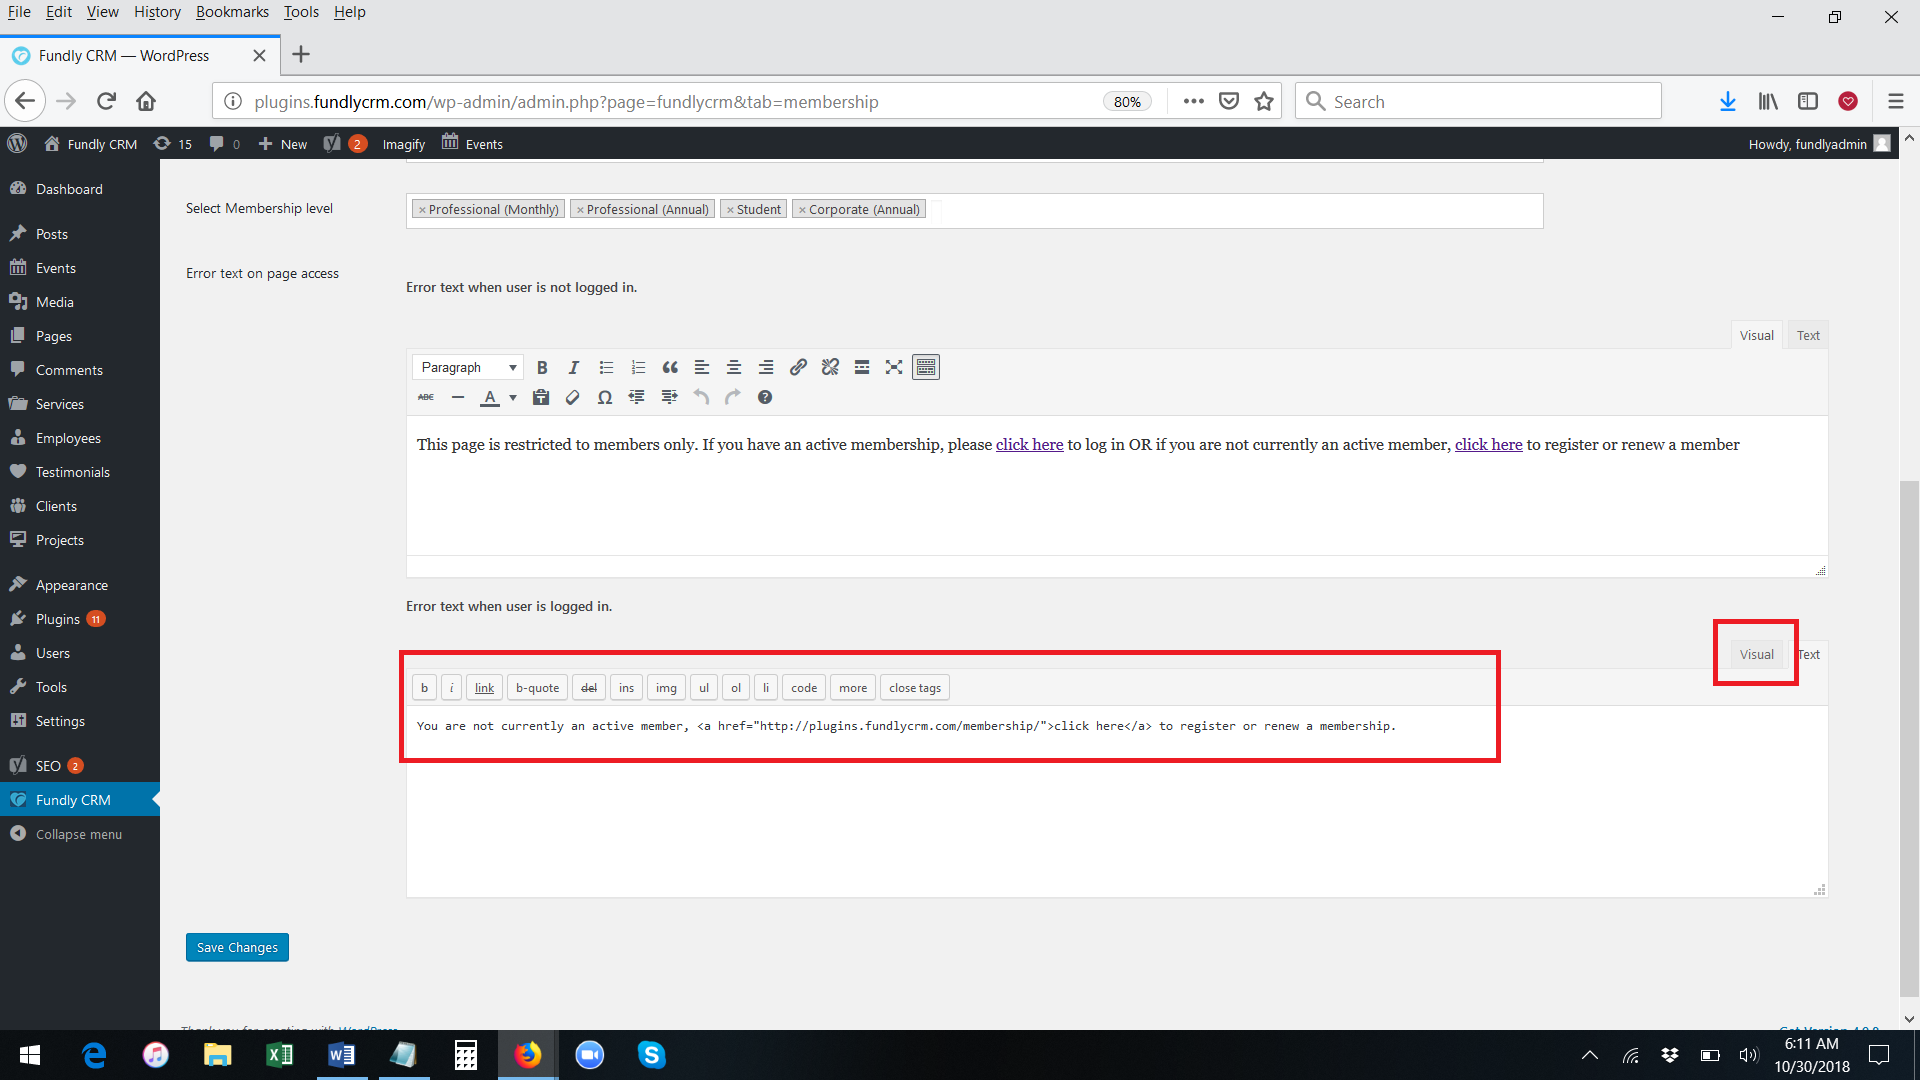
- Use the Visual/Text toggle on the right of each box to toggle to HTML source code mode (by clicking the text tab).
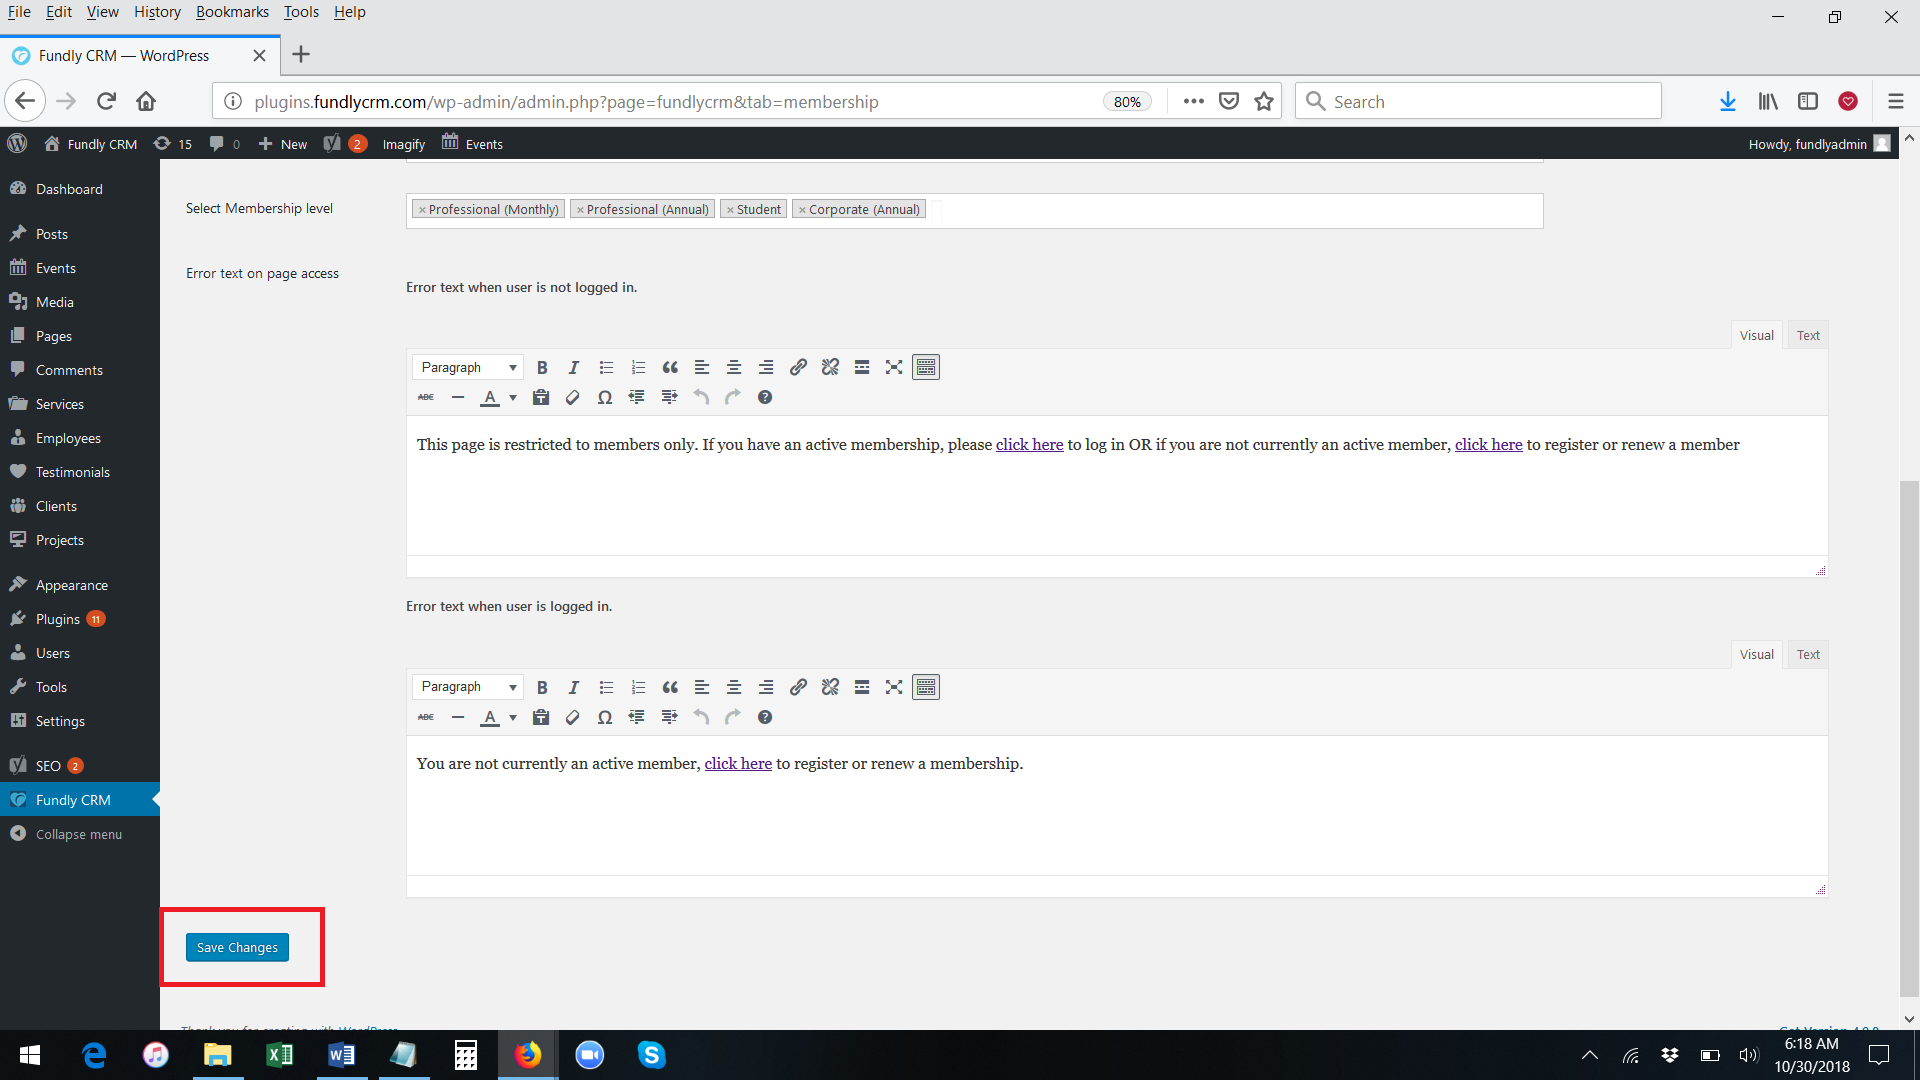
- After making any changes on this page, click the blue Save Changes button at the bottom of the page.
- The Membership List Type setting controls the default display style of the Buy/Renew membership page. In the first screen shot of the front facing buy/renew membership page, the default is set to List. In the second, it is set to Grid. The user can toggle between grid and list view by clicking the circled toggle setting/button in the upper right of the screen.
- On the Sort Memberships tab:
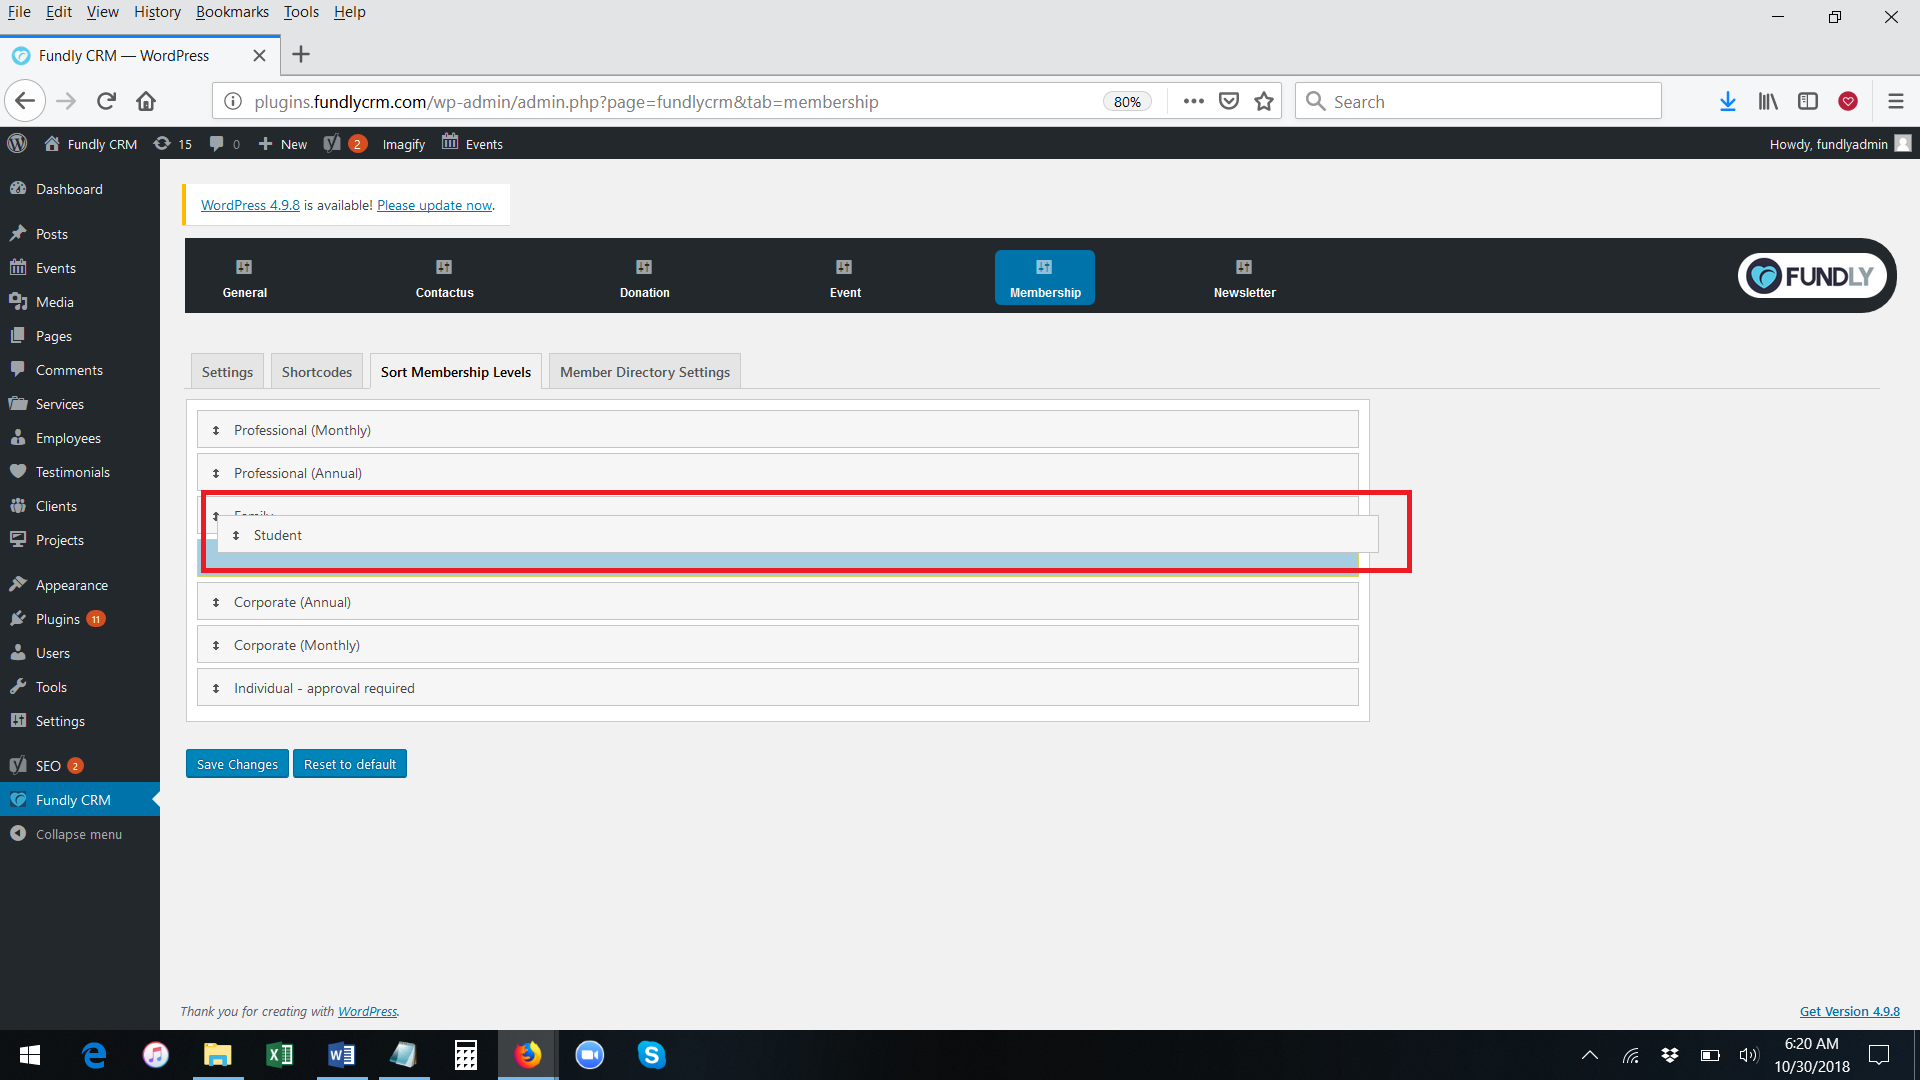
- Click on any membership level and drag and drop to set the display level of the membership on the Join/Renew page of your website.
- After making any changes, click the blue Save Changes button at the bottom of the screen.
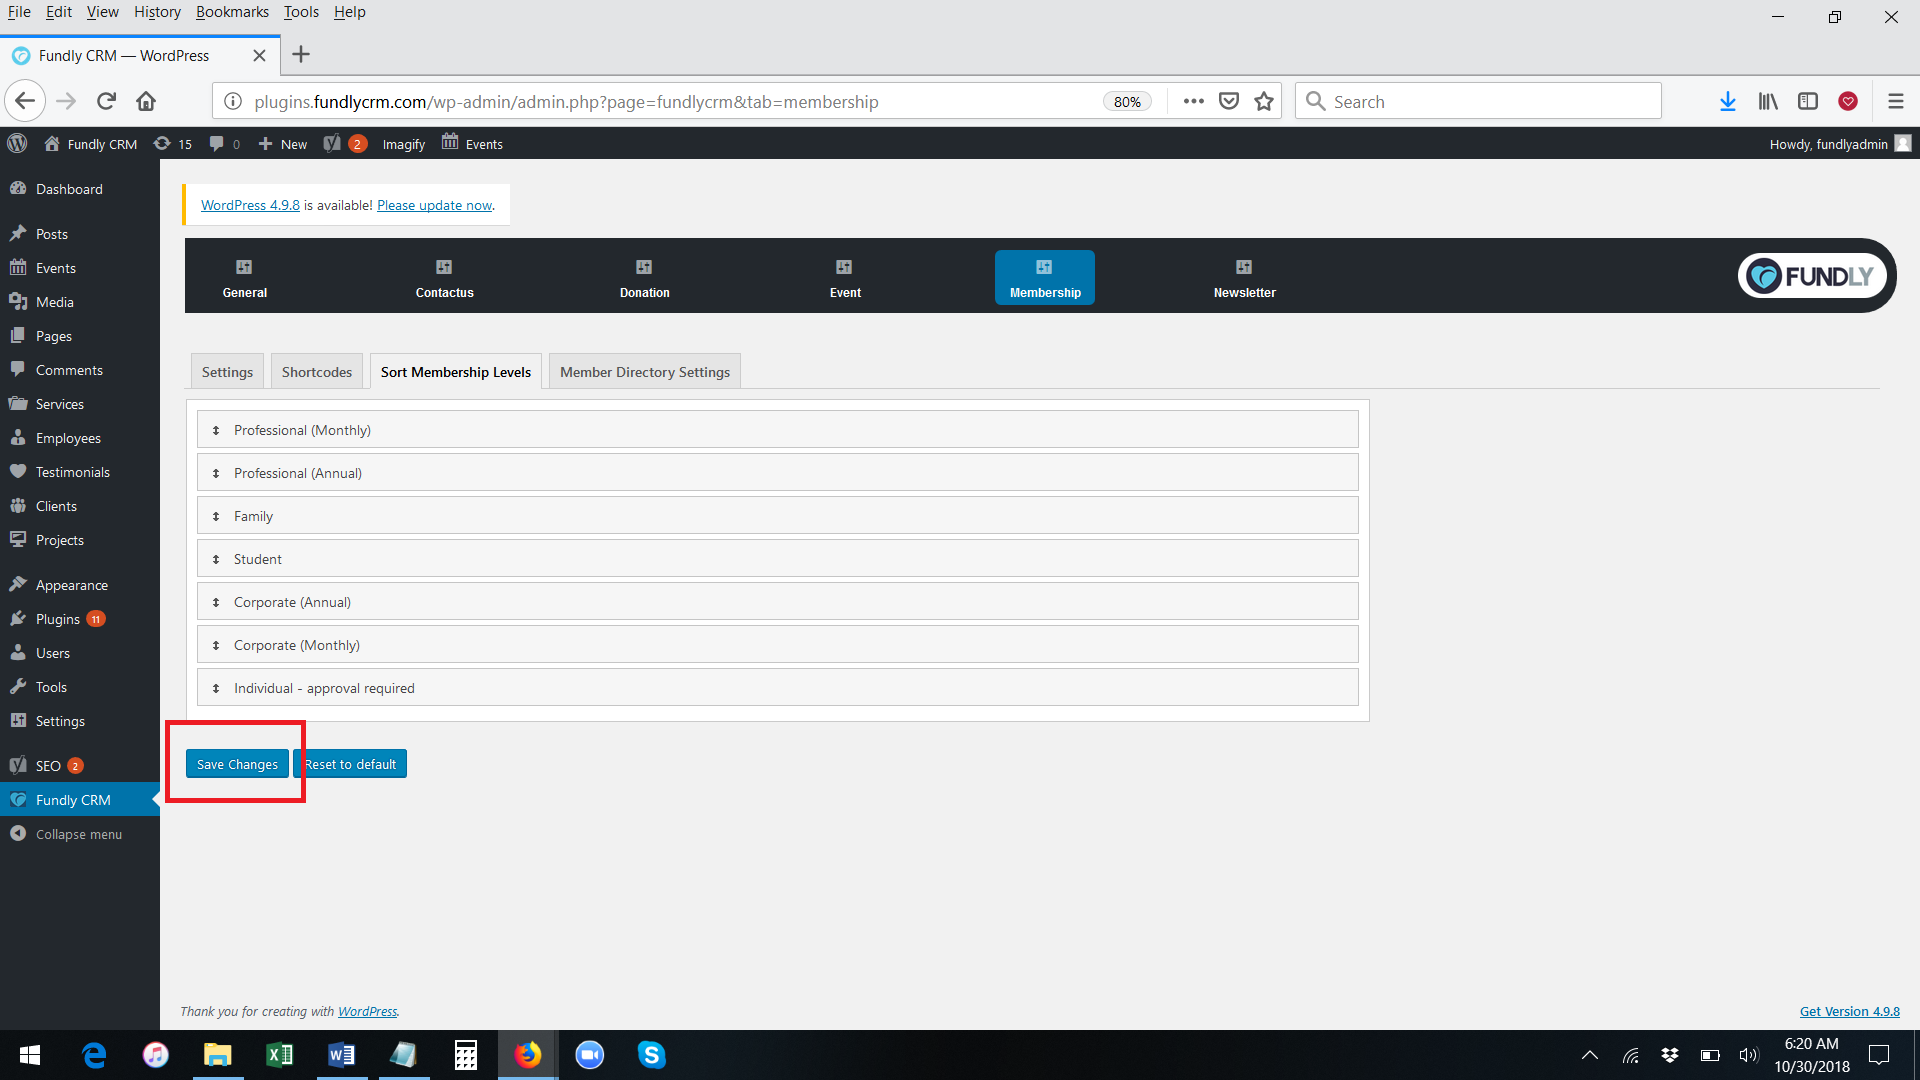
- If you want to undo your changes and set the list back to the default, click the blue Reset to Default button.

- Click on any membership level and drag and drop to set the display level of the membership on the Join/Renew page of your website.
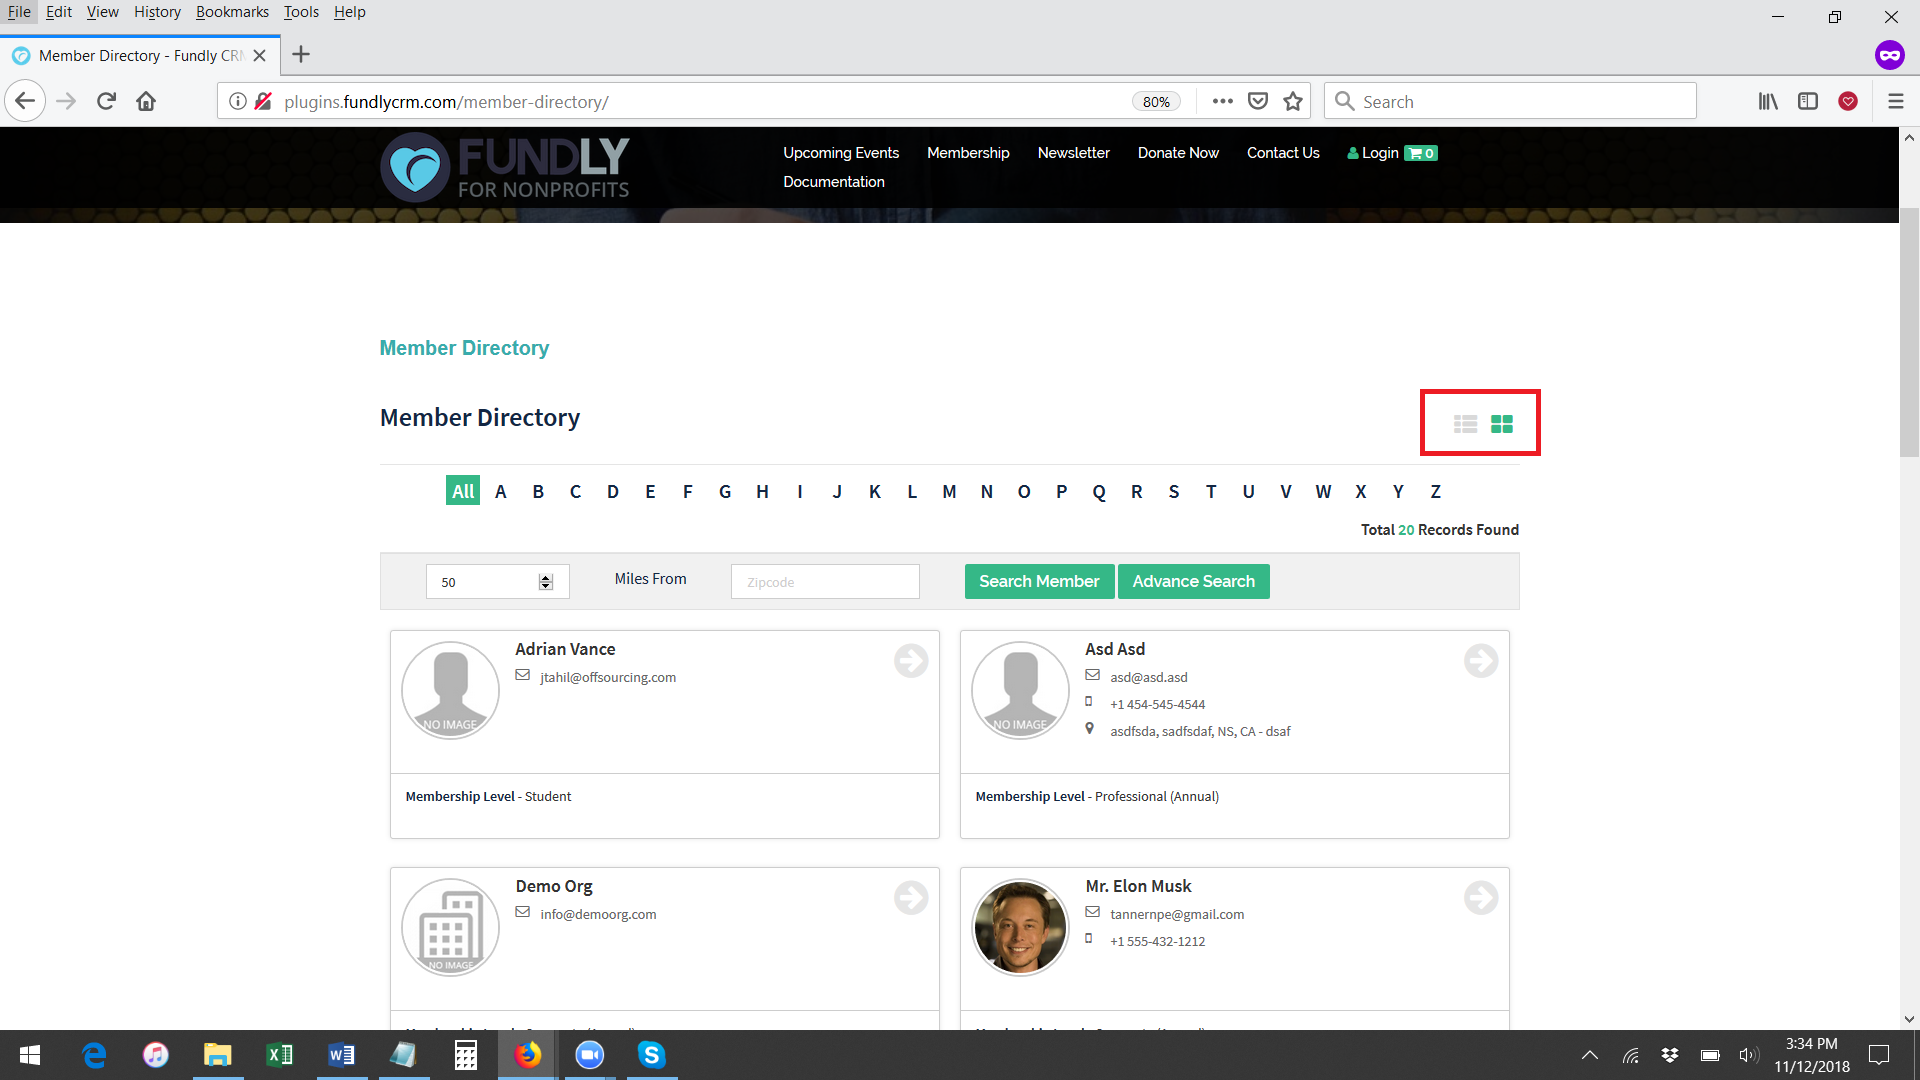
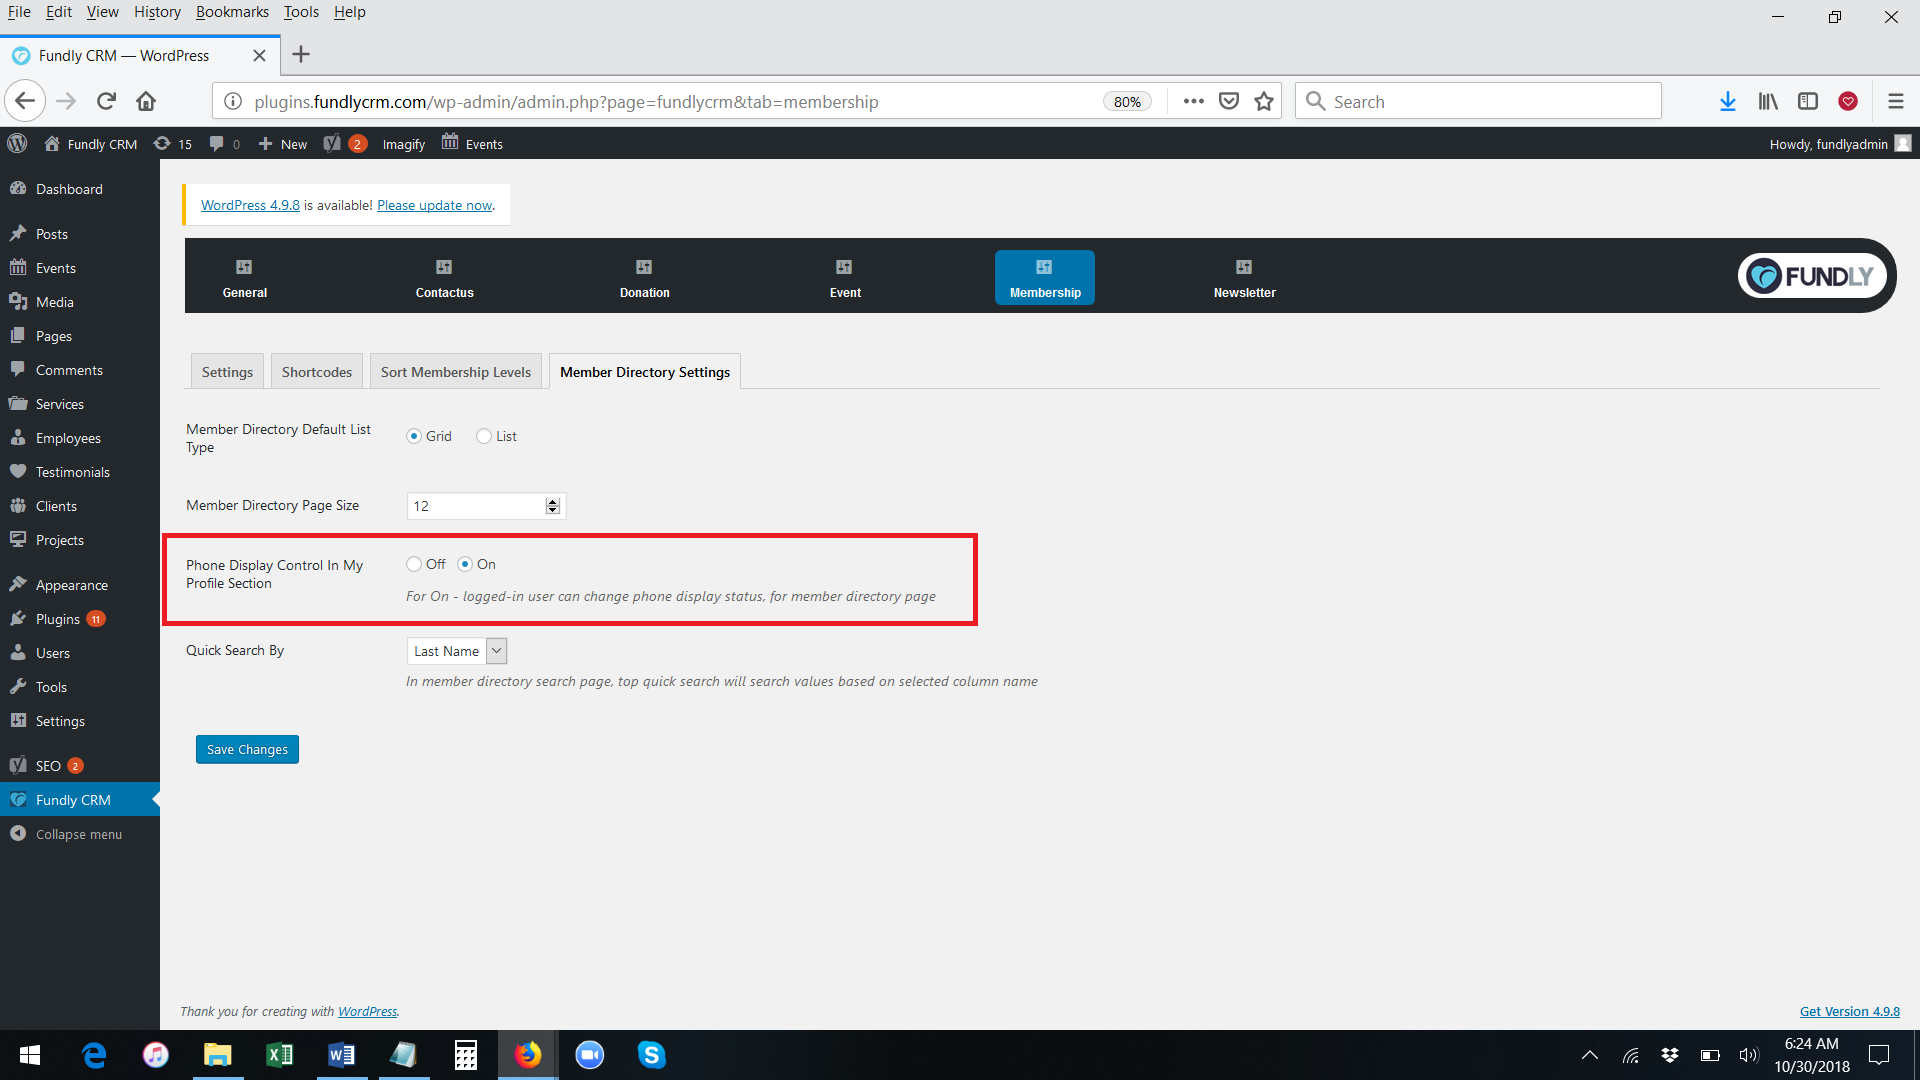
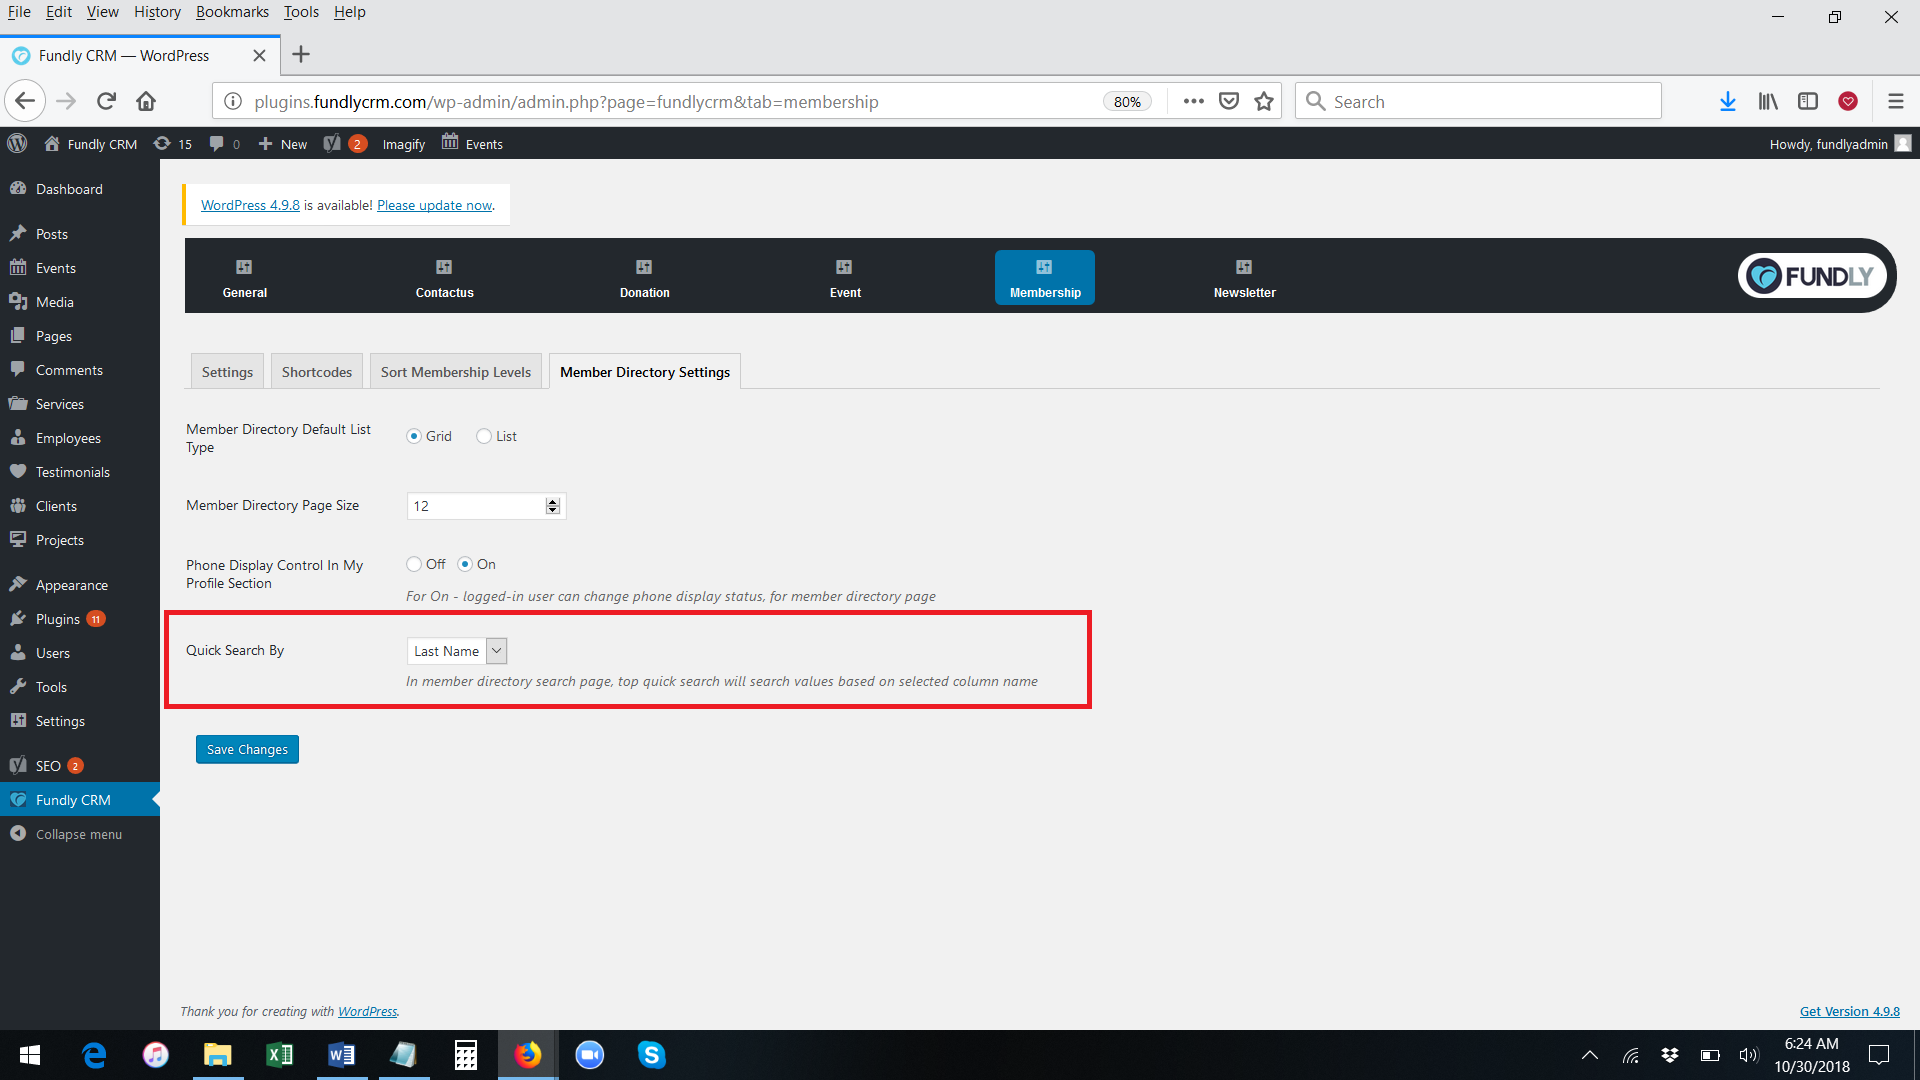
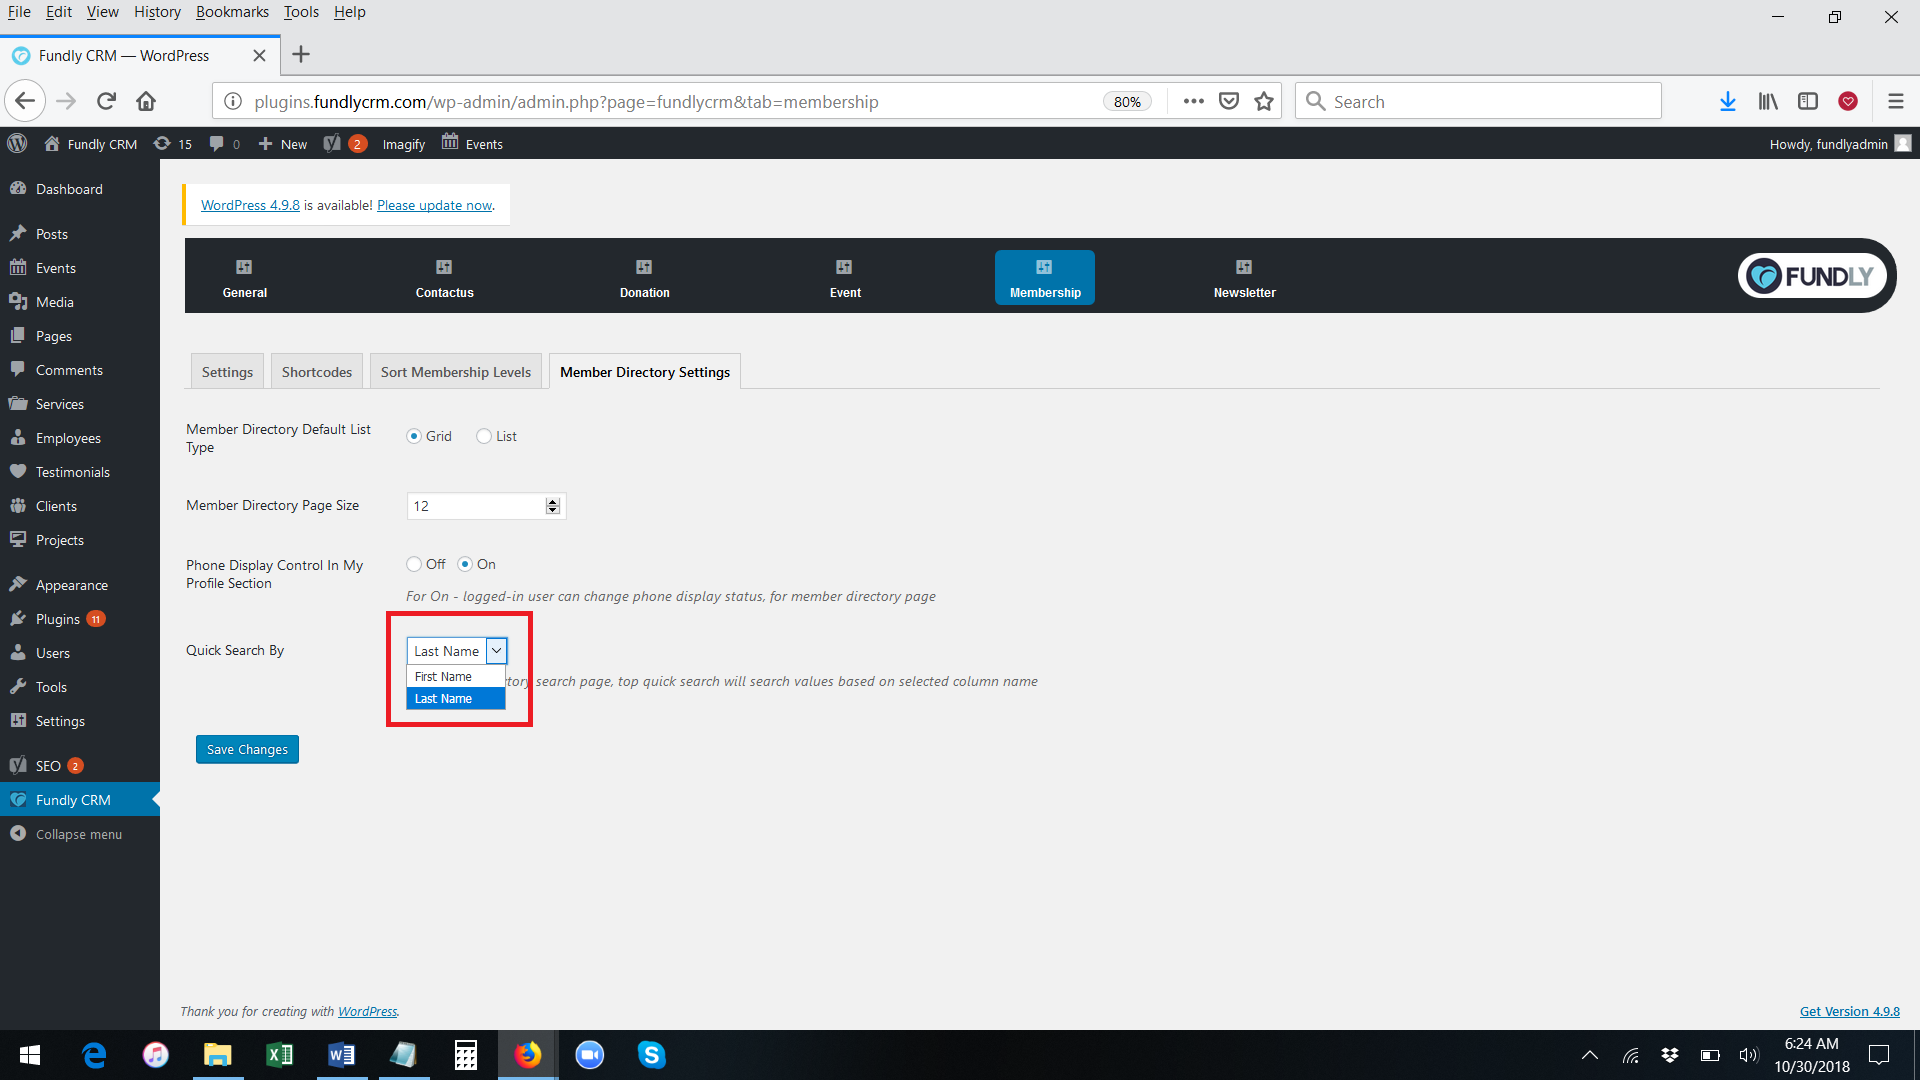
- On the Membership Directory Settings tab:
- The Member Directory Default List Type setting allows you to display the member directory as a Grid or as a List. The user can toggle the list versus the gird view by clicking the toggle in the upper right of the screen (circled in the screen shots below).
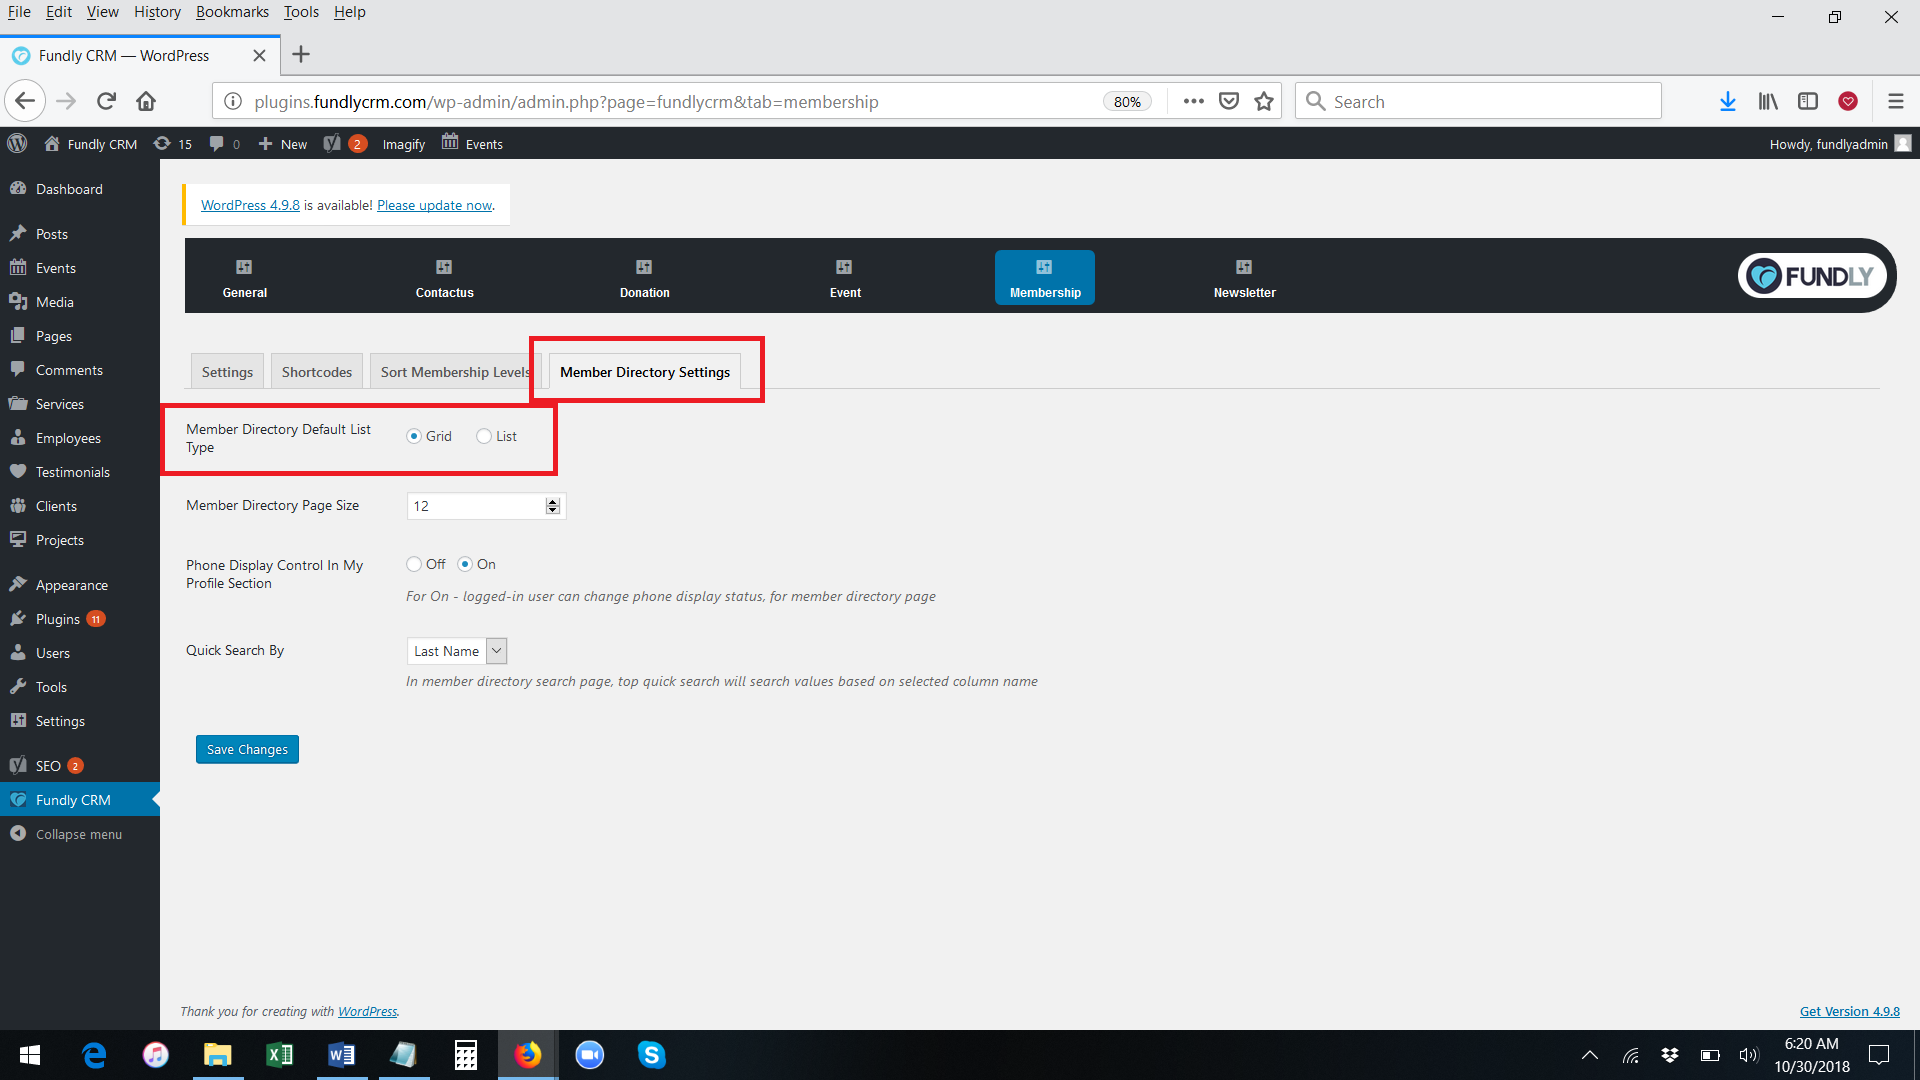

- The Member Directory Page Size setting controls the number of member records that load/display by default when the user first navigates to the page. The user can opt to view more records by clicking the Display More Members button at the bottom of the page. The next batch of X number of records will load, with X being equal to the number you set in the Member Directory Page Size.

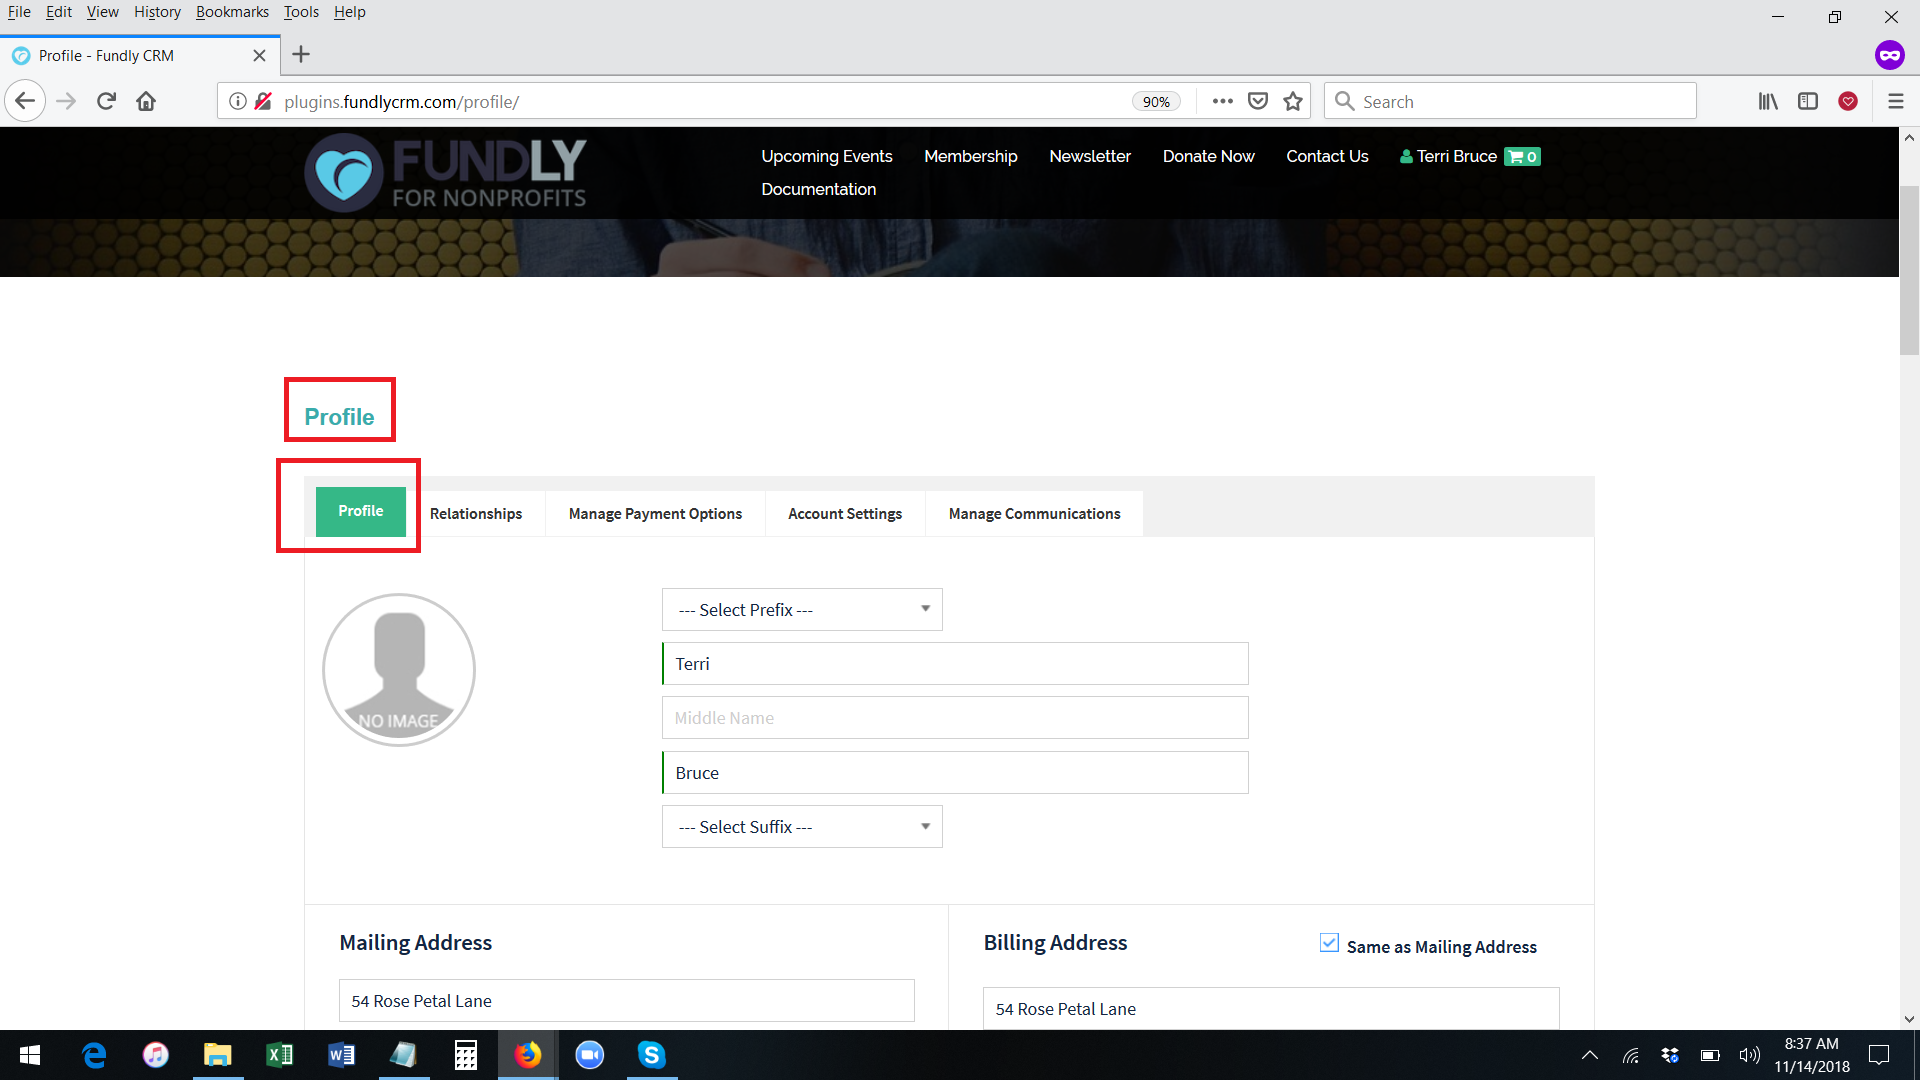
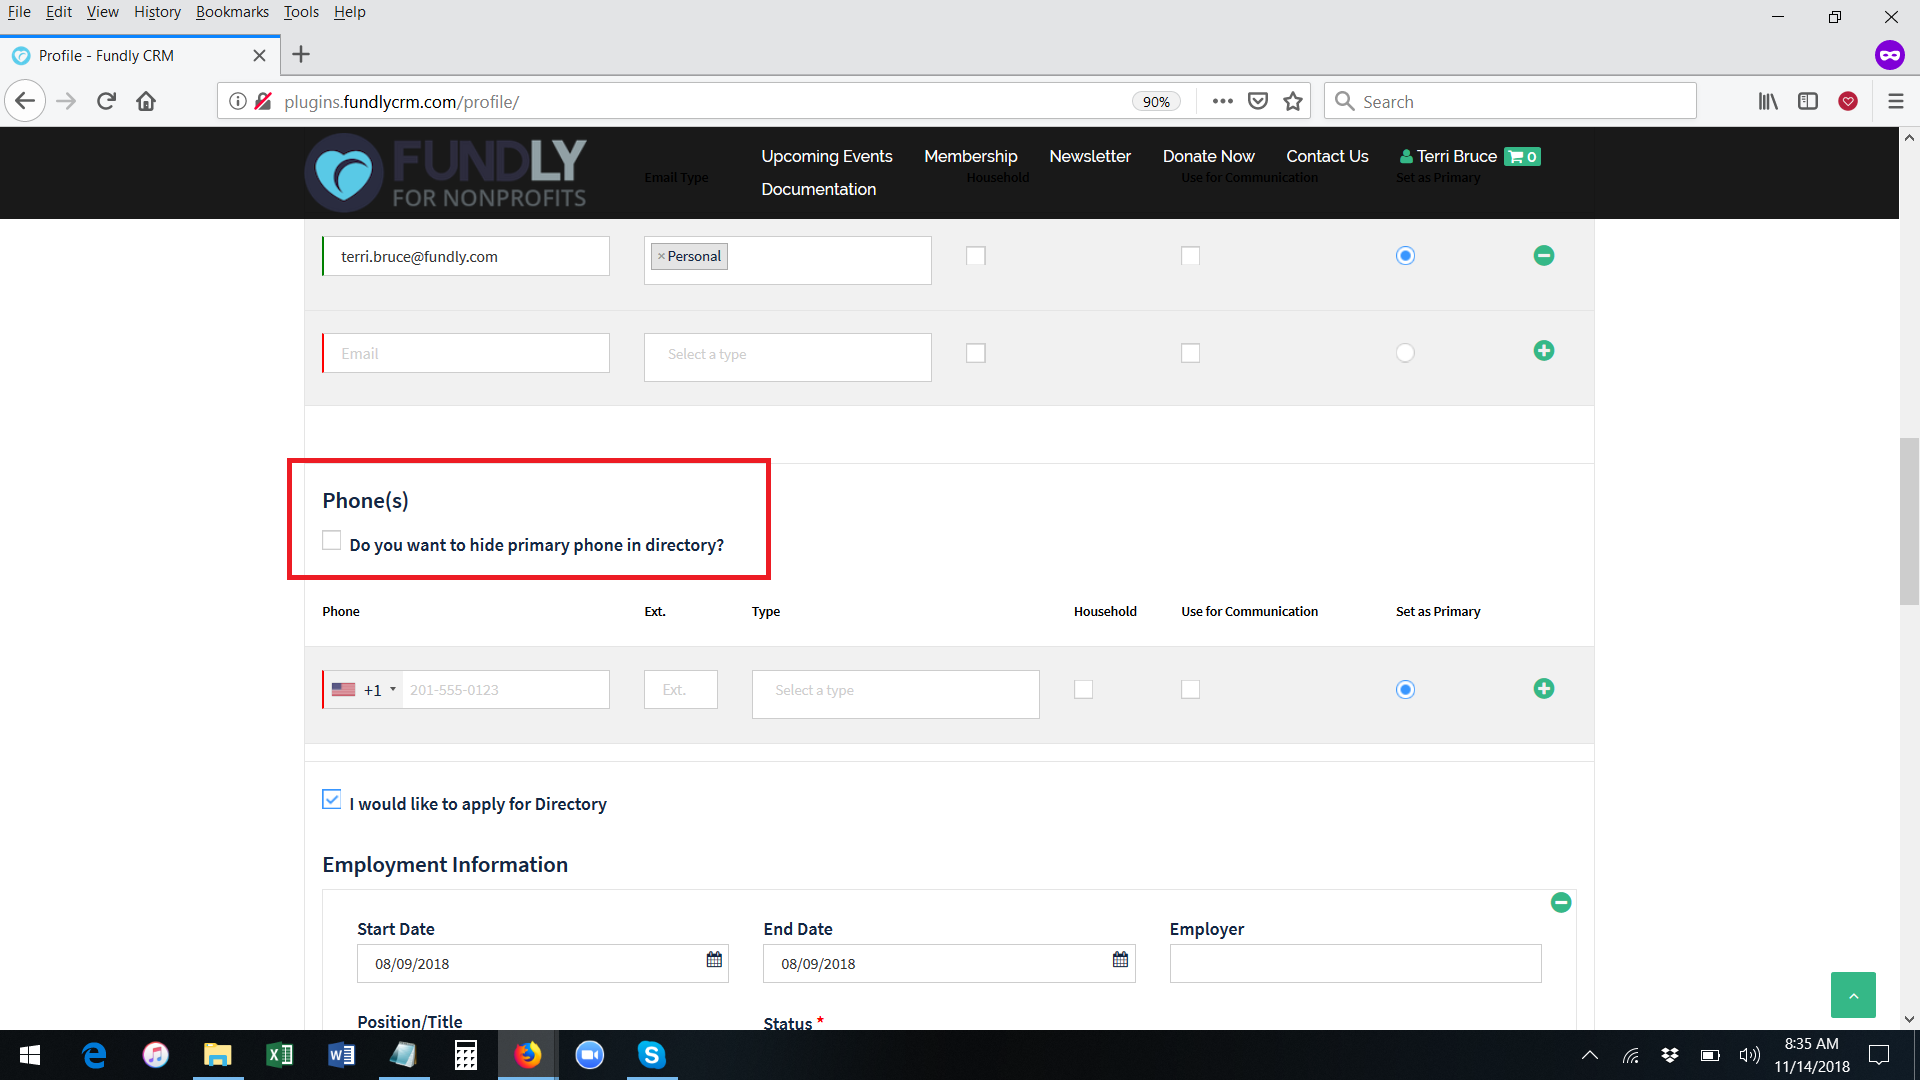
- The Phone Display Controls In My Profile Section gives members/users the option to keep their primary phone number from displaying in the member directory. When this option is set to "yes," the user will see a check box that will allow them to hide their phone number from the directory when they are logged in to their public profile and on the Profile tab of My Profile. If this option is set to "No," then the check box will not display.
- The Quick Search By setting controls if the Quick Search box at the top of the member directory page searches the first name field or last name field of the member directory.
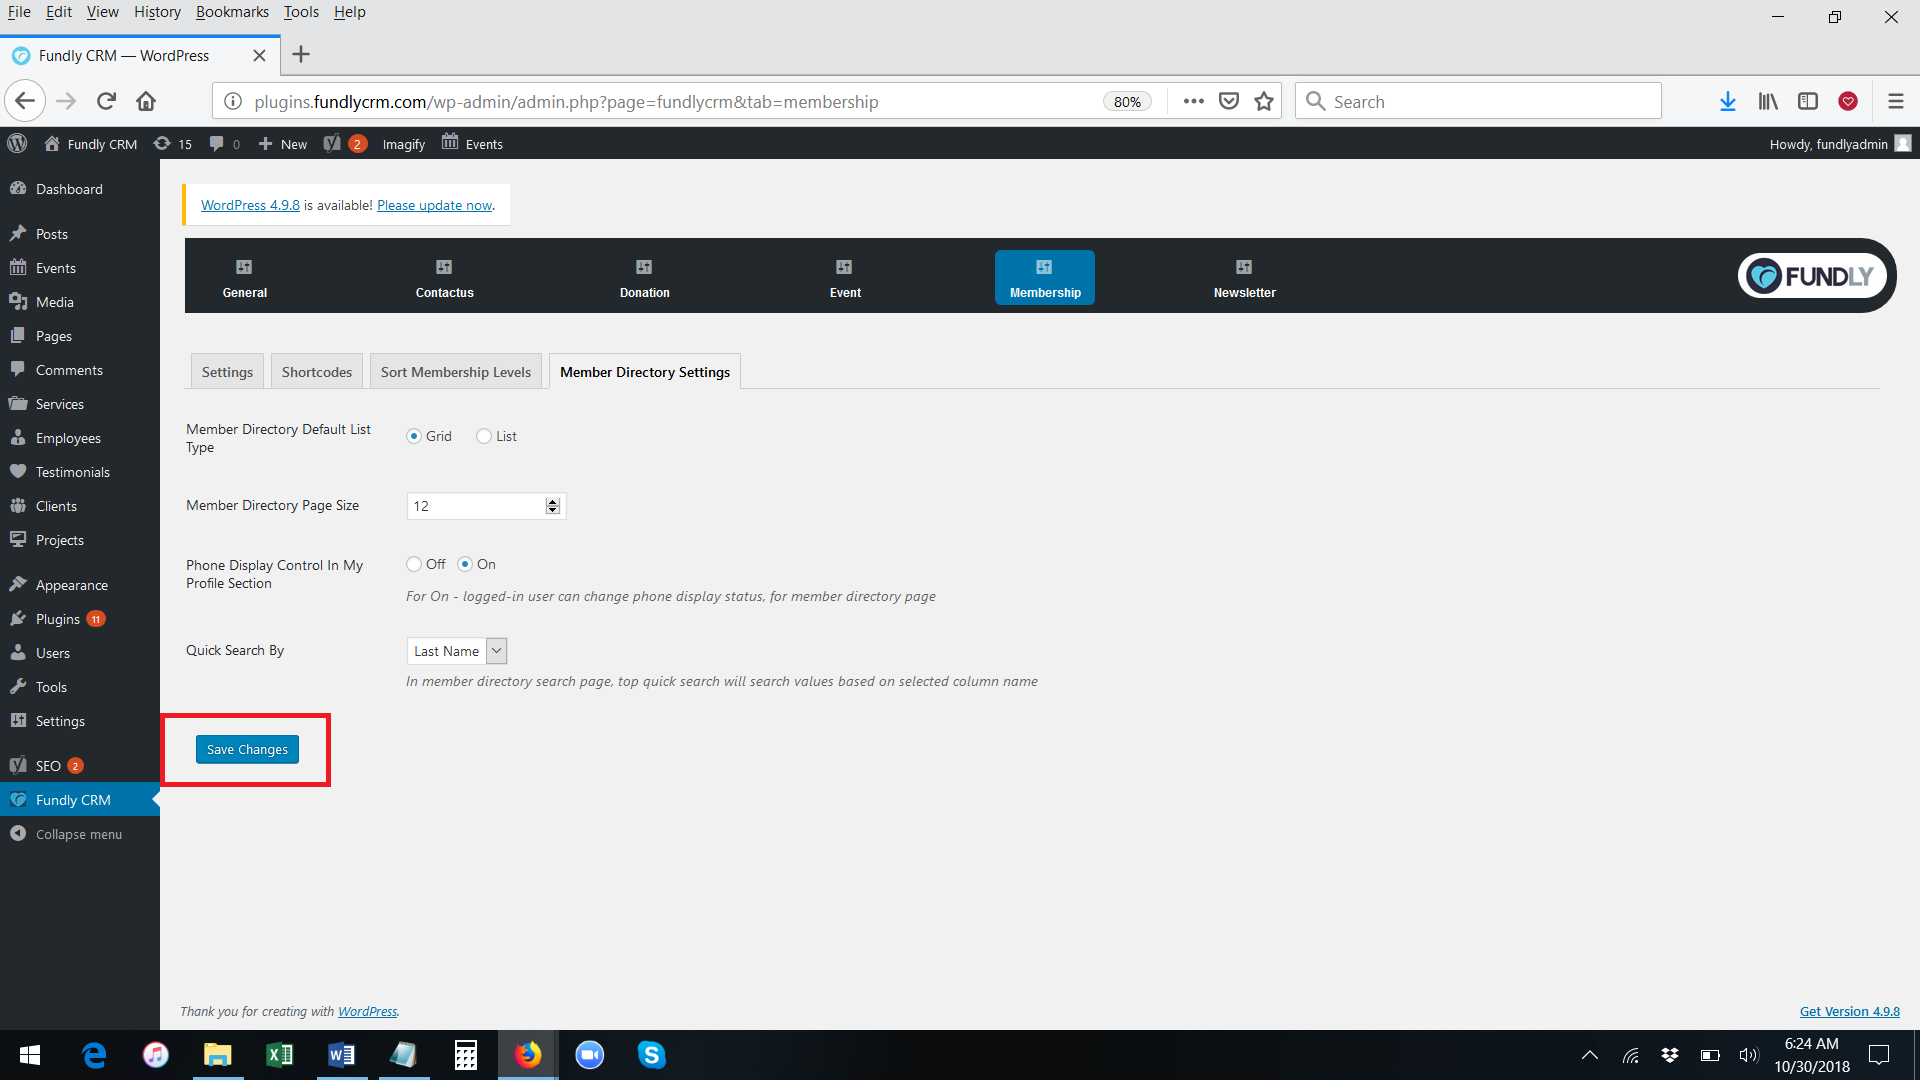
- After making any changes on this page, click the blue Save Changes button at the bottom of the screen.
Comments
0 comments
Article is closed for comments.