Wordpress Plugins Configurations and Settings Part 2c - Event Plugin
- The Event Plugin allows you to integrate your CRM with your WordPress Website in order to accept online event registrations.
- The Wordpress plugin is an additional, one-time fee (see this tutorial for pricing). Alternatively, you can use our Pages function (no additional cost). See this tutorial/chart for a comparison of Pages versus WordPress Plugin for events.
-
Important: When the events plugin is installed, the plugin will be configured according to a specific URL subdirectory (e.g. www.example.com/events). If you need to change the URL configured to your event plugin (e.g. www.example.com/workshops), please contact support and our technical team will make the required changes to ensure your events plugin continues to work. If you change the URL without informing our technical team, your events plugin will no longer work.
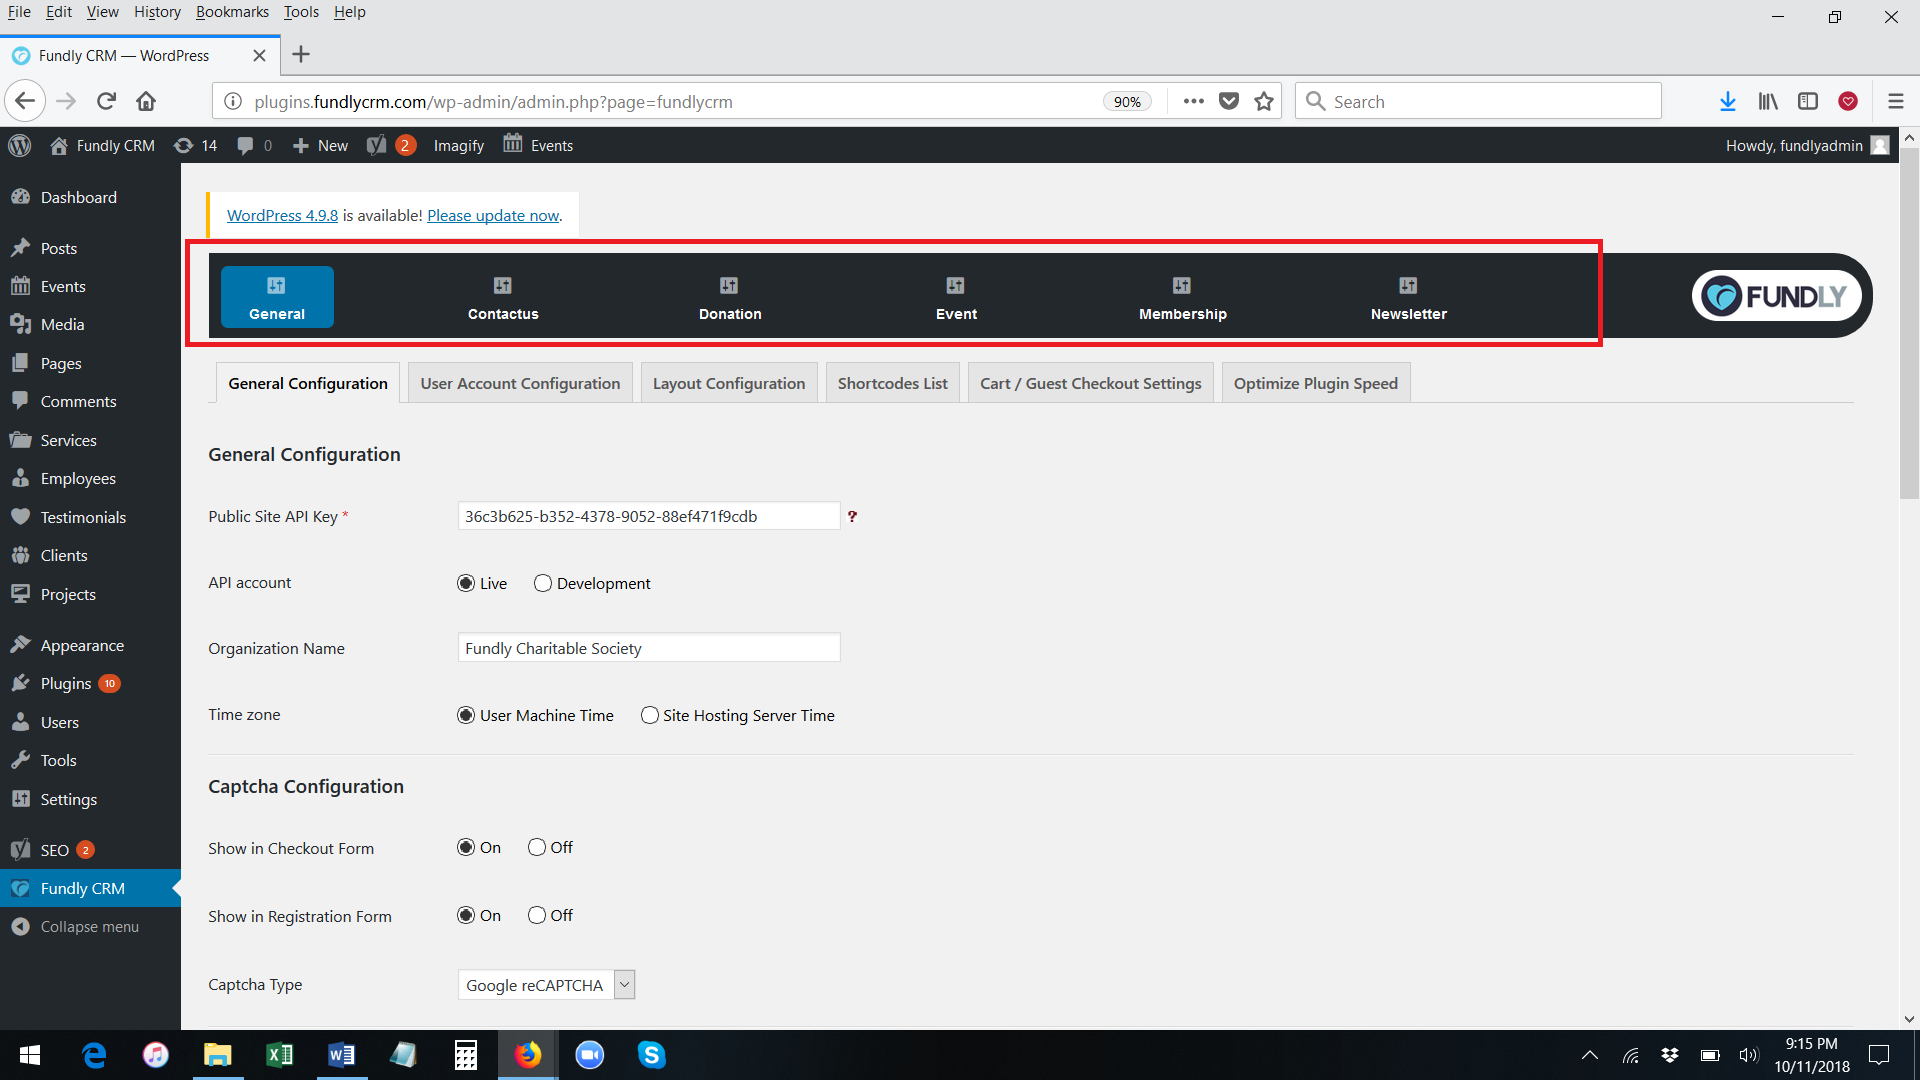
- To configure the Event WordPress Plugin, log into your WordPress admin panel. Find the CRM plugin in the left hand menu and click it.

- This will take you to the CRM Plugin admin panel. Which tabs you have here will depend on which plugins you have purchased.
- To configure the event plugin, click on the Event tab (be sure to also configure your General tab - see this tutorial for more information on the settings found on the general tab).
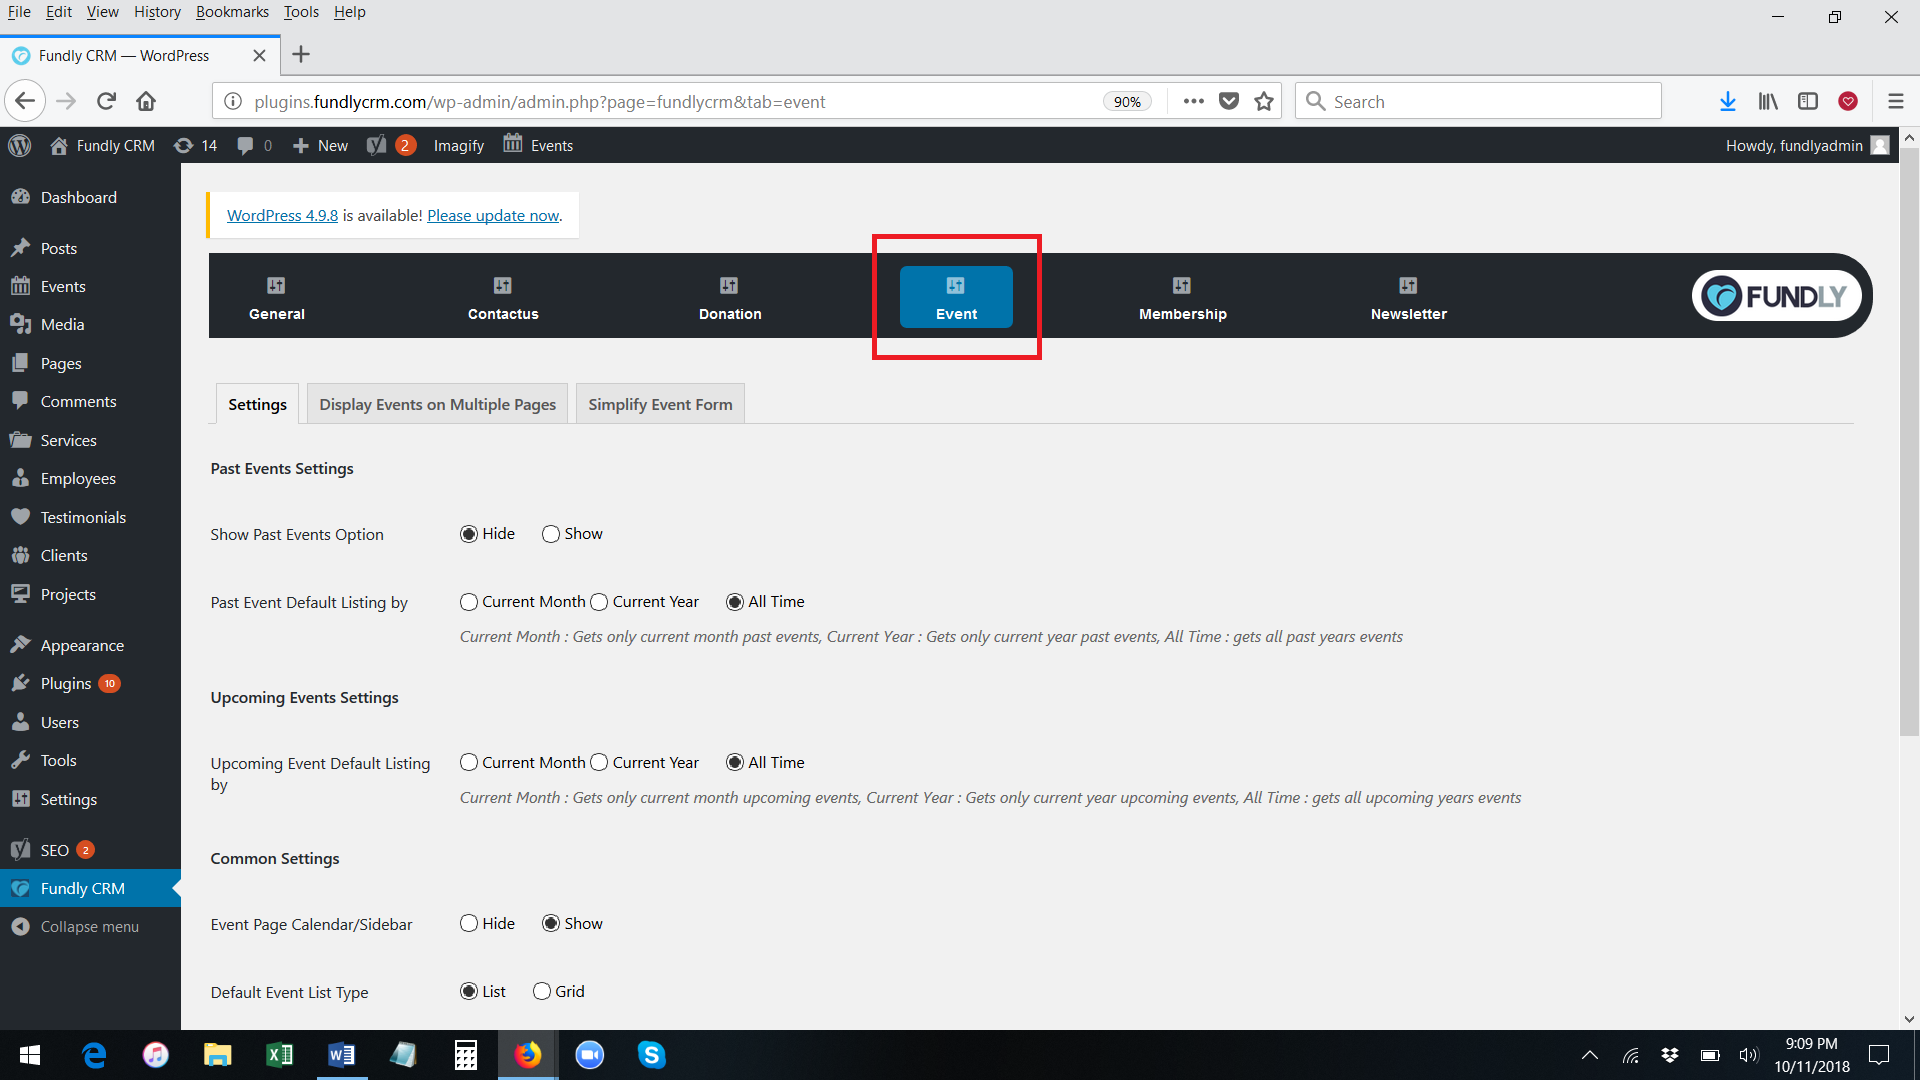
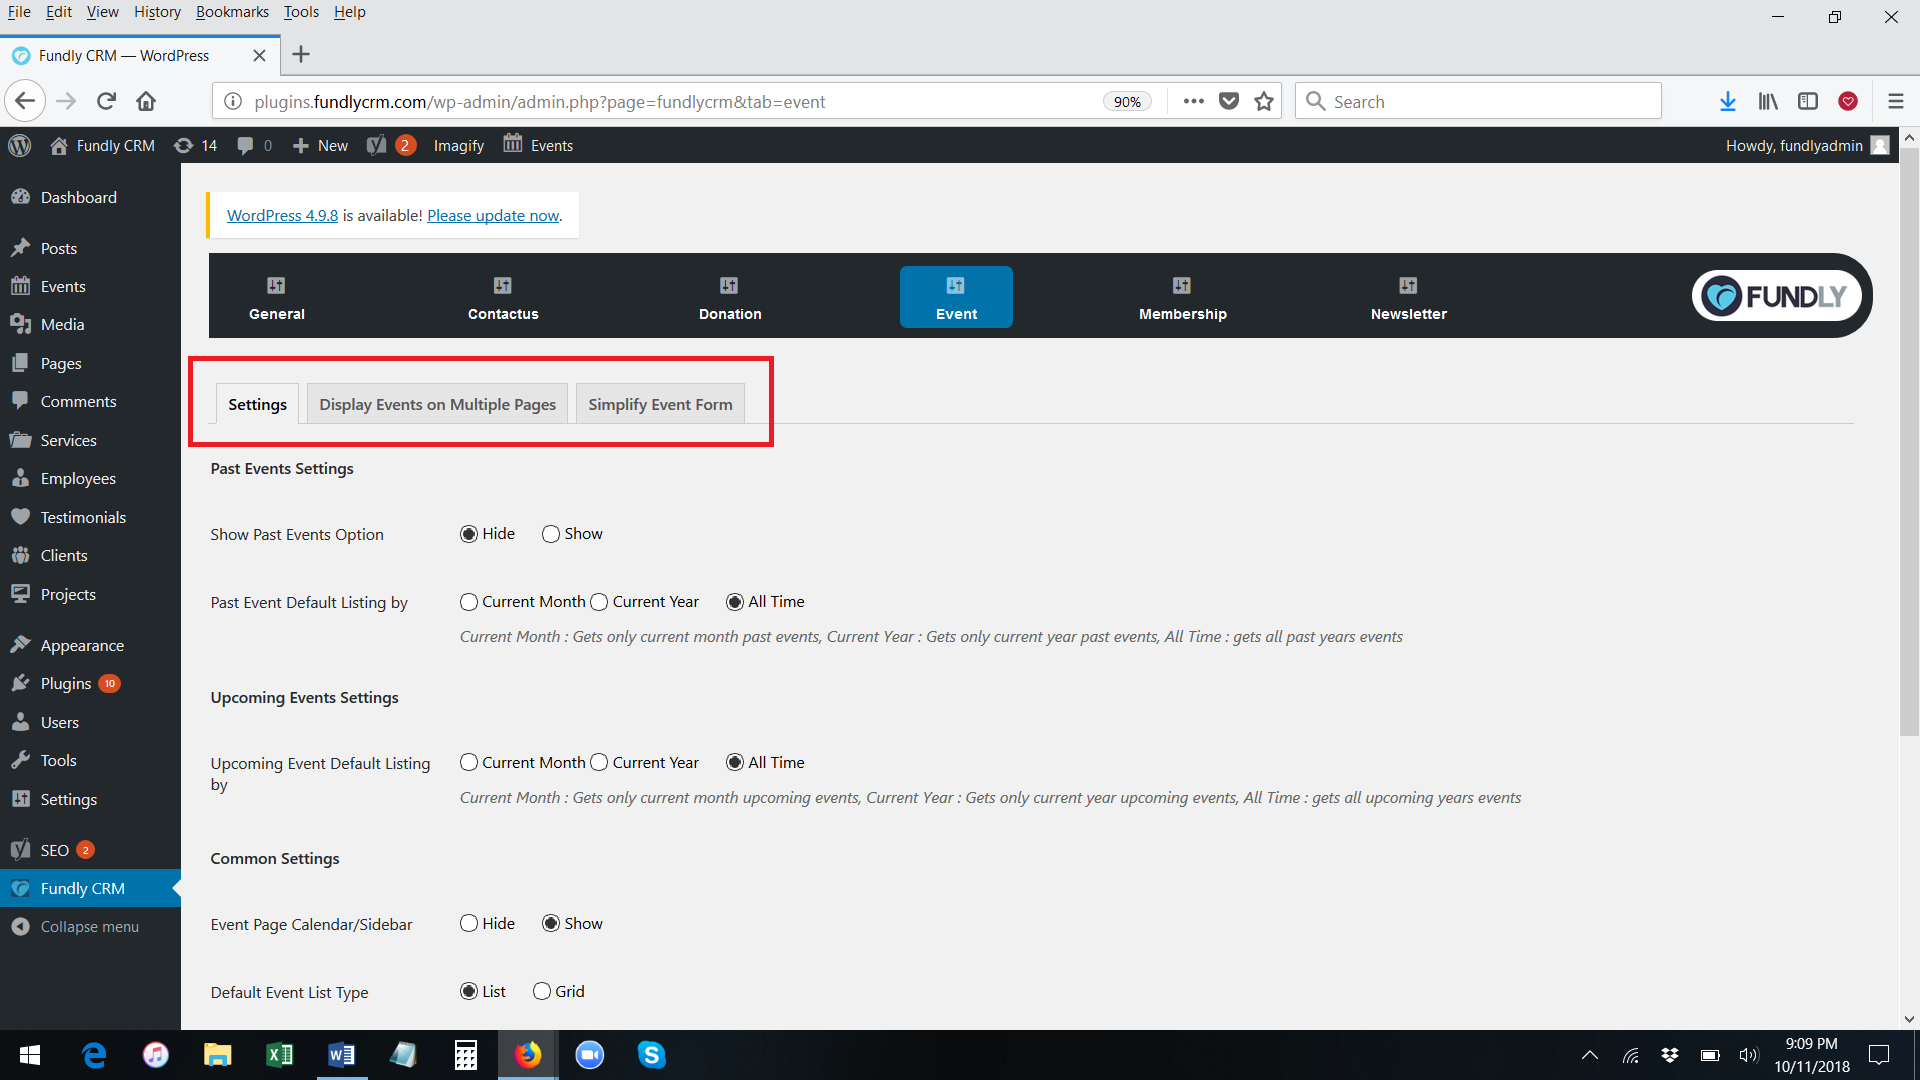
- The event plugin has three sub tabs: Settings, Display Events on Multiple Pages, and Simplify Event Form.
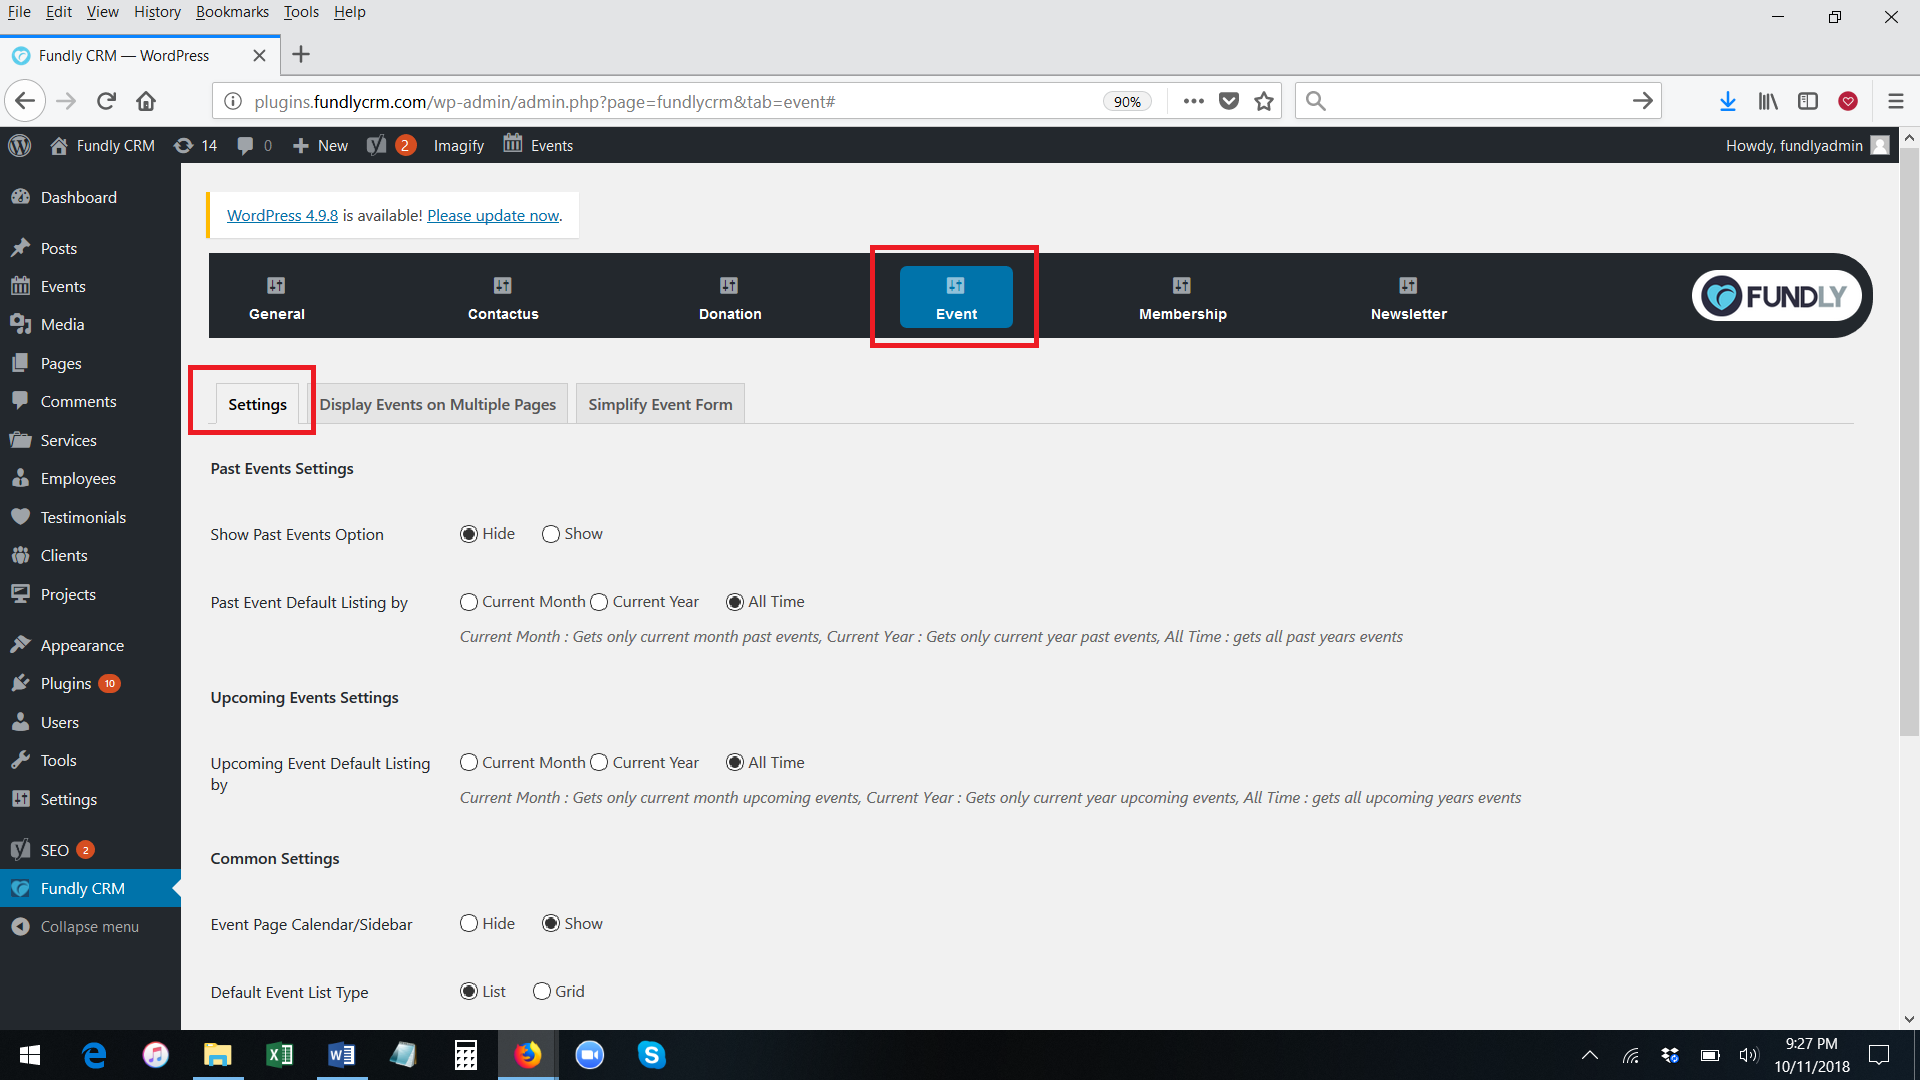
- The Settings sub-tab is where you configure the meta settings shared by all of your event pages.
- The Display Events on Multiple Pages sub-tab is where you configure your event page(s) that will be presented to visitors to your website.
- The Simplify Event Form sub-tab is where you configure settings related to event registration forms (event registration forms are configured inside of the event configurations in your CRM. There are additional settings you can configure here in your plug-in to control the look of your event registration form).
- On the Settings sub-tab:
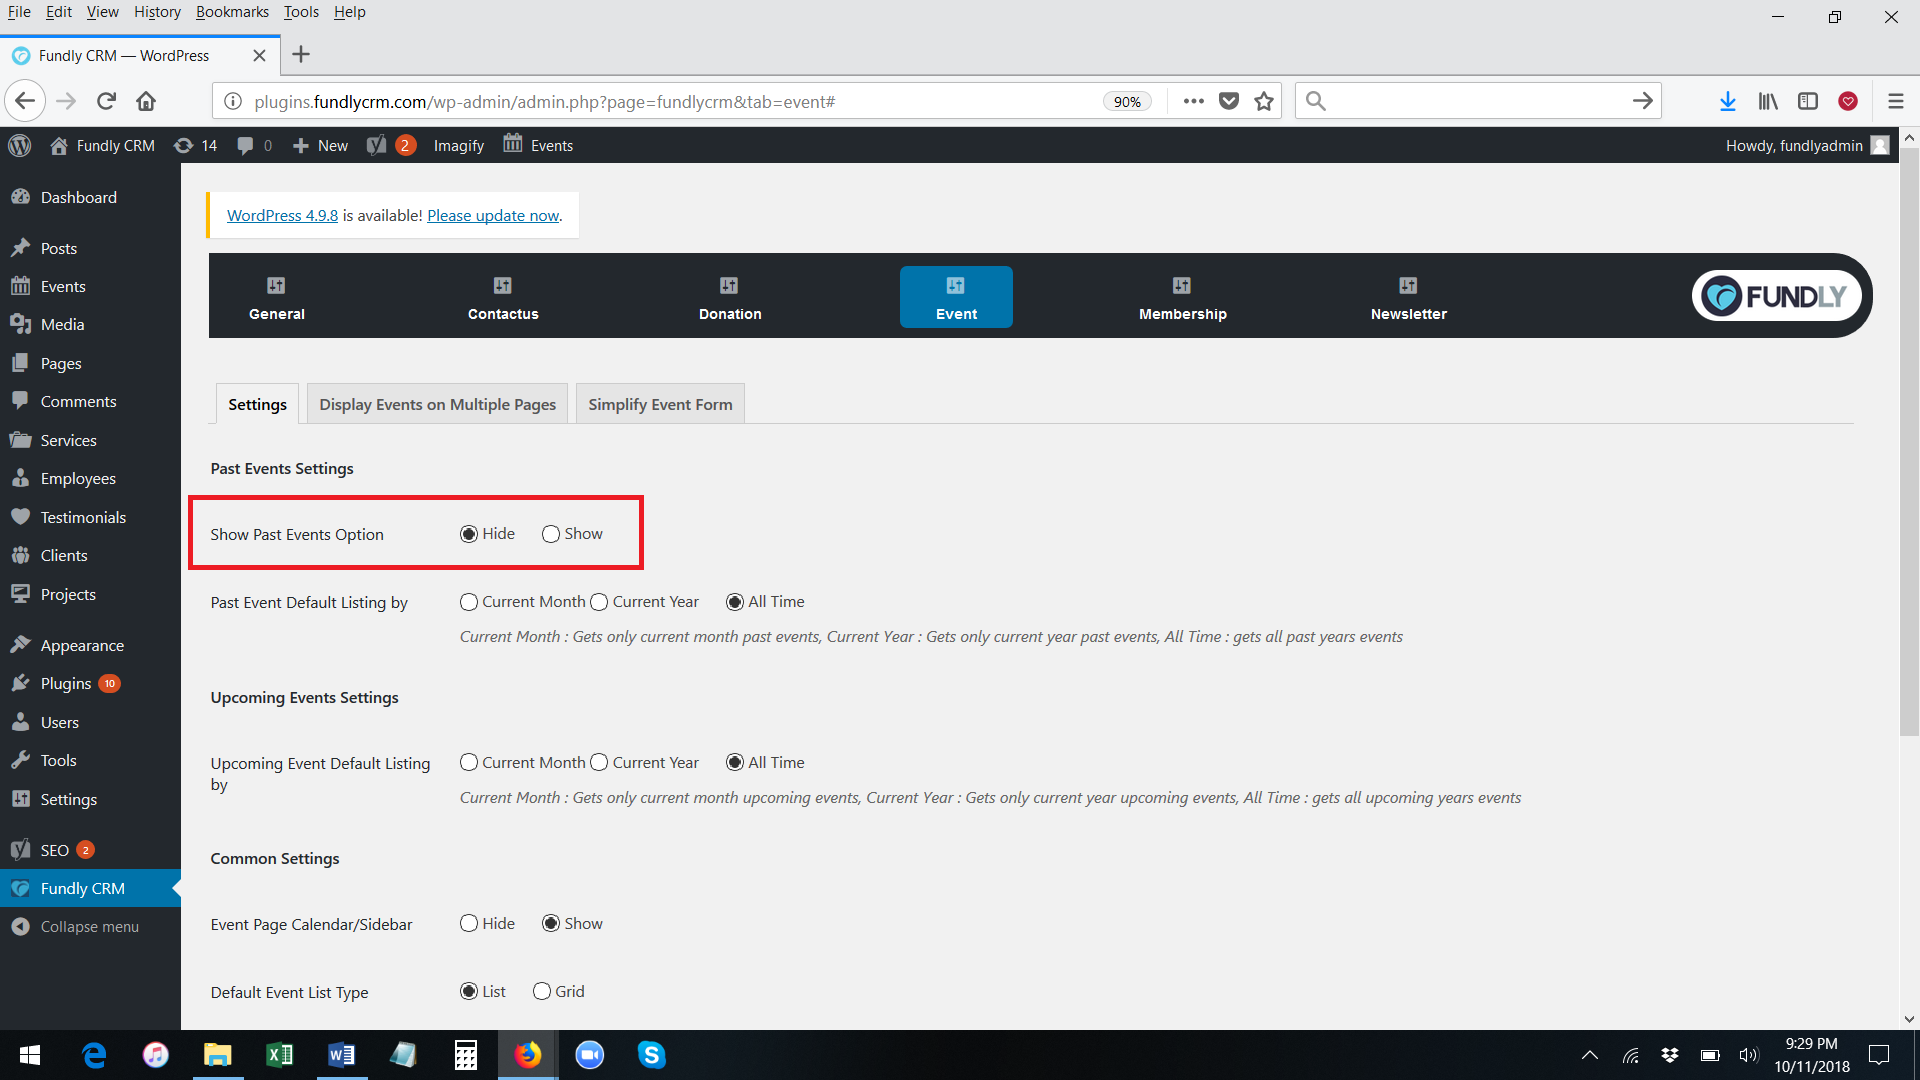
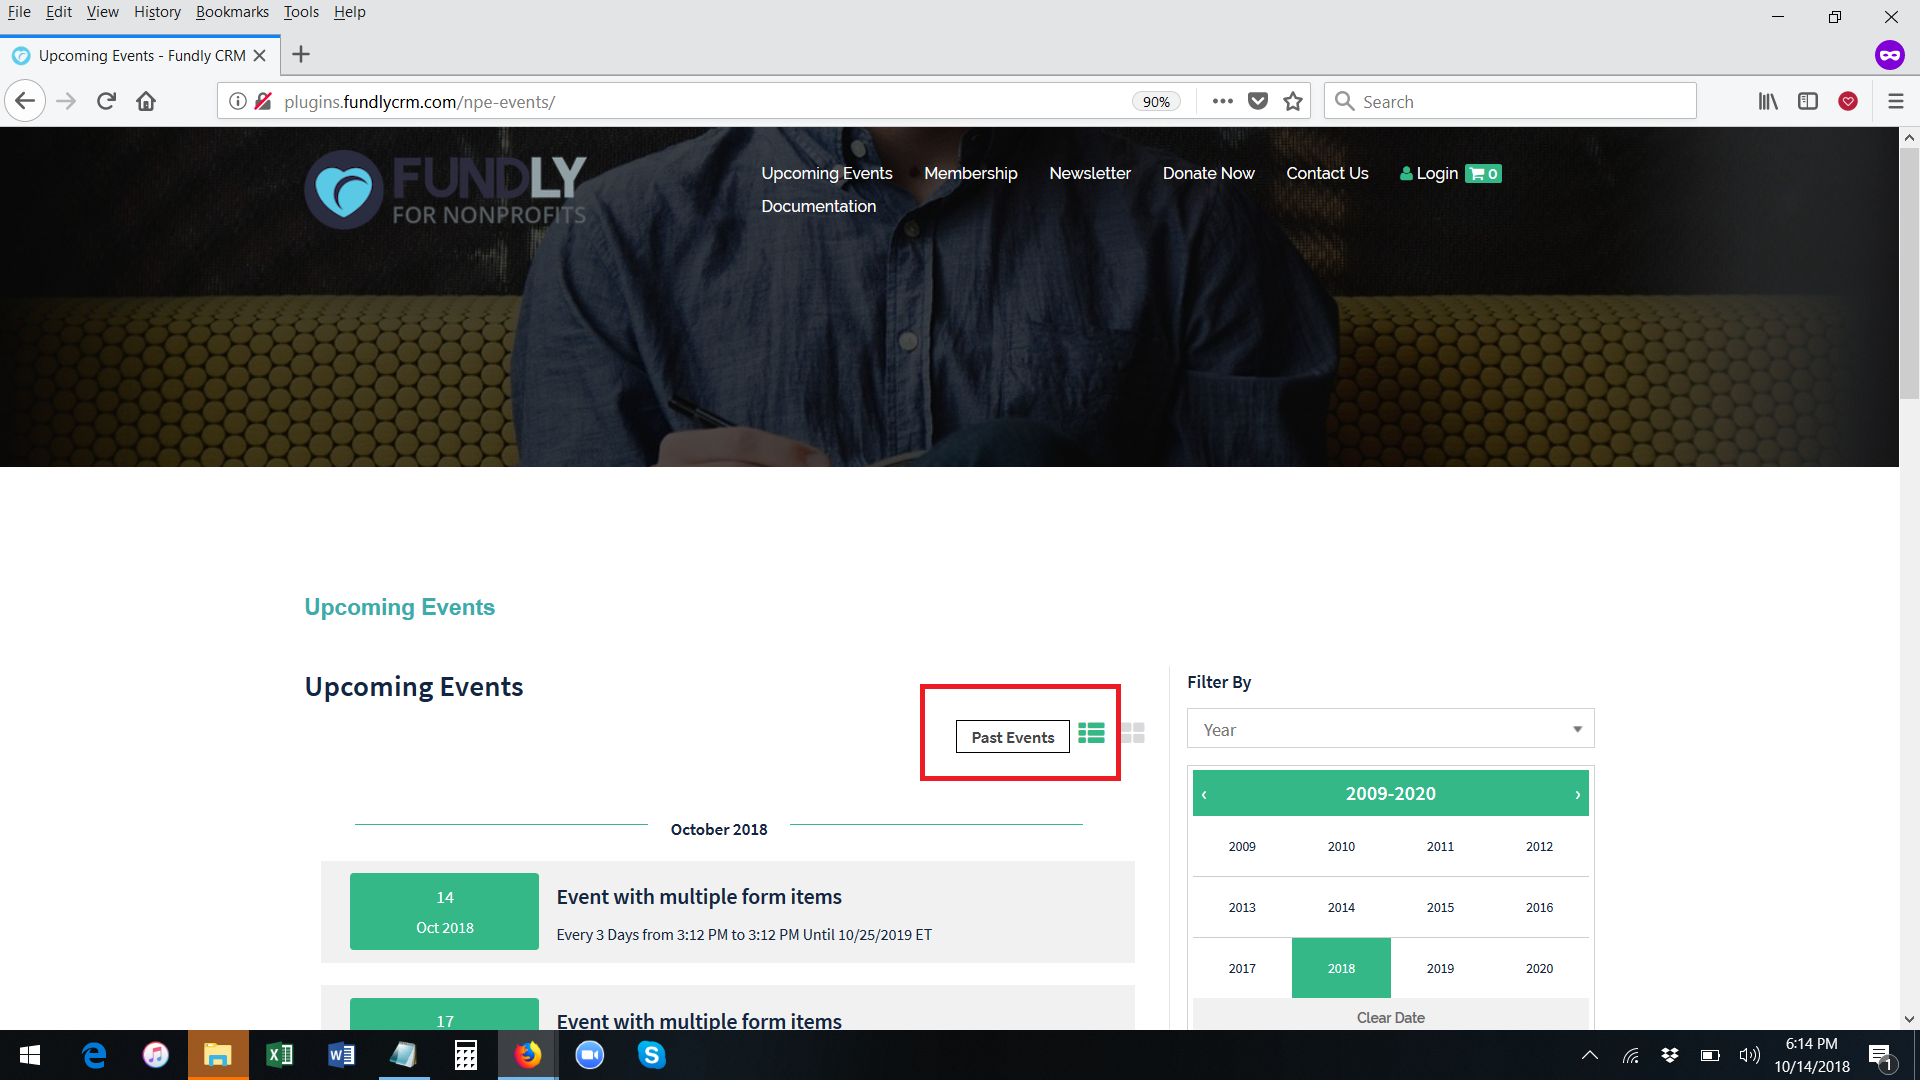
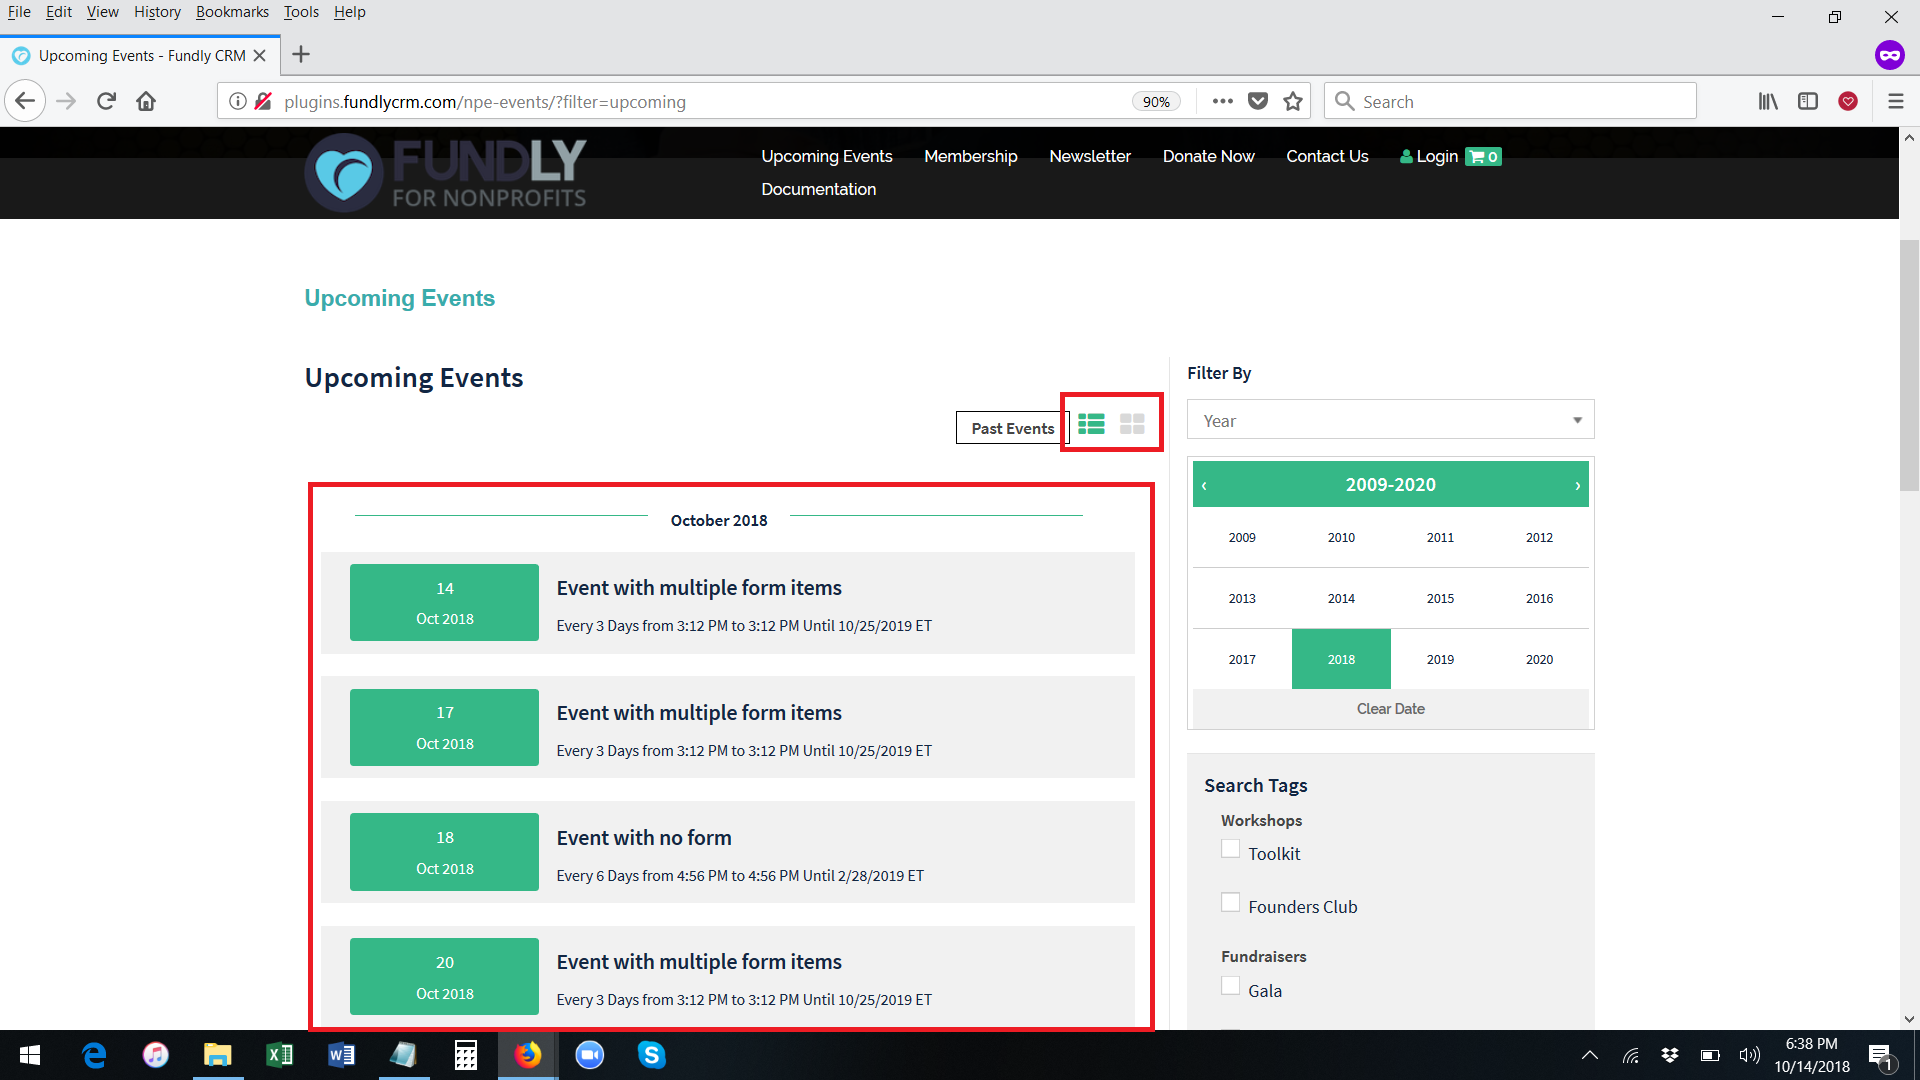
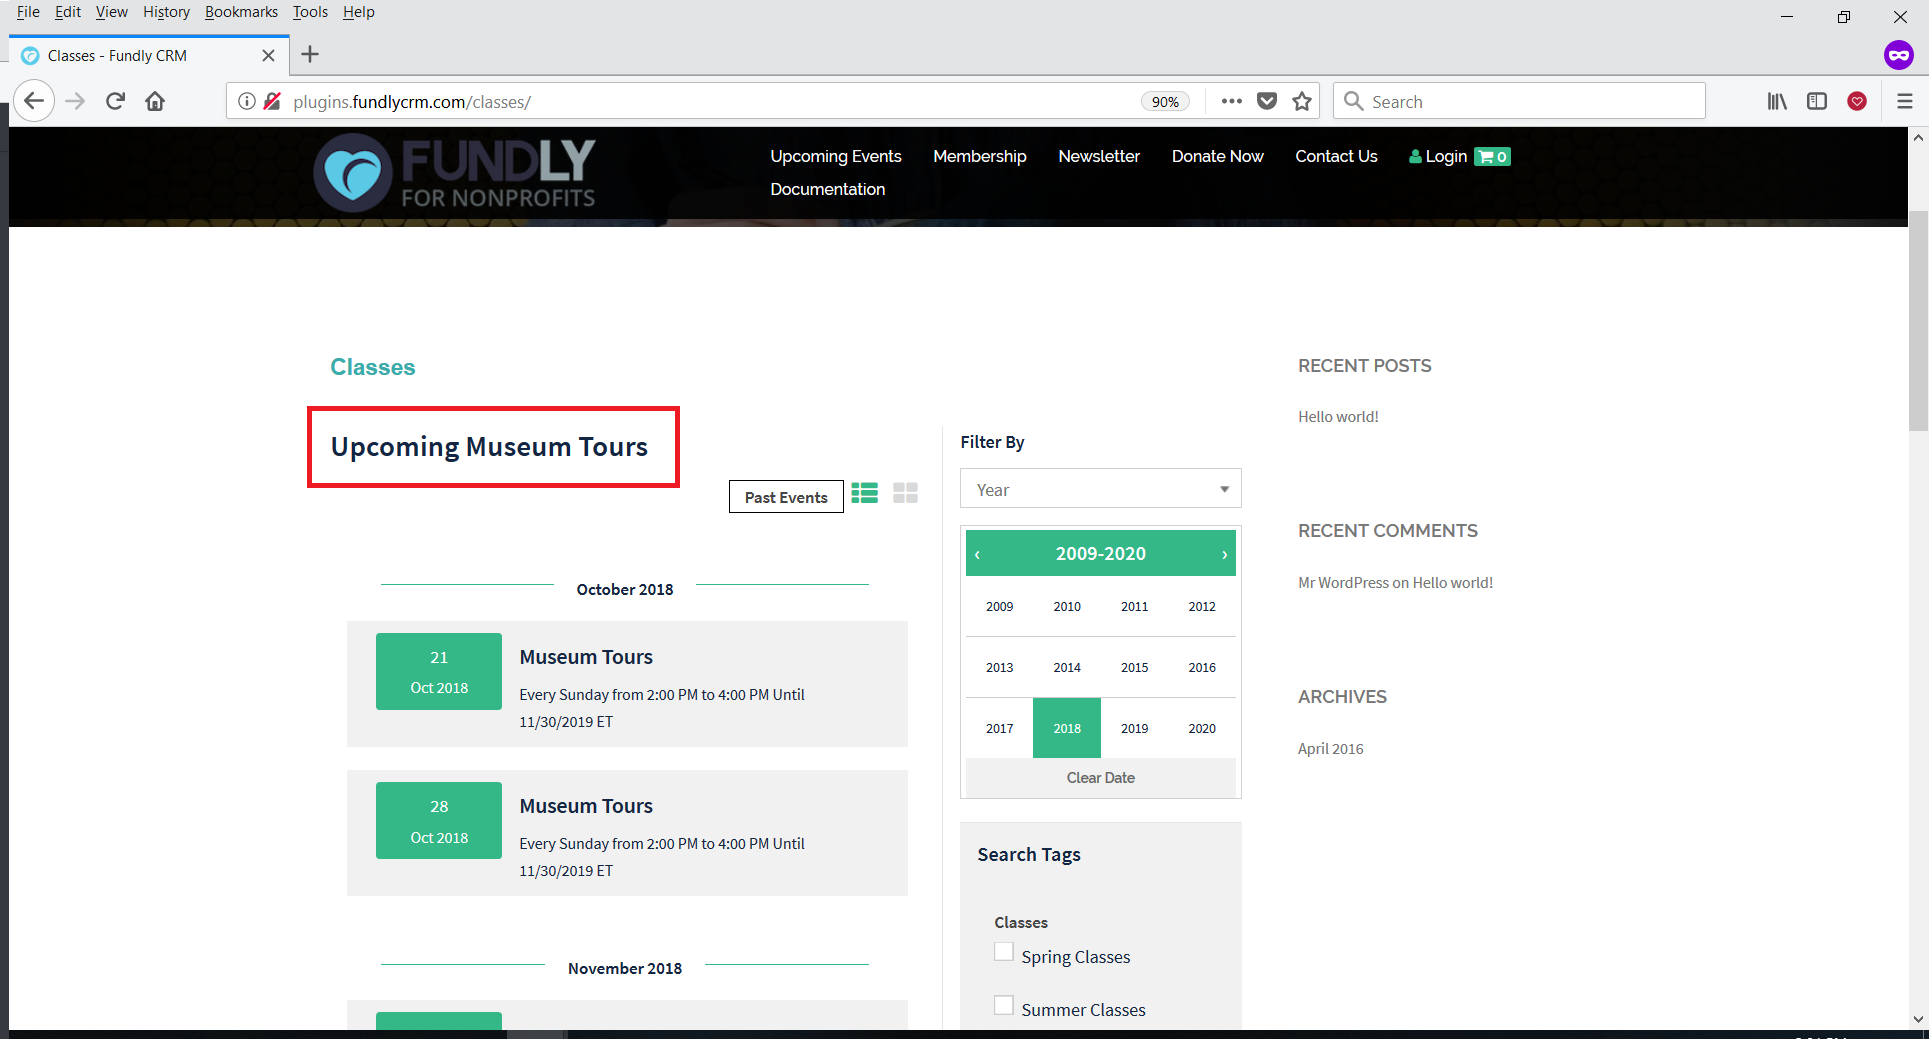
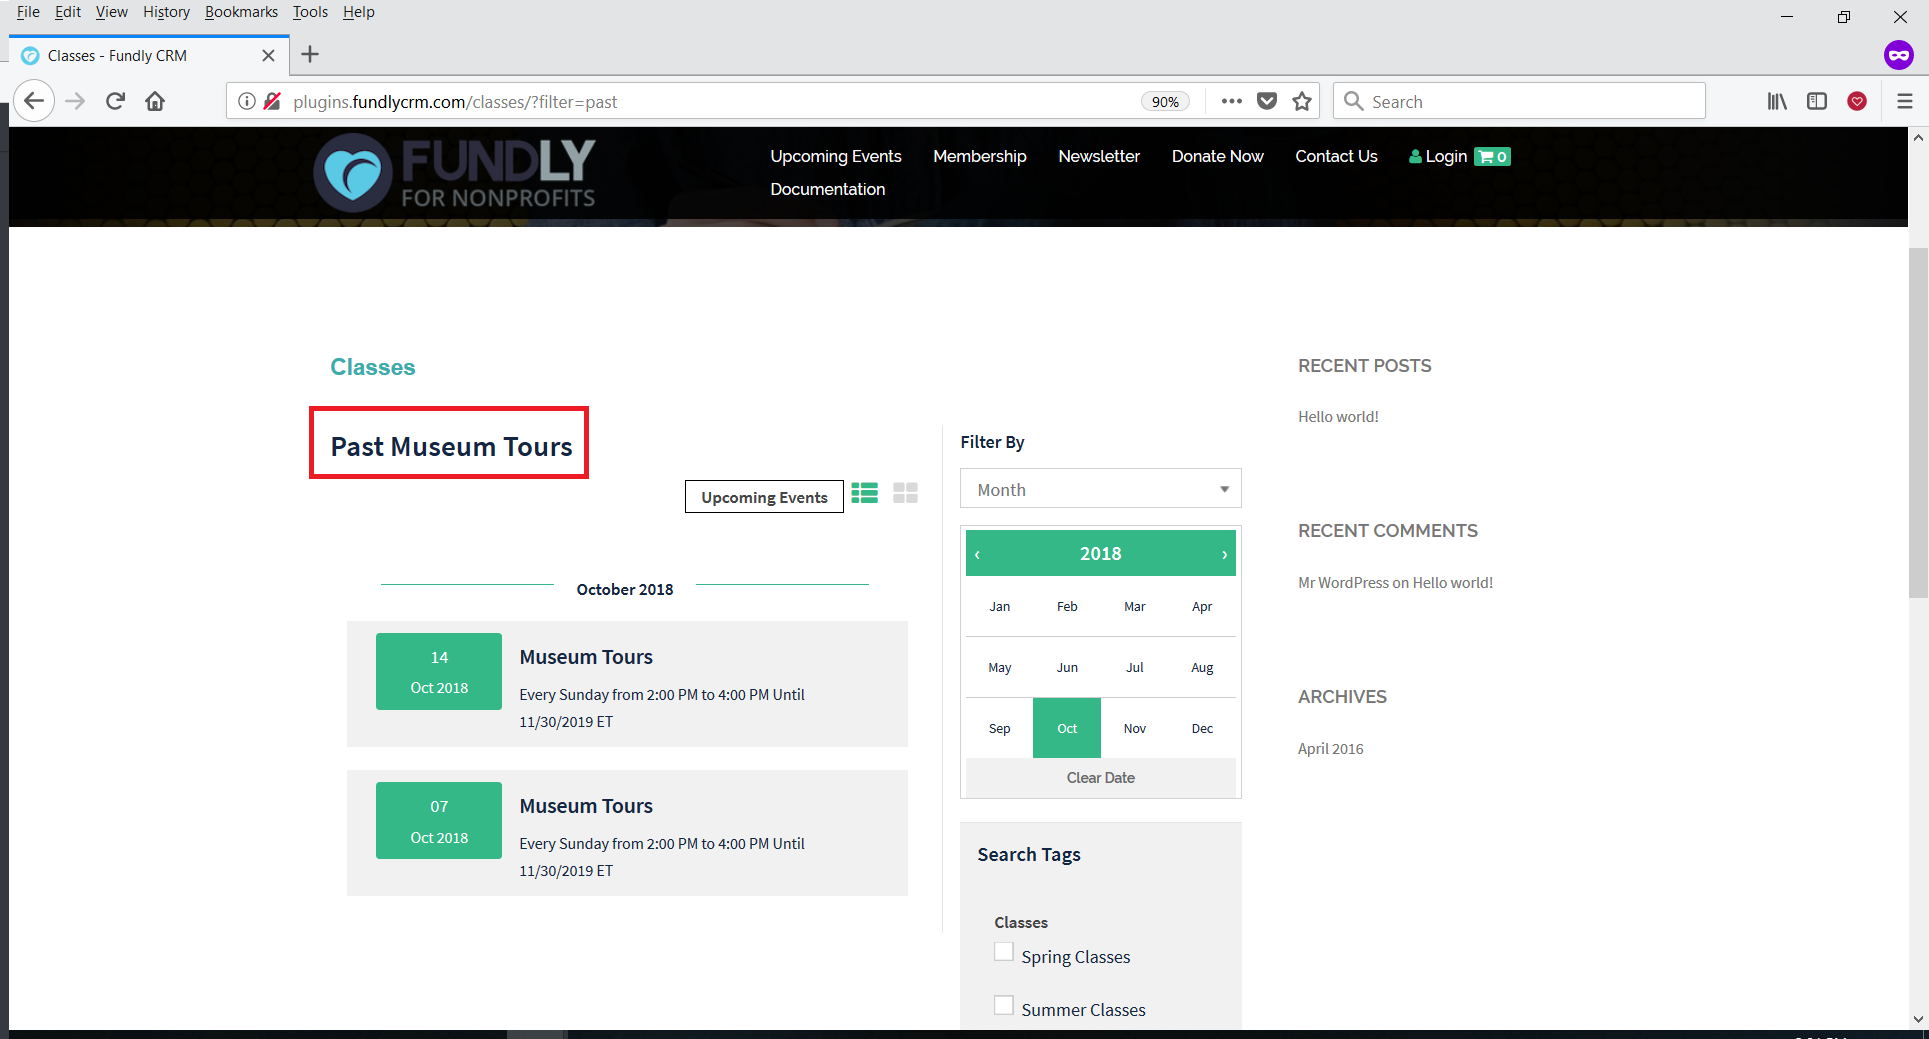
- The Show Past Events option allows you to hide all past events from your event. When you configure an event inside of CRM, you have to the option per event, to remove the event from your website (unpublish it) once it pasts. Inside of the Event Plug-In you can set a meta configuration to hide ALL past events so you do not have to set this per event inside of CRM. If you click "show," then a Past Events button will appear on your events index page. Otherwise, if you select "hide," then the button will not appear.
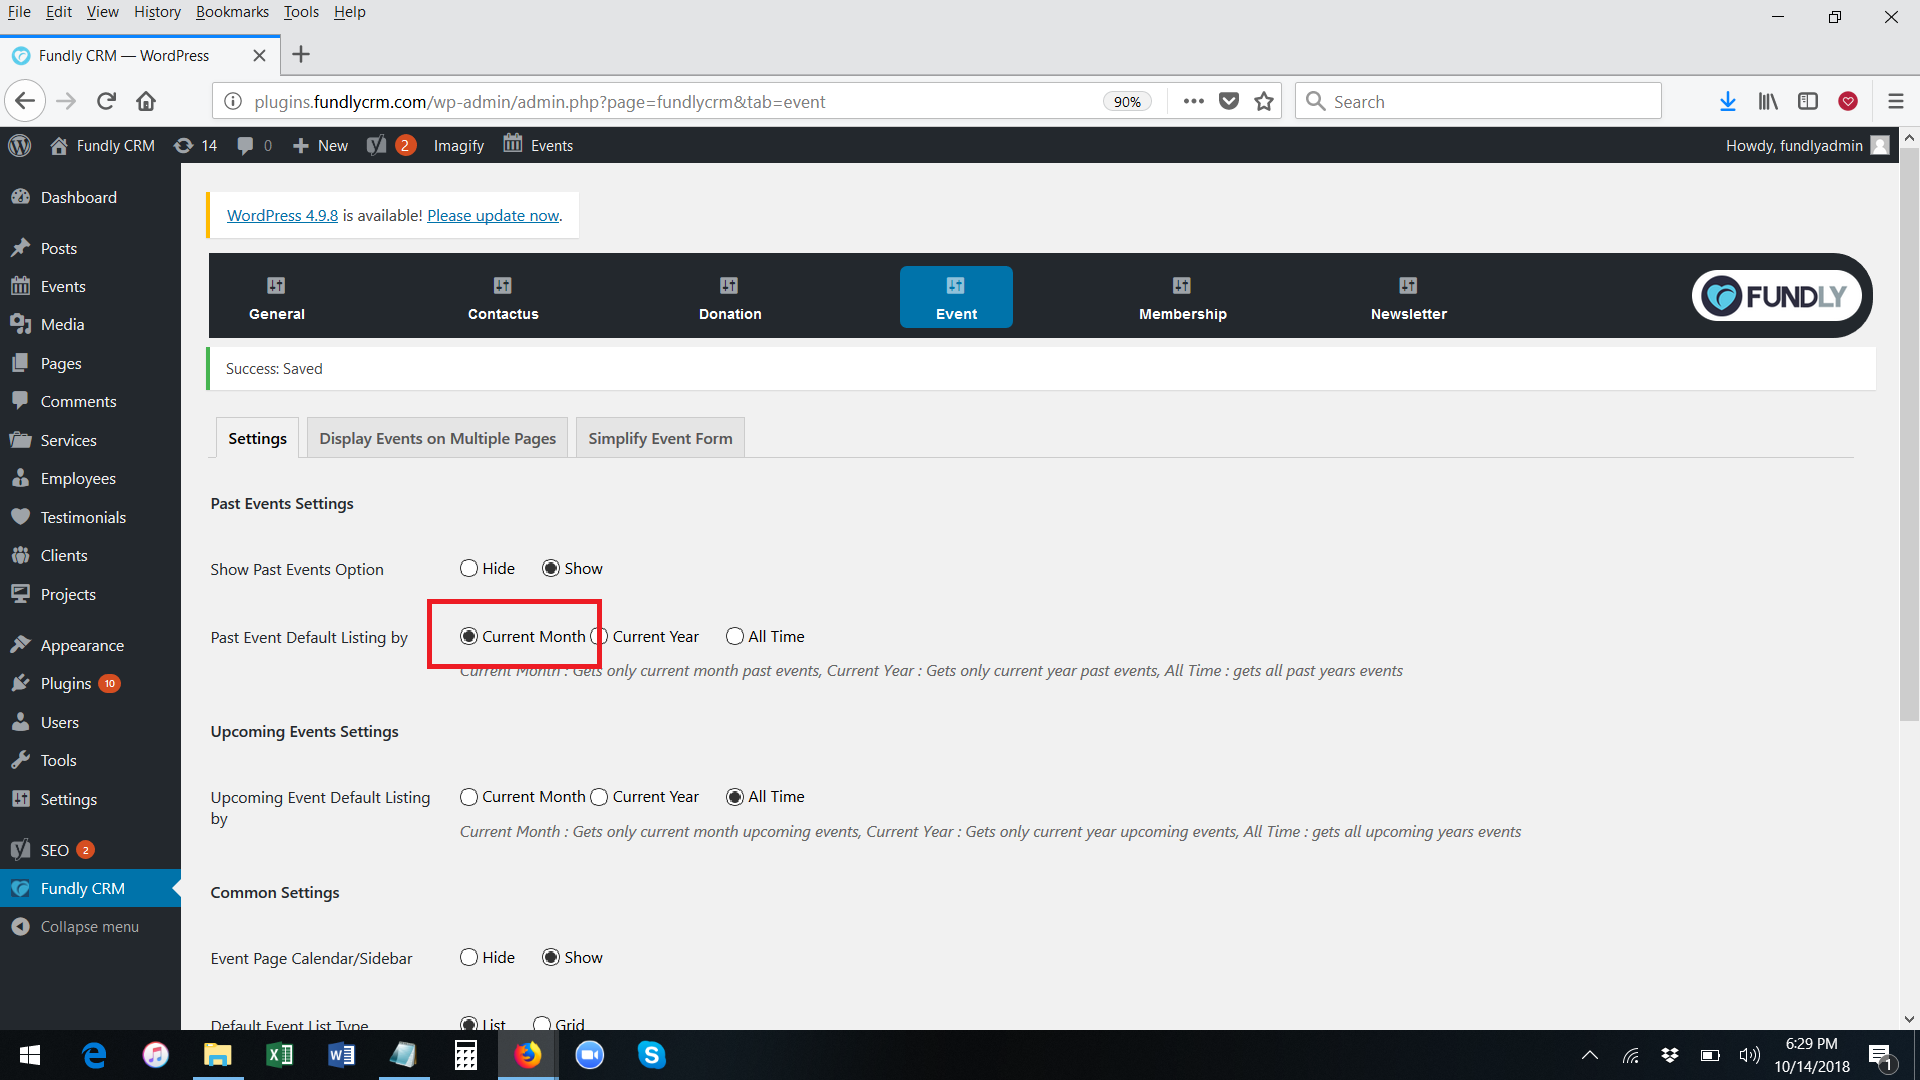
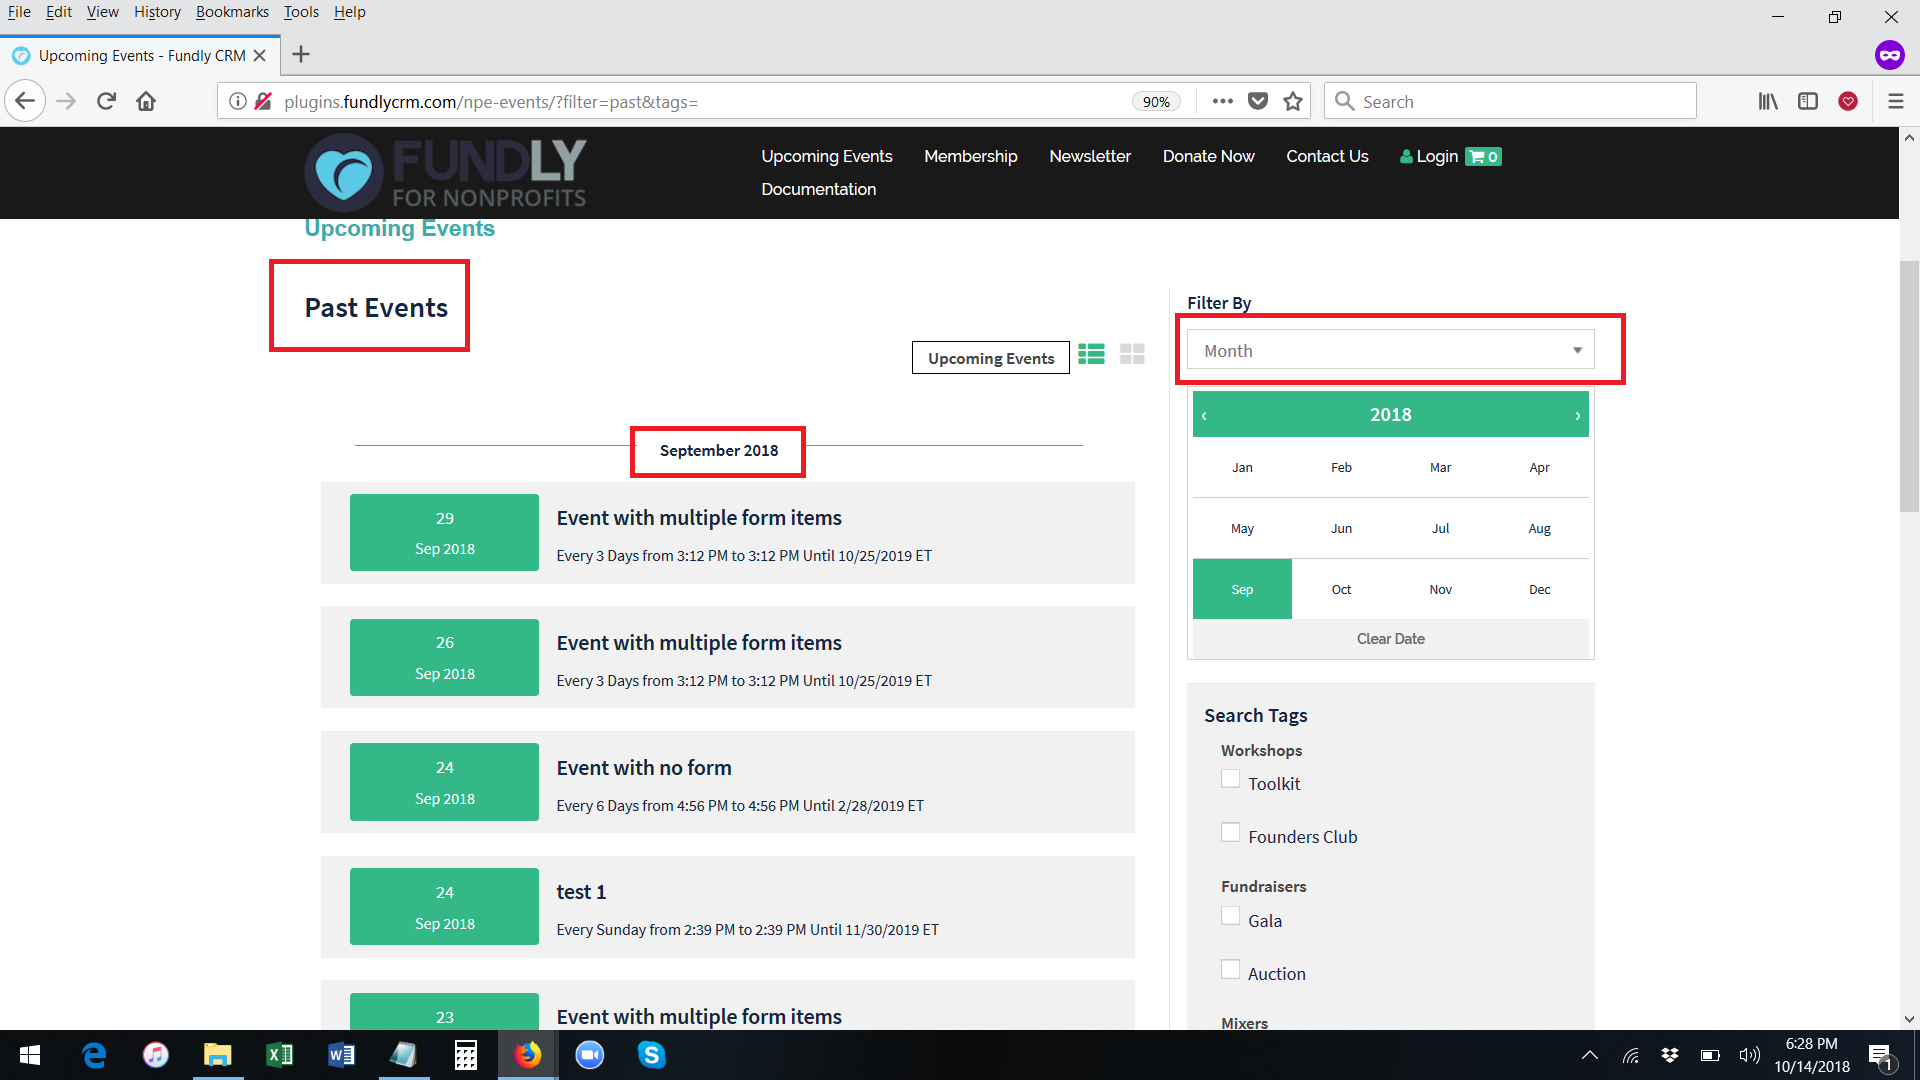
- The Past Event Default Listing By setting controls the default filtering/listing option for when users click on the past events option on your website. By default, your events index page will show just those past events that meet the filter criteria that you set here, but your users can filter on/find other past events using the filtering option and calendar in the sidebar.

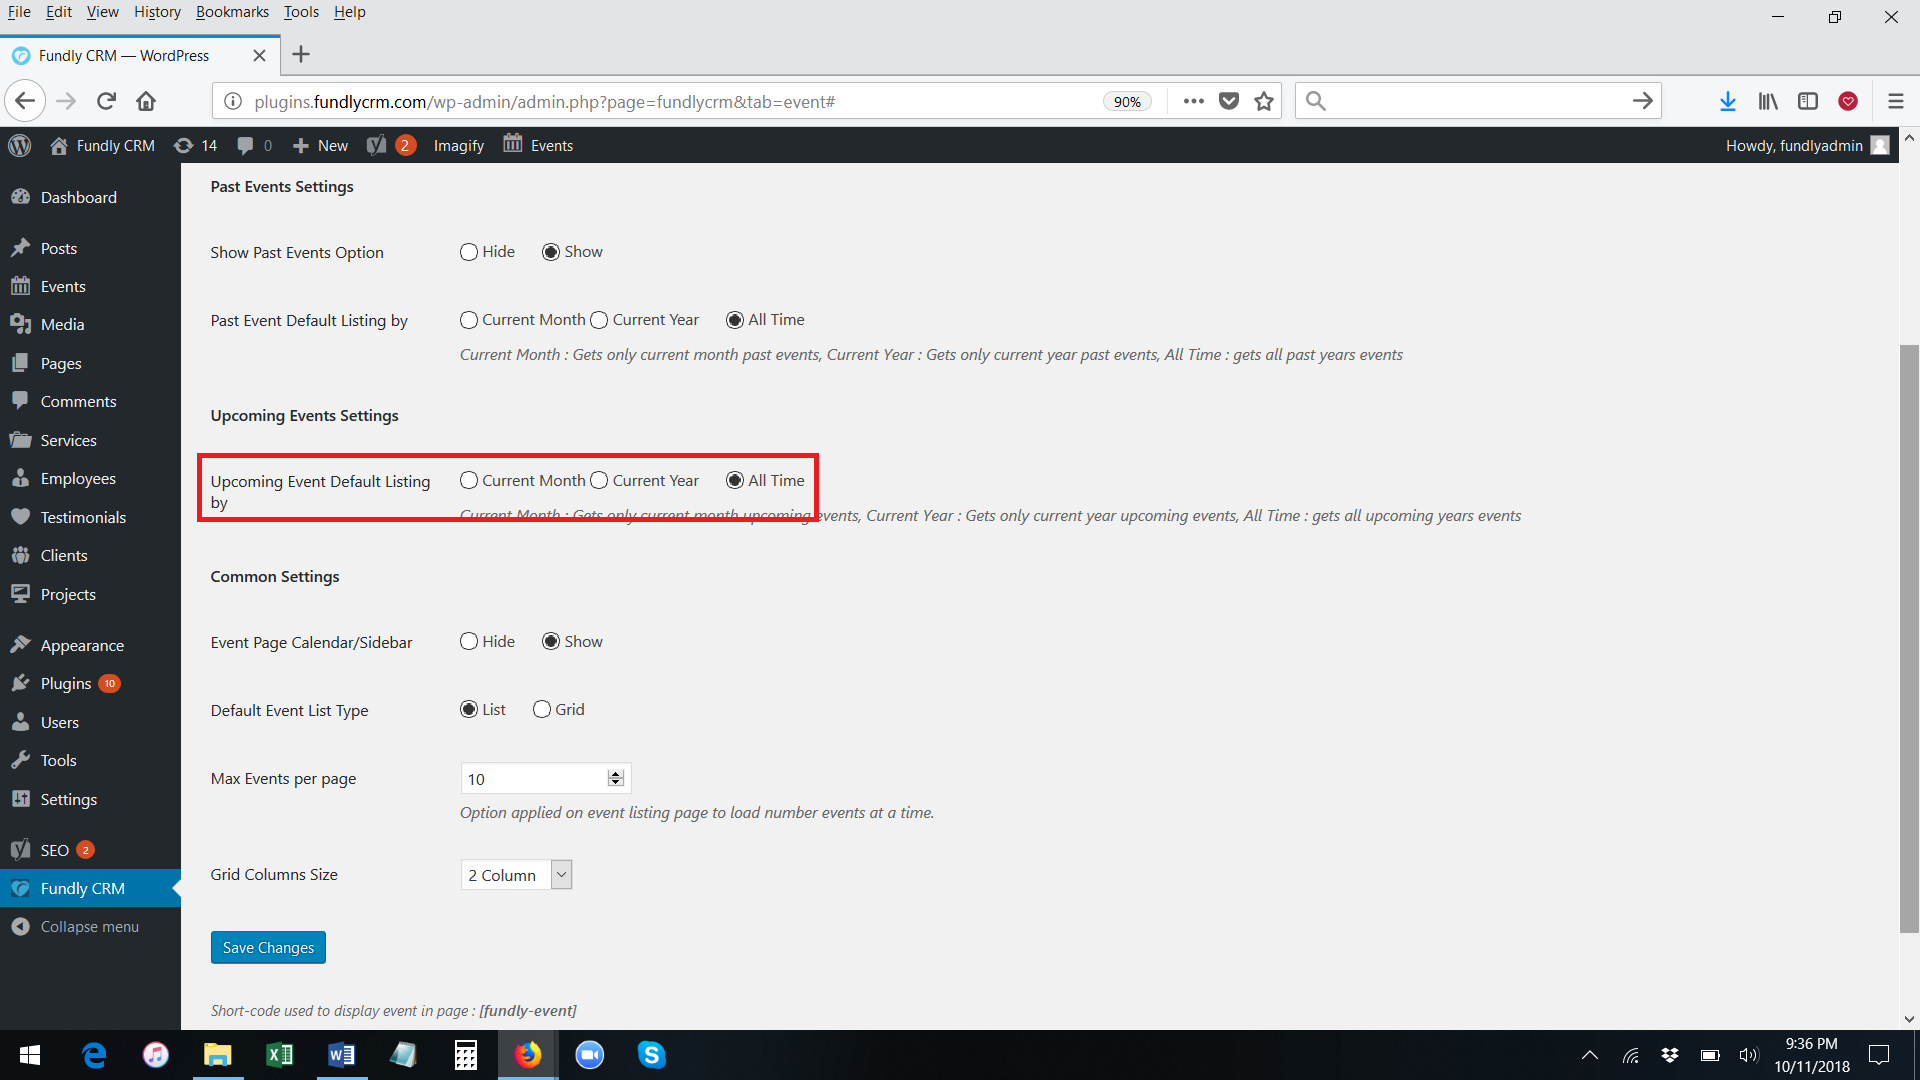
- The Upcoming Event Default Listing By setting controls the default filtering/listing options for when users click on the upcoming events option on your website. Users can find events outside of this range by using the filter option and calendar widget in the sidebar.
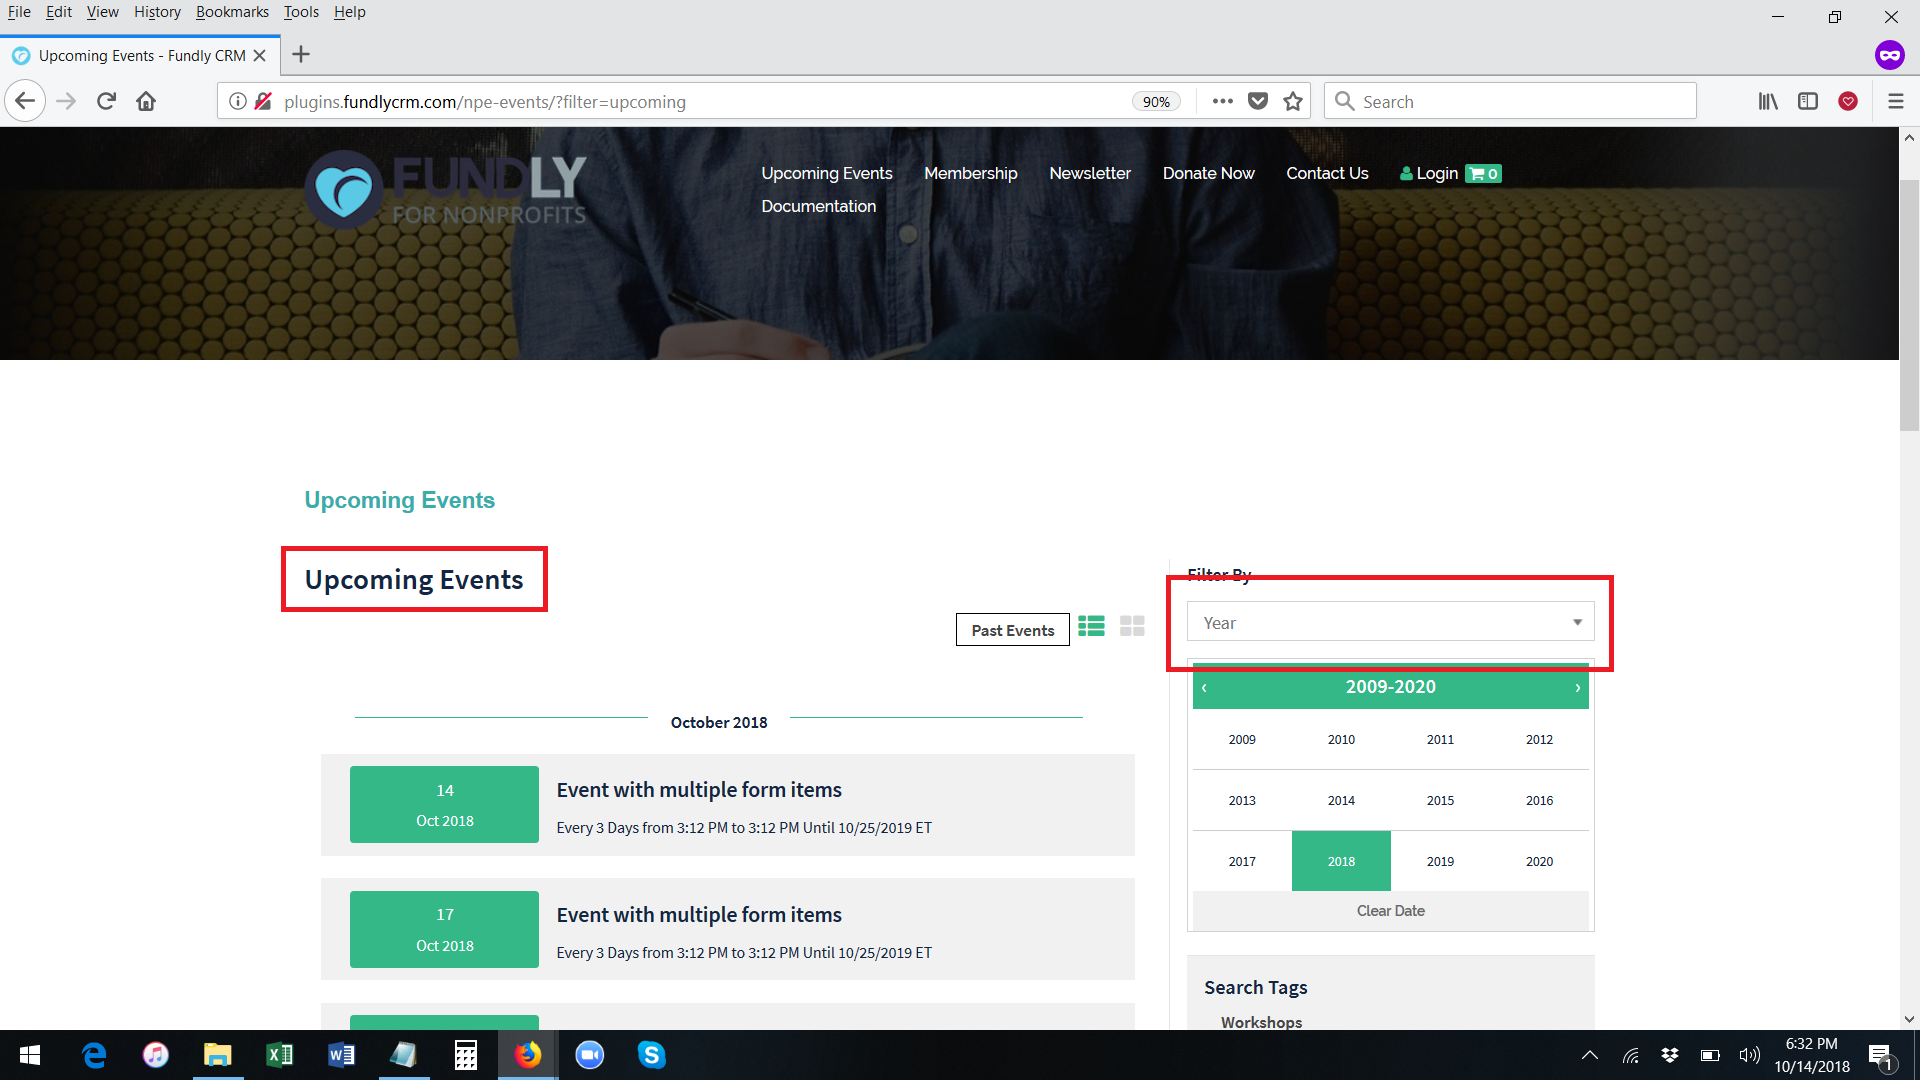
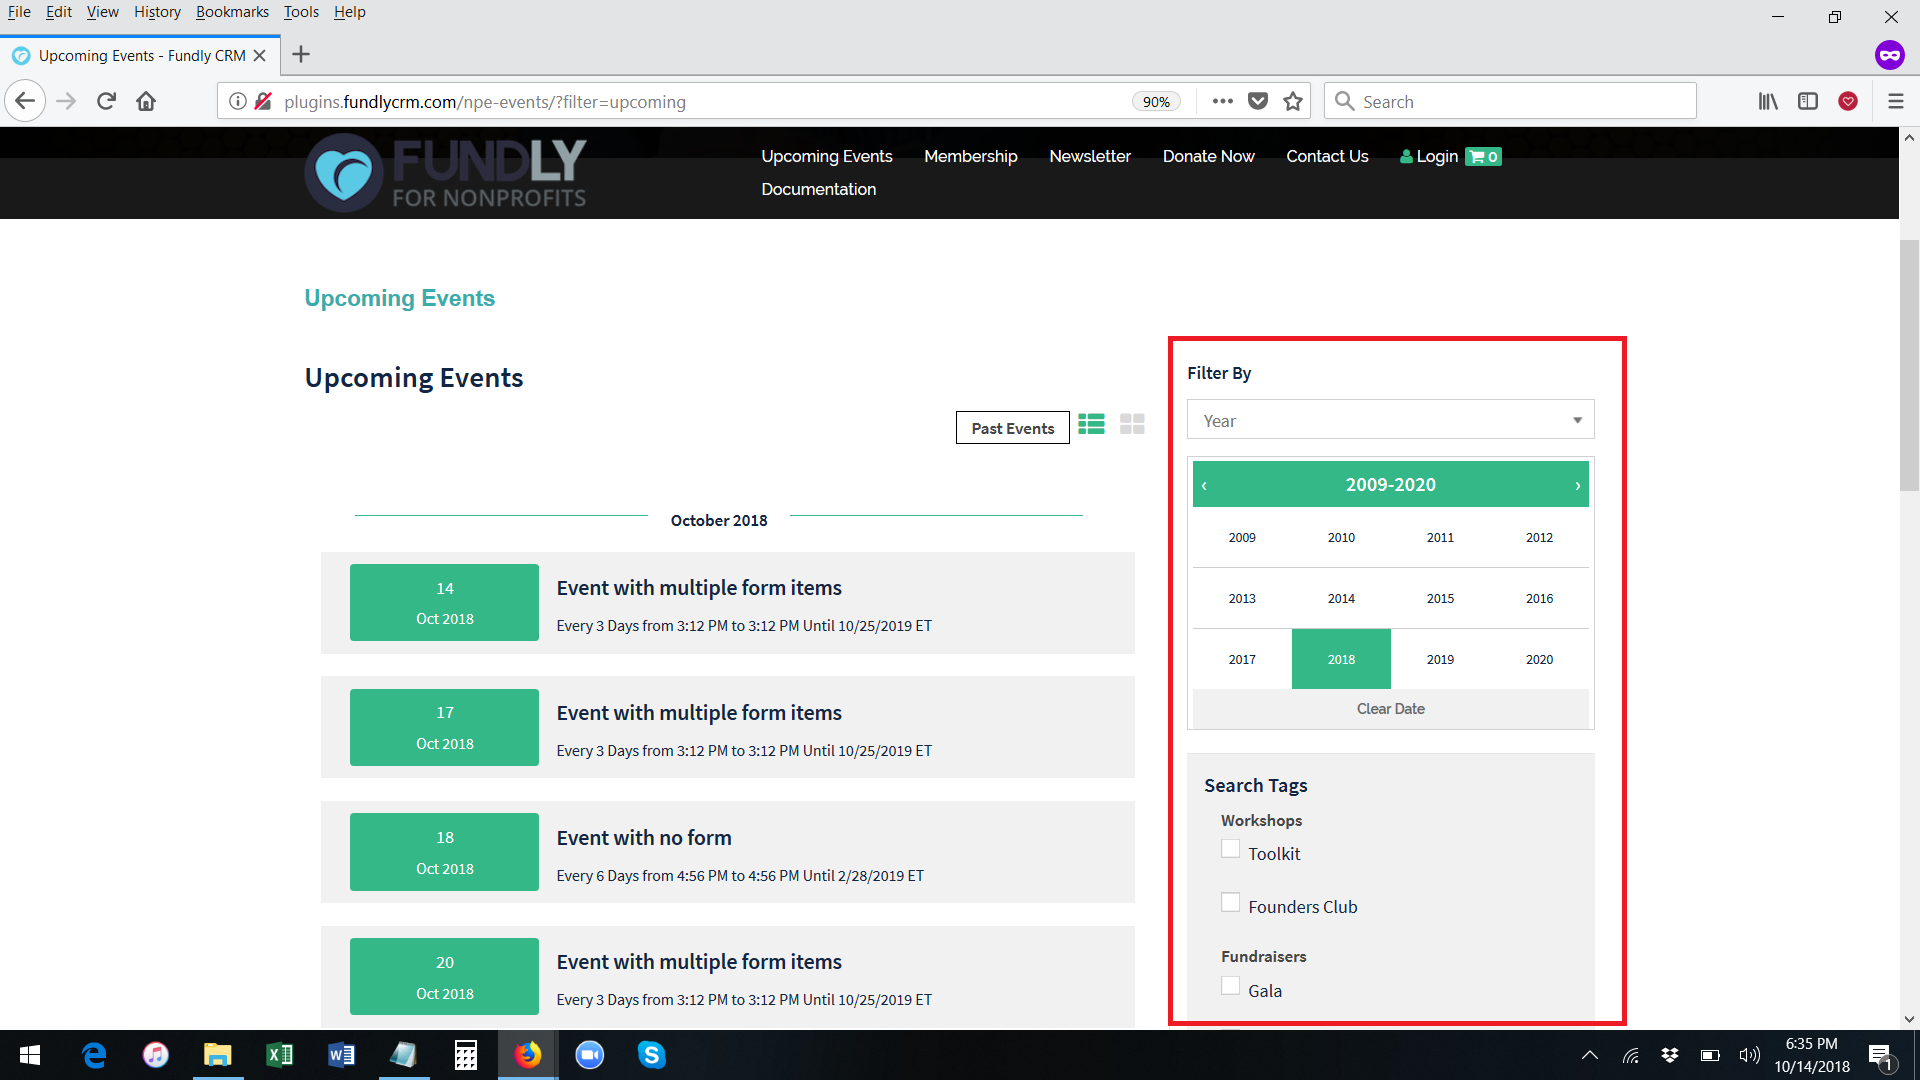
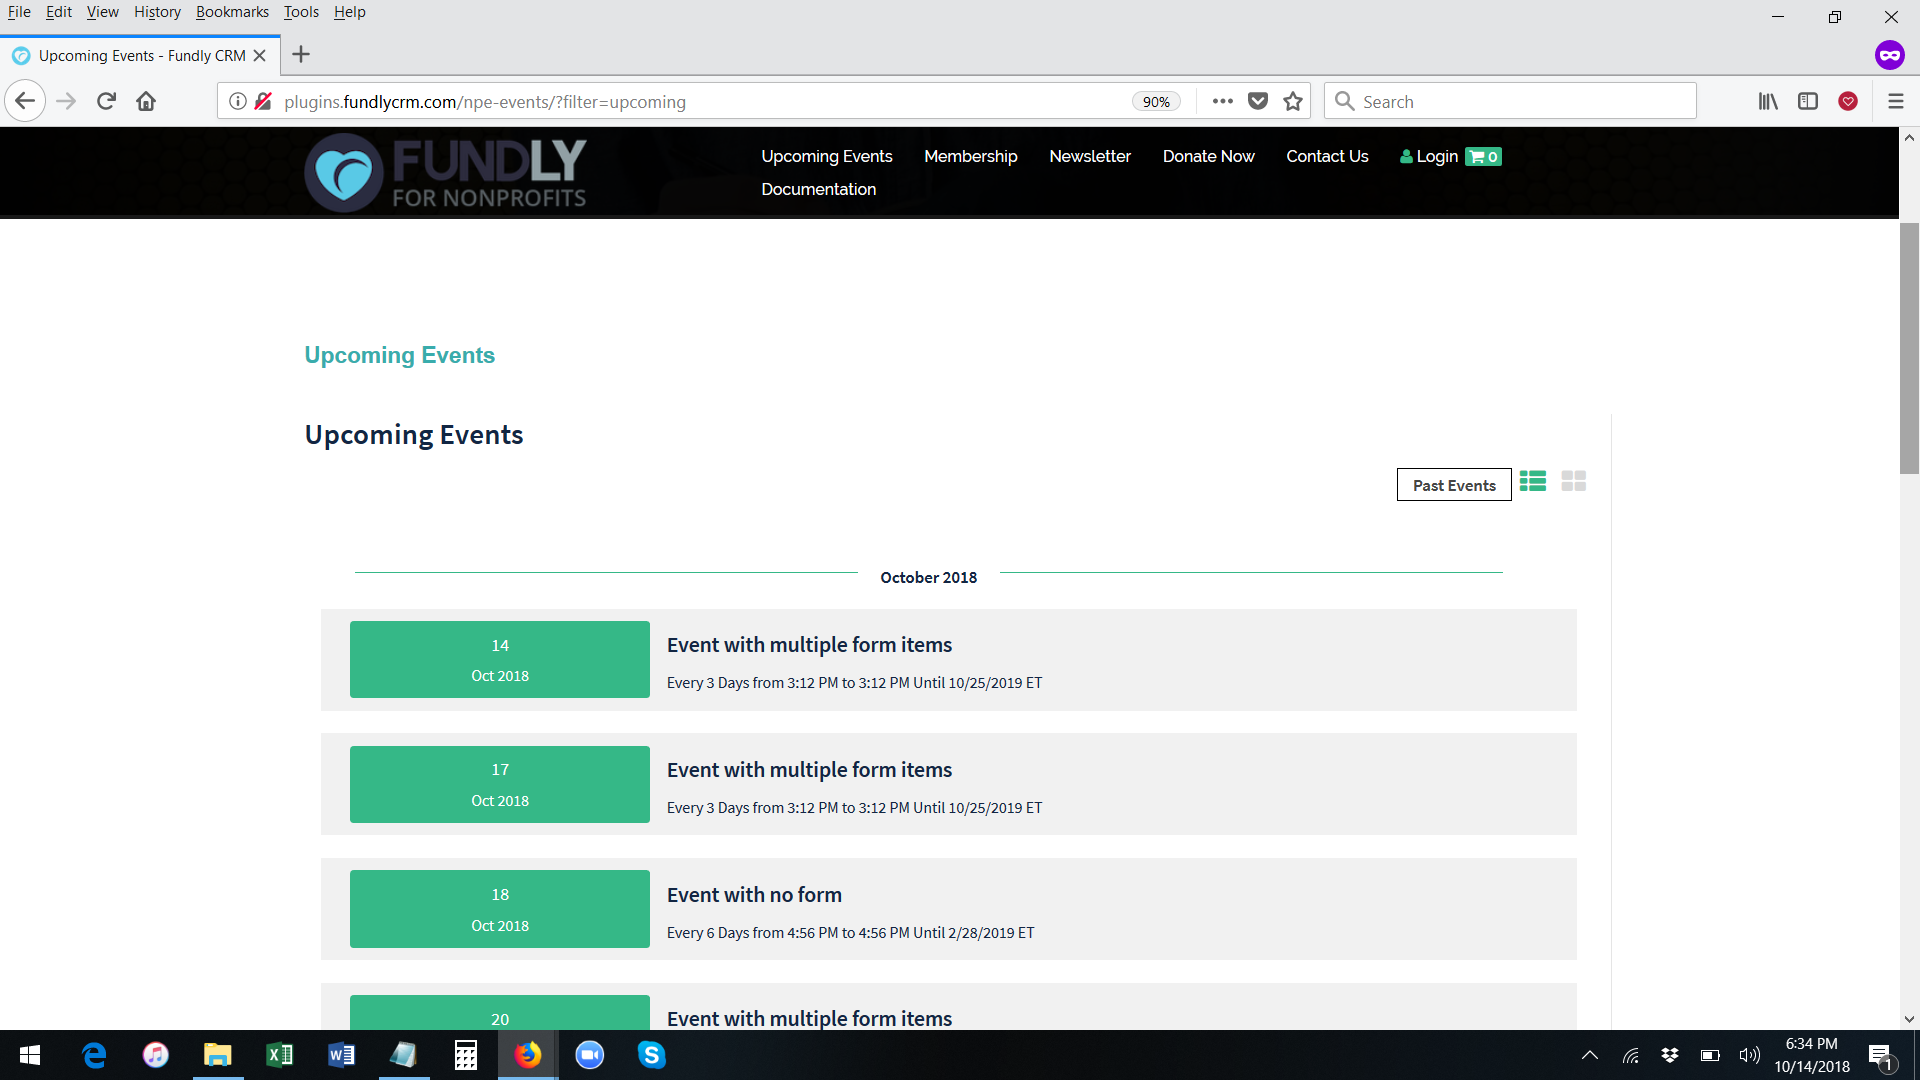
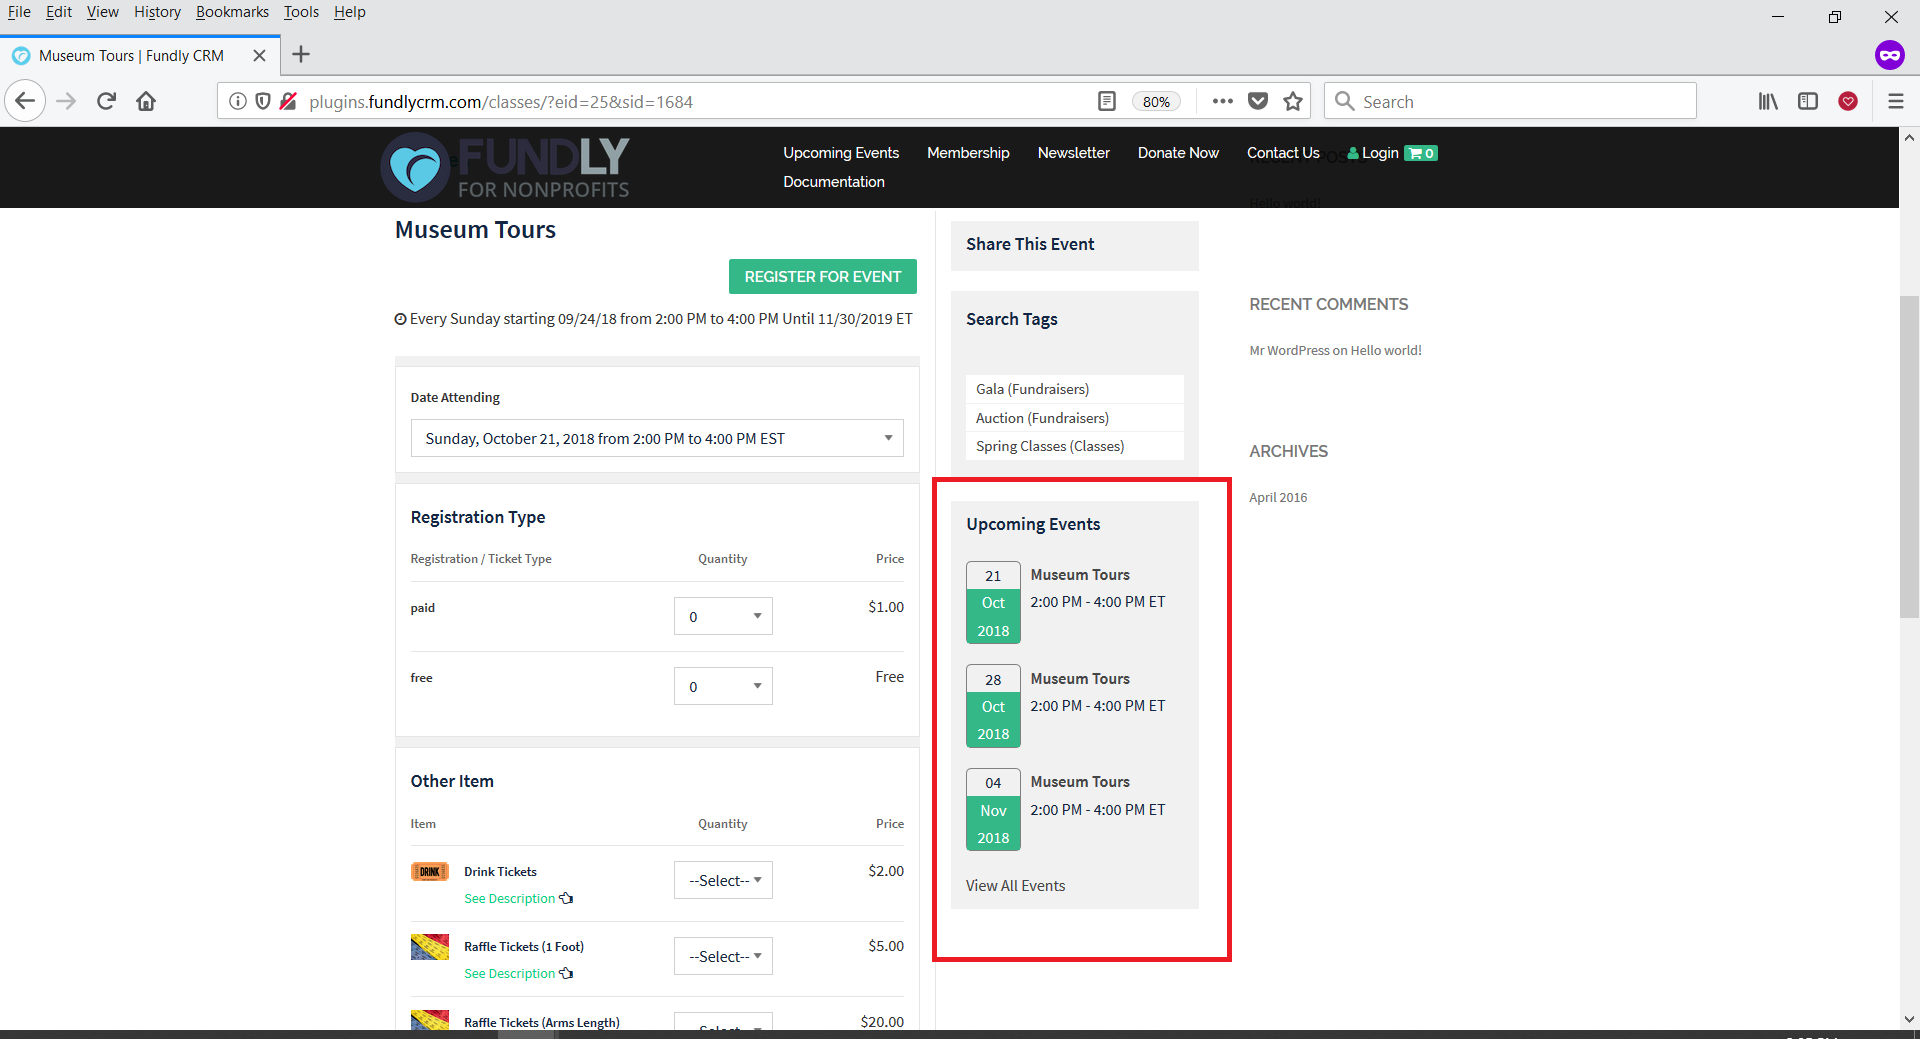
- The Event Page Calendar/Sidebar controls whether or not the event page sidebar/widgets are displayed on your website. The event page sidebar includes the upcoming/past events date range filter, the calendar picker, and the event tags search box. Selecting "hide" in this setting will remove the sidebar, as in the third screen shot below.

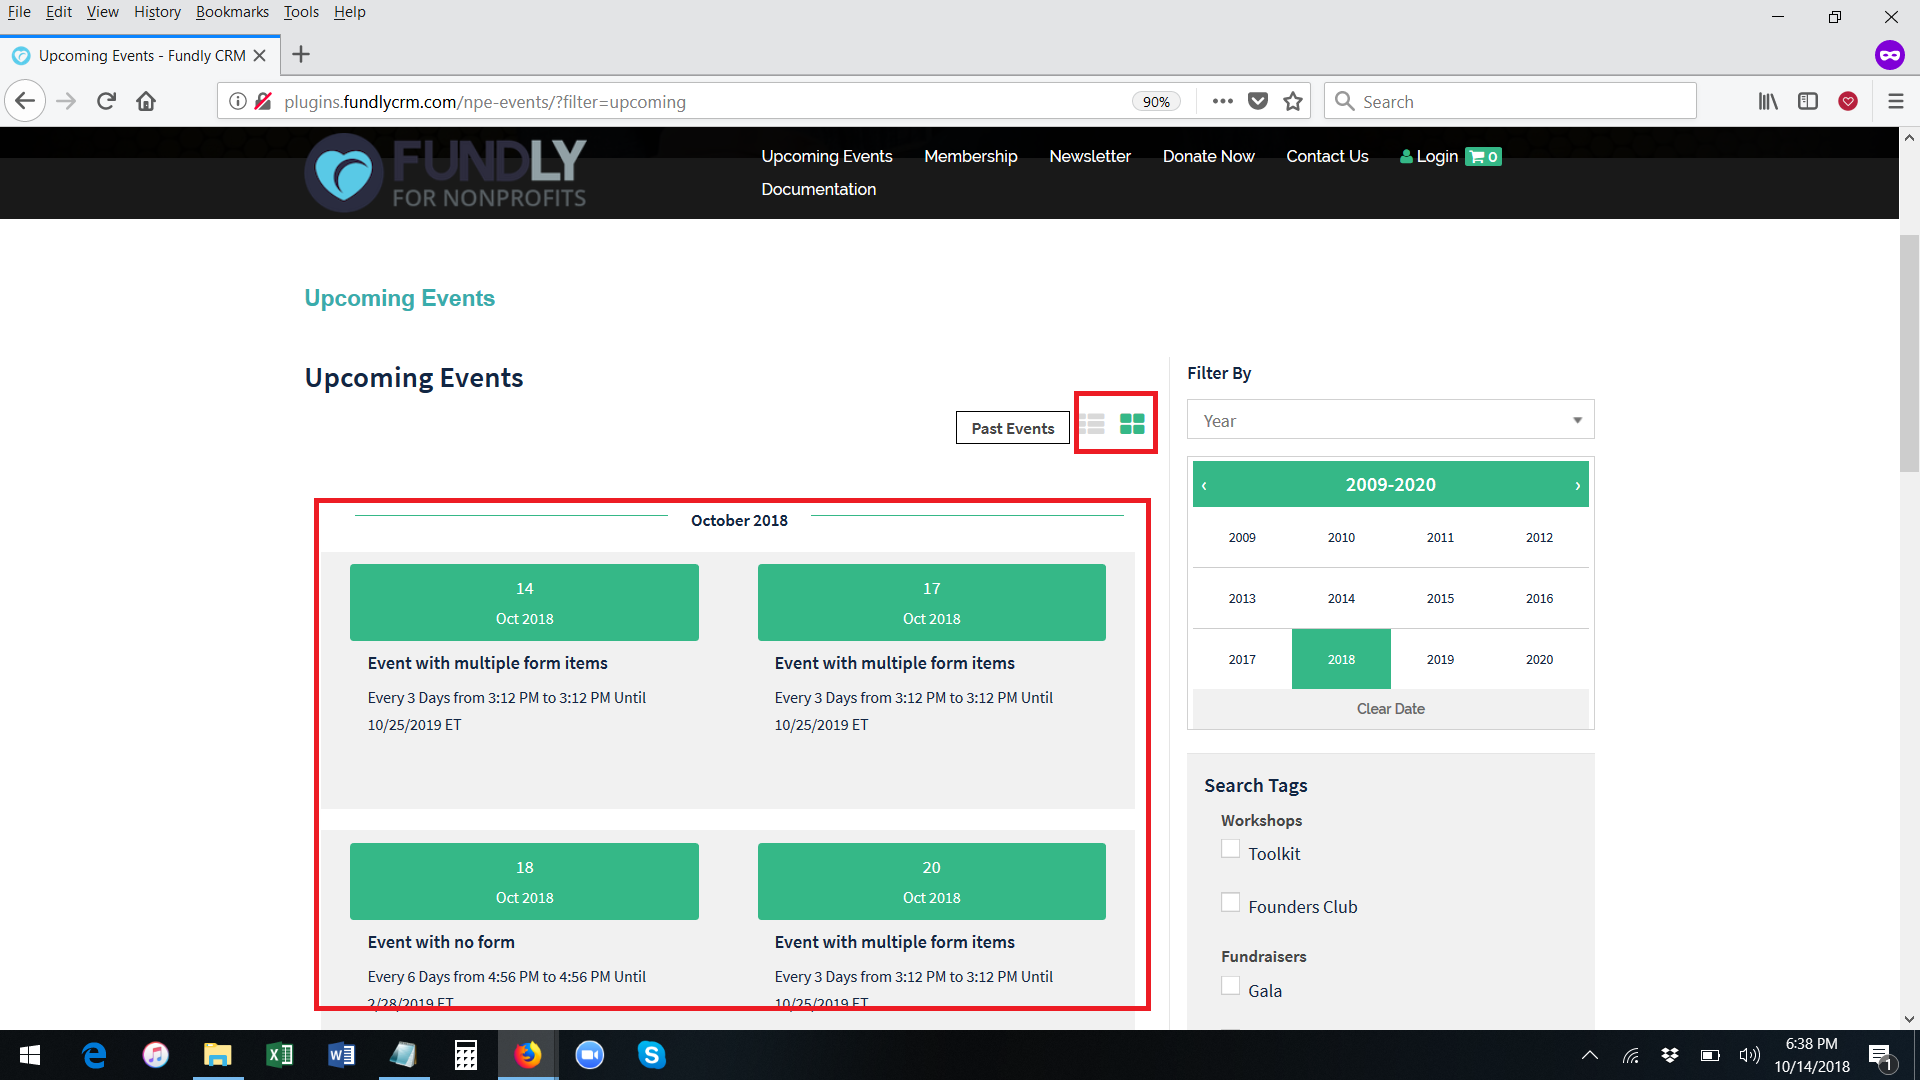
- The Default Event List Type setting controls whether the events on your events index page display as a list or as a grid by default. Users can toggle the view using the list/grid option on the events index page. This setting just sets which way the events will display initially/by default.

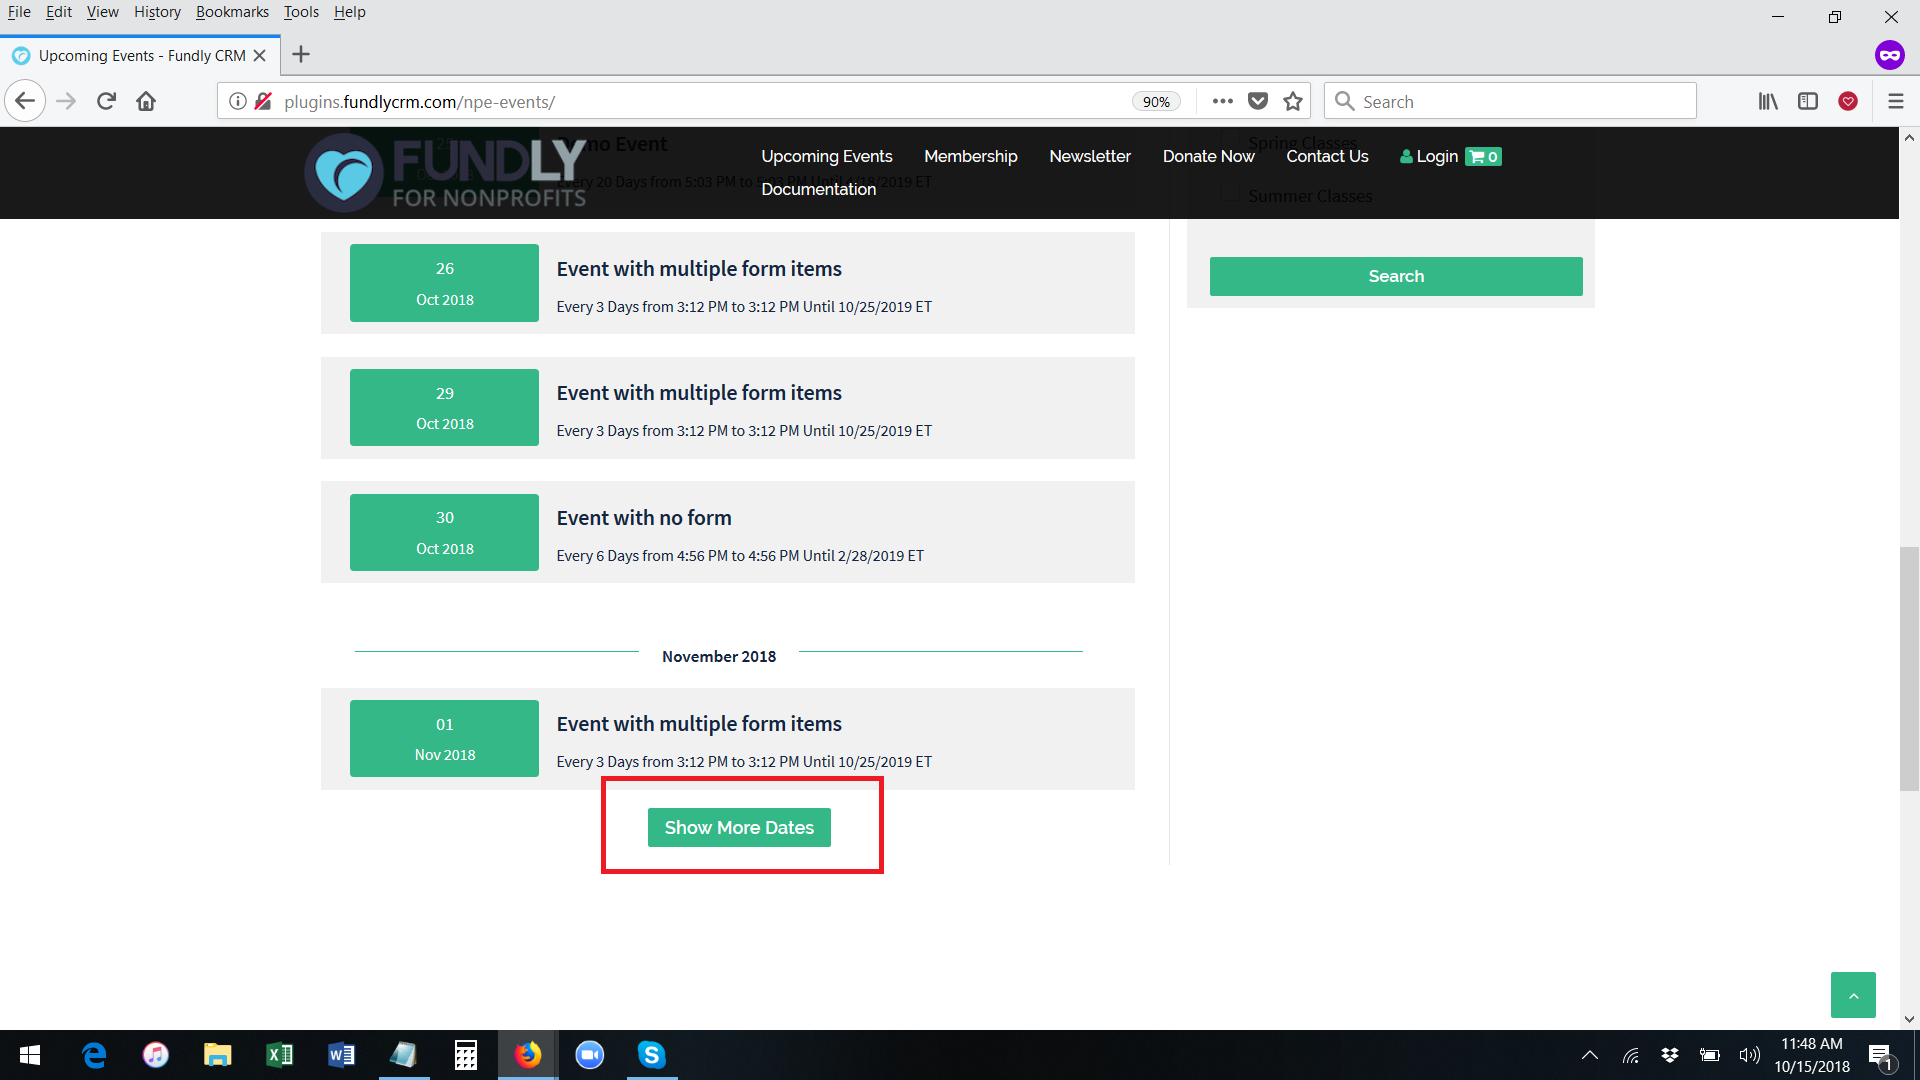
- The Max Events Per Page setting controls the number of events shown on the events index page by default. If there are more events beyond the default number set, a "Show More Dates" button will appear at the bottom of the screen and users can load/show more dates in batches equivalent to your max event per page setting (that is, if you set the max events per page to 10, then by default 10 events will load/show on the index page. If the user clicks Show More Dates, the next 10 events will then also be listed, etc.
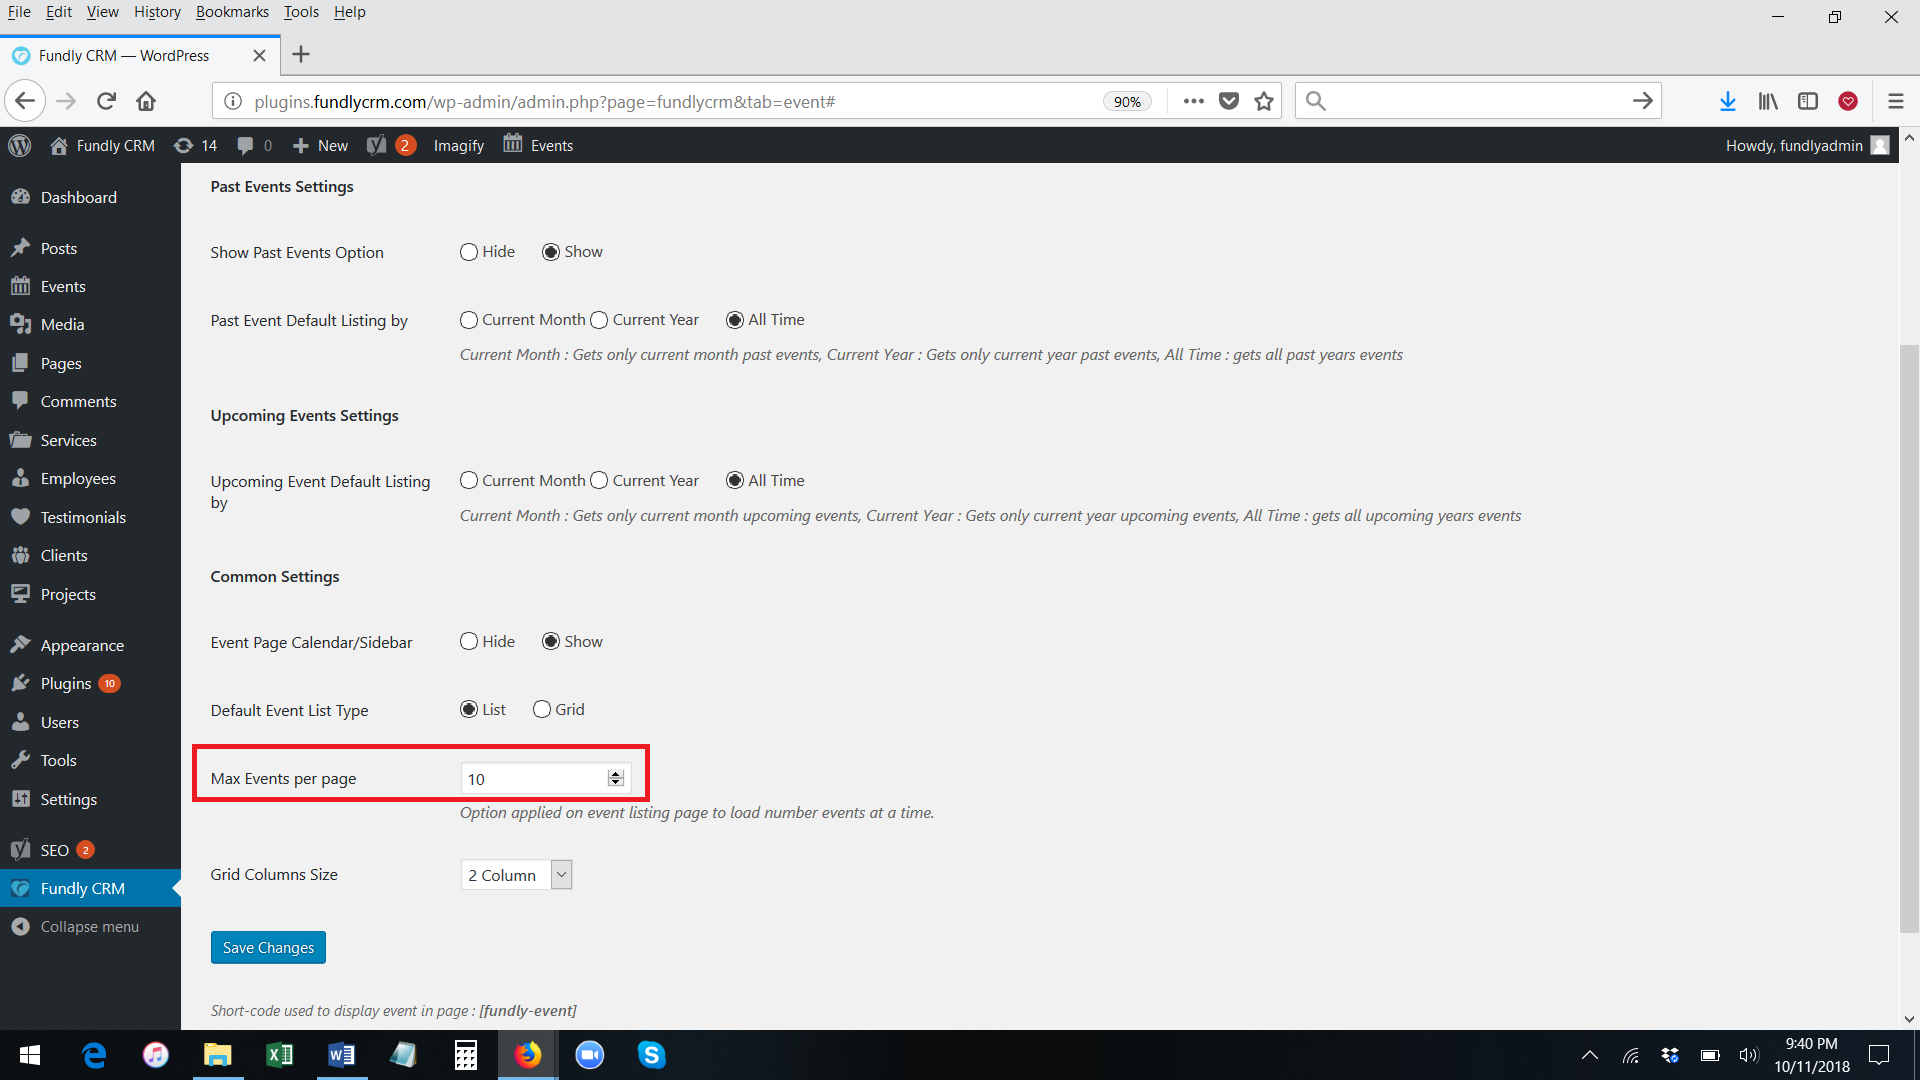
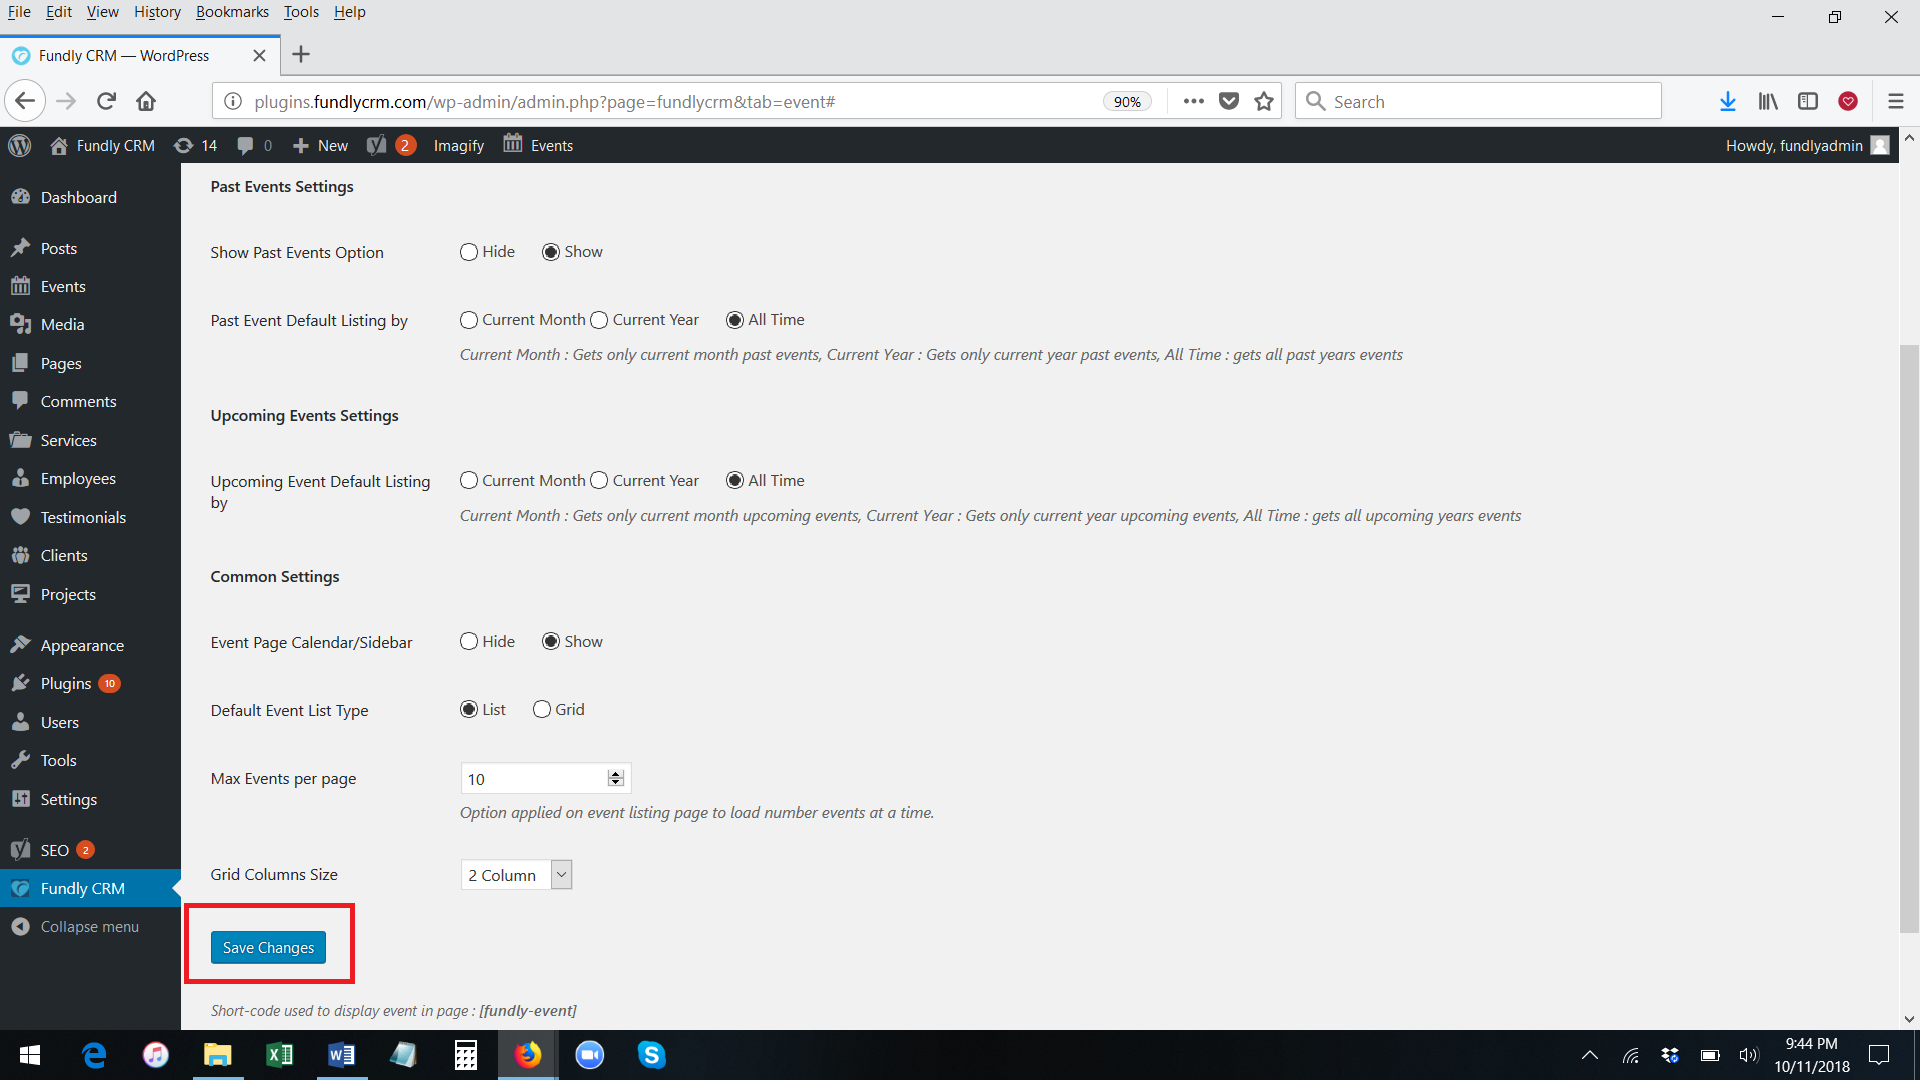
- The Grid Column Size drop down controls the number of columns that display when the events index page is viewed as a grid (you can set grid to display by default and also the user can select to view the list of events as a grid).

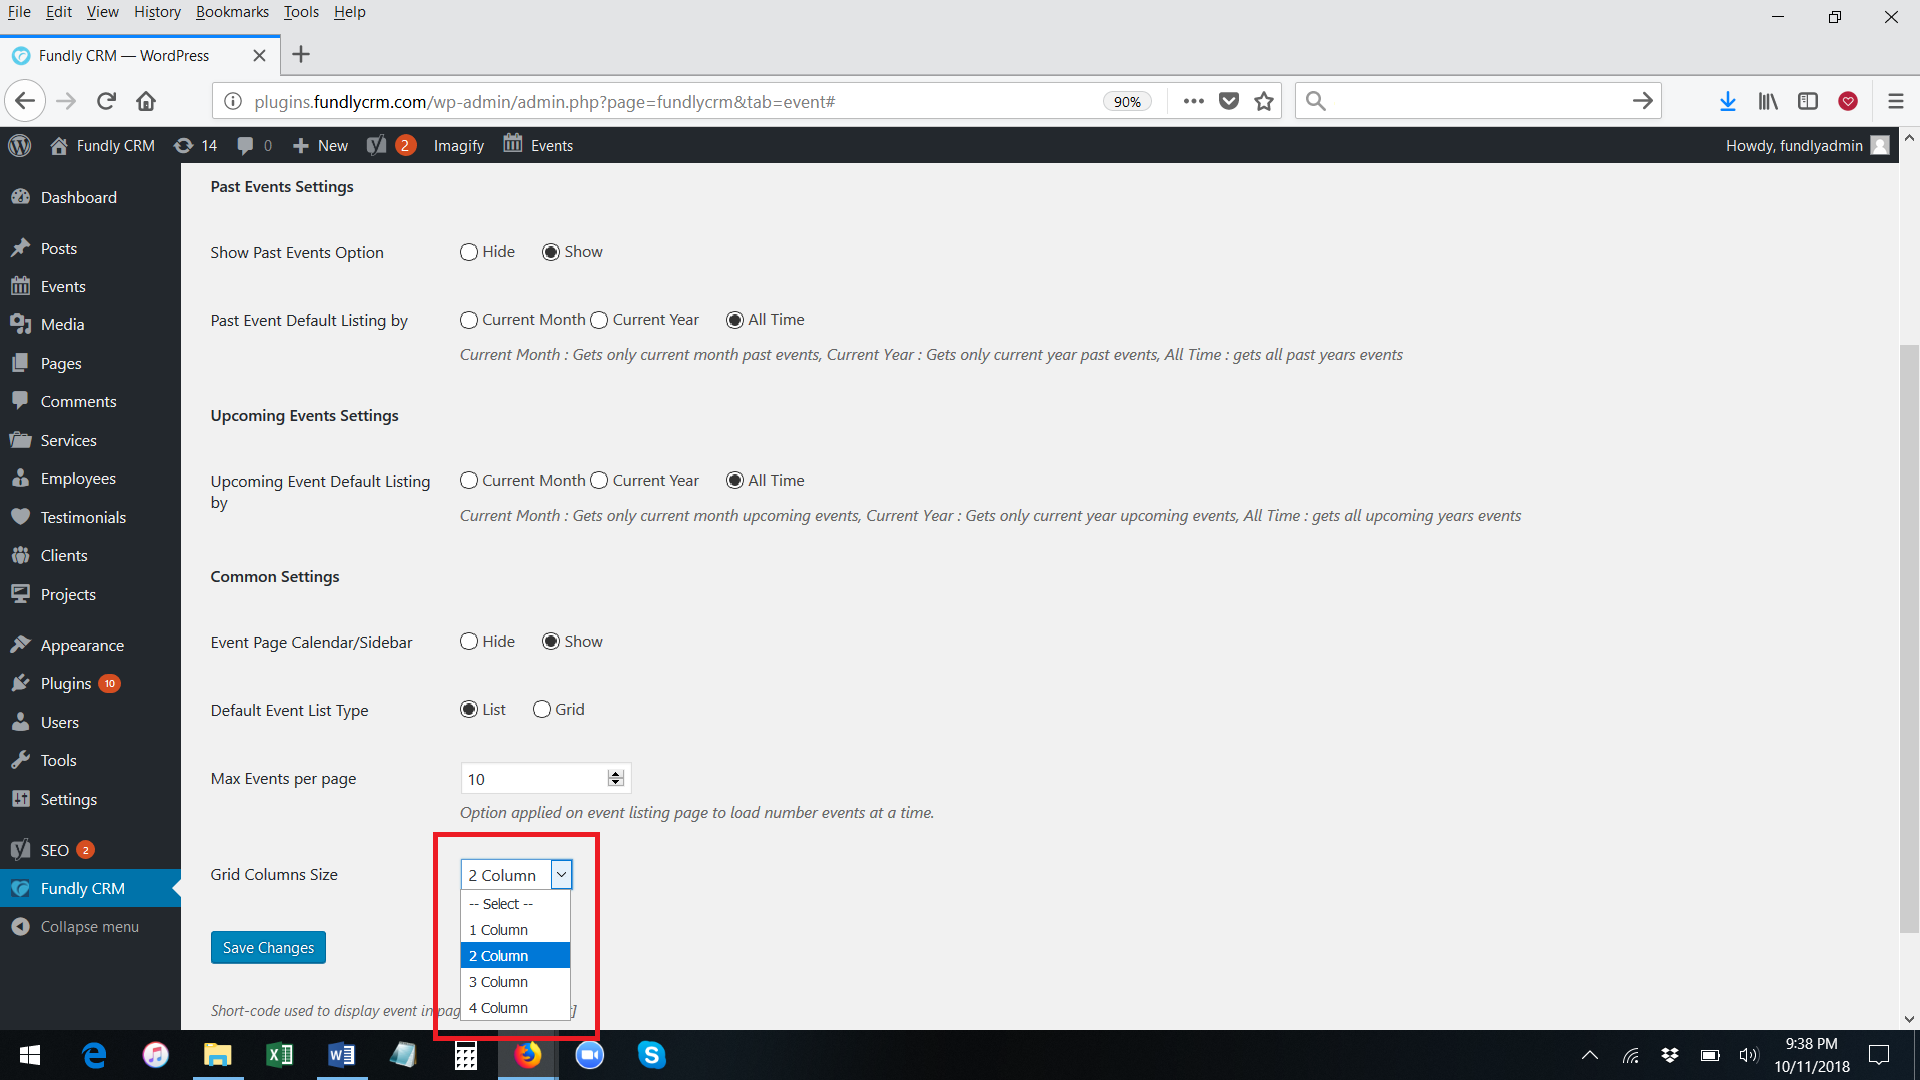
- After making any changes on this tab, click the blue Save Changes button at the bottom of the page to save.
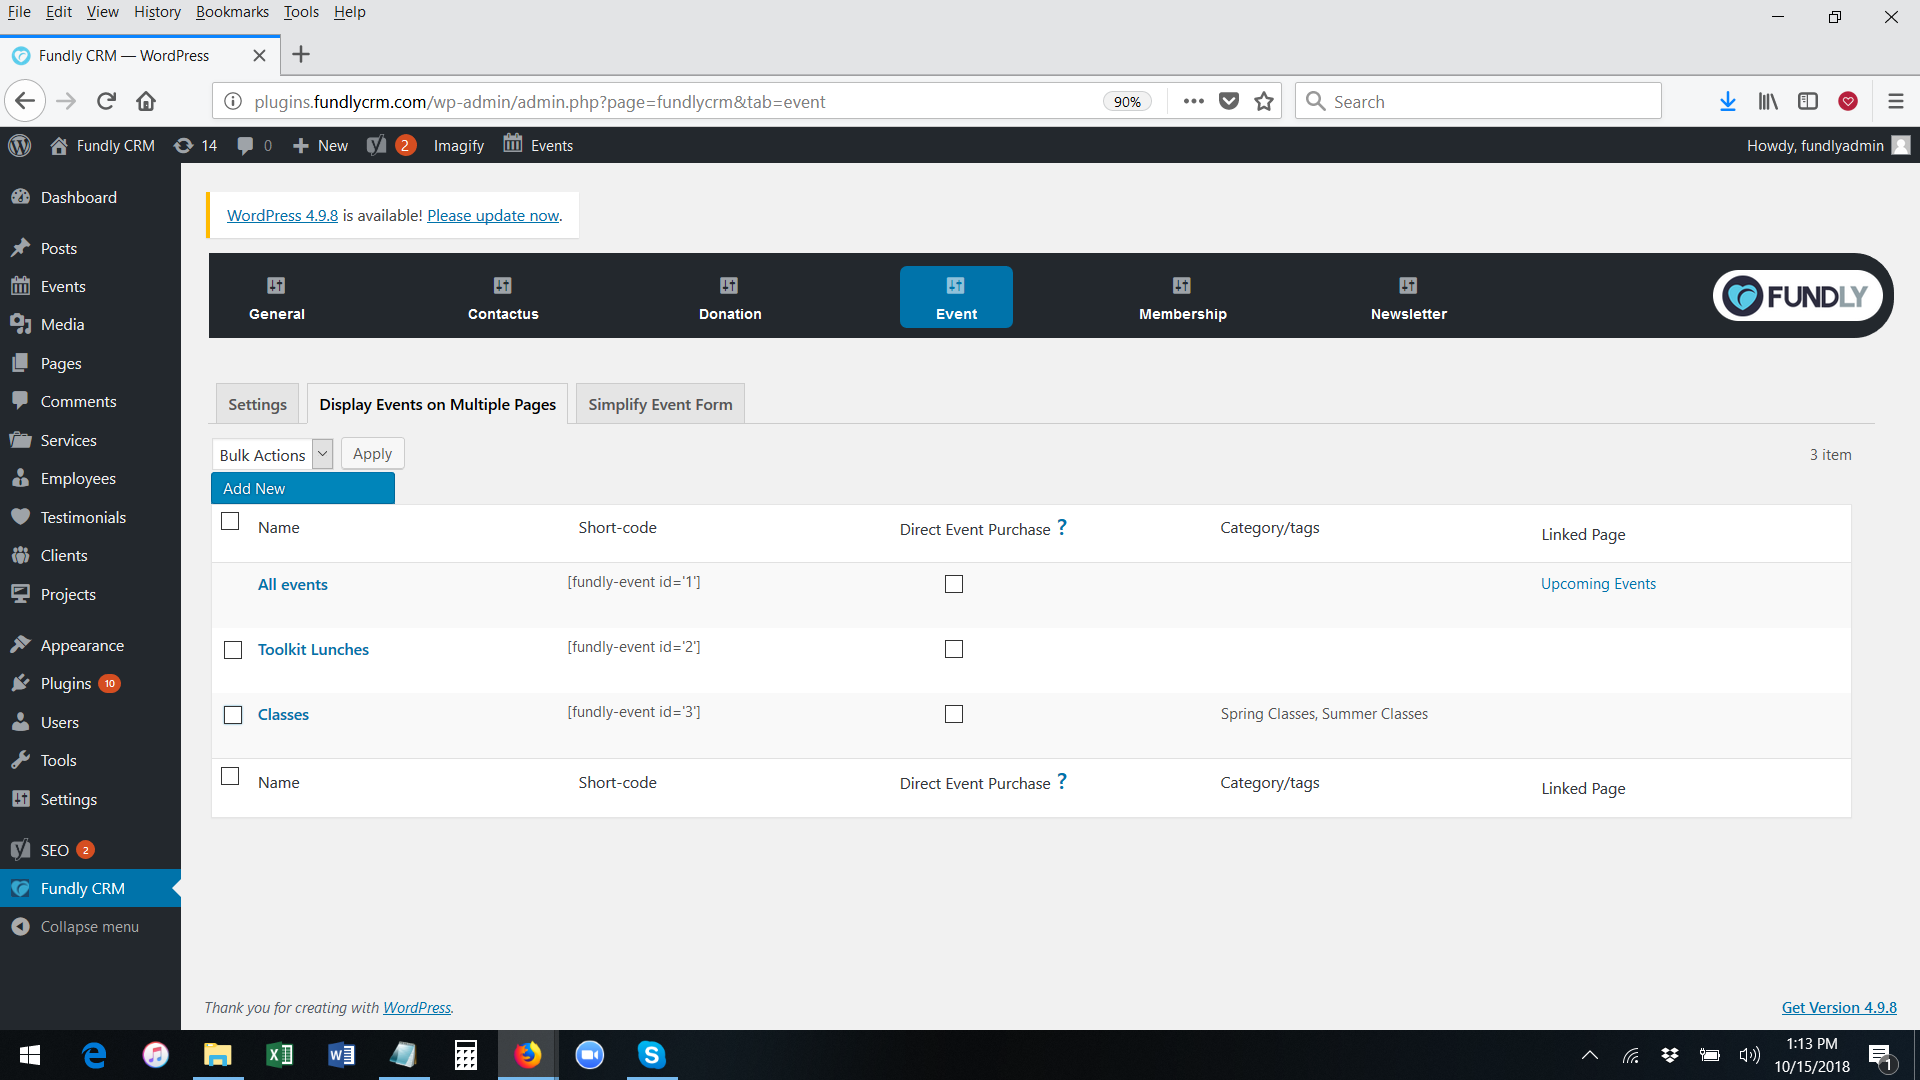
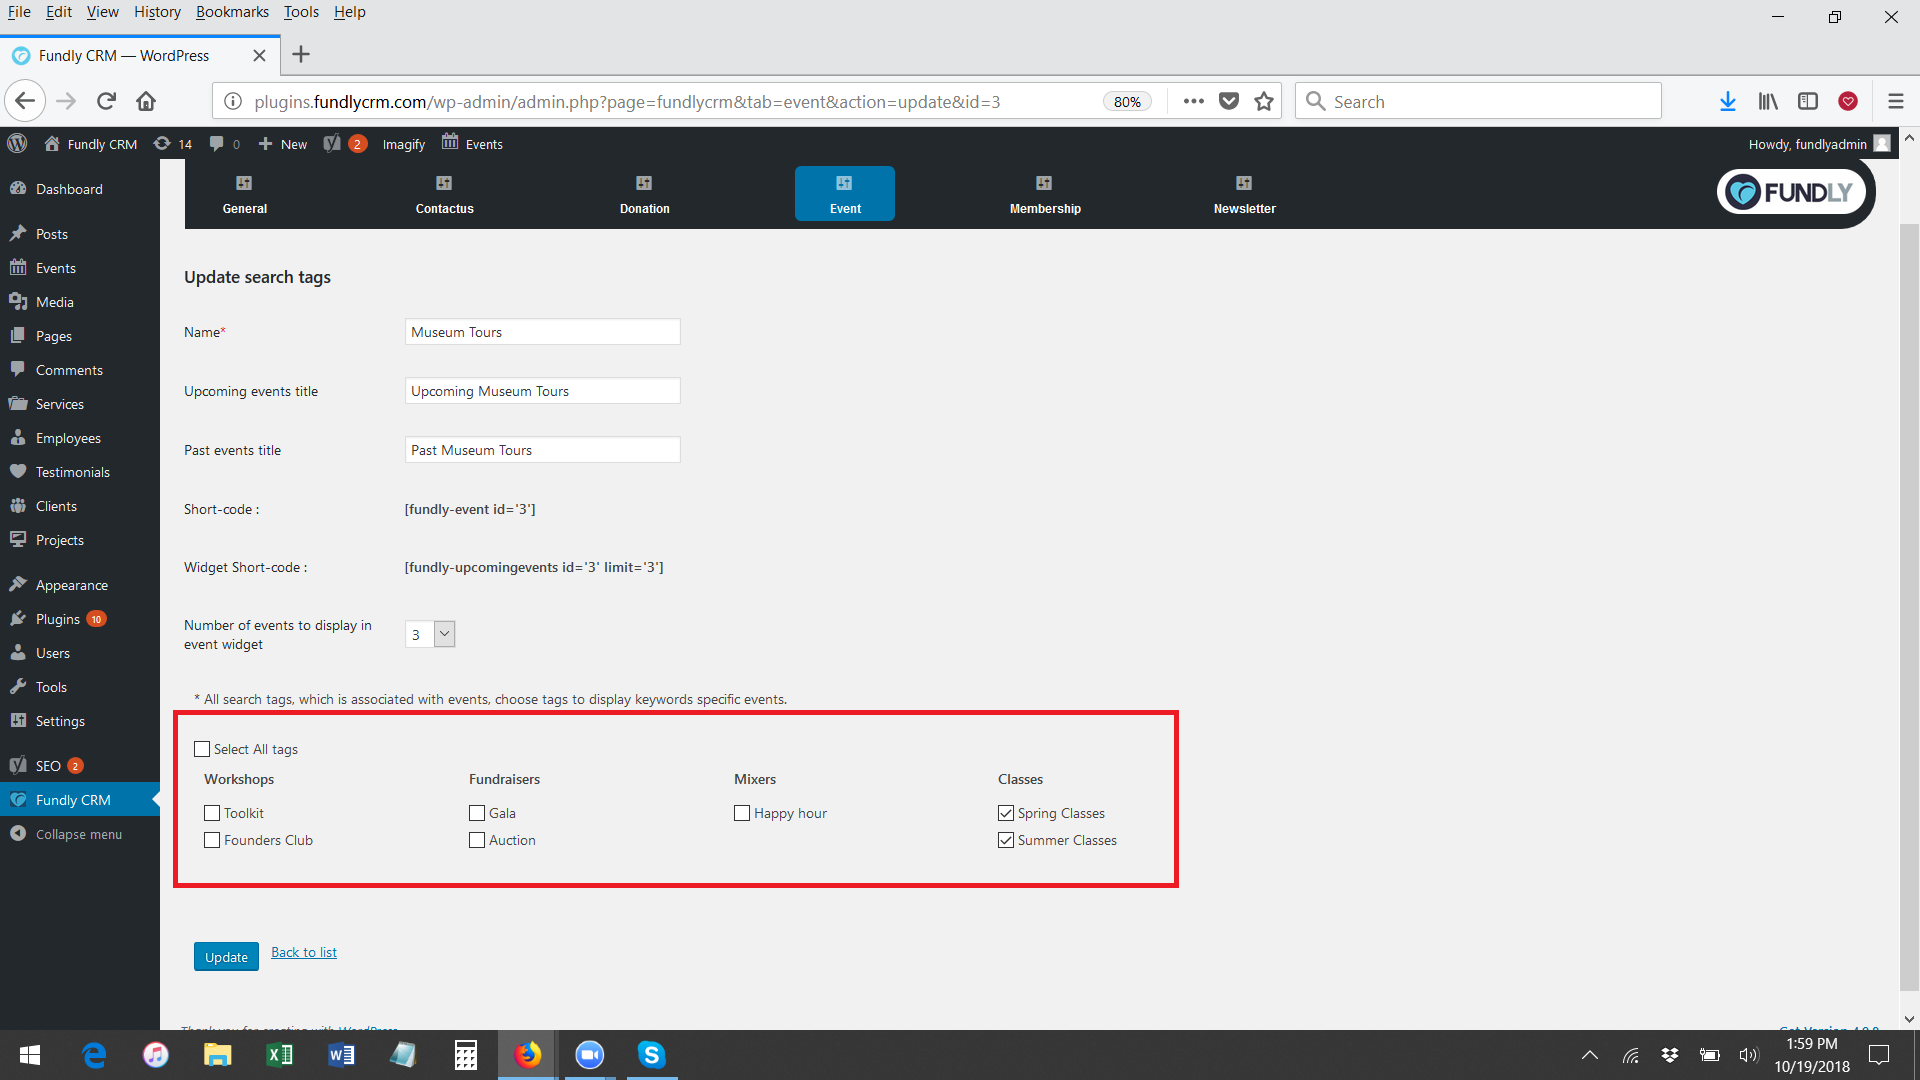
- To configure separate event index pages based on Keywords/Search categories (e.g. an index of "Workshop" events or an index of "Dog Obedience" related events), click on the Display Events on Multiple Pages tab.
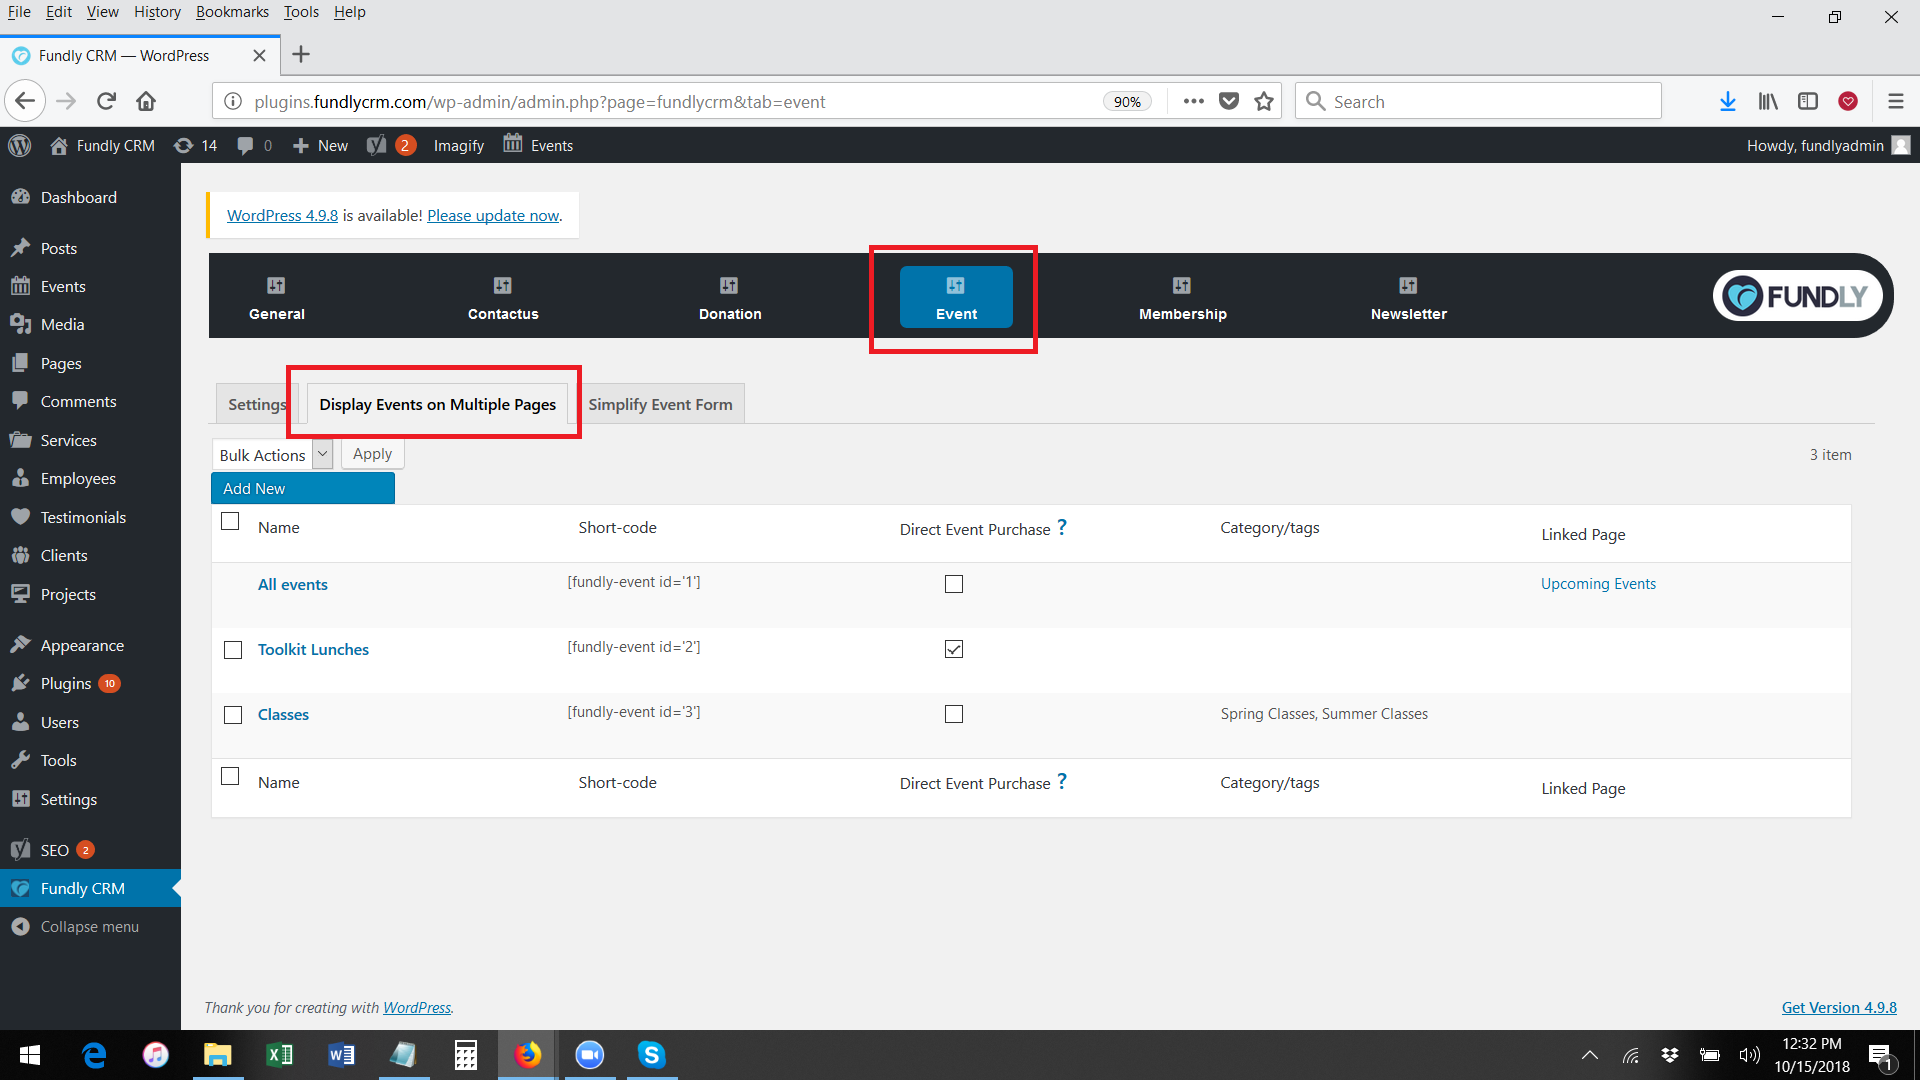
- Here you will see a list of any event category pages you have configured.
- You can edit any page by hovering over the page title and selecting Edit.
-

- You can delete any page by hovering over the page title and selecting Delete. You can also delete in bulk by clicking the white box to the left of the page title and then selecting Delete from the bulk action drop down and then clicking Apply.
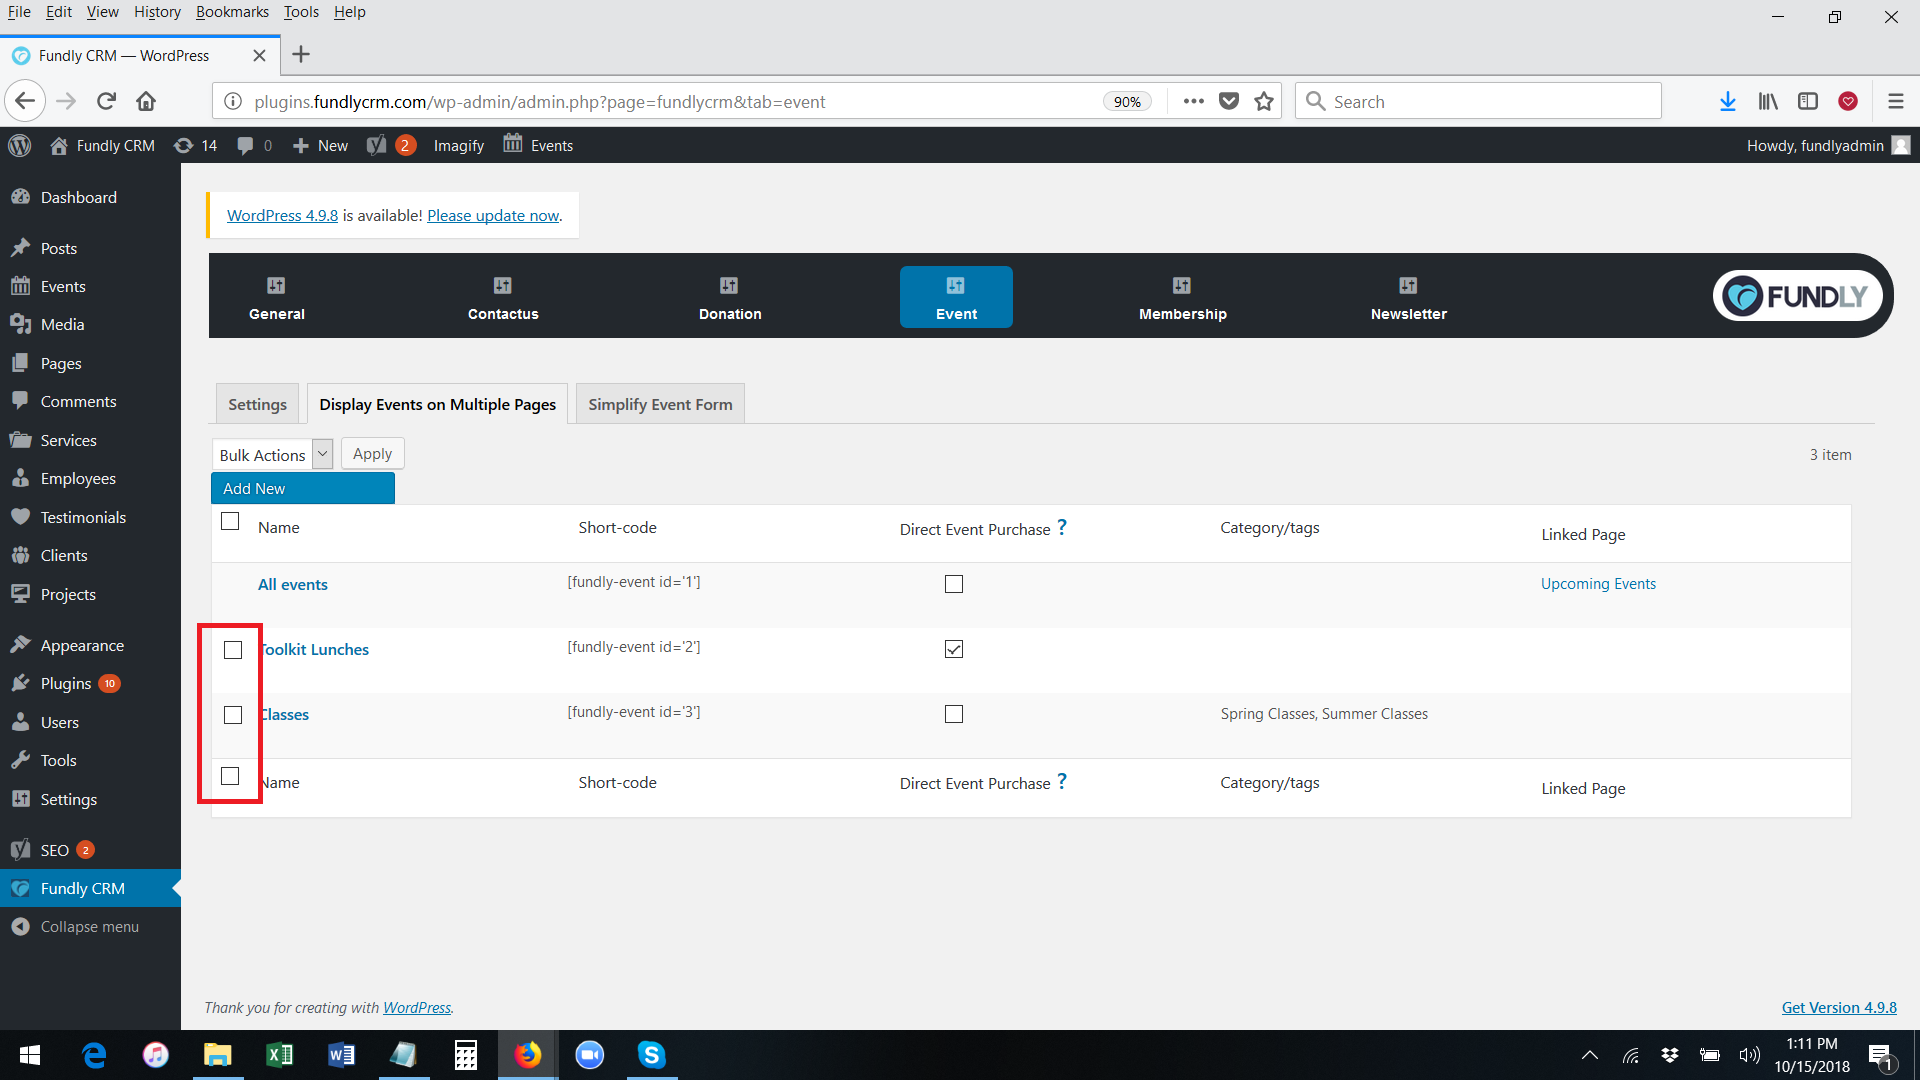

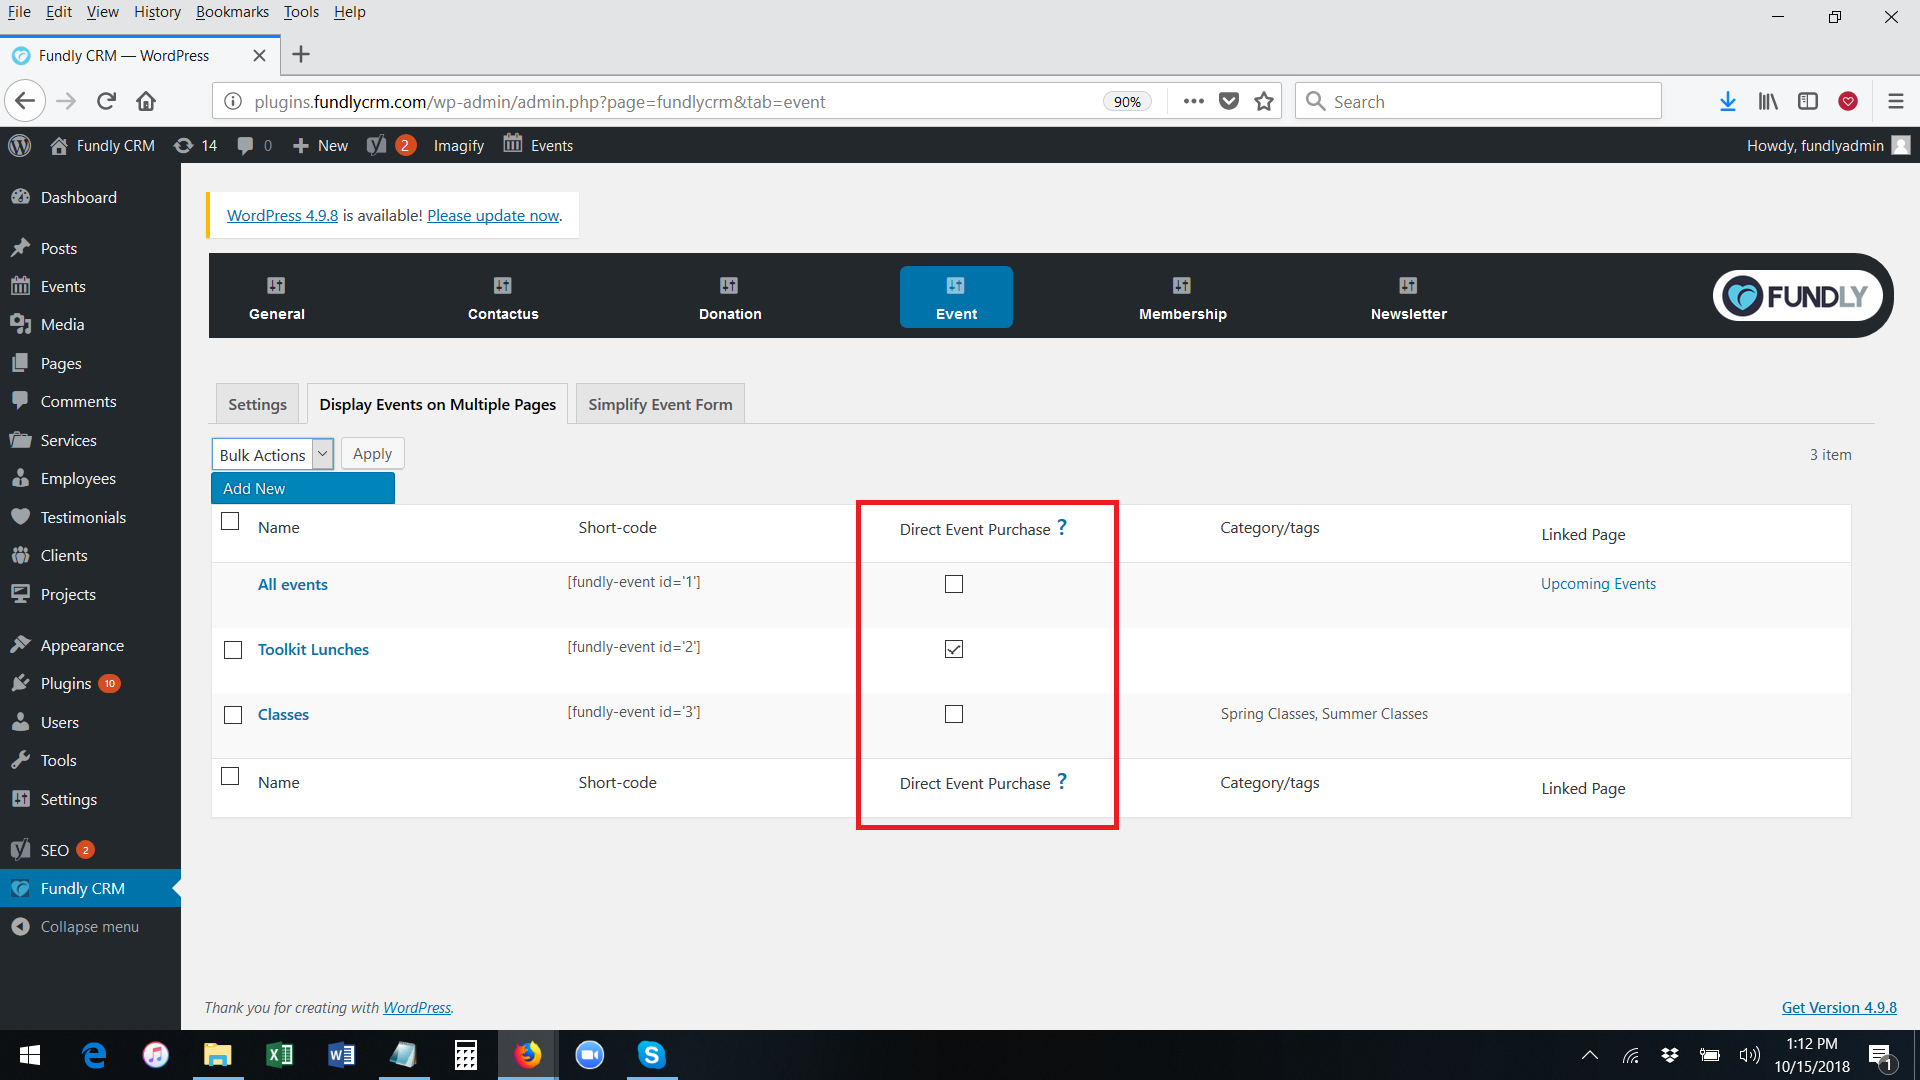
- If you wish to allow direct checkout on a event page, which hides the "add to cart" option/button and takes user directly to the check out page when they select event tickets (for faster/more streamlined check out), check the white box in the Direct Event Purchase column.
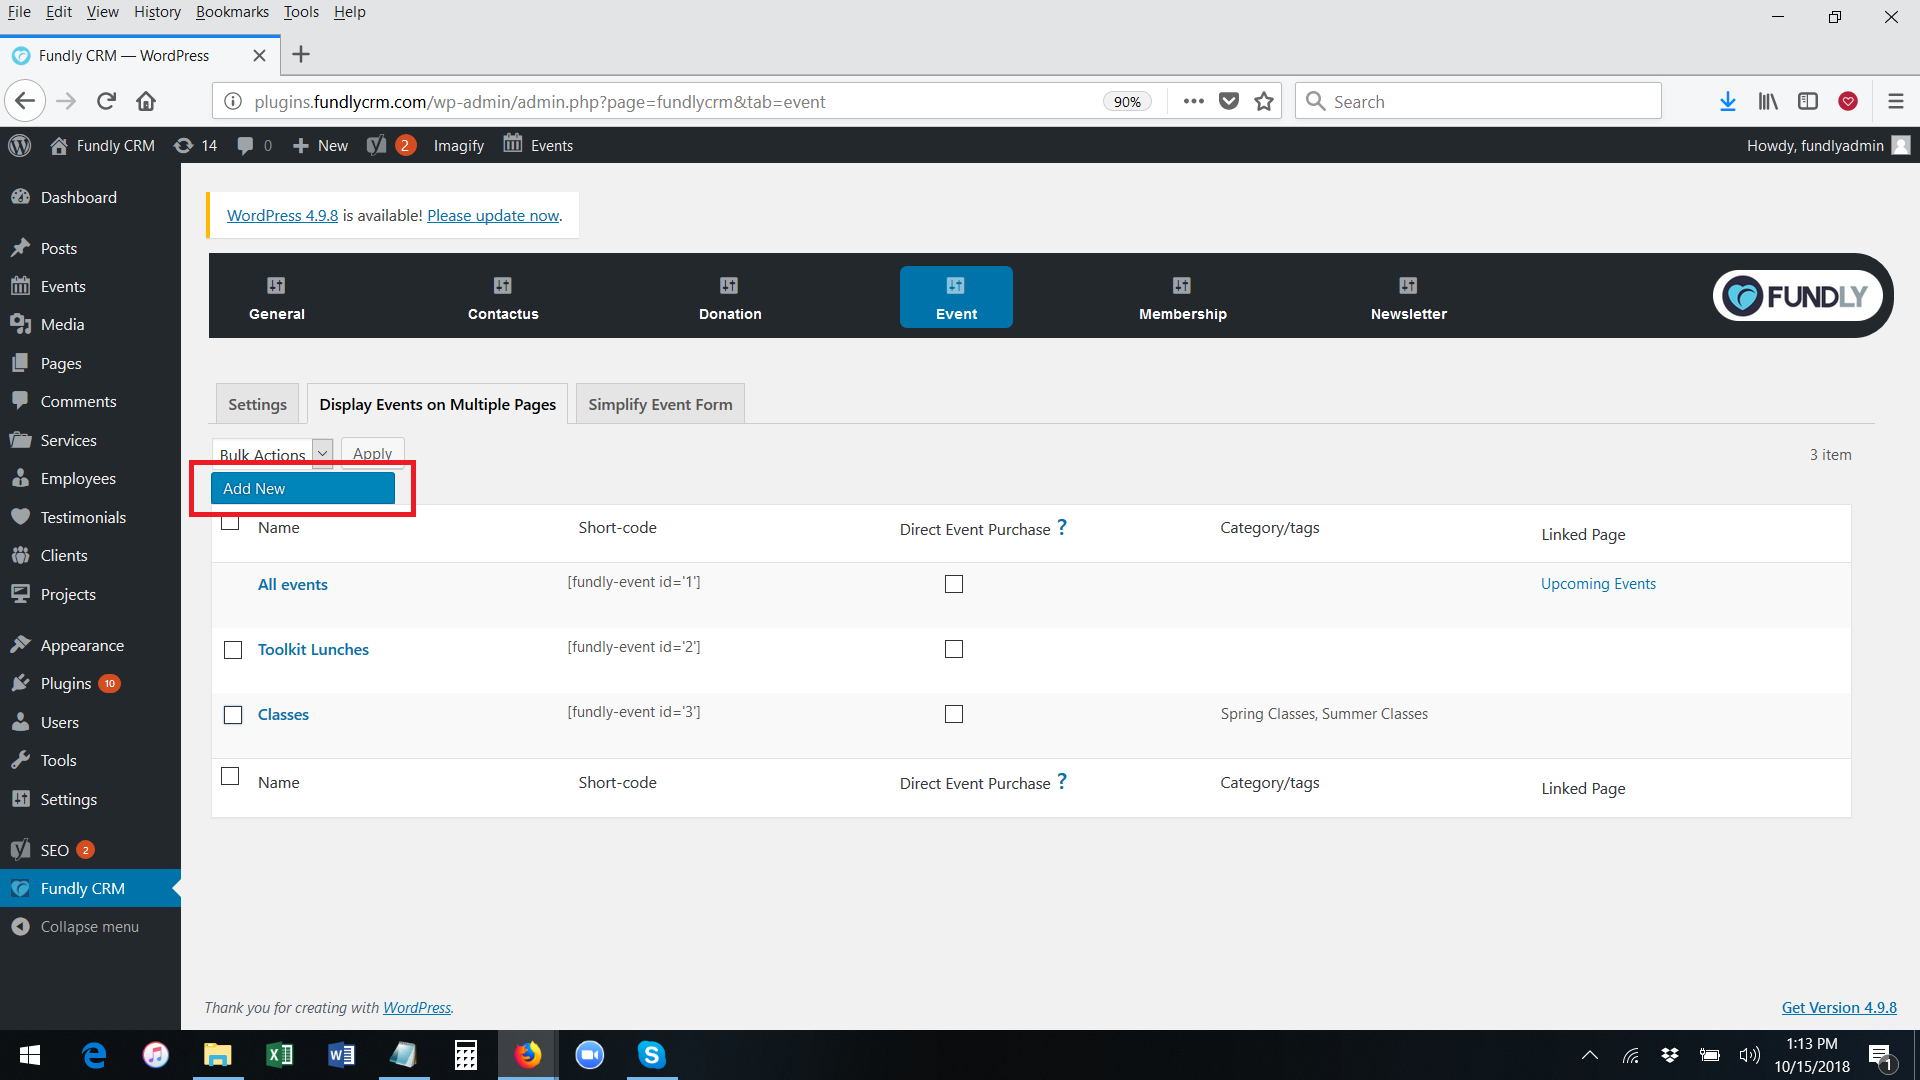
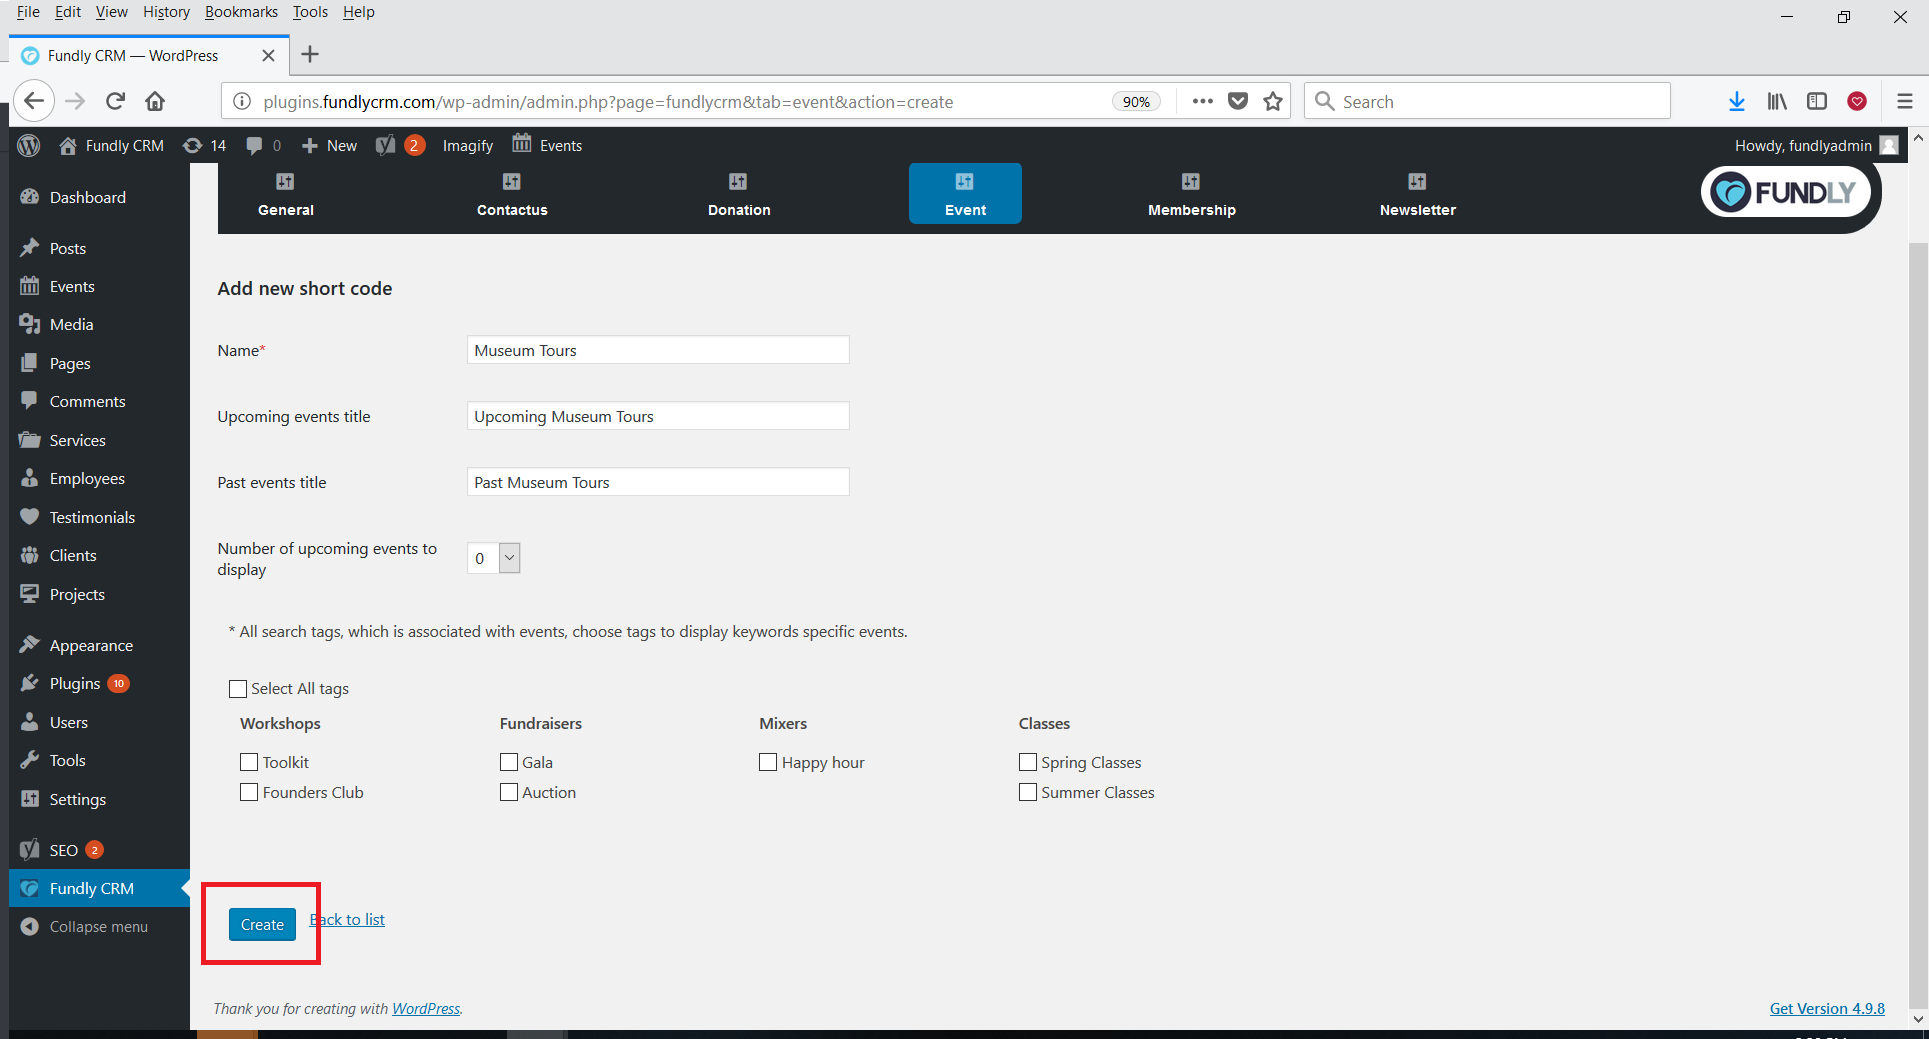
- To add a new event page, click the blue Add New button at the top of the screen.
- This will take you to the Add New Event Page screen.
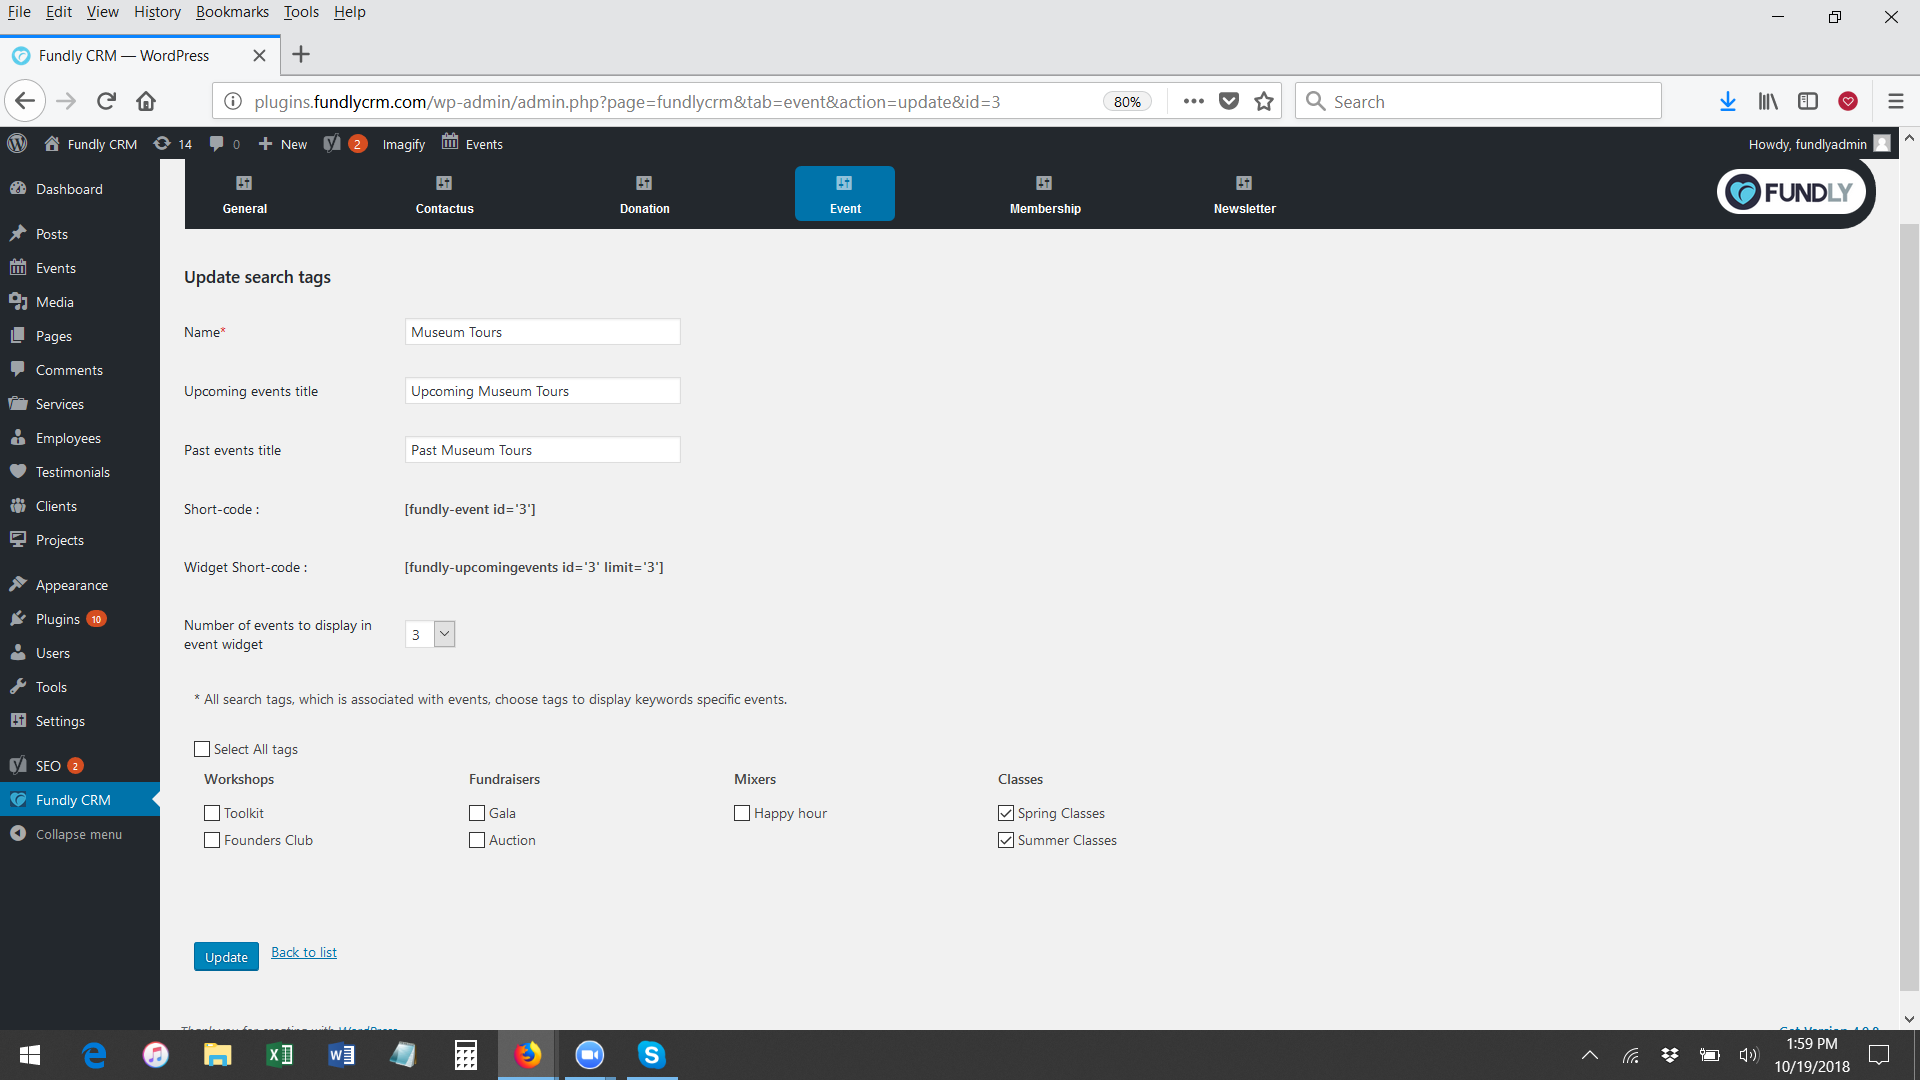
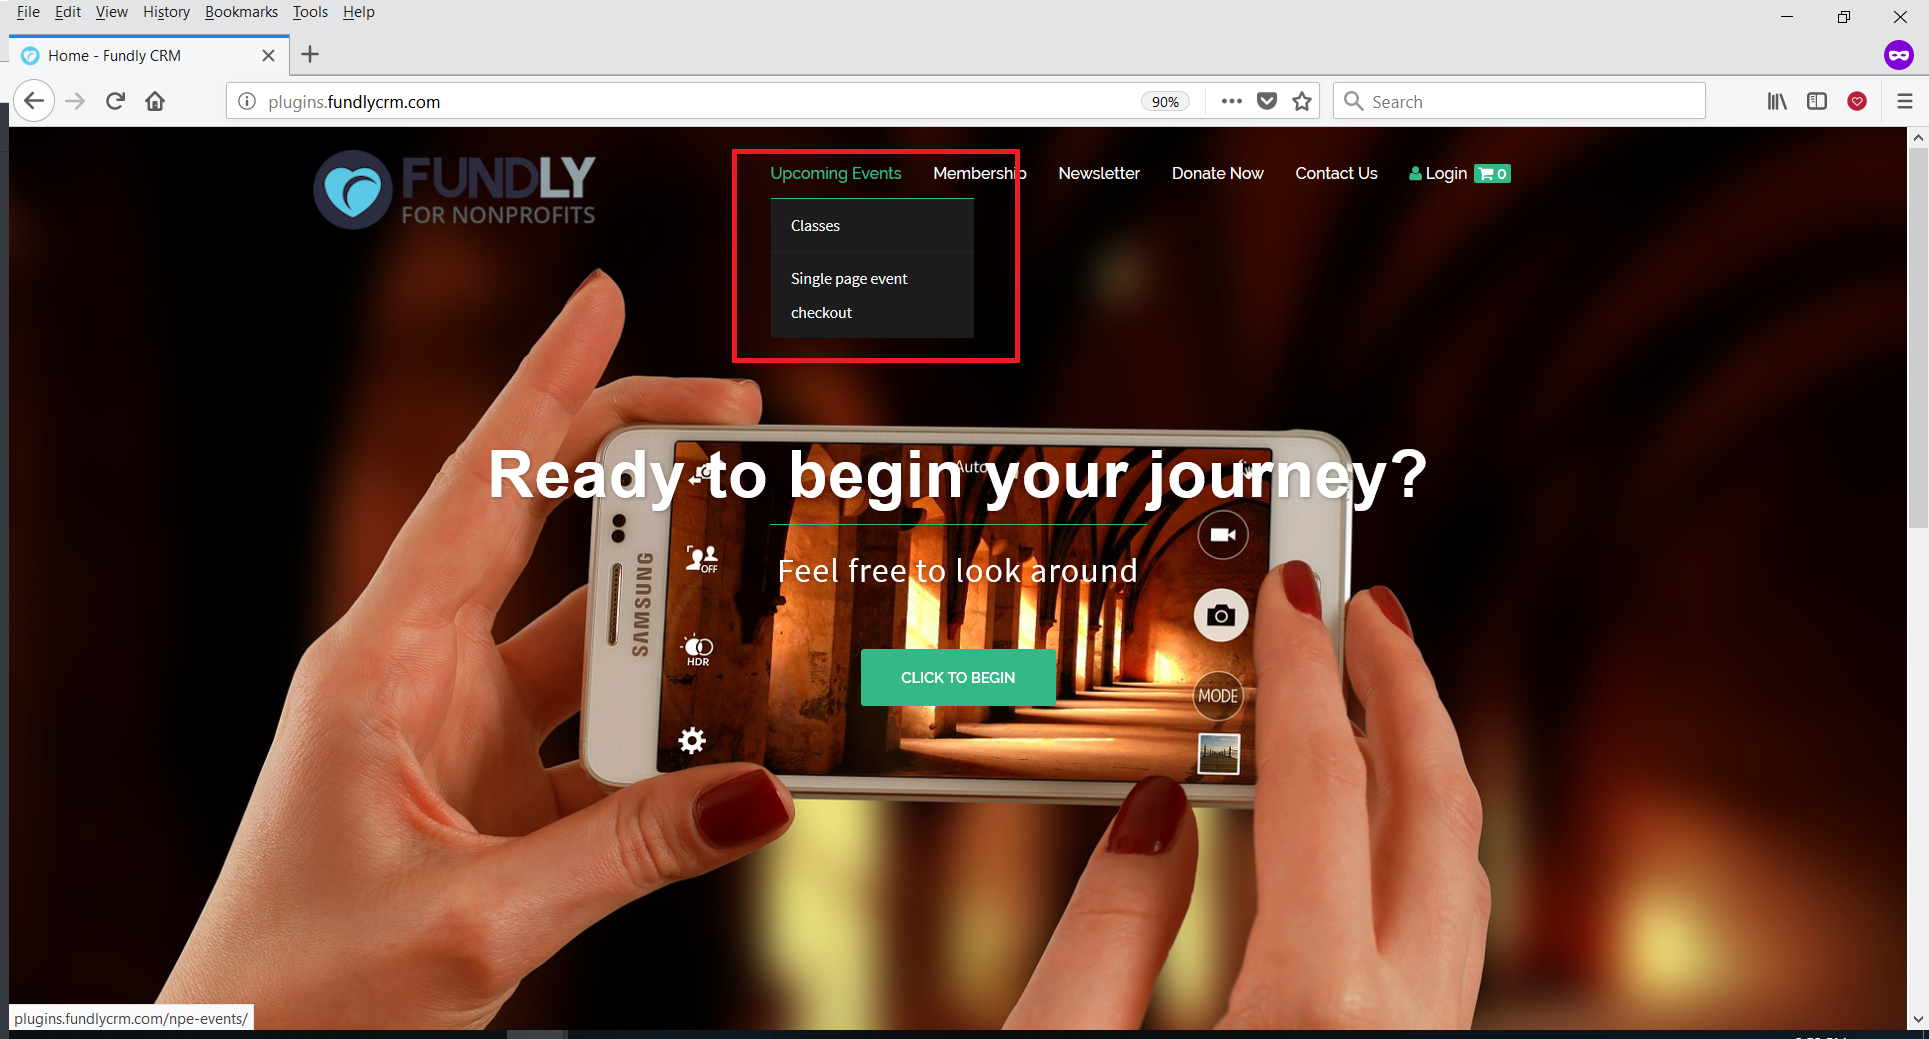
- Start by giving your new event page a Title. This title will appear in the Events menu on your published website and will appear at the top of the published page.
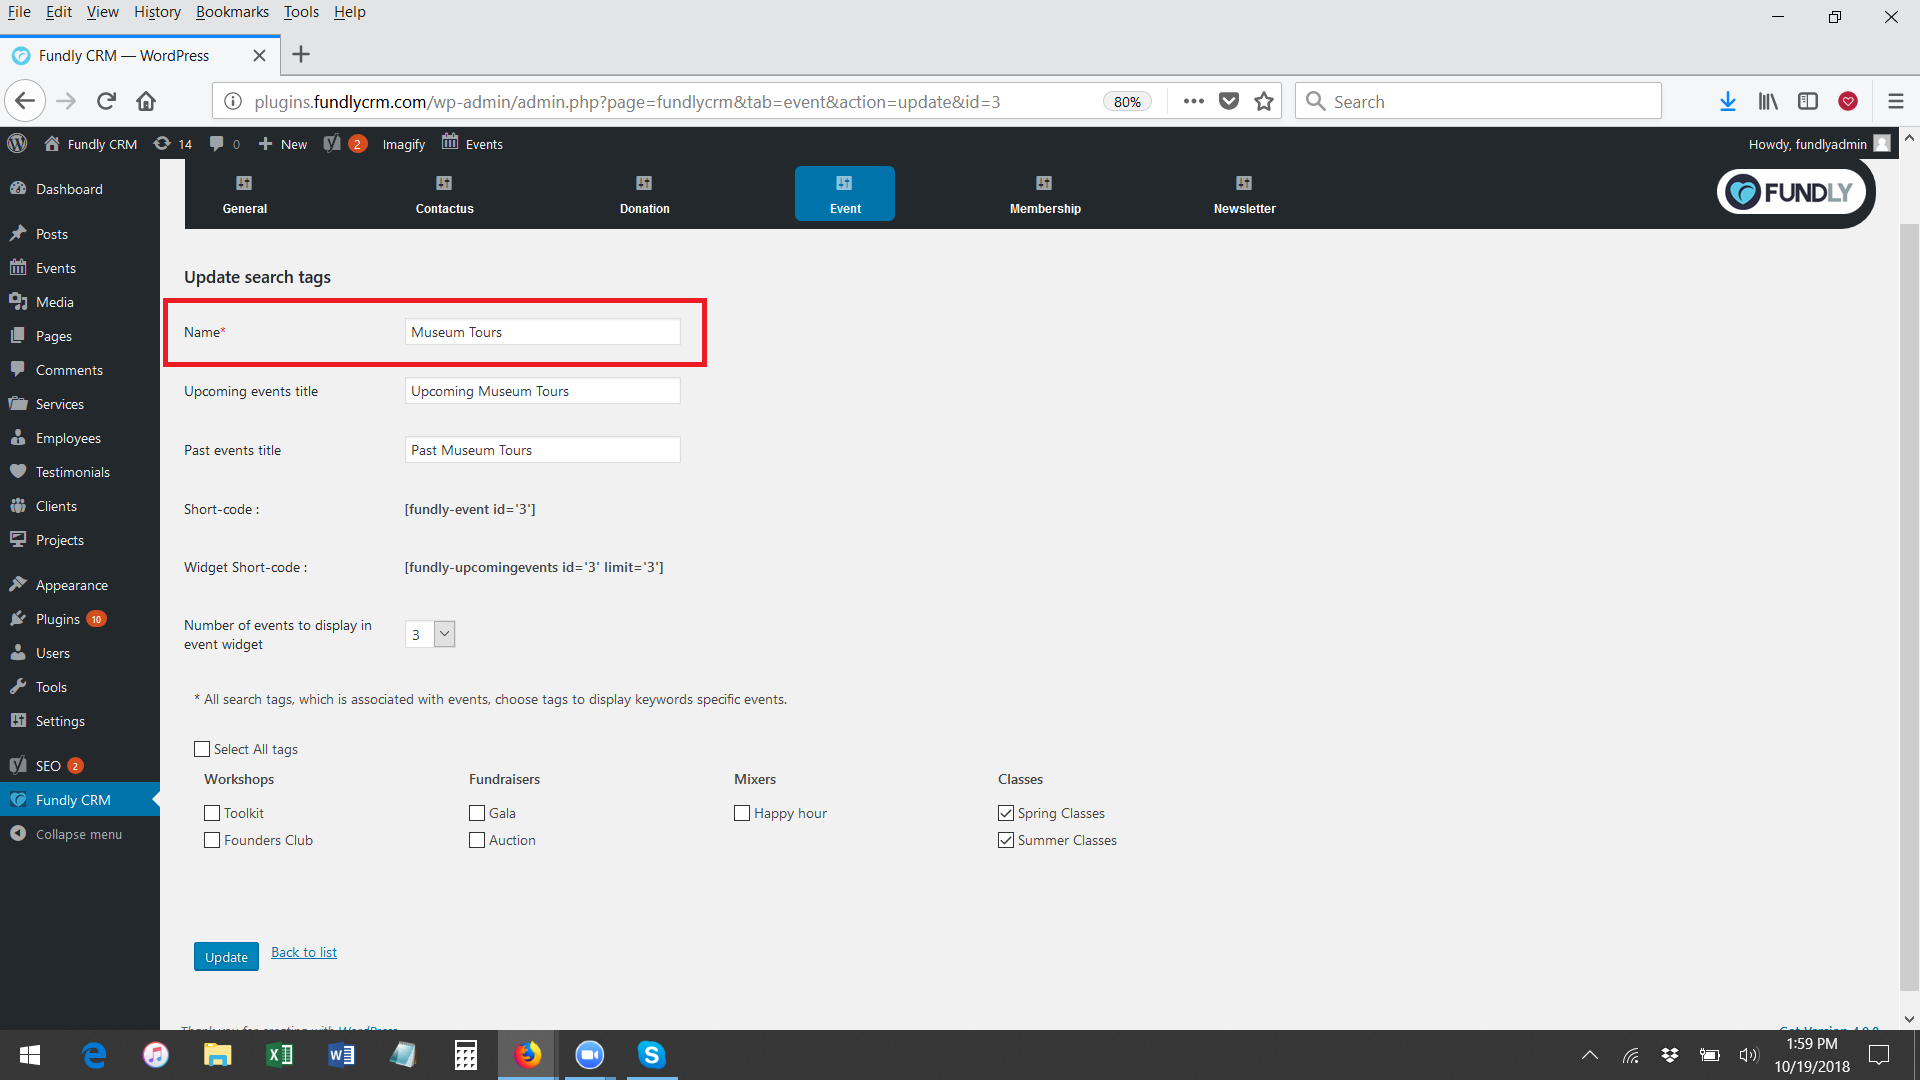
- In the Upcoming Events Title field, enter the title the upcoming events page that will show in the list of upcoming events.
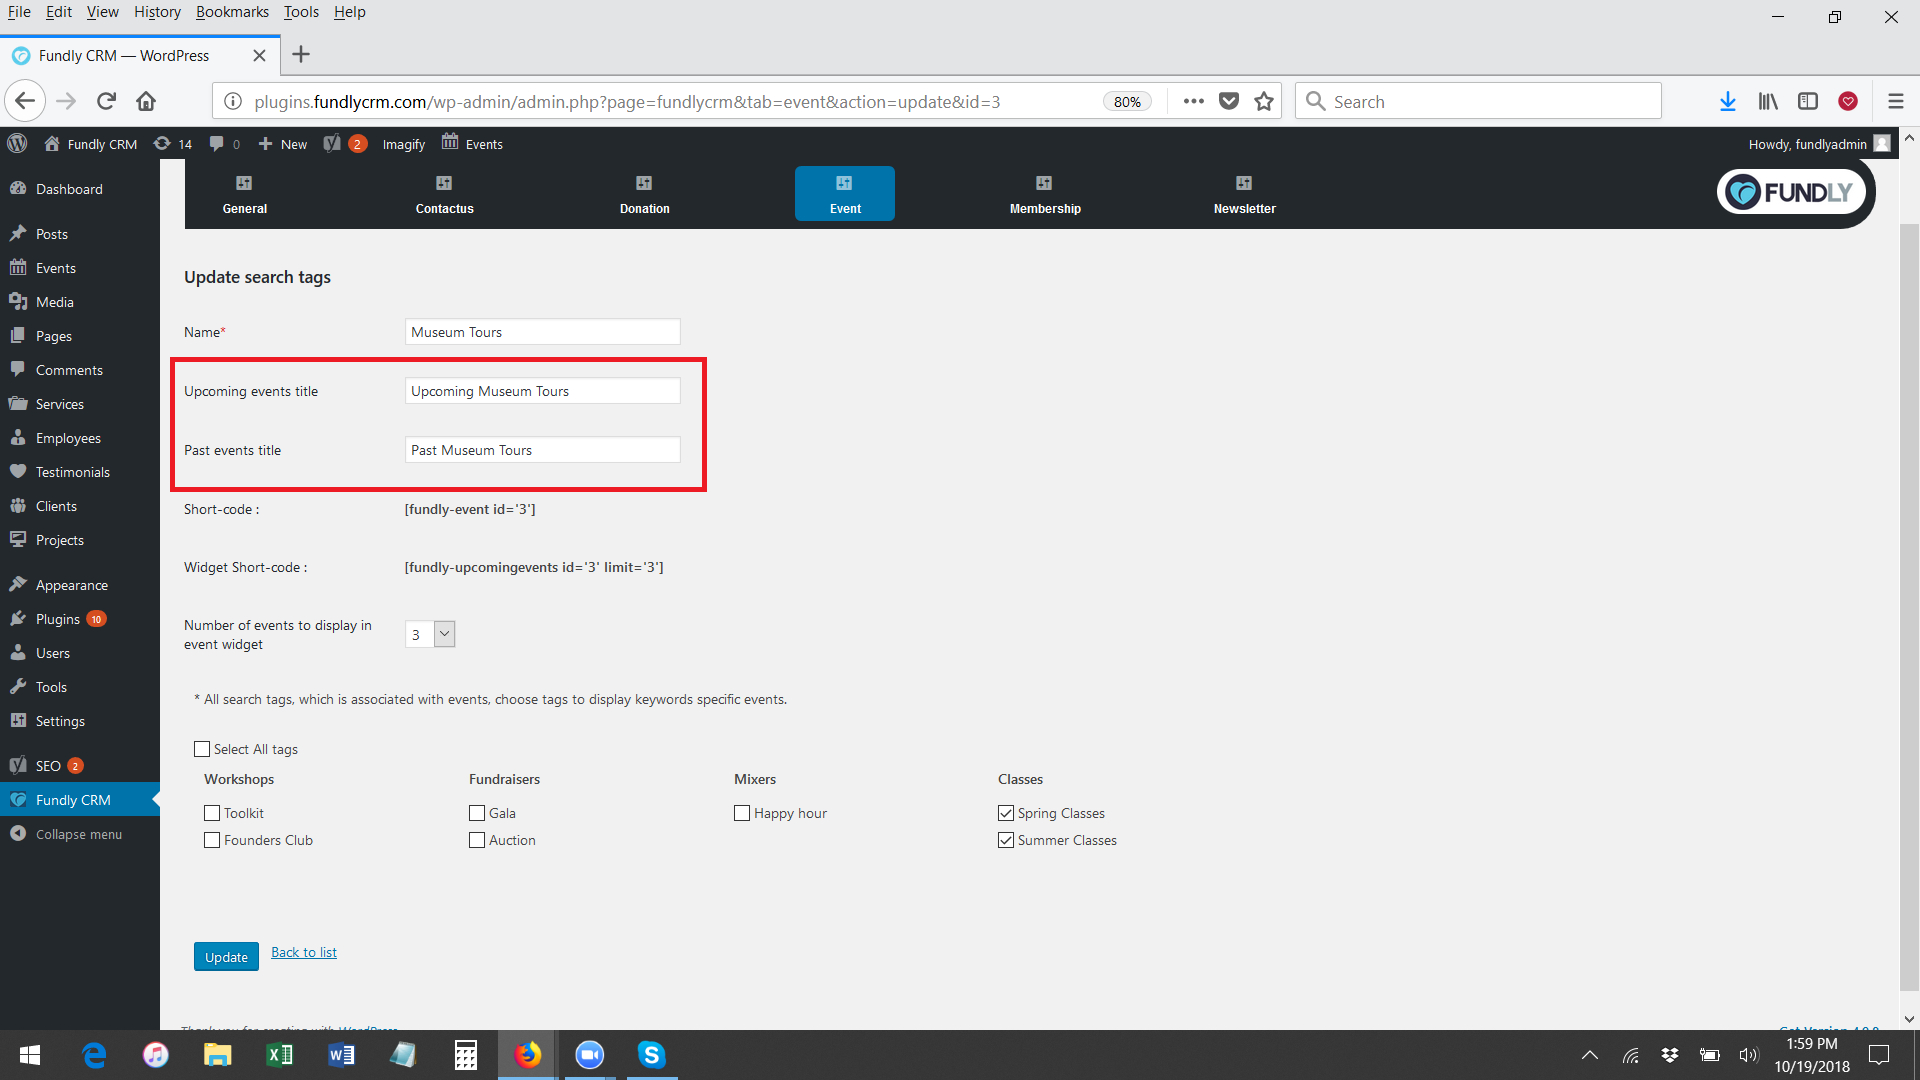
- In the Past Events Title field, enter the title of the event that will show the list of past events.
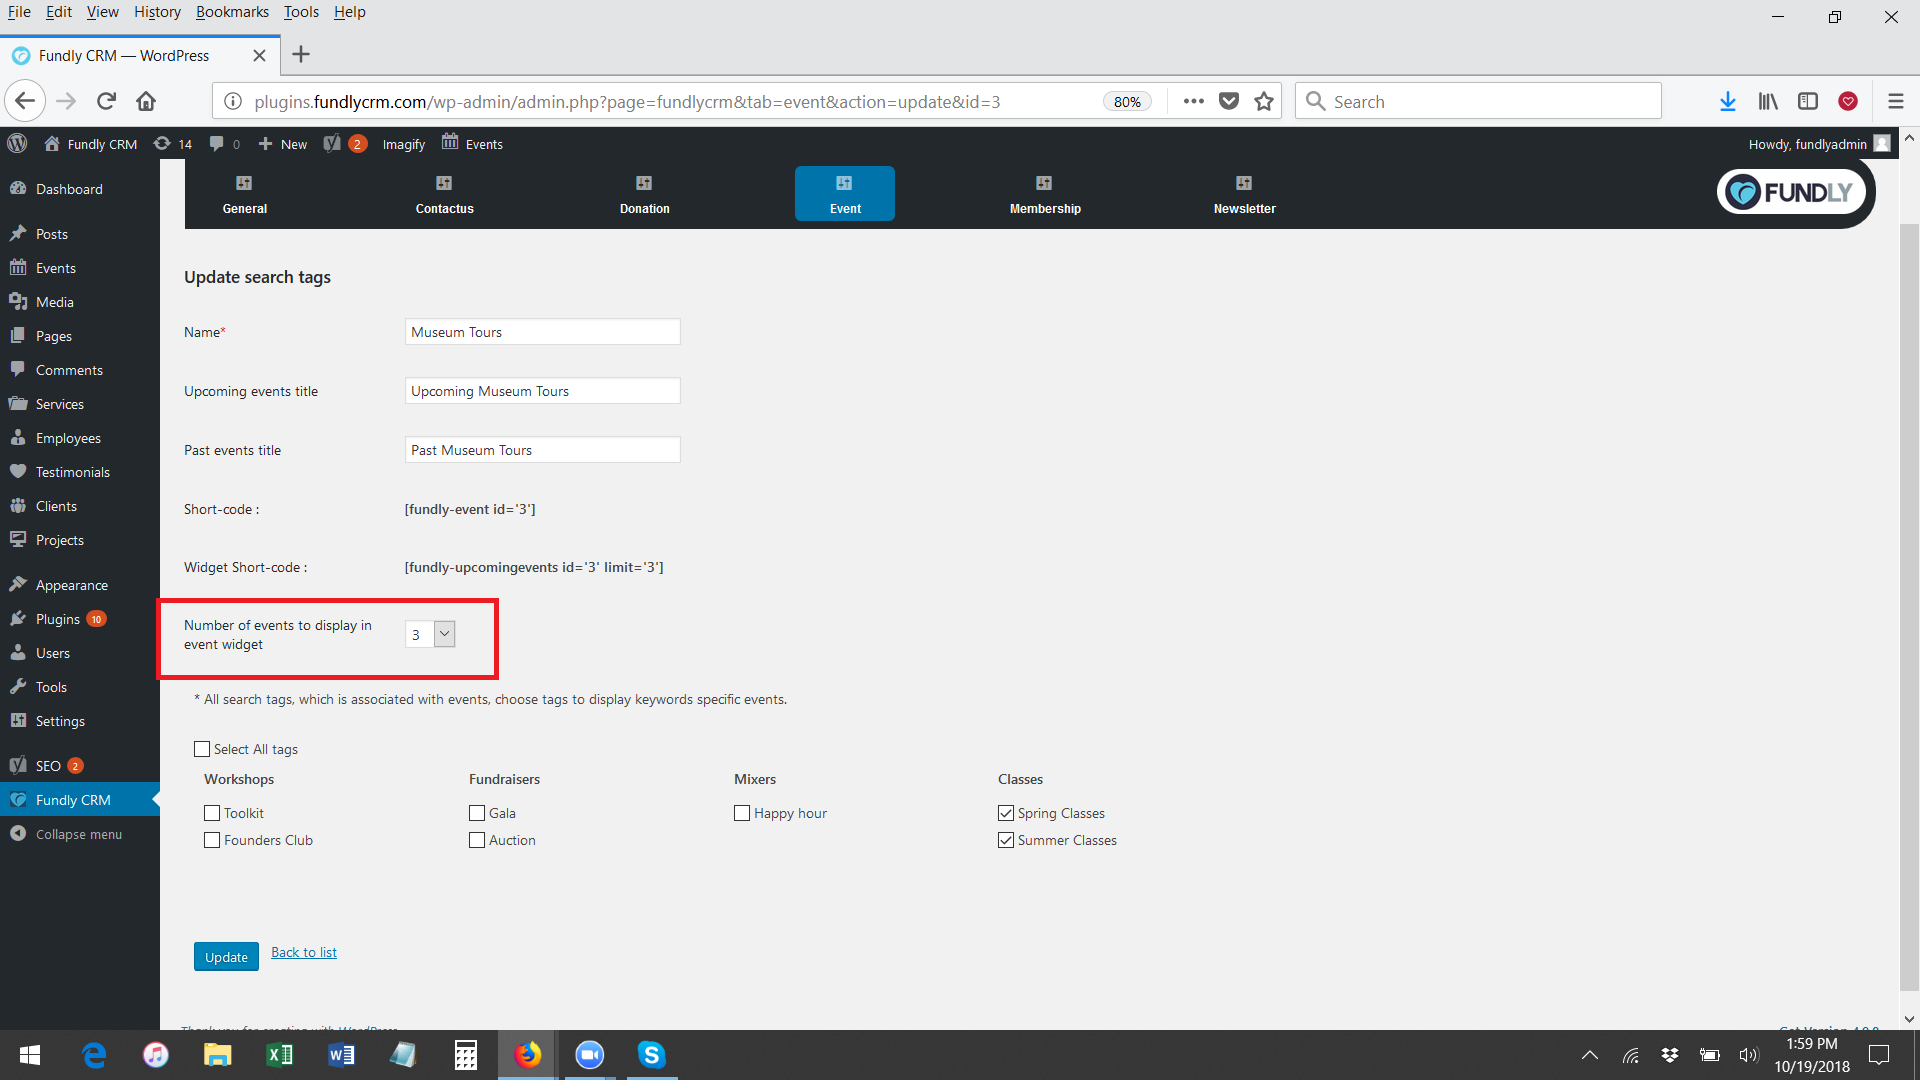
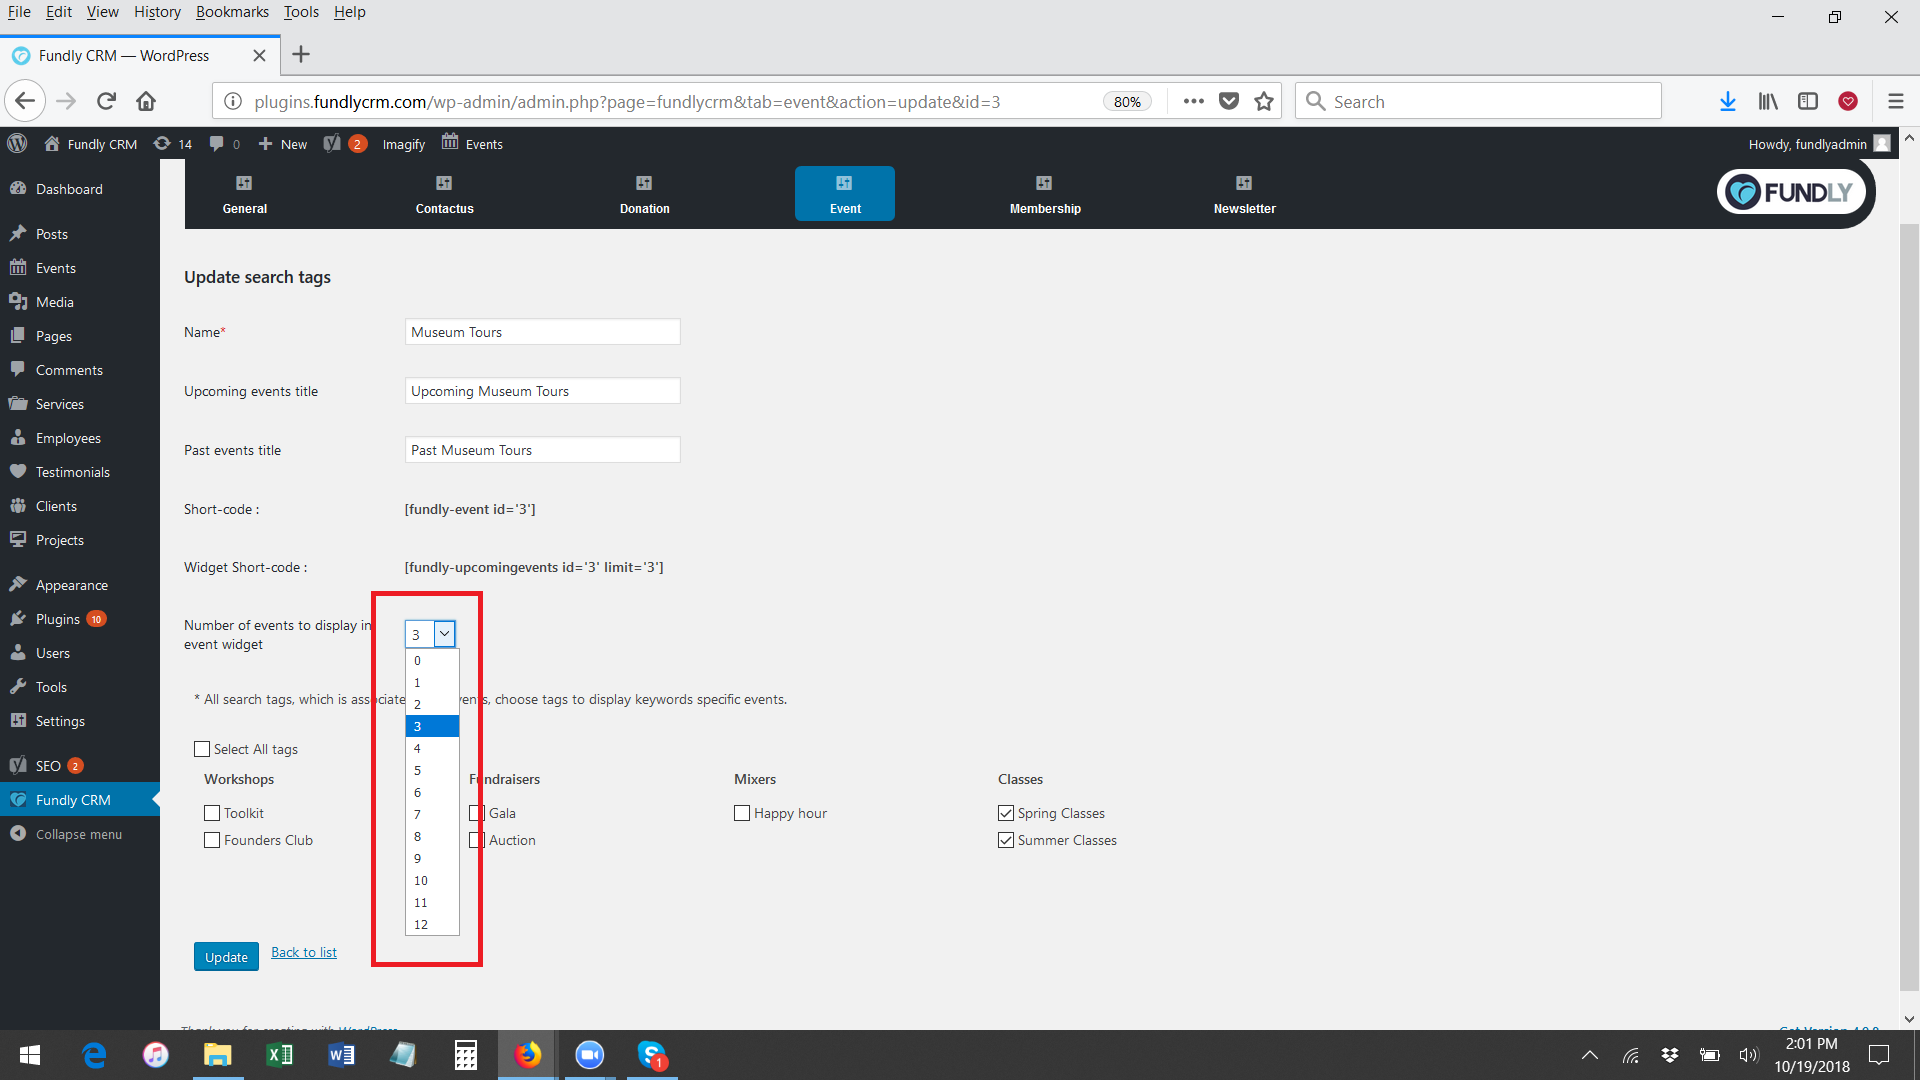
- In the Number of Upcoming Events to Display in Event Widget field, select how many events to load in the upcoming events sidebar widget displayed on the event detail page (user can select View All to see more than the default number of events).
- In the Select Search Tags section, select which search tags will be used to pull events into the page. That is, the page will display a list of events with the selected search tag(s).
- After you have completed all of your changes on this page, click the blue Create button at the bottom of the page. You will need to manually create a menu item within WordPress to add the page to your events menu. Once you do, you will have a page with a list of Upcoming/Past events that are just events tied to your search tags/just a filtered list of events.
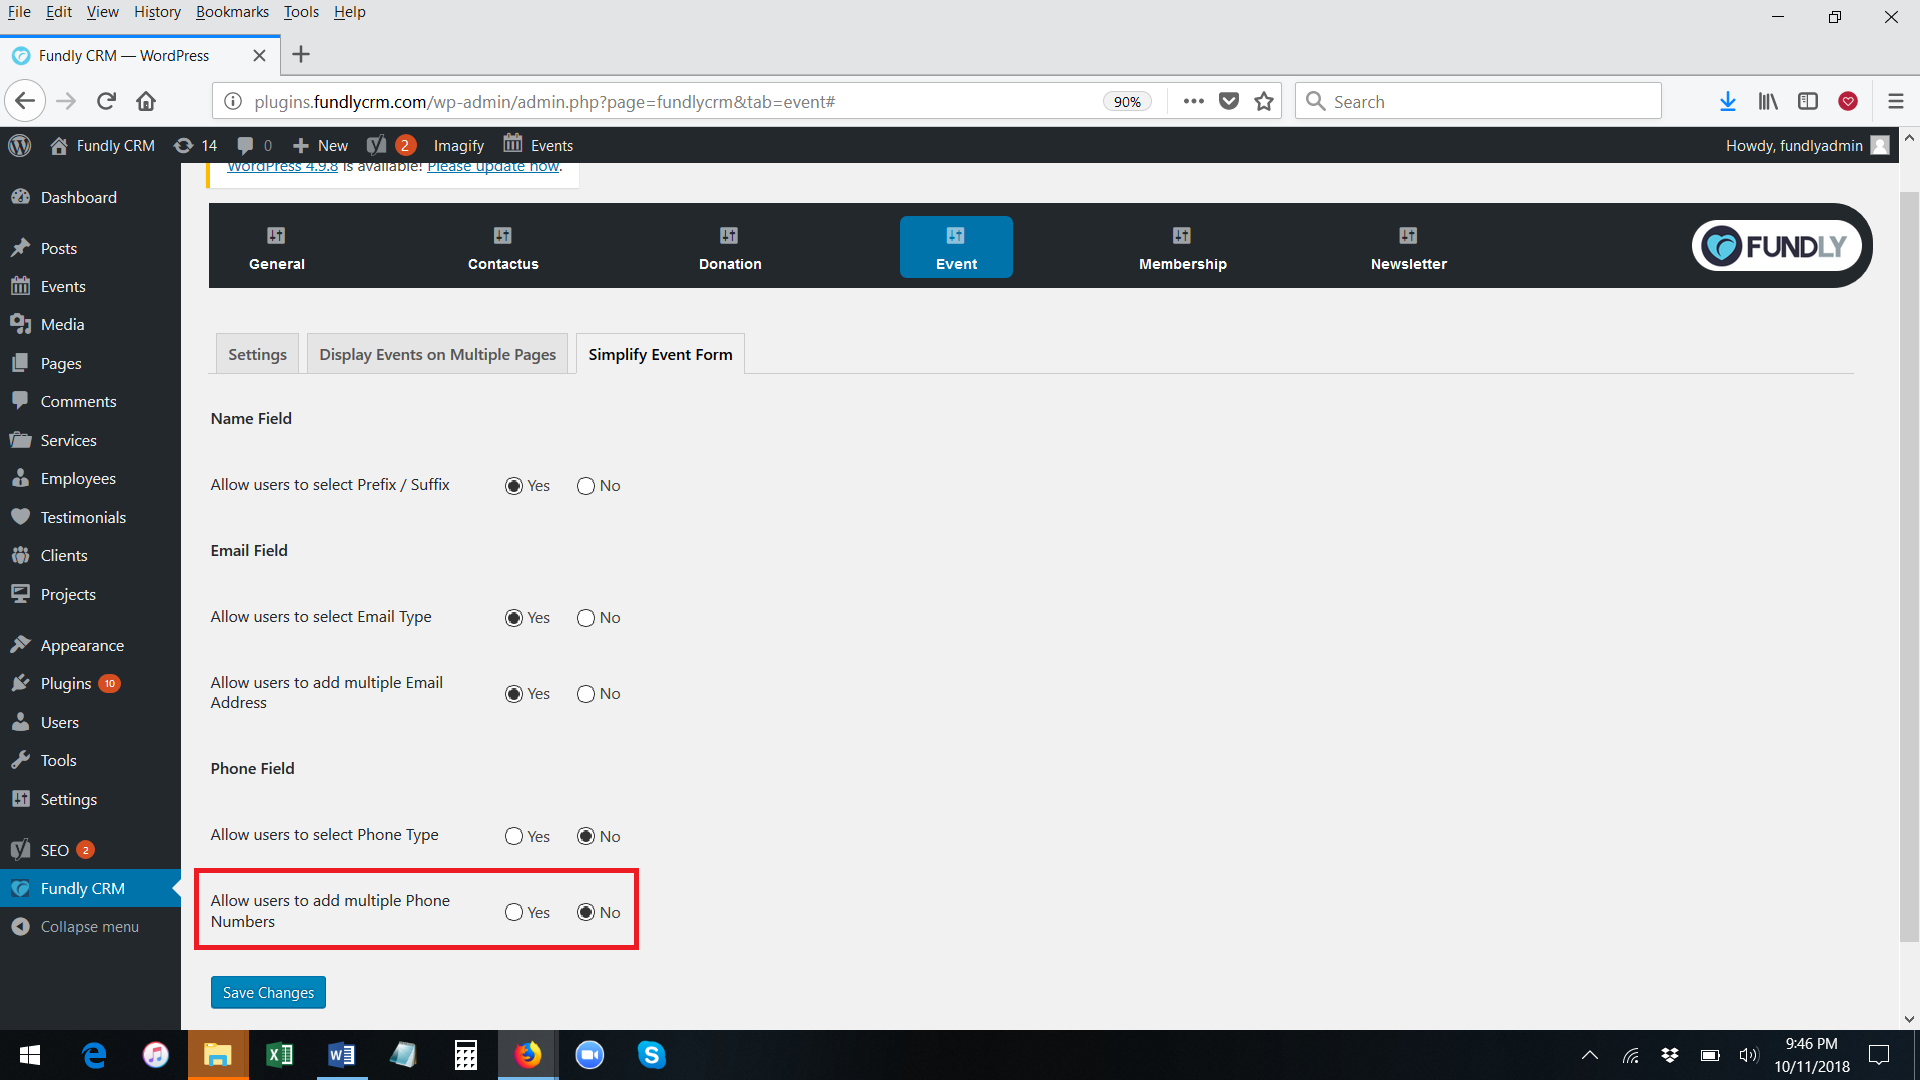
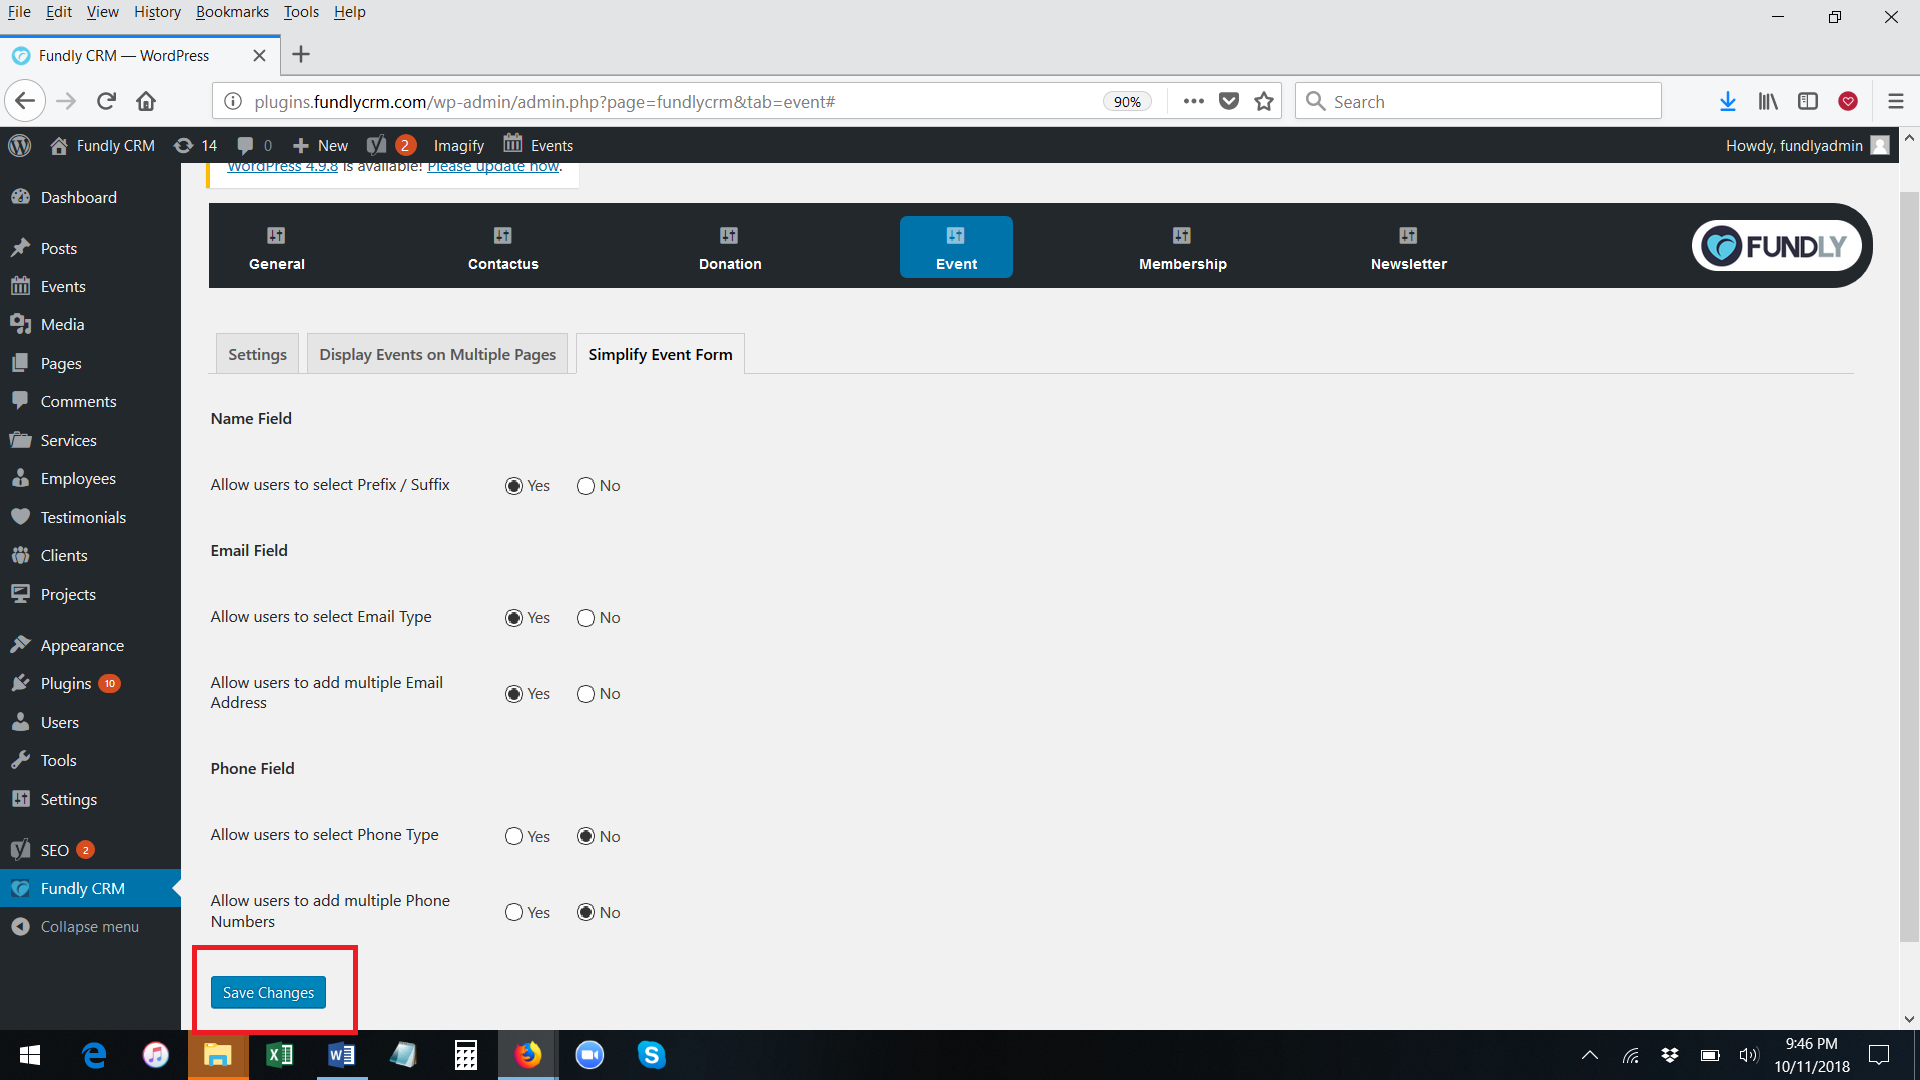
- To configure the event registration form options, click on the Simply Event Form tab.
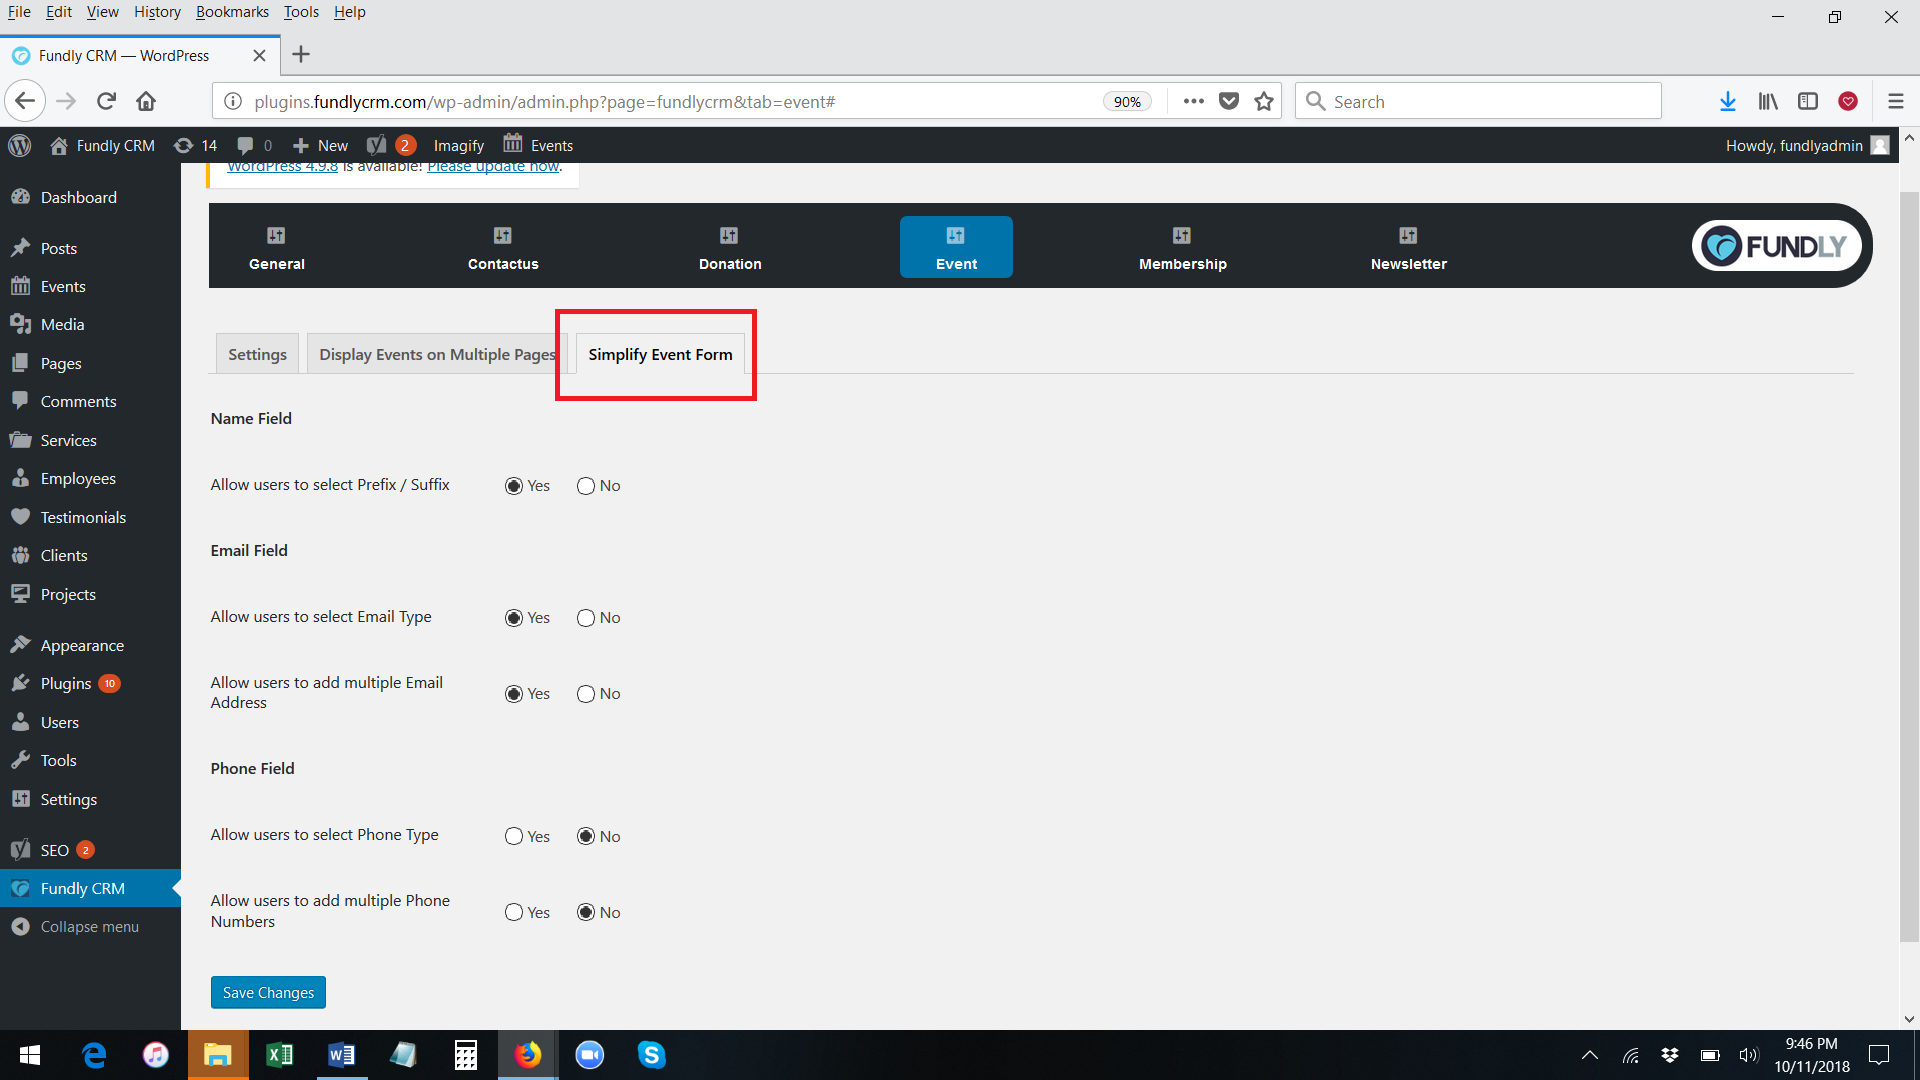
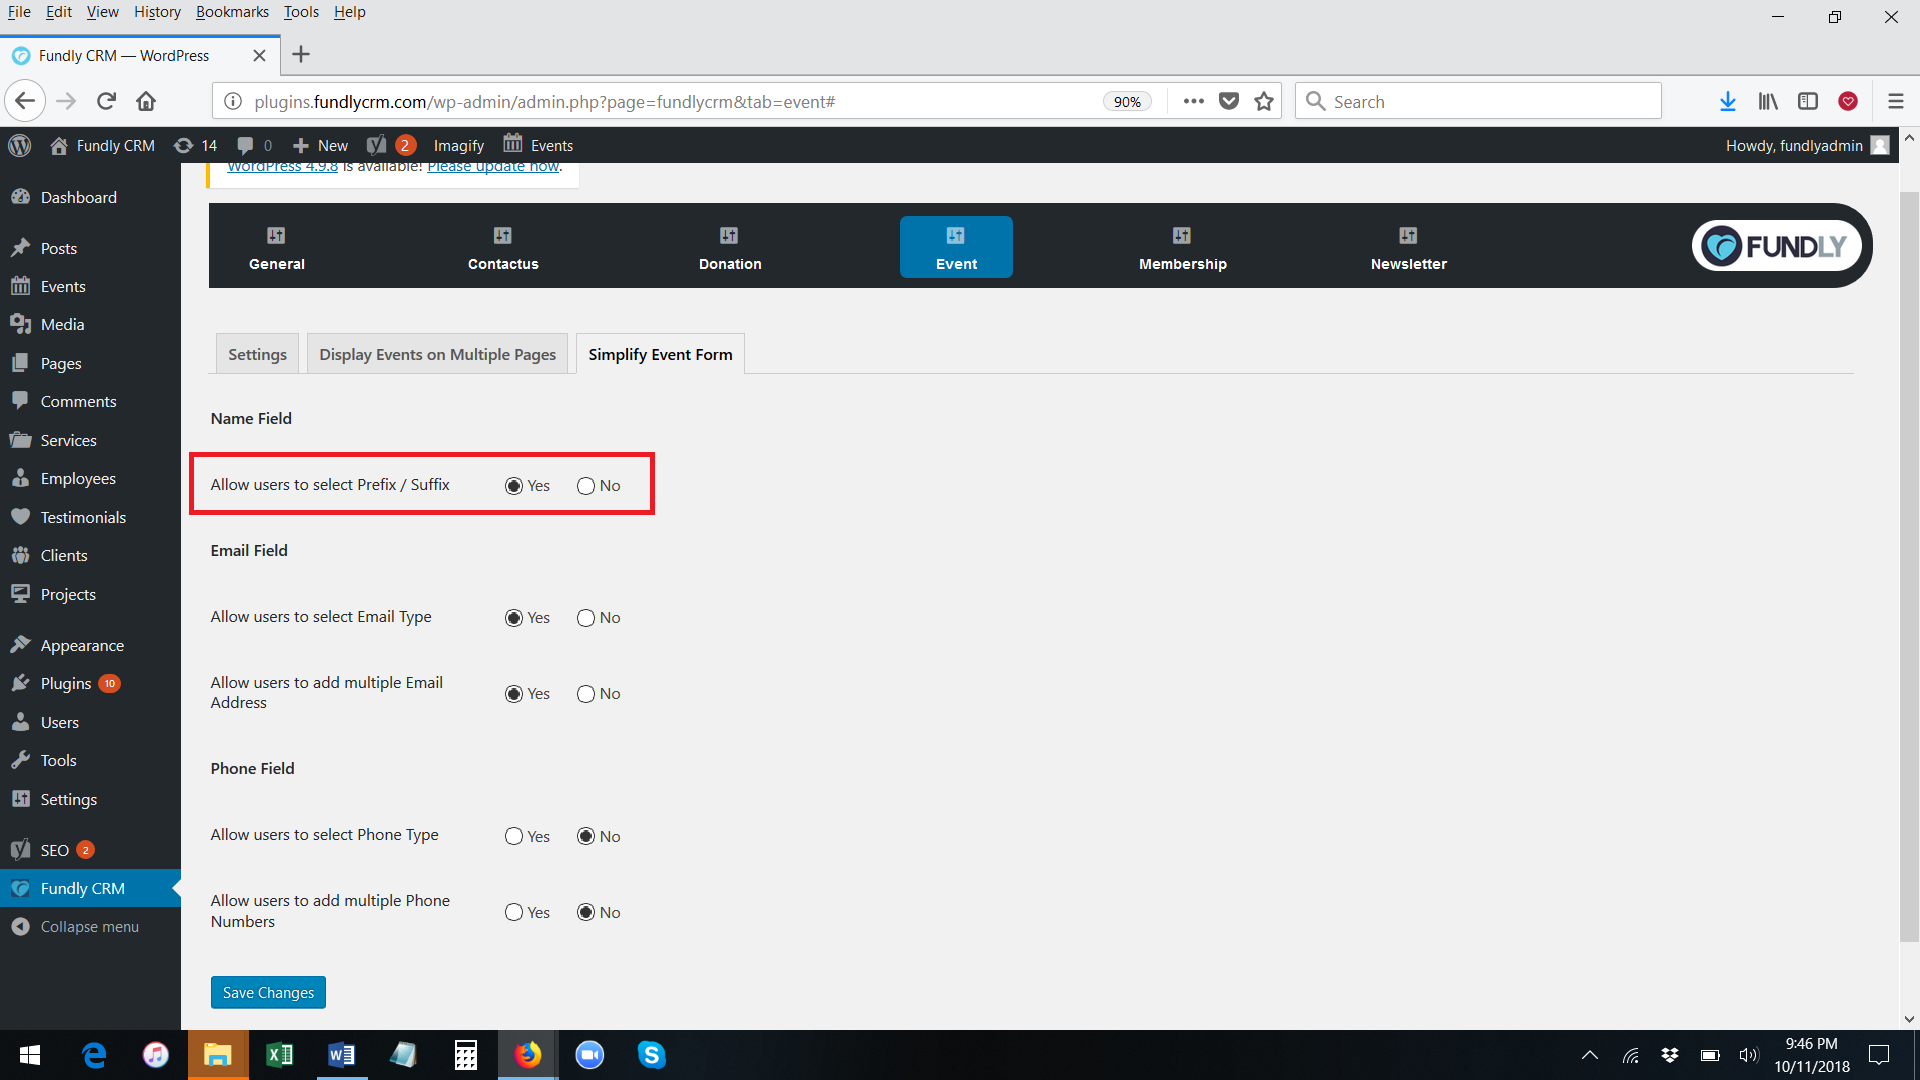
- The Allow Users to Select Prefix/Suffix field alllows you to show or hide the prefix and suffix boxes in the Name block of the event registration form.
- The Allow Users to Select Email Type setting allows you to show or hide the email type drop down field on the event registration form.

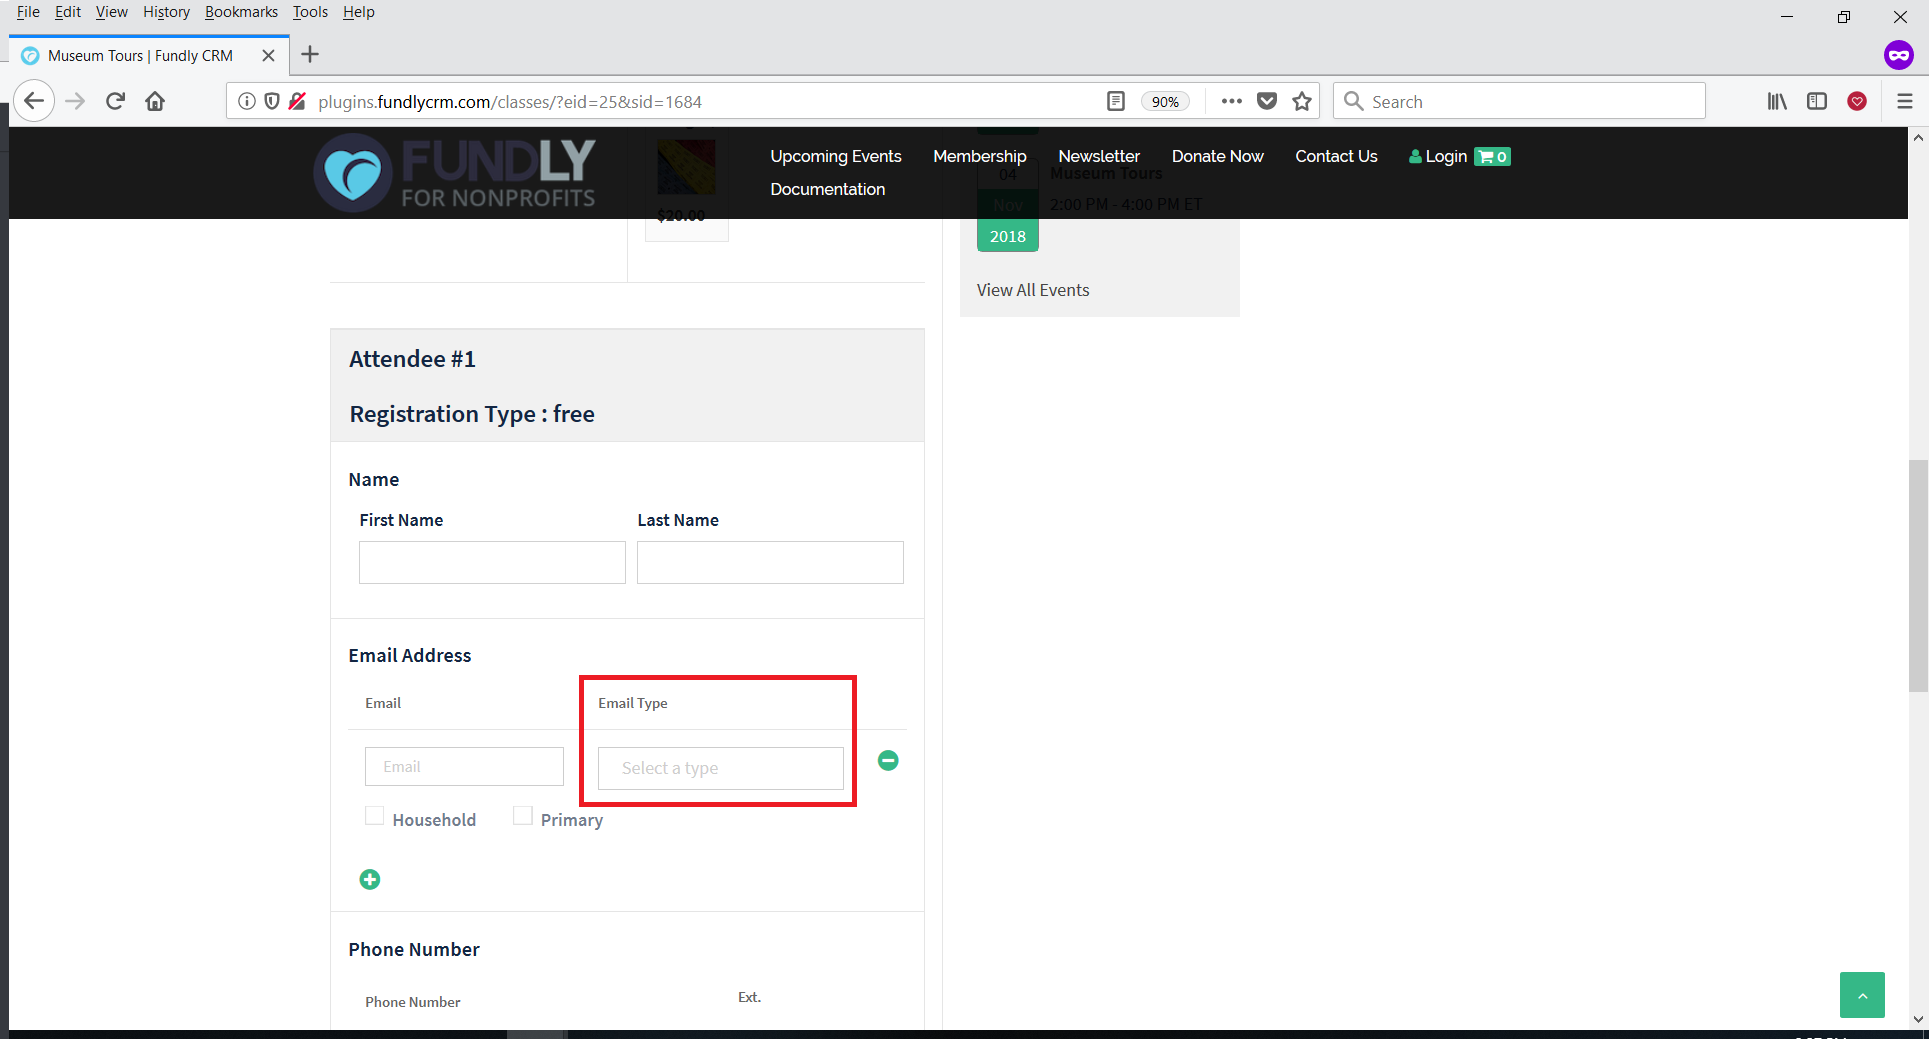
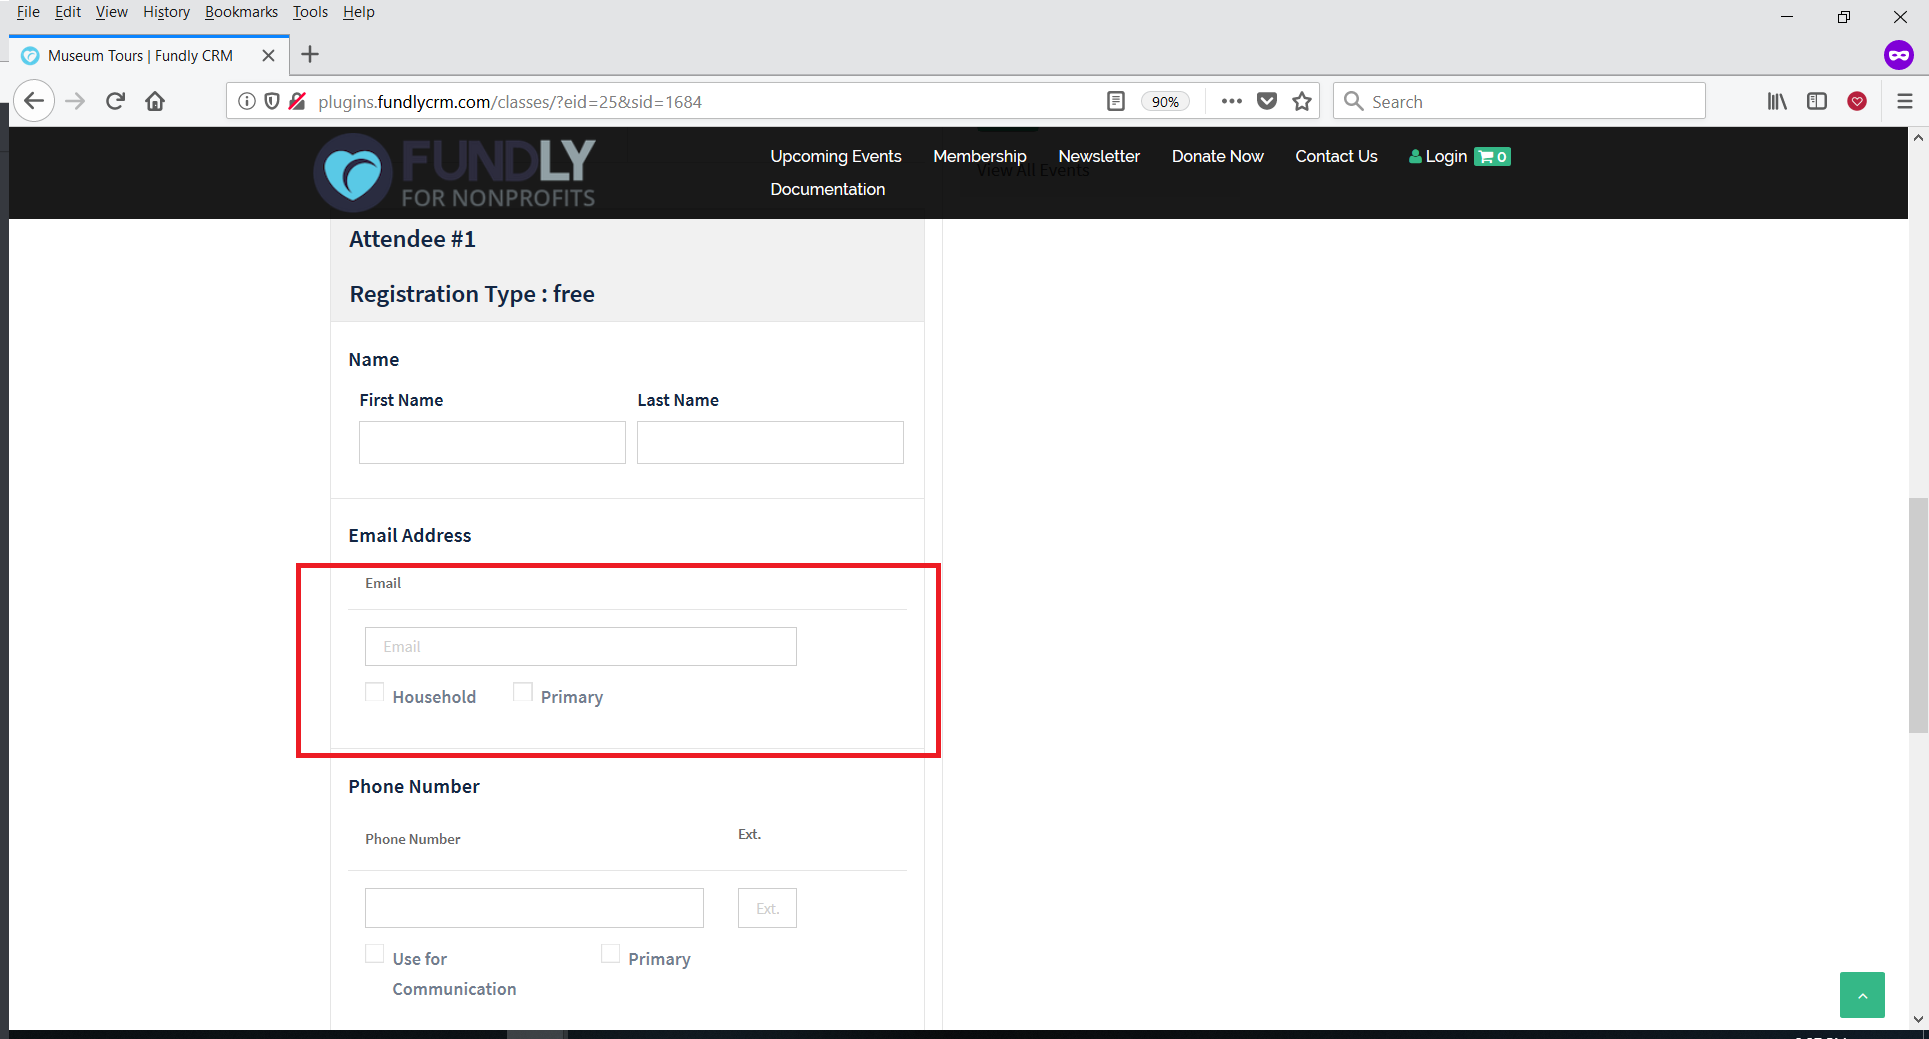
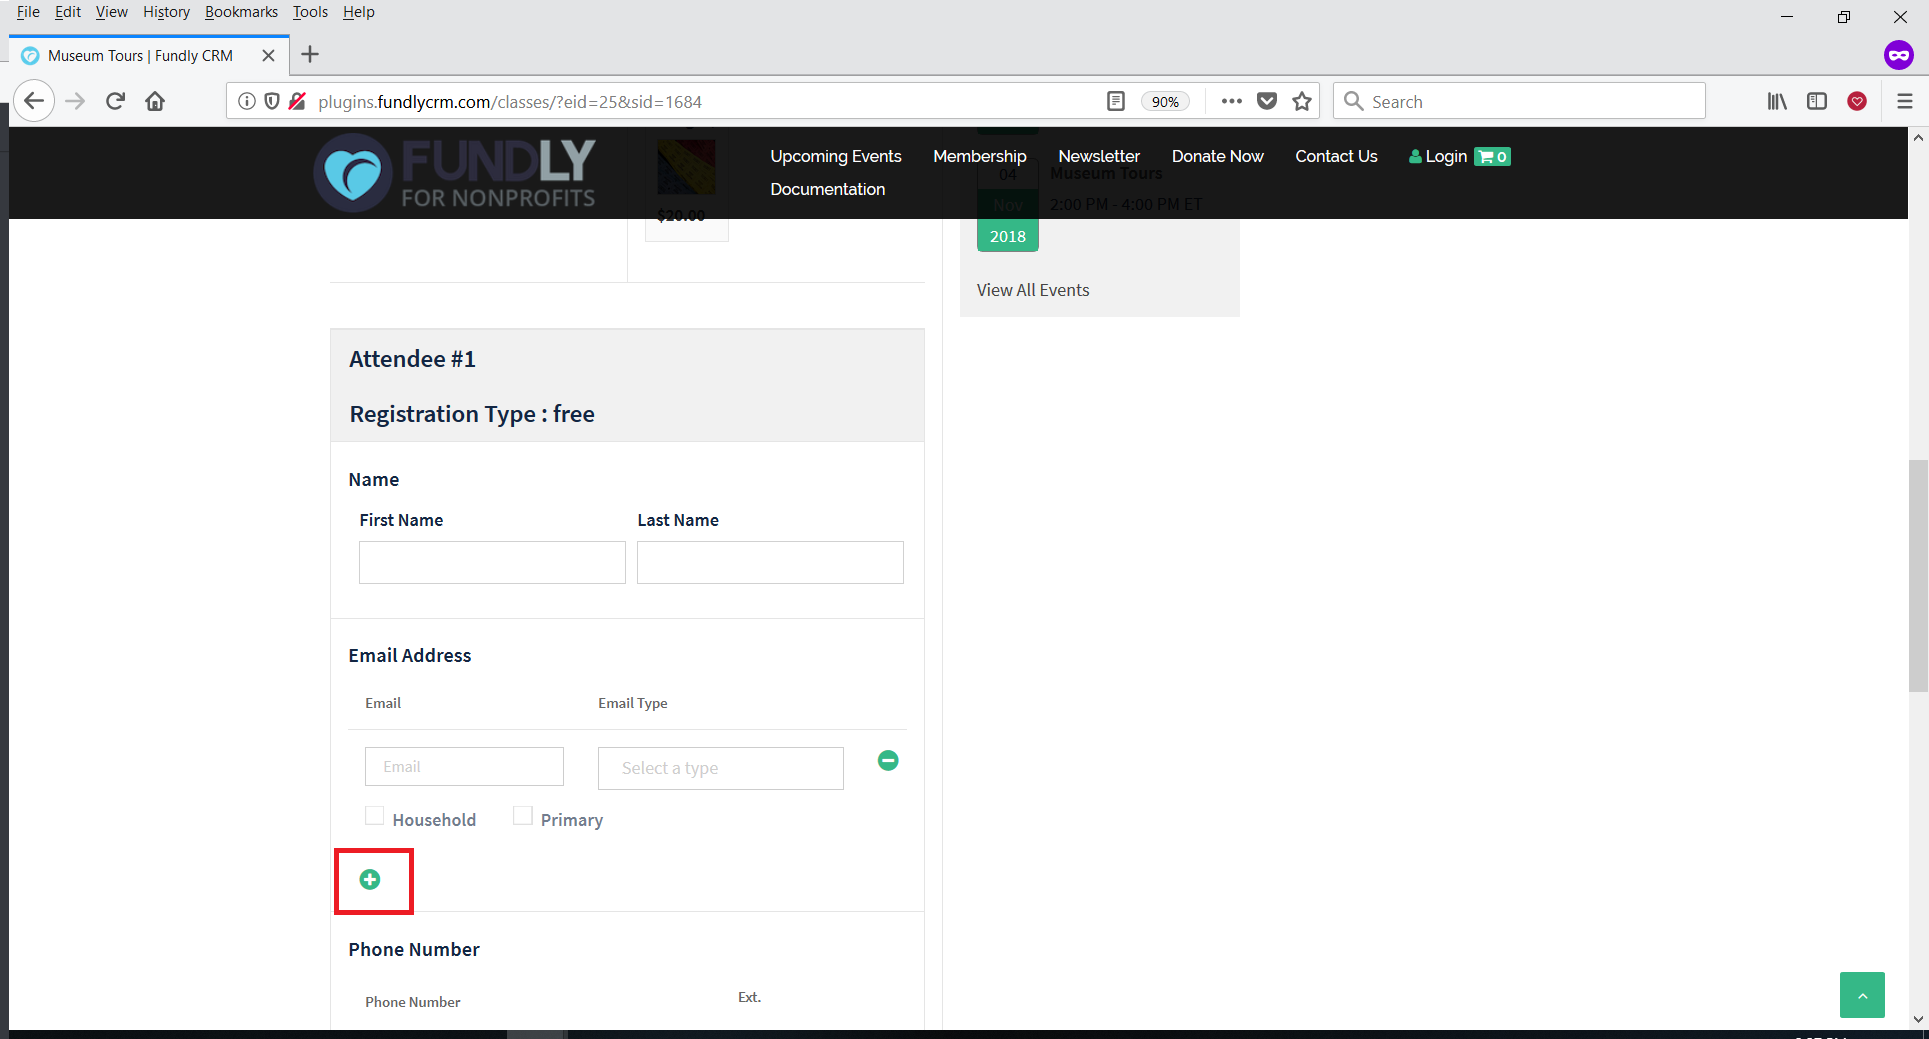
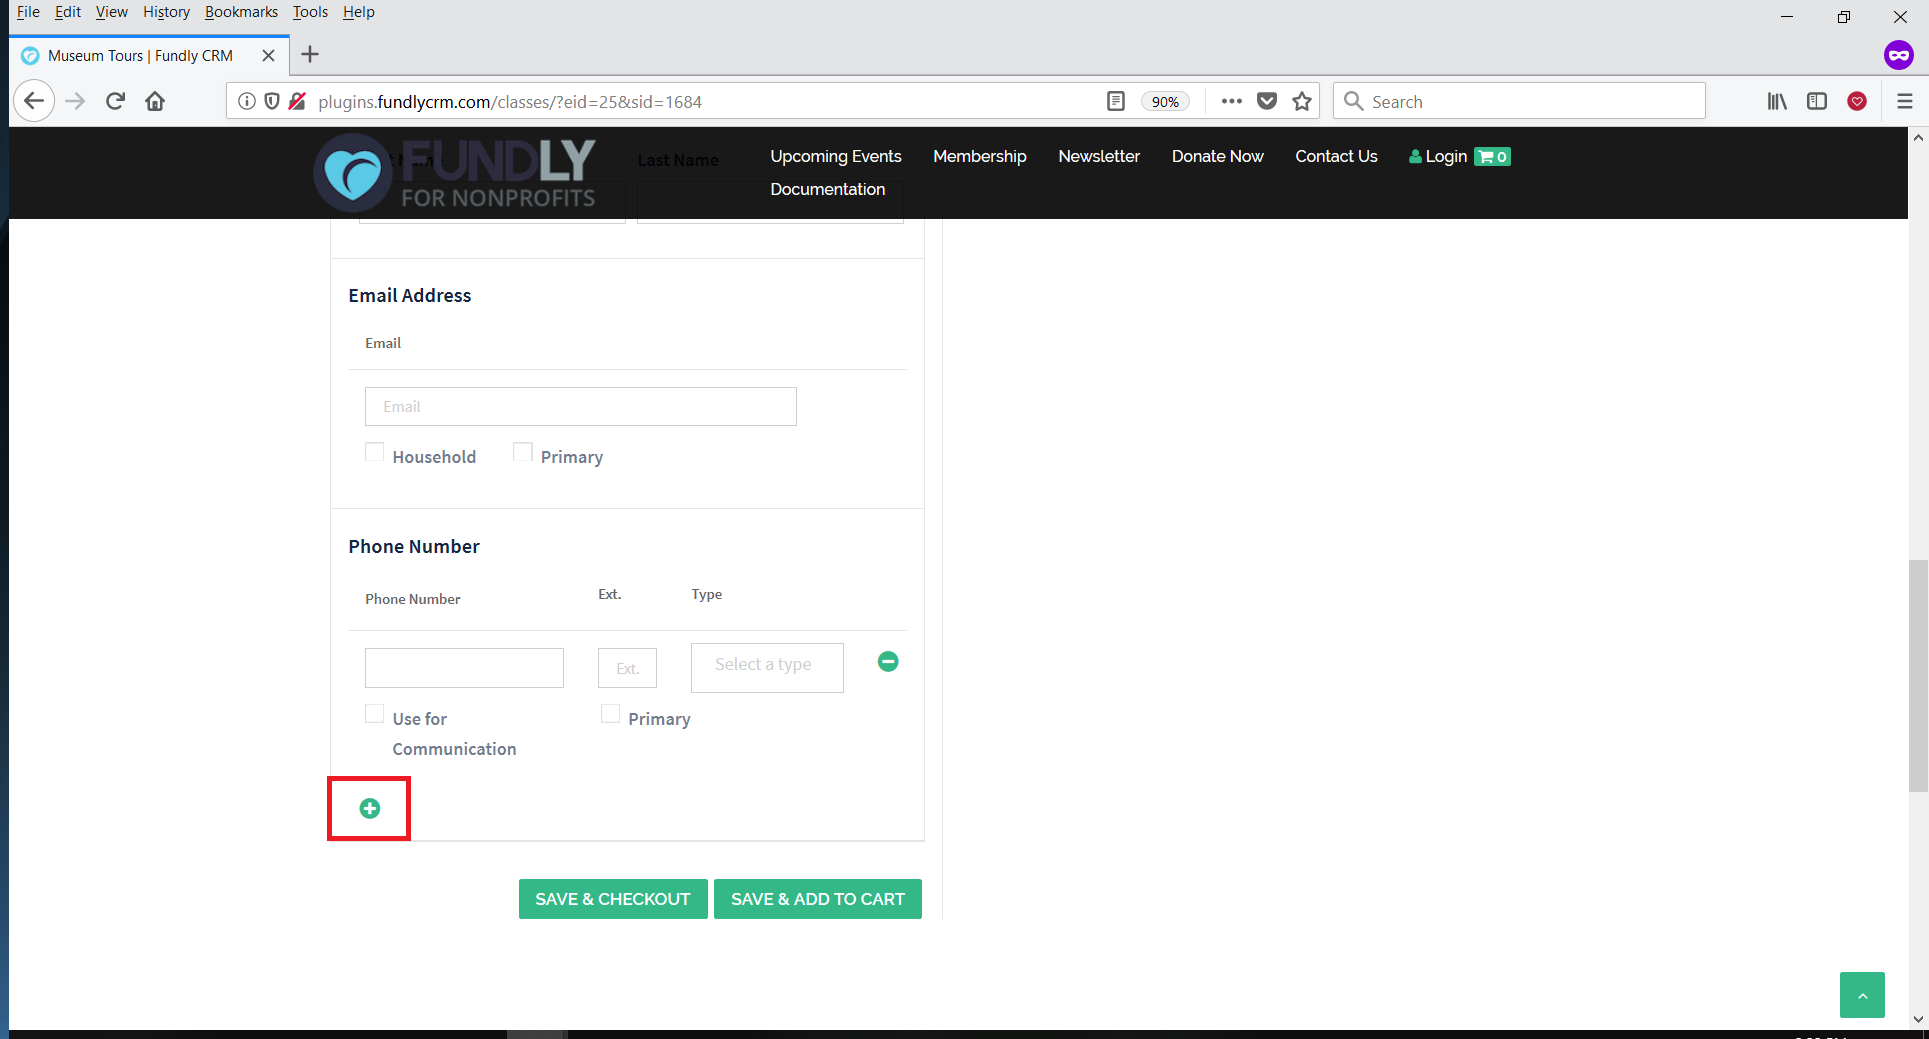
- Allow Users to Add Multiple Email Address setting allows you to collect multiple email addresses per registrant. Setting this to No hides the + sign that allows users to enter more than one email address on the registration form.
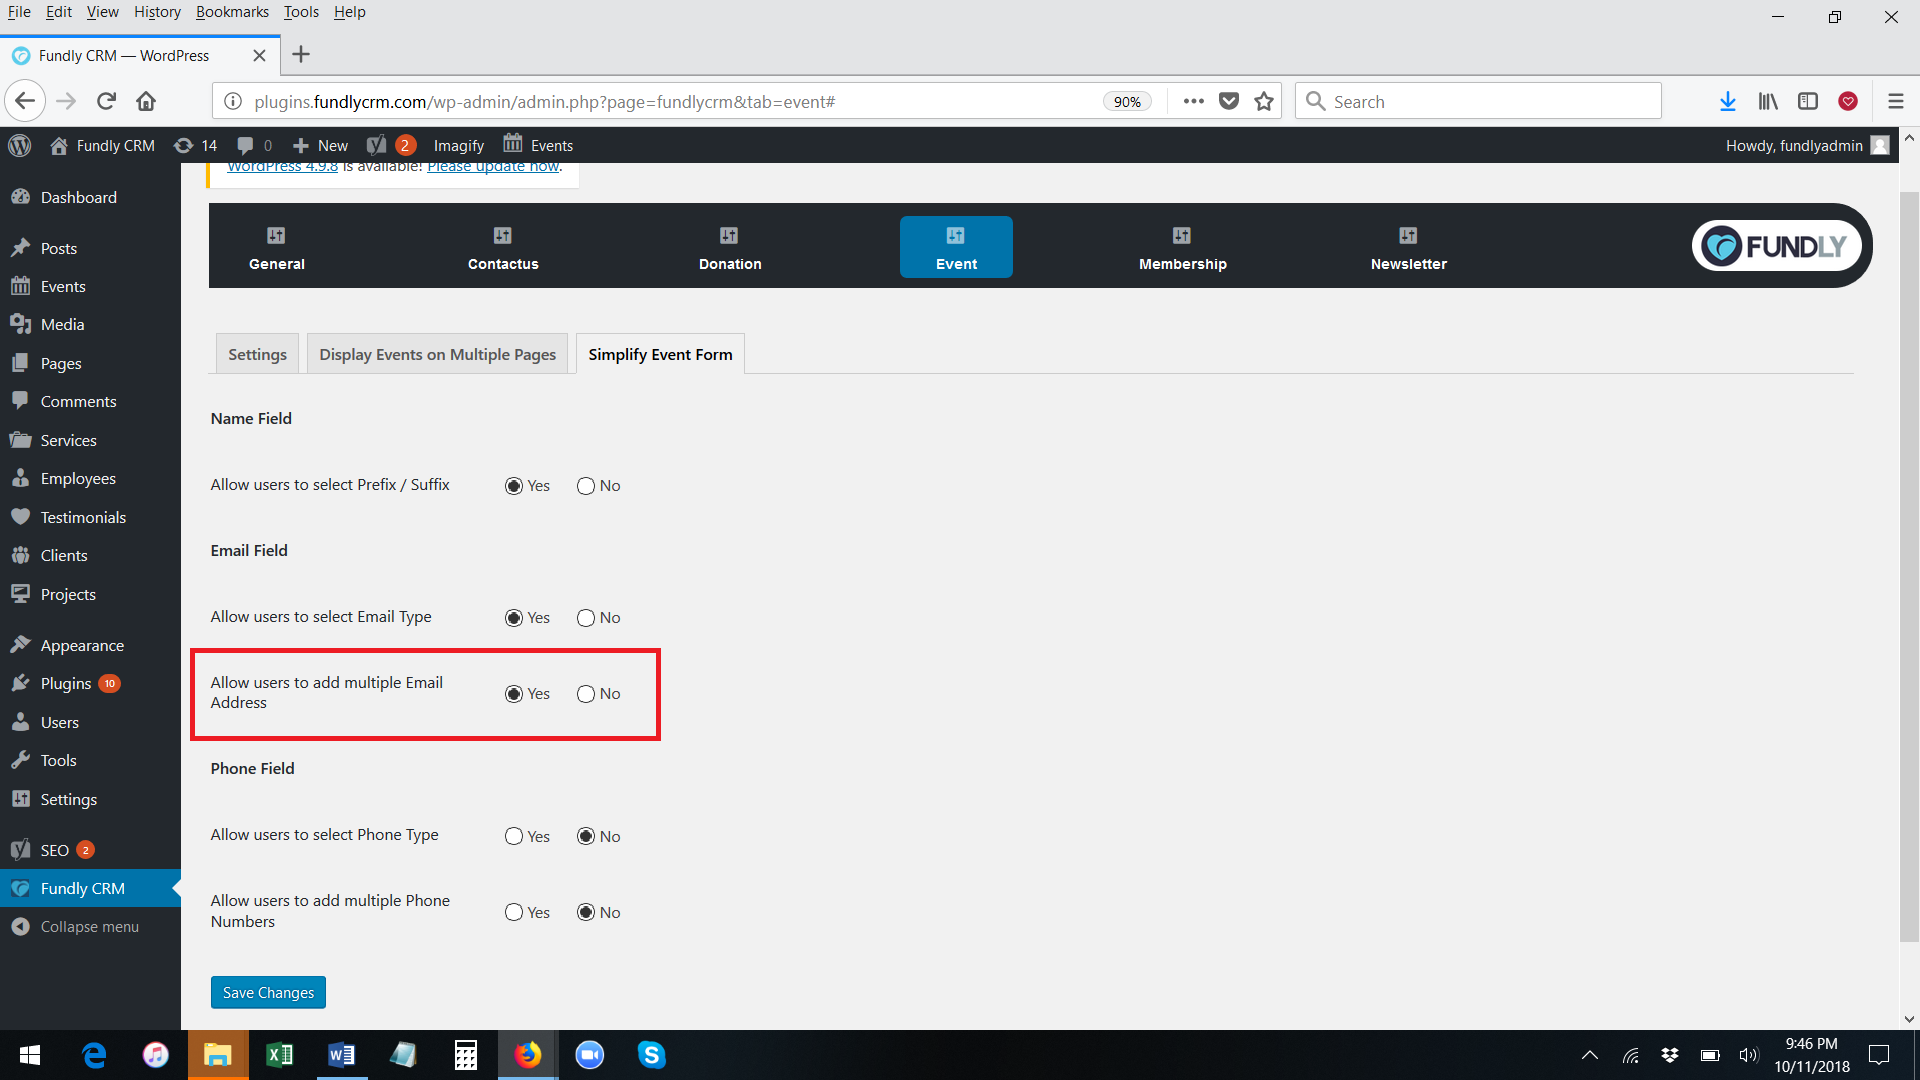
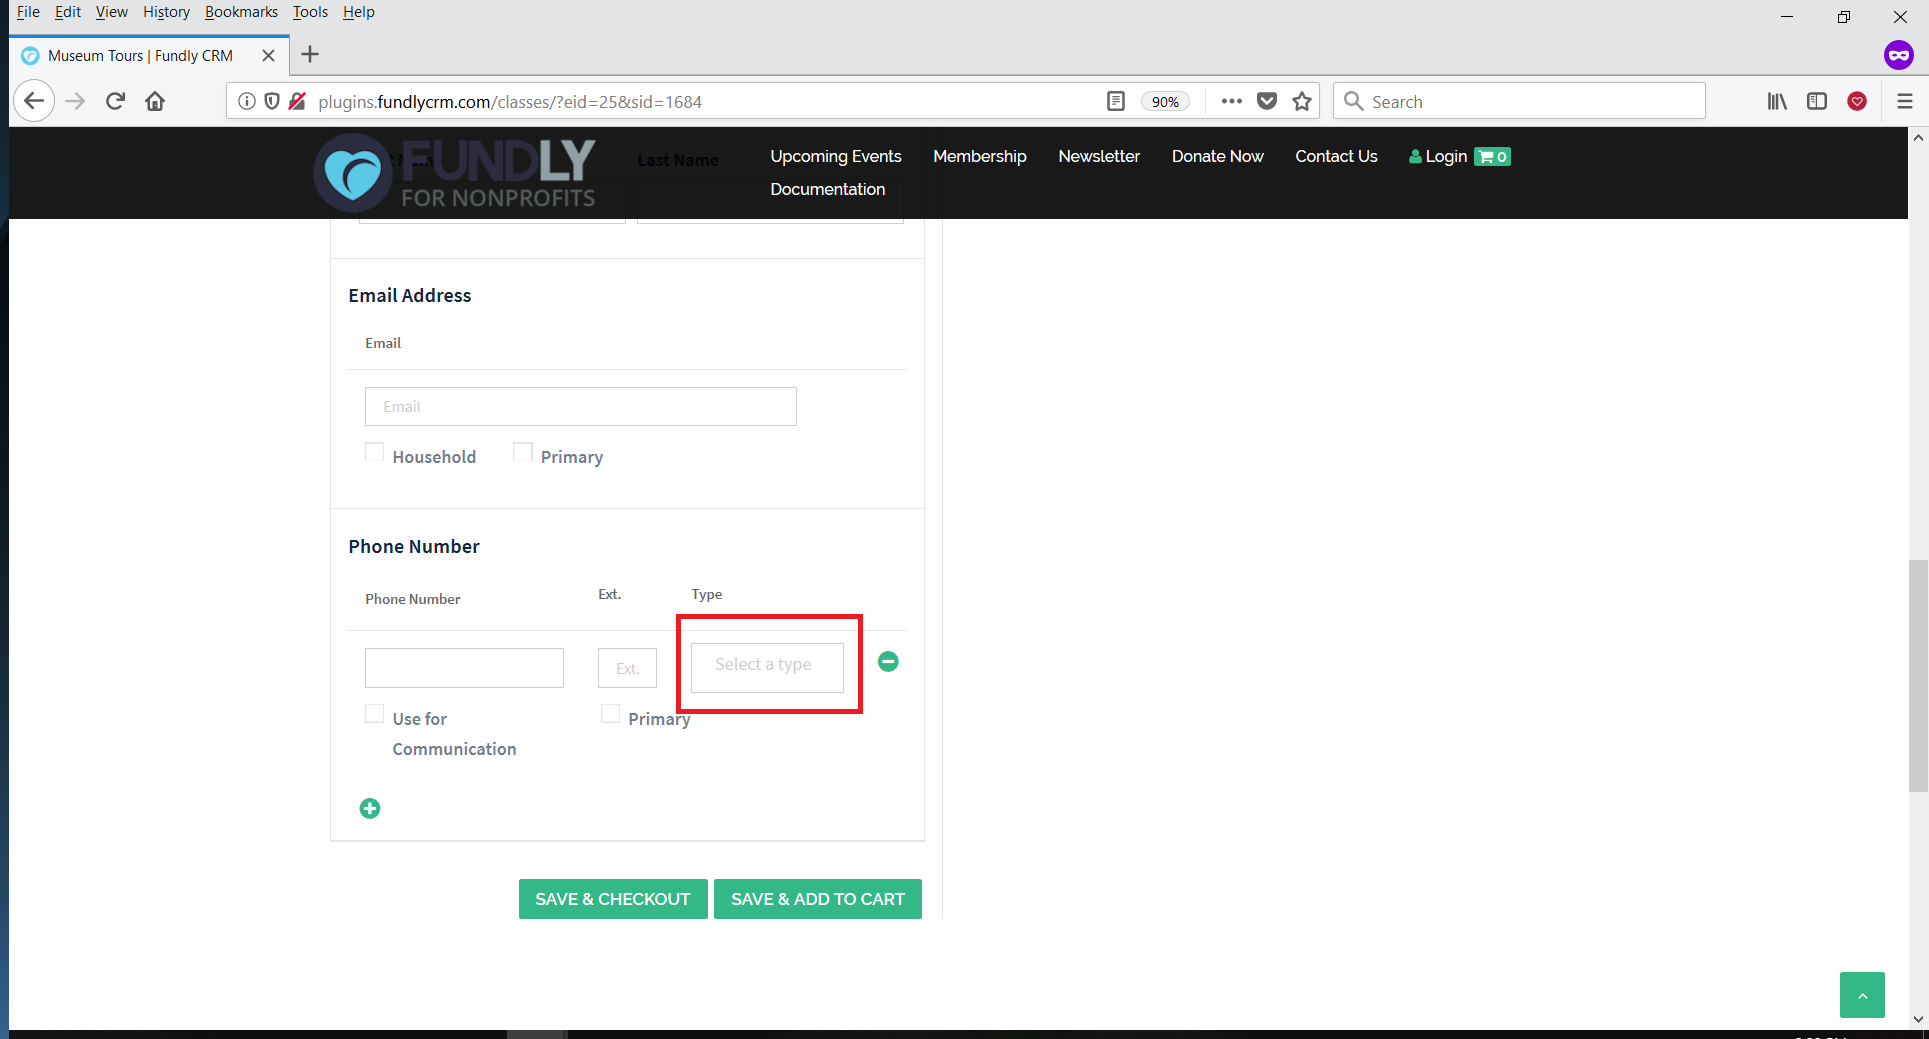
- The Allow Users to Select Phone Type setting controls whether to show or hide the phone type field on the event registration form.
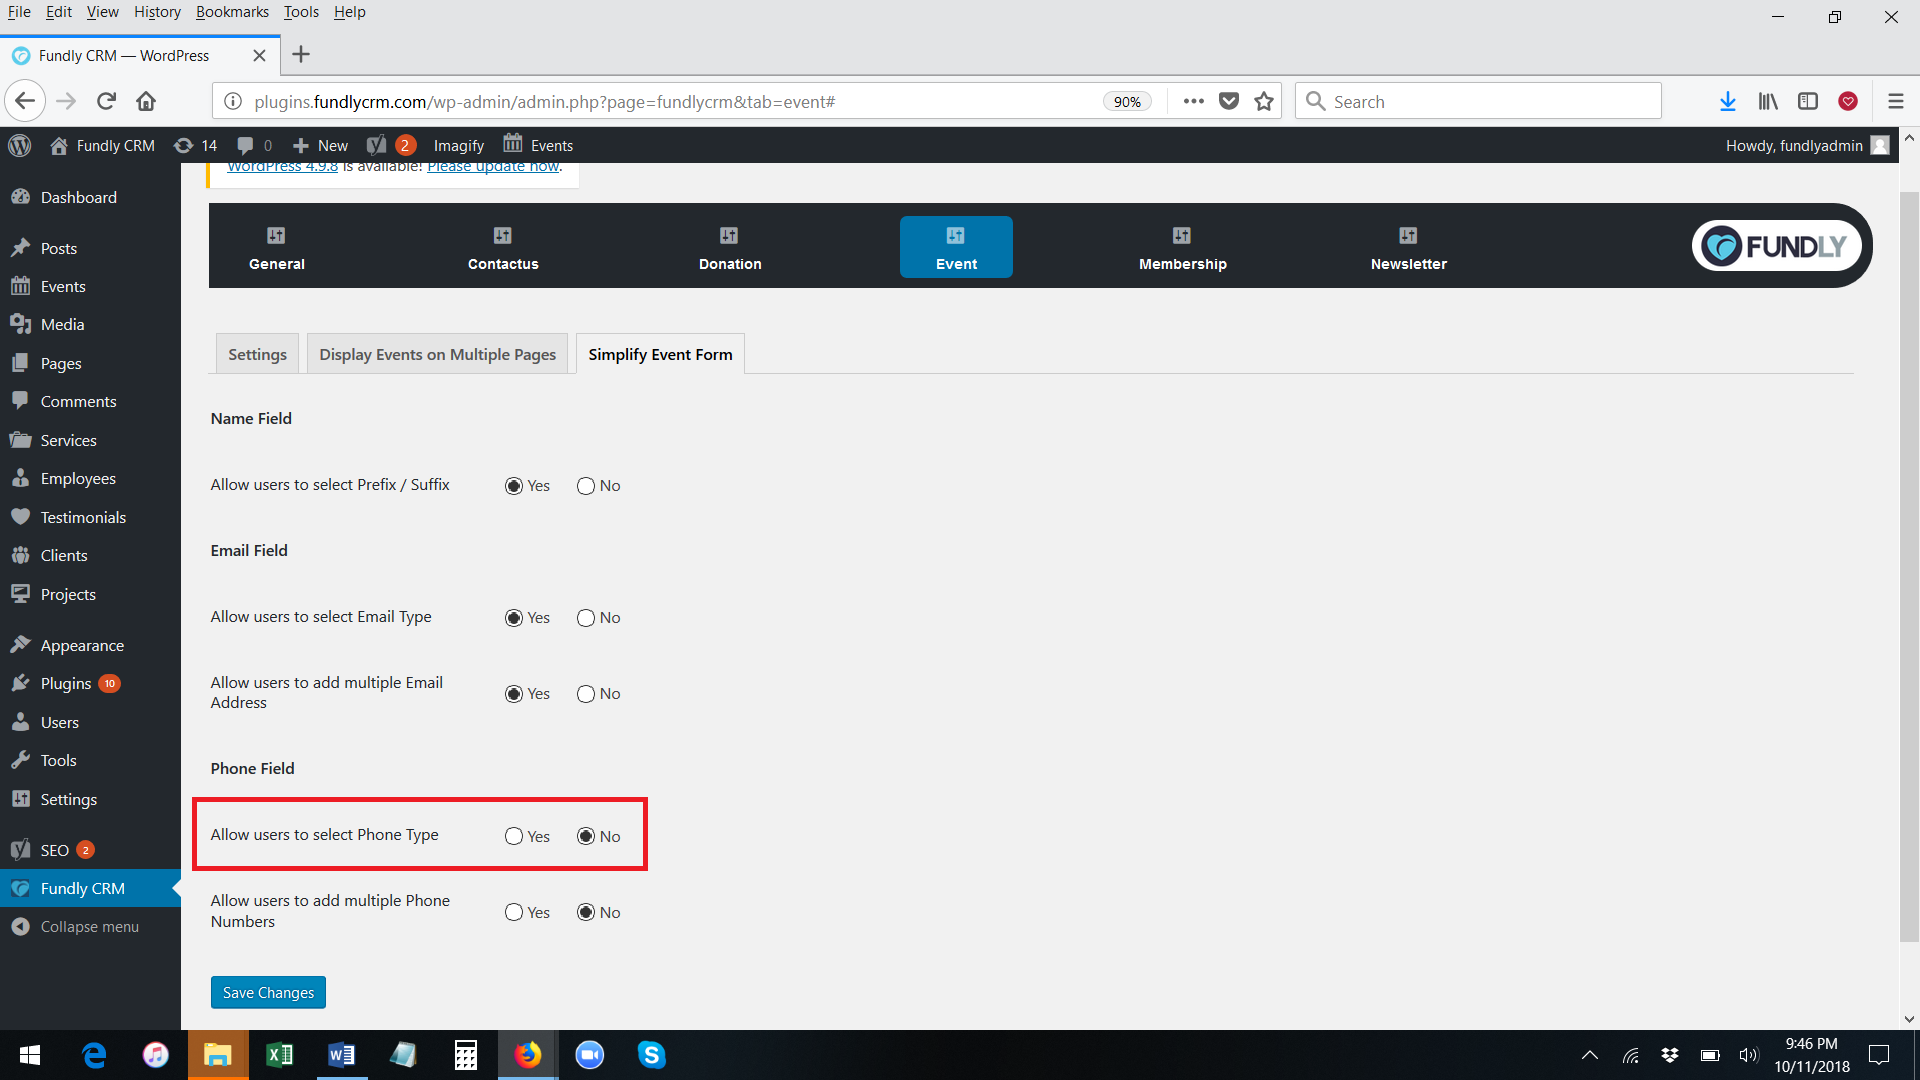
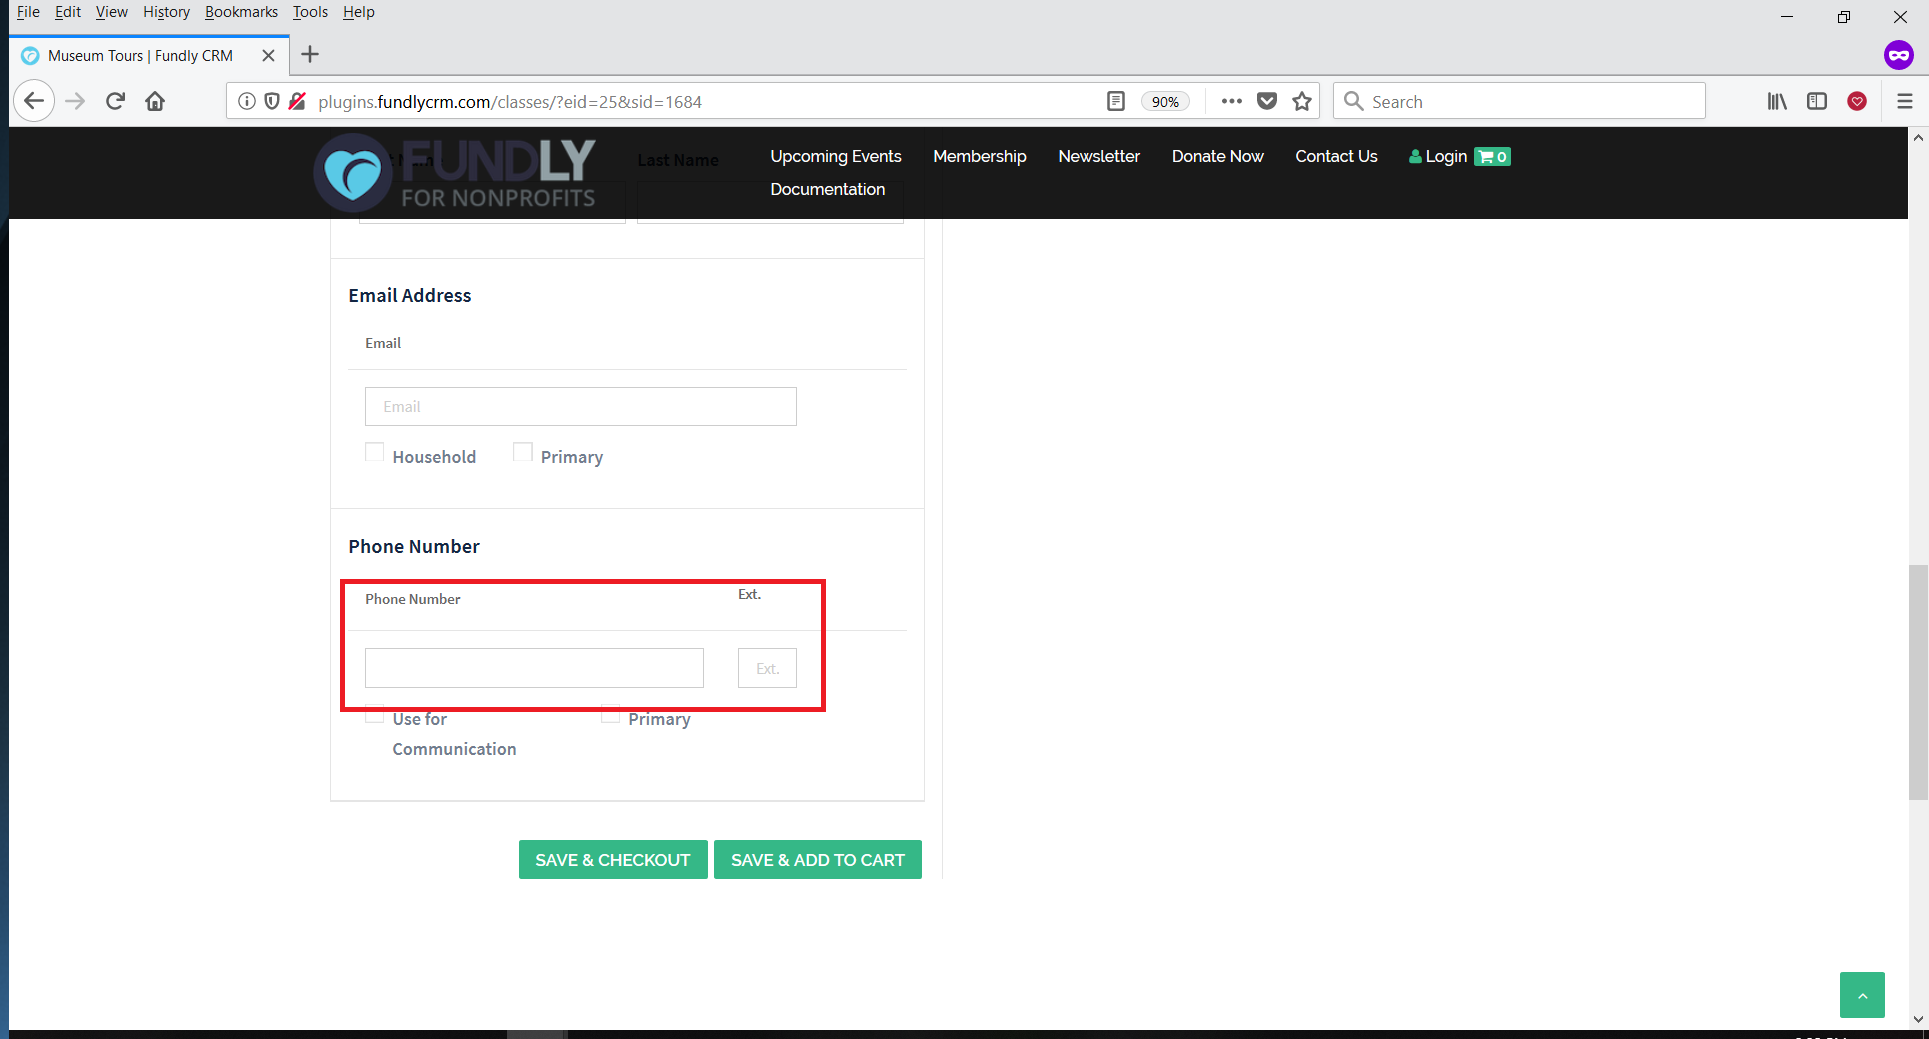
- The Allow Users to Add multiple Phone Number setting controls whether registrants can enter more than one phone number on the registration form. Setting this to No hides the + button that allows the user to enter additional phone numbers.
- After making any changes on this page, click the blue Save Changes button at the bottom of the screen to save changes.
Comments
0 comments
Article is closed for comments.