
Fundraising: Batch Pledge Entry
- This tutorial will cover the functionality of Batch Pledge Entry
- Batch Pledge Entry allows users to create multiple pledges (from multiple/various donors) into the system at once/as a group. This function only allows you to set up the pledges; there is no batch pledge payment entry function (to record payments to multiple pledges at once).
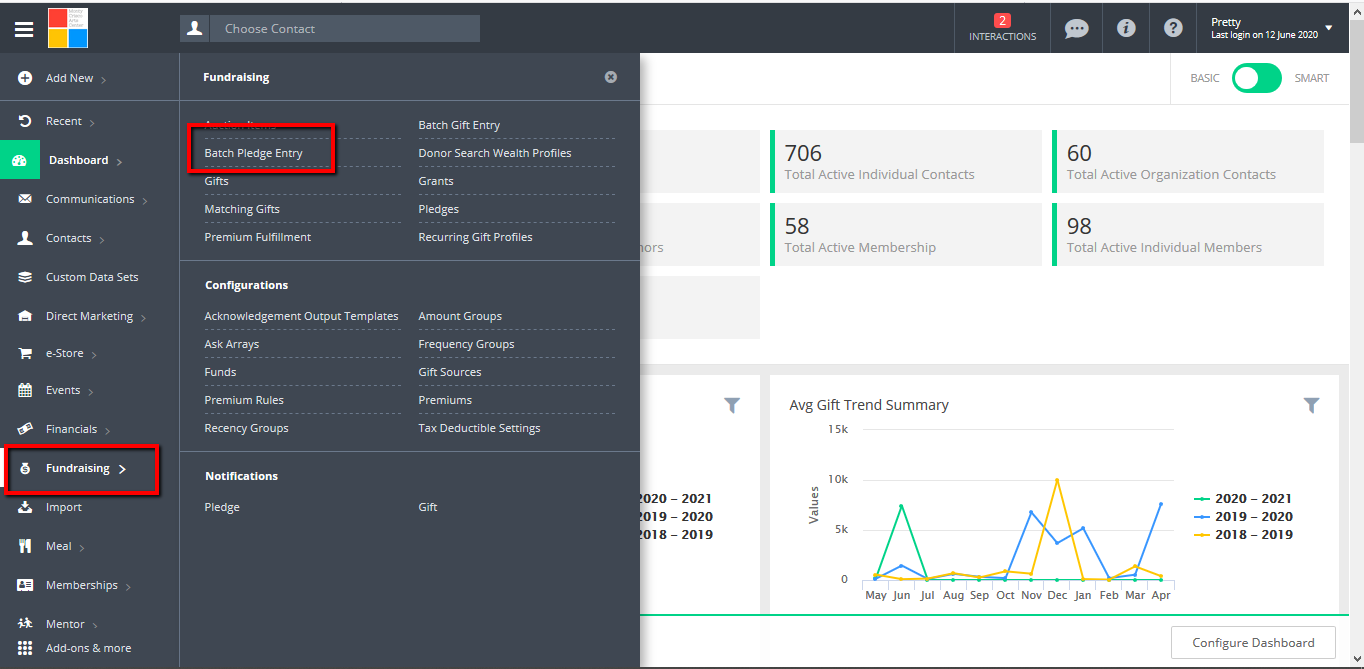
- Start by clicking on Fundraising on the Main Menu to open the fundraising sub-menu and then select Batch Pledge Entry under the Fundraising heading.
- This will take you to the Batch Pledge Entry index screen.
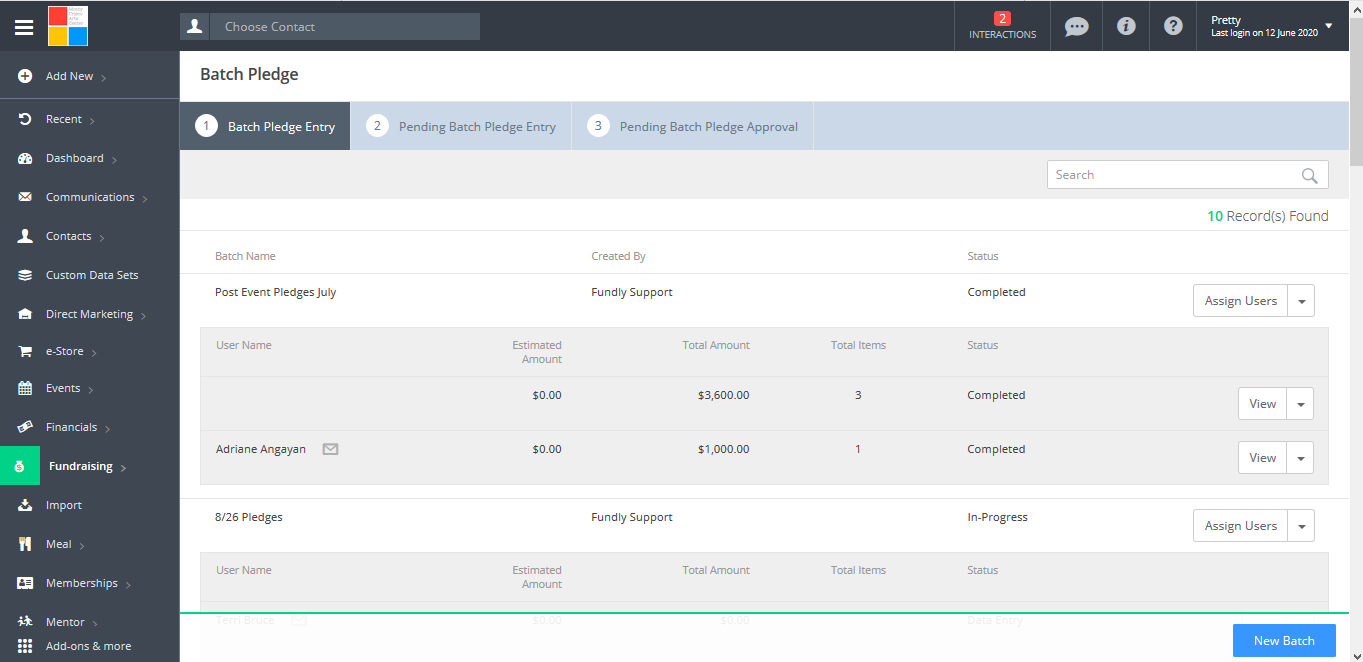
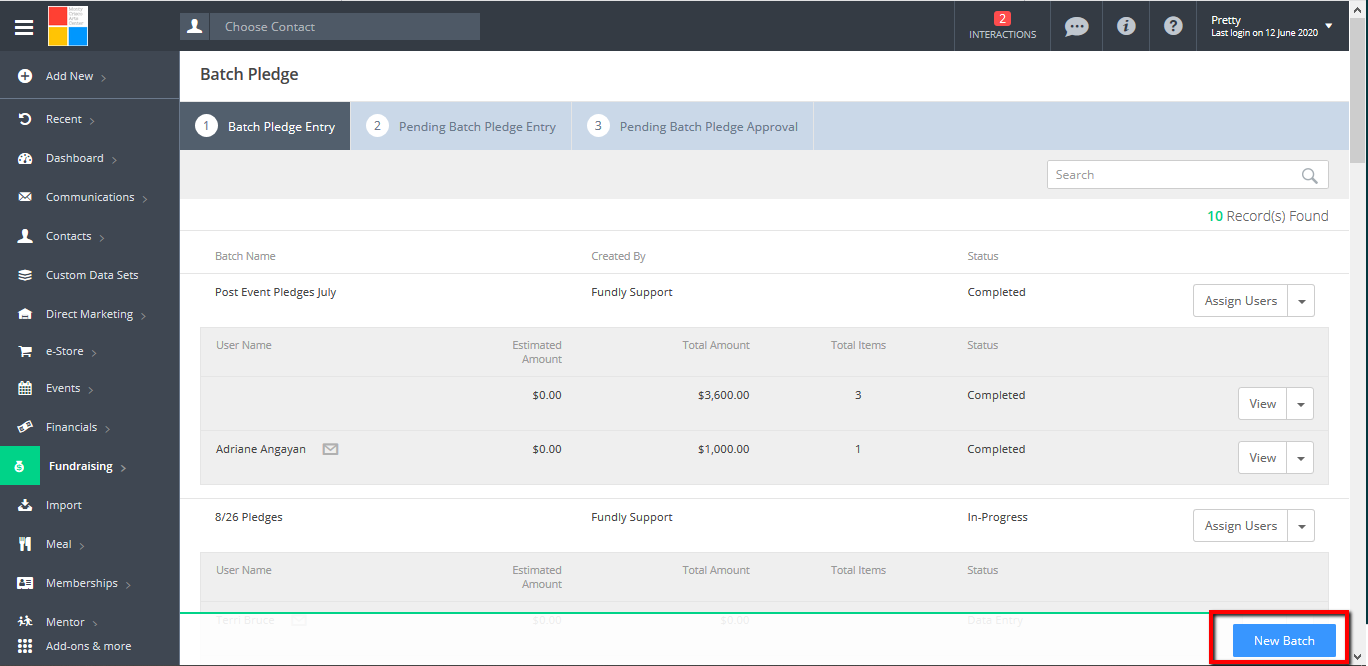
- There are three tabs here.

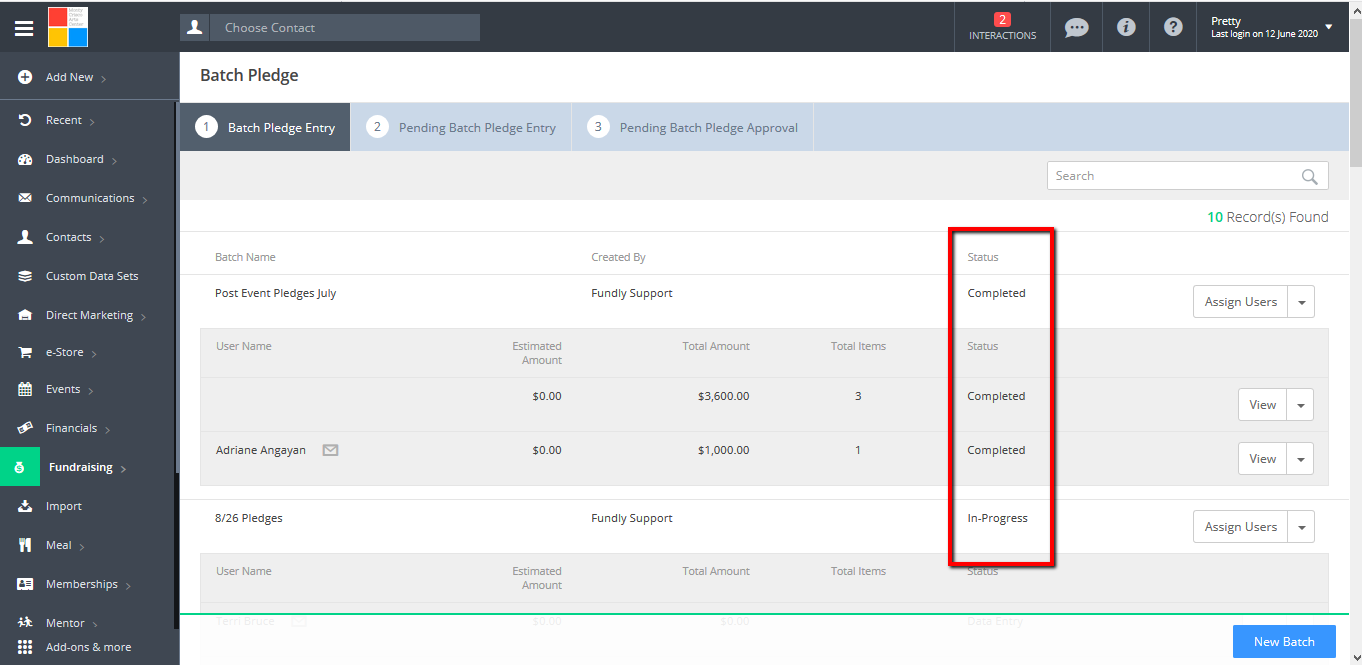
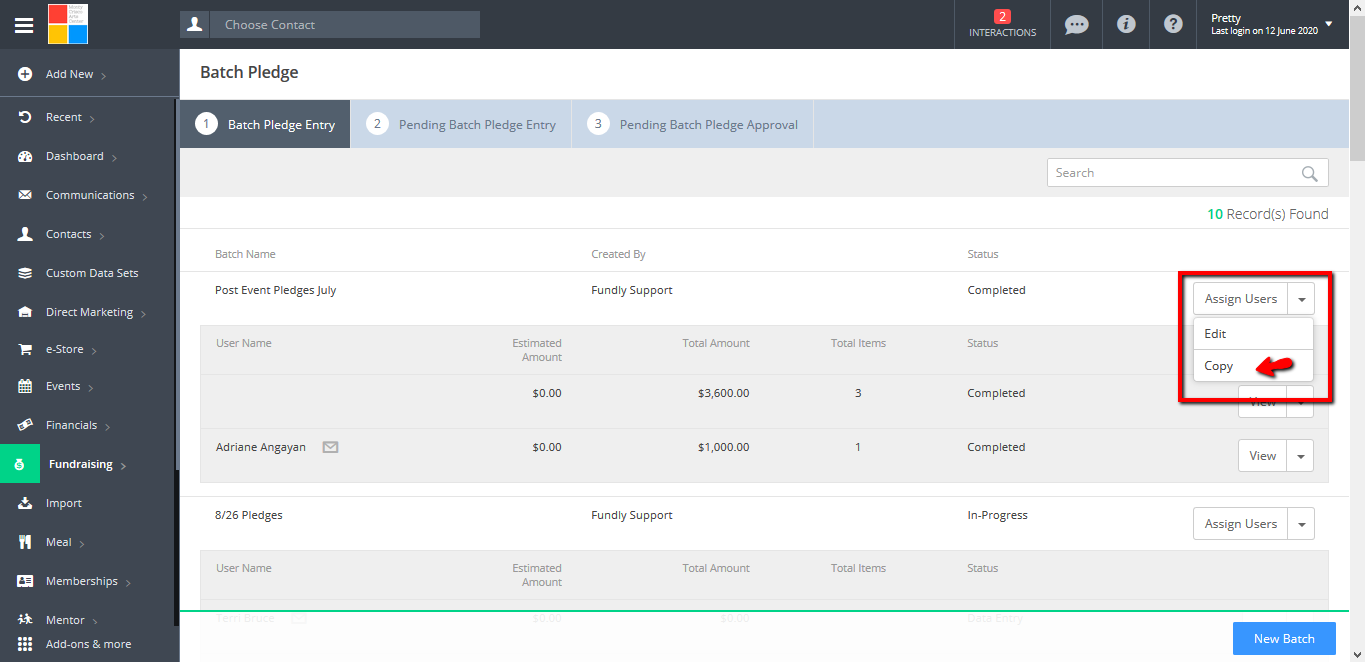
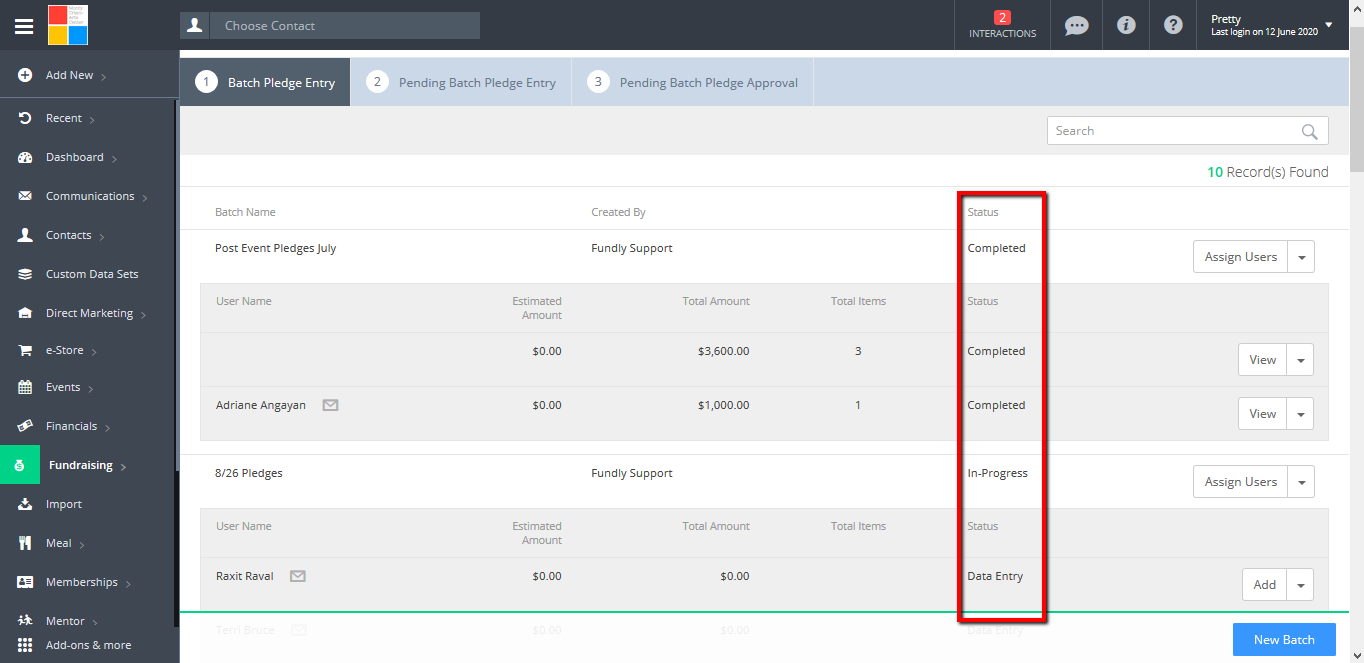
- On Tab #1: Batch Pledge Entry you will see your previous created batches and their status (In-Progress means the batch was created; data entry means records have been entered but data entry is still in progress or the batch has not yet been sent for approval; Completed means the batch has been created and approved).
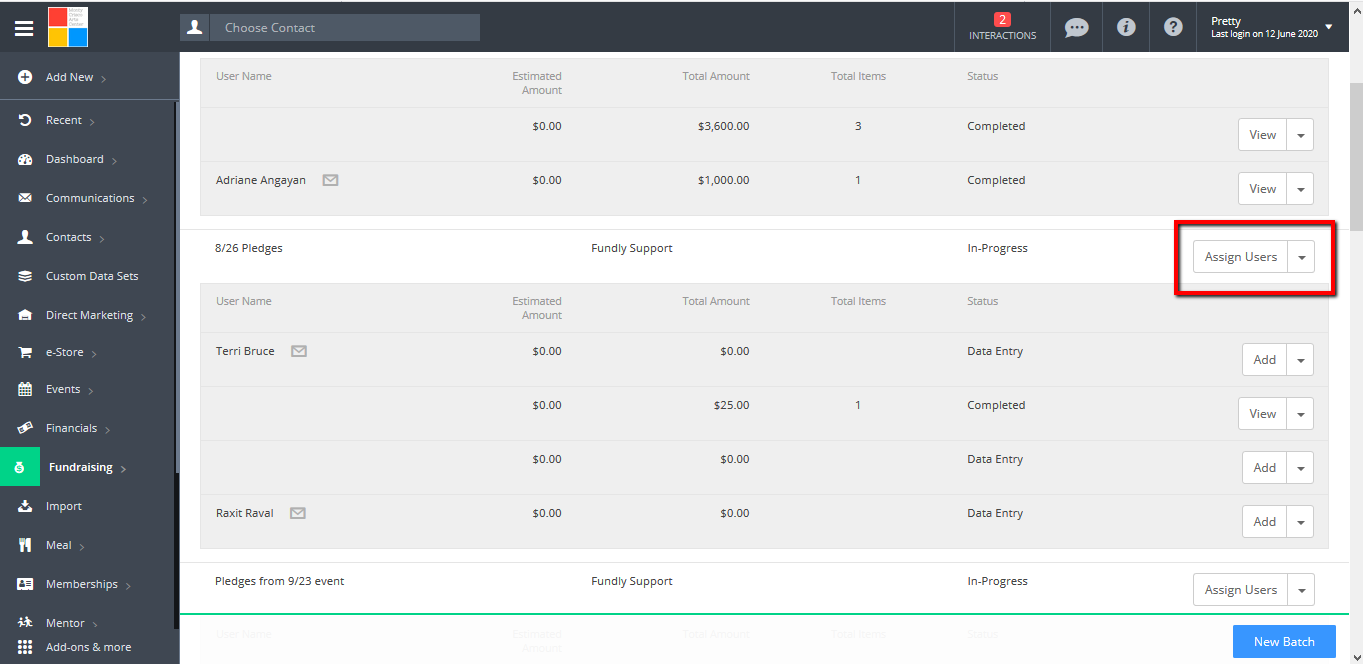
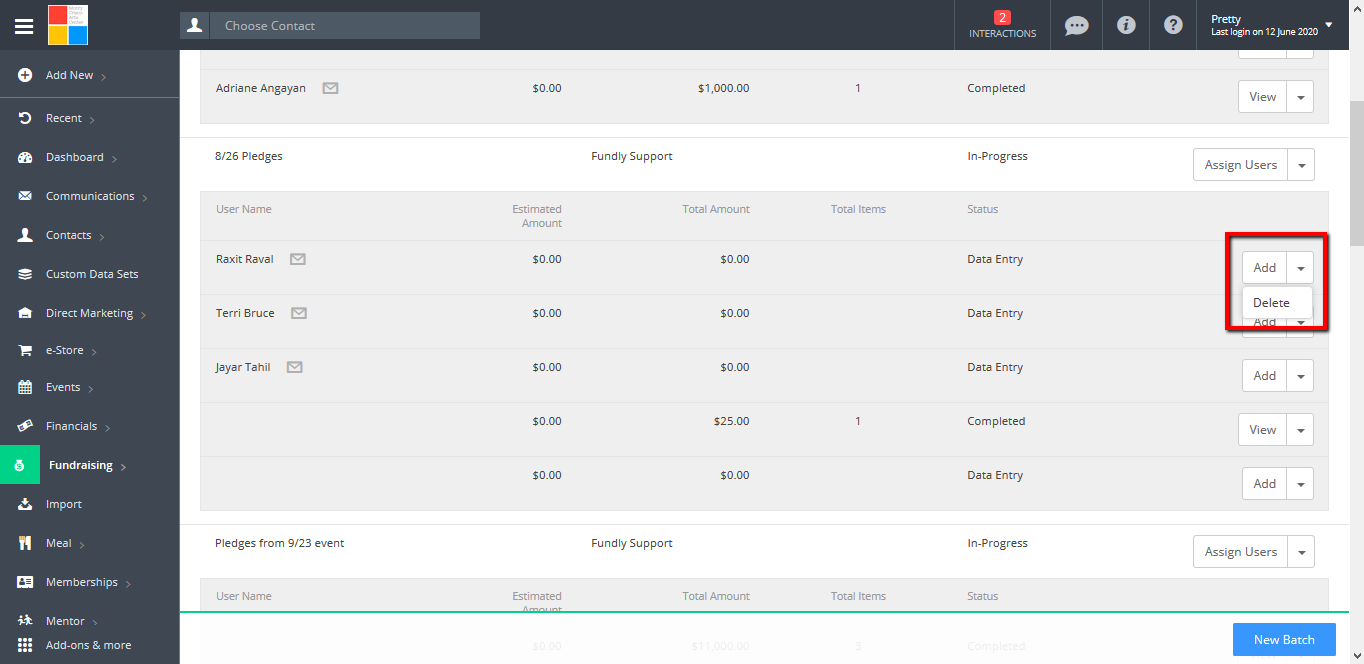
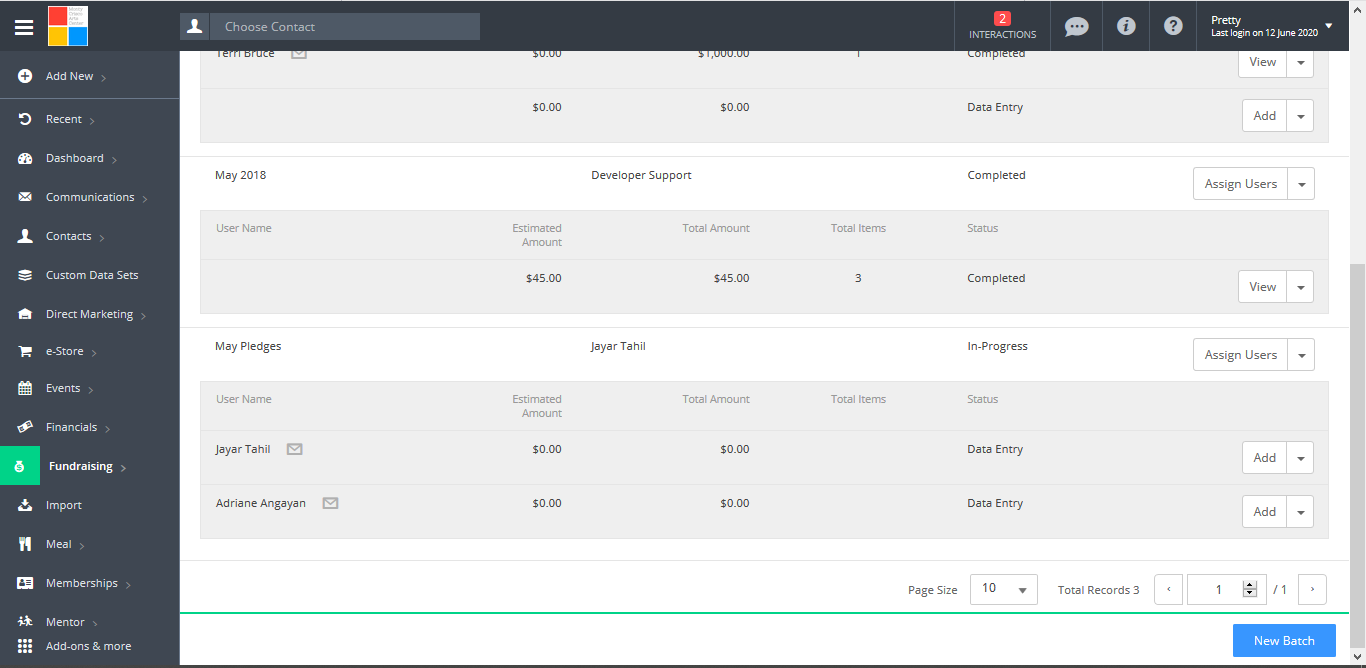
- To add pledges to an existing in progress batch, click the drop down to the right of the user name of the staff person who will be entering the data and select Add.

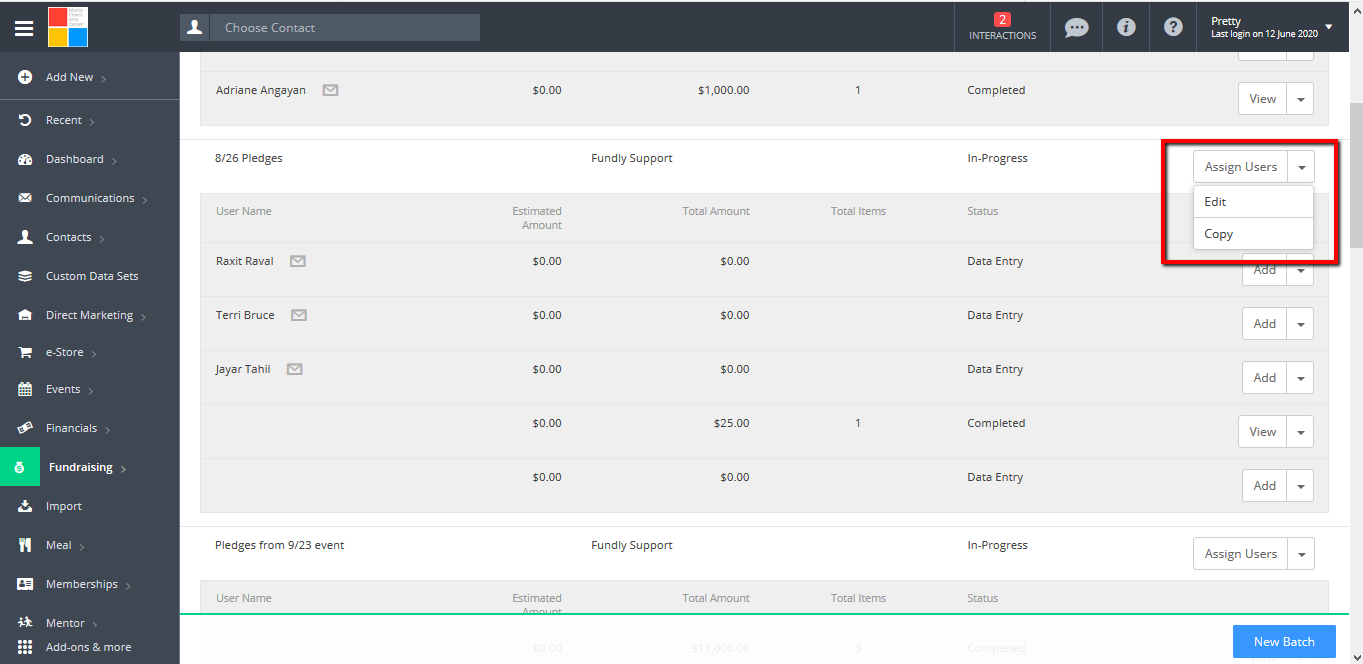
- To assign a staff person to do the data entry (of pledges) into an existing in-progress batch, click the drop down to the right of the batch and select Assign Users.
- This will take you the Assign Users screen/set of batch pledge creation. You can assign the batch to yourself for data entry or another member of your staff (this list pulls from the approved users in your system).
- To edit an existing batch's configurations (including the fields for data entry), click the drop down to the right of the batch and select Edit.

- This will take you to the batch set-up/configurations screen.
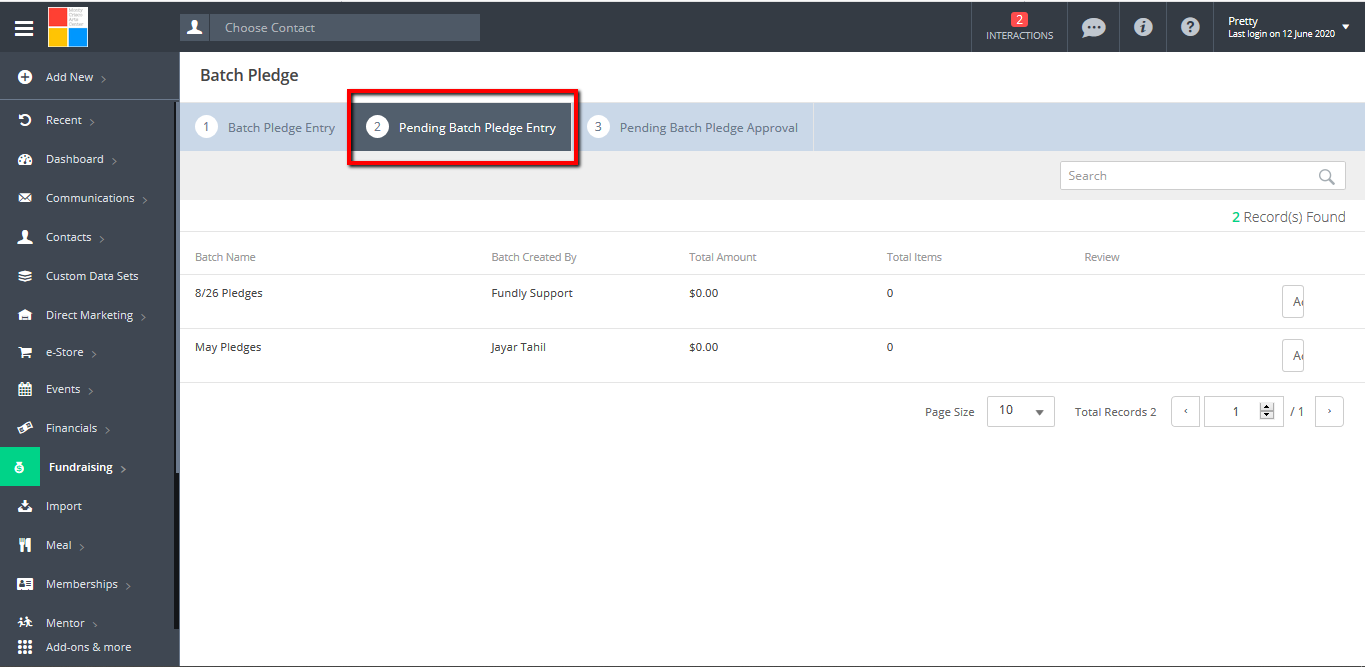
- On Tab #2: Pending Batch Pledge Entry, you will see a list of batches (a sub-set of those listed on Tab #1) that have been created but are awaiting data entry (pledge records to be entered into the batch).

- On Tab #3: Pending Batch Pledge Approval you will see a list of batches that have all data entered and which are awaiting the batch creators approval (batches will appear here when the batch creator is not the person assigned for data entry of the batch. See below for more details).
- To create a new batch, on Tab #1: Batch Pledge Entry, click on New Batch button on the bottom right OR click the drop down to the right of any previously created batch and select Copy to create a batch with the same configurations (which you can then edit).
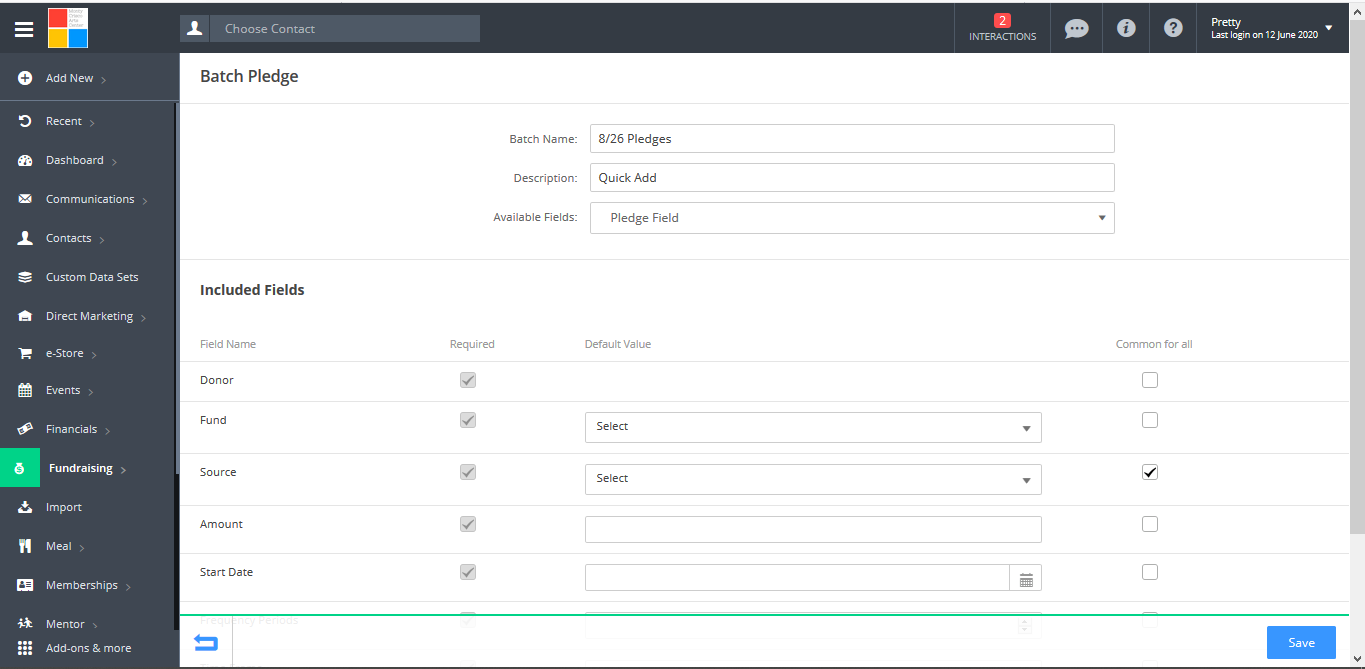
- Specify a name for the batch and a description of what is contained within the batch (such as all pledges made in May or all pledges made at your fundraising event).
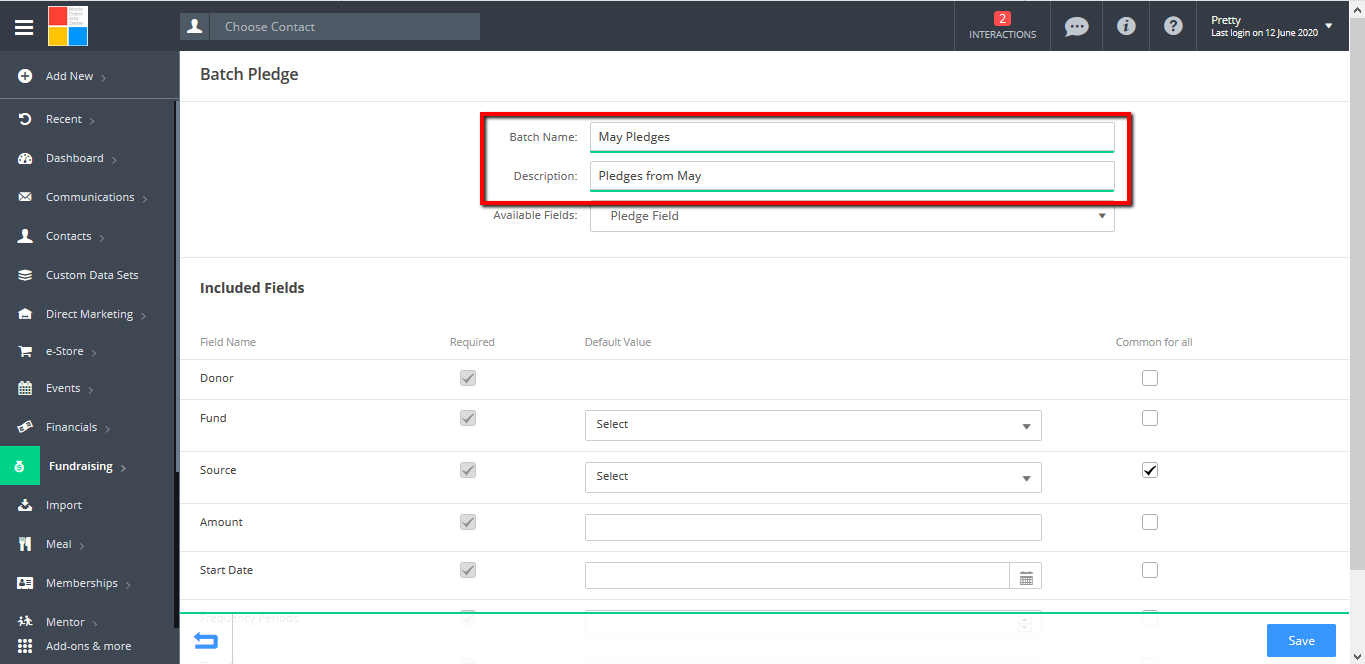
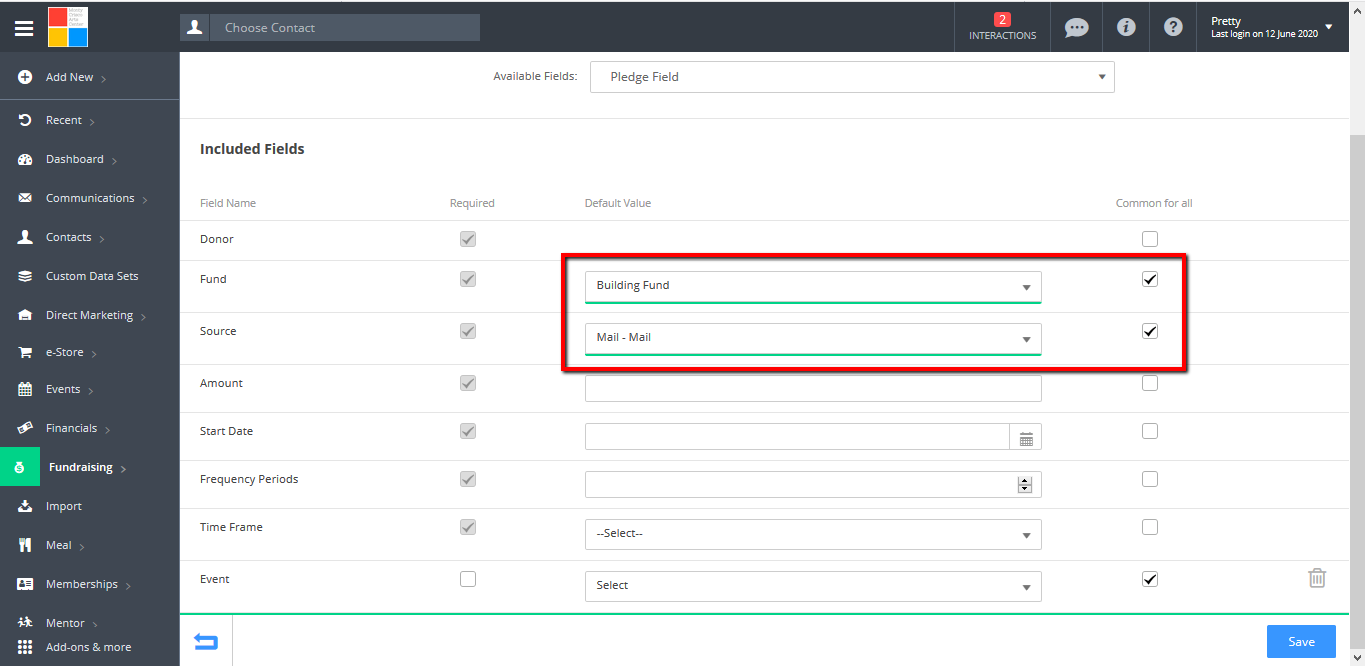
- Under Included Fields, there will be a list of the fields that will be shown for data entry. Every new batch will start with a list of default required fields.
- You can add more fields by clicking on the Available Fields drop-down at the top of the screen and select the fields. After selecting all the fields you wish, click on Apply.


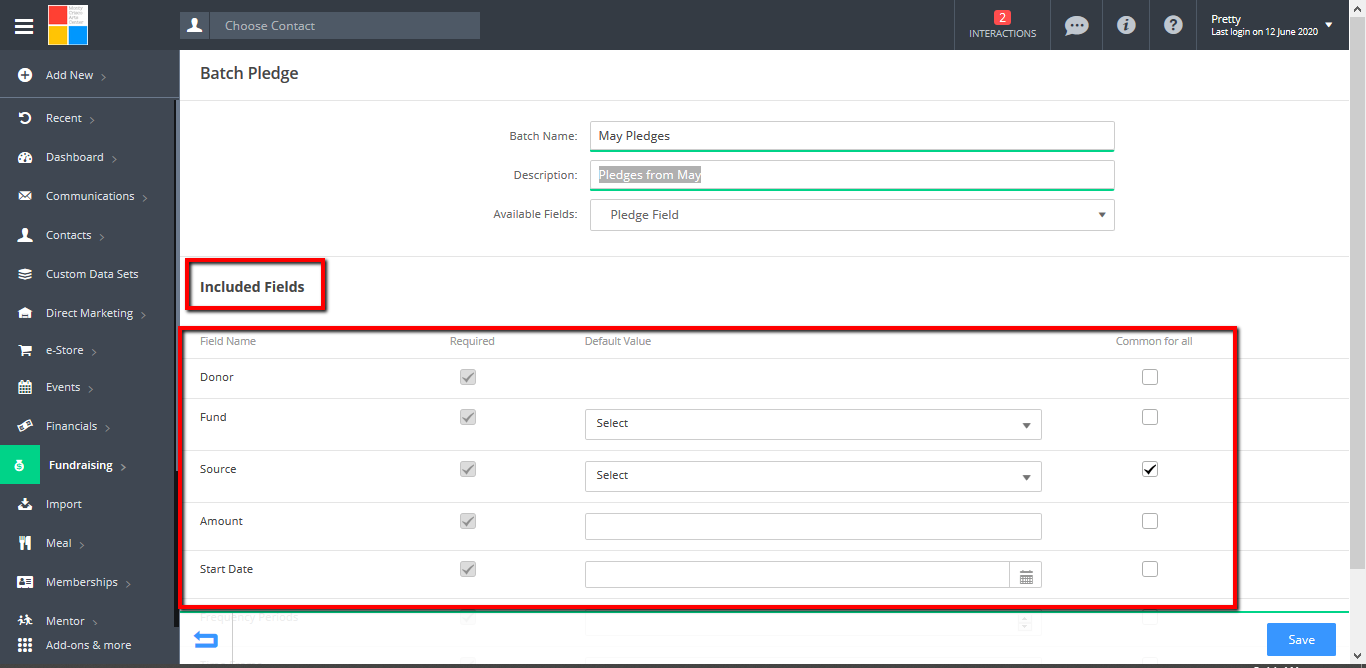
- For all fields in the Included Fields section, you can indicate if any field should be required (meaning that every record in the batch MUST have data in this field in order to save the batch/records) by clicking the Required check box. Please Note: you cannot uncheck the required field for any fields that are required in order to make a new pledge.

- In the Default Value field you can enter a value that will be added to every record in the batch by default. For example, if every pledge in the batch should be linked to your Annual Appeal campaign, you could add that campaign name as the default value for the campaign field. You will be able to edit the default value auto-populated to each record in the batch while doing data entry; however, having a default value can save time as then the user will only have to change/add data to the few records that differ from the default.
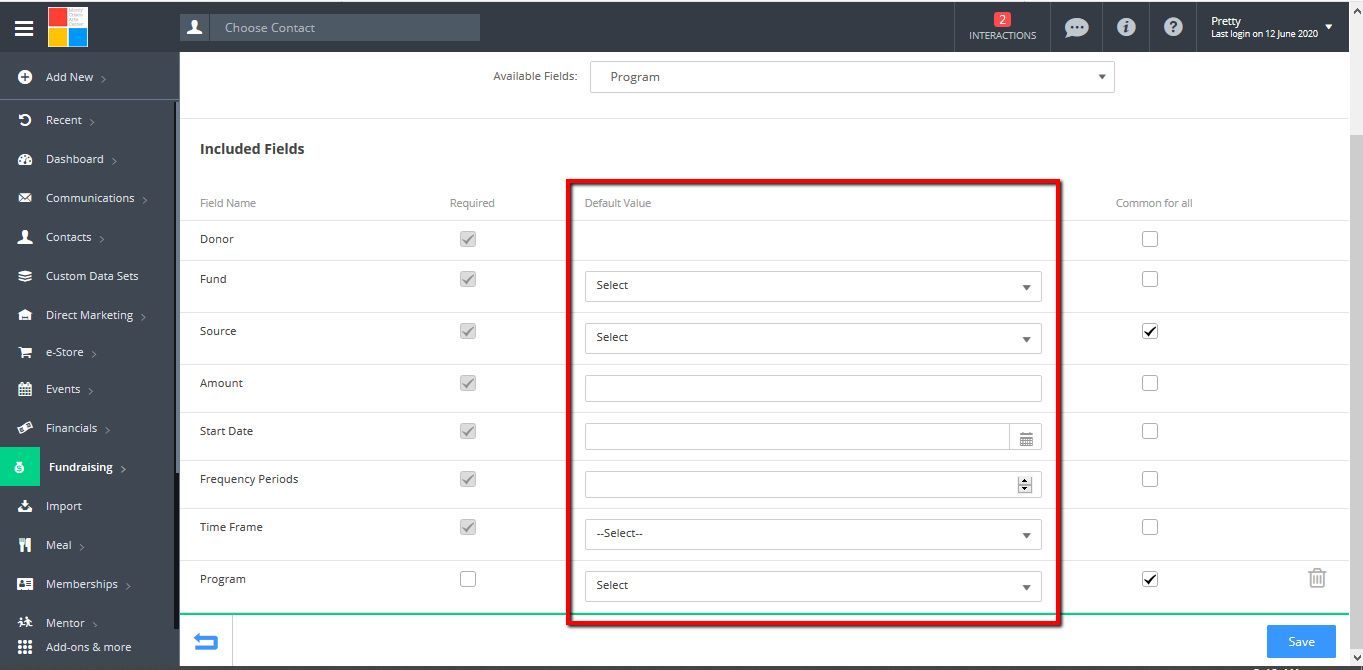


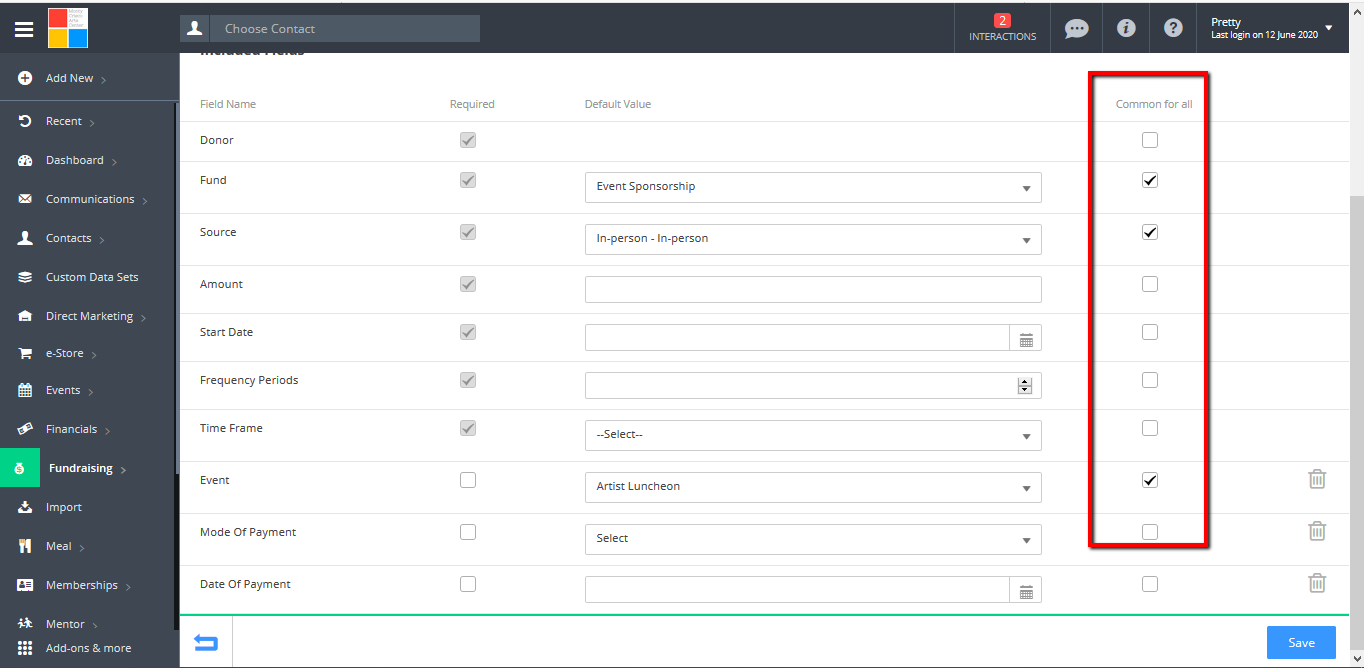
- The Common for All checkbox is used to indicate that every record in the batch has the same data in a particular field; this is similar to the Default Value field except that any item that has Common for All checked will NOT be editable per record in the batch (compare the screenshots above and below). The Common for All field(s) will not be shown on each row of the batch and instead will be shown just once at the bottom of the screen. Changing the value in a common for all field will update all records in the batch with that value.
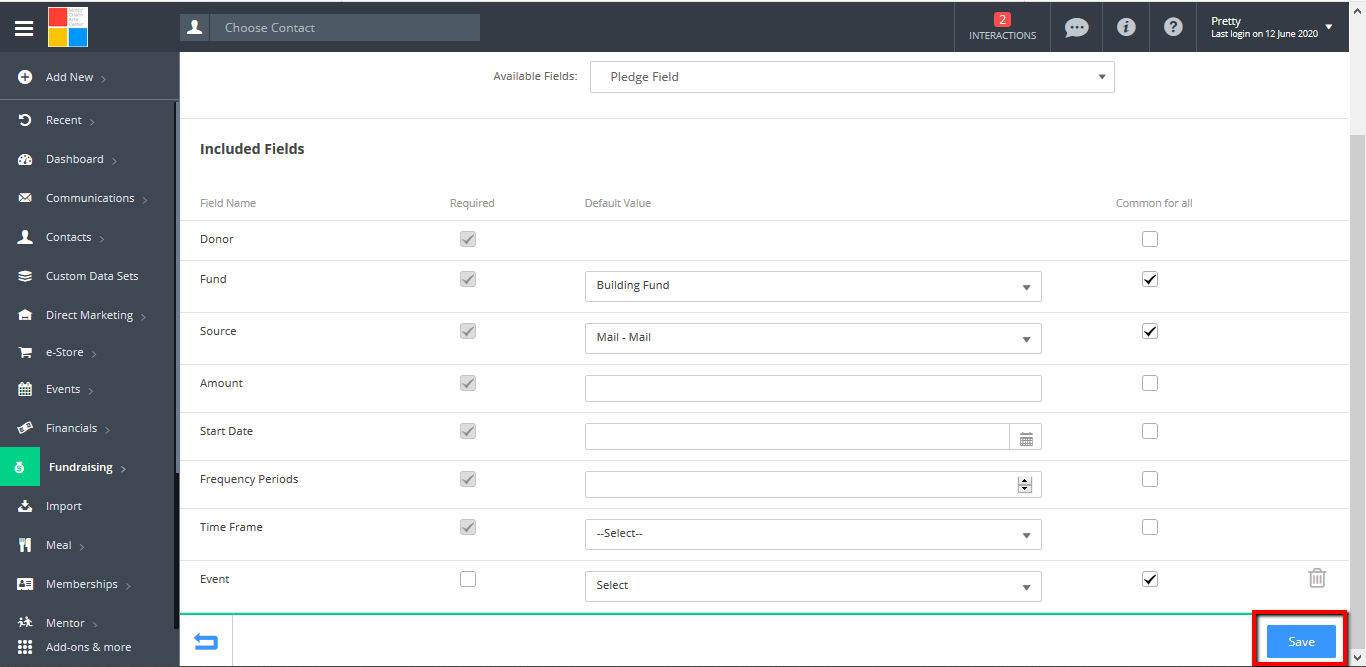
- Once you filled out the fields for the batch, click Save in the lower right. It will take you to an Assign User Page.
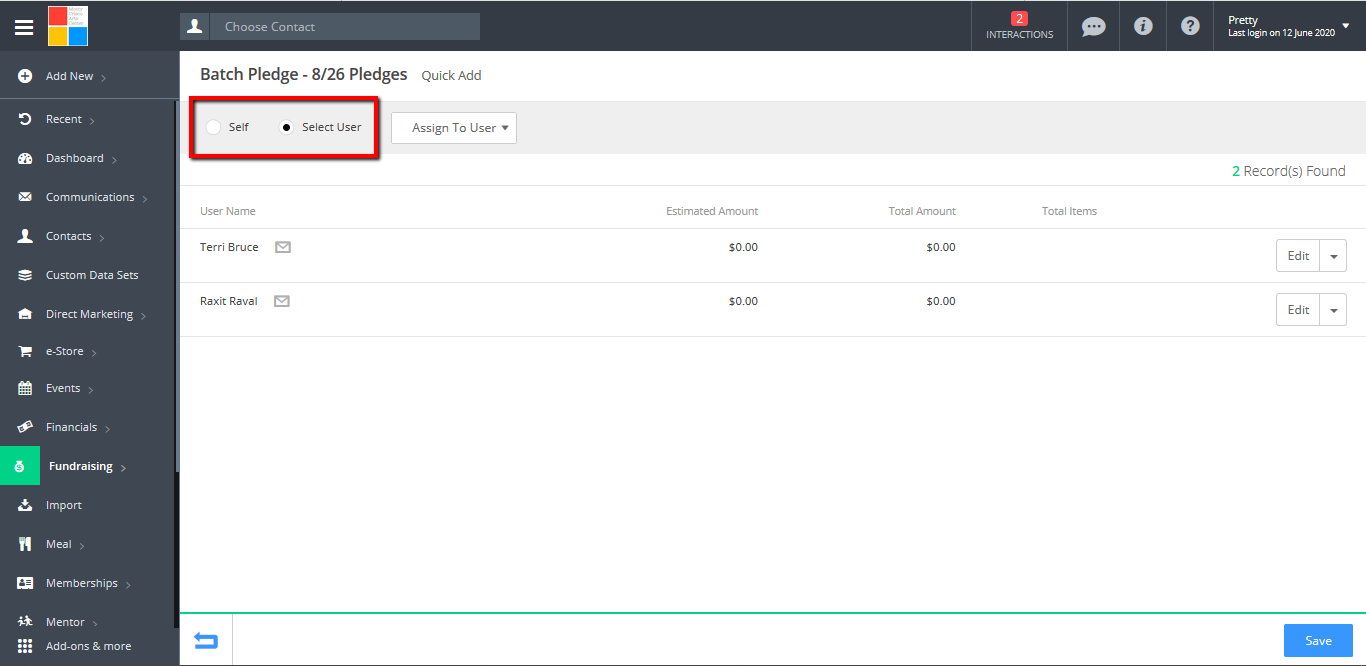
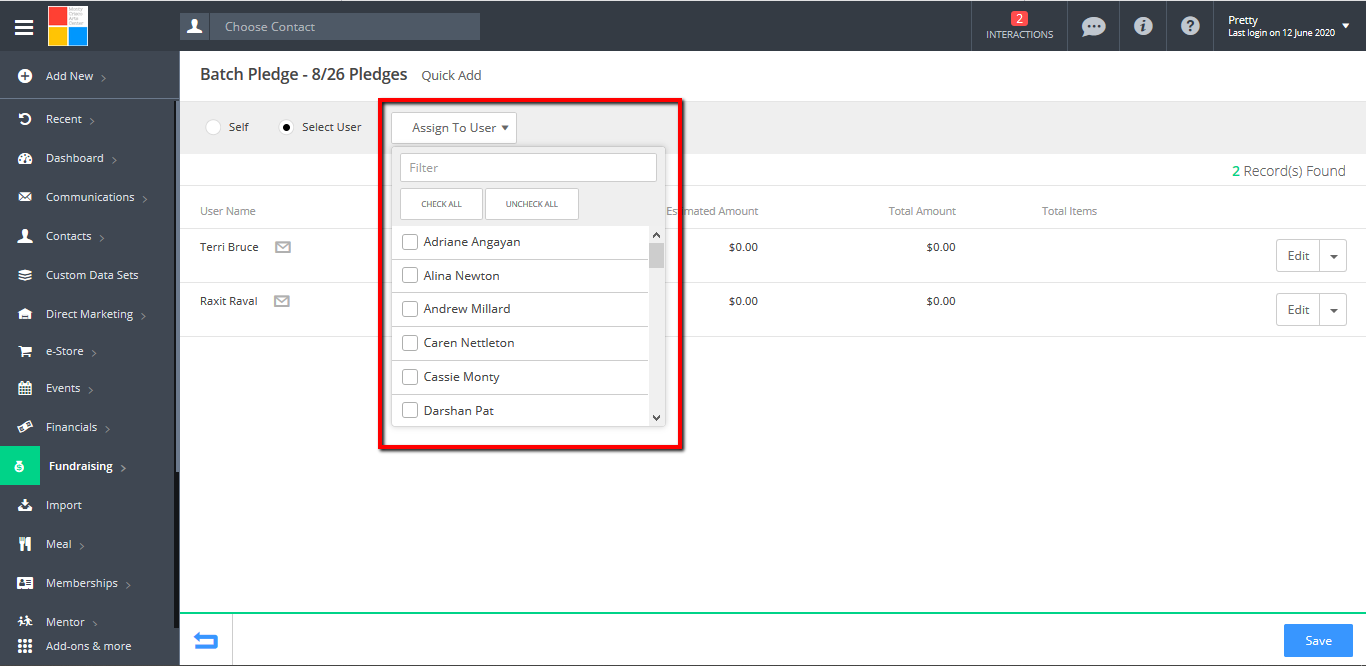
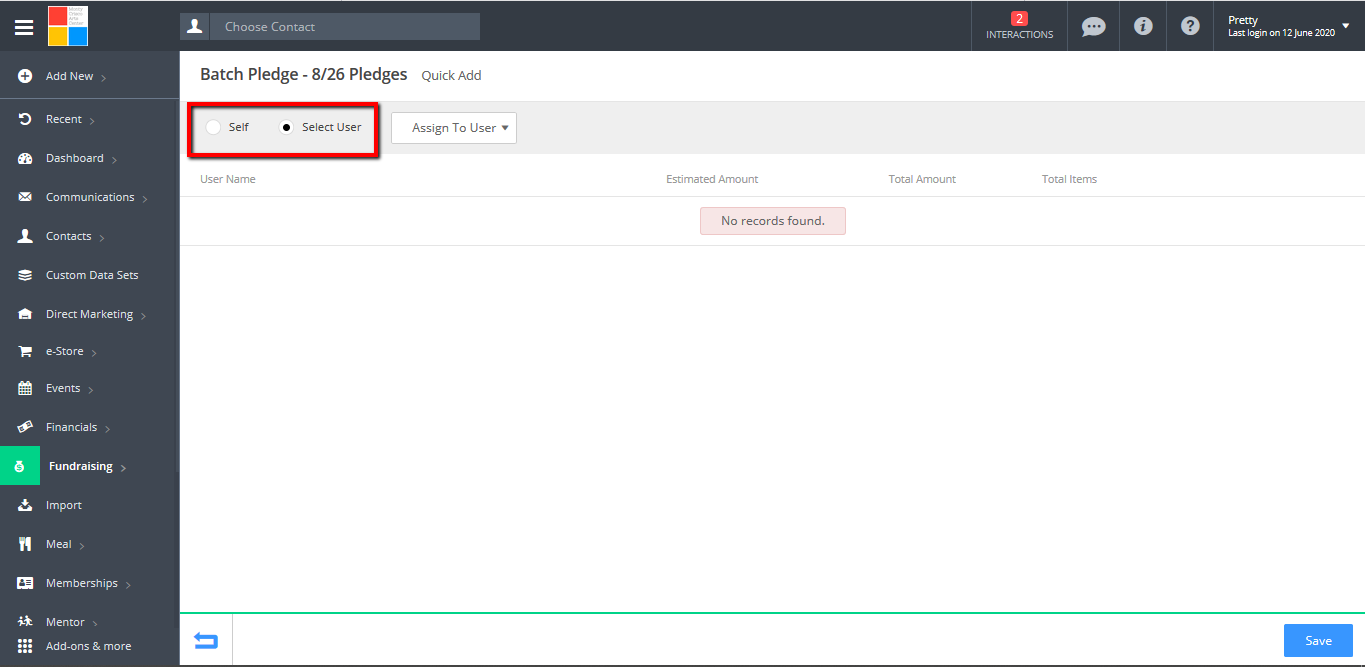
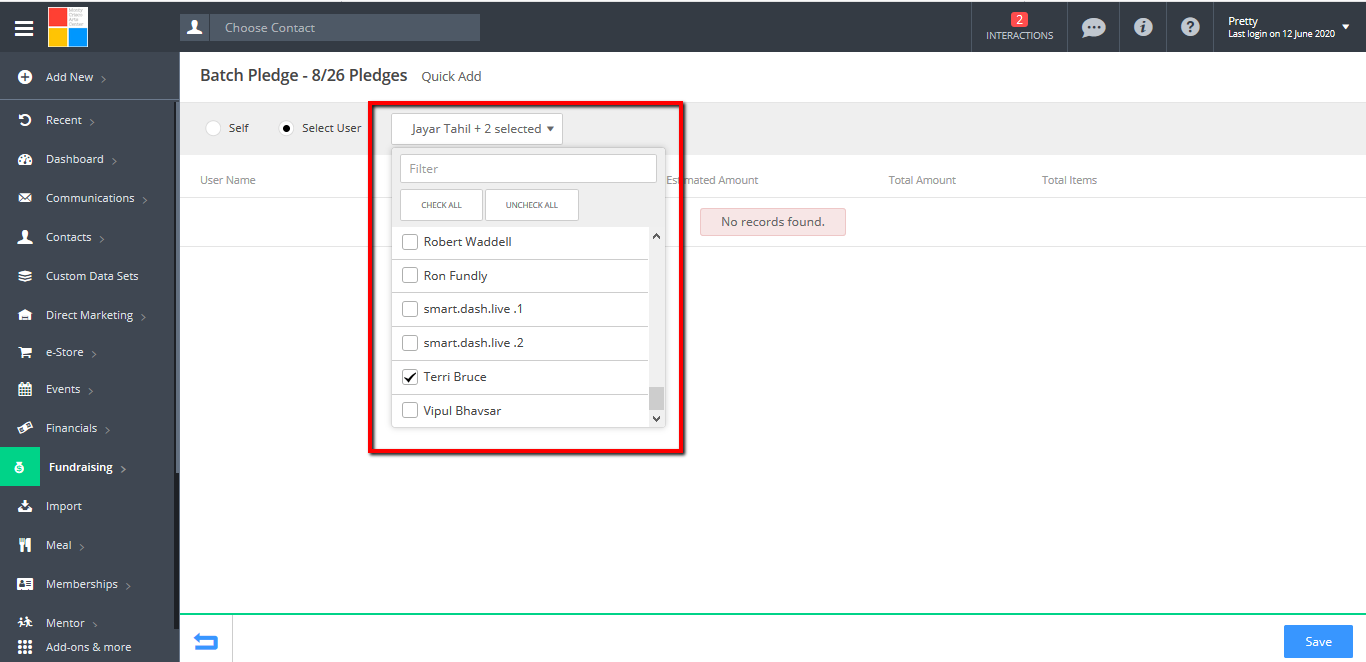
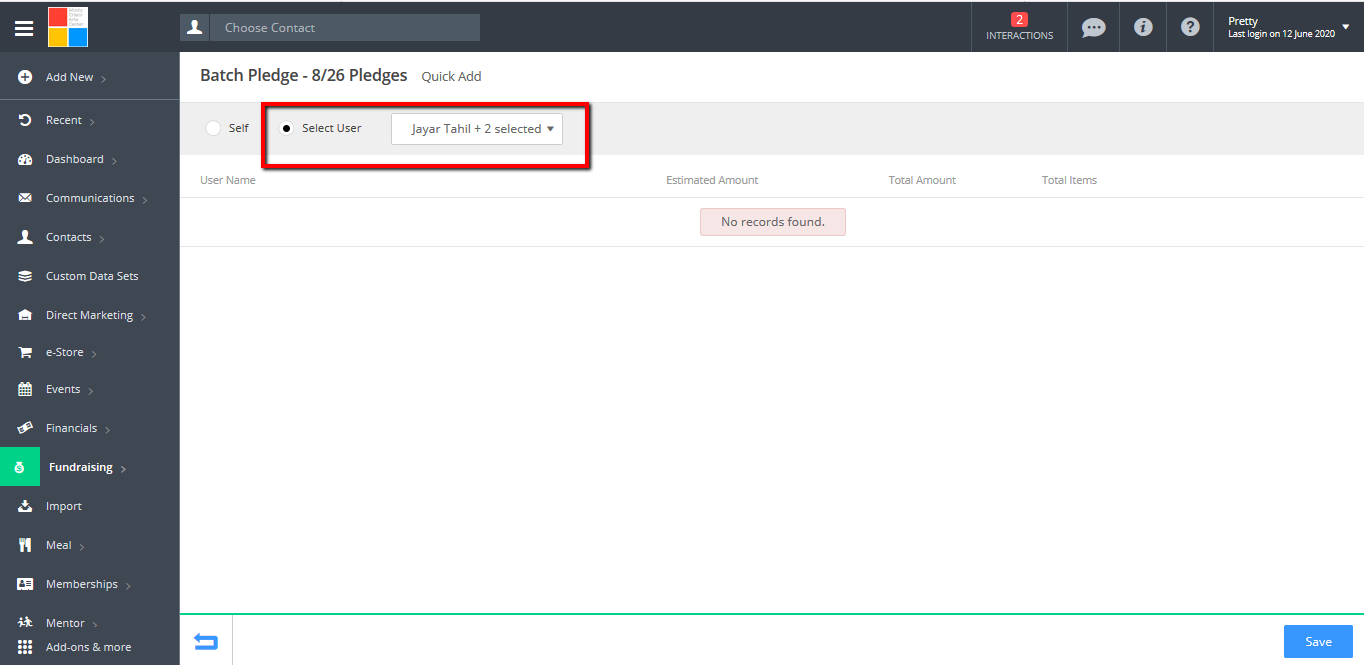
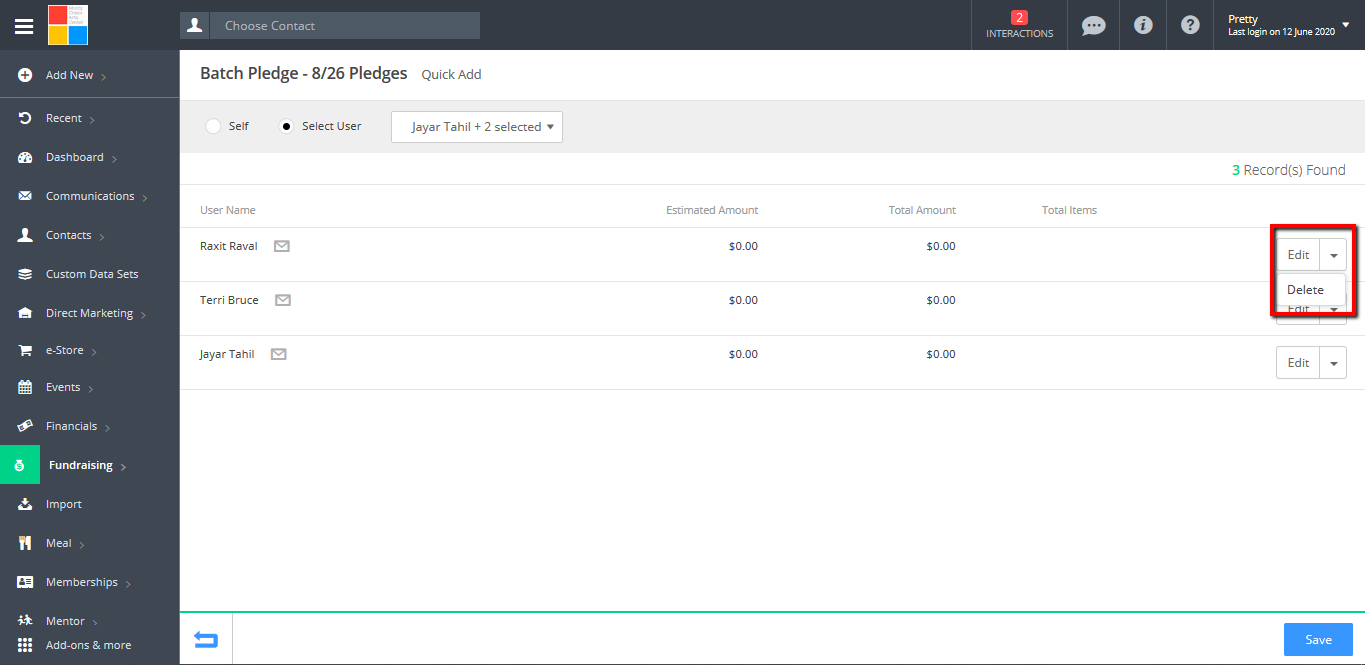
- On the Assign User Page, select the Self or Select User toggle button to assign user(s) to handle the pledge batch entry. If you choose Select User, then also select the user(s)/staff person(s) from the Assign to User drop down. If you assign the batch to someone who is not you/the person who created the batch, then after data entry is completed, the user will be required to send the batch for approval and the person who created the batch will need to review the data entry and approve it before the pledges are saved/added to the individual contact records. Then click the Save button to assign the user(s) to the batch.
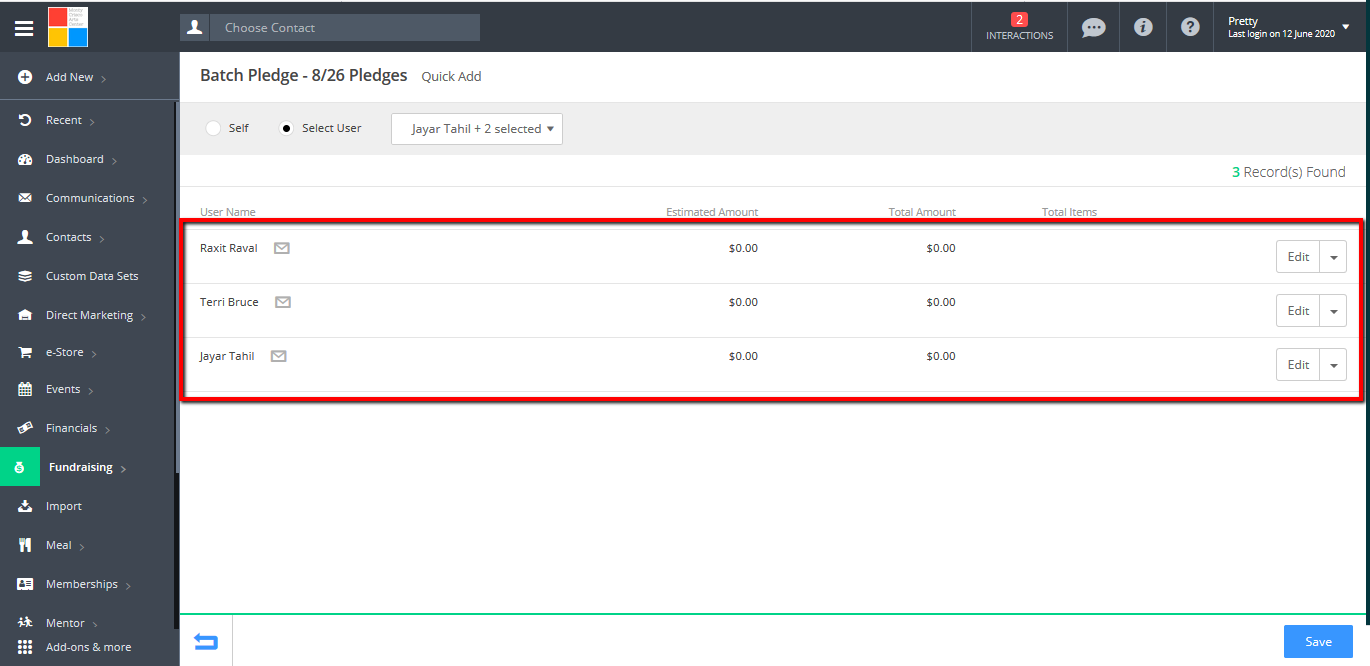
- If you assign someone to the batch during this step and you want to remove them, simply select Delete from the drop down to the right of the name.
- You can later assign (additional) users to a batch by finding the batch on Tab #1: Batch Pledge Entry and choosing Assign Users from the drop down to the right of the batch. You can delete/remove any users assigned to a batch by clicking the drop down to the right of their name and selecting Delete.
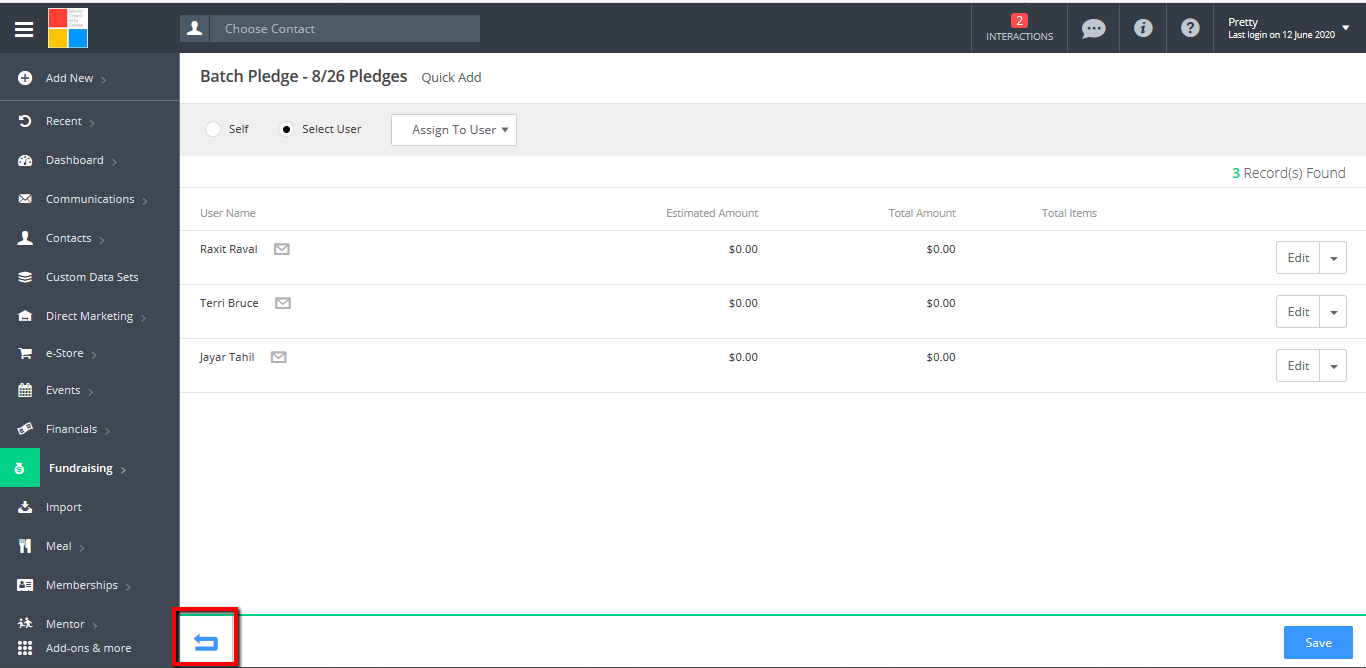
- While assigning users to the batch, you can use the drop down to the right of each name to delete users from the batch or to Edit the batch and assign an Estimated Amount - this estimate amount is the total dollar value of the pledges to be entered. For example, if you have $2,000 worth of pledges to create/setup in the system and you assign two users to each do 50% of the data entry, you can set an Estimated Amount of $1,000 for each user assigned to the batch. This Estimated Amount is a guide to help users know if they have missed any data entry and it is not required.


- To return to the Pledge Index screen, click the blue Back (blue arrow) in the lower left hand corner.
- You will now see your newly created batches on Tab #1: Batch Pledge Entry and also any batches you are assigned to do data entry for on Tab #2: Pending Batch Pledge Entry.
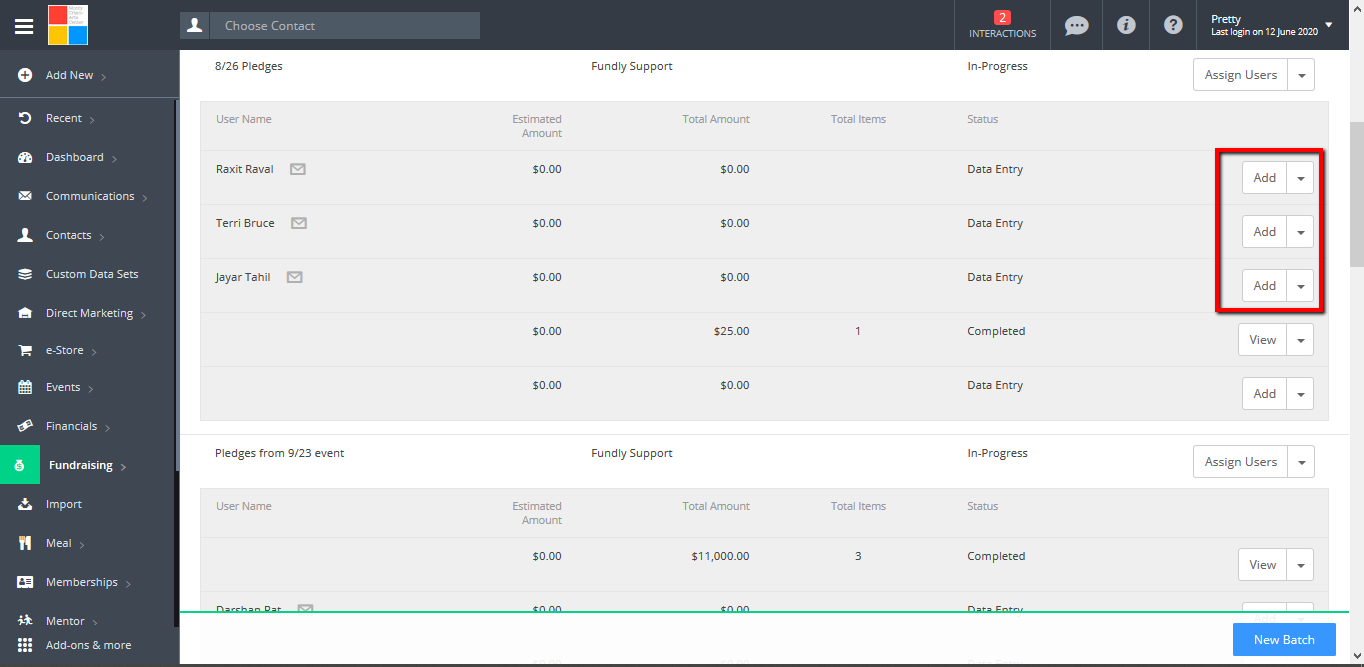
- Once a batch has been configured/set up, it is then ready for data entry (to have the pledges entered into it). To get started entering pledges into any In-Progress batches, find the batch on Tab #1: Batch Pledge Entry or Tab #2: Pending Batch Pledge Entry and click the Add button to the right of the assigned user's name.
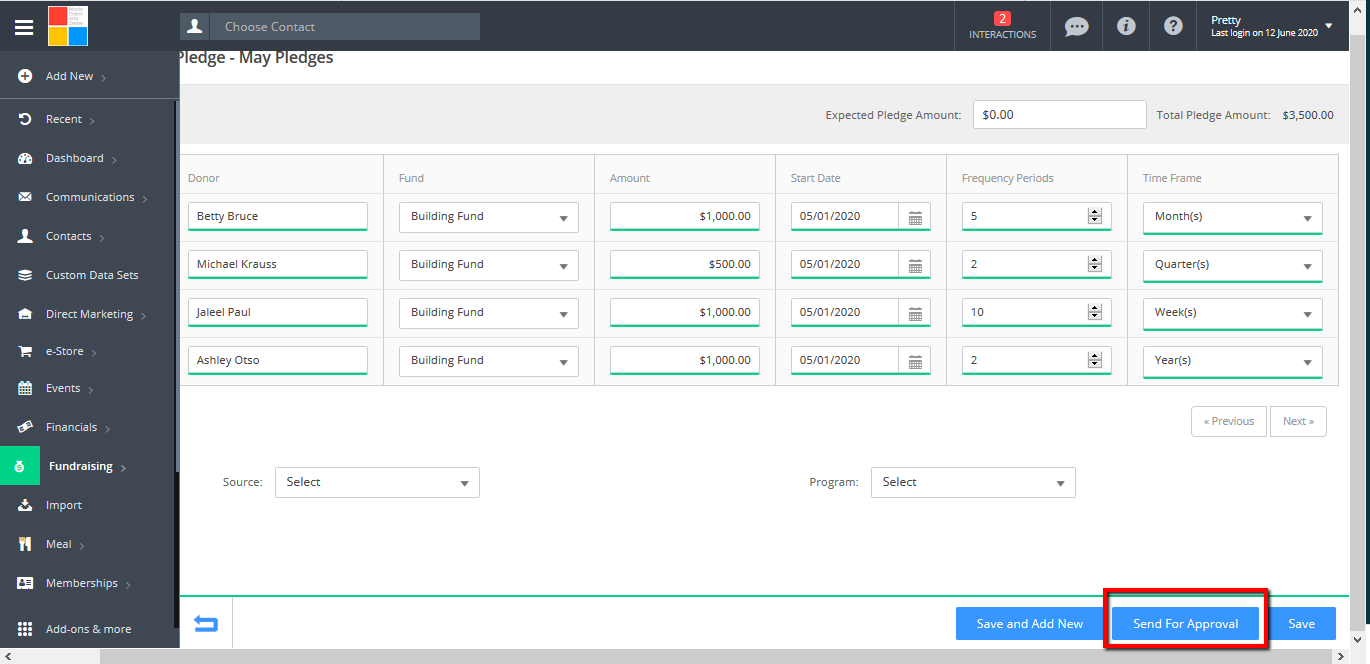
- This will take you to the pledge data entry screen.
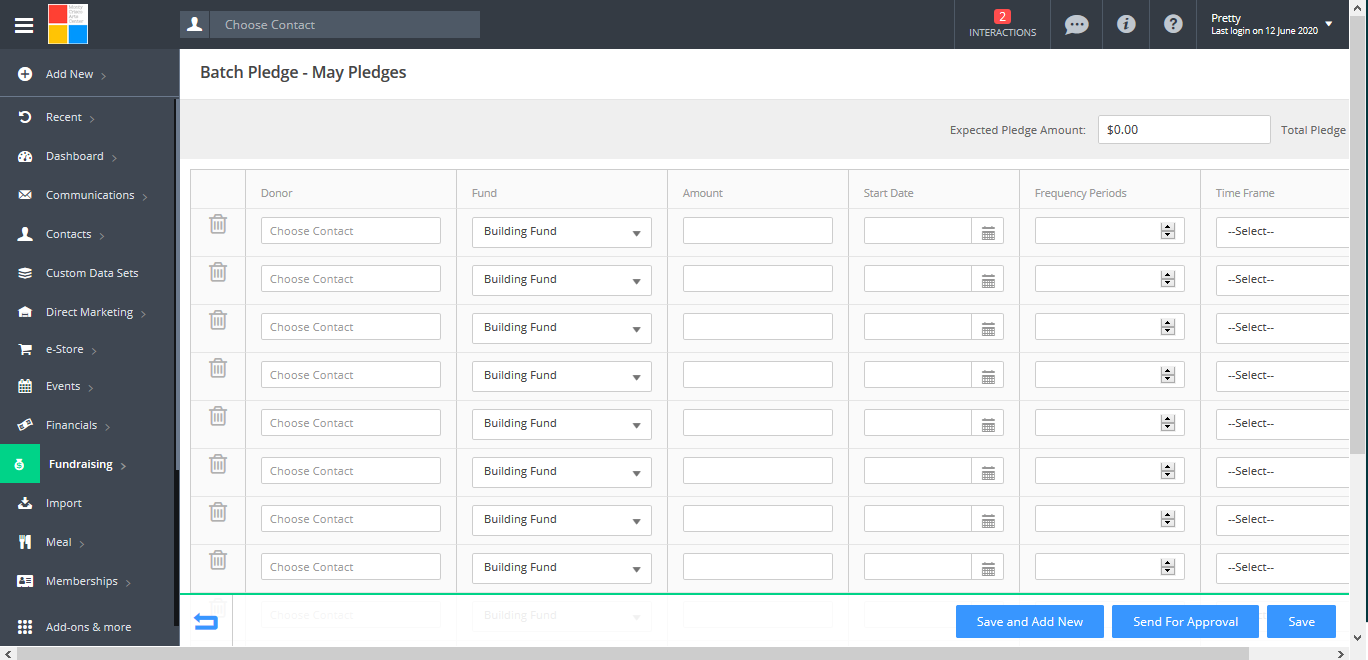
- Start by adding an Expected Gift Amount in the upper right if this was not added when adding users to the batch. This is the estimated total $ amount of the pledges to be entered into this batch. This is an optional field and can be left empty. The Total Gift Amount field next to the Estimate Gift Amount field is the total amount of entered pledges and should be equal to Expected Pledge Amount. The system provides a validation when you save/submit the batch for approval and will alert the user if the two amounts do not equal. However, the user can still save the batch even if the two amounts don't equal - this is just to alert the user that they might have missed some pledges or entered some incorrect amounts.

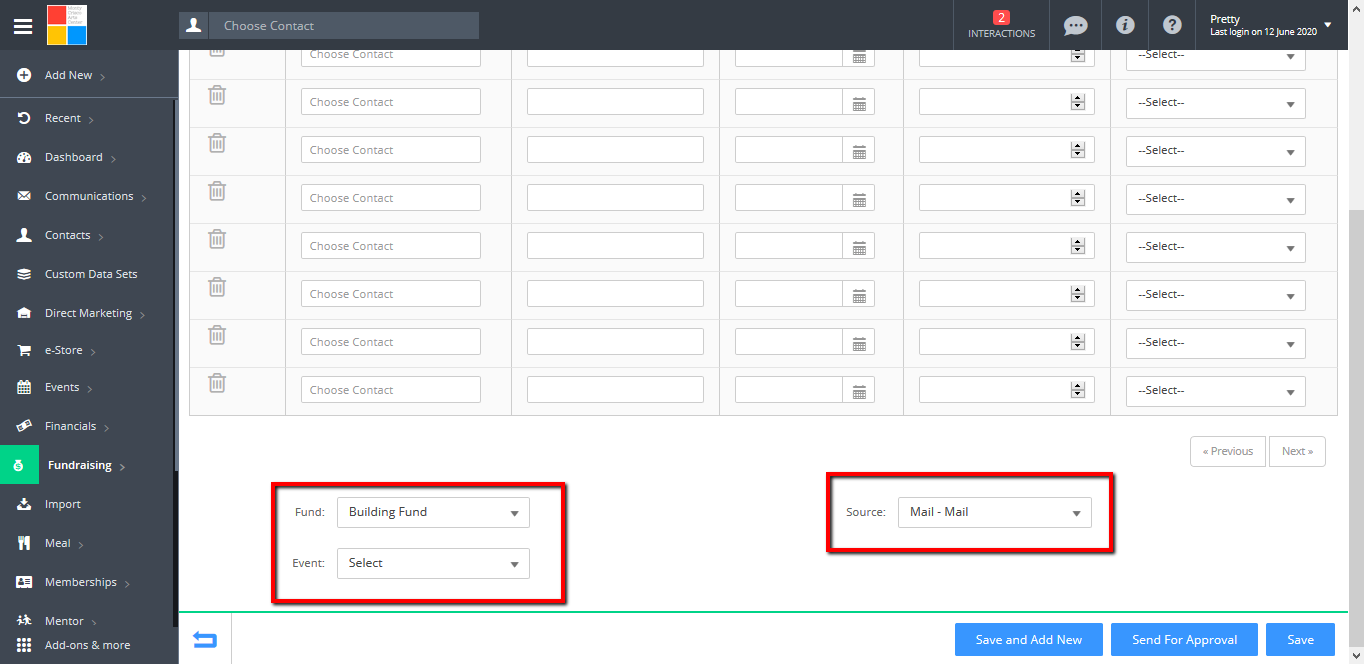
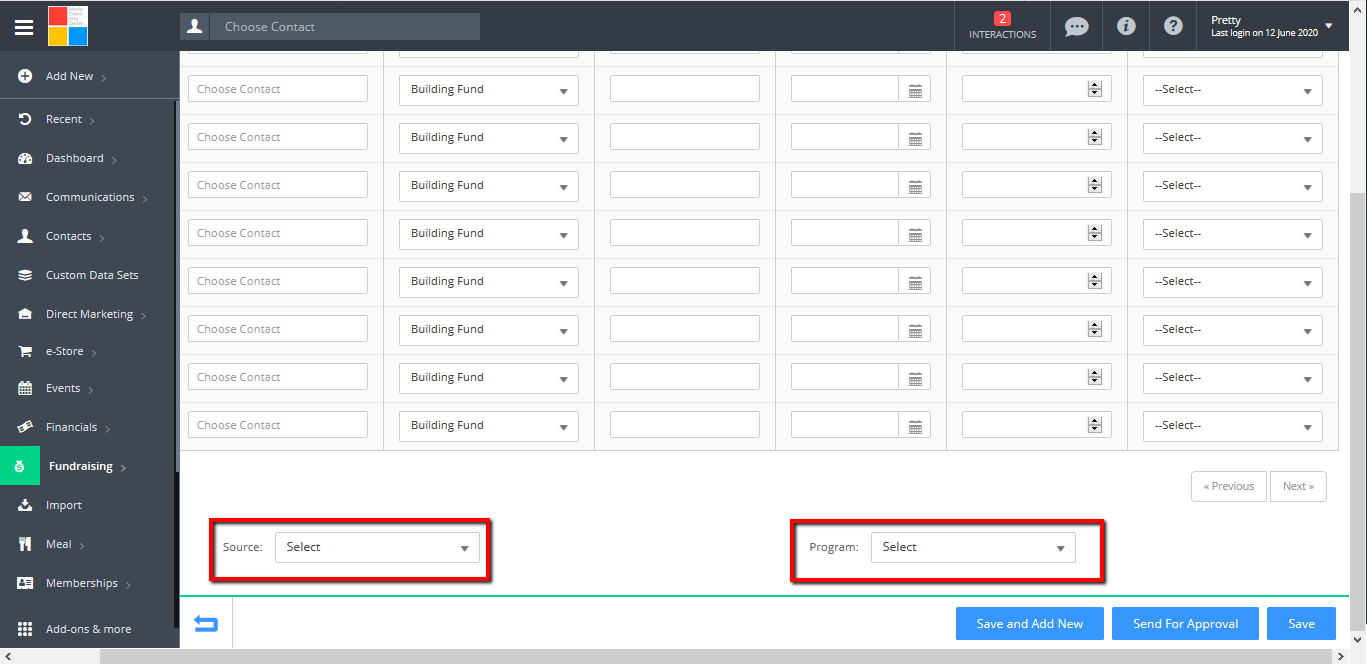
- Fill out the fields for the pledges. You will notice on the bottom of the page, the fields from the Common for all. The value of those fields will be common for all pledges.
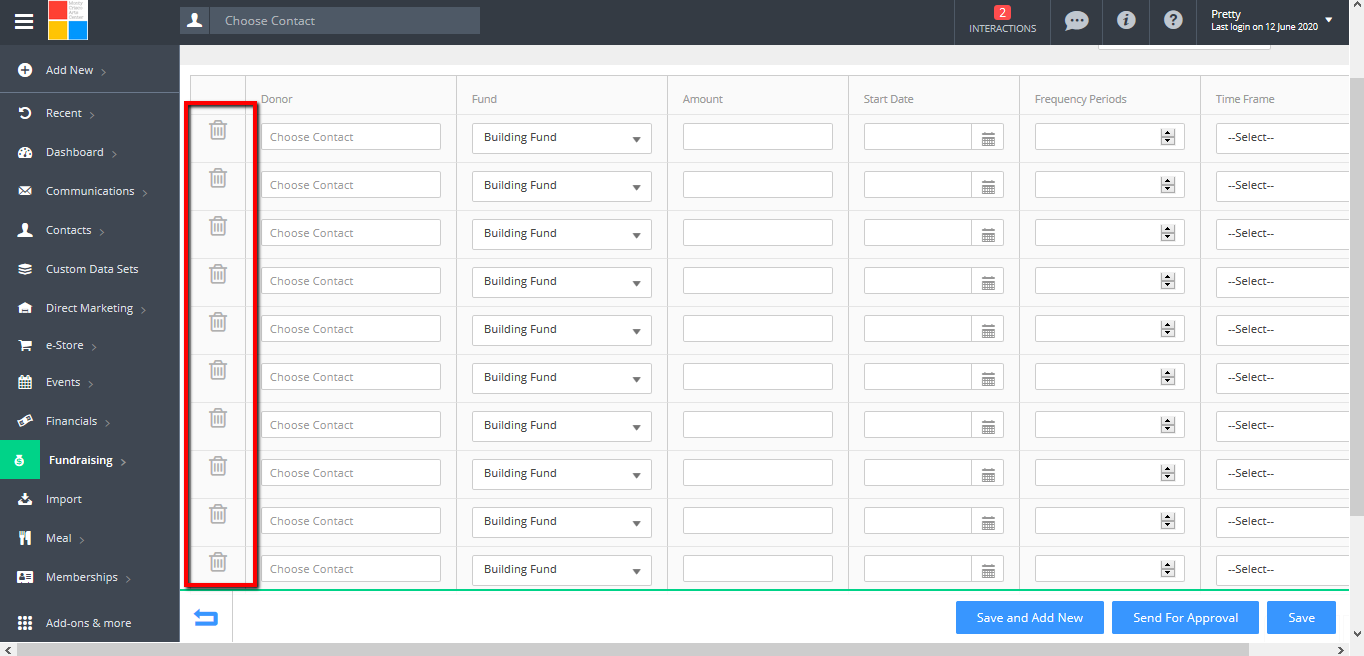
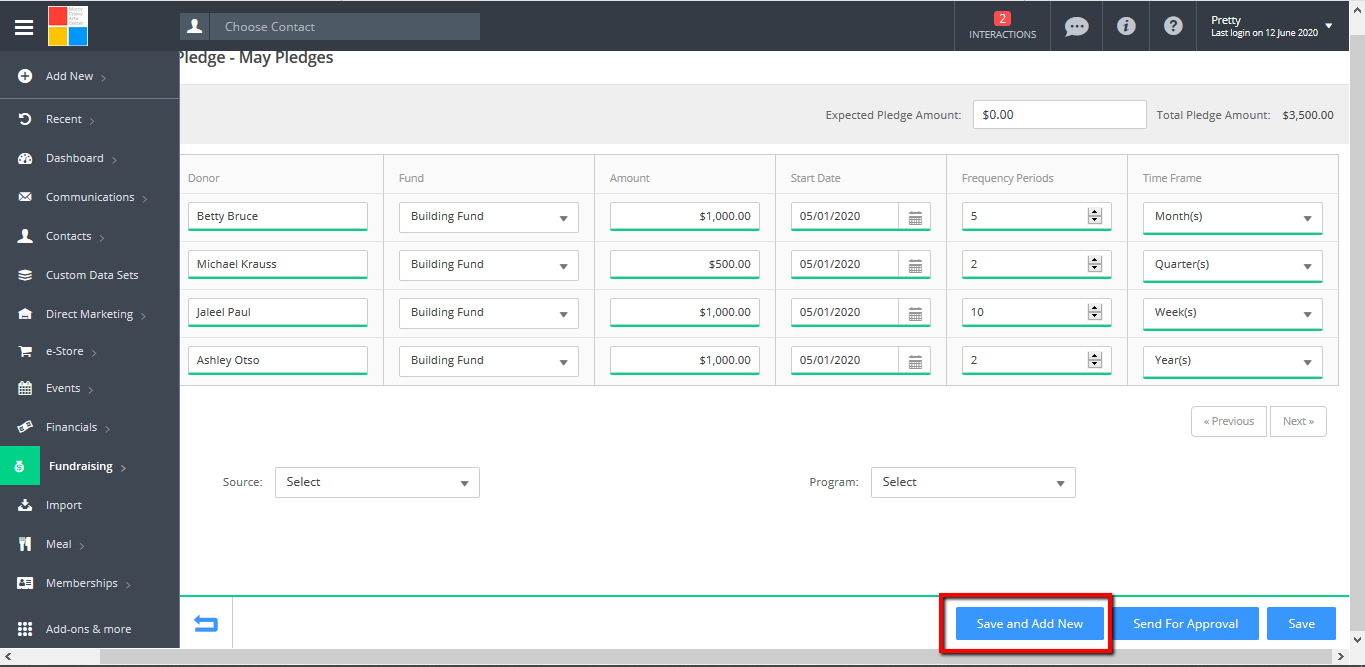
- You cannot have any empty rows in the batch. By default, the system will load ten rows. If you have less than ten, click the trash can to the right of any rows without data/without a contact name (also use the trashcan to remove any data from the batch). If you need more rows, complete all rows presented and then click the Save and Add New button at the bottom of the screen (click Save to save your work in progress and return later).
- Use the Previous and Next buttons to scroll between screens once you have more than 10 records in the batch. We recommend limiting pledge batches to 100 or less records; more than that and it will take a long time to process the pledges and slow your system down while the records are being saved/created.

- Once you are done with all data entry, click the Send For Approval button in the lower right.
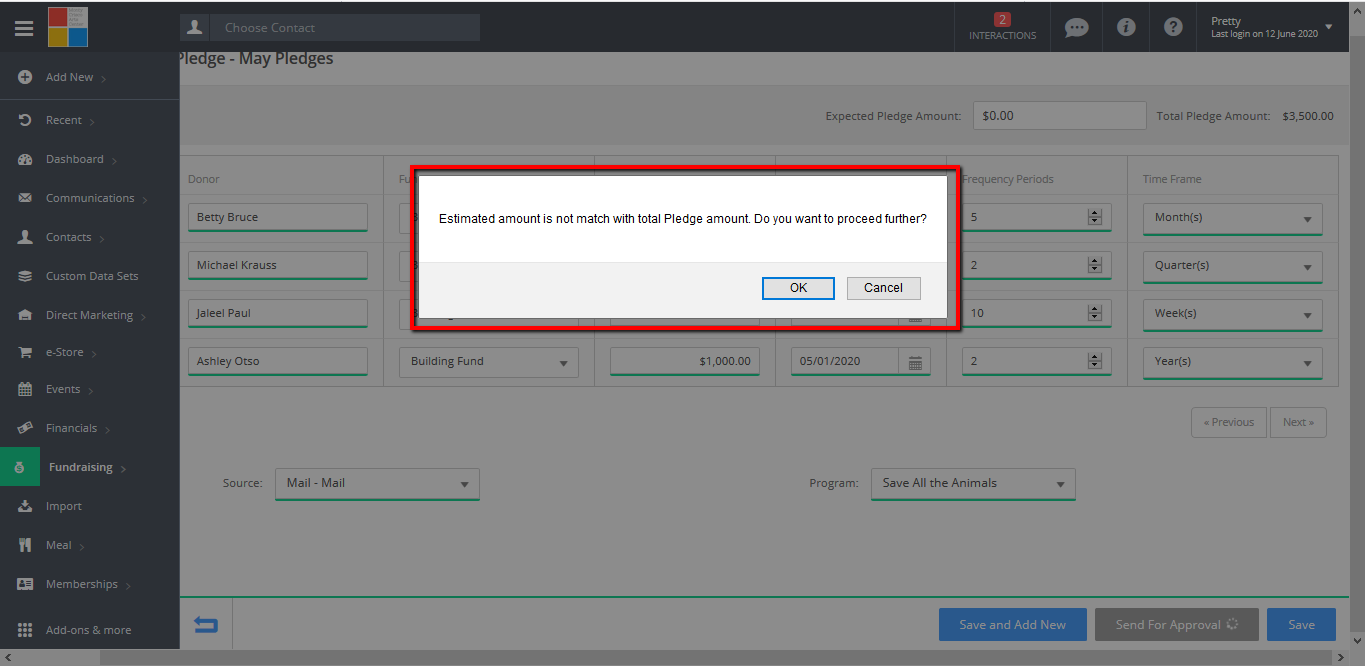
- If the Estimate Gift Amount and Total Gift Amount fields do not match, you will receive a warning message. Click OK to process the batch as is/without making any changes. Click Cancel to go back and make changes to the data entry/pledges.
- If the batch was assigned to self, the pledge batch will instantly approve. You will see this on Tab #1: Batch Pledge Entry with a status of Completed.
- If the batch was assigned to someone other than the batch creator, the batch will appear on Tab #3: Pending Batch Pledge Approval. The batch creator will need to review the batch and then approve it.
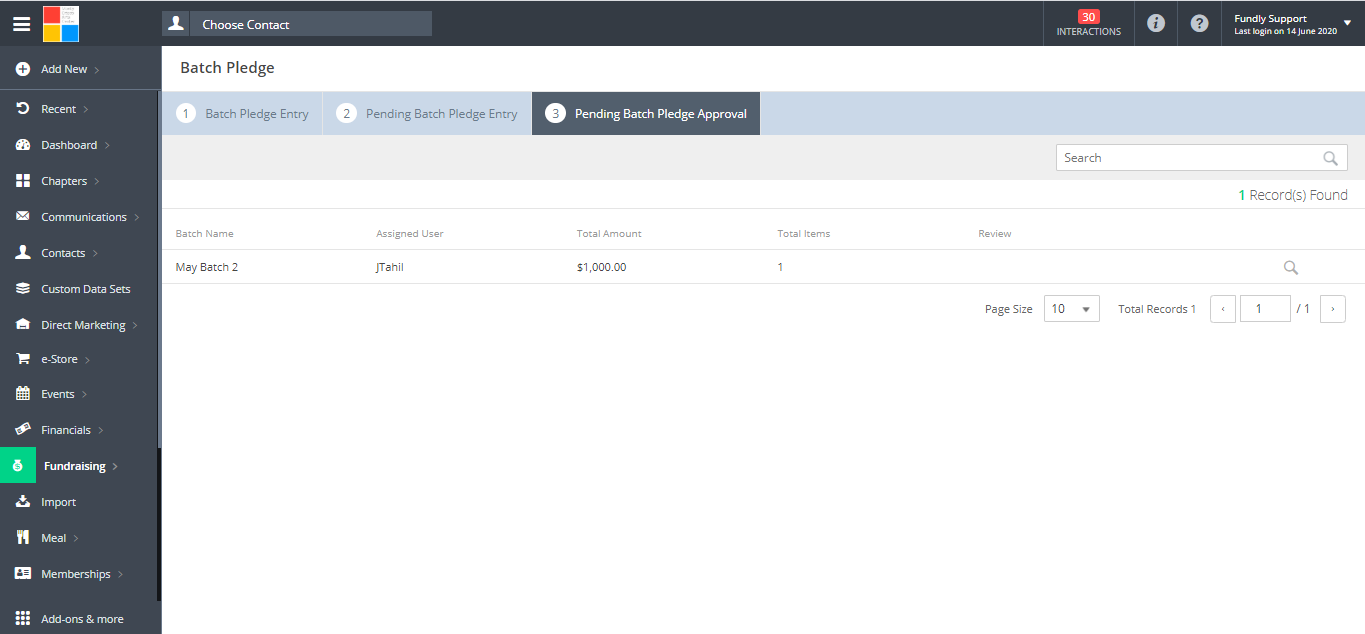
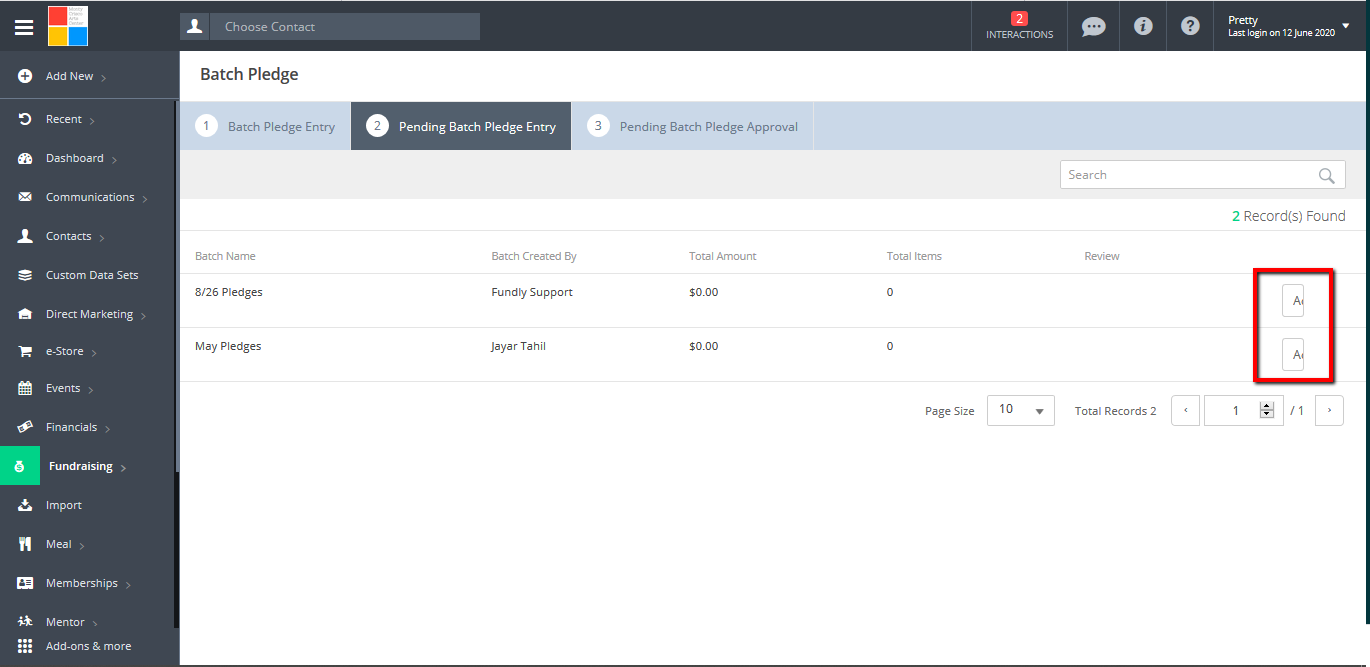
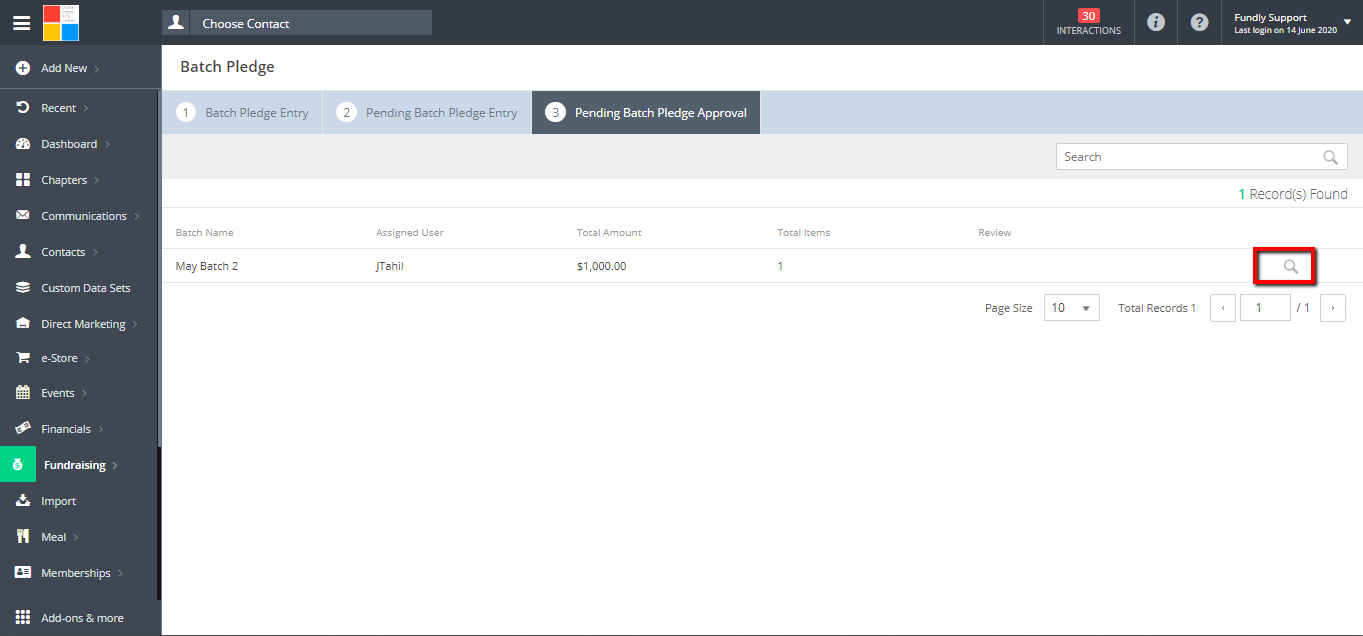
- To review pending approvals, click on Tab #3: Pending Batch Pledge Approval.
- To review a batch, click on the magnifying glass to the right of the entry you with to review.
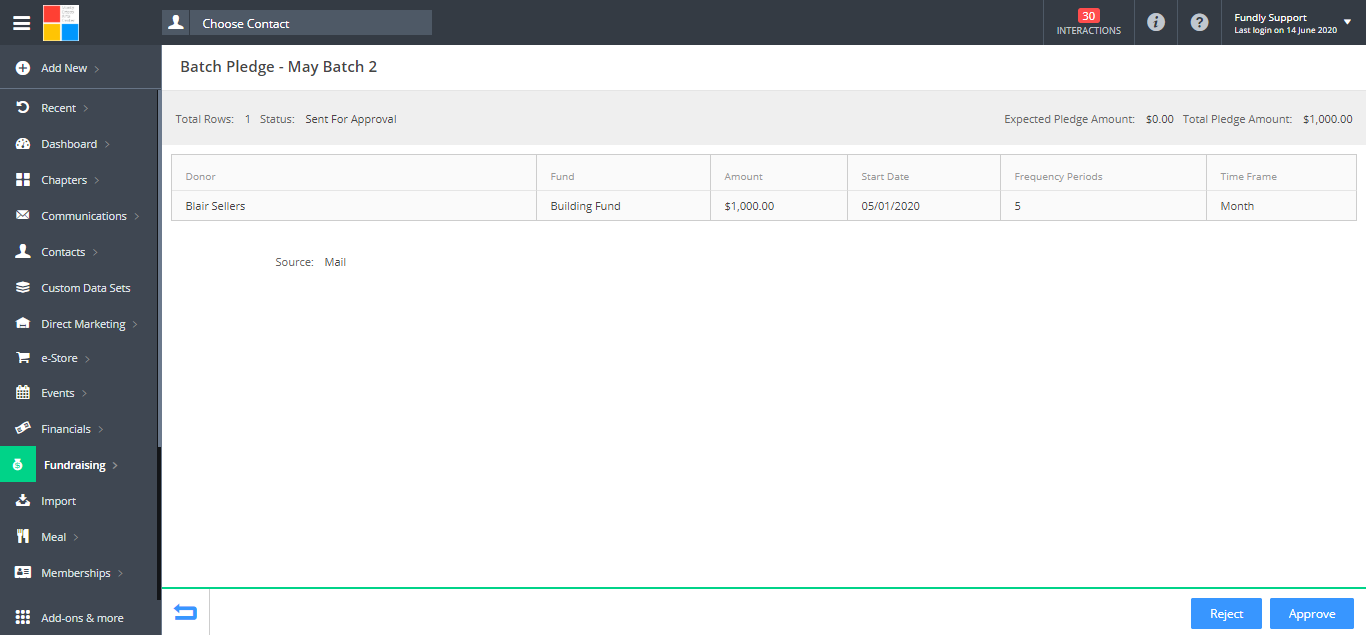
- This will bring up the review screen, showing all pledges entered.
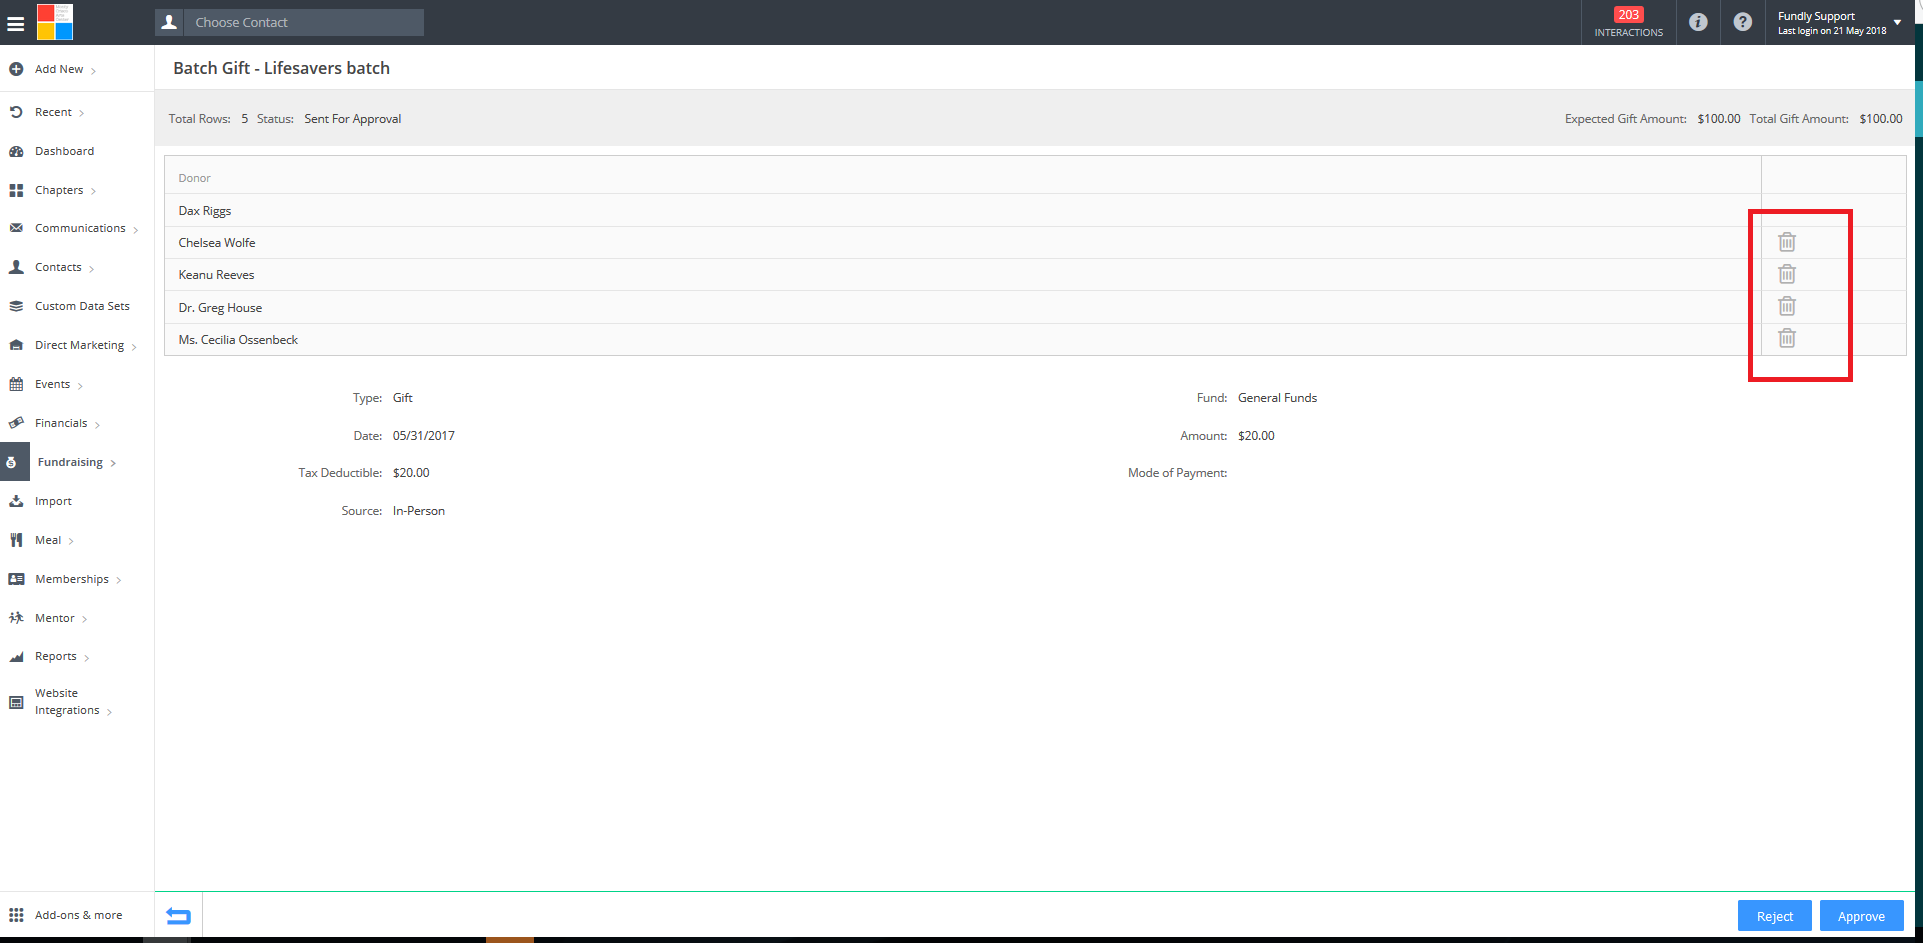
- To remove a single entry, click on the Trashcan to the right of that entry.
- To approve the batch, click on the Approve button in the lower right. This will change the batch's status on Tab #1 to Completed and create all of the pledges in the batch.
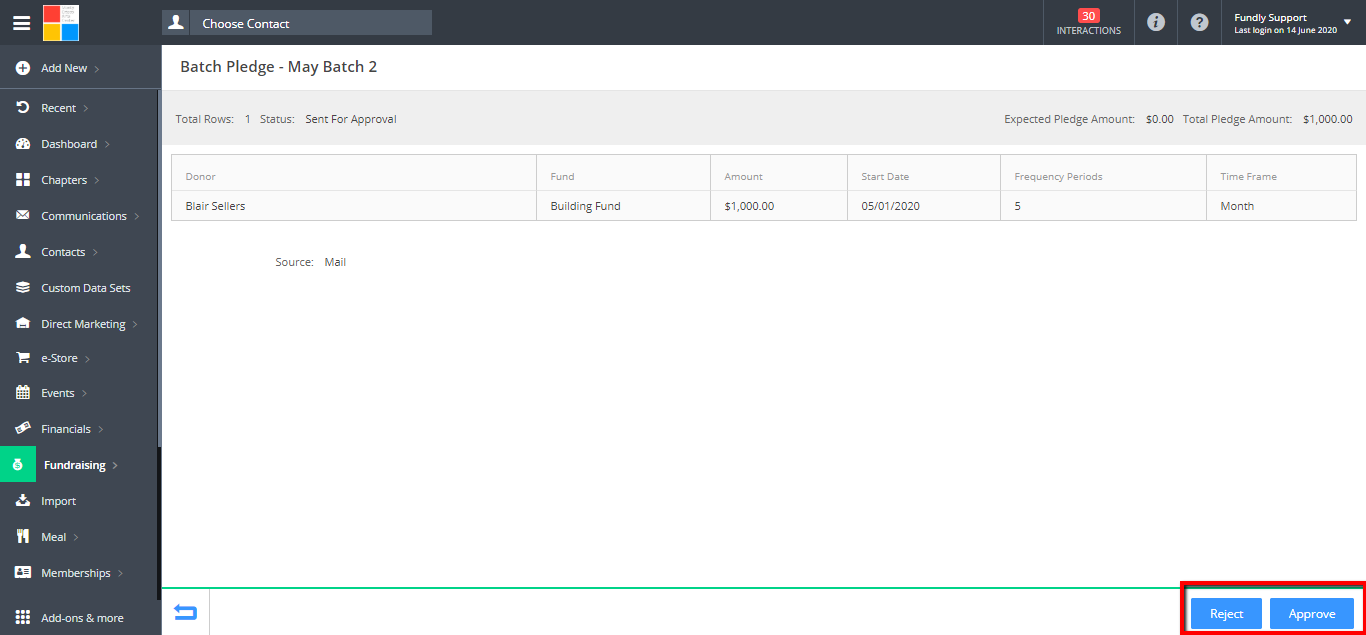
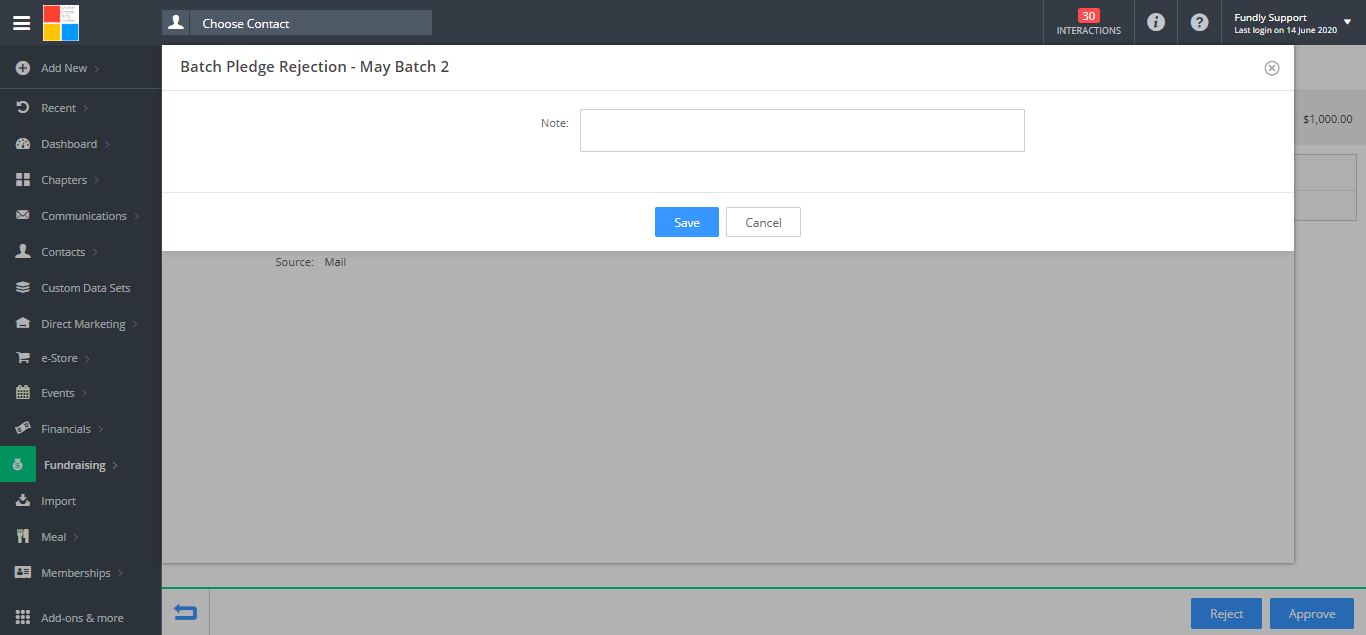
- To reject a batch, click on the Reject button. A box will pop up asking for the rejection reason. Enter the reason and save.
Comments
0 comments
Article is closed for comments.