Contacts: Individuals: Add/Edit Work Information
- This tutorial will cover how to record work information for Individual contacts.
- The Work Information section of a contact’s record is used to indicate any organizations that the individual contact may work for. It can also be used to indicate volunteer positions, internships (paid or unpaid), or other types of organization-individual affiliations.
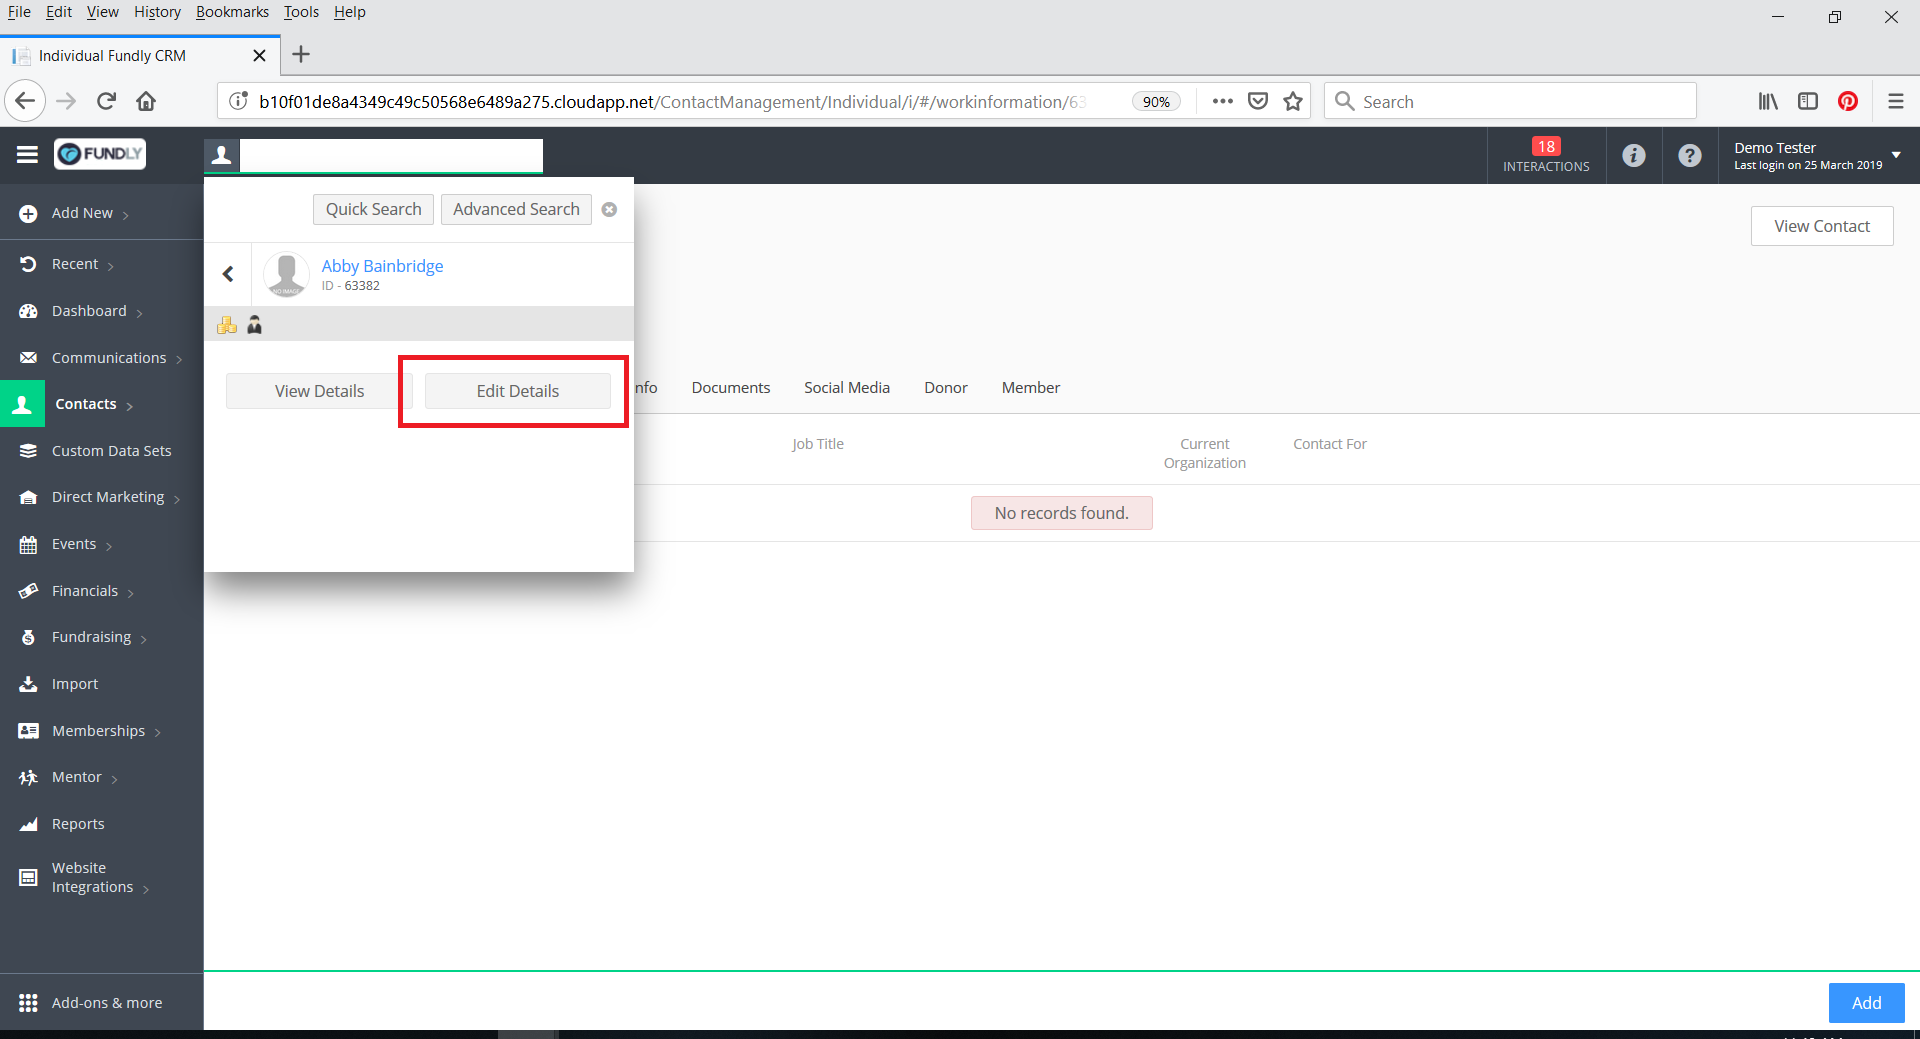
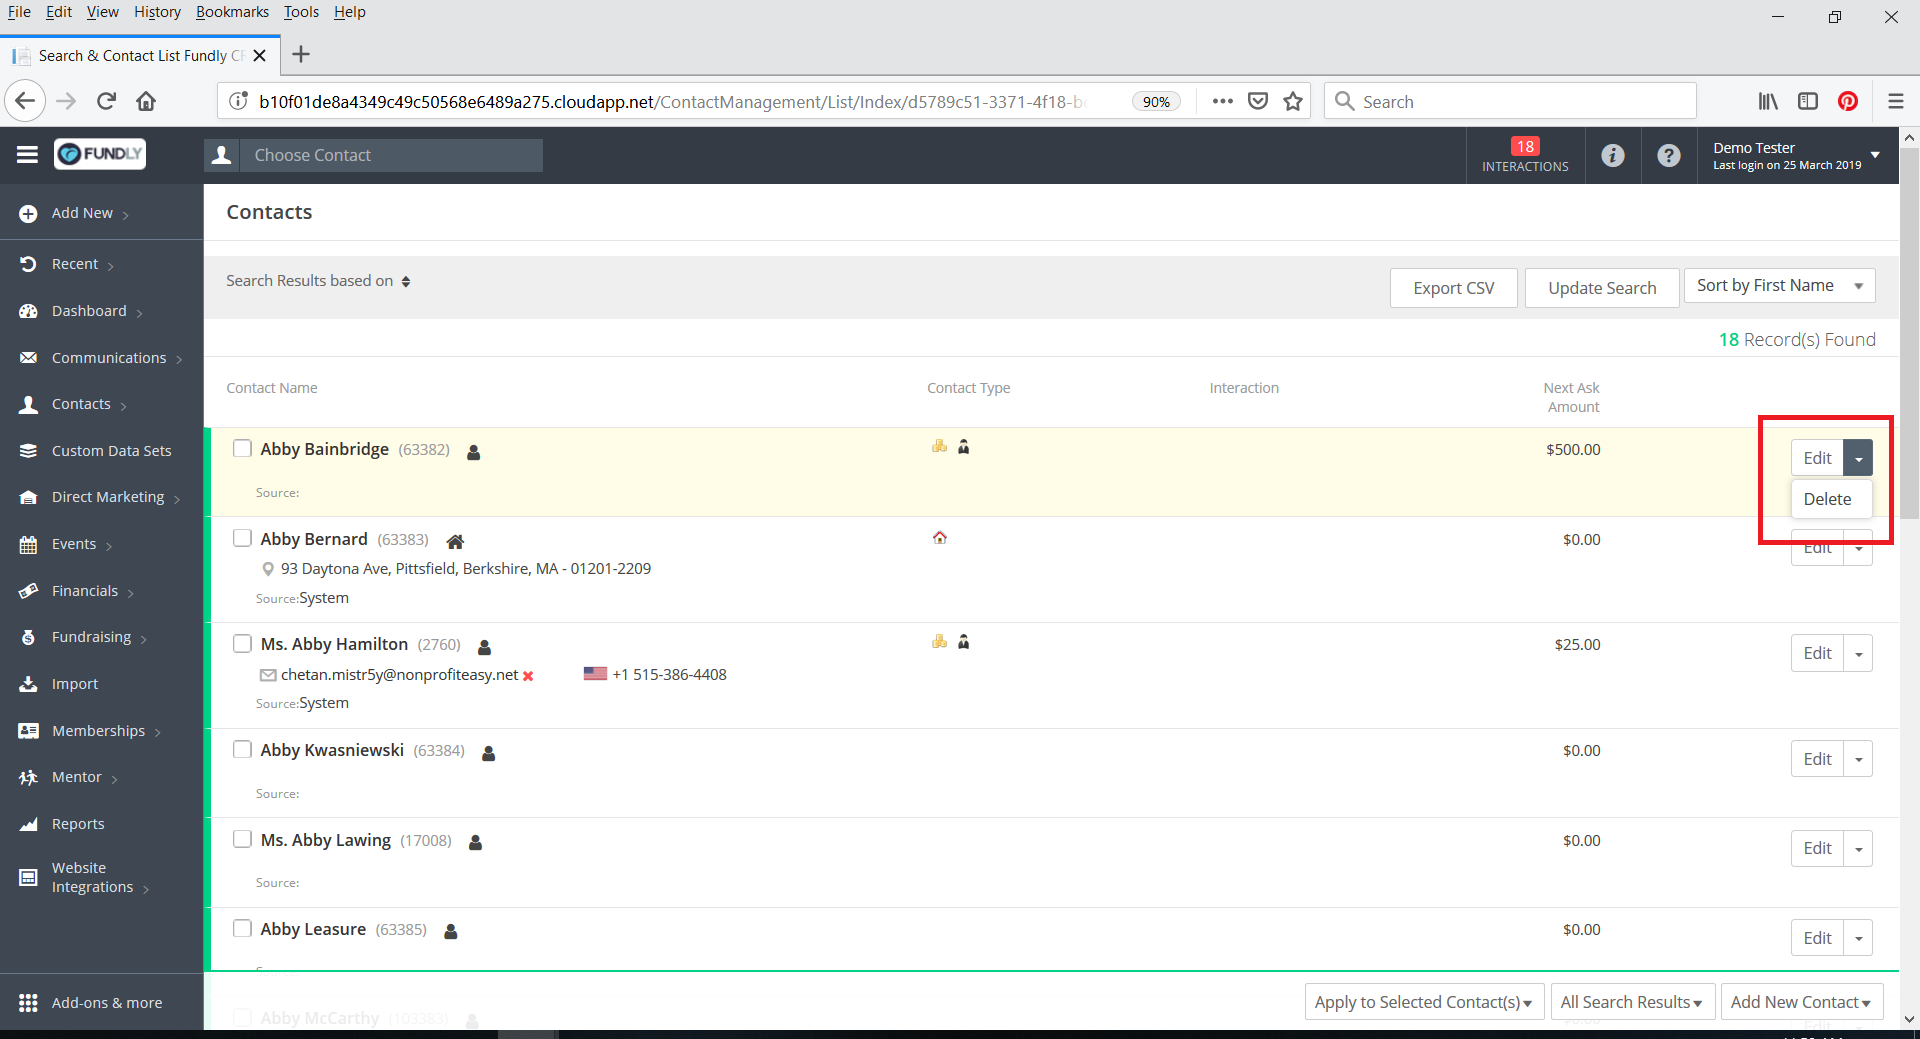
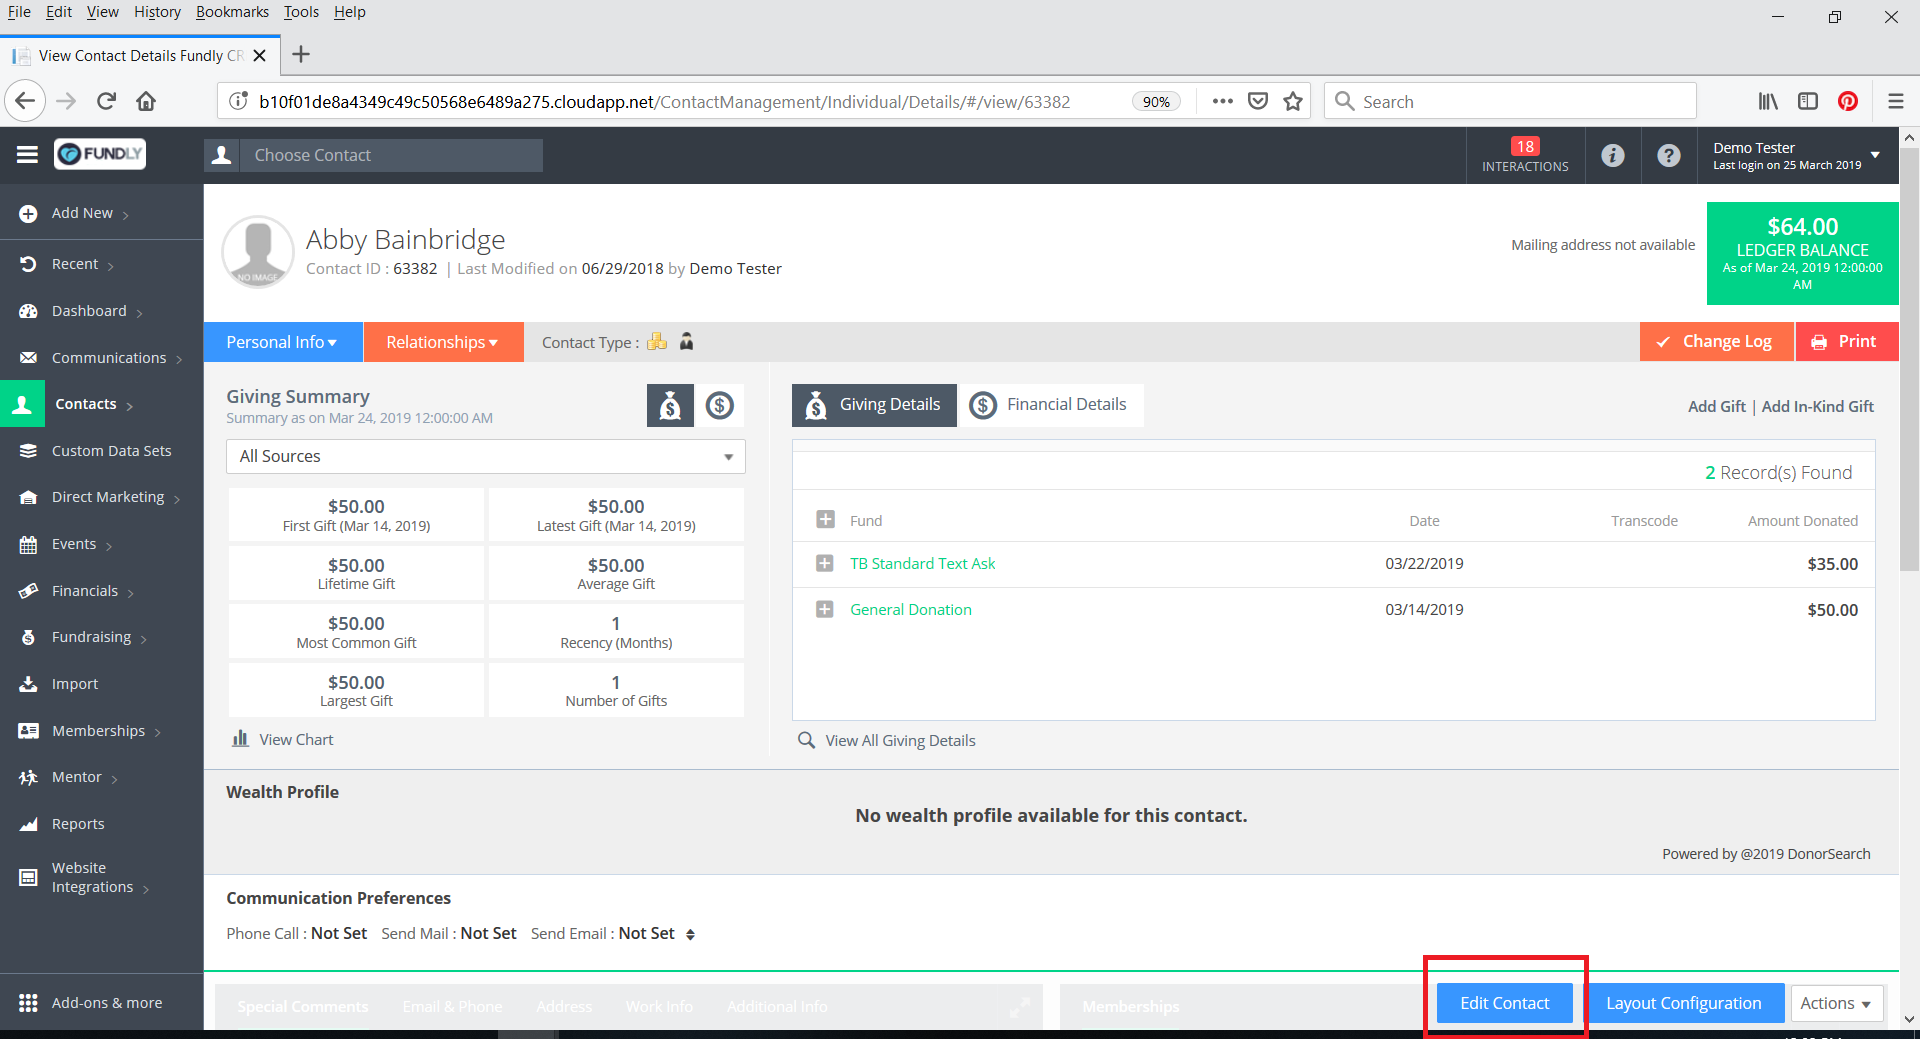
- To view a contact’s current work information, start by navigating to the contact’s record in edit mode (select the blue arrow to the right of the name in direct search results and select Edit Details, select Edit from the Quick Search or Advanced Search results screen, or view the contact record and click the blue Edit button in the lower right hand corner).
OR
OR
- Next, click on the Work Info tab, and you will see a list of all organizations the individual has been associated with. If those organizations are in your system as contact records, you will also see the individual listed on the organization's record as an employee. The employer-employee relationship is a two-way relationship. Add the information to one side of the relationship and it will show in the record on the other side of the relationship.
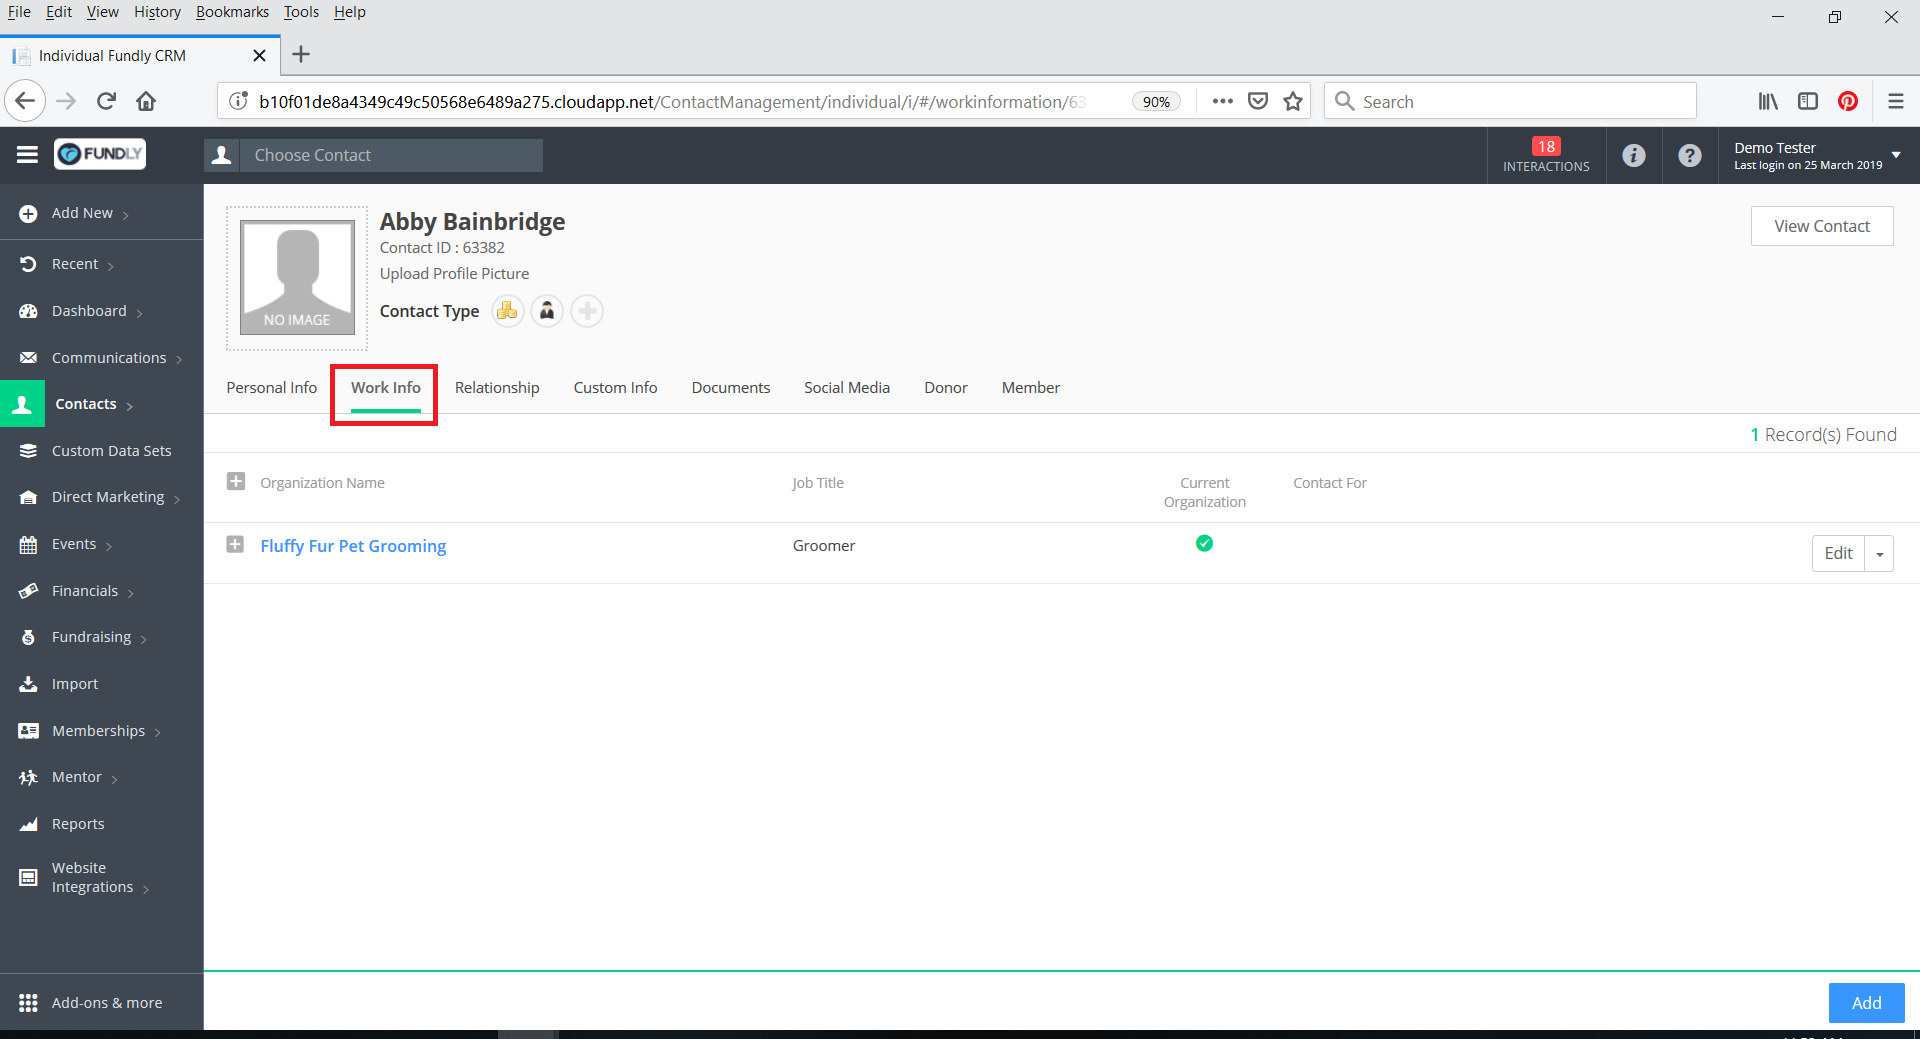
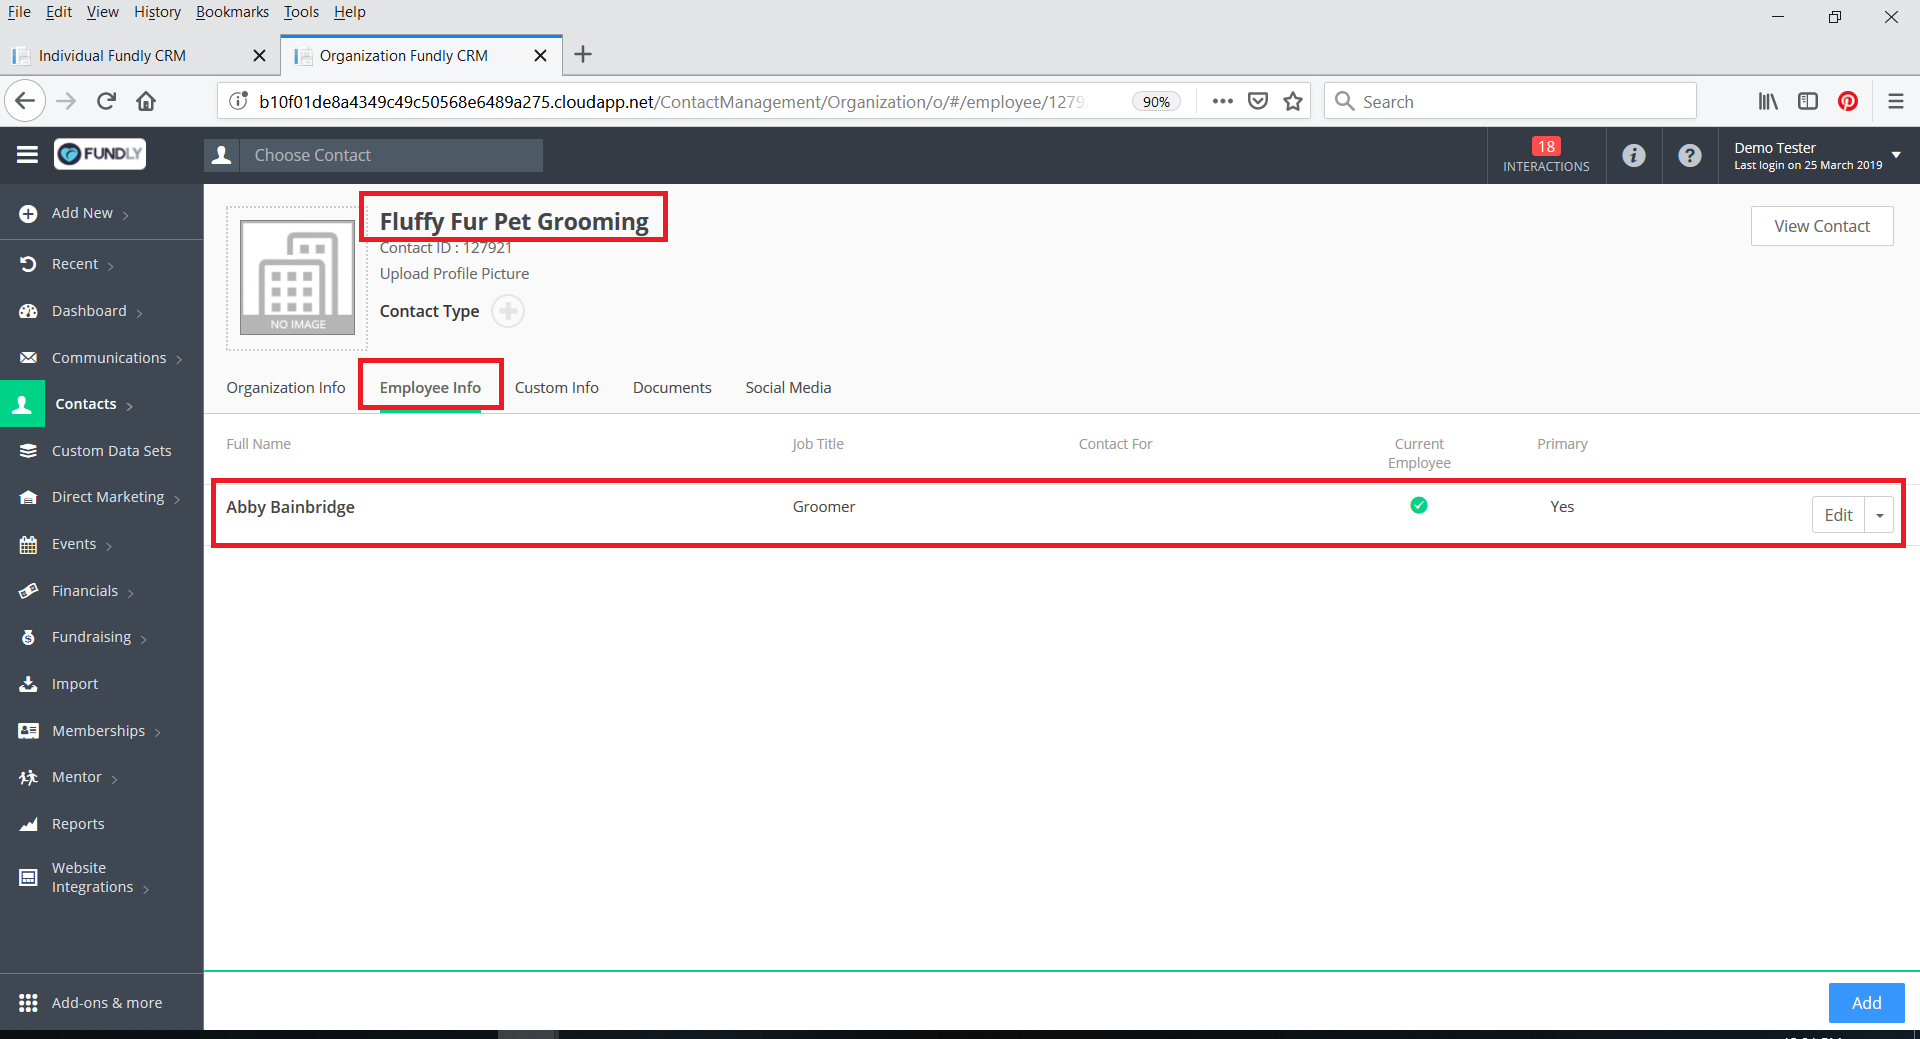
- You can expand the information shown for an organization by clicking on the small + button to the right of a given entry. This will show if the organization/employer also has a record in your Fundly CRM database or if the work information was recorded as static information only. Compare the two entries on Abby's record below for the same organization. One of these records has been recorded as static information - employer name and employee job title and current employment status only. No organizational contact record has been created for the employer. In the other work info record, an organizational contact record has been created for the organization.

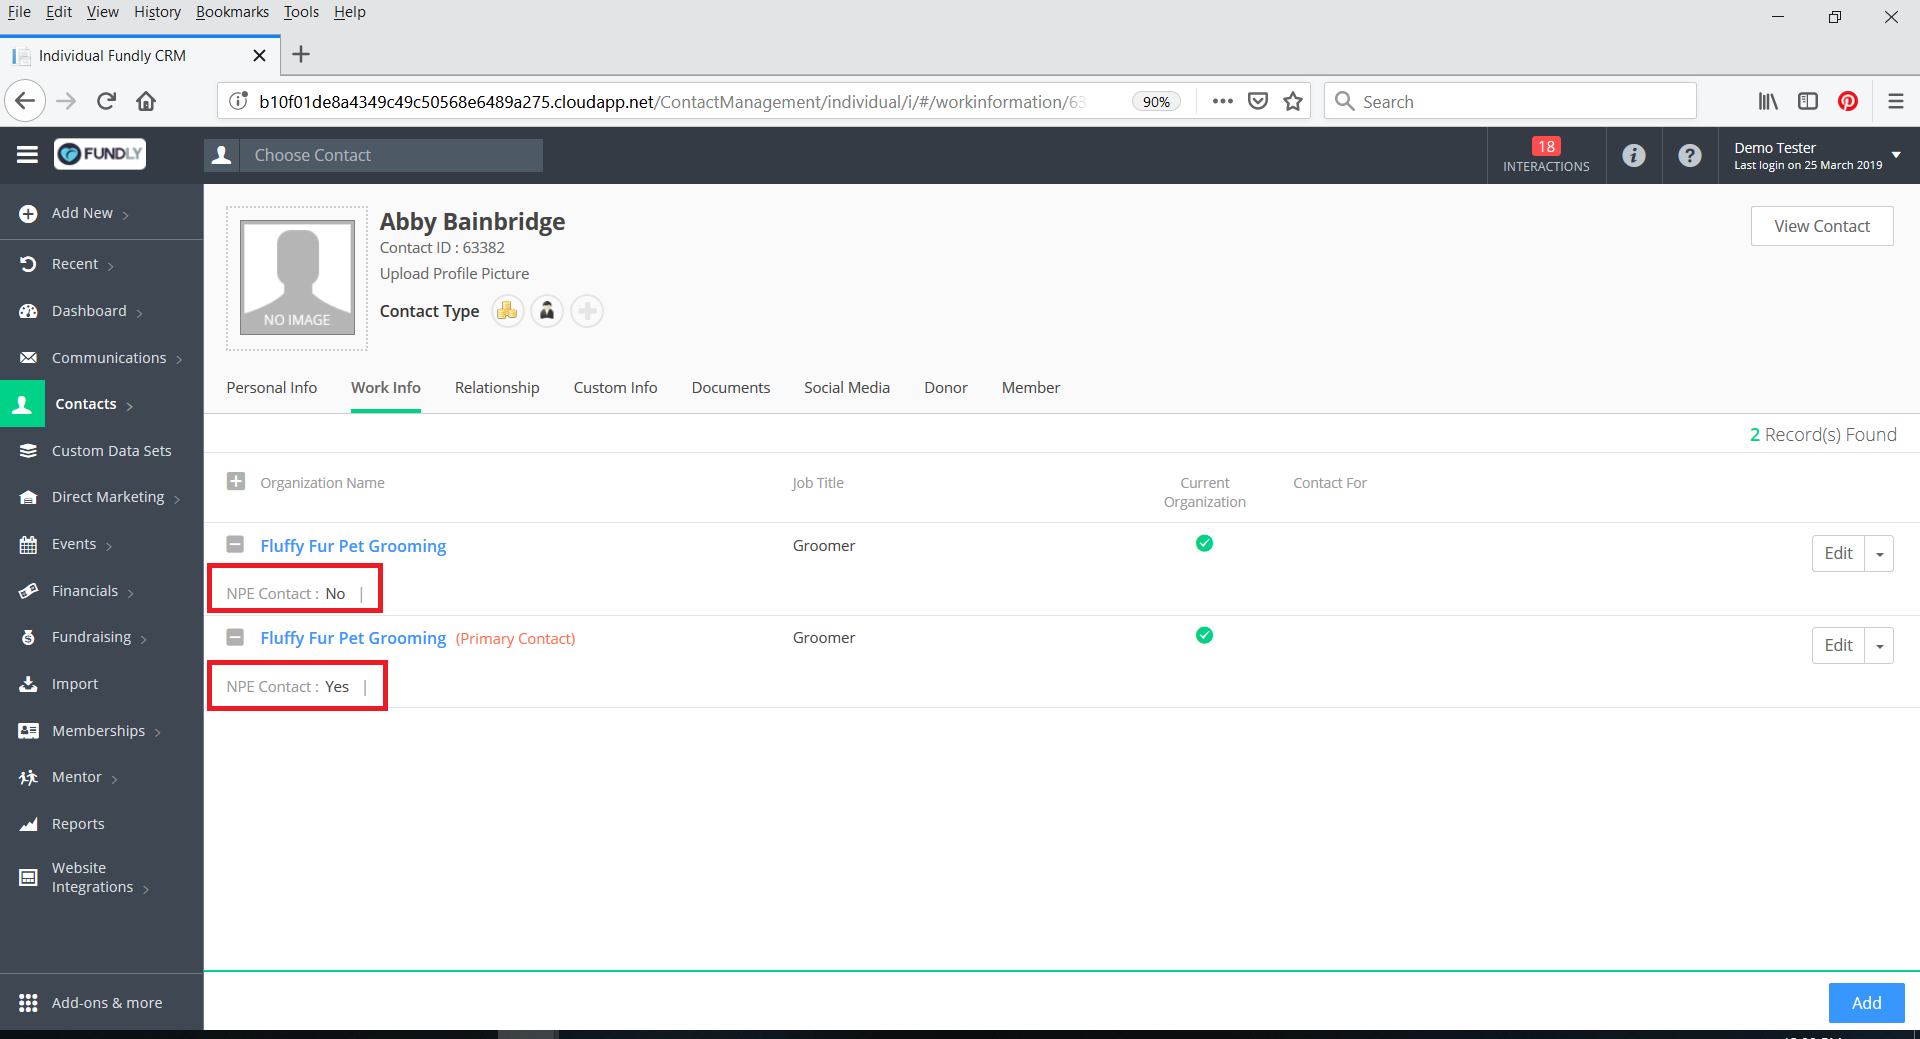
- Additionally, if your create an organizational contact record for the employer, you can indicate if the individual is the primary contact for that organization. You will see that indicated in red next to the employer name in Work Info tab.

- You can select whether or not the person currently works for any of the organizations listed by toggling the green Current Organization check mark (you can also update this information by clicking the Edit button on the right).

OR
- To edit an existing organization entry click on the Edit button to the right of the appropriate entry, and the configuration screen will be opened again.

- To delete an organization entry, click on the drop to the right of the organization name and click on Delete. Once you confirm the change, the employee/employer relationship will be removed and the organization will be permanently removed from the individual’s record (and the individual from the organization's name).
- Removing an organization from an individual’s work information will not delete the organization from your system. It will just remove the work relationship between the individual and the organization. Similarly, removing an employee from an organization contact record doesn't delete the individual contact record.
- There are three ways to add Work Information to an individual contact record:
- Add work information to the contact's record on the Work Info tab (See Step #13 below).
- Add a work address to the contact's record on the Personal Info tab (see Step #14 below).
- Add the individual as an employee on the Organization's Employee Info tab (see Step #15 below).
- It doesn't matter which method you use - they are all equal/will have the same result. However, no one method will allow you to add all of the possible information at once. For instance, using the individual's Work Info tab will give you the opportunity to add the organization's address to the employee's record if the organization already has an address on its record. If not, then you will still need to add the work address to the individual's record in a separate step (by using the individual's personal info tab or adding the individual as an employee on the organization's record). On the other hand, using the "Add Work Address" method will allow you to add the employer name and address to the individual contact record, but you won't be able to set "contact for" and "is primary contact' information in the same step. You will need to edit the entry on the Work Info tab to add that data.
- To add work information using method #1: Add work information to the contact's record on the Work Info tab:
- While editing the contact record, click on the Work Info tab.

- Click the Add button in the lower right of the screen.
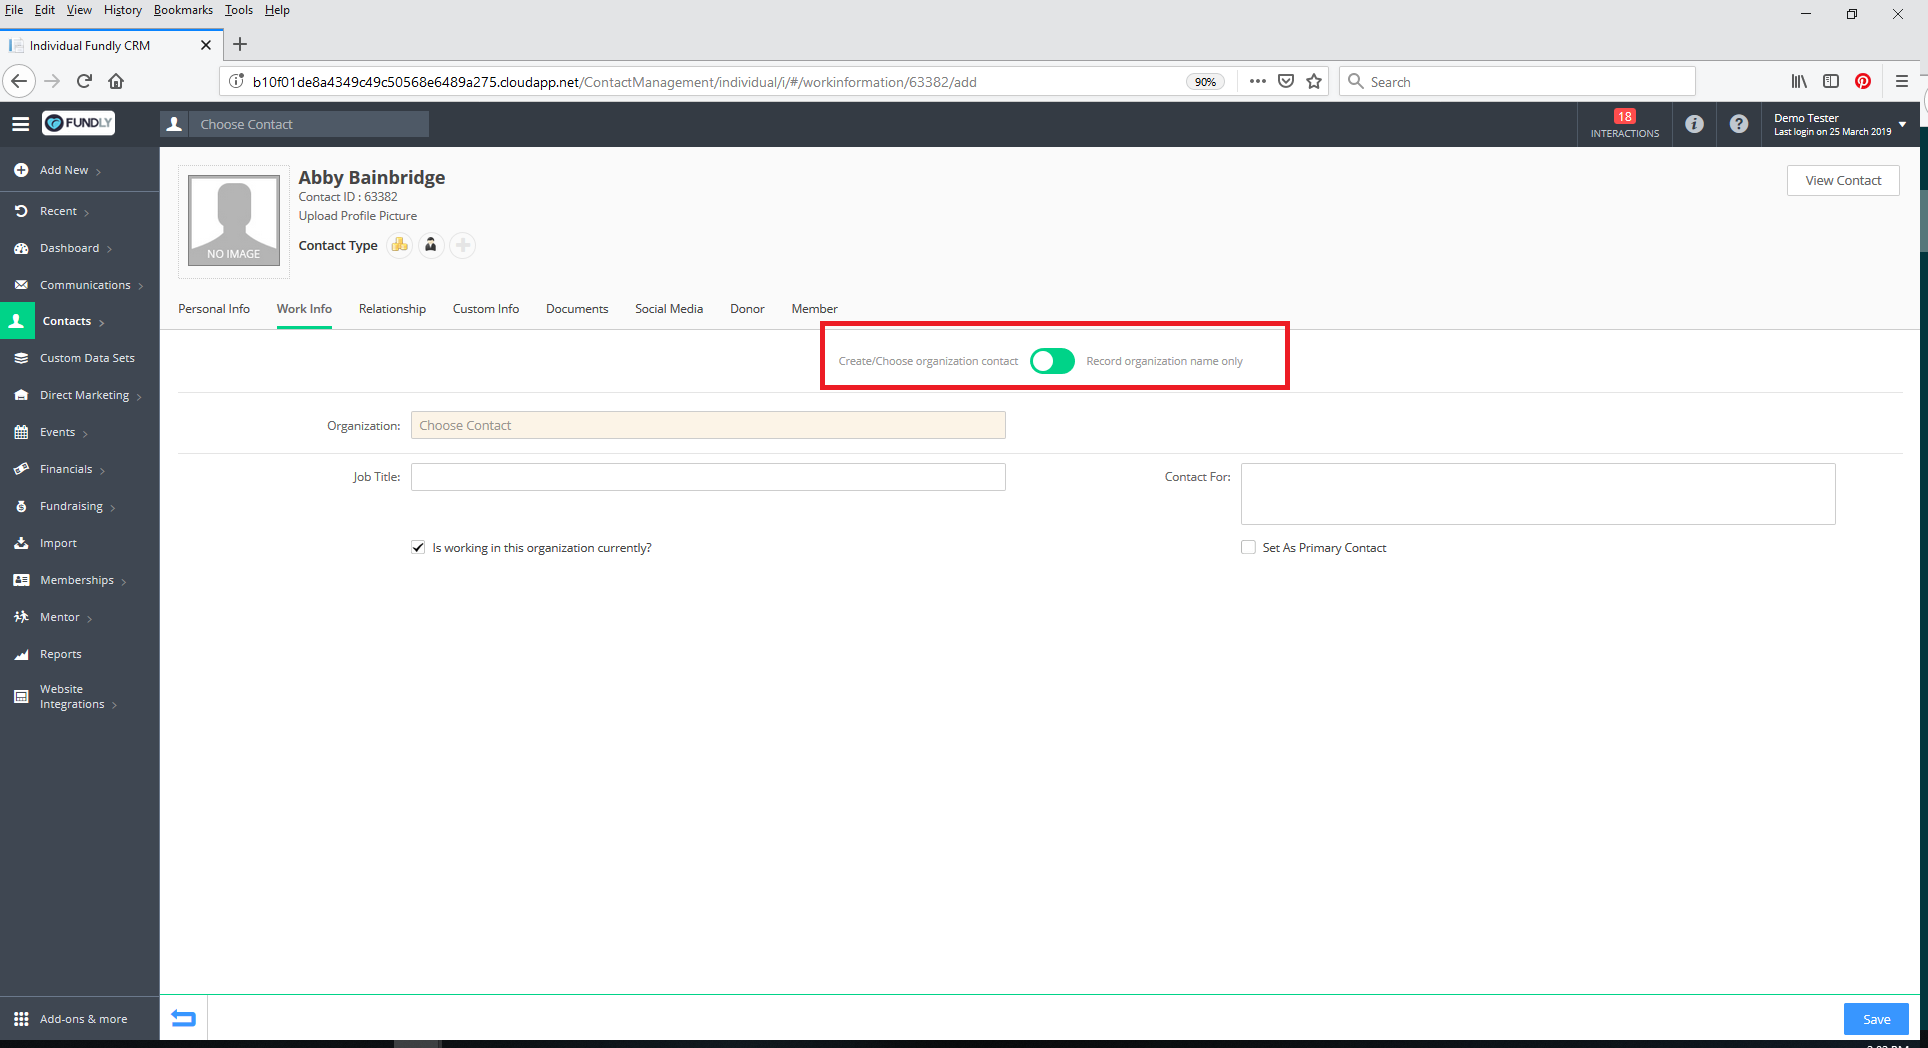
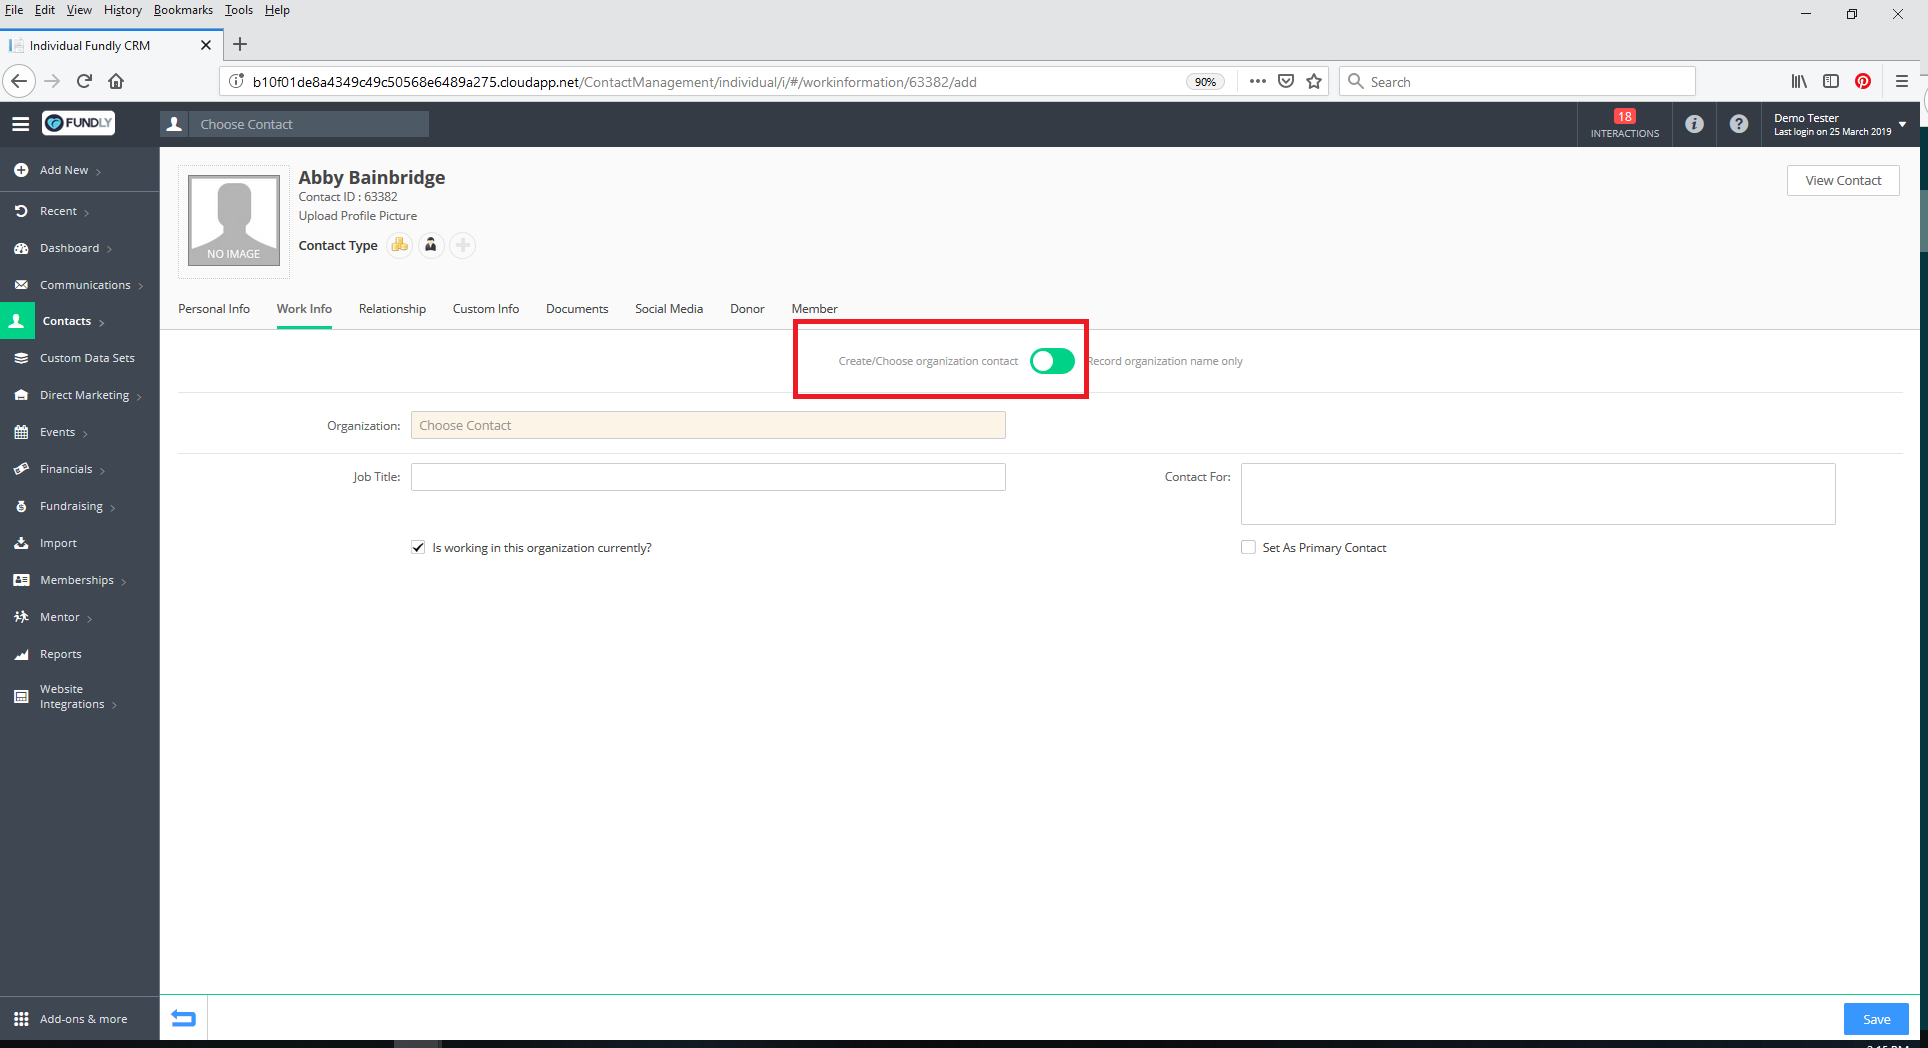
- Start by selecting whether you are adding static date (not creating an organizational contact record in your CRM) or adding a new organizational contact to your system.
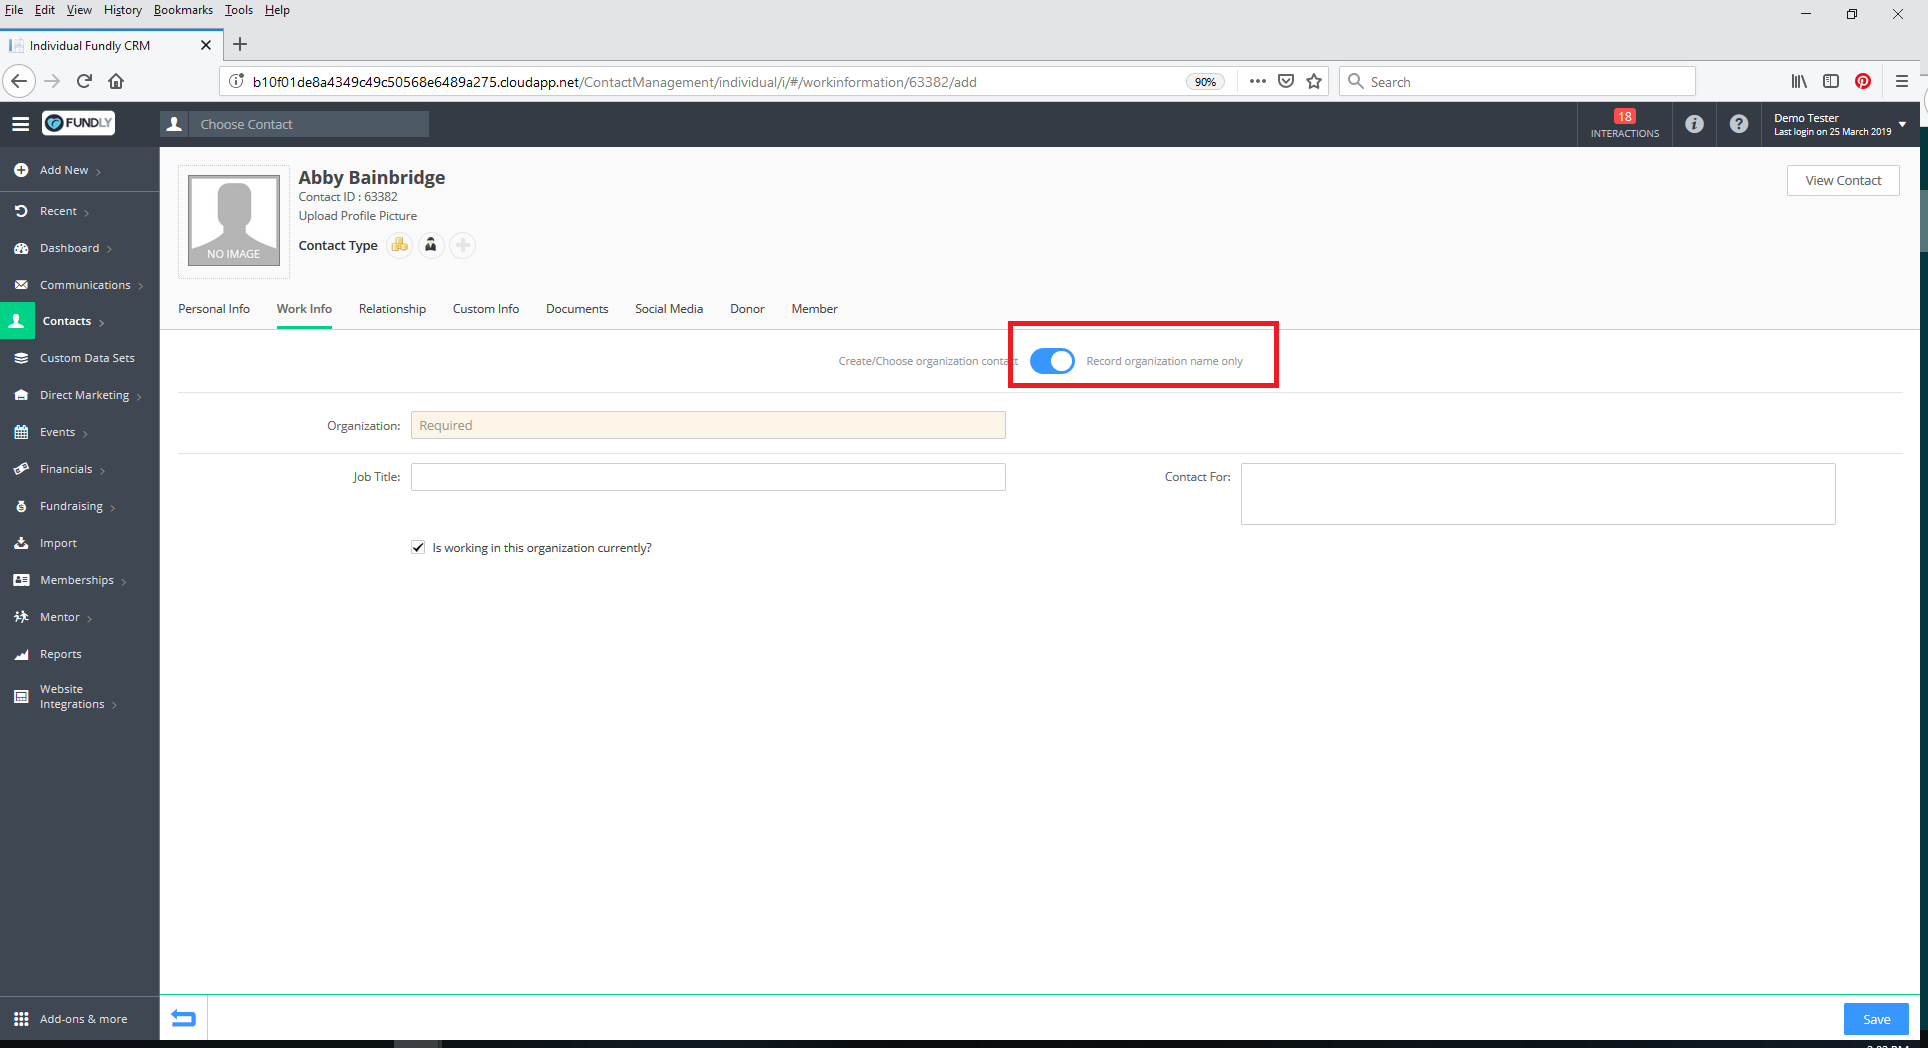
- If entering static data:
- This method will not allow you to create/add NEW addresses for the Organization (unlike Method #1), but you will be able to associate existing organizational addresses to the employee with this method.
- You will have a limited ability to associate the Organization address to the mailing address of the individual contact/employee. If the individual contact already has a mailing address on file, you cannot use this method to update/change the employee's mailing address.
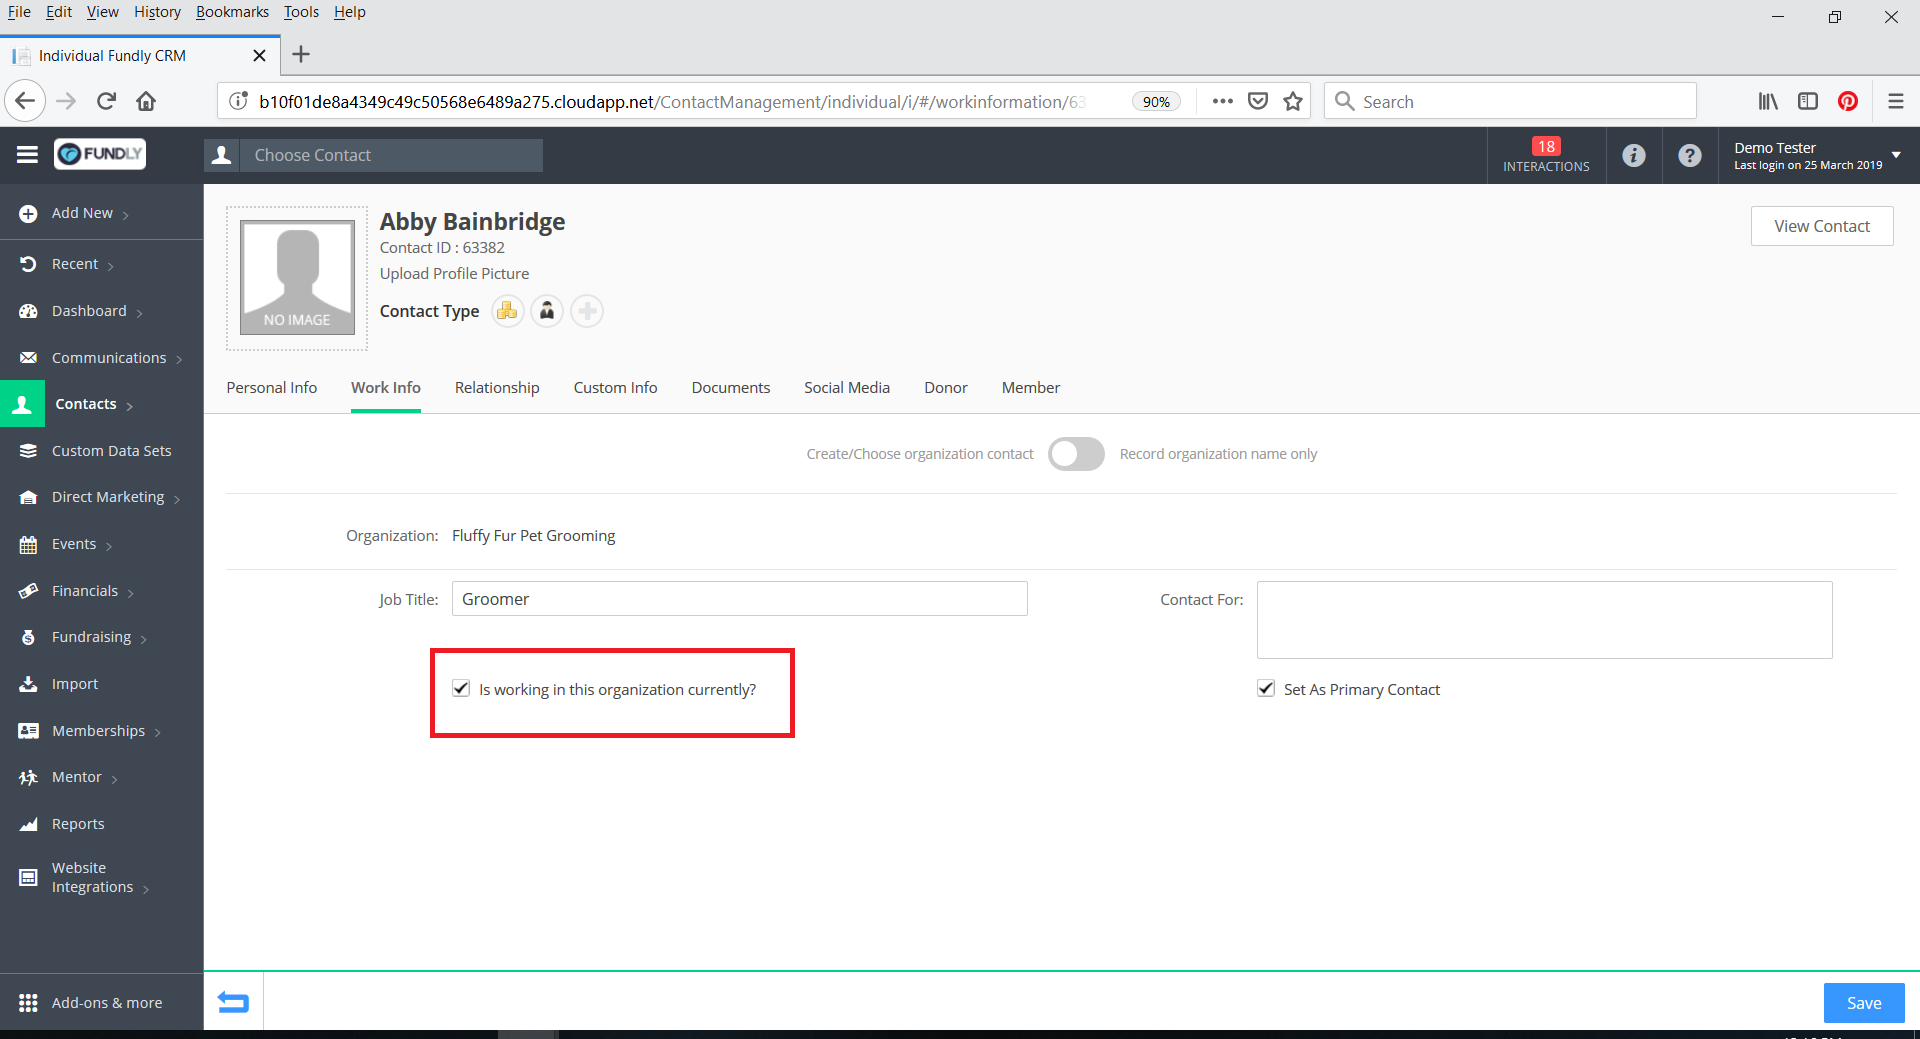
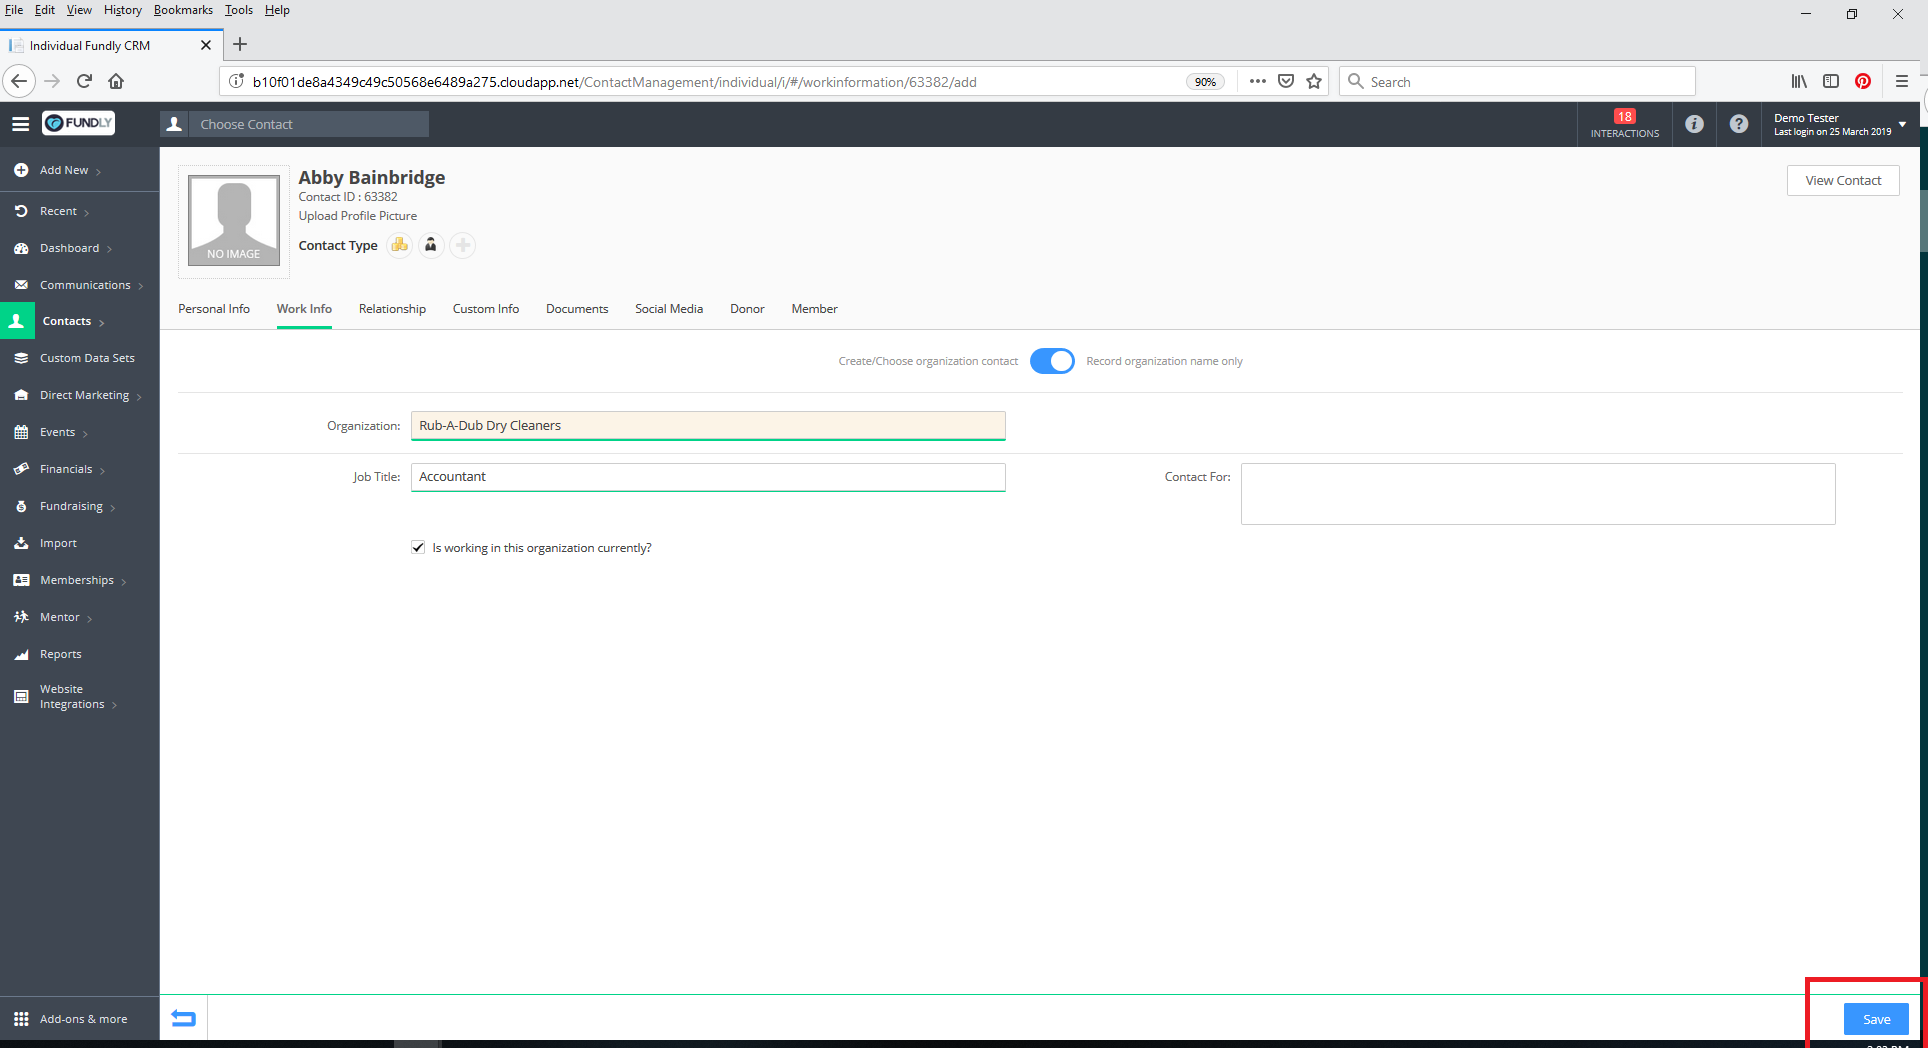
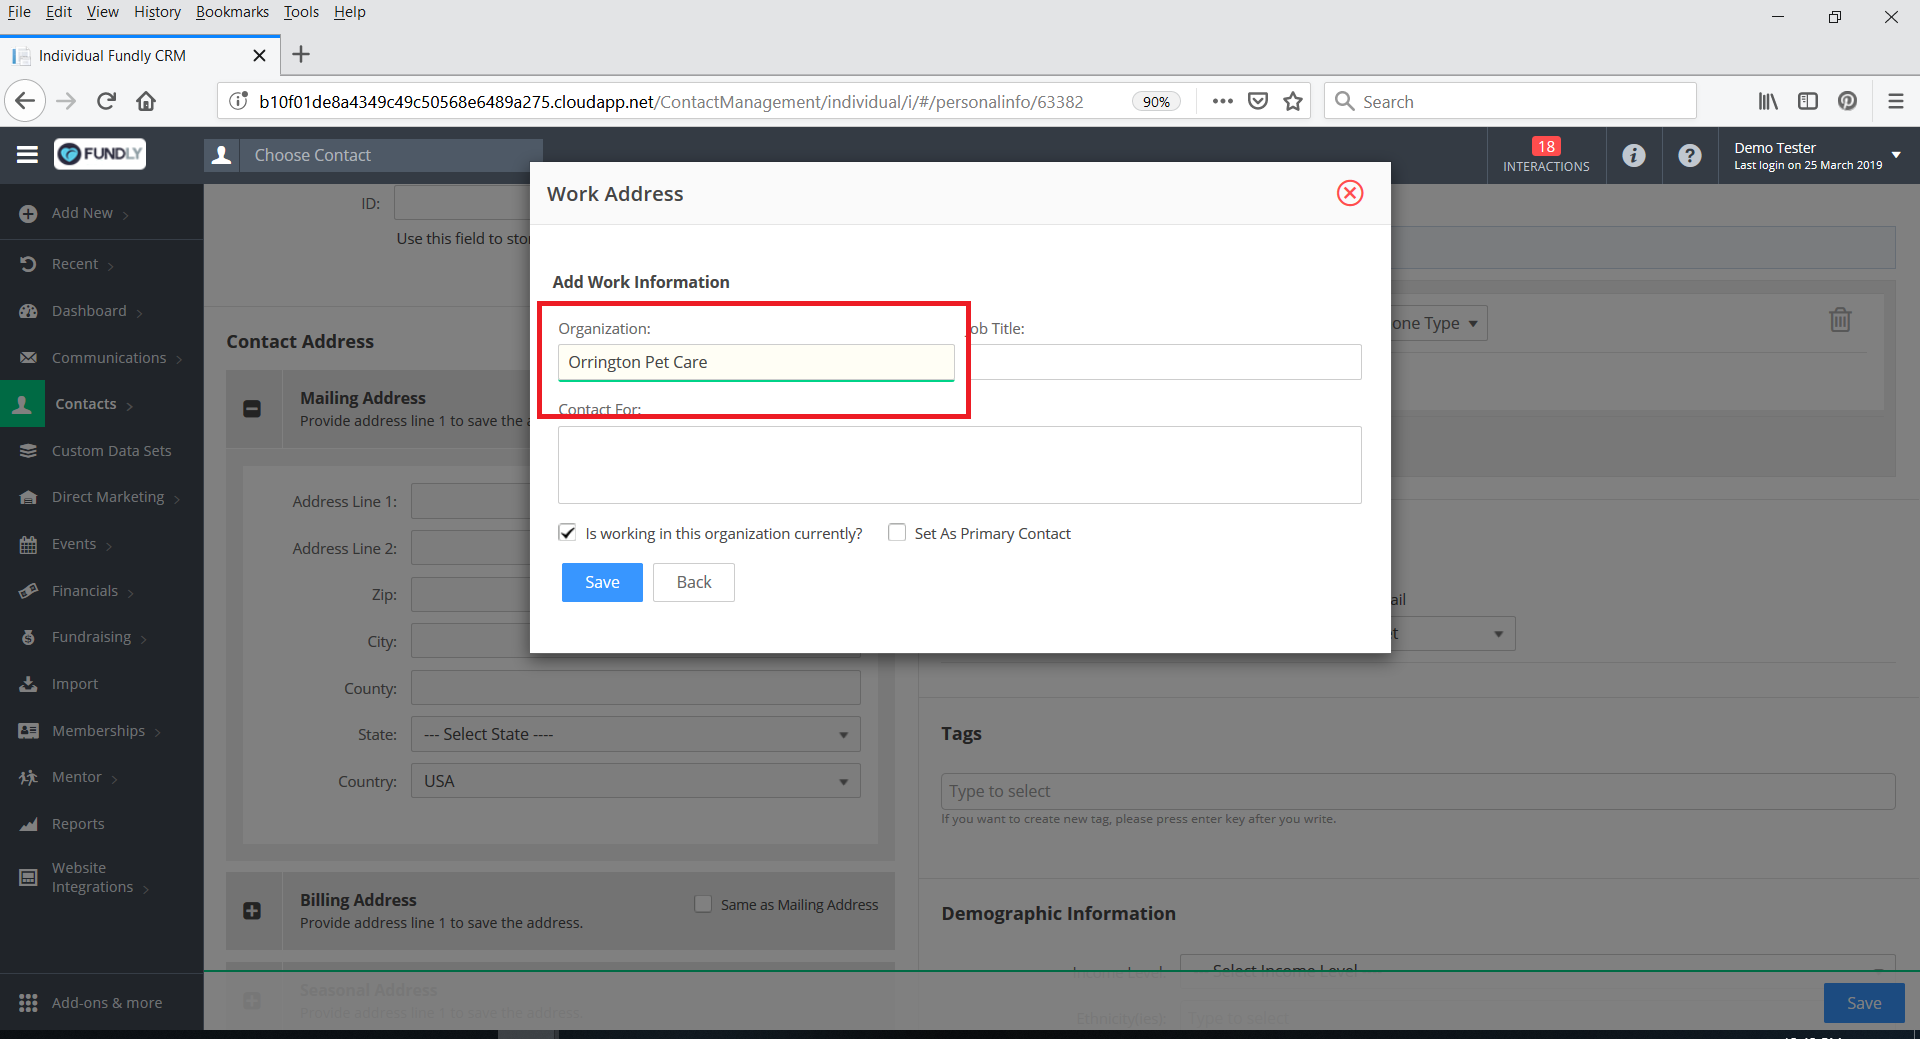
- Type in the Organization Name (required), Job Title (optional), Contact For information (what is this individual in charge of at the employer/organization [e.g. billing, grants, sponsorships, guest speaking, etc.]) (optional), and the is working at this organization currently checkbox (optional). Click the blue Save button in the lower right when you have filled in the information to save the work information.
- If creating an organizational contact record:
- Set the create organization record slider to "Create/Choose organization contact"
- Next, start typing in the name of the organization for which you are entering work information for this contact in the Organization field. If the organization already exists in your database, as you type, the name will appear in a drop-down below the Organization field. Select the name off the list of matching organizational contact records.
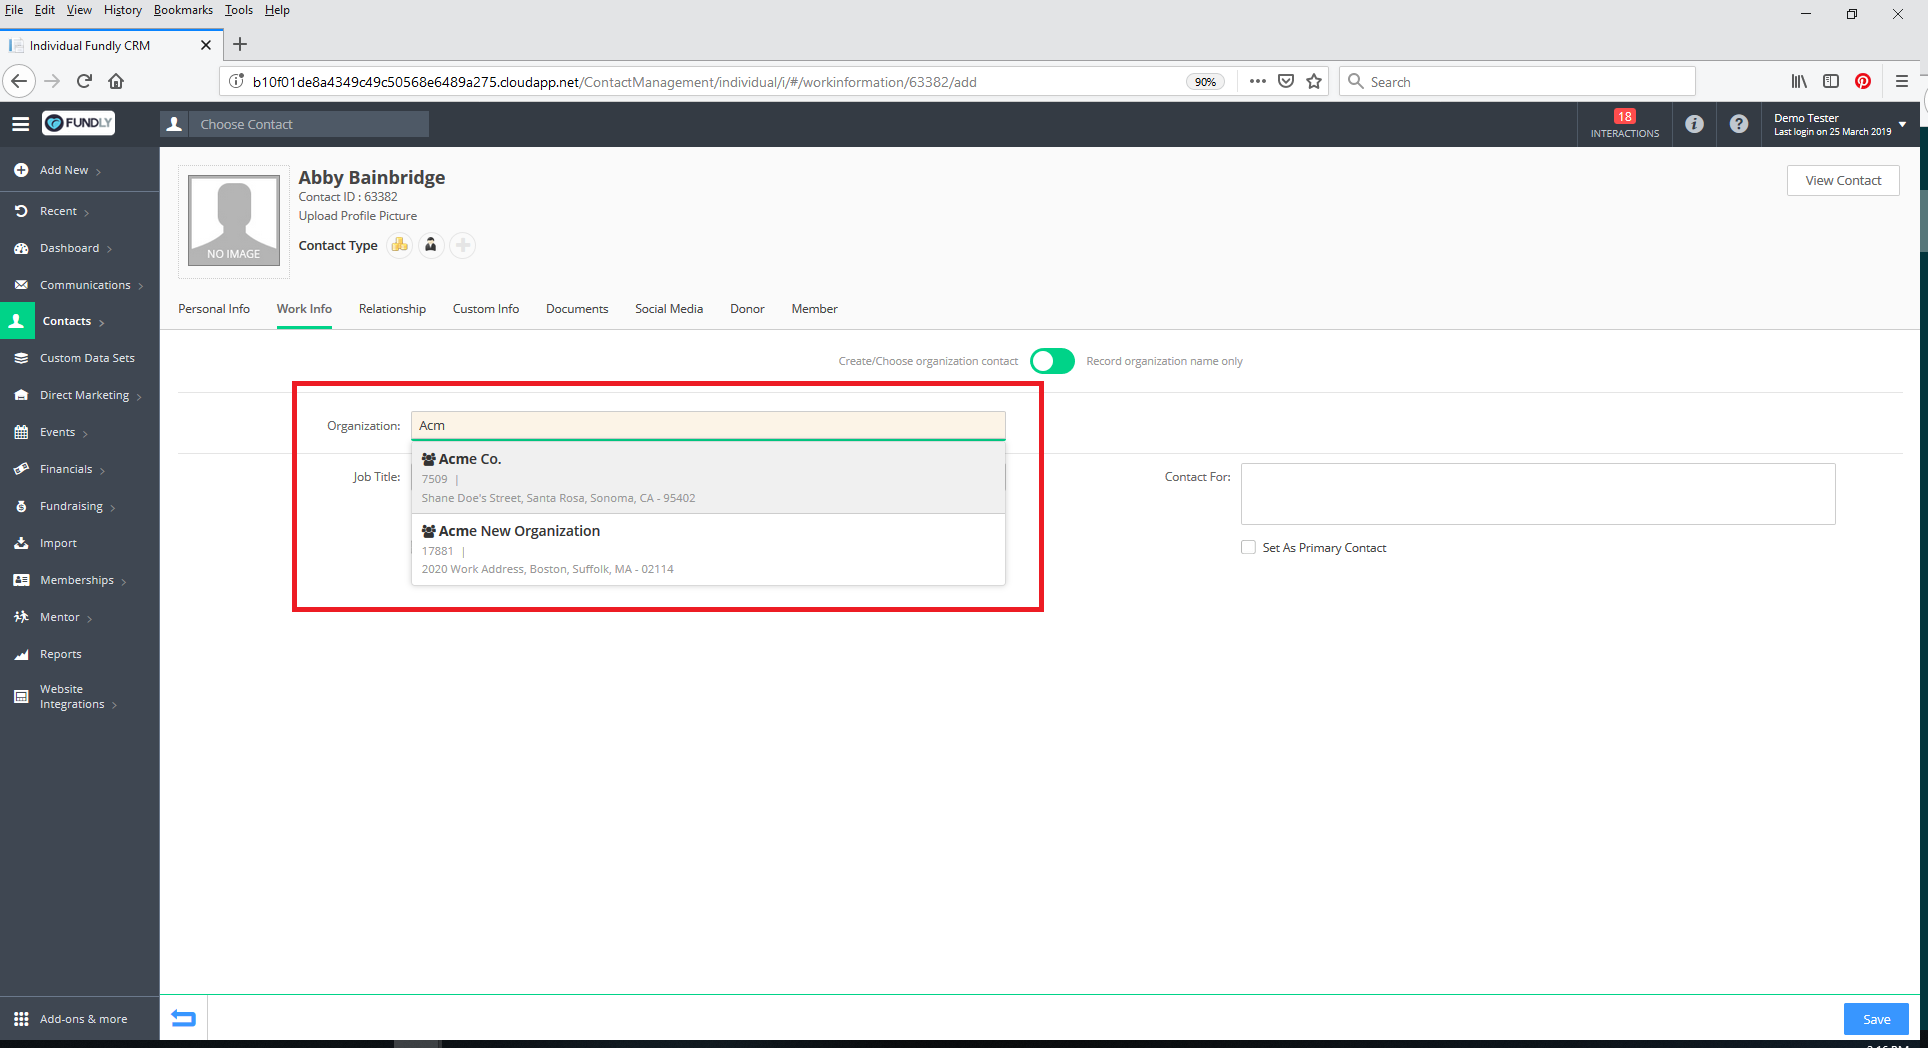
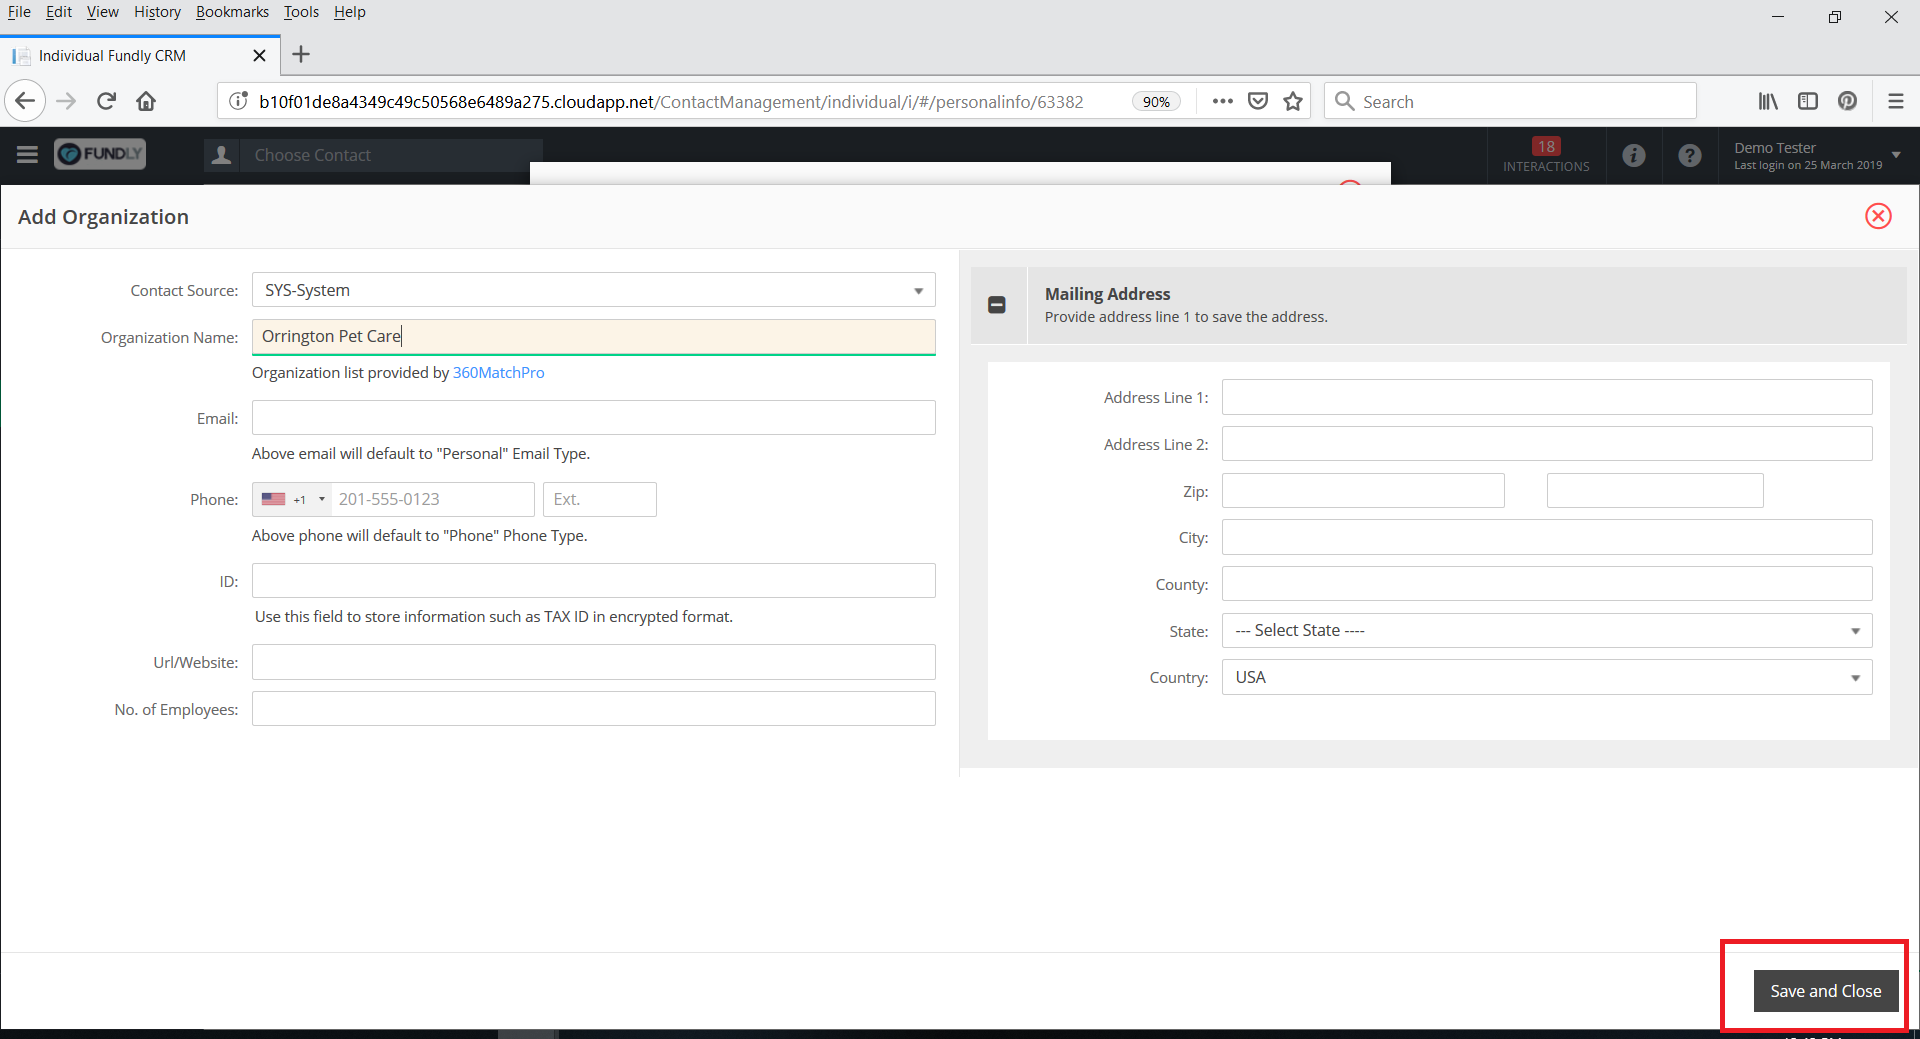
- If the organization does not exist within your database, finish typing the name and hit enter or tab. The Quick Add Organization Contact pop up window will open. Fill in whatever additional information you have about the organization (no additional information is required; only Organization Name is required to create an organizational contact). If you have any questions about Quick Add Organizational Contact, see this tutorial.


- Click Save and Close in the lower right to close the Quick Add contact pop up window and return to the Add Work Information screen.
- Finish filling in the rest of the Work Info - Job Title, Is Working In This Organization Currently, Contact For, and Primary Contact are all optional fields.
- If the organization has one or more addresses on file (Addresses in the Mailing Address or Other Address field; Billing Addresses do not appear here), they will appear on the screen. Use the select buttons to the right of each address to use that address as the individual's mailing address or other address if so desired. This is optional/not required.
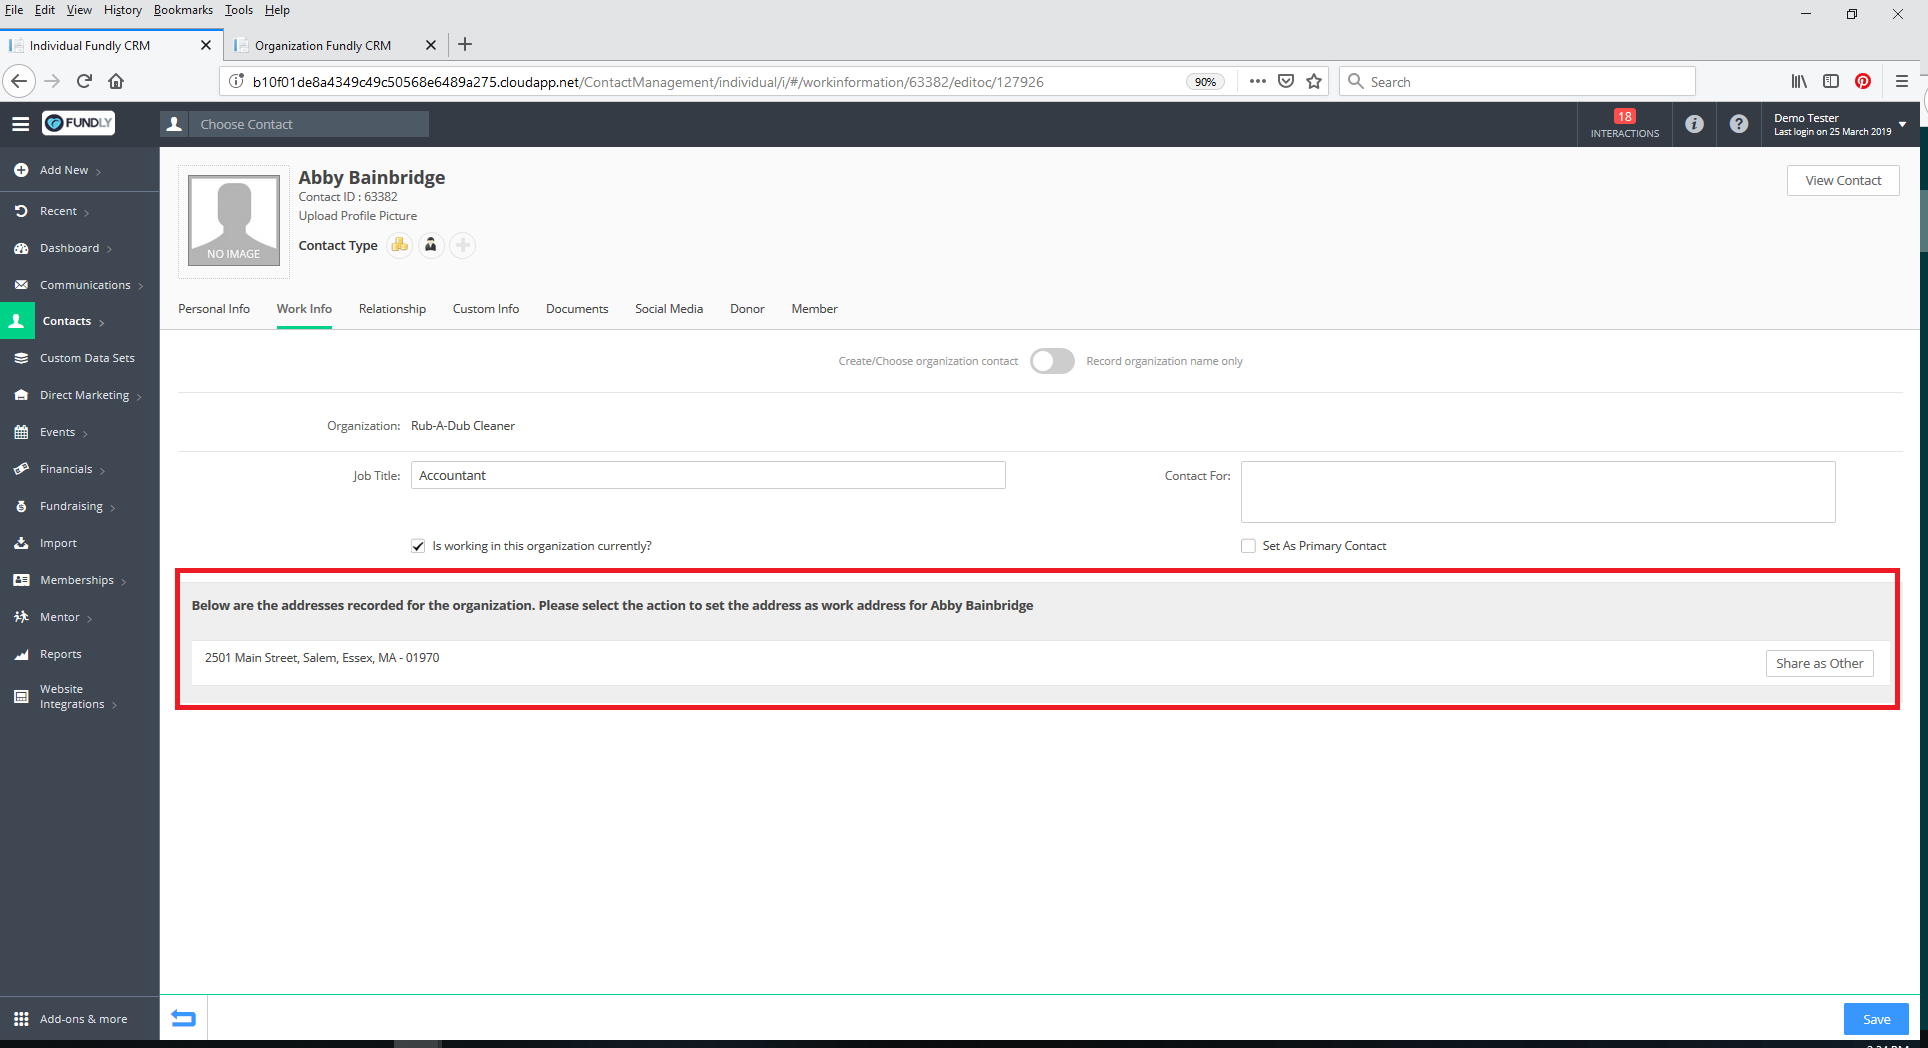
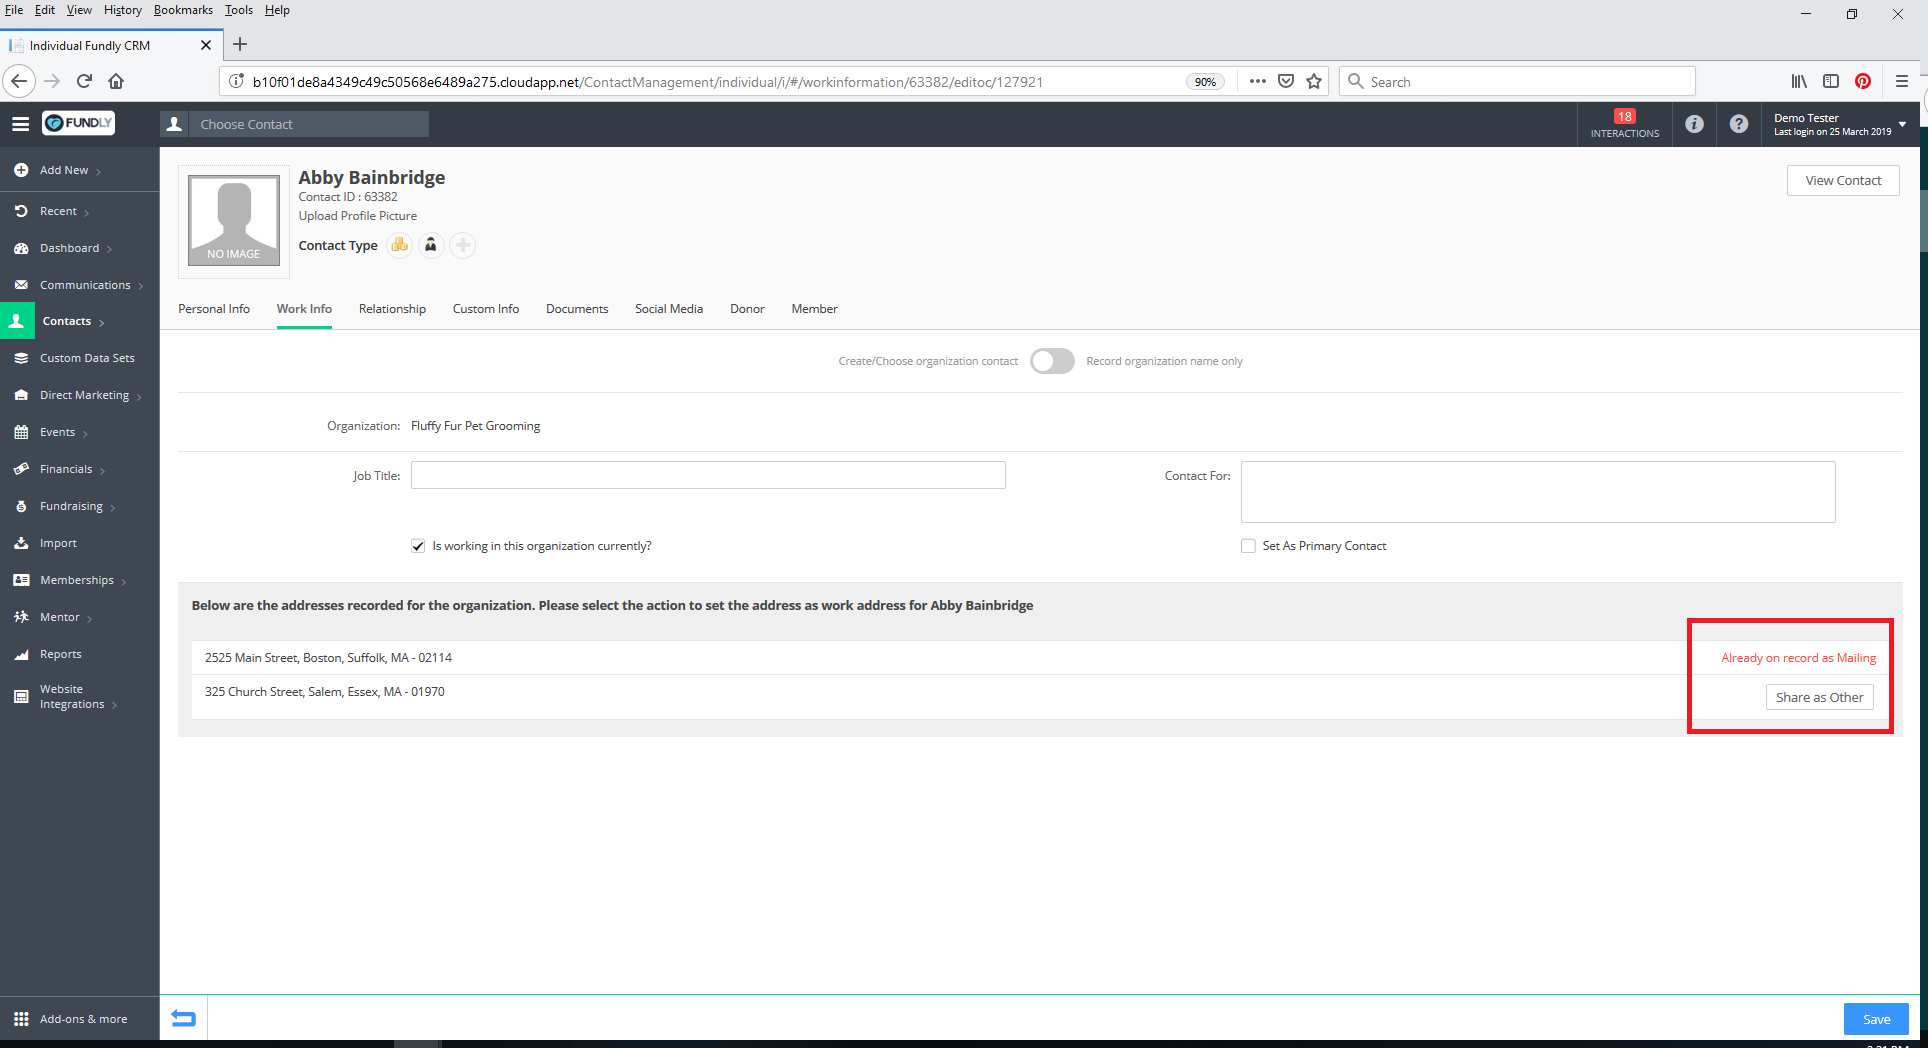
- Please note: If the individual already has a mailing address on file, then you will only have the option to share the organization's work address as the individual's/employee's Other Address. In the example below, Abby already has a mailing address (from Fluffy Fur Pet Groomers) so the address for Rub-A-Dub Cleaner can only be shared as Other Address. In the second screen shot, we have edited the Work Info entry for Fluffy Fur Pet Groomers and we can see the two addresses the organization has on file and which is being shared as the mailing address. Note that you cannot edit/change a shared work address from this screen once it has been selected and shared. See our tutorial on Add/Edit Work Address for more information.

- Any address you select will be categorized as a "work" address on the personal info tab.
- Set the create organization record slider to "Create/Choose organization contact"
- Click the blue Save button in the lower right to save the Work Information. This will also associate the individual to the Organization's contact record as an employee.

- To add work information using method #2: Add a work address to the contact's record on the Personal Info tab:
- This method ONLY works with employer information that is recorded as an organizational contact record in Fundly CRM. You CANNOT record static work addresses (not tied to an employer and not tied to an organizational contact record) in this way (to record static work address not tied to an organizational contact record, you would need to leave the address as uncategorized).
- You cannot use this method to update employment info such as is primary contact, contact for, and job title for organization's already associated to the individual as an employer (you can add that information when creating a new organizational affiliation using this method).
- We do not recommend using this method to edit work information (to solely add new employment information if you are not also associating the new employer's address to the individual contact as a mailing or other address). If you want to edit/update/add new employment information, we recommend going to the individual contact's Work Info tab and updating the employment information there.
- To get started, while editing the contact record, click on the Personal Info tab.
- Scroll down to the addresses area (lower left hand side of the screen). You can add work address to the Mailing Address block or an Other Address block (keep in mind the mailing address block is tied to the communications module - the mailing address (regardless of whether or not it is set as home, work, or uncategorized) will be used to populate contact address placeholders in the communications module (acknowledgement letters, e-appeals, letters, event invites, newsletters, etc.) and will be used to pull contacts into print communications (you will not be able to generate a print communication for any contact that does not have a mailing address). If you don't want to use the contact's work address as their mailing address, then add the work address to the Other Address block.
- In whichever address section you want to add the work address, select Work from the work/home drop down.
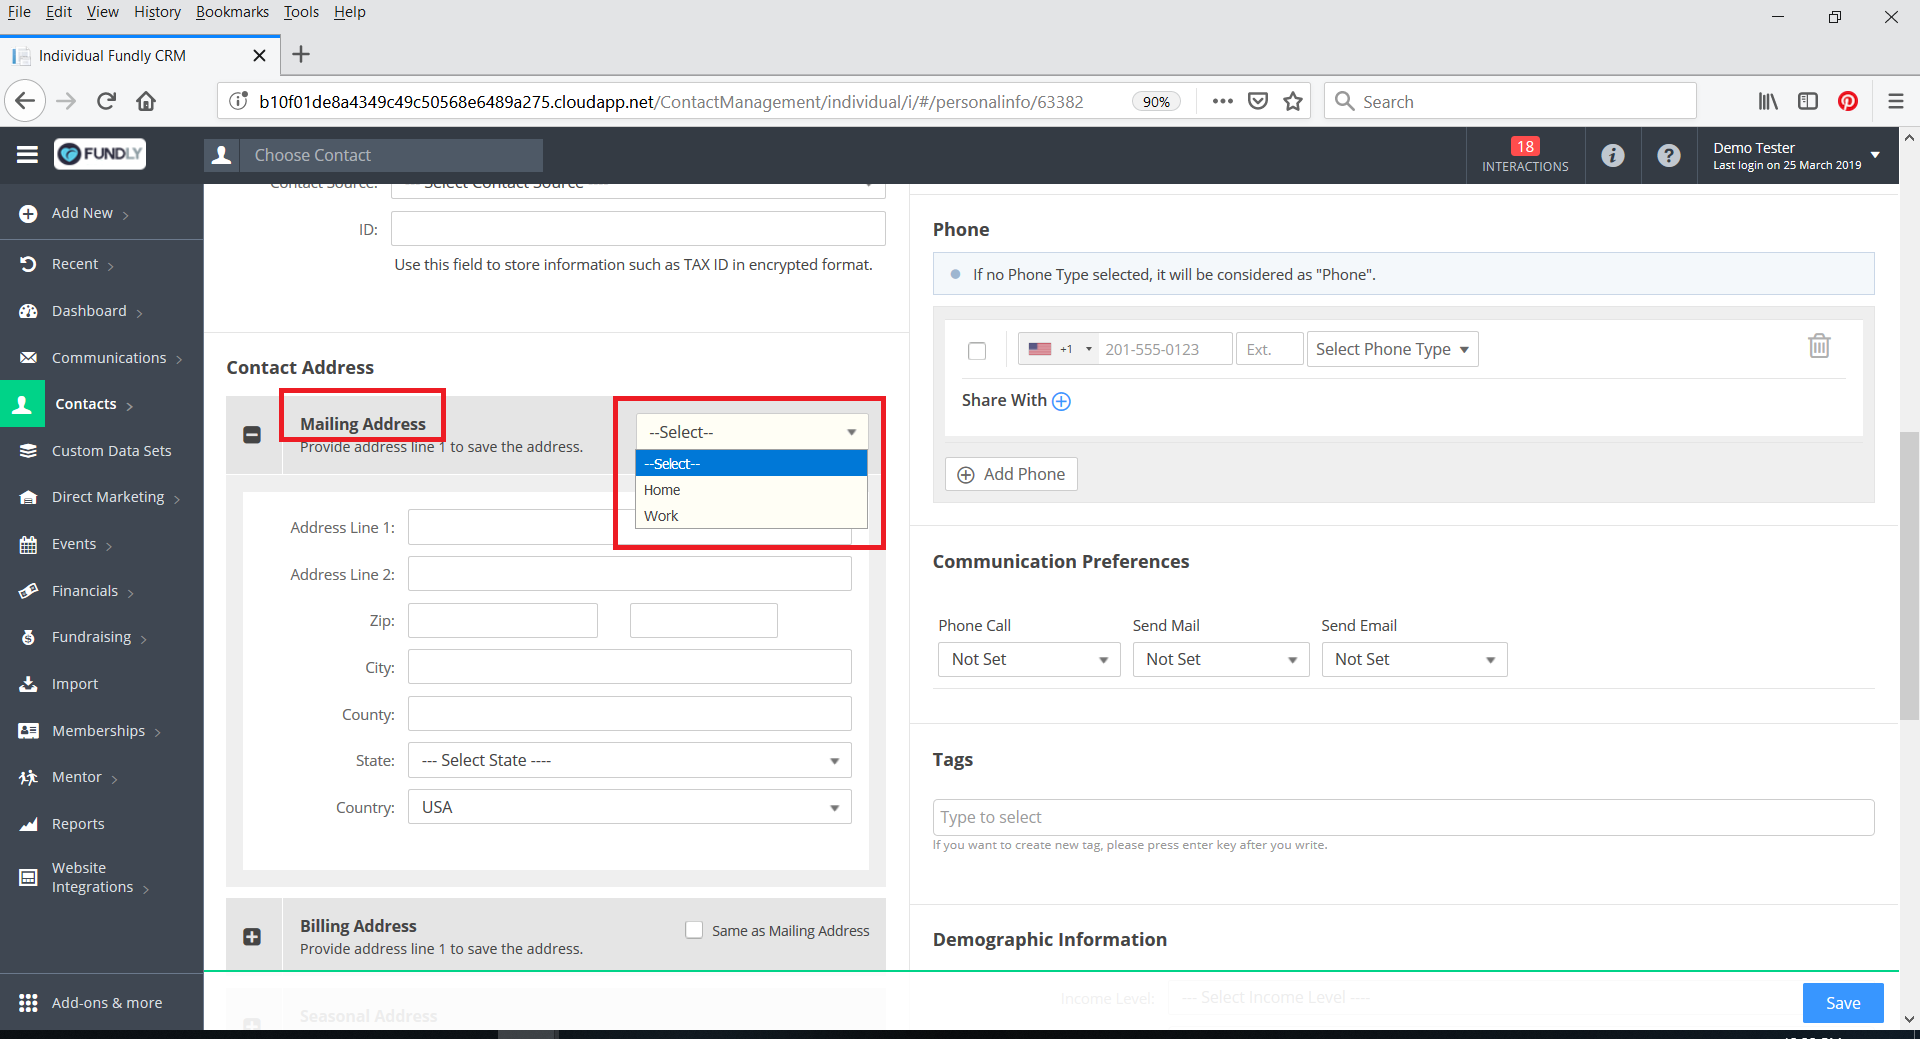

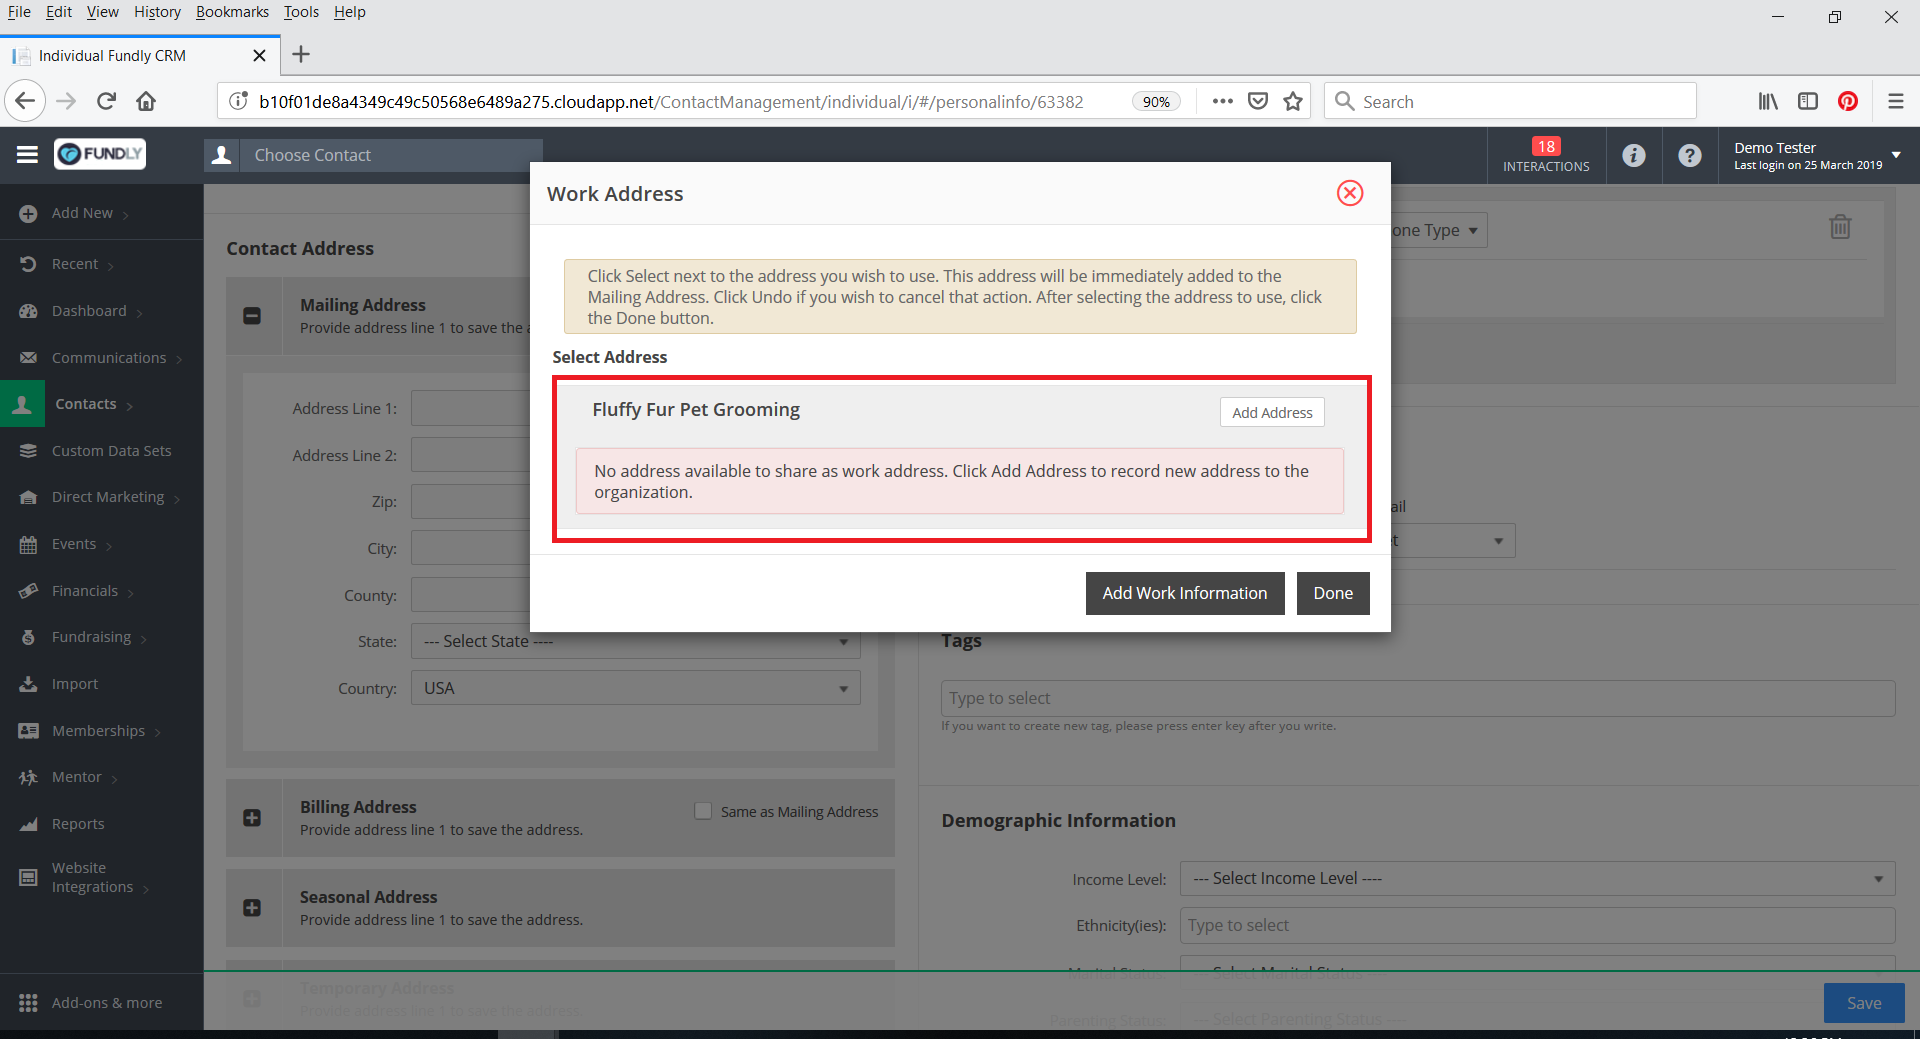
- If the contact already has an employer on file (that is an organizational contact record and not static data), the Add Work Address pop up window will appear and that organization will appear in the pop up window. If not, a blank Add Work Information box will appear.
OR
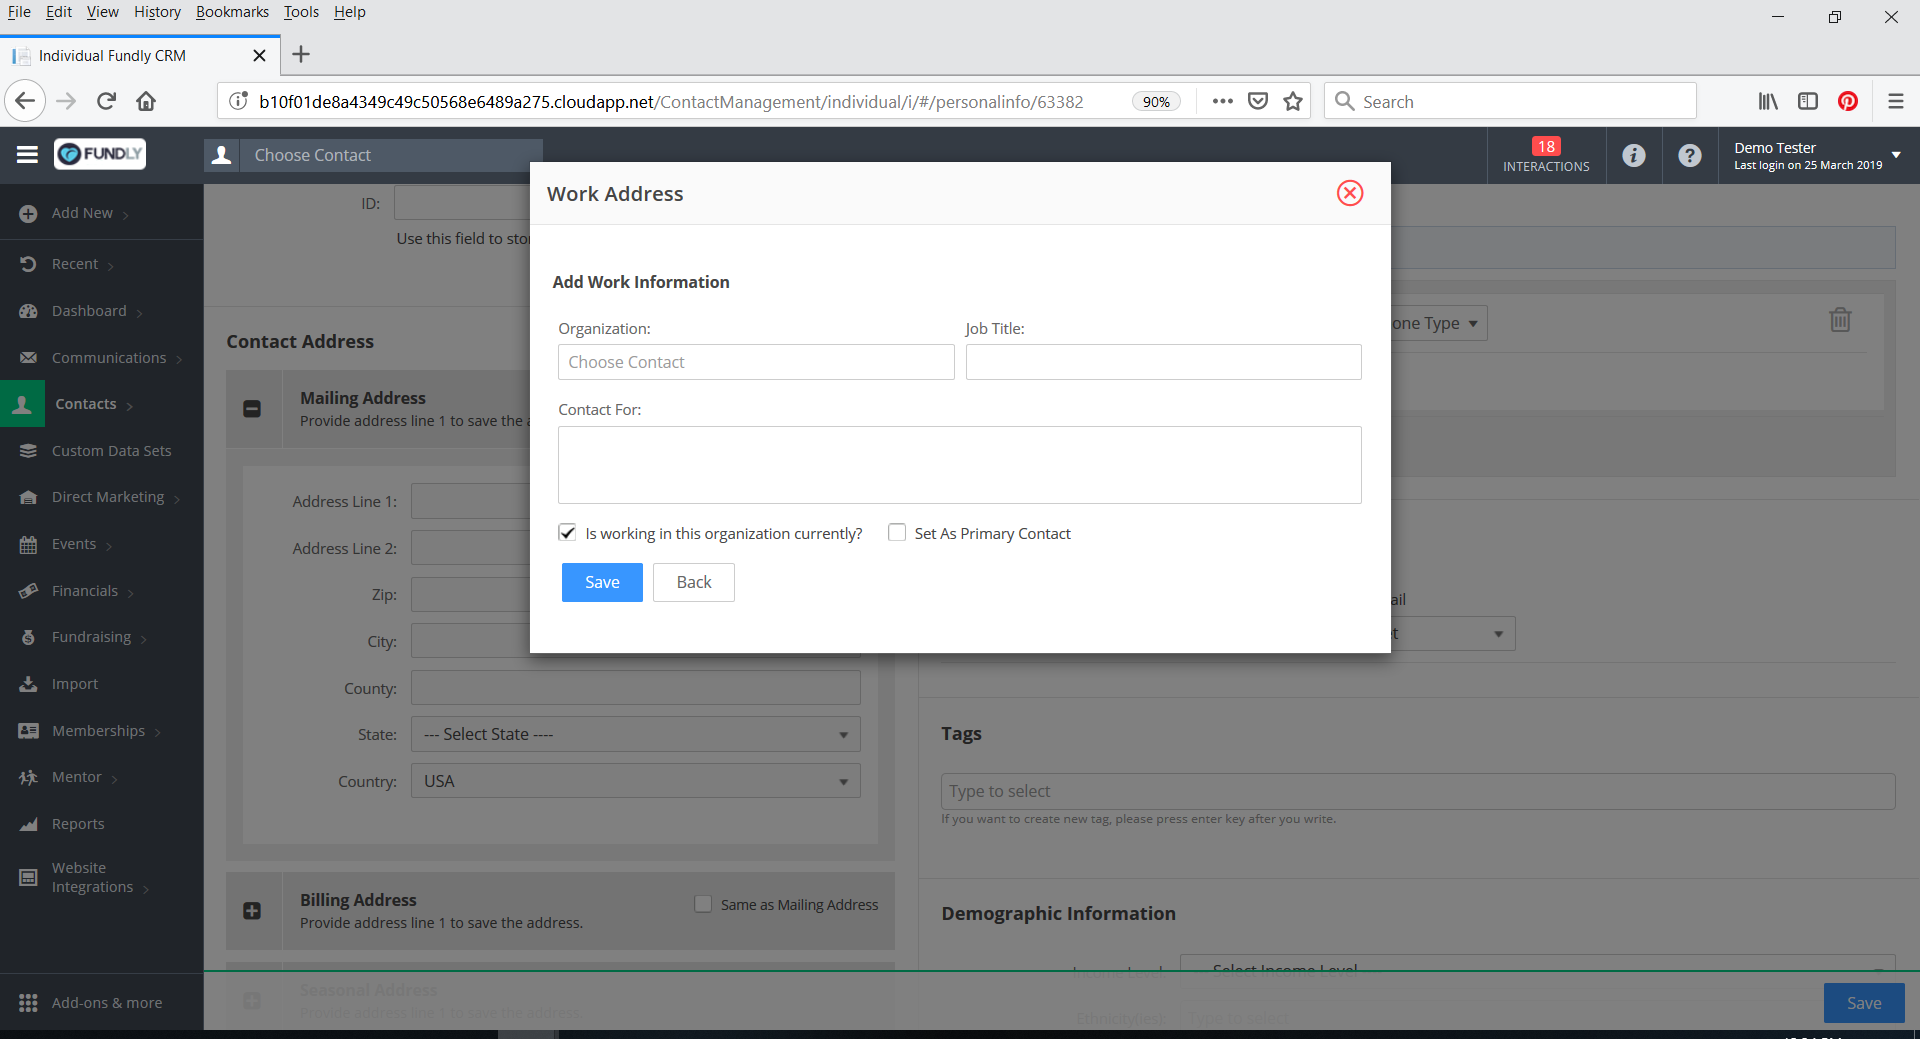
- If the contact does not yet have any employer/work info on file (if you get the blank Add Work Info pop up box):
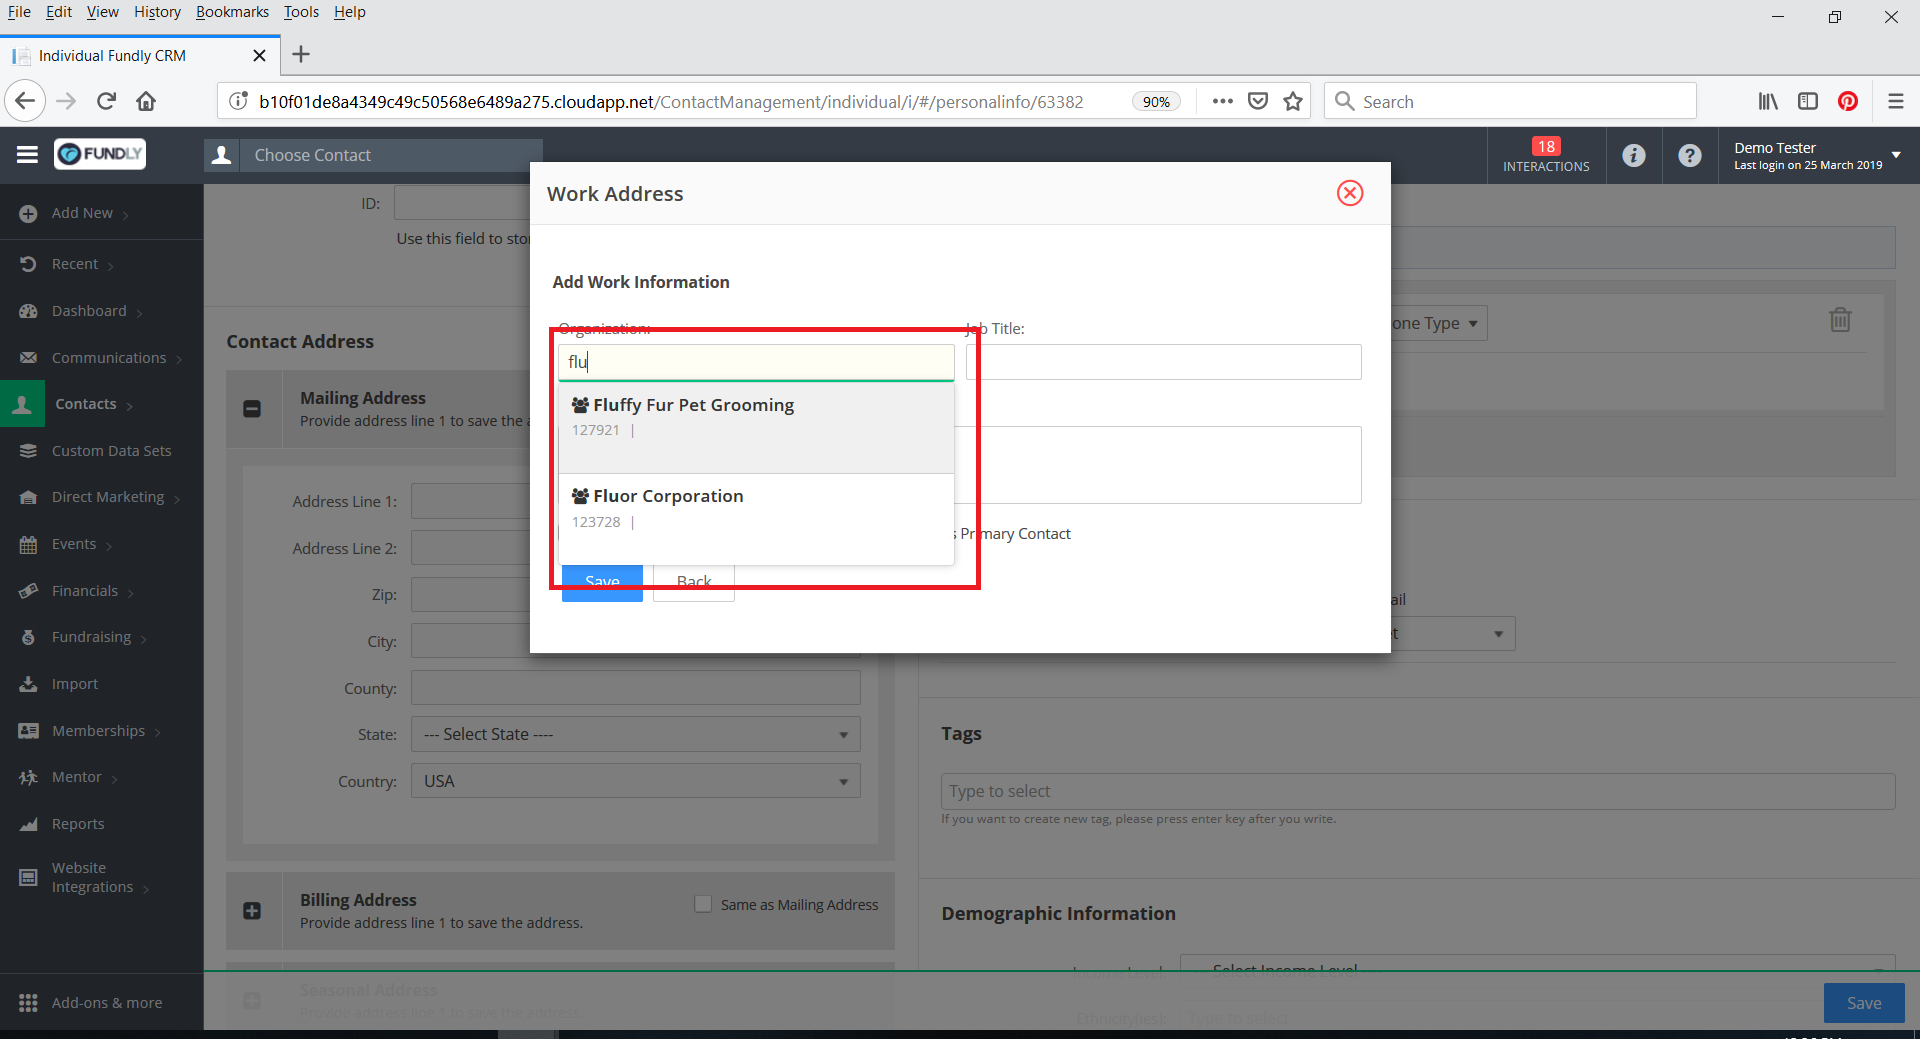
- Start by typing the employer name in the Organization field.

- If the organization is already in your Fundly CRM database, it's name will appear in the list of matching records that displays once you start typing. Select the organization name off the list.
- If the organization is not already in your Fundly CRM database
- Type the name of the organization and then tab out of the field or hit enter. The Quick Add Organization pop up window will appear. Add any additional information that you have and then click Save.
- This will take you back out to the Add Work Information pop up window. Continue with the steps below.
- Type the name of the organization and then tab out of the field or hit enter. The Quick Add Organization pop up window will appear. Add any additional information that you have and then click Save.
- Fill in any additional information that you have (contact for, job title, and is primary contact). You MUST check the "is currently working for this organization check box to save the work address. The system will not allow you to add as a current address the address of an organization the contact is no longer working for (after all, why would you want to add this as a current address if the person is no longer associated with that organization?).
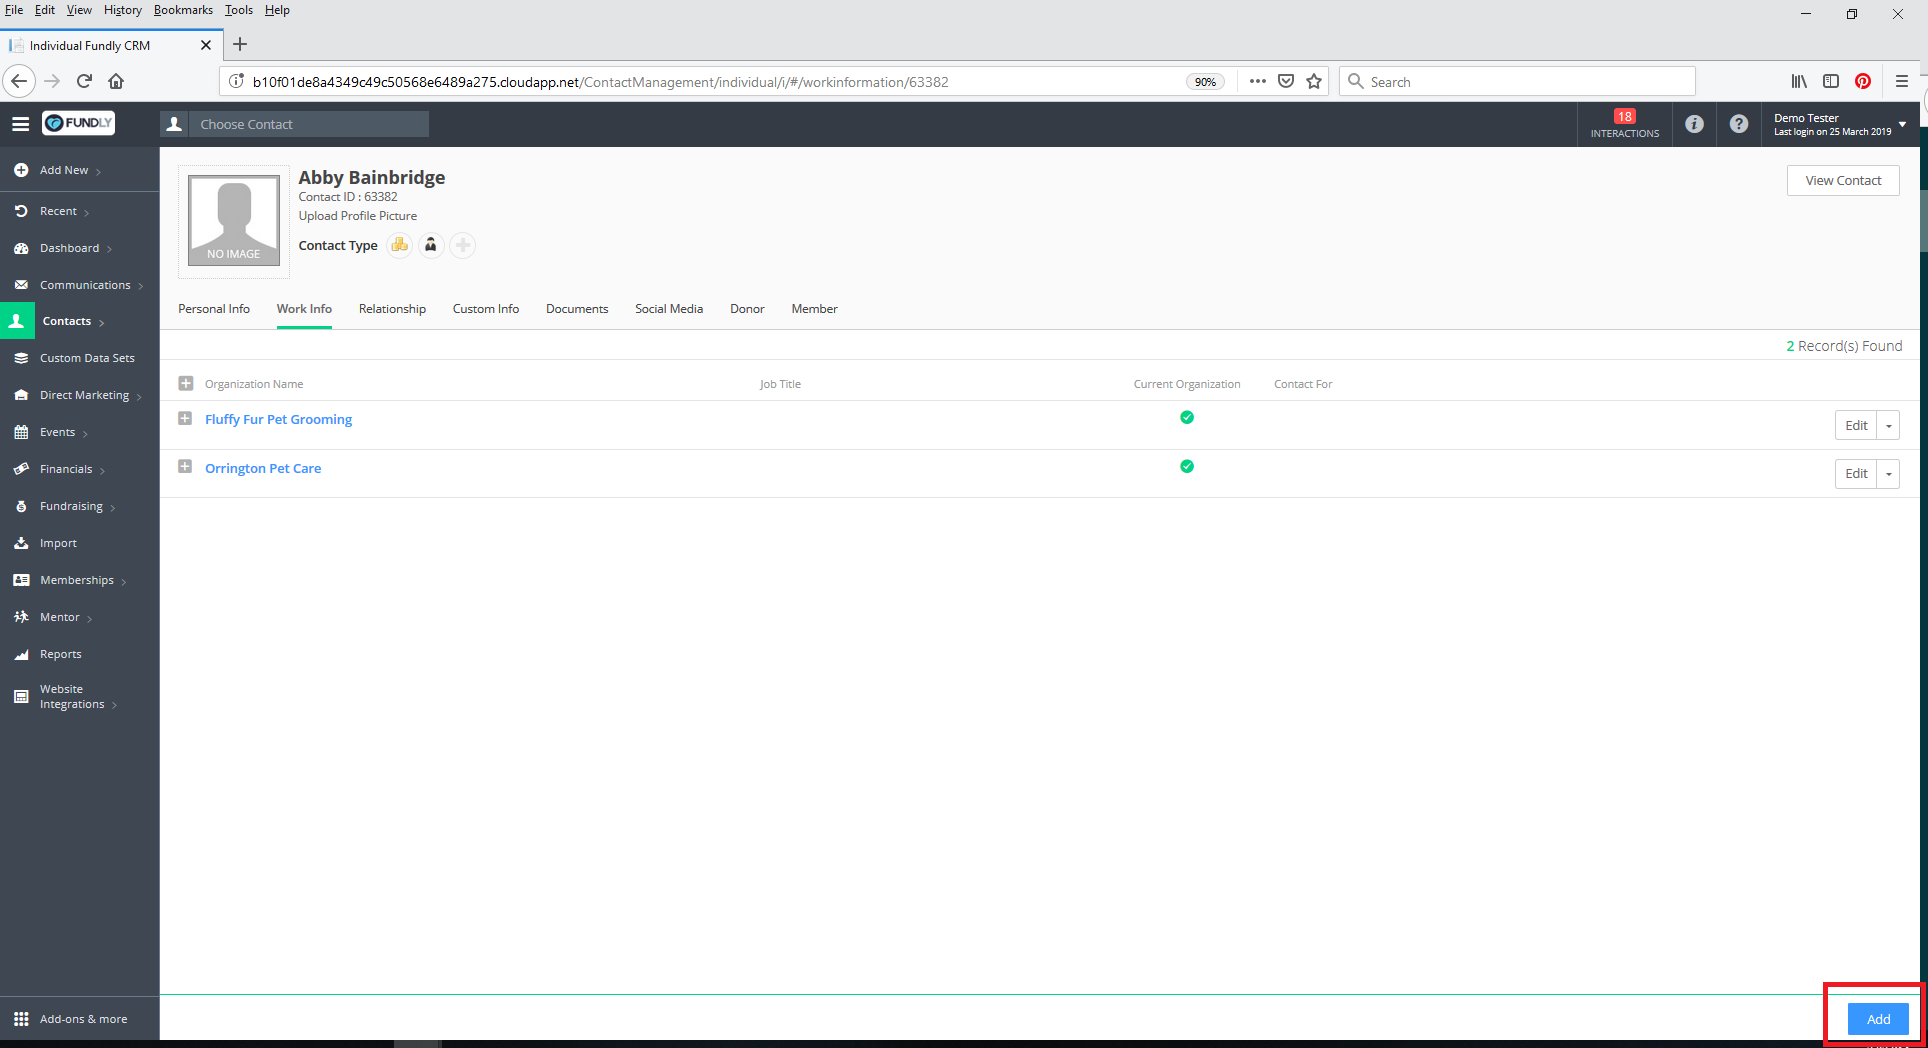
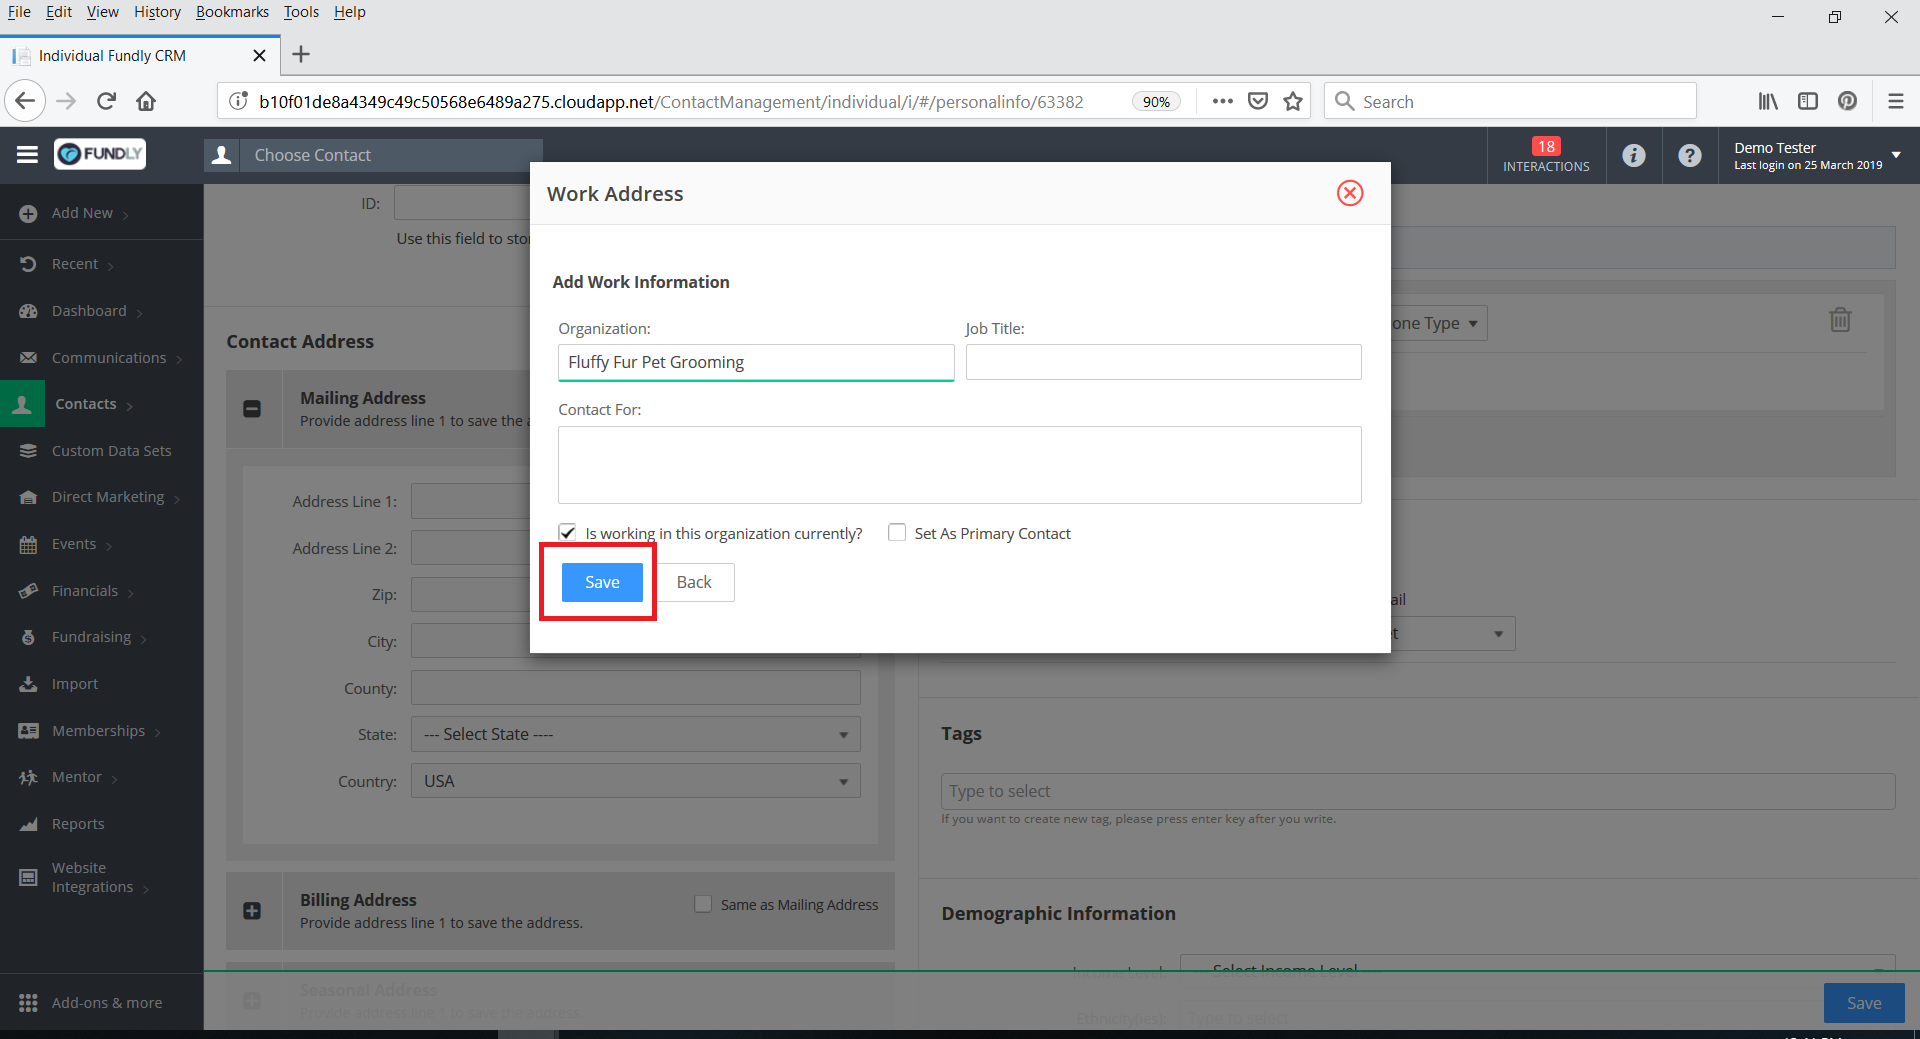
- Click the blue Save button to save the Work Info. This will take you back out to the Add Work Address pop up window (in this example, using all of the steps above, we've added both Fluffy Pet Groomers and Orrington Pet Groomers to Abby's record as current employers).

- If the contact has one or more organization's on file as their current employer but is not already associated to the organization whose address you want to use, you can add a new employer by clicking the black Add Work Information button in the lower right. Follow the steps above for filling out the Add Work Information pop up.

- Start by typing the employer name in the Organization field.
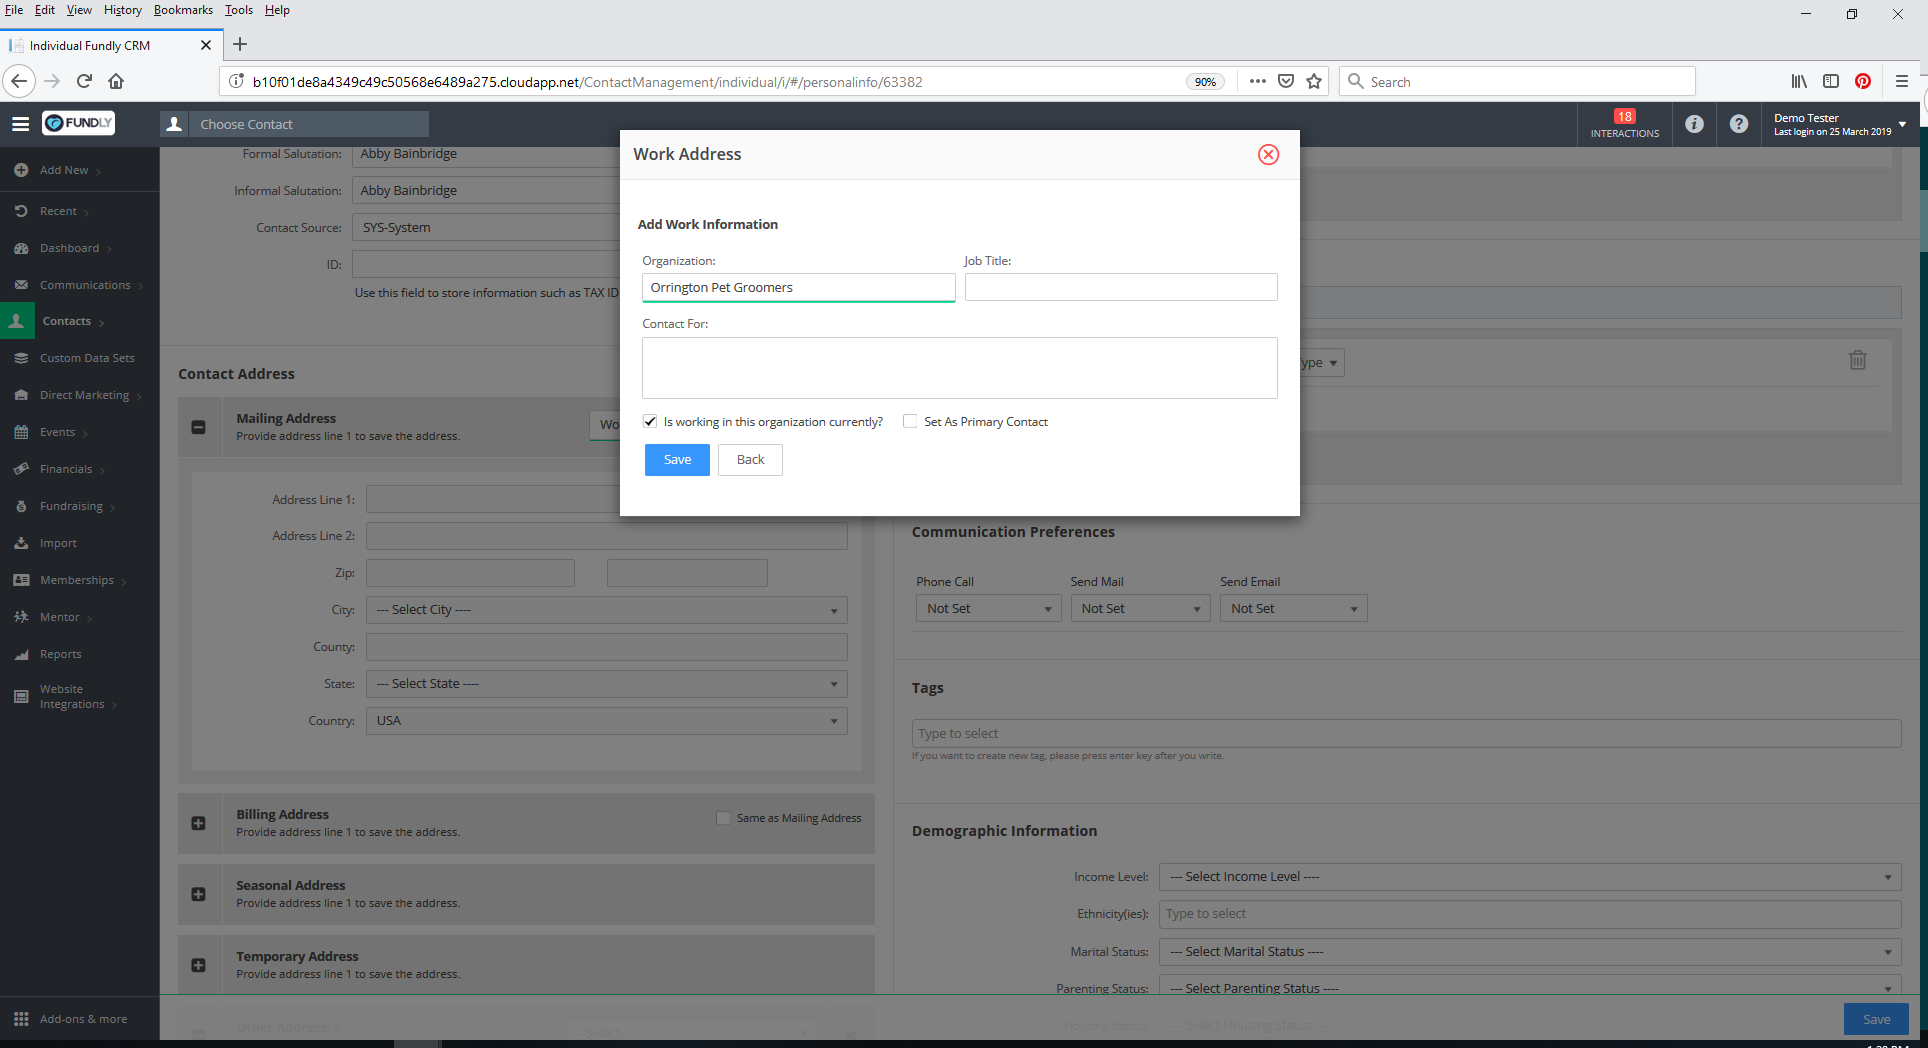
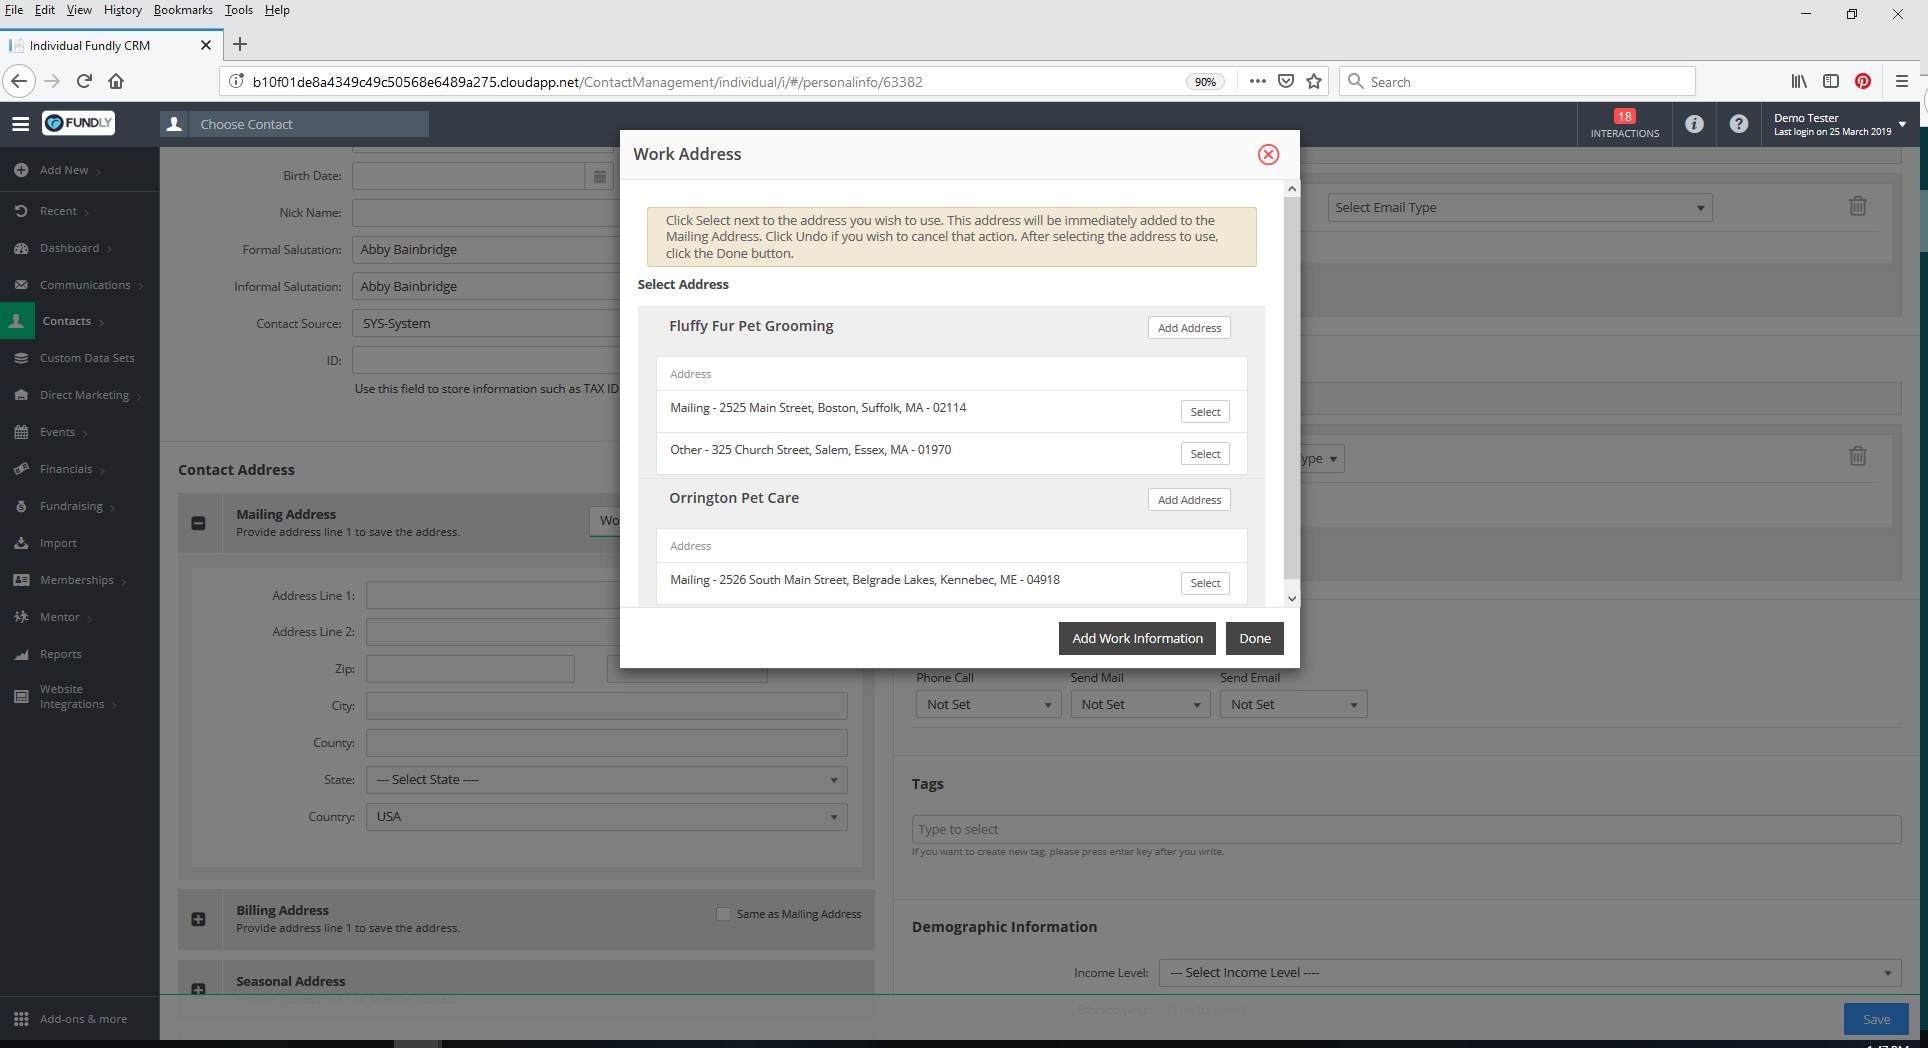
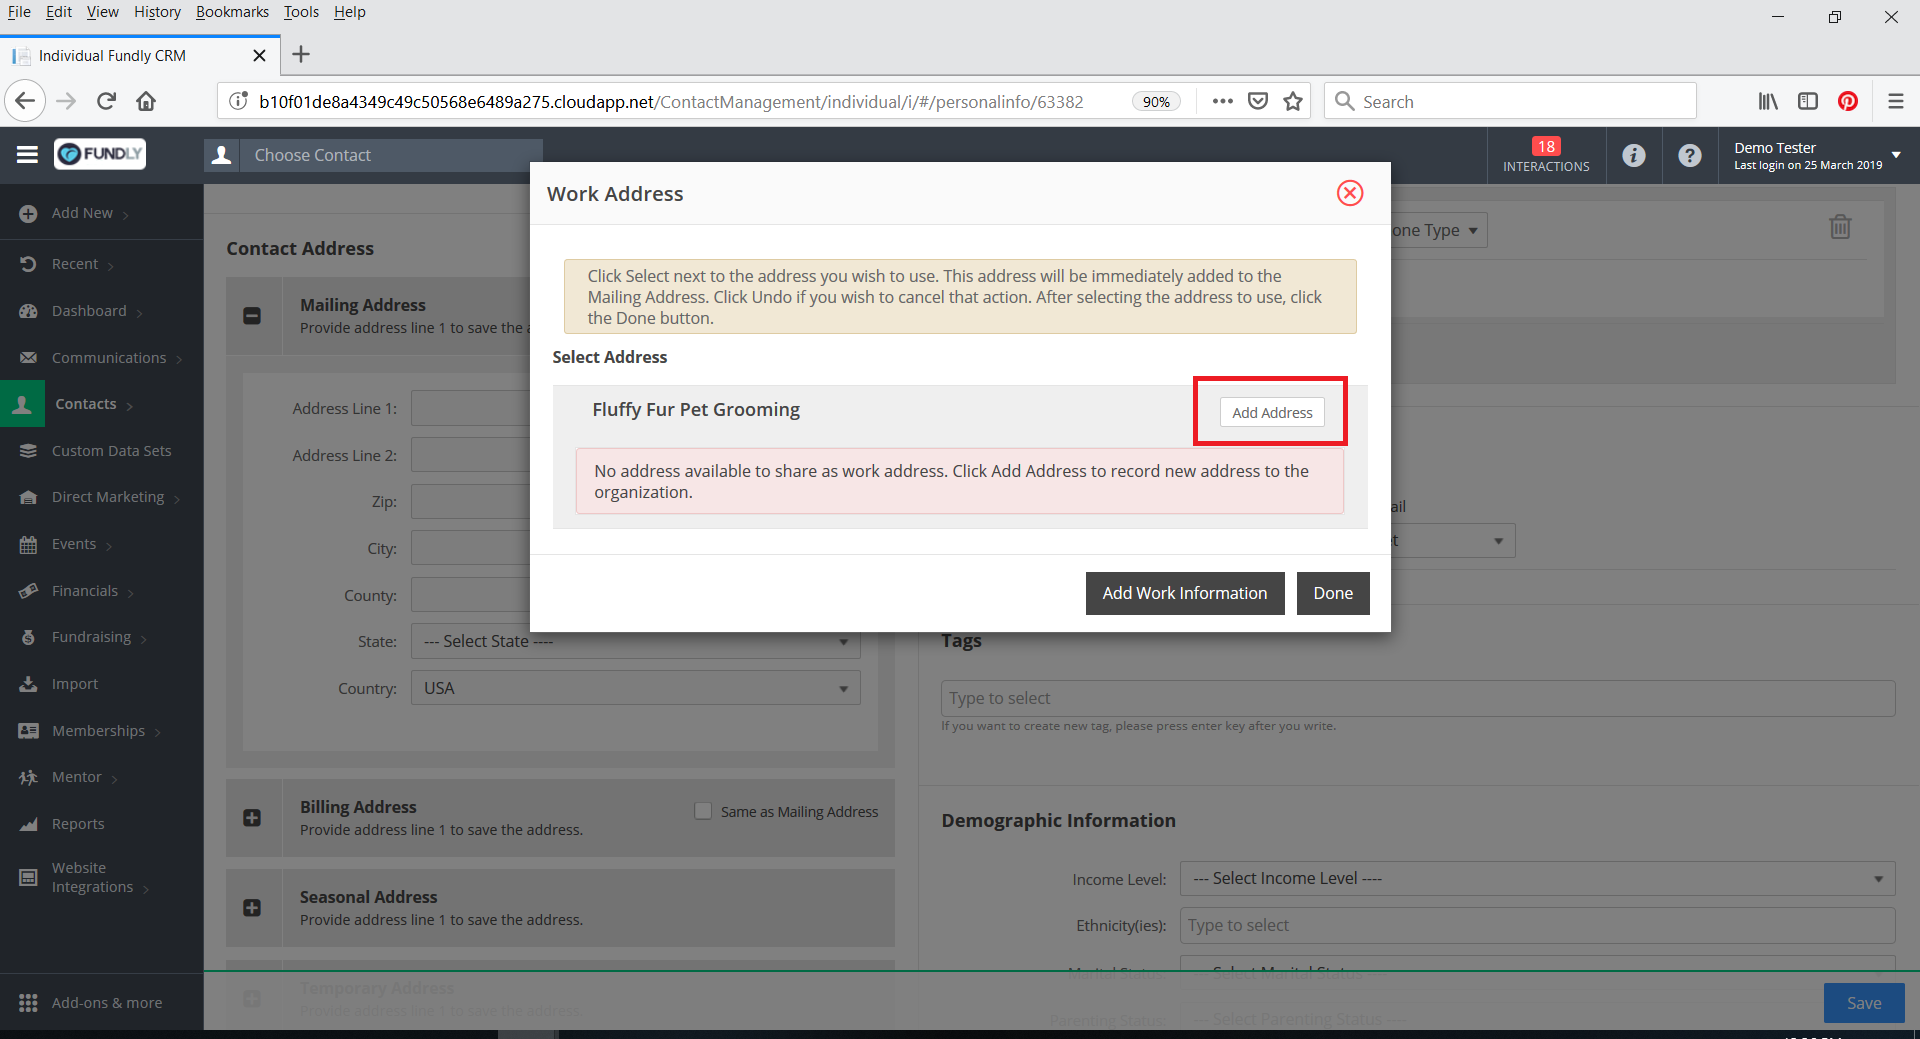
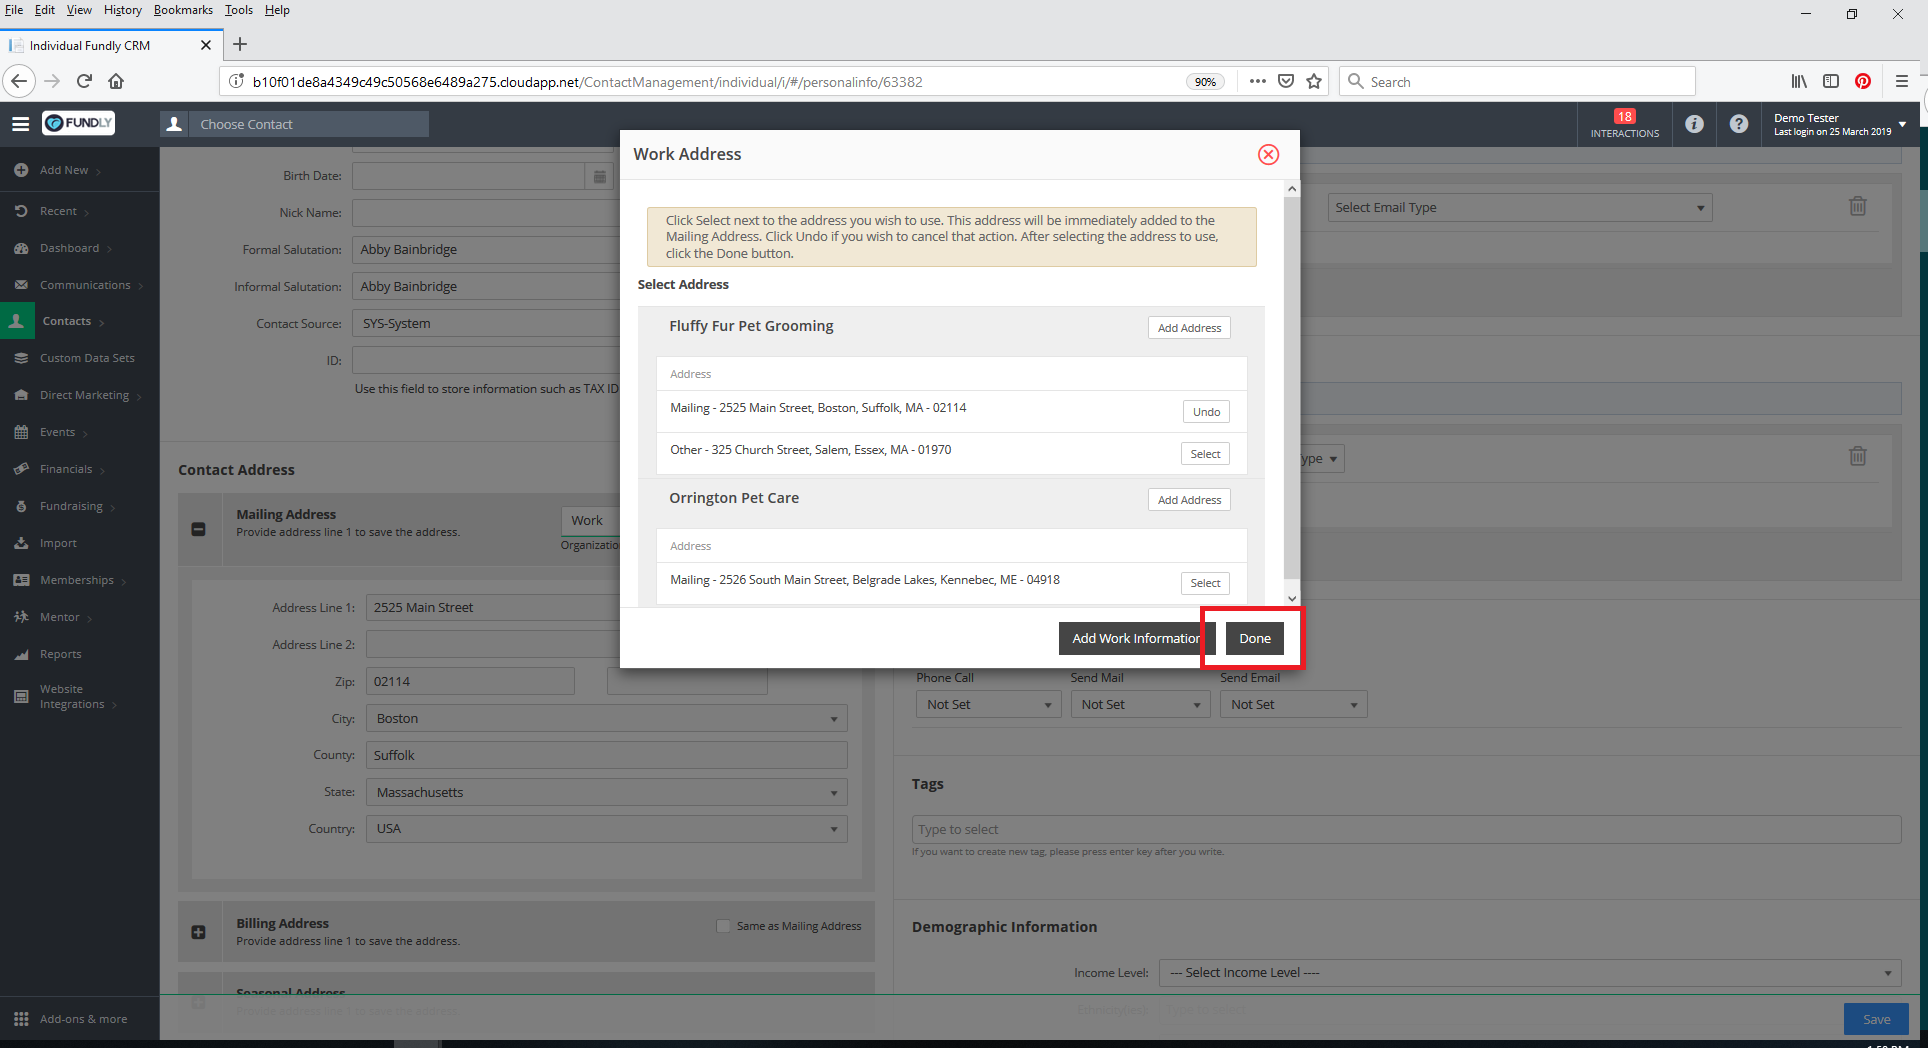
- If there is an organization on file and it has one or more addresses on file, those addresses will appear in the window for you to select from. In the first example below, Abby has two organizations on file as current employers. One of those organizations has an address on file (Fluffy Fur Pet Grooming), the other one (Orrington Pet Care) doesn't. In the second example, Fluffy Fur Pet Grooming has two addresses on file (perhaps a mailing address and an other address) and Orrington Pet Care has one address on file.
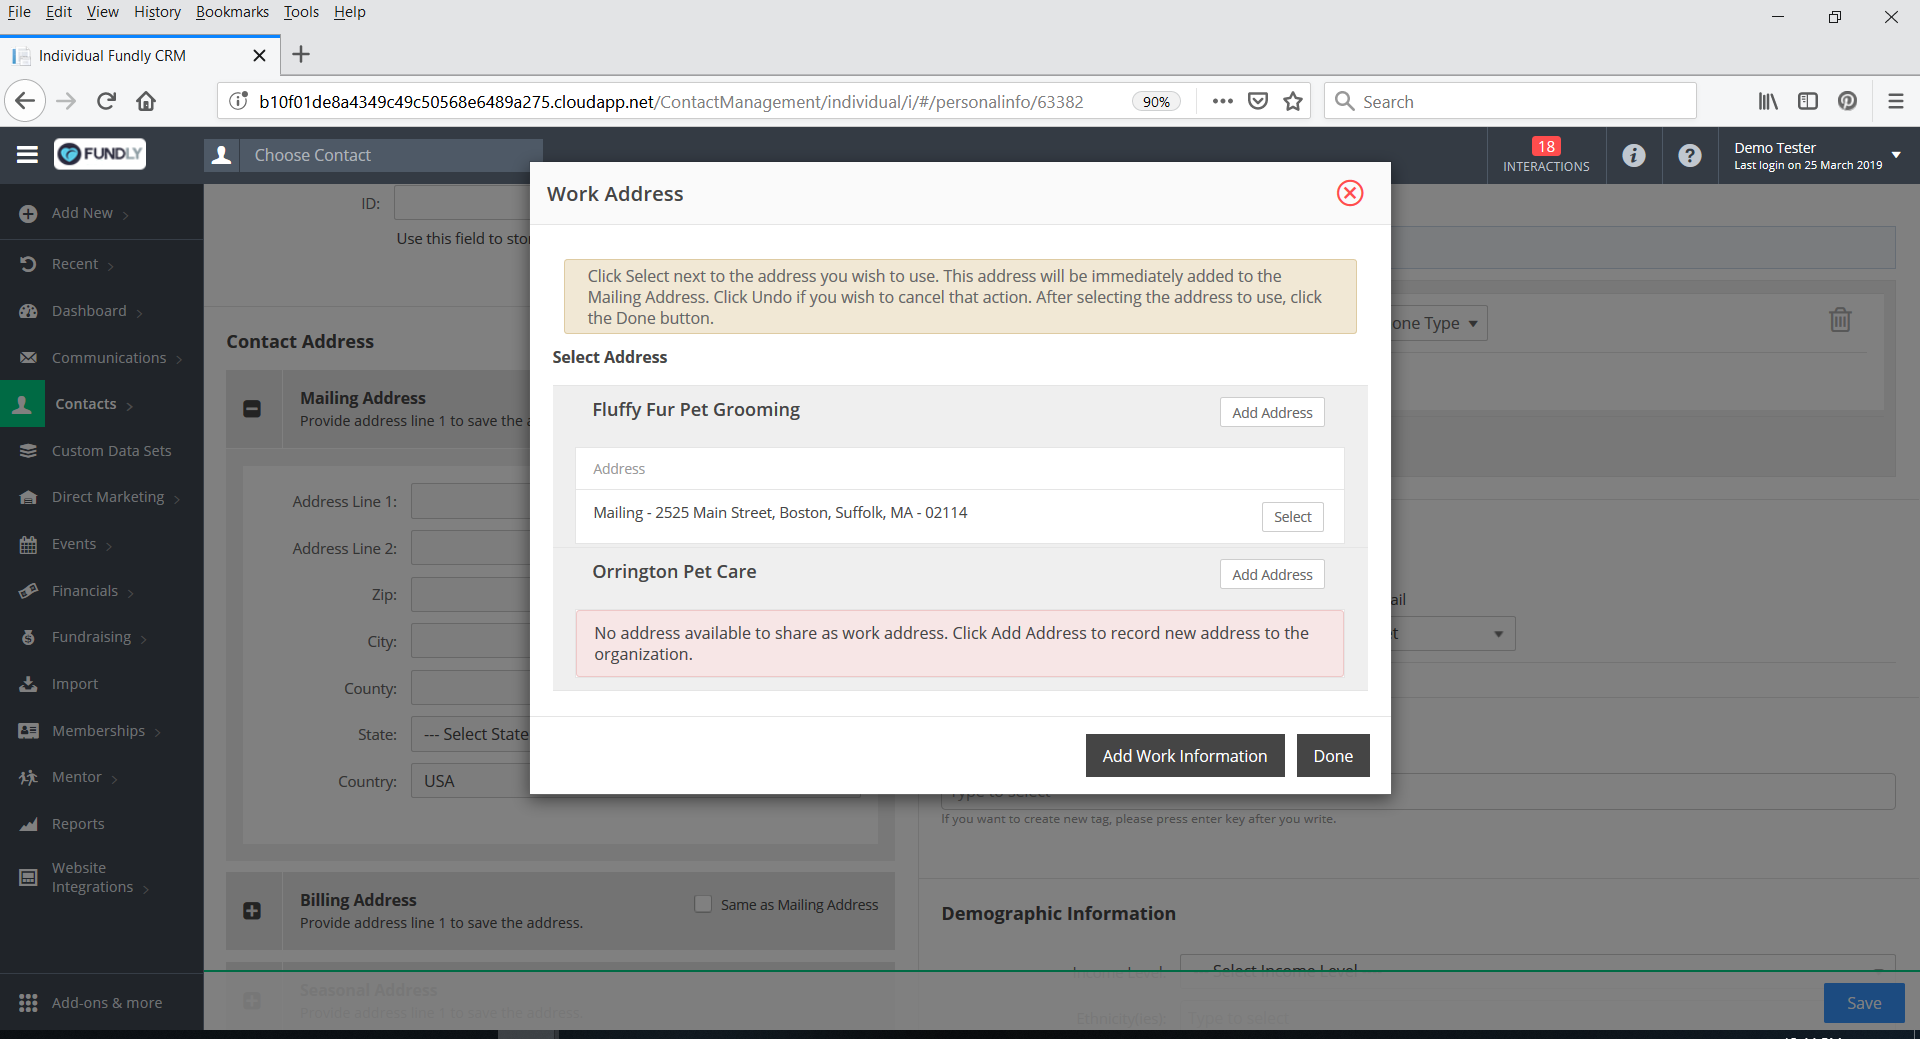
- If the organization does not yet have an address on file or you want to add an additional address for the organization, click the white Add Address button in the upper right of that organization's section.
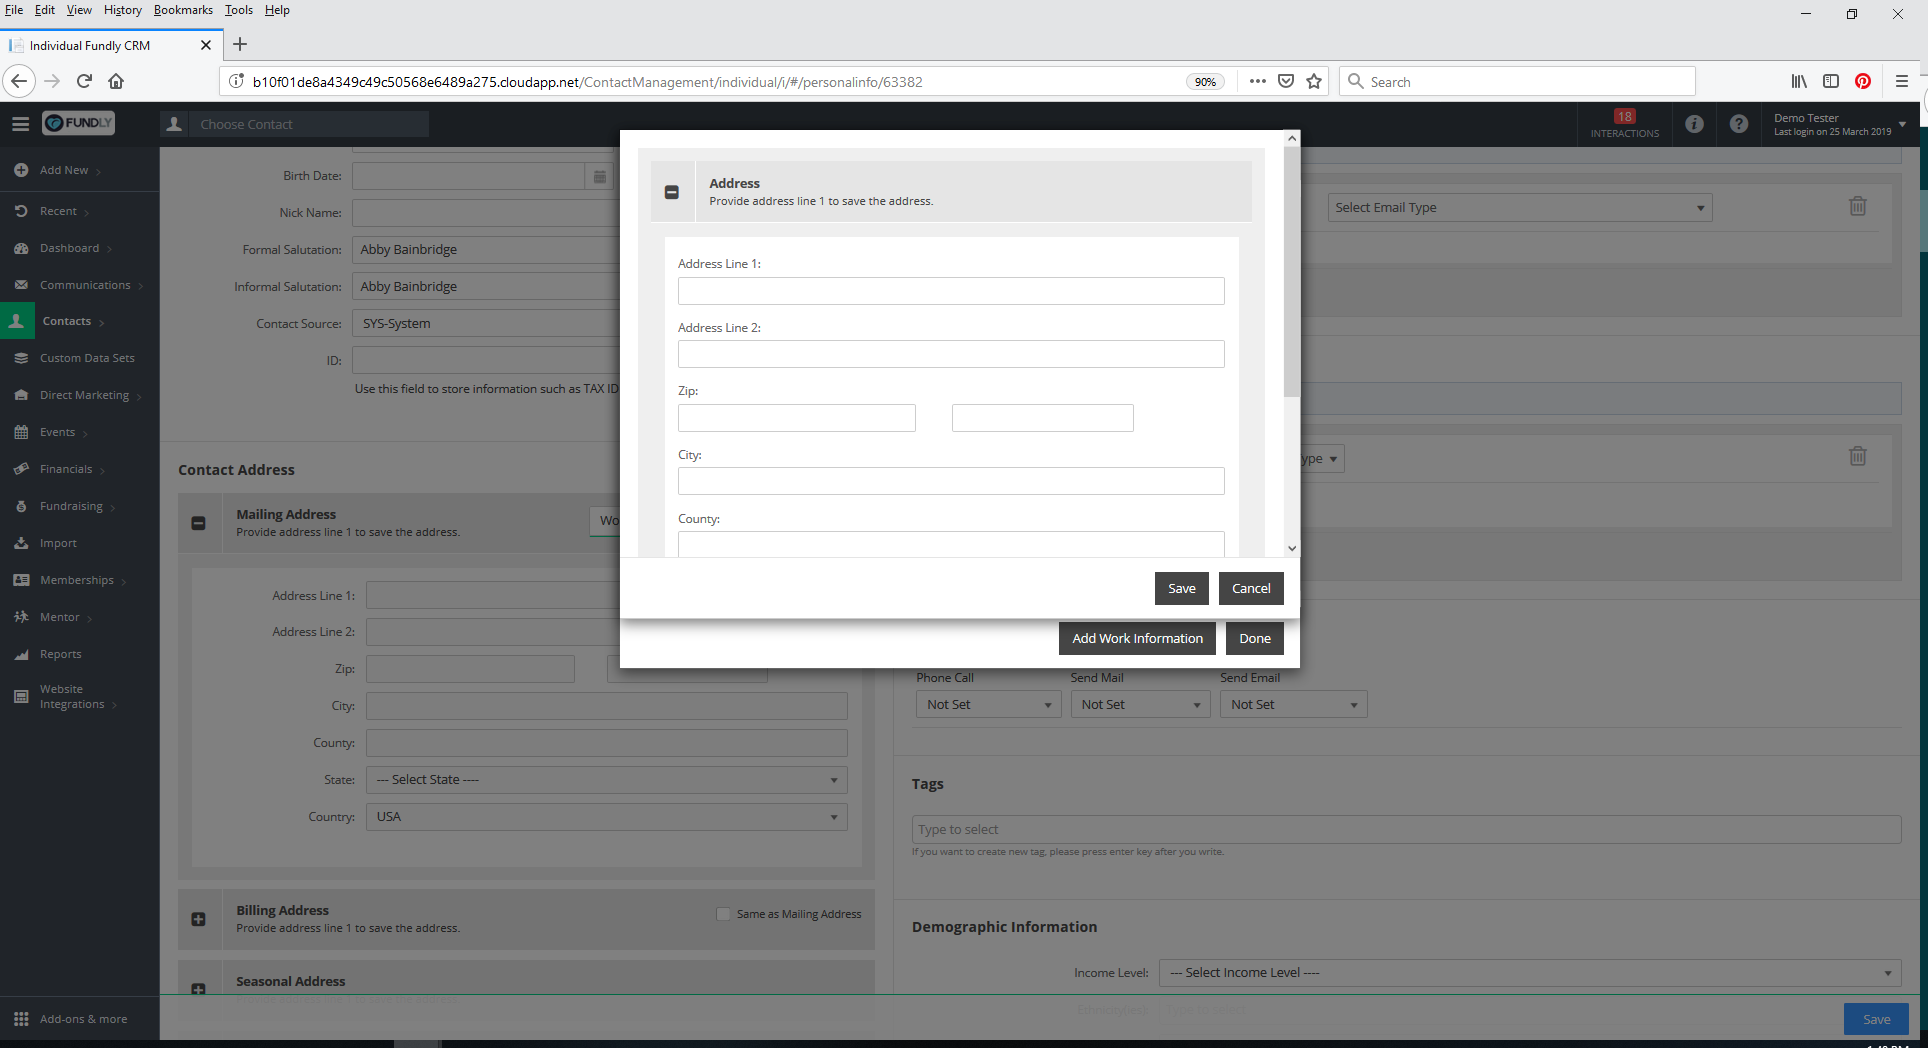
- This will open the Add Address pop up window. Add the organization's address (Address Line 1 and Zip Code are required for adding an address) and click the black Save button to save the address to the organization's record. This will then take you back to the Add Work Address pop up where the address will now appear as one of the addresses to select from.
- Click the white Select button to the right of whichever address you want to use. As soon as you click Select the address is added to the address field on the individual contact's record.
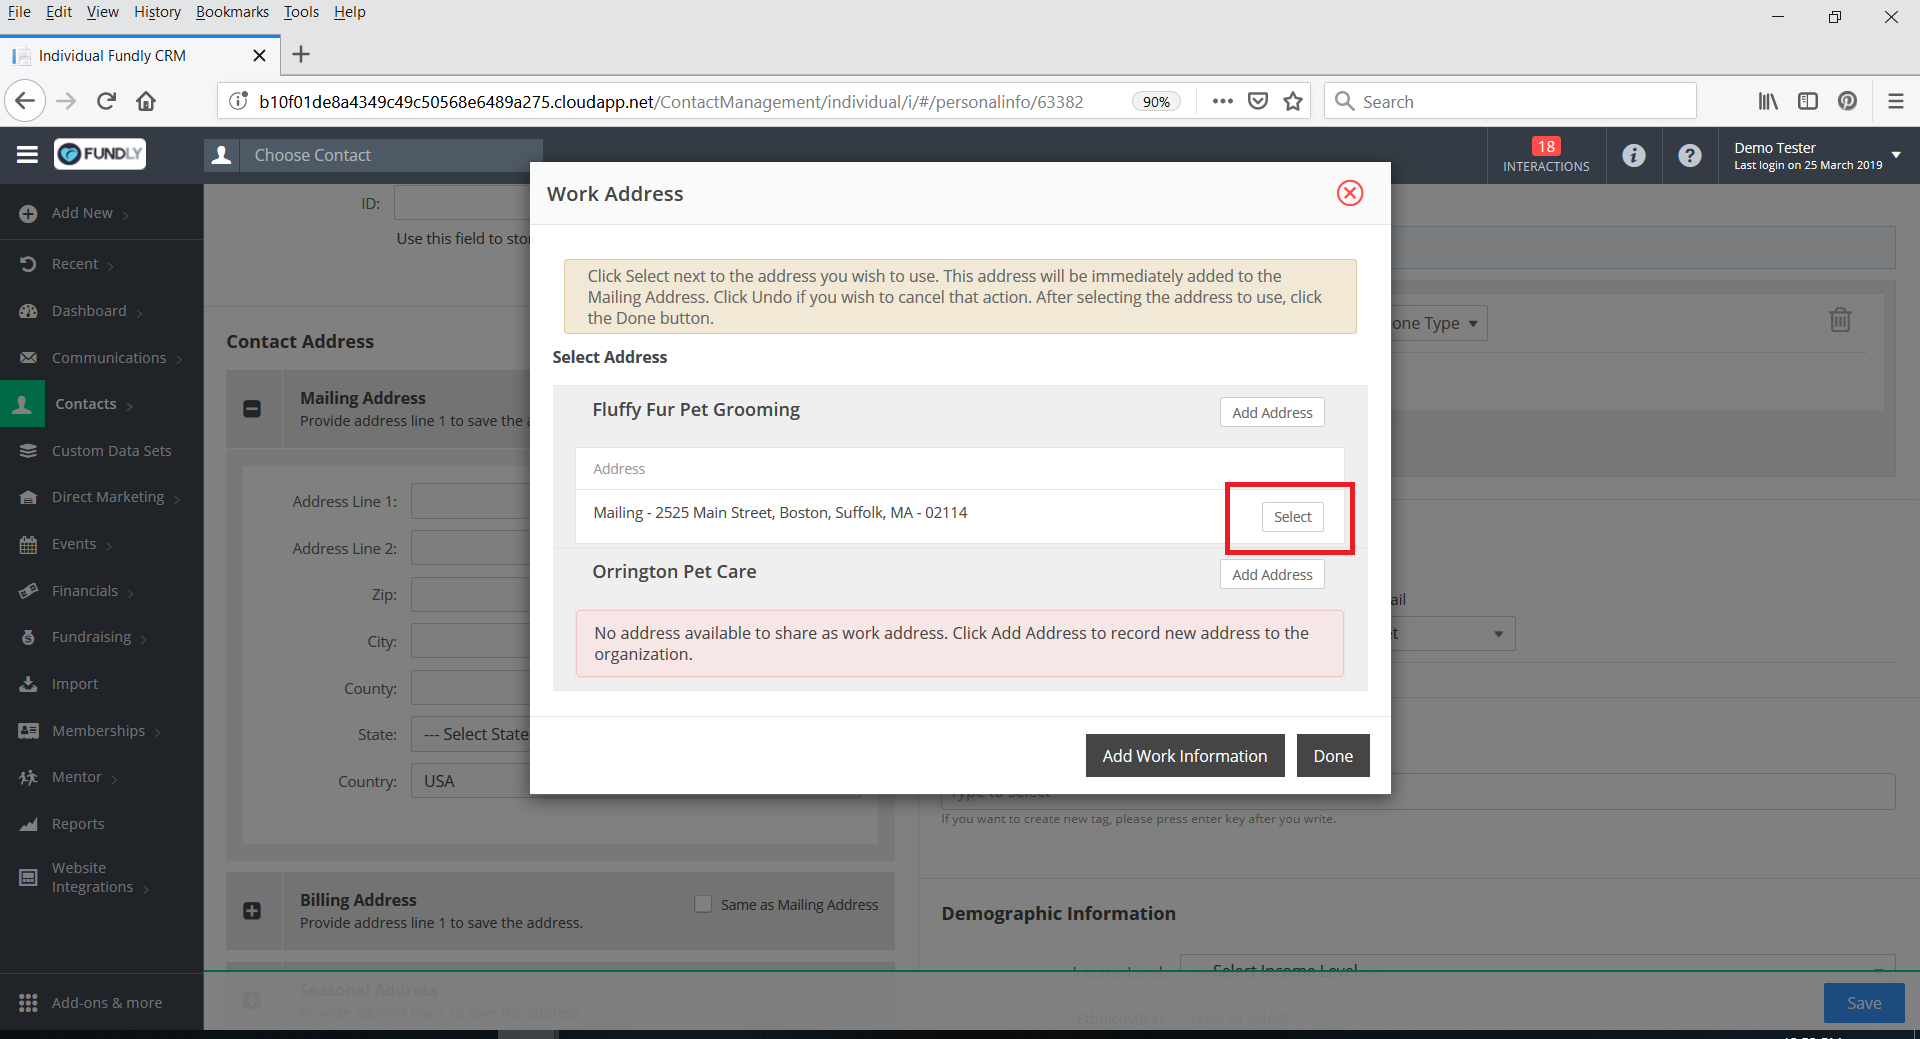
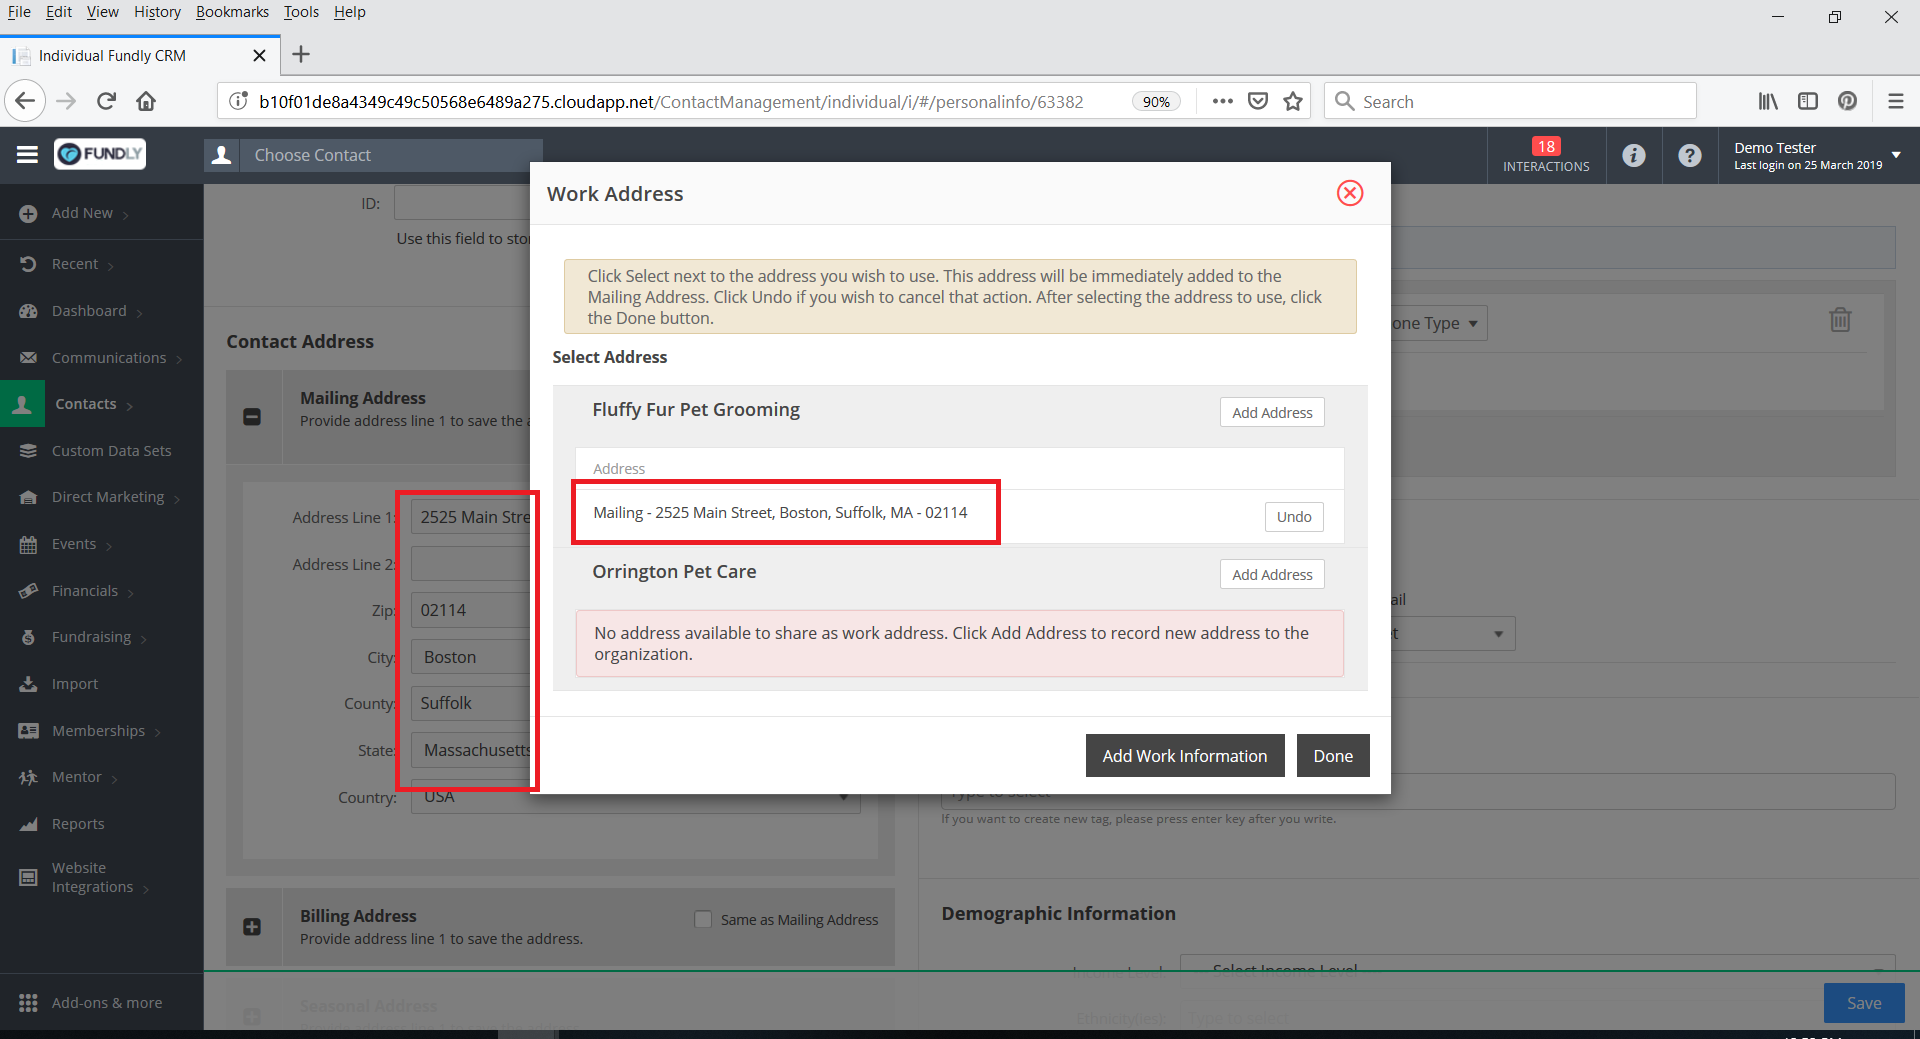
- The button to the right of the selected address will change from Select to Undo. You can click Undo to remove the address from the block. Alternatively, you can simply click Select next to any other address you prefer to use instead (if you selected the wrong one by mistake).

- Click the black Done button in the lower right when you are done adding the work address.
- This will close the Add Work Address pop up window and return you to the edit contact/Personal Info tab. Click the blue Save button in the lower right hand corner of the record to save the changes/save the address.
- This method of adding work information will also add the individual to the organization as an employee. If you add addresses to the organization during this process, that address will be added to the organization's record as well.
- For more information on working with Work Addresses (and how to update the work address), see our tutorial on Individual Contact: Add Address(es)
- To add a work information using Method #3: add the individual as an employee on the Organization's Employee Info tab see our Organizations: Add/Edit Employee Info tutorial.
- Please Note: this method will allow you to associate the organization to the individual as an employer, to create new individual contacts, fill in details of the individual's work information (job title, contact for, is org primary contact, and is currently work at the organization), and associate the organization's address to the individual (if the organization already has an address on file). You cannot use this method to create static employee information (an employee who is not also an individual contact record in your system).
Comments
0 comments
Article is closed for comments.